Looking for the best WordPress social share plugin for your site? Social share buttons are a feature you’ll see on pretty much every WordPress site, which means you’re spoiled for choice when it comes to quality WordPress social media plugins. To help you filter through all your options, I collected seven of my favorite social ... Read more7 Best WordPress Social Share Plugins: Our Picks + What We Use
There’s one thing that’s been true about WordPress since the beginning: The default search functionality isn’t always that great. I mean, it’s functional enough…but it’s definitely no Google. Beyond just plain not turning up great results sometimes, it also might not include all the information you need, especially if you’re using WordPress more as a ... Read more8+ Best WordPress Search Plugins To Improve Your Site Search
Looking for a WordPress registration plugin to help you sign up new users at your site? While WordPress includes a registration form by default, it’s not usually the most user-friendly approach, so turning to a third-party plugin helps you create a more friendly registration process at your site. To help you find such a plugin, ... Read moreWhat’s The Best WordPress Registration Plugin? 7 Top Options For 2018
Video content is taking the lead in the visual-first marketing strategy. No matter whether you want to create a playlist of video tutorials or an inspiring brand video – both can have a measurable impact on your business’ bottom line. But after the creative part of the job is done, you need to find the ... Read more27 Best Video Player Plugins for WordPress
Digital piracy is a serious problem you have to face while running and managing an online business. So if you care about your WordPress website and online business, you should find a way to secure WordPress private media files against search engines and the public. Among all WordPress plugins available in the market, Media Vault ... Read moreMedia Vault vs Prevent Direct Access: Secure WordPress Private Media Files
If you’re running a WooCommerce store, you’re probably familiar with the stats around mobile shopping. If not, now’s a good time to do some research because more than 50% of eCommerce sales happen on mobile devices in 2018. That means the mobile version of your WooCommerce store needs to be as usable and conversion-friendly as ... Read morePWACommerce Review: Turn WooCommerce Into A Progressive Web App
Do you want to exclude specific pages, authors, and more from WordPress search? By default, WordPress search includes all posts and pages in the search results. In this article, we will show you how to easily exclude specific pages, posts, authors, categories, and more from WordPress search results.
Why Exclude Items from WordPress Search?
The default WordPress search feature shows results from all WordPress posts, pages, and custom post types. This is acceptable for most websites and does not affect WordPress SEO or performance.
However if you are running an online store, then there are some pages that you may not want to appear in search results. For example, the checkout page, my account page, or a thank you page after successful downloads.
Some website owners may want to hide a category or taxonomy, while others may want to hide posts from specific authors. Optimizing your site-search by excluding unnecessary items offers a better user experience and improves your website’s usability.
That being said, let’s take a look at how to easily exclude items from WordPress search.
1. Exclude Specific Posts, Pages, and Custom Post Types from Search
Upon activation, edit the post, page, or custom post type that you want to exclude from the search result. On the edit screen, you will see a search exclude box.
Simply check ‘Exclude from Search Results’ checkbox and don’t forget to save your post/page. This particular post/page will not appear in WordPress search results anymore.
To view all the items that you have excluded from search, go to Settings » Search Exclude page. Here you will see a list of items you have excluded from WordPress search results.
If you want to remove the restriction, simply uncheck the box next to the item you want to add back and click on the save changes button.
2. Exclude Specific Category, Tag, Custom Taxonomy From WordPress Search
Don’t forget to replace ‘genre’ with the custom taxonomy and ‘action’ with the term you want to exclude.
3. Exclude Specific Author From WordPress Search
If you want to exclude posts created by a specific author from WordPress search result, then there are two ways to do that.
If the author has just a few posts, and you are sure they will not be adding any more posts, then you can just use the first method in this article to exclude their posts from WordPress search.
However if there are a lot of posts written by an author, then you can use the following code to exclude all of them from WordPress search results.
We hope this article helped you learn how to explude specific pages, authors, and more from WordPress search. You may also want to see our list of the best WordPress search plugins to improve your site search.
If you liked this article, then please subscribe to our YouTube Channel for WordPress video tutorials. You can also find us on Twitter and Facebook.
ARForms WordPress form builder plugin is a popular solution for building a range of fully responsive forms: a basic WordPress contact form, a workshop registration form, surveys, a job application form, and many more plain and complex types of forms. ARForms plugin has been around successfully for more than 4 years now. During this time, ... Read moreARForms WordPress Form Builder Plugin: The Ultimate Review
Do you want to create a Net Promoter Score (NPS) survey in WordPress?
Net Promoter Score is a popular method to measure customer loyalty, so you can improve your brand image, find new product ideas, and provide better customer service.
In this article, we will show you how to easily create a Net Promoter Score® Survey in WordPress, and how to properly use it to improve your business.
What is Net Promoter Score?
Net Promoter Score is a management tool that helps businesses measure customer loyalty. The idea was first introduced in 2003, and since then more than two-thirds of Fortune 1000 companies have adopted it.
Here is how it works.
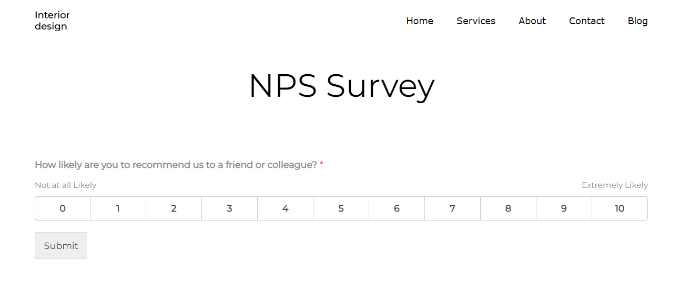
It is based on a single question, ‘How likely are you to recommend our company/product/service to a friend or colleague?’
The answer is provided on a scale of 0 to 10.
Customers who respond with a score of 9 or 10 are called ‘Promoters’. These are your brand’s most loyal customers and are highly likely to purchase again and recommend your business to others.
Users who answer with a score between 0-6 are considered ‘Detractors’. These are the customers who are unhappy with your business and are least likely to purchase or recommend your business.
Customers responding with a score of 7 or 8 are called ‘Passives’. They can be either promoters or detractors and are less likely to actively recommend your business and products to their friends or colleagues.
Your final NPS score is calculated by subtracting the percentage of detractors from the percentage of promoters. The overall score ranges from -100 to 100.
A -100 score means all customers are detractors and a full 100 score means all customers that took part in the survey were promoters. Normally, a score of positive numbers (0-40) is considered good, and a score of 50 or above is considered excellent.
Due to the popularity of NPS surveys among businesses, there are numerous very expensive survey tools that will charge you hundreds of dollars per month. These solutions are not very affordable for small businesses.
WPForms is a paid plugin, and you will need at least their Pro plan to access the surveys addon used in this tutorial.
Upon activation, you need to visit WPForms » Settings page from your WordPress to enter your license key. You can find this information under your account area on the WPForms website.
After entering your license key, you need to visit the WPForms » Addons page and locate the ‘Surveys and Polls Addon.’
Go ahead and click on the ‘Install Addon’ button. WPForms will now install and activate the addon.
You are now ready to create your first Net Promoter Score survey form.
Head over to WPForms » Add New from the WordPress admin panel to create a new form. First, you need to provide a title for your form, and then select a form template.
WPForms offers lots of prebuilt form templates. You can simply search for an NPS form template from the search bar on the left.
For this tutorial, we will use the ‘NPS Survey Simple Form’ template.
WPForms will now load the form builder interface with some typical survey form fields.
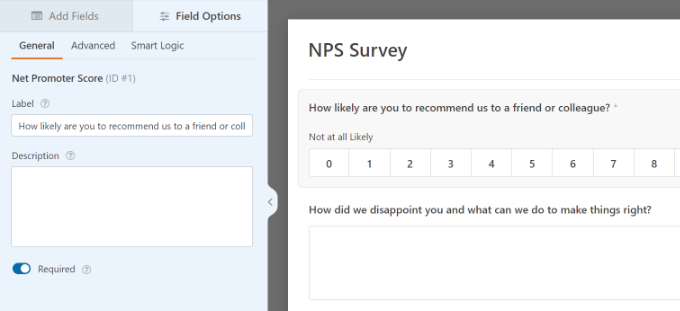
This is a drag-and-drop form builder where you can just point and click to edit any existing form fields or add new fields from the left column.
If you click on the existing fields in the form, then you’ll see more options for customization.
For instance, you can change the text for each question and make it a required field.
Your Net Promoter Score survey form is now almost ready. Simply getting the score is not very helpful because you don’t know why these customers are unhappy or happy.
Let’s add some smart conditional fields to the form to get more helpful feedback from users.
Adding Conditional Logic to Net Promoter Score Survey Form
WPForms comes with a smart conditional logic feature that allows you to show or hide form fields based on the user’s answers to previous form fields.
You can use that feature to ask users for more feedback based on their answers. For example, you can ask users who select a score between 0-6 to give you another chance to make things right. These customers are unhappy and asking them for an opportunity to make things right will help you improve your relationship with these customers.
Similarly, you can also ask users giving a score between 9-10 to leave a testimonial and ask for their permission to share it on your website. These are your most loyal customers, and their testimonials can help you add social proof to your website.
Let’s add these conditional fields to your NPS survey form.
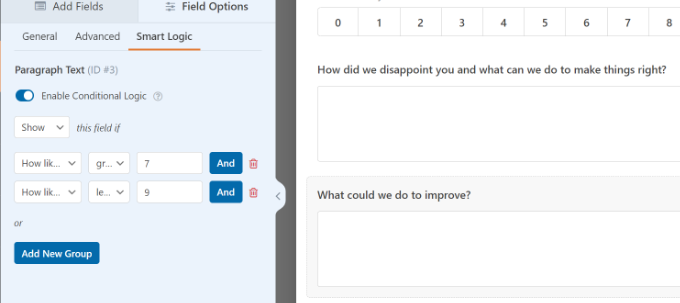
First, select the question after the NPS scale. Next, switch to the ‘Smart Logic’ tab from the menu on your left and click the ‘Enable Conditional Logic’ toggle to enable the option.
We only want to show this field to users responding with a score between 0 and 6. To do that, we will add conditional logic to this form field.
WPForms will add the logic by default. However, you can edit the rating for which you’d like to show the survey question.
Similarly, you can set up conditional logic for the second question in the survey. By default, WPForms will set the condition for you and only show the field when the score is between 7 and 9.
You can edit these conditions according to your survey needs. However, if you’re just starting out, then we recommend using the default settings.
Now repeat the process for other questions in the form. Don’t forget to save your changes.
Adding Your Net Promoter Score Survey in WordPress
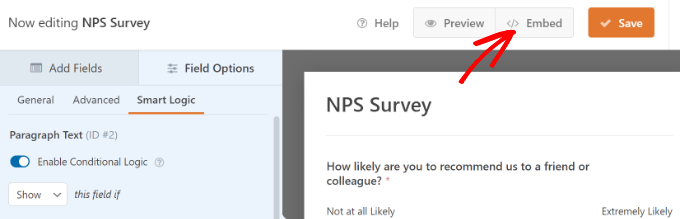
WPForms makes it super easy to add forms to any post or page on your website.
You can simply click the ‘Embed’ button inside the form builder to get started.
Next, you’ll see 2 options to embed the NPS survey. You can create a new page or select an existing page.
We’ll choose the ‘Create New Page’ option for this tutorial.
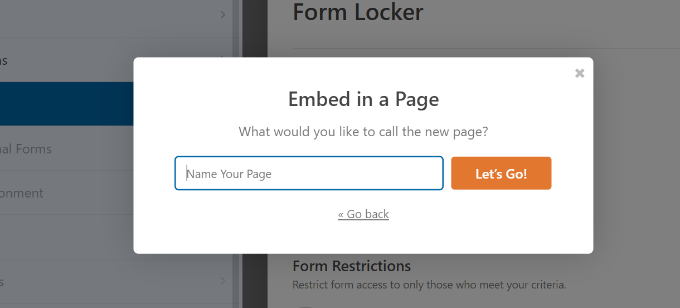
After that, a popup window will open.
Simply enter a name for your new page and click the ‘Let’s Go’ button.
Next, you should see your NPS survey form embedded in the content editor.
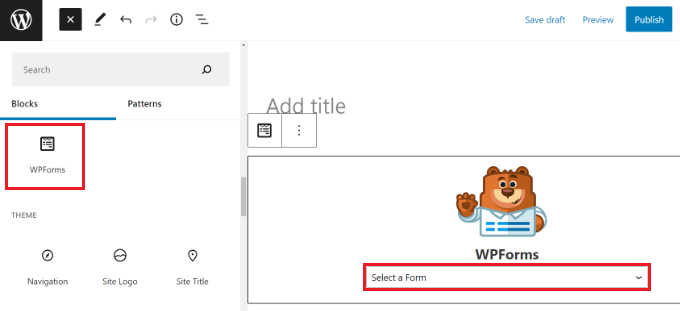
Alternatively, you can also use the WPForms block to add the NPS form anywhere on your website.
Simply click the ‘+’ button to add the WPForms block. After that, select your form from the dropdown menu.
You can now save your changes and visit your website to see the form in action.
Now, whenever a user selects a score between 0 to 6, they will see another form field asking for their feedback.
Viewing Your Net Promoter Score Results
After your form is live, WPForms will start calculating your Net Promoter Score based on survey results. You can send the NPS survey link to your customers using an email marketing service to encourage them to fill it out.
After a few users have filled out the form, you can go ahead and check your score.
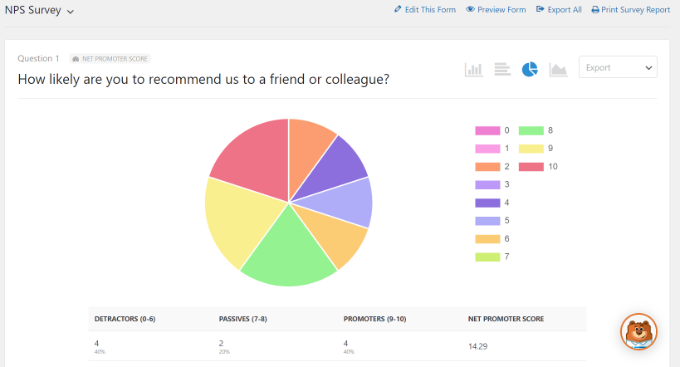
To do that, head over to WPForms » All Forms from your WordPress dashboard and click on the ‘Survey Result’ link under your Net Promoter Survey form.
WPForms will now display your total Net Promoter Score along with the number of promoters, detractors, and passives. It will also break down the results into beautiful charts, bars, and graphs.
You can use the feedback from users to improve your product, add new features, as well as offer support to unhappy customers and turn them into loyal brand evangelists.
Are you looking for the best accordion plugins? An accordion is a neat web design technique which allows you to display content in collapsible tabs. In this article, we have hand-picked the 7 best WordPress accordion plugins that you can use on your website.
Why Do You Need to Add Accordions in WordPress?
Accordions allow you to display more content on your posts and pages without adding long scrolls. If you want to shrink the length of a page, then you should consider adding your content in an accordion element.
You can add vertical or horizontal accordions with the text inside each tab. When users click or mouseover on the tab, it expands to reveal the content.
Accordions are most commonly used to add a frequently asked questions (FAQs) section, by displaying questions as tabs. However, you can use them to add any kind of content where you want to save users from scrolling.
That being said, let’s take a look at some of the best WordPress accordion plugins that you can use on your WordPress website.
Accordion is a handy WordPress plugin which allows you to add beautiful accordions in your pages, posts, template files, and anywhere on your site using shortcodes. It has a responsive design and displays your content beautifully on all devices. Accordion has Font Awesome icon font support which allows you to use beautiful icons to your accordion tabs.
You can add unlimited accordions on your site using this plugin. It allows you to change styles for the opened and closed accordion, hide the accordion without deleting, text alignment for content, and more.
Accordion FAQ is another accordion plugin for WordPress sites. It has a drag and drop builder that helps you easily add accordions anywhere on your WordPress blog. You can sort the accordions and manage their placement by dragging them up or down in the backend.
It has multiple templates, unlimited color options, Font Awesome icons support, bootstrap framework for responsive design, and more. Accordion FAQ loads faster which is great for search engine rankings of your site.
Tab, Accordion and FAQ is a WordPress plugin that allows you to add beautiful animated tabs and accordions in WordPress. You can easily add responsive horizontal, vertical, animated, and other accordions to WordPress posts, pages, and sidebar widget areas.
It has multiple transition effects, different layouts, drag and drop functionality for sorting tabs, and more.
Arconix Shortcodes is a multipurpose WordPress plugin based on different style shortcodes to add tabs and accordions on your site. It displays your content in accordions and appears neatly on all mobile devices.
You can create unlimited accordions and add them anywhere with the help of shortcodes. The plugin also comes with a compatibility mode which allows you to prevent shortcode name conflicts.
Easy Accordion is another WordPress accordion plugin that allows you to set up unlimited accordions and add them on your pages, posts, widget areas, and template files.
If you buy their premium version, then it comes with additional features like advanced shortcode system, accordions from WordPress categories and custom taxonomies, themes, unlimited colors support, and more.
Shortcodes Ultimate is a comprehensive WordPress plugin that comes with a set of shortcodes to add multiple features. You can use this plugin to add accordions on your site with its 1-click shortcode insertion and live preview.
It has a custom widget that you can use to add the accordion in any widget area of your WordPress site. Shortcodes Ultimate is easy to use and functions smoothly with modern WordPress themes.
Smooth Accordion is a simple WordPress accordion plugin. Like other accordion plugins, it allows you to add accordions on your pages and posts. Smooth Accordion adds an icon in your WordPress post editor that helps in adding the accordions in your posts and pages right away.
You can customize the background color, add custom styles to accordions, and align your content easily in plugin settings.
We hope this article helped you find the best WordPress accordion plugins. You may also want to see our ultimate step by step WordPress speed and performance guide for beginners.
If you liked this article, then please subscribe to our YouTube Channel for WordPress video tutorials. You can also find us on Twitter and Facebook.