Category Archives: duplicator

How to Back up a WordPress Site to Dropbox (Step by Step)

Are you looking for a way to back up your WordPress site to Dropbox?

It is a best security practice to regularly back up your site and store it in a separate location, like Dropbox. This way, you can easily restore your content, plugins, databases, and important settings if there is a security breach or something goes wrong.

In this article, we will show you how to back up a WordPress site to Dropbox.

How to backup a WordPress site to Dropbox

Why Back Up a WordPress Site to Dropbox?

Whether you are running a small WordPress website, an eCommerce store, or any other type of website, then creating regular backups is essential.

A backup is a copy of your website that includes important files, folders, databases, site content, themes, plugins, and other information.

With backups, you will have a copy of your website or ready in case of a fatal error or security vulnerability. Then, you can restore your website to its previous state in just a few clicks.

Storing your WordPress backups on your computer’s hard disk or website server can be risky. If your hard disk fails or the website server gets compromised, you will lose all your backups.

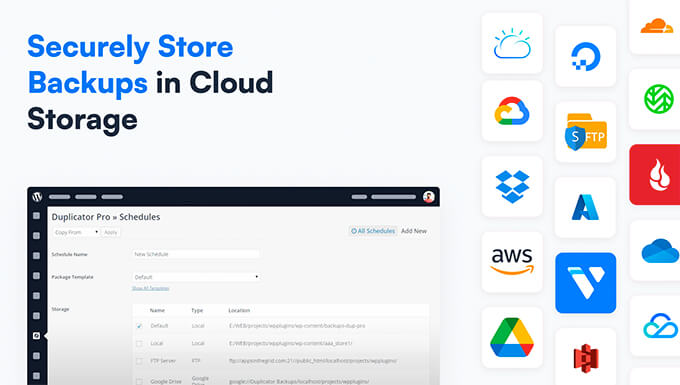
That’s why storing backups in multiple locations is a good practice, including cloud storage services like Dropbox.

Dropbox is a popular file-hosting service that lets you store and back up files to the cloud. The best part is that you can access, save, and share these files from anywhere.

That being said, let’s see how to back up WordPress to Dropbox.

Connecting Your WordPress Site to Dropbox

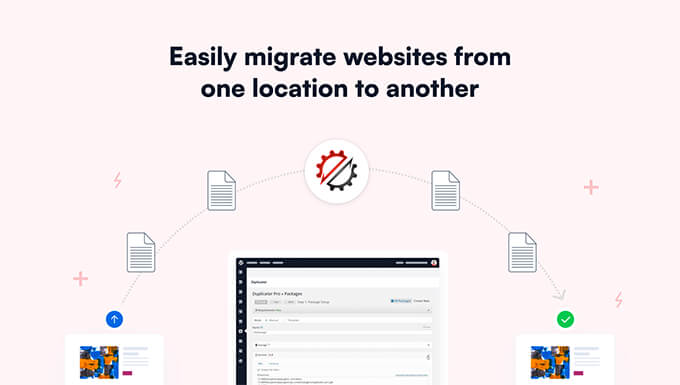
The easiest way to create WordPress backups and save them in Dropbox is by using the Duplicator plugin. It is the best WordPress backup plugin that is beginner-friendly and helps you to back up, migrate, and clone your website.

Plus, the Duplicator plugin easily integrates with different cloud services like Dropbox, Google Drive, Amazon S3, OneDrive, FTP, and SFTP – SSH.

Duplicator

Note: We will use the Duplicator Pro plugin for this tutorial because it includes cloud storage integrations. There is also a free version of Duplicator you can use to create site backups, but it doesn’t allow you to automatically store those backups in Dropbox.

First, you will need to install and activate the Duplicator Pro plugin. If you need help, then please see our guide on how to install a WordPress plugin.

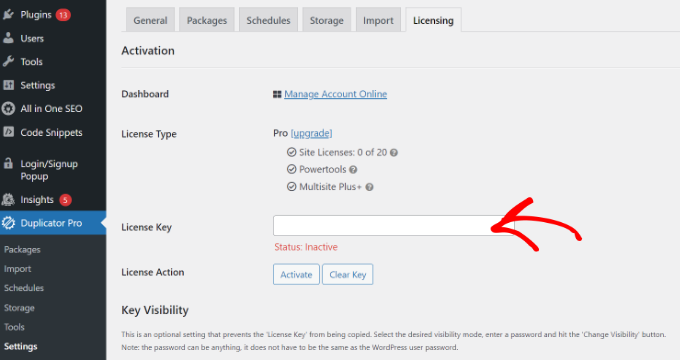
Upon activation, you need to head to Duplicator Pro » Settings from the WordPress admin panel and click the ‘Licensing’ tab.

Next, you will need to enter your license key and click the ‘Activate’ button. You can easily find the license key in your Duplicator account area.

Enter your Duplicator license

Next, you will need to connect your Dropbox account with Duplicator.

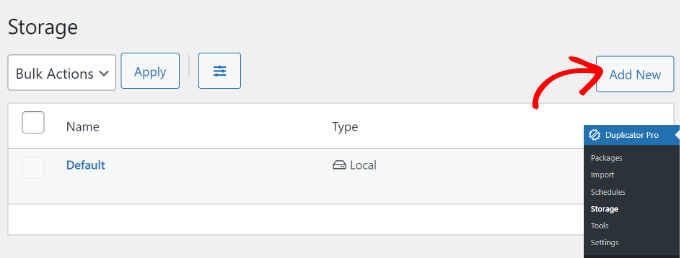
Simply go to Duplicator Pro » Storage from your WordPress dashboard. Here, you will see your local storage option, where the backups will be stored by default.

Go ahead and click the ‘Add New’ button to add Dropbox.

Add new storage option

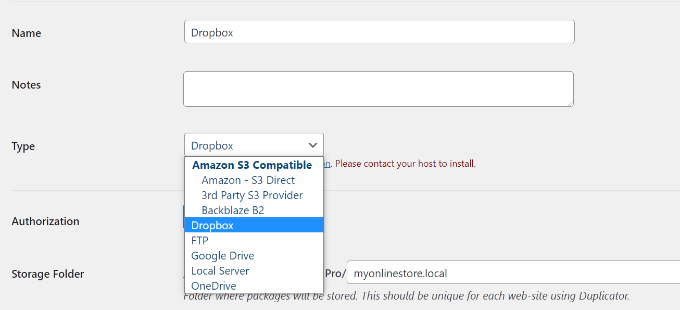
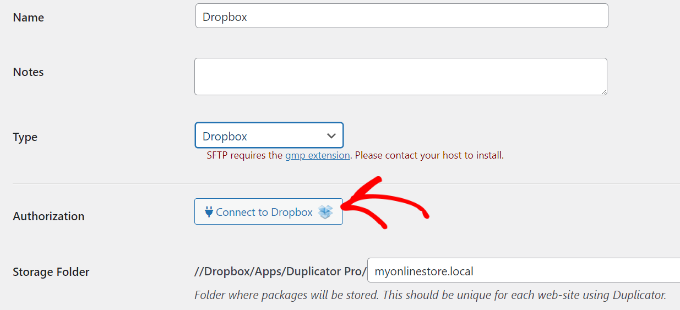
After that, you can enter a name for your new storage option so it is easily recognizable. For example, we will name it ‘Dropbox’.

Next, you must click the ‘Type’ dropdown menu and select the ‘Dropbox’ option.

Select Dropbox as type

From here, you will see new settings for your storage option.

Go ahead and click the ‘Connect to Dropbox’ button.

Click connect to dropbox

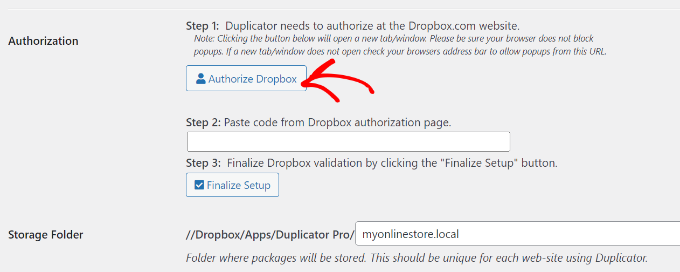
After clicking the button, more settings will appear in the Authorization section.

First, you will need to click the ‘Authorize Dropbox’ button.

Authorize Dropbox to connect to duplicator

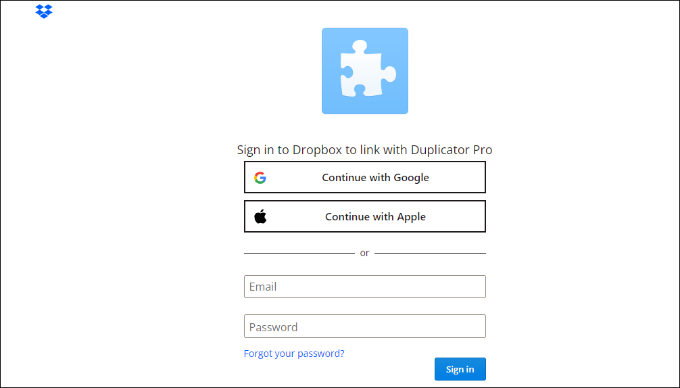
Next, a new window or tab will open. Simply log in to your Dropbox account.

You can use your Google or Apple account to sign in or enter the email and password you used when signing up for Dropbox.

Login to your Dropbox account

Once you are logged in, you will need to allow access to your Dropbox account.

Go ahead and click the ‘Allow’ button.

Allow access to Dropbox account

Next, Dropbox will show you an authorization code.

Simply copy this code.

Copy the Dropbox auth code

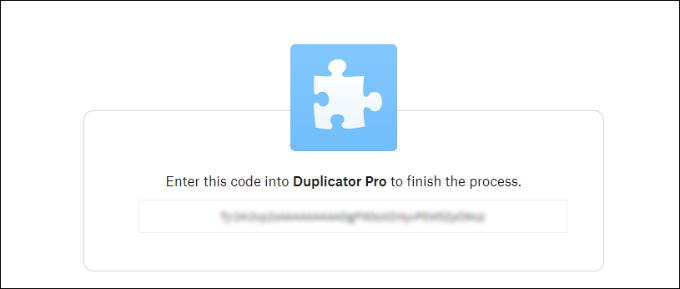
You can now return to the browser tab or window where you are configuring the Duplicator Pro storage settings.

Go ahead and enter the code into the ‘Step 2: Paste code from Dropbox authorization page’ field.

Enter code and finalize setup

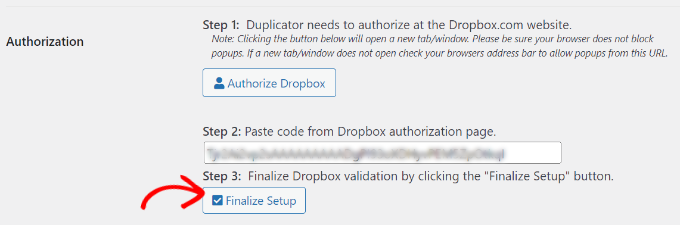
Once that’s done, simply click the ‘Finalize Setup’ button.

You have now successfully added Dropbox as a cloud storage option to save your WordPress backups.

Creating a Dropbox Backup of Your WordPress Website

The next step is to create a backup of your WordPress blog or website and save it to Dropbox.

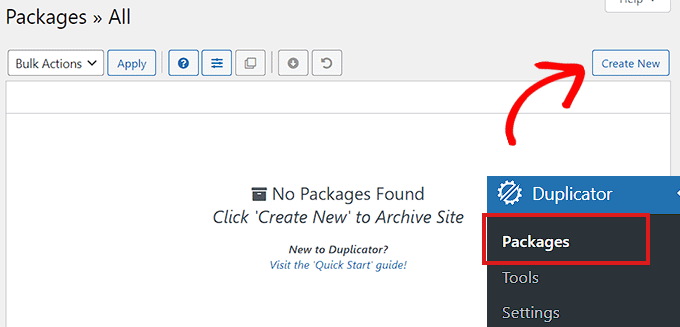
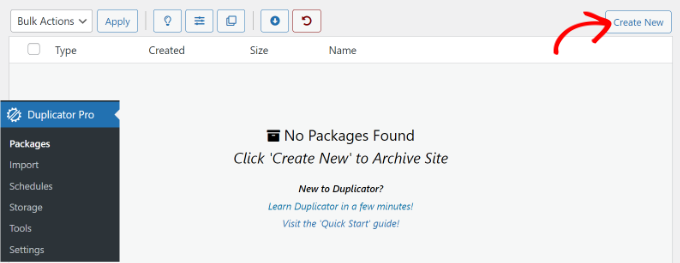
To start, go to Duplicator Pro » Packages from the WordPress admin panel and click the ‘Create New’ button.

Create a new package in Duplicator

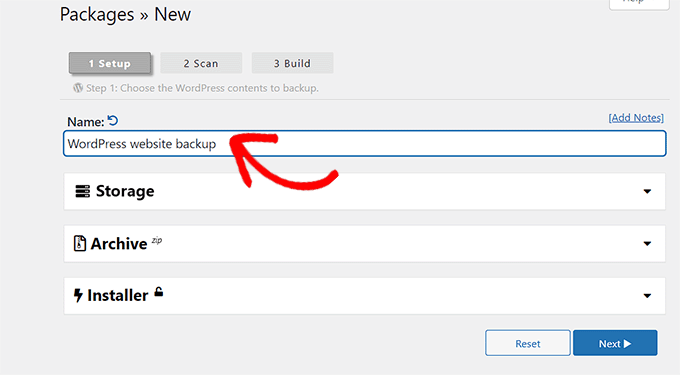
Next, you will need to enter a name for your package.

Duplicator will also give you the option to select a template. We recommend keeping it as ‘Unassigned’ because it will keep the settings from the last scan/build.

Enter name for backup package

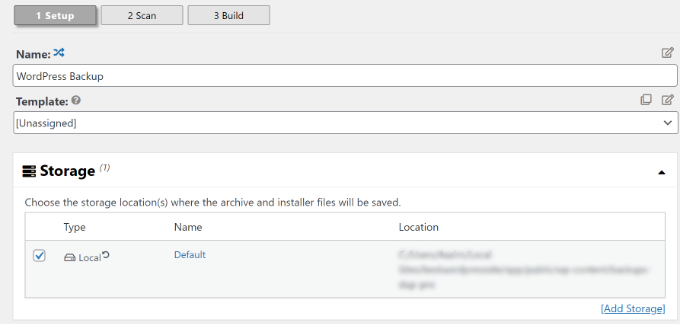
After that, you can expand the ‘Storage’ section.

Here, you will need to select ‘Dropbox’ as the storage option to store your WordPress backup.

Select Dropbox as storage option

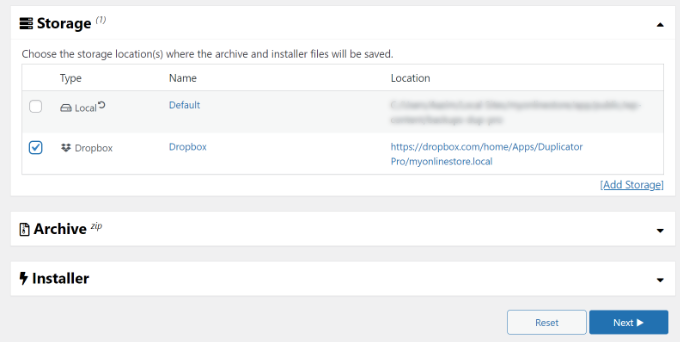
You can also change the ‘Archive’ settings before backing up your site. By default, the plugin will package your site’s content, plugins, themes, databases, and all other files.

However, you can customize your backup by selecting which part of your site to back up. For instance, you might archive only the WordPress database.

Archive settings for backup

When you are done, simply click the ‘Next’ button at the bottom.

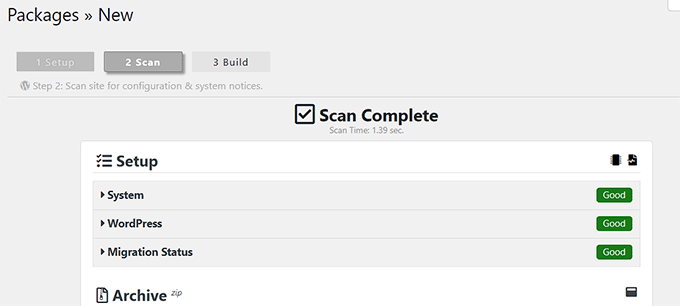
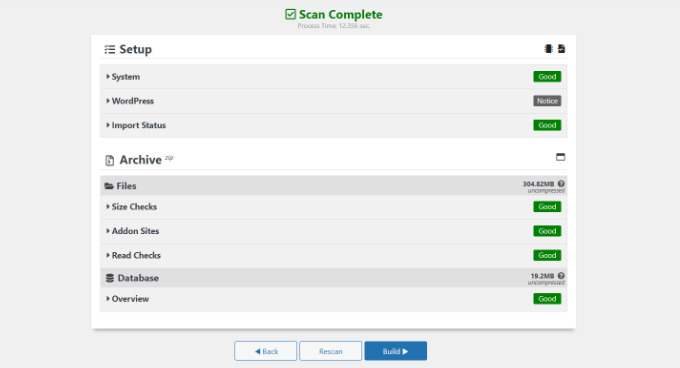
On the next screen, Duplicator will scan your website and check if everything is fine before creating a backup. You will see a notice or a warning for any issues that need to be resolved before backing up your site.

Once everything checks out, simply click the ‘Build’ button.

View scan of your package

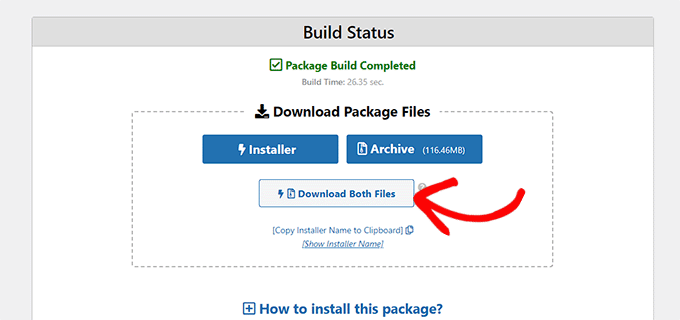
The plugin will take a few seconds or minutes to create a backup package. The time will depend on the size of the files and folders.

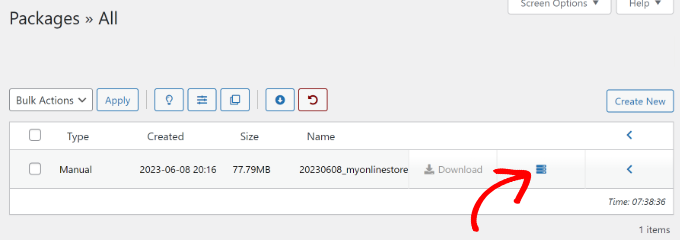
Once the package is ready, it will be saved in Dropbox. You can view the Dropbox location by clicking the ‘Storage’ icon.

View storage location

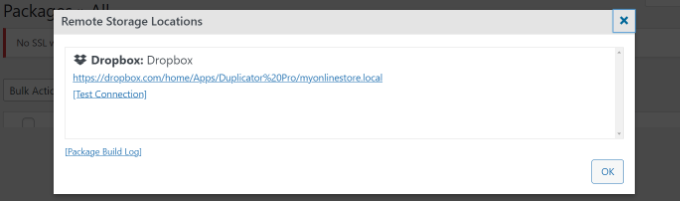
A new window will now open with the location.

You can simply click on the link to view your WordPress backup in the Dropbox dashboard.

View Dropbox storage location

Scheduling WordPress Backups to Dropbox (Pro Plugin Only)

With Duplicator Pro, you can schedule regular website backups and store them in Dropbox.

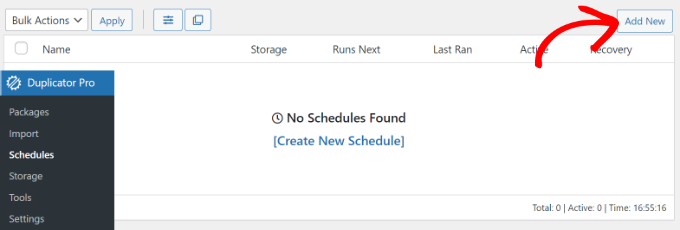
First, you will need to go to Duplicator Pro » Schedules from the WordPress dashboard and click the ‘Add New’ button.

Create a backup schedule

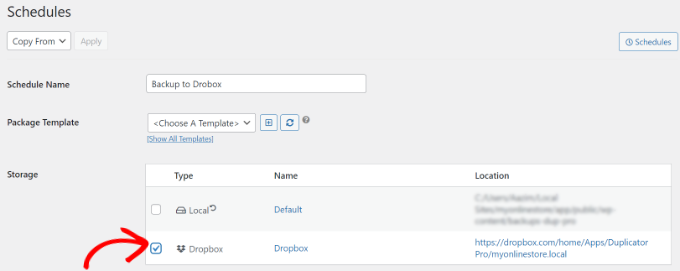
On the next screen, you can enter a name for your backup schedule and select a template. We recommend using the default template so that all your website files, folders, and databases are backed up.

After that, select ‘Dropbox’ as the storage location for your backups.

Enter name and select storage location

Next, you will need to scroll down and choose when the plugin should automatically create a backup.

You can select whether you’d like to build a package hourly, daily, weekly, or monthly. For instance, if you select the weekly option, then you can choose which day to schedule the backup.

There is also an option to choose the start time for your schedule. Lastly, make sure that the ‘Enable This Schedule’ option is checked so that your schedule is active.

Select time to run backups

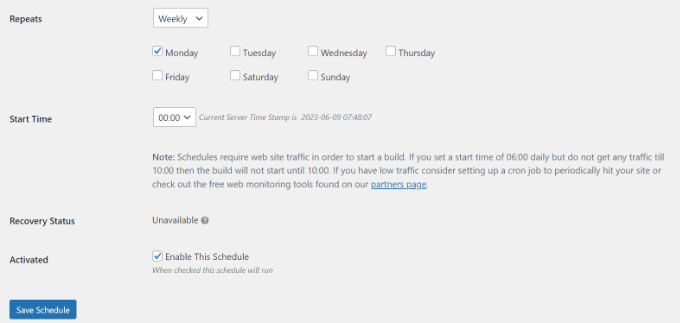
Once you are done, simply click the ‘Save Schedule’ button.

Restoring a WordPress Backup From Dropbox

Now that you have scheduled regular backups, you will always have a copy of your site in Dropbox. This way, you can easily restore the backup if there is a fatal error, data loss, or security breach.

To restore your site, you will first need to open your Dropbox account and head to the Duplicator Pro folder.

Go to Duplicator folder in Drobox

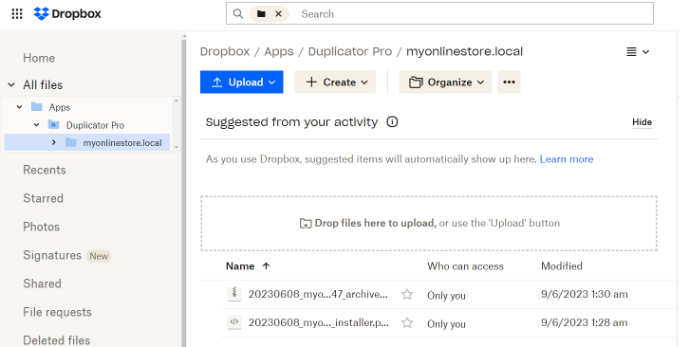
Next, select the website backup you would like to download.

Simply click the 3 dotted icons and then select the ‘Download’ option.

Download website backup from dropbox

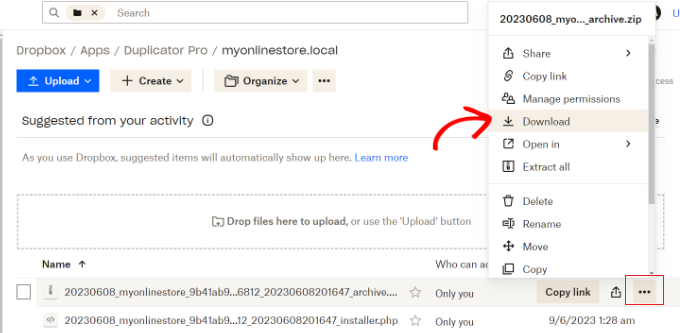
From here, you can save the zip file on your computer.

After that, you must go to your WordPress dashboard and head to Duplicator Pro » Import. Go ahead and click the ‘Select File’ button.

Import backup package

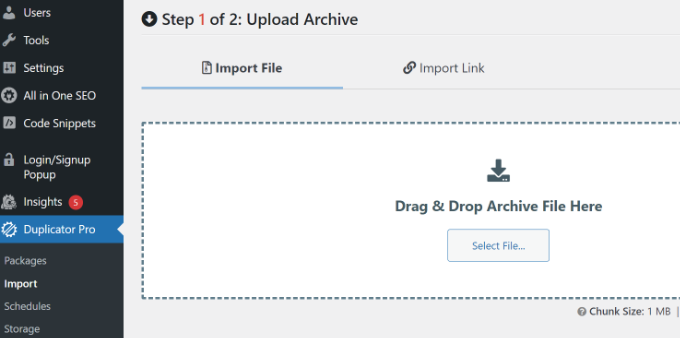
Next, you can select the zip file from your computer to restore the website backup.

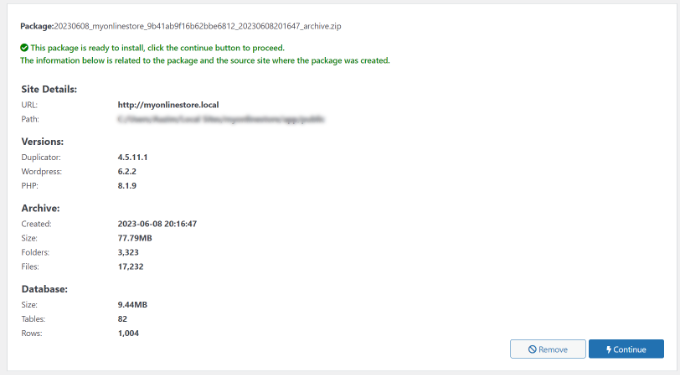
Once the file is uploaded, you can scroll down to see the package details. Simply click the ‘Continue’ button.

View package details

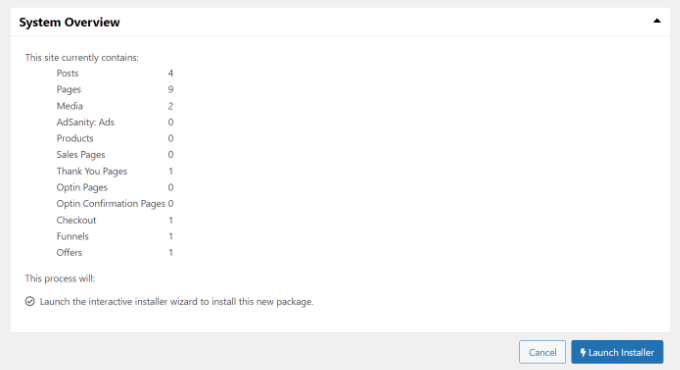
On the next screen, you will see an overview of your package. For instance, it will show the number of posts, pages, media files, plugins, and more that are in the backup.

Go ahead and click the ‘Launch Installer’ button.

View overview of current site

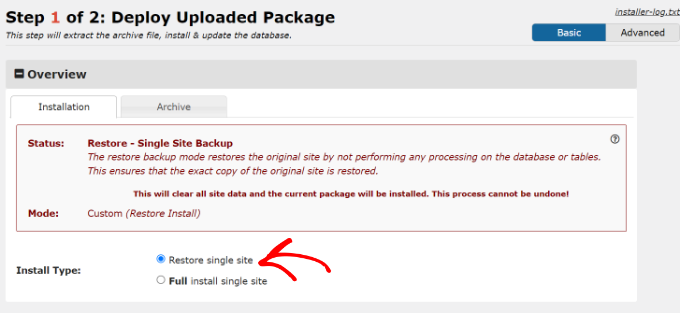
Once you click the button, the Duplicator installer wizard will launch.

First, you will need to choose an Install Type for your package. Go ahead and select the ‘Restore single site’ option.

Select restore single site

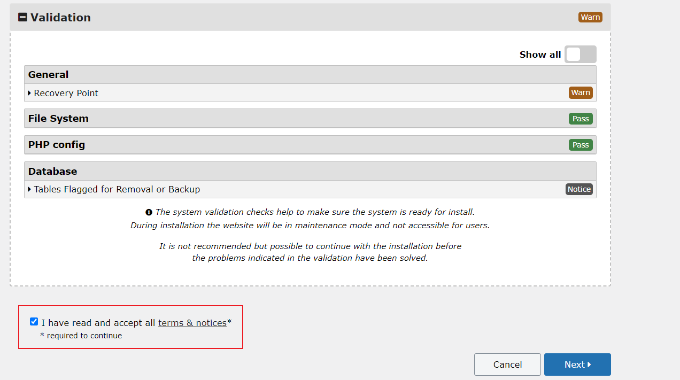
Next, you can scroll down to view the Validation checkpoints and make sure the system is ready to install the backup. If there are any warnings or notices, then you must resolve them before restoring the backup.

Once that’s done, click the checkbox for ‘I have read and accepted all terms & notices’ and click the ‘Next’ button.

Check validation settings and accept terms

A popup will now open with install confirmation details.

You can click the ‘OK’ button to move forward.

Install confirmation in duplicator

The plugin will now extract archive files from the package.

Once the extraction is finished, you will see the install results. To complete the backup, you must click the ‘Admin Login’ button and log back in to your site to finalize the installation.

Log back in to admin panel

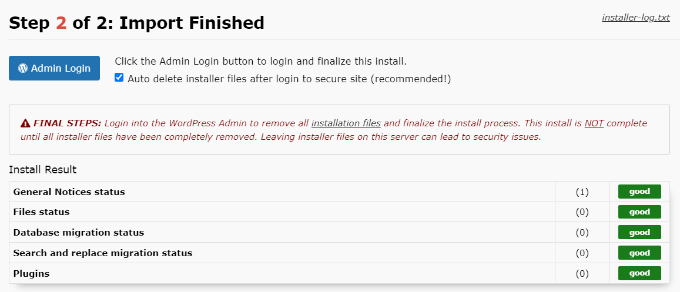
You have now successfully restored your website backup from Dropbox.

We hope this article helped you learn how to back up a WordPress site to Dropbox. You may also want to see our guide to WordPress security and our expert picks for the best live chat software for small businesses.

If you liked this article, then please subscribe to our YouTube Channel for WordPress video tutorials. You can also find us on Twitter and Facebook.

The post How to Back up a WordPress Site to Dropbox (Step by Step) first appeared on WPBeginner.

How to Download Your Entire WordPress Media Library (3 Ways)

Do you want to download all the images and media files from your WordPress website?

By downloading your media library, you can easily store a backup of your media files on your computer or, if you have created another WordPress site, then you can also transfer these images from one site to another.

In this article, we’ll show you how to easily download your entire WordPress media library, step by step.

How to download your entire WordPress media library

Why Would You Want to Download the Media Library?

The WordPress media library stores all the media files that you have uploaded to your site. If you want to create a backup of these media files, then you can easily do that by downloading a copy of the media library and storing it on your computer.

You can always use a fully automated WordPress backup solution to back up your entire WordPress site (including plugins, themes, posts, and the media library).

However, most backup plugins do not offer an easy way to just download and upload your media library.

You could also use your WordPress hosting account file manager or FTP to download the media library, but these methods are a bit complicated and confusing for beginners.

With that being said, we’ll show you some easy ways to easily download your entire media library in WordPress.

Method 1. Download Media Library Using The Export Media Library Plugin

For this method, we’ll be using a plugin to download the media files.

First, you need to install and activate the Export Media Library plugin. For more details, see our guide on how to install a WordPress plugin.

Upon activation, go to the Media » Export page from your admin area.

Once you’re on the ‘Export Media Library’ page, simply choose the ‘Single folder with all files’ option from the dropdown menu beside the ‘Folder Structure’ option.

Download the media library using the Export Media Library plugin

Now all your media will be downloaded into one folder. They will be downloaded as the original file types, such as JPG, PNG, or SVG.

If you want your media to be placed into separate folders based on the time of upload, then choose the ‘Nested Folder’ option from the dropdown menu.

After that, simply click the ‘Download Zip’ button, and your entire media library will be downloaded into a zip file on your computer.

Method 2. Download the Entire WordPress Backup Including Media Files

If you want to create a backup for your entire WordPress website including the media library, then this method is for you.

We’ll be using the Duplicator plugin which is the best WordPress backup plugin on the market and enables you to create a complete backup of your WordPress website.

First, you’ll need to install and activate the Duplicator plugin. For more details, see our guide on how to install a WordPress plugin.

Upon activation, you need to visit the Duplicator » Packages page from the admin sidebar and click on the ‘Create New’ button.

Create a new backup by clicking the Create New button

Next, you need to choose a name for your WordPress backup.

It can be anything that will help you identify the backup once it’s downloaded on your computer.

After that, click on the ‘Next’ button to continue.

Choose a backup name

In the next step, your website will be scanned for potential errors.

Once the scan is complete, simply click on the ‘build’ button to create your package.

Note: If an error is highlighted by Duplicator during the scan, you would need to solve that error before rescanning and building your package.

Scan complete

Once the package is built, you need to click on the ‘Download Both Files’ button.

Now, your installer and archive files will be downloaded simultaneously.

Click the Download both files button

Your WordPress website backup including media files will now be downloaded and stored on your computer.

If you want to restore a WordPress backup, you may also want to see our guide on how to restore WordPress from a backup.

Method 3. Download Media Library Using WordPress Settings

In this method, we’ll show you how to download your entire media library from your WordPress backend and import it to another WordPress website.

Note: This method allows you to download the media library without using any plugins. However, we do not recommend this method because it exports your media as an XML file.

This method can come in handy if you want to import your WordPress media library to one of your other websites.

For that, head over to the Tools » Export page from the WordPress admin dashboard.

Now that you’re on the ‘Export’ page, simply check the box beside the ‘Media’ option.

If you don’t want to download your entire library, then you can also select a date range for a specific time frame. With this feature, only the images uploaded during your chosen time frame will be downloaded.

Finally, click on the ‘Download Export File’ button.

Choose media on the export page

Now, your WordPress media library will be saved on your computer as an XML file.

Next, you need to install and activate the WordPress Importer plugin. For more instructions, please see our guide on how to install a WordPress plugin.

This plugin will allow you to import your XML file to another WordPress website.

First, you need to visit the Tools » Import page from the admin sidebar.

Then you can simply click on the ‘Run Importer’ link below the ‘WordPress’ option.

Click on the run importer link

This will take you to the ‘Import WordPress’ page where you need to click on the ‘Choose File’ button.

Now, you can upload your media library XML file from the computer.

Import media

Once you’re done, don’t forget to click on the ‘Upload file and import’ button to upload the media library.

We hope this article helped you download your WordPress media library. You may also want to see our tutorial on how to speed up your WordPress website, and our comparison of the best Instagram plugins for WordPress.

If you liked this article, then please subscribe to our YouTube Channel for WordPress video tutorials. You can also find us on Twitter and Facebook.

The post How to Download Your Entire WordPress Media Library (3 Ways) first appeared on WPBeginner.

Welcome Duplicator to the WPBeginner Family of Products

Today, I’m extremely excited to share that Duplicator is joining Awesome Motive, and they’re now part of the WPBeginner family of products.

Duplicator is a top-rated WordPress backup and site migration plugin. Over 1,500,000+ smart website owners use Duplicator to make reliable and secure WordPress backups to protect their websites. Along with backups, you can also use Duplicator to easily migrate your website from one host to another within minutes.

Welcome Duplicator to the WPBeginner Family of Products

Introduction to Duplicator – Quick Overview

Duplicator makes it easy for website owners to protect their websites with reliable and secure cloud backups. You can use it to create manual or scheduled WordPress backups and store them on any cloud service like Google Drive, Dropbox, Amazon S3, etc.

You can also use Duplicator to easily migrate and restore your website from one hosting provider to another, or even from local server to live.

This is why over 1,500,000 smart website owners and developers use Duplicator to backup or migrate websites while saving time.

What makes Duplicator stand out is that it’s both EASY and POWERFUL.

It comes with all the powerful backup features that you need including complete WordPress files & database backup, scheduled backups, recovery points to allow for quick rollbacks, archive encryption for enhanced security, and integrations with all the popular cloud storage platforms like Amazon S3, Dropbox, Google Drive, Microsoft OneDrive, FTP / SFTP, and any S3 compatible storage service like Wasabi, etc.

Duplicator Cloud Backup Integrations

When it comes to WordPress site migrations, Duplicator really stands out from competition. It has an easy migration wizard, streamlined installer, custom search & replace, support for larger websites & managed hosting, server-to-server import, ability to migrate WordPress multisite to standalone or vice-versa, shared database support, and more.

Easily Migrate WordPress Websites from One Location to Another with Duplicator Plugin

For developers and agencies, Duplicator helps eliminate the rework by allowing you to create pre-configured sites that you can quickly set up with just a few clicks. Instead of manually configuring the same themes and plugins over and over, just configure one site and bundle it into a Duplicator package. Install the package to create a pre-configured site on as many locations as you want!

Aside from that, you can brand the installer with your own logo, and it comes with tons of developer hooks for further customization.

Smart developers and agencies use Duplicator as their preferred tool because it’s always reliable and it helps simplify even the large complex website migrations.

Duplicator - Branded Pre-configured WordPress Installer for Agencies and Developers

Whether you’re a small business owner or developer, I highly recommend adding Duplicator to your WordPress toolkit.

You can also use the free version of Duplicator to get started. 

Background Story – Why Duplicator? 

As you know, every year I do a WPBeginner reader survey where I ask for your suggestions on what new tutorials we should write, plugins we should build, new features we should add to our existing plugins, and so on.

For the last several years, the number of requests for us to build a beginner-friendly WordPress backup & migration plugin has been increasing.

So in 2020, I finally decided to reach out to Bob & Cory (co-founders of Duplicator) to see if they would be interested in joining Awesome Motive. The reason why I picked Duplicator was because I have used it numerous times for our various website migrations, and it was always the most reliable solution especially when dealing with complex migrations.

Not to mention we have written about them in numerous WPBeginner tutorials, so you already know that I am a fan of the product.

Well 2020 was a crazy year for everyone, so the timing wasn’t right for an acquisition, but nonetheless we stayed in touch. Fast forward to 2022, we came to an agreement for Duplicator to join WPBeginner family of products.

The two co-founders will not be joining the team as they want to move on to the next chapter of their life, but the entire Duplicator team will be joining us in the journey ahead, and I am very excited to work alongside them to build the features that you have been asking for.

As you know, my goal at Awesome Motive & WPBeginner is to help small businesses grow and compete with the big guys. Our software today powers over 21 million websites and helps shape the web for billions worldwide.

I believe that a reliable website backup solution is a critical part of every website because it helps you protect your website in case something goes wrong.

And that’s why I’m really excited to have Duplicator join the AM family.

Note: Want to join our remote team to work on something awesome & make an impact? We’re hiring. Come work alongside me and help shape the future of the web.

What’s Coming Next? 

Our work is just starting.

We have an extensive list of ideas and feature roadmap from the feedback that you, the WPBeginner audience, have shared with us in the survey.

I’m looking forward to making those ideas come to life.

This is truly going to be a game changer!

Whether you’re a small business owner or a developer, I think you will want to choose Duplicator to protect your website with our reliable secure backups, and easily migrate your website when you’re looking to switch hosts.

If you have suggestions on features you’d like to see in the Duplicator plugin, then please let us know by sending us a message via WPBeginner contact form.

As always, I want to thank you for your continued support of WPBeginner. 

WPBeginner and Awesome Motive would not be here without YOU, and I just want to say how much I appreciate all of you.

And I look forward to continuing serving you and the larger WordPress / web ecosystem for years to come.

Yours Truly,

Syed Balkhi
Founder of WPBeginner

The post Welcome Duplicator to the WPBeginner Family of Products first appeared on WPBeginner.