Do you want to download all the images and media files from your WordPress website?
By downloading your media library, you can easily store a backup of your media files on your computer or, if you have created another WordPress site, then you can also transfer these images from one site to another.
In this article, we’ll show you how to easily download your entire WordPress media library, step by step.
Why Would You Want to Download the Media Library?
The WordPress media library stores all the media files that you have uploaded to your site. If you want to create a backup of these media files, then you can easily do that by downloading a copy of the media library and storing it on your computer.
You can always use a fully automated WordPress backup solution to back up your entire WordPress site (including plugins, themes, posts, and the media library).
However, most backup plugins do not offer an easy way to just download and upload your media library.
You could also use your WordPress hosting account file manager or FTP to download the media library, but these methods are a bit complicated and confusing for beginners.
With that being said, we’ll show you some easy ways to easily download your entire media library in WordPress.
Method 1. Download Media Library Using The Export Media Library Plugin
For this method, we’ll be using a plugin to download the media files.
First, you need to install and activate the Export Media Library plugin. For more details, see our guide on how to install a WordPress plugin.
Upon activation, go to the Media » Export page from your admin area.
Once you’re on the ‘Export Media Library’ page, simply choose the ‘Single folder with all files’ option from the dropdown menu beside the ‘Folder Structure’ option.

Now all your media will be downloaded into one folder. They will be downloaded as the original file types, such as JPG, PNG, or SVG.
If you want your media to be placed into separate folders based on the time of upload, then choose the ‘Nested Folder’ option from the dropdown menu.
After that, simply click the ‘Download Zip’ button, and your entire media library will be downloaded into a zip file on your computer.
Method 2. Download the Entire WordPress Backup Including Media Files
If you want to create a backup for your entire WordPress website including the media library, then this method is for you.
We’ll be using the Duplicator plugin which is the best WordPress backup plugin on the market and enables you to create a complete backup of your WordPress website.
First, you’ll need to install and activate the Duplicator plugin. For more details, see our guide on how to install a WordPress plugin.
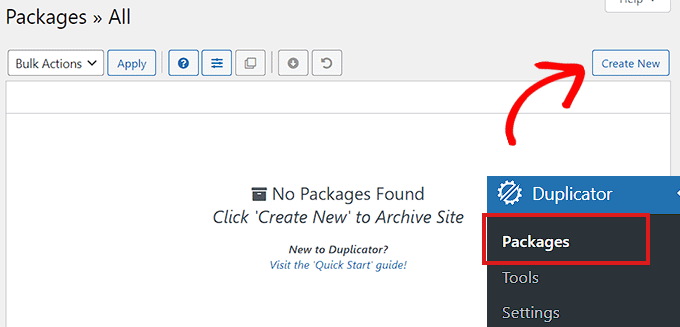
Upon activation, you need to visit the Duplicator » Packages page from the admin sidebar and click on the ‘Create New’ button.
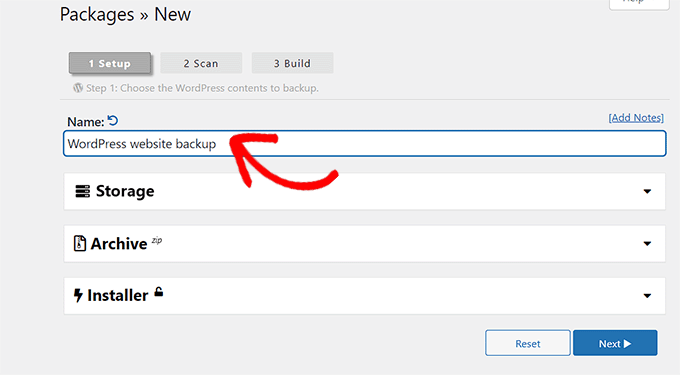
Next, you need to choose a name for your WordPress backup.
It can be anything that will help you identify the backup once it’s downloaded on your computer.
After that, click on the ‘Next’ button to continue.
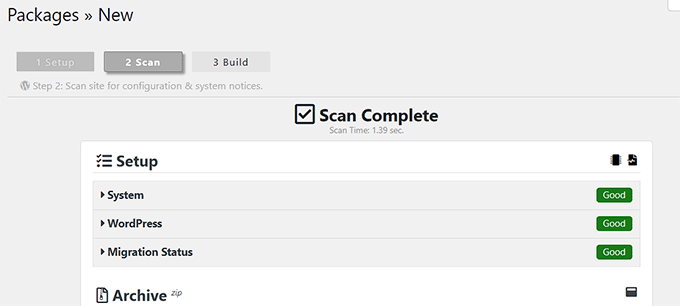
In the next step, your website will be scanned for potential errors.
Once the scan is complete, simply click on the ‘build’ button to create your package.
Note: If an error is highlighted by Duplicator during the scan, you would need to solve that error before rescanning and building your package.
Once the package is built, you need to click on the ‘Download Both Files’ button.
Now, your installer and archive files will be downloaded simultaneously.
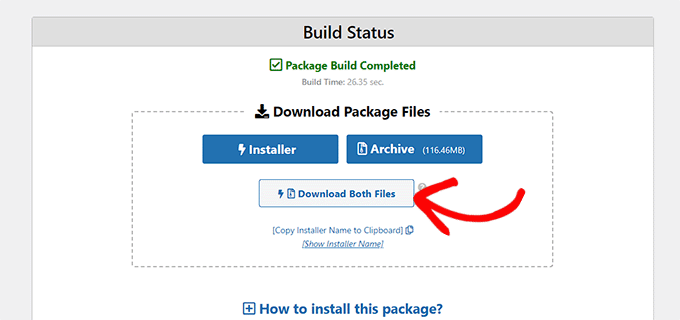
Your WordPress website backup including media files will now be downloaded and stored on your computer.
If you want to restore a WordPress backup, you may also want to see our guide on how to restore WordPress from a backup.
Method 3. Download Media Library Using WordPress Settings
In this method, we’ll show you how to download your entire media library from your WordPress backend and import it to another WordPress website.
Note: This method allows you to download the media library without using any plugins. However, we do not recommend this method because it exports your media as an XML file.
This method can come in handy if you want to import your WordPress media library to one of your other websites.
For that, head over to the Tools » Export page from the WordPress admin dashboard.
Now that you’re on the ‘Export’ page, simply check the box beside the ‘Media’ option.
If you don’t want to download your entire library, then you can also select a date range for a specific time frame. With this feature, only the images uploaded during your chosen time frame will be downloaded.
Finally, click on the ‘Download Export File’ button.
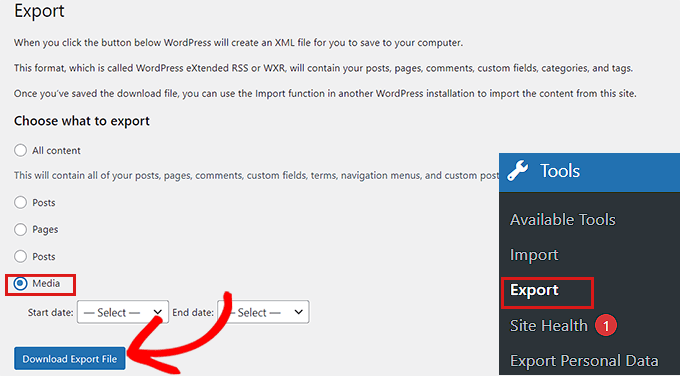
Now, your WordPress media library will be saved on your computer as an XML file.
Next, you need to install and activate the WordPress Importer plugin. For more instructions, please see our guide on how to install a WordPress plugin.
This plugin will allow you to import your XML file to another WordPress website.
First, you need to visit the Tools » Import page from the admin sidebar.
Then you can simply click on the ‘Run Importer’ link below the ‘WordPress’ option.

This will take you to the ‘Import WordPress’ page where you need to click on the ‘Choose File’ button.
Now, you can upload your media library XML file from the computer.

Once you’re done, don’t forget to click on the ‘Upload file and import’ button to upload the media library.
We hope this article helped you download your WordPress media library. You may also want to see our tutorial on how to speed up your WordPress website, and our comparison of the best Instagram plugins for WordPress.
If you liked this article, then please subscribe to our YouTube Channel for WordPress video tutorials. You can also find us on Twitter and Facebook.
The post How to Download Your Entire WordPress Media Library (3 Ways) first appeared on WPBeginner.
