Looking to start a WooCommerce AliExpress dropshipping store? AliExpress makes it easy to find a range of dropshipping suppliers and products, and WooCommerce is an affordable way to create an eCommerce store to sell those products to the public. In this post, we’ll show you how to marry those two concepts to create a working ... Read moreHow To Create A WooCommerce AliExpress Dropshipping Store The Easy Way
Do you want to create a referral program in WordPress? Referral programs are a great way to get more people to promote your products to a larger audience. In this article, we will show you how to easily create a referral program in WordPress and get more customers.
Why Create a Referral Program in WordPress?
Referral program or affiliate program allows you to get more people to help you sell your products and services. In return, you pay them a small commission on each sale they make. For more details, see our ultimate affiliate marketing guide to see how it works.
In simple terms, it is like building your own sales army without paying them a salary.
To manage a referral or affiliate program, you will need a tool that can manage your affiliate program. It will allow affiliate marketers to join your referral program. It will also help you track sales and traffic sent by each affiliate partner.
Why Use AffiliateWP to a Create Referral Program in WordPress?
Large number of addons including free, paid, and third-party add-ons to extend AffiliateWP
Real-time affiliate tracking with detailed reports for you and your affiliate partners
Cons of Using AffiliateWP
Here are some of the disadvantages of using AffiliateWP to manage your referral program.
It has limited reach compared to affiliate networks which already have thousands of affiliate marketers actively looking for products to promote
It does not come with advanced fraud detection features that are offered by popular affiliate networks.
There is no automatic payout system, and you will have to manually send payments each month
Does not calculate taxes and 1099 forms for payouts. As a business owner, you will have to manage it on your own.
It is less convenient for affiliate partners. They will have to create an account and login to view their reports, compared to affiliate networks where they can see all their earnings at one place.
A good alternative to AffiliateWP would be ShareASale, which is a large affiliate network with thousands of skilled affiliate marketers actively looking for new products to recommend.
For a more detailed comparison, you may want to see this article on setting up your own affiliate program by Syed Balkhi (Founder and CEO of WPBeginner).
With that being said, let’s take a look at how to create a referral program in WordPress using AffiliateWP.
Upon activation, you need to visit Affiliates » Settings page to enter your license key. You can find this information under your account on AffiliateWP website.
After activating your license key, you need to select a page to be used for Affiliate Area. AffiliateWP automatically creates one for you, but if you want to use a different page, then you can select it here.
Next, you need to choose the terms of service page. You can check out affiliate program terms pages on other websites to create one for your own site. After creating the page you can select it here.
After that, you need to review other settings on the page and set them up based on your own referral program policies.
Don’t forget to click on the ‘Save Changes’ button to store your settings.
Next, you need to switch to the integrations tab on the Settings page. From here you need to select the integrations you want to enable. AffiliateWP supports most popular eCommerce, membership, contact form, and LMS plugins.
Click on the save changes button and then switch to ‘Emails’ tab on the Settings page.
AffiliateWP allows you to edit emails sent out to your affiliates. You can also upload your business logo, create your own email templates, and choose the email address you want to use to send out affiliate emails.
Lastly, switch to the Misc tab on the settings page to set up advanced settings for your affiliate program. The first option on the page is to allow affiliates to register themselves. You can check this if you want affiliates to be able to sign up for your referral program.
Next, you would also want to enable reCAPTCHA to prevent bots from registering as affiliates.
You will need to carefully review each setting and change them as needed. Don’t forget to click on the save changes button to store your settings.
Adding Links to Your Referral Program
Now that you have set up your referral program, the next step is to add links to it. For example, if you have enabled affiliate registration, then you may want to add a link to affiliate area so that interested marketers can register themselves.
Simply go to Appearance » Menus page and add your affiliate area page to a navigation menu. For detailed instructions, see our beginner’s guide to adding navigation menus in WordPress.
Clicking on the link will take users to the affiliate area where they can register to join as a new affiliate, or login to their account to see their reports.
Managing Your Referral Program in AffiliateWP
AffiliateWP comes with powerful tools to manage your affiliates, view reports, and effectively run your affiliate program without leaving WordPress.
To view affiliates that have joined your referral program, simply go to Affiliates » Affiliates page.
On this page, you can see a list of all your affiliate partners, their earnings, unpaid earnings, referral visits, and more. You can edit any affiliate account individually.
To view each sale made through a referral partner, you need to visit Affiliates » Referrals page. Here you will see all referral sales, affiliate partner, amount, and more. You can also click on ‘Reject’ link if you suspect a referral to be fraudulent.
Viewing Your Referral Program Reports in AffiliateWP
Reporting is crucial to run a successful referral program, and AffiliateWP comes with powerful reporting features. Head over to Affiliates » Affiliates page for a full overview.
You can filter the reporting period by time and specific affiliate partner name. You can also view reports for affiliates, referral visits, and campaigns.
Sending Payments to Your Affiliates
Unfortunately, AffiliateWP doesn’t come with automatic payouts, which means you will have to manually send payments. AffiliateWP makes it easy to manage your payouts.
Depending on when and how often you want to pay your referral partners, you can head over to the Affiliates » Referrals page and click on the ‘Generate Payout File’ button.
This will generate a payout file which is compatible with PayPal’s mass payment system. The file also works with Skrill and other payment services that support mass payment feature. It contains the amount and payment email addresses for all your unpaid referrals.
We hope this article helped you learn how to create a referral program in WordPress. You may also want to see our ultimate step by step WordPress SEO guide for beginners.
If you liked this article, then please subscribe to our YouTube Channel for WordPress video tutorials. You can also find us on Twitter and Facebook.
Are you looking to use FOMO and social proof notifications on your WordPress site?
FOMO, short for fear of missing out, is basically a marketing technique used to create anticipation and excitement for a product. It uses a basic psychology principle to help customers make a buying decision faster.
In this article, we will show you how to properly use FOMO on your WordPress website to increase conversions and sales.
What is FOMO and How Does it help with Conversions?
FOMO or ‘fear of missing out’ is a psychological term that describes anxiety about missing out on something exciting and trendy.
As a WordPress website owner, you can take advantage of this human behavior in your marketing strategy and improve your conversions.
The concept of FOMO is not new. It’s actually been used by marketers even before the arrival of the internet. However, with online marketing, FOMO has become far easier to implement and much more effective.
For example, if you run an online store, then you can create anticipation about an upcoming sale and limited-time offers by adding social proof to your landing pages.
With that said, let’s take a look at how to easily add FOMO to your WordPress site. We will show you two techniques that we have successfully used on our own websites with incredible results.
Method 1: Adding FOMO with Social Proof by Using TrustPulse
People feel more comfortable with their buying decision when they know others have also bought the same product or service and had a good experience with it.
This is why smart business owners use social proof in their marketing.
TrustPulse allows you to display real-time user activity notifications on your website, such as products purchased, forms submitted, etc.
To get started, you’ll need to install and activate the TrustPulse plugin on your website. For more details, see our step-by-step guide on how to install a WordPress plugin.
The plugin helps you connect your WordPress site to the TrustPulse app.
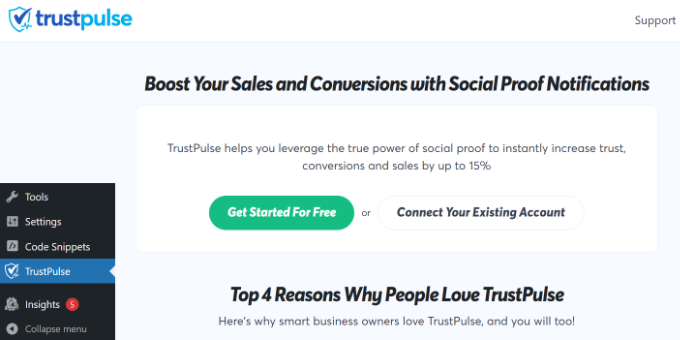
Upon activation, click on the TrustPulse menu from the WordPress admin sidebar and click the ‘Get started for free’ button to continue.
This will take you to the TrustPulse website, where you can sign up for a free account. The free plan is good for up to 500 sessions per month.
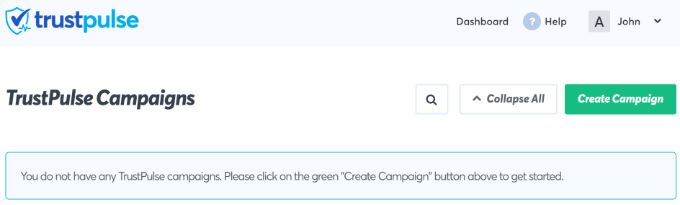
Once you sign up, you are ready to create your first campaign. Simply click on the ‘Create Campaign’ button to start your first FOMO campaign.
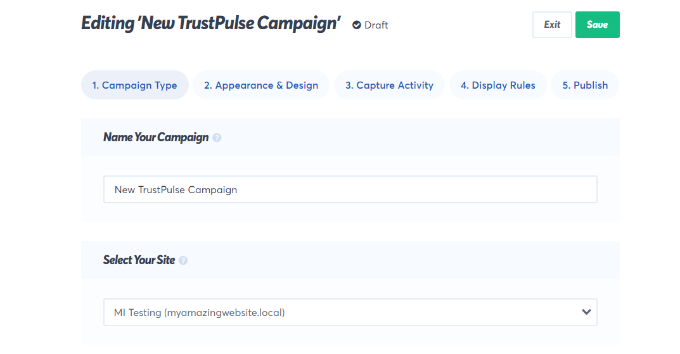
Next, you will need to provide a title for your campaign and select your website.
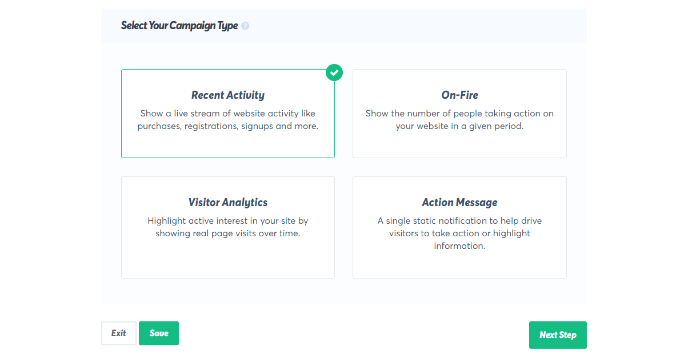
If you scroll down, then you can choose a campaign type.
TrustPulse offers 4 different campaign types to choose from.
These include showing recent activities, the number of people taking action, visitor analytics, or a static notification with helpful information.
After selecting a campaign type, don’t forget to click the ‘Next Step’ button.
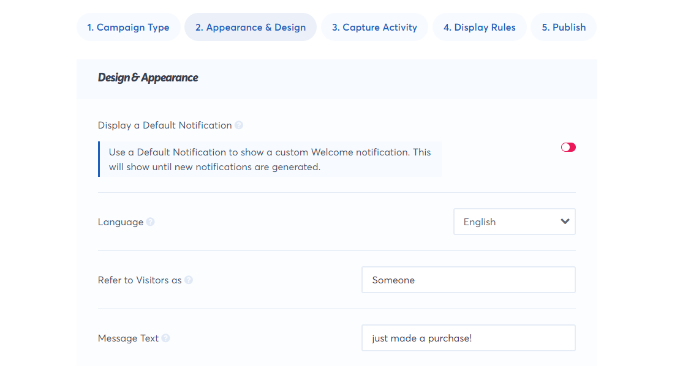
You can now head to the ‘Appearance & Design’ tab and choose language and appearance options for your campaign. You can change the position, badge image, style, and more.
Once done, click on the next step to continue.
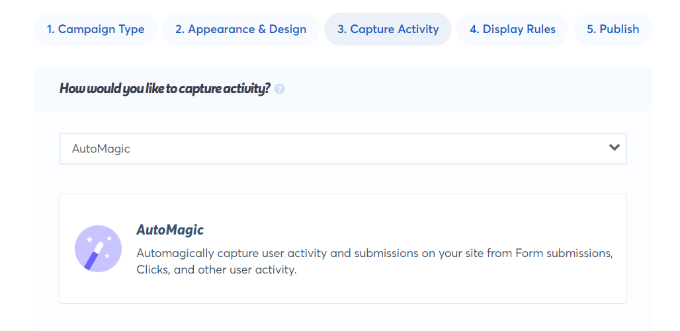
Next, you need to choose how you want to capture the activity.
We recommend using ‘AutoMagic,’ which allows you to select the activity that matches different conditions. For example, you can select your checkout page to automatically capture eCommerce activity.
You can also use Zapier to capture activities from 1000+ integrations.
Once done, click on the next step button to continue.
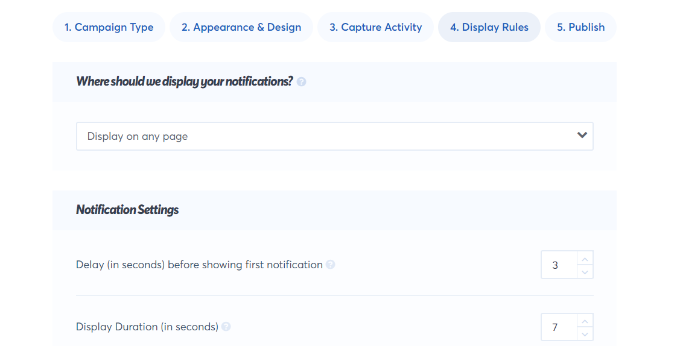
Next, you need to set up the display rules. You can display the badge on all pages or specific pages on your site. You can also choose the delay between notifications, run them as a loop, and enable mobile notifications.
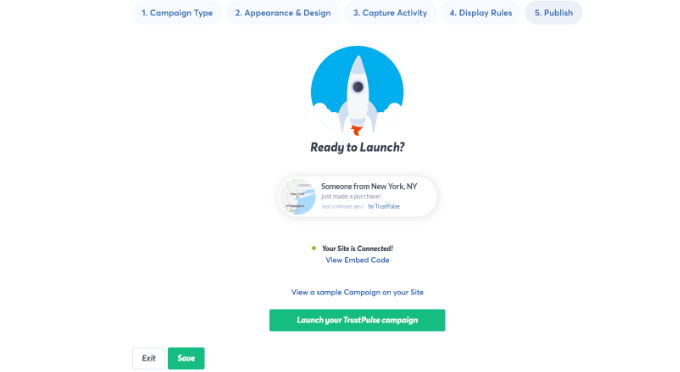
After that, click on the ‘Publish’ tab at the top.
In the next step, simply click the ‘Launch your TrustPulse campaigns’ button.
Don’t forget to click the ‘Save’ button to store your changes and then exit the campaign builder.
You can now visit your website to see your FOMO campaign in action.
Method 2: Adding FOMO Countdown Timers with OptinMonster
We have all seen marketers using ‘Urgency’ to get customers’ attention. Whether it is your local grocery store or a big name-brand website, it is one of the oldest marketing techniques, which works just as effectively online.
Basically, you show users an offer with a sense of urgency, which triggers the fear of missing out on a valuable deal and helps users make a purchasing decision.
Urgency hacks can be used with limited-time offers, seasonal sale campaigns, one-time discounts, and more. To learn more, see this article on using urgency to hack conversion rates with proven methods.
The best way to add urgency timers in WordPress or WooCommerce is by using OptinMonster. It is the most popular conversion optimization and lead generation software that helps businesses turn potentially abandoning website visitors into subscribers and customers.
First, you will need to sign up for an OptinMonster account. It is a paid tool, and you will need at least the ‘Basic’ plan to use their Floating bar campaigns.
This plugin is a connector between your WordPress site and the OptinMonster application.
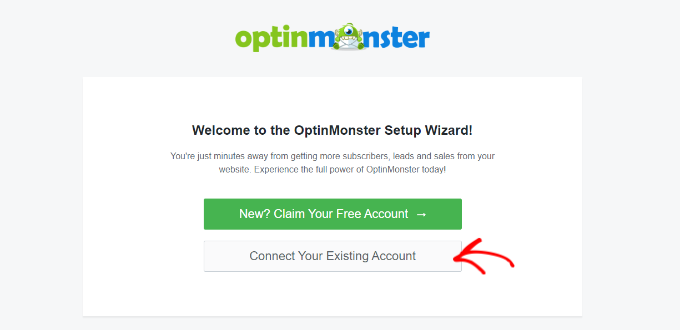
Upon activation, click on the ‘Connect Your Existing Account’ button on the OptinMonster welcome screen.
Next, you should see a new window open where you’ll be asked to connect your website.
Go ahead and click the ‘Connect to WordPress’ button.
After connecting your website, you will need to go to OptinMonster » Campaigns from your WordPress dashboard.
From here, click on the ‘Create Your First Campaign’ button to continue.
This will launch the OptinMonster campaign builder.
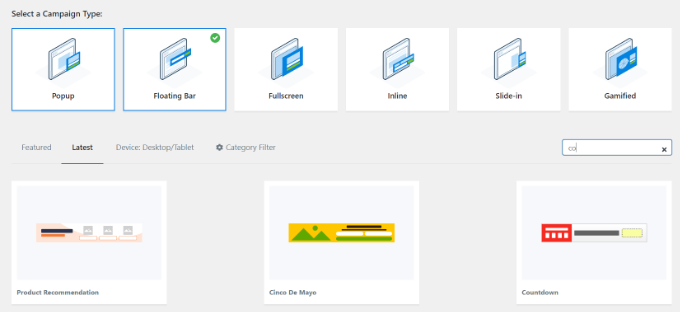
First, you will need to select an optin type and then select a theme. We will use a ‘Floating bar’ campaign with the ‘Countdown’ theme.
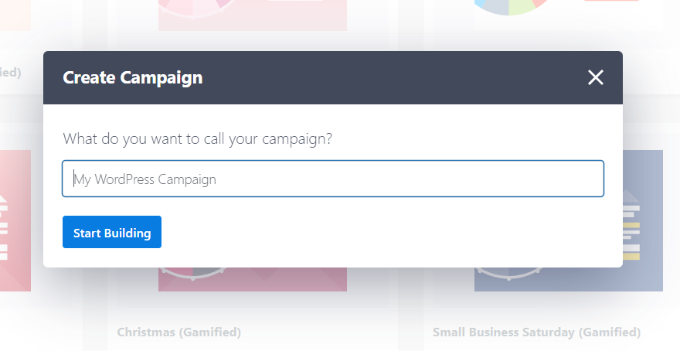
Next, you will be asked to choose a name for your campaign.
Once that’s done, simply click the ‘Start Building’ button.
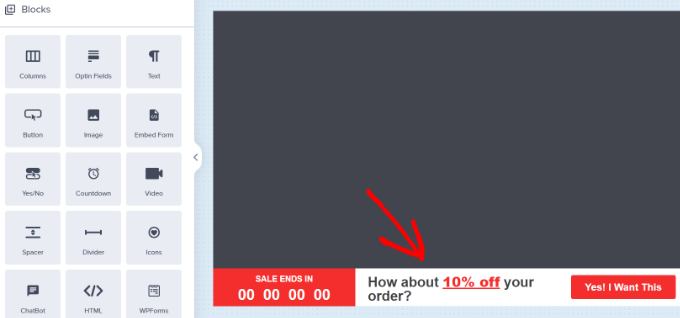
On the next screen, you’ll see the drag-and-drop tool, where you can simply point and click to design your campaign.
You’ll see a live preview of your campaign in the right panel and a bunch of customization blocks and options in the left panel.
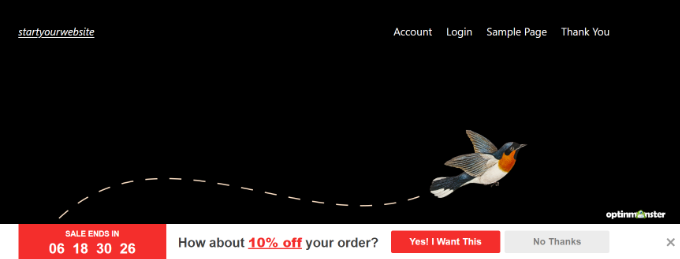
With the floating bar countdown campaign, the preview will appear near the bottom of the screen for you, just as it does for the users.
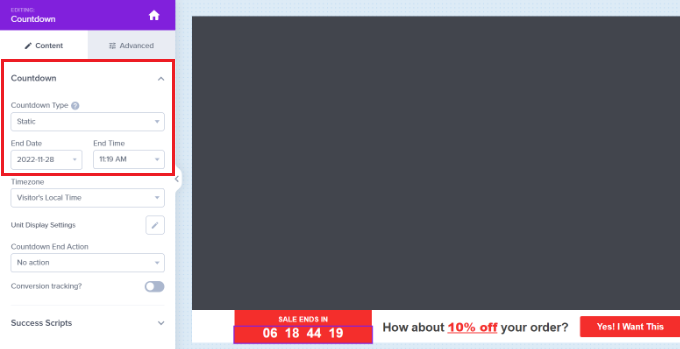
Go ahead and click on the countdown timer in the live preview to set the countdown style and end date. You can use two types of countdown timers: Static and Dynamic.
The static timer remains the same for all your users, while the Dynamic timer changes based on user behavior on your website.
For this tutorial, we will be using the static timer. Since we are using a floating bar with a countdown theme, we can move the floating bar to the bottom or the top.
You can just point and click to edit the text in your floating bar. You can add a coupon code, add links to special offers, and style it any way you want.
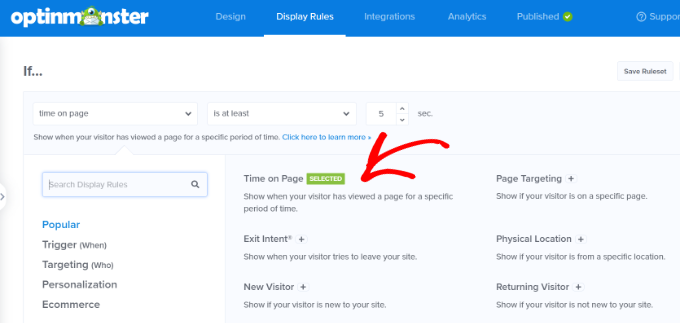
Next, you can go to the ‘Display Rule’ tab at the top. Here, you’ll see different options for showing your campaign.
For instance, you can select the ‘Time on Page’ option and show the floating bar after a user spends at least 5 seconds on your website.
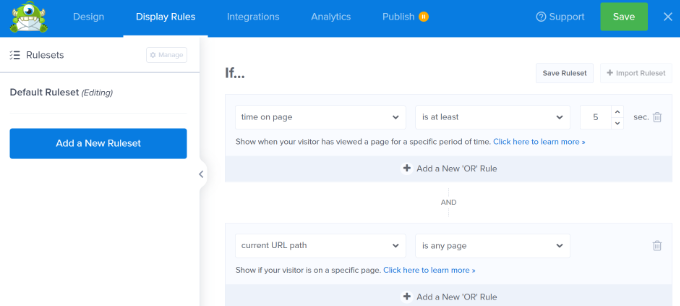
Below that, you also get to select the location for your campaign. We’ll use the default setting where the countdown timer floating bar will appear on all the pages on your website.
Once you are satisfied, don’t forget to click on the ‘Save’ button at the top.
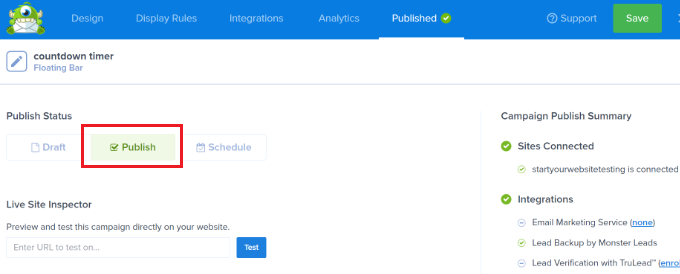
After that, head to the ‘Publish’ tab. Now, change the Publish Status from Draft to Publish.
Don’t forget to click the ‘Save’ button and close the campaign builder.
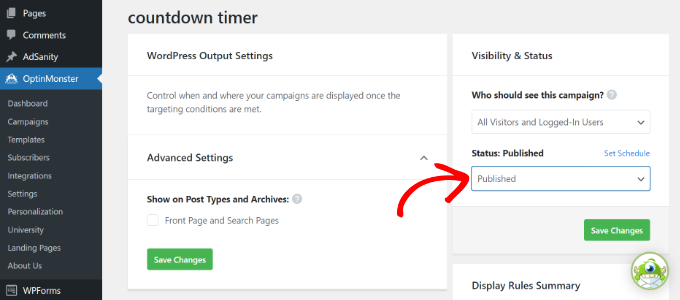
You will now see the WordPress Output settings for your recently created campaign.
By default, your campaign will be disabled, and you just have to click on the Status dropdown menu to change it from Pending to Published.
Once that’s done, click the ‘Save Changes’ button.
You can now visit your website to see your countdown timer FOMO campaign in action.
Tracking Your Conversions in WordPress
FOMO techniques work really well for conversions, but how do you keep track of their performance? Without tracking, you wouldn’t know how many sales or leads were generated because of these campaigns.
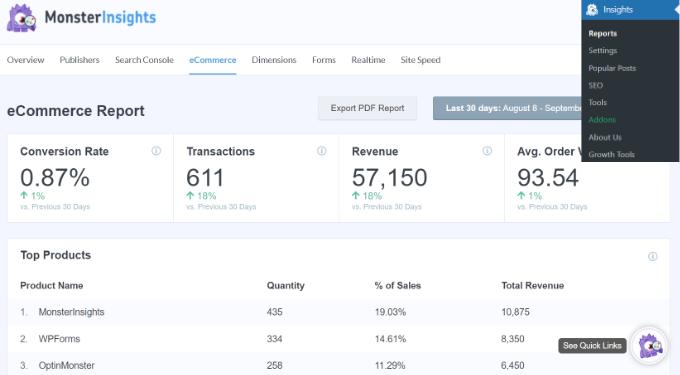
The easiest way to use Google Analytics in WordPress is through MonsterInsights. It is the best Google Analytics plugin for WordPress and makes it super easy to track conversions on your website.
For instance, it has an eCommerce addon, which helps you track your eCommerce performance without leaving the WordPress dashboard. Plus, you can also track form conversions, link clicks, and more with MonsterInsights.
We hope this article helped you learn how to add FOMO to your WordPress website and boost conversions. You may also want to see our list of must-have WordPress plugins for business websites and how to start a WordPress blog.
If you liked this article, then please subscribe to our YouTube Channel for WordPress video tutorials. You can also find us on Twitter and Facebook.