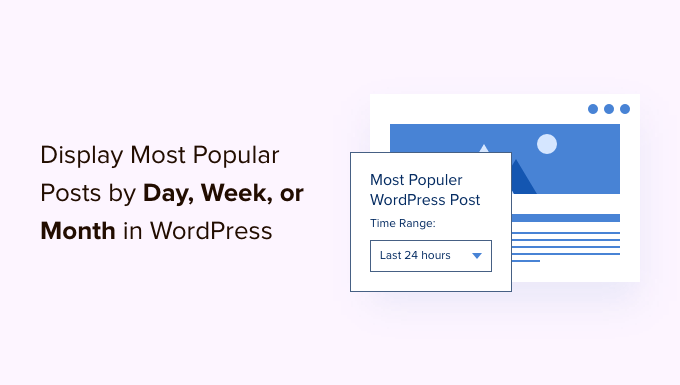
Do you want to display your most popular posts by day, week, month, or even all-time in WordPress?
Popular posts allow your visitors to quickly discover your top content, which helps you increase user engagement, pageviews, and conversions.
In this article, we will show you how to display popular posts by day, week, month, and all time in WordPress.
Why Display Popular Posts in WordPress?
When you start a WordPress blog, you don’t have much content, which allows you to display selected posts in a sidebar widget manually.
However, as your website grows, you will notice that older articles on your website don’t get much exposure. By showcasing your top content, you allow new users to quickly discover the best articles on your website. This boosts user engagement on your website and increases your page views.
Now the problem is that if you are showing your all-time popular articles, then a very limited set of articles get repeated exposure. You can diversify it by displaying popular posts by day, week, or month as well.
Let’s take a look at how to easily display popular posts in WordPress by day, week, month, or all time.
Add Popular Posts by Day, Week, and Month in WordPress
The best way to show popular posts in WordPress is using MonsterInsights. It’s the best Analytics plugin for WordPress and helps you set up Google Analytics without editing code.
For this tutorial, we’ll use the MonsterInsights Pro version because it lets you automatically show top posts from Google Analytics.
There is also a MonsterInsights Lite version that’s free and also includes the Popular Posts feature, but does not connect to GA.
First, you’ll need to install and activate the MonsterInsights plugin. If you need help, then please see our guide on how to install a WordPress plugin.
Upon activation, you will be directed toward the MonsterInsights welcome screen. Go ahead and click the ‘Launch the Wizard’ button.

After that, you can follow the onscreen instructions to configure Google Analytics. For more details, please see our guide on how to install Google Analytics in WordPress.
With MonsterInsights, you can also set up a Google Analytics 4 property. This is the new version of Analytics. The previous Universal Analytics version will sunset on July 1, 2023, and you won’t be able to track website data after this date. That’s why now is the best time to switch to Google Analytics 4 and protect your data.
Now that you’ve added Google Analytics to your website, the next step is to go to Insights » Popular Posts from your WordPress dashboard.
MonsterInsights lets you show your top articles within the content, in the sidebar as a widget, and display popular products if you have an online store.
For this tutorial, we’ll use ‘Inline Popular Posts’ and show featured articles within the content of other blog posts.
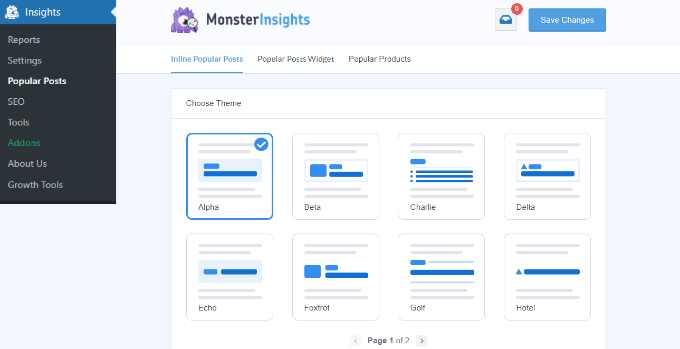
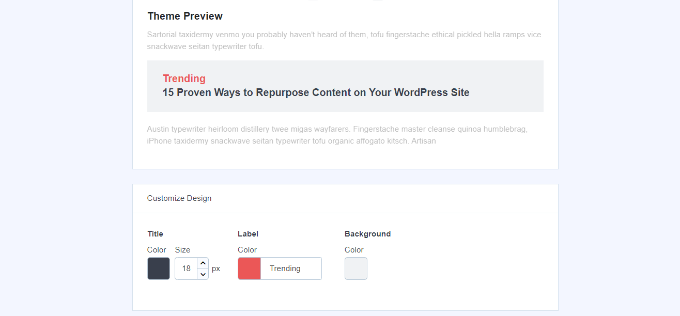
The plugin comes with prebuilt themes, and you can see a preview of how your popular posts will appear on the website.
Once you’ve chosen a theme, simply scroll down to see more customization options. For instance, you can change the title color and size, edit the color of the label and background, and more.
Show Popular Posts by Day, Week, Month, and All Time in WordPress
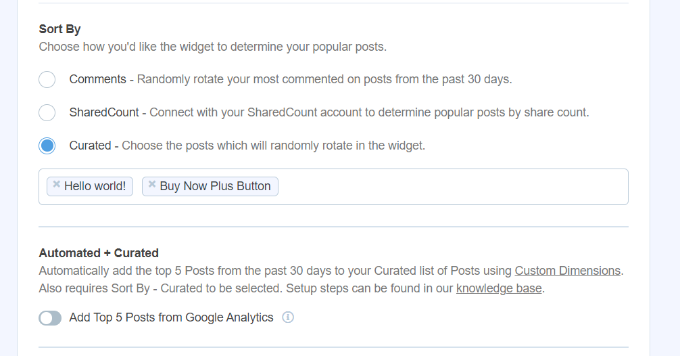
Next, you’ll need to choose how the plugin will determine your popular posts. Let’s see how you can show posts by day, week, month, and all time.
Displaying Popular Posts by Day, Week, and All Time
In MonsterInsights, you can manually select which posts appear in the Popular Posts widget.
This is useful when displaying top content from a specific day or week. Plus, you can also show your all-time best articles anywhere on your website.
Simply select the ‘Curated’ option under Sort By section and then choose the articles you want to feature.
These could be your evergreen content, weekly announcement or news, trending topics from a particular day, and more.
Just begin typing the name of the posts you want to include, and then select them as their name pops up in the field. To continuously display your top posts of all time, you simply need to select them, and as long as ‘Curated’ is chosen, they will appear as popular posts.
However, if you want to display popular posts by the day or the week, you will have to manually change some of these curated posts so they stay fresh for your audience.
For instance, if you are featuring different WooCommerce products weekly, you will need to choose which posts are listed under ‘Curated’ each week.
Displaying Popular Posts by Month and All Time
In MonsterInsights, you get multiple options to automatically show popular posts by month and all time.
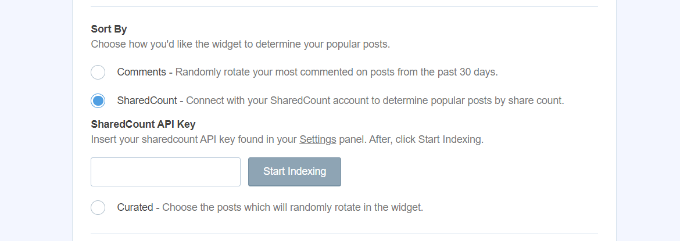
First, you can show your most commented pages from the last 30 days by selecting the ‘Comments’ option. The plugin will randomly rotate blog posts with the highest comments and show them in the popular post widget.

Similarly, MonsterInsights also lets you automatically display popular posts based on social shares using the ‘SharedCount’ option.
It integrates with the SharedCount and helps you display your all-time most shared articles. This way, people can easily find content that’s driving social engagement.
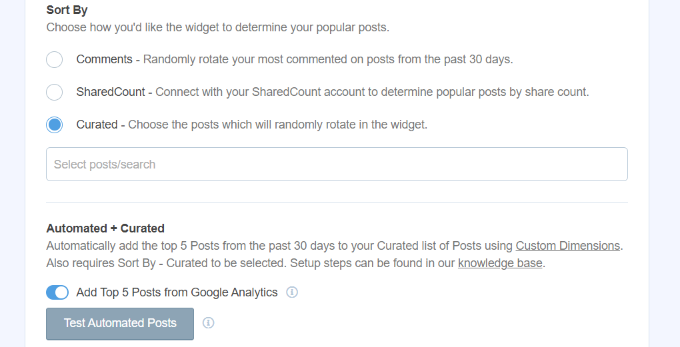
MonsterInsights also offers an option to show the top 5 posts from Google Analytics in the last 30 days. This way you can show your top-performing content from last month or all-time anywhere on your site.
First, you’ll need to select the ‘Curated’ option under the ‘Sort By’ section.
After that, you can enable the ‘Add Top 5 Posts from Google Analytics’ option under the Automated + Curated section.
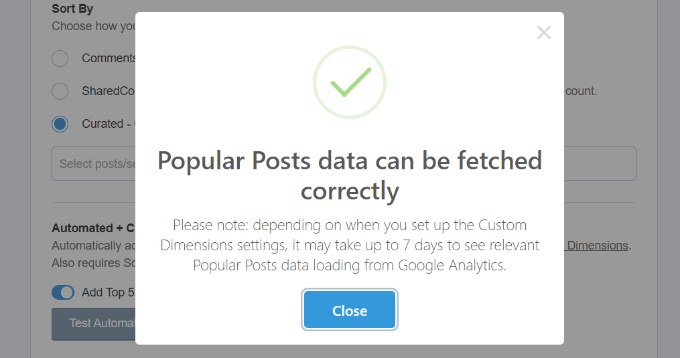
To ensure that your data is being fetched from Google Analytics, click the ‘Test Automated Posts’ button under ‘Automated + Curated.’
A popup message will now appear, showing that the popular posts are being fetched correctly. You can click the ‘Close’ button.
Do note that you’ll need to set up the ‘Post Type’ custom dimensions in MonsterInsights and Google Analytics to use the Automated + Curated feature.
Custom dimensions are additional metrics you can track in Google Analytics. For more details on custom dimensions and how to configure them, you can see our guides on how to enable author tracking in WordPress and the best time to publish a blog.
Insert Popular Posts to Your WordPress Website
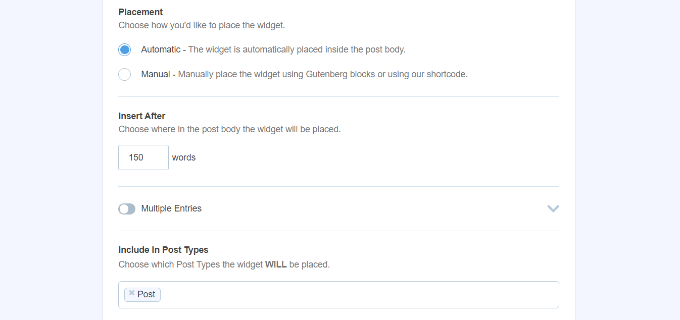
Next, you’ll need to select how you’d like to insert the featured articles.
MonsterInsights offers 2 options, including automatic placement and manual placement.
If you select the ‘Automatic’ option, then you can decide after how many words you’d want the popular post widget to appear. There is also an option to include and exclude pages from display featured posts.
When you’re done, simply click back to the top and click the ‘Save Changes’ button.
This way, your settings will be saved, and MonsterInsights will automatically display popular posts on your site.

On the other hand, you can also show popular posts in any blog post by adding the MonsterInsights block or using a shortcode.
First, add a new post or edit an existing one. Once you’re in the content editor, simply click the ‘+’ button and add the ‘Popular Posts’ block.
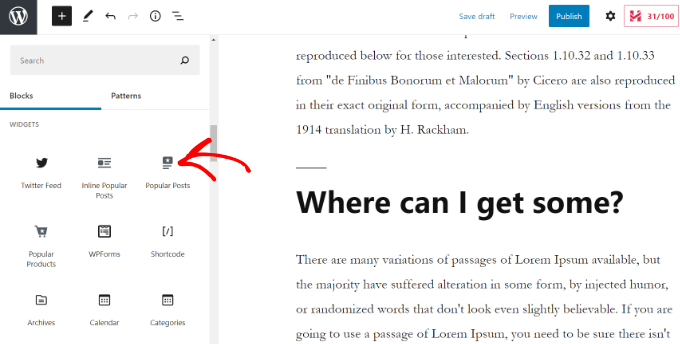
After that, you can see a preview of your featured articles in the content editor.
Once you’re satisfied with the widget’s appearance, you can go ahead and publish your article.

We hope this article helped you display popular posts by day, week, month, and all time in WordPress. You may also want to see our guide on WordPress SEO and the best WooCommerce plugins.
If you liked this article, then please subscribe to our YouTube Channel for WordPress video tutorials. You can also find us on Twitter and Facebook.
The post How to Display Popular Posts by Day, Week, and Month in WordPress first appeared on WPBeginner.


