All posts by Editorial Staff

10 WordPress Plugins Using Artificial Intelligence and Machine Learning

Do you want to use artificial intelligence and machine learning technologies on your WordPress site?

Many WordPress plugins are using AI and machine learning to offer smarter features. There is a chance that you might already be using one of these plugins on your site.

In this article, we will share some of the best WordPress plugins that use artificial intelligence and machine learning.

WordPress Plugins Using Artificial Intelligence and Machine Learning

What are Artificial Intelligence and Machine Learning?

If you follow the news, then you must have heard the words artificial intelligence or machine learning being mentioned.

Artificial intelligence and machine learning are computer technologies that offer smarter solutions in computer devices, apps, GPS devices, smart TVs, home assistance devices, and more.

Artificial intelligence gives computer programs able to make choices without human intelligence.

Machine learning helps the software learn from experiences, data, and user activity to improve artificial intelligence and make better choices.

These technologies allow developers to automate tasks that would normally need human intelligence.

For example, voice recognition, search patterns, translations, image recognition, and more are currently being used by most modern mobile phones and smart devices.

What’s the difference between artificial intelligence and machine learning?

Artificial intelligence can make decisions based on programmed intelligence.

Machine learning further enhances artificial intelligence by self-learning through user activity and collecting information. This makes artificial intelligence smarter and allows it to make more accurate decisions.

What about machines taking over the world?

Many prominent scientists, engineers, and entrepreneurs have expressed concern over the possible threat to human society from artificial intelligence and self-learning machines.

However, it also has great potential to improve the lives of billions of people. That’s why even the most prominent AI skeptics encourage its careful usage for the greater good.

What Can Artificial Intelligence Do for WordPress Websites?

It can provide a smarter and much better user experience for your users.

For example, it can improve WordPress search, grammar and style checking, show related content, improve conversions, boost eCommerce sales, and more.

Your website becomes smarter, faster, and more personalized for your users. This saves you time which allows you to do other things to grow your business.

That being said, let’s take a look at the WordPress plugins that use AI and machine learning.

1. Akismet

Akismet

Akismet is one of the only two plugins that come pre-installed on every WordPress website. It uses artificial intelligence and machine learning to detect spam comments.

Used by millions of websites, Akismet has improved over the years to detect almost all spam submitted by bots. It can also detect spam comments manually submitted by actual human users by learning from their mistakes and recognizing patterns across millions of websites.

For more details, see our Akismet guide for beginners with instructions on how to set it up on your WordPress website.

2. WordLift

WordLift

The WordLift plugin integrates its web-based service to your WordPress website. It offers SEO tips to improve your content with the help of its knowledge graph.

It analyzes your content to offer facts, figures, and media to match and build contextual relationships among your articles which results in better content recommendations. It builds a knowledge graph for your own website, which becomes smarter as you add more content.

3. Grammarly

Grammarly

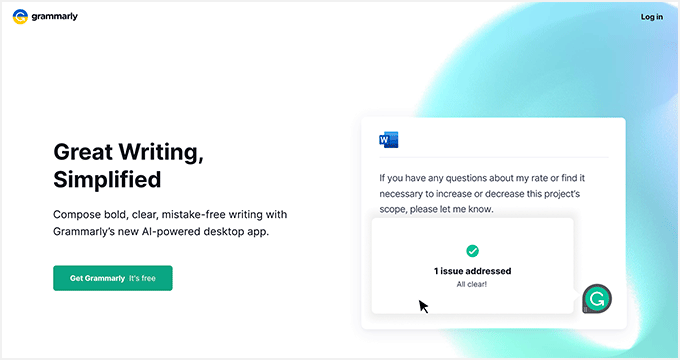
Grammarly is one of the most popular WordPress plugins. It is an artificial intelligence-powered grammar-checking tool that analyzes the readability of your content to help you write better.

It supports American, British, Canadian, and Australian English languages. It is also available as a Google Chrome addon as an alternative to the JetPack module.

4. Google Language Translator

Google Language Translator

Google Language Translator lets your users easily translate your website content without creating a multilingual WordPress site. It brings Google’s AI and machine learning translation engine to your WordPress website.

You can simply select languages you want to display on your website. After that, you can add the translator to your website using the sidebar widget or shortcode.

For detailed instructions, see our guide on how to add Google Translate to WordPress.

5. MyCurator Content Curation

MyCurator

MyCurator is a cloud-based content curation service. It allows you to add an artificial intelligence-powered content aggregator, which shows content relevant to your selected topics and improves results by learning from what you add or vote on.

You can create a curated content section on your website by fetching the best bits of content relevant to your audience. You can add any article you like to your website with an excerpt and a link back to the source.

6. WebsiteVoice

WebsiteVoice

WebsiteVoice is a free WordPress plugin that converts your text content into high-quality audio. This helps improve user engagement and save time for users to listen to your articles while they’re busy with other routine work.

You’ll need their website token to activate the text-to-speech option on your site. These tokens are free initially, but you have to upgrade to a premium plan to continue using their service.

7. Quttera Web Malware Scanner

Quttera

Quttera Web Malware Scanner allows you to scan your WordPress site for malware and malicious code. This is particularly useful if you suspect that your WordPress site is hacked or blacklisted by search engines.

The plugin uses artificial intelligence to learn from false positives and improves scan results based on usage. While it helps scan an infected website, it doesn’t protect your website from getting affected.

For better security, see our ultimate WordPress security guide to protect your website against hacks, DDOS attacks, and malicious code.

8. ChatBot

ChatBot

ChatBot provides AI-powered virtual chat agent for your website. It uses machine learning to improve the live chat experience and send accurate responses.

You need to sign up for a free account on the plugin’s website. After that, it will start learning as you use it. You can also train it on what to say and how to respond to user queries. This can be handy in keeping users engaged on your website and generating more leads.

9. Link Whisper

LinkWhisper

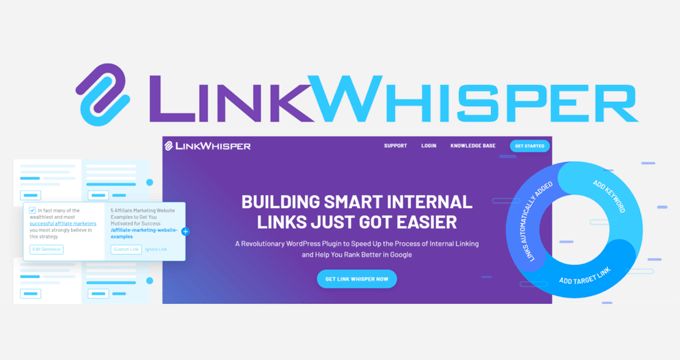
LinkWhisper is a free WordPress internal linking plugin powered by Artificial Intelligence. It learns from the content on your site and suggests powerful internal linking opportunities to improve your search rankings and grow your traffic.

The plugin looks into your website’s content, including pages and posts. Then it offers suggestions in the WordPress block editor to add internal links while you’re writing and editing an article.

10. ImageSEO

ImageSEO

ImageSEO is a free WordPress image optimization plugin. It uses artificial intelligence to optimize the alt text and title of your images to grow your organic traffic.

The plugin also generates social cards for Twitter, Facebook, and channels. After activating the plugin, you can upload images on the WordPress website, and ImageSEO will write the name, title, and tag for the images automatically. It seamlessly works on single and bulk image uploads.

We hope this article helped you learn about WordPress plugins using artificial intelligence and machine learning. You may also want to see our guide on how to improve your WordPress website speed and performance.

If you liked this article, then please subscribe to our YouTube Channel for WordPress video tutorials. You can also find us on Twitter and Facebook.

The post 10 WordPress Plugins Using Artificial Intelligence and Machine Learning first appeared on WPBeginner.

How to Restore the Get Shortlink Button in WordPress

Do you want to create a shortlink of your WordPress blog posts or pages? WordPress shortlinks are useful for sharing in your emails, facebook messages, or even text messages. It was a default feature until WordPress version 4.4. Recently, one of our readers asked how to bring back the get shortlink feature in WordPress. In this tutorial, we will share how to restore the get shortlink button in WordPress.

How to Get the Get Shortlink Button in WordPress

What is the Get Shortlink Button in WordPress?

Get Shortlink button is a WordPress feature that allows you to easily get a short link of your WordPress blog post or page. It used to be located right next to the permalink area in the post edit screen.

Get Shortlink Button

However if you recently started your blog, then you will not see this feature on your WordPress site because it was removed after WordPress version 4.4.

We find this feature to be quite useful for easily getting shortlinks for our blog posts that look like this:

http://wpbeg.in/2csN1pj

If you want to bring back the get shortlink feature on your WordPress site, then you’re in the right place.

Let’s take a look at how to bring back the get shortlink button back in WordPress.

Method 1: Using WP Bitly plugin to Add Get Shortlink Button

This method is easier and recommended for most users. This method also allows you to create custom branded short URLs for your website.

First thing you need to do is install and activate the WP Bitly plugin. For more details, see our step by step guide on how to install a plugin in WordPress.

Upon activation, this plugin will automatically add the Get Shortlink button on your post edit screen.

Get Shortlink Button

Once you click on this button, it will show you the shortlink for your WordPress posts and pages. This shortlink can be shared in your emails and messages, so your audience can reach directly to the page.

Page Shortlink

You can also use the WP Bitly plugin to create custom branded shortlinks for your blog posts like we do on WPBeginner. See our step by step guide on how to create your own customized short url in WordPress.

Method 2: Manually Adding Get Shortlink Button

This method requires you to add code to your WordPress files. If you haven’t done this before, then please take a look at our guide on how to copy and paste code in WordPress.

You will need to add the following code to your WordPress theme’s functions.php file or a site-specific plugin:


add_filter( 'get_shortlink', function( $shortlink ) {return $shortlink;} );

This code will add the shortlink filter to display the Get Shortlink button in your WordPress pages and posts.

Get Shortlink Button

You can click on this button to get the shortlink for your post or page.

We hope this article helped you bring back the Get Shortlink button in WordPress. You may also want to check out our list of the must have WordPress plugins for business websites.

If you liked this article, then please subscribe to our YouTube Channel for WordPress video tutorials. You can also find us on Twitter and Facebook.

The post How to Restore the Get Shortlink Button in WordPress appeared first on WPBeginner.

How to Add YouTube Subscribe Button in WordPress

Do you want to get more subscribers on your YouTube channel? Having a subscribe button on your blog makes it easy for your visitors to find your videos and subscribe to your channel. In this article, we will show you how to add a YouTube subscribe button in WordPress.

How to Add YouTube Subscribe Button in WordPress

Method 1: Manually Adding YouTube Subscribe Button Code

The first thing you need to do is visit the YouTube subscribe button page on the Google Developer’s website.

Configuration Button

On this page, you will need to enter your YouTube channel’s name, select a layout, theme, and subscriber count option. It will display a live preview of how your button will look on the website. Once you are satisfied, simply scroll down to copy the embed code.

Copy Code

Next, you need to login to the WordPress admin area of your site and go to Appearance » Widgets. There you will need to drag and drop a text widget to your widget area, and paste the YouTube subscribe button code inside the widget.

Add YouTube Subscribe Script

Once you are done, don’t forget to save your changes and visit your website to see the YouTube subscribe button in action.

Subscribe to YouTube Channel in Sidebar

Method 2: Using Plugin to Add a YouTube Subscribe Bar

Another way to add a YouTube subscribe button on your website is by adding it below every YouTube video on your site. This offers additional exposure and can help you significantly increase your subscribers.

First you need to install and activate the YouTube Subscribe Bar plugin.

Upon activating the plugin, you need to go to Settings » YouTube Subscribe Bar to add your YouTube channel ID. You will also need to style the button layout, choose a button theme, and show subscribers count.

YouTube Subscribe Bar Settings

The YouTube subscribe bar plugin allows you to add some text before the button and edit its styling. You can use this area to add a call to action like “Subscribe to My Channel”.

Once you are done, make sure to click on the Save Changes button to save your settings.

This plugin will automatically display your YouTube Subscribe bar below every YouTube video on your site. The YouTube Subscribe bar will appear on the videos from your channel and third-party channels, so you can share useful video content on your site and get more subscribers on your YouTube channel.

YouTube Subscribe Bar

Note: The YouTube subscribe bar plugin only works with oEmbed videos. It will not work with videos embedded via iFrame.

We hope this article helped you add the YouTube subscribe button in WordPress. You may also want to check out our guide on how to track user engagement on your WordPress site.

If you liked this article, then please subscribe to our YouTube Channel for WordPress video tutorials. You can also find us on Twitter and Facebook.

The post How to Add YouTube Subscribe Button in WordPress appeared first on WPBeginner.

How to Use the WordPress Desktop App for Your Self-Hosted Blog

Do you want to use the WordPress desktop app for your self-hosted WordPress.org blog? WordPress desktop app allows you to easily write and edit blog posts without being distracted by other browser tabs. In this article, we will show you how to use the WordPress desktop app for your self-hosted WordPress blog.

How to use WordPress desktop app for self hosted WordPress site

Pros and Cons of Using the WordPress Desktop App

WordPress desktop app is created by Automattic, a company founded by WordPress co-founder Matt Mullenweg. It is also the company behind JetPack and WordPress.com. For details, see our article on the comparison between WordPress.com vs WordPress.org.

WordPress desktop app offers an improved user experience for self-hosted WordPress websites, which is particularly great for users looking for a distraction free editor to create content.

However, just like everything else in the world it has its own pros and cons.

Pros

Here are the advantages of using the WordPress desktop app on your computer to manage your self hosted WordPress.org website.

  • Offers a nice user interface to manage your website
  • It syncs your content fast and offers a great writing experience
  • Offers a clean distraction free writing area to create your content
  • Allows you to perform website management tasks without opening your browser like updating plugins and answering comments.

Cons

Following are the disadvantages you need to consider before using the WordPress desktop app for managing a self-hosted WordPress site.

  • It doesn’t work while offline. This means you cannot write posts and just save them to your computer using the desktop app.
  • Doesn’t load custom fields created by plugins in the post editor. For example, if you are using Yoast SEO, then you will not be able to edit post’s SEO settings from the app.
  • Requires you to install the JetPack plugin and sign up for a WordPress.com account.

That being said, let’s take a look at how to use the WordPress desktop app for your self-hosted WordPress.org site.

Using WordPress Desktop App for Self-Hosted WordPress

First thing you need to do is install and activate the JetPack plugin on your website. For more details, see our step by step guide on how to install a WordPress plugin.

Upon activation, you will be asked to connect JetPack to a WordPress.com account.

Connect JetPack to WordPress.com

You need to click on the ‘Setup Jetpack’ button to continue.

This will take you to the WordPress.com website. If you already have a WordPress.com account, then you can login. Alternatively, you need to click on the sign up button to create a new account.

Login or sign up for a WordPress.com account

After sign up, you will be taken to the pricing page. Simply scroll down to the bottom of the page and click on the ‘Start with free’ button.

Get free account

WordPress.com will now create your free account, and you will be redirected back to your website.

Next, you need to download and install the WordPress Desktop App on your computer.

WordPress app login screen

After installation go ahead and launch the app. You will see the login screen where you need to enter your WordPress.com username and password to login.

Once logged in, you will see the WordPress.com reader screen where you can explore content and follow blogs. To manage your website, you will need to switch to the My Sites tab.

WordPress desktop dashboard

You will now see your website title in the left menu along with other website management sections. In the right column, you will see JetPack traffic reports.

Using the admin bar on the left column, you can edit and create posts, pages, and custom post types. You can also add a new blog post by clicking on the write button at the top.

Adding content to your site from the app

The content editing area offers a very polished user experience.

On the right column, you will find post settings like status, post scheduling, categories and tags, featured image, and more. To the left, you have a distraction free writing area with a rich text editor.

Writing posts in WordPress desktop app

You can add photos and galleries to your article by clicking on the ‘Add’ button in the editor. You can close the settings column by clicking on the gear icon at the top.

Now let’s take a look at the Comments section.

The WordPress desktop app allows you to easily manage comments on your website. You can reply to comments as well as approve or delete comments pending moderation.

managing comments in WordPress desktop app

The themes section in the app allows you to manage themes installed on your website. You can also install a new theme without leaving the app.

Managing themes

However, you cannot customize your theme inside the app. Clicking on customize will open the customizer window on your website in a new browser tab.

The plugin section allows you to install, upload, and activate plugins directly from the app.

Manage plugins

The app will also notify you of plugin updates, and you can update them directly from the app. You can also optionally choose to auto-update plugins that you trust.

Updating plugins from the app

Now, let’s review the Sharing section.

Here you can connect the JetPack plugin to popular social media websites and automatically share new posts on social media.

Enabling social sharing in WordPress.com

If you want to add new authors and users to WordPress, then you can do so directly from the ‘People’ section in the app. It shows all registered users on your website as well as users following your blog using the JetPack follow feature.

managing users via WordPress app

You can click on the add button to invite new users and click on existing user accounts to view their details and delete accounts if needed.

The Settings section inside the app allows you to manage WordPress settings from the app. Some of these settings are specific to the app and JetPack plugin while others are WordPress settings that you would normally manage in the admin area.

Settings panel in WordPress app

If you manage multiple WordPress sites, then you can add them to the app and manage them from the same dashboard.

Any new website you add should have JetPack installed and connected to the same WordPress.com account you are using in your app. After that you can simply click on the add new site button at the bottom right corner of the app to add them.

Add new site to WordPress app

We hope this article helped you learn how to use WordPress desktop app for your self-hosted website. You may also want to see our list of best mobile apps to manage your WrodPress site.

If you liked this article, then please subscribe to our YouTube Channel for WordPress video tutorials. You can also find us on Twitter and Facebook.

The post How to Use the WordPress Desktop App for Your Self-Hosted Blog appeared first on WPBeginner.

6 Best Online Grammar Checker Tools for WordPress (2018)

Are you looking for the best online grammar checker tools for WordPress? Most browsers come with a built-in spellcheck too, but it doesn’t check for grammar and readability. In this article, we have hand-picked the best grammar checker tools that you can use with WordPress.

Online grammar checker tools for WordPress

Why Add a Grammar Checker Tool for WordPress?

Even the most experienced writers make mistakes. Proofreading your own articles often lead to making small careless errors because we often tend to rush through the pre-publish checklist.

One way to overcome this issue is to read your articles out loud. Listening to your own voice can help you find mistakes and improve the overall readability score of your articles.

To help you with the grammar and spelling, you can use a grammar checker tool. These tools can detect spelling and grammar mistakes as you type. This saves you time on proofreading while improving content across your website.

That being said, let’s take a look at the best grammar checker tools for WordPress that you can use.

1. Grammarly

Grammarly is a popular online grammar checker tool available as a browser addon for Google Chrome, Firefox, and even Microsoft Edge. It checks for grammar and spelling errors as you write your posts.

Grammarly

It will show an indicator at the bottom right corner of the writing area. Clicking on the indicator will show you the number of errors. Spelling, grammar, and contextual errors will be highlighted with an underline as you write.

One downside of Grammarly is that you will have to switch to the text editor for proofreading.

2. Ginger

Ginger is another handy spelling and grammar checker tool to improve your writing skills and boost productivity. It is available as a browser addon and offers a nice user experience.

Ginger

It displays a tiny icon at the bottom right corner of writing areas including WordPress post editor, Gmail, Facebook, and more. It checks for mistakes as you type and highlight errors with context.

There are a few drawbacks of using Ginger. You will need to switch to the text editor in WordPress. For better proofreading, you will need to click on the icon to launch the Ginger editor.

3. After The Deadline

After The Deadline is available as a Google Chrome extension. It comes with a built-in spell checker tool with optional grammar and readability check.

Once you have installed the addon in your browser, you will need to click on it and select options. This will open the addon’s settings page where you can check the options that you want the addon to look out for.

After the deadline

You can run the tool while writing your blog posts by clicking on the spellcheck icon at the bottom right corner of the editor.

4. Hemingway

Hemingway is available as a web-based text editor, so it doesn’t work directly inside your WordPress post editor. However you can use their free web based editor to check your articles for readability, grammar, and spelling errors.

Hemingway

Think of Hemingway as not just a grammar checker but a style checker. It is designed to improve readability by showing you a readability score of your content and suggesting improvements. The web app has a clean and distraction free layout which can help you asses your content quickly before hitting the publish button in WordPress.

Hemingway is also available as a paid desktop app for both Windows and Mac which allows you to post directly to WordPress.

5. LanguageTool

LanguageTool is available as a free addon for Chrome, FireFox, Google Docs, and LibreOffice. It is also available as a web based editor and a complete desktop app.

LanguageTool

The good thing about LanguageTool is that it works with English, German, Polish, Russian, and over 20 other languages. This makes it a particularly useful tool for multilingual websites and multilingual authors.

The downside is that the free version is only limited to 20,000 characters per check, so you will need to upgrade to paid plans for more features.

6. Jetpack

Jetpack is a WordPress plugin suite that comes with a lot of useful modules. One of its core features is to add proofreading to the WordPress post editor.

JetPack

For extended grammar check, you need to visit the JetPack » Settings page. Under the writing tab, you will see the spelling, style, and grammar section. From here you can enable different proofreading options including style rules.

The downside of using JetPack is that it requires a WordPress.com account, and you will also get tons of features that you may not need.

We hope this article helped you find the best online grammar checker tools for WordPress. You may also want to see our list of best contact form plugins for WordPress.

If you liked this article, then please subscribe to our YouTube Channel for WordPress video tutorials. You can also find us on Twitter and Facebook.

The post 6 Best Online Grammar Checker Tools for WordPress (2018) appeared first on WPBeginner.

How to Change the Default Search URL Slug in WordPress

Do you want to change the default search URL slug in WordPress? By default, WordPress search URLs are not user friendly. In this article, we will show you how to easily change the default search url slug in WordPress and make it more SEO and user friendly.

Changing default WordPress search URL slug

Why Change Default Search URL Slug in WordPress

WordPress uses SEO friendly URL structure for all pages on your website. Typical SEO friendly WordPress URLs look like this:

http://example.com/some-page/
http://example.com/2018/03/some-article/
http://example.com/category/some-category/

As you can see, these URLs are quite easy to understand for users as well as search engines.

However, WordPress still uses non-friendly URL for search results page. A typical search URL in WordPress looks like this:

http://example.com/?s=search-term

This URL structure doesn’t match the rest of your website URLs. While some WordPress search plugins improve the search results, most don’t do anything about the search URL itself.

What if you can make your search URL look like:

http://example.com/search/your-search-term/

Let’s take a look at how to make the WordPress search page URL slug more SEO friendly.

Changing Search Page URL Slug in WordPress

For this tutorial you will need to edit your WordPress theme files. If you haven’t done this before, then please take a look at our guide on how to copy and paste code in WordPress.

Method 1. Change WordPress Search URL Slug via Functions File

This method is easier and recommended for most users.

First, you need to copy and paste the following code in your theme’s functions.php file or a site-specific plugin:

function wpb_change_search_url() {
	if ( is_search() && ! empty( $_GET['s'] ) ) {
		wp_redirect( home_url( "/search/" ) . urlencode( get_query_var( 's' ) ) );
		exit();
	}	
}
add_action( 'template_redirect', 'wpb_change_search_url' );

Don’t forget to save your changes.

You can now go to your website and try using the search feature. You will notice that the search URL looks like this:

http://example.com/search/your-search-query/

Method 2. Change Search URL Slug via htaccess File

The .htaccess file is often used to set up redirects and other website configuration tasks. You can also use it to change the default search URL slug in WordPress.

Your .htaccess file is located in your website’s root folder, and you will need to use FTP or File Manager app in cPanel to edit it. Refer to this guide, if you can’t find the .htaccess file.

In your .htaccess file, you need to paste the following code at the bottom:

# Change WordPress search URL
RewriteCond %{QUERY_STRING} \\?s=([^&]+) [NC]
RewriteRule ^$ /search/%1/? [NC,R,L]

Don’t forget to save your changes and upload the .htaccess file back to the server.

You can now go to your website and use the search feature. You will notice the search URL will now look like this:

http://example.com/search/your-search-query/

We hope this article helped you change the default search URL slug in WordPress. You may also want to see our list of 55+ most wanted WordPress tips, tricks, and hacks.

If you liked this article, then please subscribe to our YouTube Channel for WordPress video tutorials. You can also find us on Twitter and Facebook.

The post How to Change the Default Search URL Slug in WordPress appeared first on WPBeginner.

Which is the Best WordPress Calendar Plugin?

Are you looking for the best WordPress calendar plugin for your site? WordPress calendar plugins come with a variety of different features. Some are made for simple event management while others are more complex with booking, ticketing, and scheduling features. In this article, we have hand-picked the best WordPress calendar plugins for your site.

Best WordPress calendar plugins

How to Chose a Calendar Plugin for WordPress?

As we mentioned earlier that there are many different kind of WordPress calendar plugins available catering to the needs of different users.

Some calendar plugins are simple allowing you to just display events on a calendar. Others have more advanced features like appointments and bookings, scheduling, ticketing, and integrations with third-party services like Google Calendar.

You need to choose a plugin that fits your requirements. For example, if you want to sell event tickets, then a calendar with just the booking feature may not be good for you.

Let’s take a look at some of the best WordPress calendar plugins that you can try.

1. The Events Calendar

The Events Calendar

The Events Calendar is a powerful event management system for your WordPress site. It is feature-rich but extremely easy to use due to a neat user interface that blends into your WordPress admin area.

The Events Calendar allows you to easily add your events and manage organizers / venues. You can choose to display Google Maps for your venue locations. The plugin’s settings page gives you full control on how you want to manage your events and calendar.

Want to sell tickets for your events? The Event Calendar has paid add-ons to integrate it with WooCommerce, Eventbrite, and more.

2. All in One Event Calendar

All in One Event Calendar

All in One Events Calendar is a powerful event management plugin for WordPress. Its intuitive user interface makes it extremely easy to use even for beginners. You can easily add events, sort them into categories / tags, and choose from three built-in themes for the calendar display. You can also display your event venues using Google Maps right along the event details.

You can tweak the calendar theme by choosing different colors. It also allows you to add events from any other calendar that supports iCal format including Google Calendar. It doesn’t have ticket selling integrations, but you can add URLs to third party ticketing services.

3. My Calendar

My Calendar

My Calendar is another free and powerful event management solution for WordPress. It supports multiple calendars, event groups, categories, and locations. It also comes with a shortcode generator and widgets, so you can easily add calendars to your posts, pages, or sidebars.

This is a highly configurable plugin with an extensive settings page. You can control almost every aspect of how your calendar is displayed on the front-end. It comes with six built-in skins for calendar display.

For advanced users, there is a style editor to upload your own custom CSS. It also supports Google Map display on single event page, and on event popup.

4. Simple Calendar

Simple Calendar

Google Calendar Events brings Google Calendar to your WordPress site. You can create and manage your events through Google Calendar. This plugin simply display those events on your website. All you have to do is provide your Google Calendar feed URL.

The plugin comes with a powerful set of features. You can control the display of your calendar and events using the shortcodes. You can even control the appearance of the calendar using custom stylesheets.

The plugin does not support a ticketing system, but you can still use third party services to sell your event tickets and enter the ticketing page URL right into your event listing on Google Calendar.

5. Booking Calendar

Booking Calendar

As the name suggests, Booking Calendar is a booking management plugin for WordPress. It allows you to add a calendar to the front-end of your website where users can fill in a simple form to submit their booking requests. You can then accept or decline their booking request.

Booking Calendar comes with CAPTCHA support to avoid spam. You can control who can add a booking in the admin area. One downside of the plugin is that you cannot add new input fields for booking form in the free version of the plugin.

It can be used for booking any kind of service. However if you are particularly looking for a hotel booking system, then you should checkout our guide on how to add a hotel room booking system in WordPress.

We hope this article helped you choose the best calendar plugin for your WordPress site. For other plugin recommendations, see our list of the essential WordPress plugins for your website.

If you liked this article, then please subscribe to our YouTube Channel for WordPress video tutorials. You can also find us on Twitter and Facebook.

The post Which is the Best WordPress Calendar Plugin? appeared first on WPBeginner.

How to Create an Online Marketplace using WordPress

Do you want to create an online markeplace using WordPress? Online marketplace websites allow your users to buy and sell items by setting up their own mini stores within your eCommerce website. In this article, we will show you how to easily create an online marketplace using WordPress.

Building an online marketplace using WordPress

What Do You Need to Start an Online Marketplace using WordPress?

First you need to make sure that you are using the right website platform, and since you’re reading this article, you’re in the right place.

There are two types of WordPress available: WordPress.com vs WordPress.org. One is a limited blog hosting service while the other is known as the self-hosted WordPress which you’ve likely heard tons about. See the full comparison between WordPress.com vs WordPress.org.

We recommend using WordPress.org because it gives you the freedom and access to all WordPress features out of the box.

To start an online marketplace using self-hosted WordPress you will need the following:

  • A domain name (For example, wpbeginner.com)
  • Web hosting account (This is where your website’s files are stored)
  • SSL Certificate (To securely accept online payments)
  • WooCommerce (best WordPress eCommerce addon)
  • Online marketplace addon

The entire setup can take up to 40 minutes, and we will walk you through every step one by one.

Ready? Let’s get started.

Step 1. Setting up Your Ecommerce Platform

First step is to buy a domain name and a web hosting account. You don’t just need a web hosting, but you will need a service that specializes in WooCommerce hosting because this is the software that we will be using as our eCommerce platform.

Typically a domain name costs $14.99/year, web hosting 7.99/month, and SSL certificate 69.99/year.

Now this seems like a lot of money if you are just starting out.

Fortunately, Bluehost an officially recommended WordPress and WooCommerce hosting provider has agreed to offer our users free domain + SSL and discount on their cloud WordPress hosting.

Basically, you can get started for $6.95 / month.

→ Click Here to Claim This Exclusive Bluehost Offer ←

Once you have purchased hosting, then follow our step by step tutorial on how to start an online store for complete setup instructions.

You would now have a WordPress website with WooCommerce installed on it. However, by default WooCommerce assumes that your website is a single vendor website, so it is not possible for other users to add their own products to your website.

Let’s change this.

Step 2. Turn Your WooCommerce Site into an Online Marketplace

First you need to install and activate the WC Vendors plugin. For more details, see our step by step guide on how to install a WordPress plugin.

Upon activation, head over to WooCommerce » WC Vendors page to configure marketplace settings.

WC Vendors settings

On this screen, you need to set a commission rate that you will pay to each vendor. This rate could also be overridden for individual products or vendors.

The default settings on the page will work for most sites, but you can review and change them as needed.

Don’t forget to click on the ‘Save General changes’ button to store your settings.

Next, you need to switch to the products page. On this screen, you can choose which items to hide from vendors when they are adding a product.

Configure products settings for vendors

WC Vendors allows you to setup vendor capabilities and permissions. Head over to the Capabilities tab on the WC Vendors settings page.

WC Vendors capabilities

Next item on the WC Vendors settings page is to setup pages.

The plugin will automatically create pages to use for vendor dashboard, shop settings, and orders page. You can use a different page if you would like by using the shortcodes shown below each page.

Setting up vendor pages

One page that is not automatically created by the plugin is the terms page. These are the terms that a vendor has to agree to when submitting their application.

To create a terms page, you can simply create a new page in WordPress and add the terms and conditions in plain text describing what vendors can sell, how they will get paid, how to settle disputes, etc.

Once you have created a terms page, you can return back to this section and select your newly created page here.

The final item on WC Vendors settings page is the most important one, the Payments. By default, WC Vendors uses PayPal Adaptive Payments to pay vendors.

You will see a link to setup PayPal adaptive payments. After you have set it up, you can choose when you want to pay the vendors.

Scheduling payments

Now that WC Vendors is all set up, let’s setup WooCommerce for a multi-vendor environment.

Step 3. Enable Account Management in WooCommerce

First you need to visit WooCommerce » Settings page and click on the ‘Accounts’ tab. From here you need to check the boxes next to customer registration option.

Enable customer registration in WooCommerce

Don’t forget to save your changes.

Step 4. Setting Up Navigation Menus

Now that your multi-vendor marketplace setup is finished. It is time to make it easy for your users to find their way around your website.

To do that, you need to visit Appearance » Menus page. You will need to add your user account and checkout pages to the navigation menu.

Add to menu

Don’t forget to click on the ‘Save Menu’ button to store your changes. For more detailed instructions, see our guide on how to add navigation menus in WordPress.

If you don’t have a My Account page, then simply create a new page in WordPress and add the following shortcode in the post editor.

[woocommerce_my_account]

Step 5. Testing Your Marketplace Website

Your online marketplace website is now ready for testing. You can visit your website in a new browser window and create a new account by clicking on the My Account link at the top.

Testing your website

From here, both customers and vendors can login to their accounts as well as create a new account.

Register as vendor

Once users create a new account, you will recieve an email notification. If you are unable to recieve email notifications, then take a look at our guide on how to fix WordPress not sending email issue.

You can also view new vendor applications by visiting Users » All Users page. You will see all new vendor requests as ‘pending vendor’, and you can approve or deny applications by clicking the link under their username.

Approve vending vendors

Once approved, these vendors can log in to their accounts and add their products by visiting their vendor dashboard. They can also view their orders and sales reports.

Vendor dashboard

The first thing your vendors need to do is to setup their shop settings by clicking on ‘Store Settings’ link.

Shop settings

They will need to provide their PayPal email address to recieve payments. After that they can enter their shop name and description.

Once a vendor adds a new product, you will get a notification email and see an icon next to the products menu. You can then edit a product, approve it, or delete it.

Pending products

Your shop page will clearly show the products sold by vendor’s shop name.

Sold by vendor

We hope this article helped you learn how to create an online marketplace using WordPress. You may also want to see our pick of the best WooCommerce themes, best WooCommerce plugins, and the ultimate WordPress SEO guide for beginners.

If you liked this article, then please subscribe to our YouTube Channel for WordPress video tutorials. You can also find us on Twitter and Facebook.

The post How to Create an Online Marketplace using WordPress appeared first on WPBeginner.

Beginner’s Guide: How to Center Align a Video in WordPress

Do you want to center-align a video in WordPress?

By default, if your video’s width is less than your article area, then WordPress automatically aligns it to the left, leaving extra white space on the right side.

In this article, we will show you how to easily center align a video in WordPress.

How to center align a video in WordPress

Why Center Align Videos in WordPress?

When you embed a video in WordPress, it automatically aligns them to the left by default. This is because videos are external content embedded in the content, so WordPress is unable to guess how you would like to display it.

As a best practice, it automatically aligns it to the left, leaving it up to you to adjust the alignment if needed.

By aligning the video to the center, users will have a better experience viewing your content. This way, you won’t have noticeable blank space on the one side of the page, which could give an unprofessional look.

Besides, if you upload videos directly to WordPress, the same thing will happen to them if their width is less than your content area. WordPress will align them to the left by default.

That being said, let’s see how you can easily center-align a video in a WordPress website. We’ll cover both the block editor and classic editor, so you can click the links below to jump ahead to any section.

How to Center Align Video in WordPress Content Editor

If you want your video to fill the width of your content area, then the best way to do this is by adding a YouTube or Vimeo video URL directly in the WordPress content editor.

First, you’ll need to edit a post or a page or add a new one. Once you are in the content editor, simply paste the link to the video. WordPress will embed the video automatically.

Paste video embed code in block editor

Next, select the video block and then click the Change Alignment option. From the dropdown menu, you can choose the position of the video.

WordPress lets you choose from the following alignments:

  • wide width
  • full width
  • align left
  • align center
  • align right.

Go ahead and select the ‘Align center’ option.

Align the video to the center

After that, you can preview and publish your page or post.

The video will now be center-aligned.

Center aligned video preview

However, sometimes for one reason or another, you may need to use the embed code. In that case, you will need to add some simple HTML around your video’s embed code.

First, you need to click the 3 dotted icons in the video block. After that, you can select the ‘Edit as HTML’ option from the dropdown menu.

Edit as HTML

Next, you can enter the following piece of HTML code around the embed code of the video:

<div style="text-align:center;">

/// your video embed code goes here

</div>

Here’s what your embed code would look like with the custom HTML.

Preview of custom HTML code

You can now save your changes and preview the post or page. Your video will be neatly aligned in the center of your content area.

Another approach is to manually increase your video’s width to fit the content area. To achieve this, you need to add or change the ‘width’ parameter in your embed code.

<iframe width="760" height="315" src="https://www.youtube.com/embed/4YpyiJ05YOg" frameborder="0" allow="autoplay; encrypted-media" allowfullscreen></iframe>

How to Center Align Video in the Classic Editor

If you’re using the Classic editor, then you can center align videos by editing a post or creating a new one.

Once you’re in the editor, switch to the Text view. Now enter the following HTML code:

<div style="text-align:center;">

/// your video embed code goes here

</div>

Just make sure to replace ‘your video embed code goes here’ with your video’s embed code.

Once that’s done, it will look something like this:

Center align videos in classic editor

You can now preview and publish your page.

Simply visit your website to see the center-aligned video.

Center aligned video classic editor preview

We hope this article helped you learn how to center align a video in WordPress. You may also want to see our guide on how to start a WordPress blog and must-have WordPress plugins.

If you liked this article, then please subscribe to our YouTube Channel for WordPress video tutorials. You can also find us on Twitter and Facebook.

The post Beginner’s Guide: How to Center Align a Video in WordPress first appeared on WPBeginner.