Looking for an easy way to connect the WordPress Media Library to Google Drive? In this article, I’m going to show you a simple way to sync your WordPress Media Library with Google Drive in both directions. That is, when you add a file to your WordPress Media Library, that file will show up in ... Read more
Wondering what WP-Cron is, whether or not your site needs it, and/or how to disable WP-Cron (I guess that’s kind of a spoiler to the previous question)? In this post, I’m going to take you through everything that regular WordPress users need to know about WP-Cron. I’ll explain what WP-Cron is, how it works, and ... Read more What Is WP-Cron? Plus How to Disable WP-Cron in 2020
Interested in WordPress must-have plugins? No, I’m not talking about the essential plugins that all WordPress sites need, I’m talking about a little-known WordPress core feature called mu-plugins. In a nutshell, WordPress mu-plugins, or must-have plugins if you enjoy extraneous typing, let you force activate certain features on your site. Neither you nor pesky clients ... Read more WordPress mu-Plugins: Your Guide to Using Must-Use Plugins
Want to use Shopify with WordPress? That is, display Shopify products on WordPress? In a lot of posts, you see people compare WordPress and WooCommerce vs Shopify as if they’re always two separate platforms. But did you know that it’s actually possible to use Shopify with WordPress, which kind of gives you the best of ... Read more How to Use Shopify With WordPress (Display Products on WordPress)
If you’re using the WordPress block editor (AKA Gutenberg), WordPress 5.5 brought a flexible new feature – WordPress block patterns. In a nutshell, block patterns are basically pre-arranged collections of blocks that help you create more attractive designs and save time while doing so. All in all, they’re a pretty useful feature. However, since WordPress ... Read more WordPress Block Patterns: What They Are & How to Use Them
Struggling to understand the difference between a WordPress category vs tag? Categories and tags are both tools to help you organize your blog posts. However, while they share a lot of similarities, they’re different in some ways, so you’ll want to make sure you understand the differences so you know when to use each. In ... Read more WordPress Category vs Tag: Key Differences & When to Use Each
Struggling to understand the difference between a WordPress post vs page? Both make it easy to add new content to your site. However, posts and pages serve different purposes, so you’ll want to make sure you’re using the right type of content for your needs. In this post, we’ll help you understand the difference between ... Read more WordPress Post vs Page: Key Differences & When to Use Each
Want to create a better, more engaging experience for mobile visitors to your WordPress site? Google Web Stories help you create unique, “snackable” stories for your mobile visitors. They’re a vertically optimized, swipeable form of storytelling that’s great for people on the go – I’ll show you some examples in the next section. With the ... Read more How to Create Google Web Stories on WordPress (Without Code)
Do you want to create a separate page for blog posts in WordPress? By default, WordPress displays your blog posts on the homepage.
However, if you are making a business website or simply want to customize your homepage, then you may want a separate page for your blog section.
In this article, we will show you how to easily create a separate page for blog posts in WordPress.
Setup WordPress to Create a Separate Blog Page
WordPress allows you to easily configure your website to have a custom home page. This feature also allows you to choose any other page on your website to be used as your blog page.
First, you need to create two pages in WordPress that you would like to use as your homepage and blog page.
You don’t need to add any content to those pages, and you can even name them anything else if you want. For instance, some business websites use News for their blog page.
Once you have created those pages, you can head over to the Settings » Reading page in the WordPress admin area.
Under the ‘Your homepage displays’ section, you need to click on the ‘ A static page’ option. After that, you can select the home and blog pages you created earlier.
You can now go to Pages » All Pages section in admin area. You’ll notice your blog and homepage with new labels. Go ahead, and click on the View link under those pages to preview them.
The appearance of these pages depends on your WordPress theme, and you may need to configure your theme settings.
Since each WordPress theme has different options, you’ll have to check out your theme’s documentation or check the options under Appearance » Customize page.
We’ll also show you other methods later in this article.
Put The Blog Page Link to Your Website’s Navigation Menu
Now that you have created a separate blog page let’s help your website visitors find that.
Simply visit the Appearance » Menus page and add the Blog page you created earlier to your website’s navigation menu.
By default, many WordPress themes come with a built-in template to display a static page as your website’s front page. However, you’ll still need to set it up under Appearance » Customize.
Some WordPress themes also allow you to choose a homepage template for your page. If your theme comes with such a template, then you can select it by editing the Home page.
Finally, you can use a WordPress page builder plugin to use simple drag and tools to create your homepage from scratch.
We recommend using Beaver Builder as it is the best WordPress WordPress page builder plugin on the market. It is super-easy to use, includes ready-made templates, and super-flexible to create any layout you want.
By default, WordPress automatically looks for a template in your WordPress theme to display posts on a separate blog page.
If your theme does not have one, then it automatically falls back to the archive template. For more details, see our guide on the WordPress template hierarchy.
Now, if you don’t like how your theme handles your blog page, then you can change that using some extra tools and without writing any code.
Beaver Themer is an add-on plugin for Beaver Builder and enables you to not just create pages but entire new WordPress themes from scratch.
First, you need to visit Beaver Builder » Themer Layouts page and click on the Add New button.
From here you can provide a name for your layout, select ‘Themer Layout’ as your type, and then select Archive as your layout.
This will create a themer layout for the archive templates. On the next screen, you need to select ‘Post Archive’ for location option and then click on the ‘Launch Beaver Builder’ button.
This will open the Beaver Builder with your selected layout. You can simply point and click at any item on the screen and start editing it. You can also add new rows, columns, and web elements to the page.
Do you want to use cookie retargeting in WordPress?
Cookie retargeting is the secret tool already used by many of the most popular websites. It allows you to show custom on-site messages to your users based on their past behavior which helps you boost sales.
In this article, we’ll show you how to use cookie retargeting in WordPress to show custom on-site messages and boost conversions.
What is Cookie Retargeting?
Cookie retargeting is a marketing technique where websites use cookies to track user behavior and offer a personalized experience.
There are two types of cookie retargeting techniques.
First, there is off-site cookie retargeting. This method is used to track user activities across the web.
Facebook pixel and Google remarketing are two of the most popular advertising programs that allow you to use their massive reach and show targeted ads to people who visit your website.
Secondly, you have on-site cookie retargeting, which allows you to show targeted messages to users based on how they interact with your WordPress website.
What are cookies?
Cookies are small text files containing pieces of data. Websites set cookies in users’ browsers to store temporary information such as login status, user preferences, session details, and more.
How to Use On-Site Cookie Retargeting to Boost Conversions?
There are a number of ways website owners use on-site retargeting messages to boost conversions and increase sales.
For instance, eCommerce stores can show custom offers to users based on how they interact with other offers. This allows you to create a dynamic sales funnel that leads users to make a purchase.
Another use-case scenario would be lead generation. With on-site retargeting, if a user closes one sign-up form, then you can show them a different message with another offer.
On-site retargeting messages are highly effective because:
It shows personalized messages to users at a time when they are already engaged with your website.
Allows you to create customized campaigns that get better with each user interaction until they convert
You save money on paid advertising campaigns by utilizing your existing website traffic to the max
That being said, let’s take a look a how to use cookie retargeting in WordPress.
Creating On-Site Retargeting Campaign in WordPress
The best way to create on-site retargeting messages is by using OptinMonster. It is the best conversion optimization and lead generation software in the world.
You can use it to easily create attention-grabbing signup forms, popups, welcome mats, in-line offers, custom offers, and more.
First, you need to signup for an OptinMonster account by visiting the website and clicking the ‘Get OptinMonster Now’ button. You’ll need at least their Pro plan for cookie retargeting and Growth plan for follow-up campaigns.
This plugin acts as a connector between your WordPress site and the OptinMonster app.
Upon activation, you will see the welcome screen. Simply click the ‘Connect Your Existing Account’ button.
Next, a new window will open, where you’ll need to sign in to your account and connect your website with OptinMonster.
Go ahead and click the ‘Connect to WordPress’ button.
Now, you’re ready to create a new campaign.
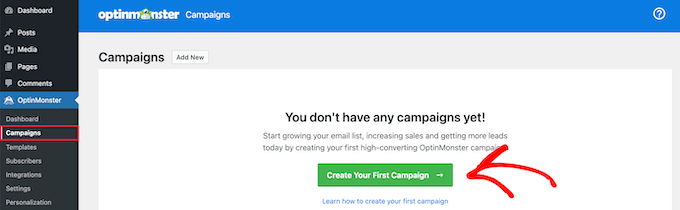
First, you’ll need to go to OptinMonster » Campaigns from your WordPress admin panel and then click the ‘Create Your First Campaign’ button.
This will take you to the OptinMonster website, where you’ll be asked to choose a campaign type and a template.
You can choose any campaign type or template, but for this tutorial, we’ll be creating a lightbox popup.
You can select any template that you’d like to use for your campaign.
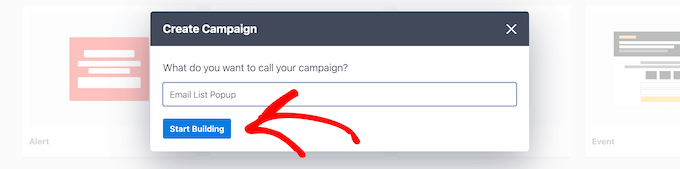
Next, you’ll be asked to provide a name for your campaign and click the ‘Start Building’ button.
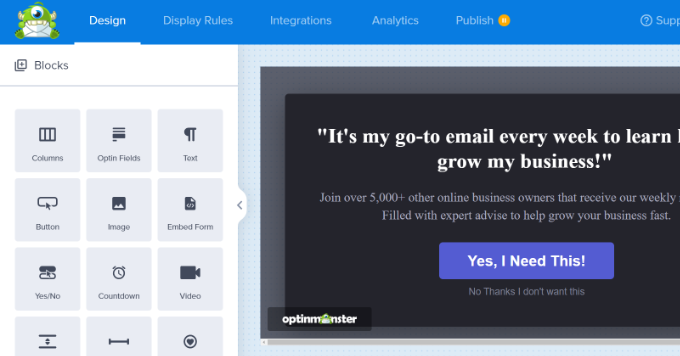
After that, you’ll enter the drag-and-drop campaign builder interface.
It is a powerful design tool where you can simply point and click on any item to edit it. You can also add new items like buttons, images, columns, and more to your popup campaign.
Next, you can switch to the ‘Display Rules’ tab at the top.
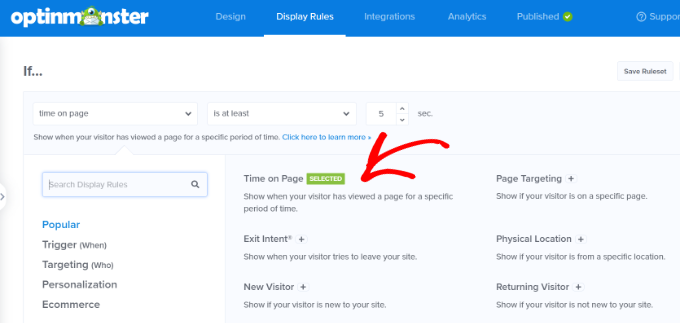
Here, OptinMonster will give you different options for displaying your onsite targeting campaigns.
For instance, you can show the popup after users spend a certain time on the page, are from a particular location, or are about to exit your website.
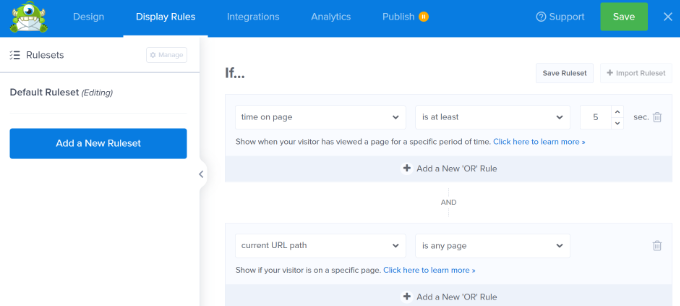
By default, OptinMonster will show your campaign after a visitor spends at least 5 seconds on the site. Plus, it appears on all the pages.
Once you are satisfied, simply switch to the publish tab.
Next, you’ll need to make your campaign live by changing its status from Draft to Publish. Don’t forget to click the ‘Save’ button when you’re done.
Now by default, OptinMonster will show this campaign to all users who visit your website. Users will be able to close the popup or perform their desired action.
Creating a Retargeting Campaign to Show Custom Messages
Now that you have launched your first campaign, let’s add another campaign using the follow-up retargeting feature.
Click on the create new campaign button in the OptinMonster dashboard and select your campaign type and template. Since we have used a lightbox popup, we’ll be using a ‘Floating bar’ as our retargeting campaign.
After selecting a template, you’ll enter your campaign name.
Then simply click the ‘Start Building’ button to continue.
After that, you’ll enter the OptinMonster builder where you can design your campaign using simple drag-and-drop tools.
You can edit the optin text, adjust the countdown timer to generate FOMO, add a coupon, and so much more.
Once you are satisfied with the design, it is time to select which users you want to show this custom message to.
Simply switch to the Display Rules tab at the top of the builder. OptinMonster offers a ton of display rules that you can choose from. You can also add multiple rulesets.
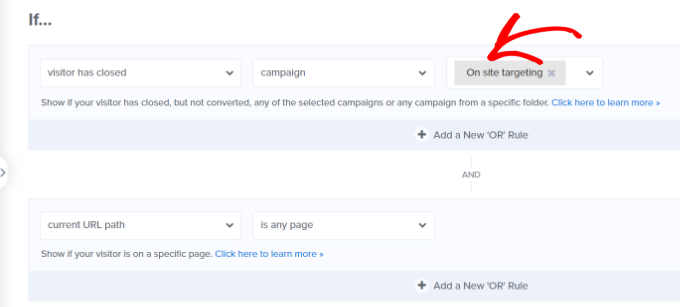
Next, under the If menu, go to the ‘Personalization’ display rules options and select Has Closed.
After that, select ‘Campaign’ and then select your previous campaign.
Next, you need to switch to the ‘Publish’ tab.
Here, simply change your campaign status from Draft to Publish under ‘Publish Status.’ Once that’s done, simply click the ‘Save’ button and exit the campaign builder.
You can now visit your website in the incognito browser tab to see your campaign and the follow-up retargeting message.
Adding Cookie Retargeting with Custom Messages
Cookie retargeting allows you to show custom messages to users based on their previous actions, cart status, shopping history, and more.
This allows you to create promotions and upsells designed for customers at different stages of your sales funnel.
When customizing your campaign, simply switch to the ‘Display Rules’ tab.
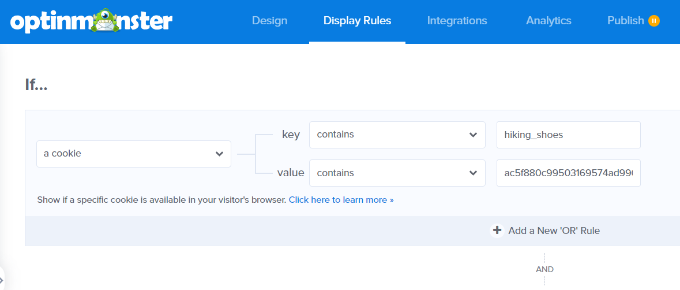
Under the If menu, you can go to the ‘Targeting (Who)’ display rules options and select Cookie Targeting.
Next, you’ll need to enter the cookie key and value. The key is the cookie name, and the value parameter is the contents of the cookie.
OptinMonster lets you select different operators to use for the display rule. These include options like match exactly, contain, exist, start with, ends with, and more operators.
For instance, if you are using WooCommerce, then you can use WooCommerce cookies to target users who have added products to their cart. This way, you can cross-sell items in their cart, reduce cart abandonment, and more.
After adding cookie retargeting rules, go to the ‘Publish’ tab.
From here, simply change the Publish Status from Draft to Publish for your campaign.
OptinMonster will now display your custom message based on the cookie-targeting rules you have set.
We hope this article helped you learn how to use cookie retargeting in WordPress to show custom on-site messages. You may also want to see our guide on how to recover abandoned cart sales in WooCommerce as well as our comparison of the best live chat software for websites.
If you liked this article, then please subscribe to our YouTube Channel for WordPress video tutorials. You can also find us on Twitter and Facebook.