Do you want to allow your customers to book an appointment directly from your WordPress site? Many businesses need an appointment booking form which allows customers to easily book an appointment online. In this article, we will show you the best WordPress appointment and booking plugins.

What Kind of Appointment and Booking Form Plugin To Choose?
You may want to customize your appointment booking form to meet your business requirements. However, there are few common things that you should look for in your WordPress booking form plugin.
Your appointment booking form should be able to accept customer requests for available time slots divided into your business hours.
It should work on mobile phones, so that your customers can easily book appointments from their phones as well as computers.
A good appointment booking form will save appointments in your WordPress database or a calendar app like Google Calendar. You may also want to send an automatic email notification to customers once their booking is accepted.
That being said, let’s take a look at the best appointment and booking plugins that you can use on your WordPress site.
1. BirchPress

BirchPress is a comprehensive WordPress booking plugin. It allows you to add a professional online booking management system into your WordPress site. Your users can book appointments from your website and pay for it using their PayPal account or credit card.
BirchPress syncs your booking calendar with your other calendars such as Google Calendar, iCal, Android, Outlook, etc. It has a customizable email notification and reminder system to keep you, and your clients informed about the booking.
2. Booking Calendar

Booking Calendar is one of the best free WordPress booking plugins in the market. It is simple, easy to use, and well documented. It comes with a calendar view for both you and your website visitors. You can easily add your booking / appointment form into any WordPress post or page.
While it is simple enough for beginners, it is also very powerful and includes a whole range of options that can be configured from the plugin’s settings page. It comes with built-in captcha to prevent spam, email notifications, jQuery effects, and more. You can even customize the booking form with your own custom fields.
3. WP Simple Booking Calendar

WP Simple Booking Calendar is another straightforward WordPress booking plugin. Simply create a calendar and then add it to a post or page using the shortcode. It only allows users to book an entire day. This means there are no hourly time slots.
If you were looking for something very simple and basic for rooms, accommodation, or other per day offerings, then this plugin will do the job. For more complex items, look at the plugins we mentioned above.
4. Easy Appointments

Easy Appointments is a flexible and free WordPress appointment booking plugin. It allows you to easily add multiple locations, services, and workers. After that you can create flexible connections with granular control of the calendar. It also allows you to customize the booking form by adding custom form fields.
You can easily add appointment booking form to any page or post using the shortcode. You can also customize the notification emails plugin sends to clients, workers, and website administrator.
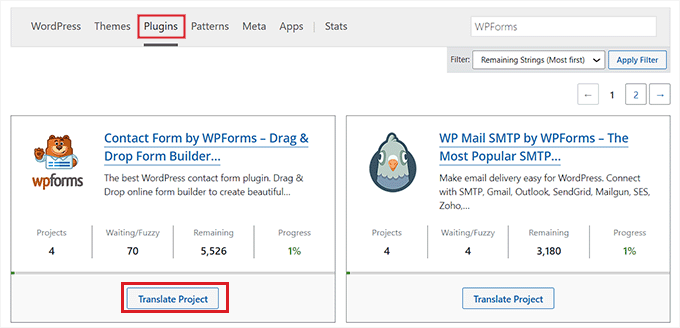
5. WPForms

WPForms is the best WordPress contact form plugin. It comes with a beginner friendly drag and drop form builder that allows you to easily create any kind of form within minutes.
WPForms can be integrated with Google Calendar through Zapier but it doesn’t allow you to set working hours. However, if you already have WPForms installed, then you can easily use it to create a custom booking form. You will have to manually approve and confirm each appointment.
We hope this article helped you find the best WordPress appointment and booking plugins. You may also want to see our list of the must have WordPress plugins for business websites.
If you liked this article, then please subscribe to our YouTube Channel for WordPress video tutorials. You can also find us on Twitter and Facebook.
The post 5 Best WordPress Appointment and Booking Plugins appeared first on WPBeginner.