Are you thinking of starting an online store? Not sure whether you should use Shopify or WooCommerce? These are the two most popular eCommerce platforms in the market with their own advantages and disadvantages. In this article, we will compare Shopify vs WooCommerce to help you decide the best option for you.
Since this is a detailed comparison of Shopify vs WooCommerce, here’s a quick table of content:
Overview: Shopify vs WooCommerce
Before we start with our in-depth comparison of the two most popular eCommerce platforms on the web, it’s important that we cover the basics and highlight what makes these platform stand out.
What is Shopify?
Shopify is an all-in-one eCommerce platform that makes it easy for you to create an online store, accept payments, and manage your inventory all from a single platform without ever worrying about the technical aspects of managing a website such as web hosting, security, caching, etc.
What is WooCommerce?
WooCommerce is an open-source eCommerce plugin built for WordPress. It allows you to leverage the most powerful content management system (CMS) and use it to run an online store. Because of the open-source nature, you can customize every aspect of your store and easily build custom extensions.
The decision to choose between the two platforms depend entirely on your needs and skill level.
What to Look for in Your eCommerce Platform?
There are few things that you absolutely need to keep in mind when starting an online store. These key factors will help you decide which platform is better suited for your needs.
- Budget – The initial cost of starting a fully functional ecommerce store.
- Ease of use – It should be easy to use even for absolute beginners.
- Payment Methods – It should have support for multiple payment methods (e.g. PayPal, Stripe, other merchant processors).
- Integrations – Number of services and third party tools you can integrate to grow your business.
- Scalability – The platform should be able to scale as your business grows.
These are the very basic requirements that all online store owners must consider. However depending on your need, you may also want to look at other options like shipping, inventory management, invoicing, taxes, etc.
Our goal with this article is to take an in-depth look at how Shopify and WooCommerce stand on these basic requirements, and which one of them is best suited for your needs.
Cost: Shopify vs WooCommerce
Cost is often the most important consideration for eCommerce website owners. You need to evaluate the cost of getting started while also keeping in mind the variable costs for add-on services and software.
The true cost of using Shopify
Shopify makes it super easy to start your online store. Their basic plan starts at $29 per month, and you can upgrade to the Shopify plan for $79 or the Advanced Shopify plan for $299 per month.
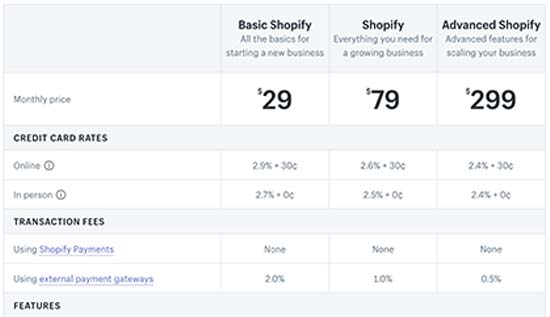
Each of these plans include domain name, SSL certificate, and web hosting.
The basic plan comes with enough features to setup a new online store. You can add unlimited products, 2 user accounts, unlimited file storage, and more.
However, this pricing doesn’t include third-party tools and addons that you will need to take your Shopify store to the next level. As your business grows, these costs will start adding up, and you’ll soon be paying a lot more than the basic plan.
Payments are another factor that affects your costs. Shopify offers their own Shopify Payments solution which costs 2.9% + 30 cents per transaction.
If you want to use third-party payment gateways or your own merchant account, then you will be charged a flat fee of 2.0% for all transactions. You can reduce this fee to 0.5% by using the Shopify Advanced plan which costs $299 per month.
These payment processing fees are fairly steep when using external payment gateways. However if you’re just starting out and want to use the Shopify payment solution, then the fees are fairly comparable to popular platforms like Stripe and Braintree.
The true cost of using WooCommerce
WooCommerce is an eCommerce plugin for WordPress.org (also known as self-hosted WordPress). It is open source and freely available as a WordPress plugin.
However, you’ll need a domain name, SSL Certificate, and a WordPress hosting account to start a WooCommerce store.
Typically, a domain name costs $14.99, SSL Certificate costs $69.99, and web hosting around $7.99 / month. This is not cheap, particularly when you are just starting out.
Thankfully, there are several hosting companies who are now offering specialized WooCommerce hosting plans which significantly reduces the cost.
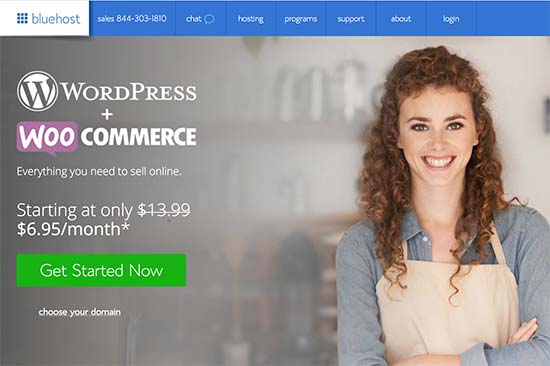
Bluehost, an official WordPress and WooCommerce recommended hosting provider, has agreed to offer our users a free domain name, free SSL certificate, and a discount on web hosting.
This will help you start your online store for as low as $6.95 / month.
→ Click here to Claim this Exclusive Bluehost offer ←
As you can see, the cost of starting a basic WooCommerce store is significantly lower than Shopify. WooCommerce also doesn’t charge you a percentage fee of your transactions which is a very nice perk.
But the WooCommerce costs start adding up as you purchase paid extensions. Your hosting costs will also increase as your online store grows.
However, one clear advantage of using WooCommerce is that you can often find free alternatives to the paid extensions. You can also keep your costs in control by only purchasing the tools and plugins as you need them.
With the amount of free themes and free addons available for WooCommerce, it’s definitely the winner when it comes to cost.
Winner: WooCommerce
Ease of Use: Shopify vs WooCommerce
Most users starting an online store are not web designers or developers. Even users who are familiar with basic concepts need a platform that is easy to use and gets out of their way.
Let’s see how Shopify and WooCommerce stack up in terms of user friendliness.
Shopify – Ease of Use
Shopify is a fully hosted platform which means you don’t need to install, manage, or update any software. You also don’t need to worry about security, performance, backups, and compatibility issues.
As soon as you sign up, it helps you pick a design for your website. After that, they walk you through customization, and then help you add products.

Shopify comes with an intuitive drag and drop interface. Managing your products, sales, and inventory inside Shopify is a breeze.
One downside of this guided, polished, and highly optimized user experience is that it limits your control. You can only use the design and development tools provided by Shopify or addons available in their marketplace.
However, this is not as bad as it sounds. For most users, the large selection of extensions and themes available in Shopify, is more than enough to get started and grow your online store.
WooCommerce – Ease of Use
WooCommerce is not a hosted platform like Shopify. This means you will need to install WooCommerce, manage updates, keep backups, and make sure that your website is secure. There are plenty of free and paid plugins that can automate most of these tasks for you.
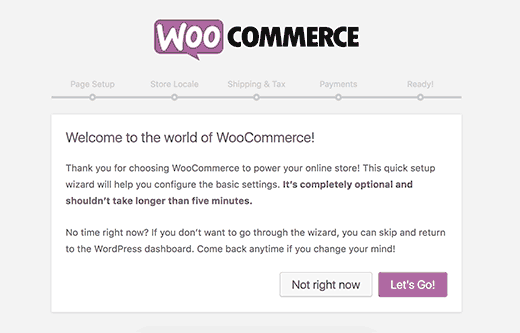
WooCommerce is super flexible when it comes to customizations. You have full control of the whole platform. You can add any functionality imaginable to your website with the help of more than 50,000+ WordPress plugins. However, there is no built-in drag & drop design builder. You can use one of the WordPress page builders like Beaver Builder, but it adds to your cost.
The biggest downside of the flexibility is that it comes with a learning curve and requires a more hands-on management of your website. You also have to signup for a merchant account or similar service like Stripe / PayPal. While the WooCommerce guided setup wizard is helpful, it does not come close to the onboarding and ease of use of Shopify.
Winner: Shopify
Payment Methods: Shopify vs WooCommerce
There are many payment gateways that you can use to accept payments online. Some payment methods may not be suitable for you, and others may not be available to your customers.
This is why it’s important that the platform you choose offer multiple payment options. Let’s take a look at how Shopify and WooCommerce compare when it comes to payment integrations.
Payment Options in Shopify
Shopify offers plenty of payment options that you can use to receive payments from customers. It has its own payments solutions called Shopify Payments (powered by Stripe) as well as all popular third party payment gateways.
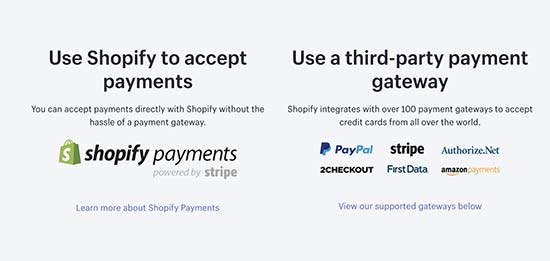
The problem is that Shopify charges an extra 2% fees on each transaction made through third party payment gateways. This is on top of the transaction fees charged by the payment gateway. You can reduce the fee to 0.5% by paying $299 per month for Advanced Shopify plan.
Shopify Payments has flat credit card fees, but no other transaction fees. Credit card rates start from 2.9% + 30¢ for basic plan and get lower for other plans.
Payment Options in WooCommerce
WooCommerce offers PayPal and Stripe payments by default. It also supports all other popular payment service providers through add-ons.
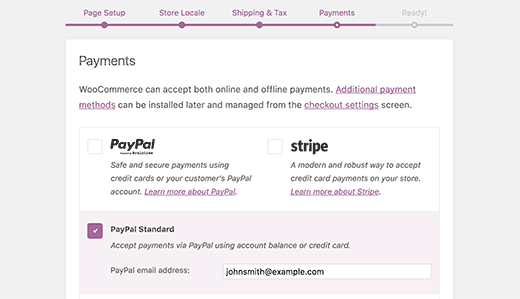
For payment gateways, WooCommerce even has support for many regional and less popular payment services. Since there is no barrier to entry, any payments company can create add-ons for WooCommerce and provide support for it.
As a self hosted platform, you are only charged transaction fees by your payment gateway or your bank. WooCommerce never charges you a % fee on your store transactions which is a major plus.
If choosing your own merchant account and using a third-party gateway is important for you, then you will save A LOT of money by using WooCommerce. But if you’re a small store and willing to use Shopify Payments which has the same credit card rates as Stripe / Paypal, then it makes no difference.
Winner: Tie
Integrations and Add-ons: Shopify vs WooCommerce
No matter how robust an ecommerce platform is, you’ll always need third-party tools and services to grow your store. For example, an email marketing software, lead generation tool, analytics tools, outreach services, etc.
Both Shopify and WooCommerce have a massive extensions directory, and they integrate with many third-party services.
Shopify Add-ons and Integrations
Shopify comes with a powerful API and an App Store where you can buy third party addons for your Shopify store. They have hundreds of apps in the store covering every feature you’ll want to add to your store.
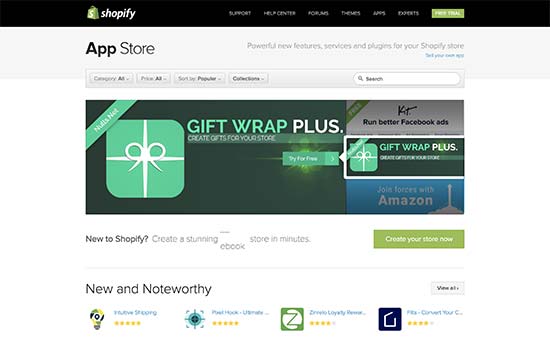
For lead generation, they have integrations with software like OptinMonster which helps you grow your email list and reduce cart abandonment. They have apps for SEO, product reviews, discounts, countdowns, and more.
Shopify’s app store contains both free and paid apps. Free apps are usually created by third party services that have their own pricing, and the app only integrates your store to their APIs. Pricing for paid addons varies and most apps offer monthly subscriptions.
WooCommerce Add-ons and Integrations
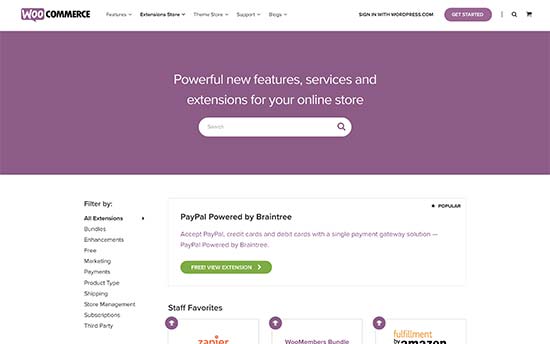
WooCommerce is open source and built on top of WordPress. This gives you access to more than 50,000 free WordPress plugins and many more paid plugins.
You can use these addons to add payment gateways, lead generation, SEO, performance optimization, and almost any feature you can think of.
Due to the low barrier of entry, there are a lot more integrations and addons available for WooCommerce than Shopify. Almost all third party tools and service providers have their own plugins to seamlessly integrate with your WooCommerce store.
You can also hire a developer to create an integration or plugin just for your own website. However it’s important to keep in mind that WooCommerce is a lot easier to customize. Having personally gone through the process of submitting a plugin for WordPress and submitting an app to the Shopify store, we can say that the process is extremely harder on Shopify vs WooCommerce.
Winner: WooCommerce
Scalability and Growth: Shopify vs WooCommerce
You have probably heard the term “growth-pains” from various CEOs. As your business grows, you will need more resources to handle new challenges and goals.
Shopify and WooCommerce can both be scaled to handle large amount traffic and orders, but they’re not created equal. Let’s take a look at how these two eCommerce platform compare when it comes to scalability.
Scalability on Shopify

Shopify handles the technical parts of your store which means you don’t ever have to worry about performance, security, and scalability. Once your business starts growing, you can simply upgrade your Shopify plans.
Their infrastructure can easily handle your growing business without you having to worry about downtimes, backups, updates, or security. They also offer enterprise services as part of the Shopify Plus plan.
This takes out the painful part of the growth, but it also adds to your cost of business. Your expenses will grow, and you’ll have to plan accordingly.
The good part is that your costs will be offset by you not having to hire / manage a technical team in-house.
Scalability on WooCommerce

WooCommerce is a self hosted platform which makes you responsible for maintaining updates, backups, and security of your website.
Your starter WooCommerce hosting plan would run out of resources as your store starts getting more traffic.
The good part is that you have plenty of options to manage growth as you are in full control of your website. Starting with better management of resources with caching to upgrading your hosting plan to more powerful servers.
Your WooCommerce hosting costs will increase, but you will have better control on resources, and you can make sure that you are not paying for resources that you don’t need. You can use a managed WordPress hosting provider like WP Engine or LiquidWeb to help scale your WooCommerce store.
Despite the control that WooCommerce offers, some business owners simply prefer a hassle-free solution.
Winner: Shopify
WooCommerce vs Shopify: Which is the Best eCommerce Platform?
Shopify and WooCommerce are both powerful platforms to start your eCommerce store. It truly comes down to your personal skills and preferences.
Shopify is a lot easier to use. It doesn’t require you to install anything, and you can get started quickly. Setting up payments is easier, and they have easy to understand pricing plans.
The disadvantage of Shopify is that you don’t have full control of everything. Your costs can go high with transaction fees, add-ons, and integrations. Your upgrade options are limited to select plans, and you cannot manage costs on pay as you grow basis.
WooCommerce is open source and gives you full control of your website. It costs a lot lower to start an online store with WooCommerce specially with these WooCommerce hosting companies.
The disadvantage is that you’ll have to maintain the software. It comes with a bit of learning curve. However, millions of beginners are already using it, and they get over the learning phase quite quickly.
If you are looking for a cost-effective solution, and you want to have full-control of your online store, then WooCommerce is the best platform for you.
If you want something that’s completely hassle-free that has infinite scalability, then Shopify is the better platform for you.
We hope this article helped you compare pros and cons of Shopify vs WooCommerce. You may also want to see our guide on how to choose the best website builder.
If you liked this article, then please subscribe to our YouTube Channel for WordPress video tutorials. You can also find us on Twitter and Facebook.
The post Shopify vs WooCommerce – Which is the Better Platform? (Comparison) appeared first on WPBeginner.