Are you wondering what to add to the footer of your WordPress site?
The footer is the area at the bottom of your website. Although it’s easy to overlook, the footer can improve the user experience on your site in lots of significant ways.
In this checklist, we will share the top things that you should add to the footer of your WordPress website.
What is the Footer in WordPress?
The footer is the area that appears below the content part of your website. It is a common website design feature used by millions of websites.
‘Footer’ can also refer to the footer code area. Third-party services like Google Analytics, Facebook Pixel, and many others may ask you to add code snippets to your website’s footer.
This sort of footer code doesn’t appear to visitors but it allows you to add features, services, and other content to your WordPress website.
With so many options, beginners may struggle to decide what to add to the footer area. As a result, many website owners miss out on opportunities to improve their sites and provide a better visitor experience.
That being said, let’s take a look at some of the things to add to the footer of your WordPress site, and how to make it more useful.
Here are all the things we’ll add, so feel free to jump straight to the items that interest you.
- Adding Links to The Footer of Your WordPress Site
- Adding Code in WordPress Footer
- Adding Privacy Policy Link in WordPress Footer
- Adding Copyright Date in WordPress Footer
- Remove Powered by Links from Footer in WordPress
- How to Add Instagram Feed in WordPress Footer
- Add a Sticky Footer Bar in WordPress
- Add Social Buttons in WordPress Footer
- Add a Phone Number in WordPress Footer
- Add a Contact Form in WordPress Footer
1. Adding Links to The Footer of Your WordPress Site
Many websites add links to the footer area. This helps visitors find your site’s most important content such as the about page, products page, checkout, contact form, and more.
All popular WordPress themes come with a footer widget area where you can add different content and elements.
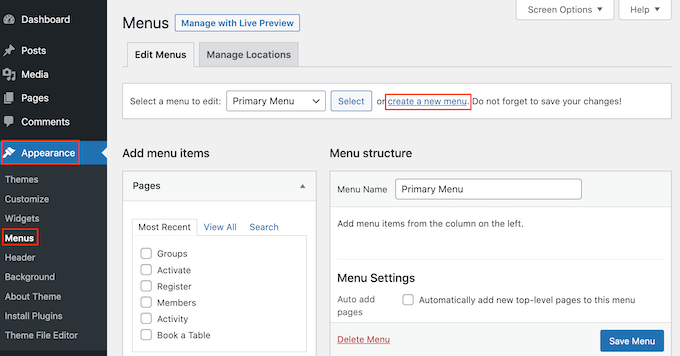
To add links to the footer area, go to the Appearance » Menus page and click on the ‘create a new menu’ link.
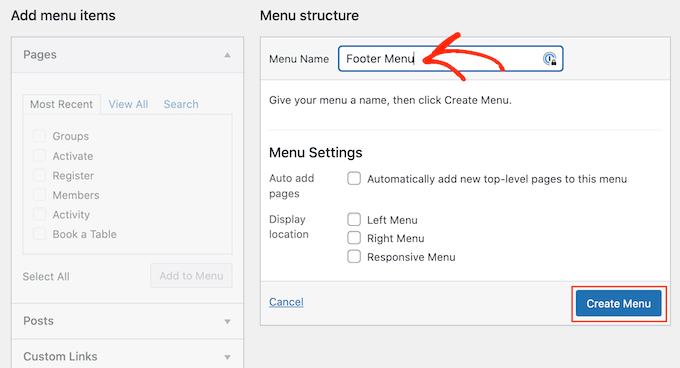
After that, type in a name for the menu. This is just for your reference so you can use anything you want.
With that done, click on the ‘Create Menu’ button.
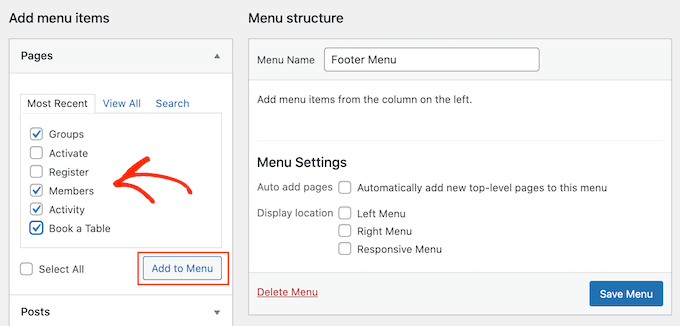
Now, check the box next to each item that you want to add to the menu.
Then, click on ‘Add to Menu.’
When you’re happy with how the menu is set up, click on the ‘Save Menu’ button to store your changes. For more help, see our guide on how to create navigation menus in WordPress.
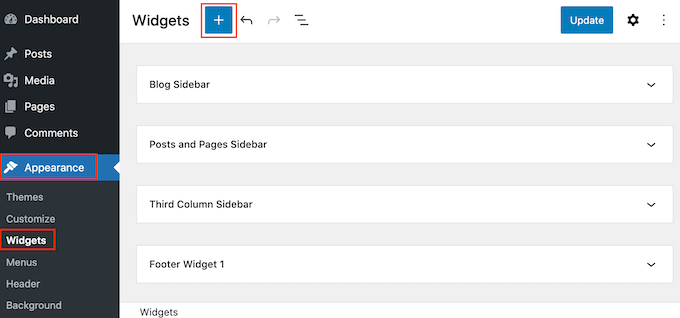
Now you’ve created a menu, let’s add it to the footer area of your website by going to Appearance » Widgets. Here, click on the blue ‘+’ button.
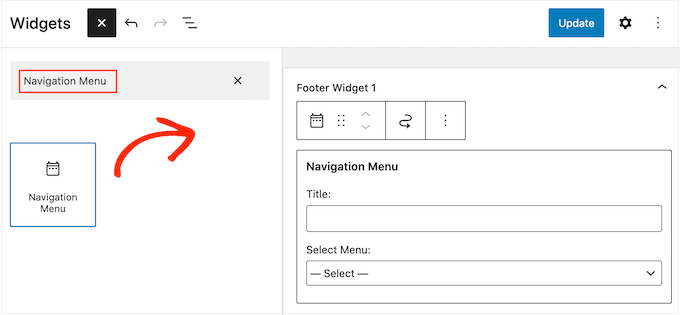
In the ‘Search’ field, type in ‘Navigation Menu.’
When the right block appears, drag and drop it onto the ‘Footer’ or similar area.
After that, open the Select Menu’ dropdown and choose the footer menu you created earlier.
You may also want to type in a title, which will appear above the links in your website’s footer.
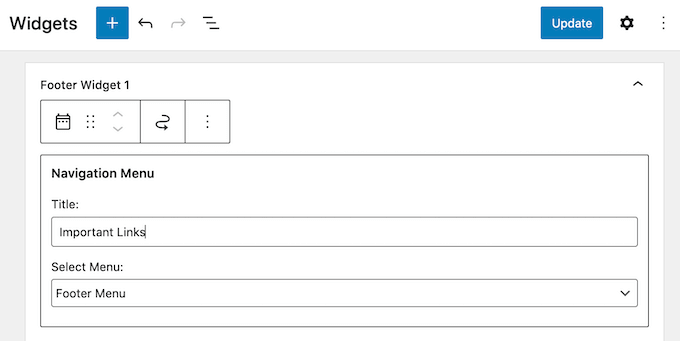
With that done, click on the ‘Update’ button.
Now, if you visit your website you’ll see all the links in the footer area.

You can also add links to the footer using a drag-and-drop page builder plugin like SeedProd. You can even create different footers for individual WordPress pages.
For step-by-step instructions, check out our guide on how to edit the footer in WordPress.
Adding a Menu to Your Footer with the Full-Site Editor
If you’re using a block-based theme such as ThemeIsle Hestia Pro or Twenty Twenty-Three, then the process of adding a menu to the footer is slightly different.
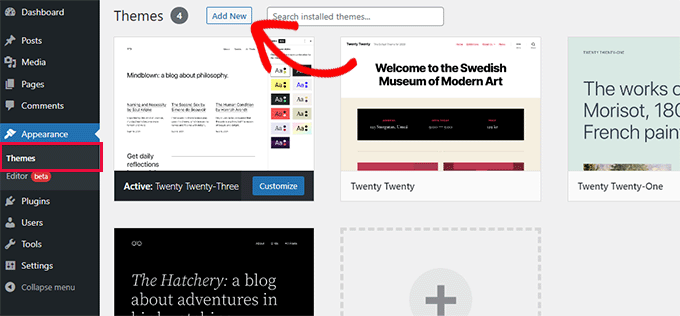
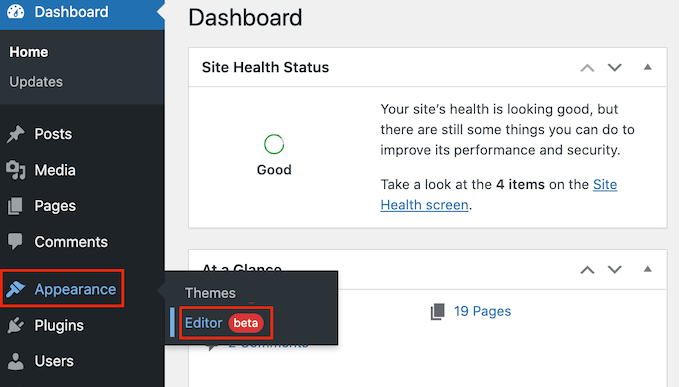
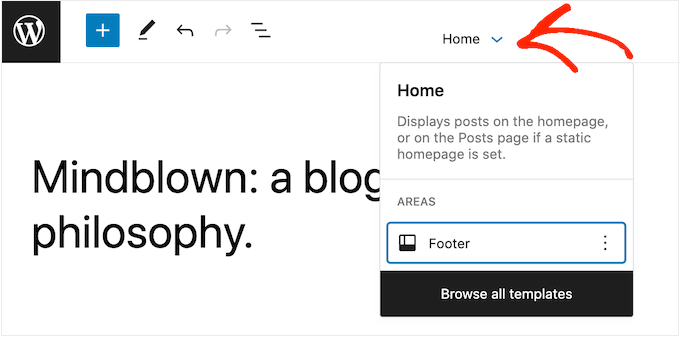
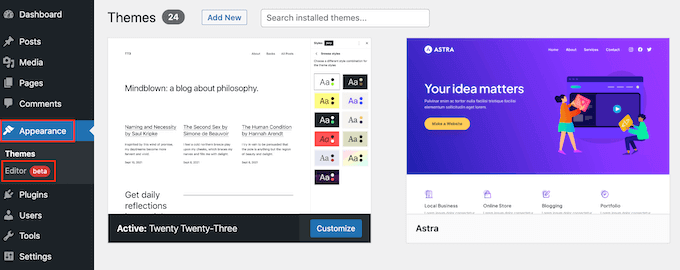
Simply create a navigation menu following the same process described above. Then, go to Themes » Editor in the WordPress dashboard to open the full-site editor.
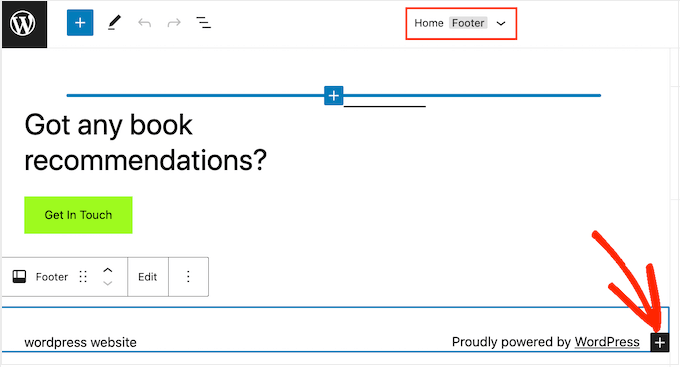
Here, click on the downwards-pointing arrow in the toolbar and select the ‘Footer’ template.
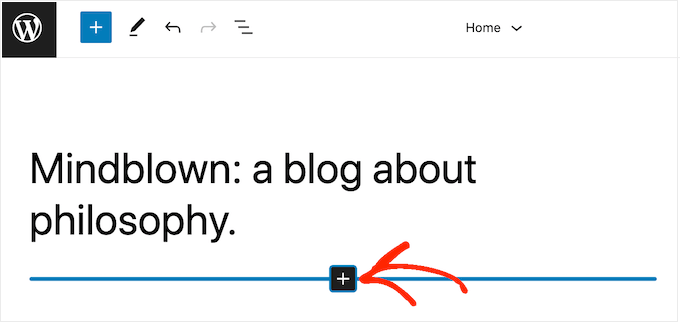
In the footer area, go ahead and click on the ‘+’ button to add a new block.
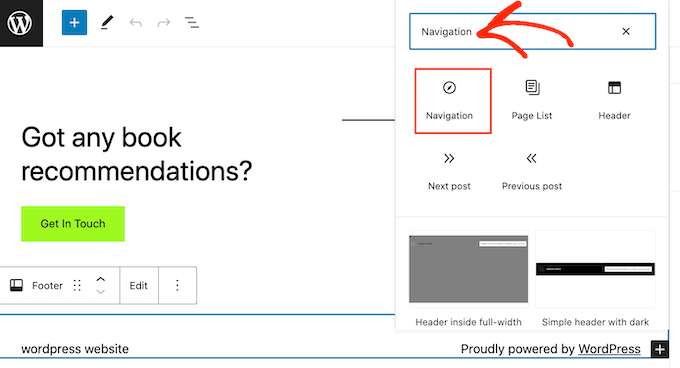
In the ‘Search’ bar, type in ‘Navigation.’
When the right block appears, click to add it to the footer area.
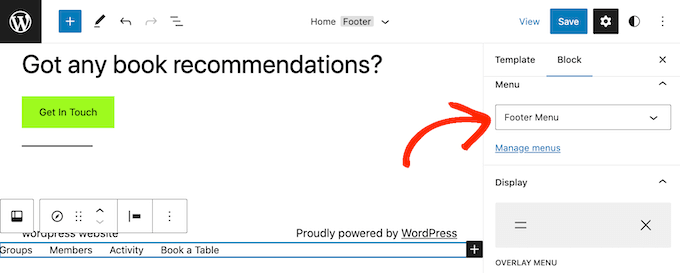
The full-site editor will show one of your navigation menus by default.
If you want to show a different menu instead, then open the ‘Select menu’ dropdown in the right-hand panel and choose the menu you want to use.
When you’re happy with how the menu looks, click on ‘Save’ to make your changes live.
2. Adding Code in WordPress Footer
Sometimes you may need to add snippets to your WordPress blog or website’s footer.
You could edit your theme files directly and paste the new code in the footer.php template. However, this isn’t recommended as the custom code will disappear if you change the WordPress theme, or update that theme.
Editing your theme files directly can also be risky. Even a simple typo or mistake could cause lots of common WordPress errors.
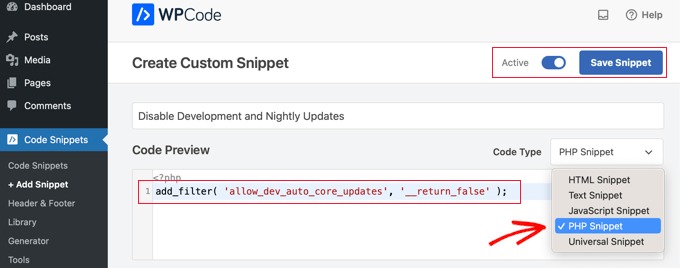
The best way to add code in the WordPress footer is by using a code snippets plugin. WPCode is the best code snippets plugin for WordPress. It makes it easy to insert code into your WordPress site’s headers and footers without needing to edit your theme files.
First, you need to install and activate the WPCode plugin. For more details, see our step-by-step guide on how to install a WordPress plugin.
Upon activation, go to Code Snippets » Header & Footer. From here you can paste your code snippet into the ‘Footer’ box.
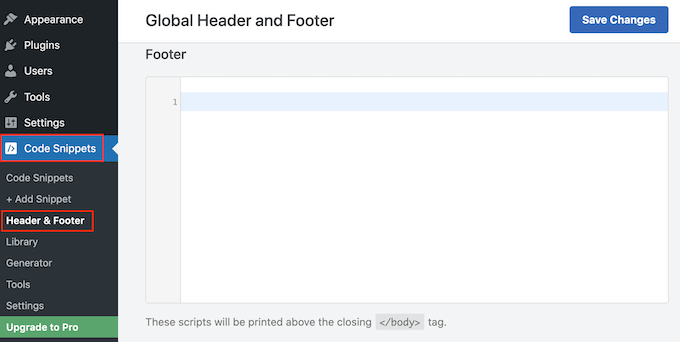
Don’t forget to click on the ‘Save Changes’ button to store your changes. For more detailed instructions, please see our article on how to add header and footer code in WordPress.
3. Adding Privacy Policy Link in WordPress Footer
To comply with GDPR and other privacy-related laws in different countries, you need to add a privacy policy page in WordPress and then link to it from all the other pages.
Since the footer appears across your entire website, it’s the perfect place to add this URL.
First, you need to go to Settings » Privacy in the admin area. You’ll notice that WordPress has already created a Privacy Policy page draft for you.
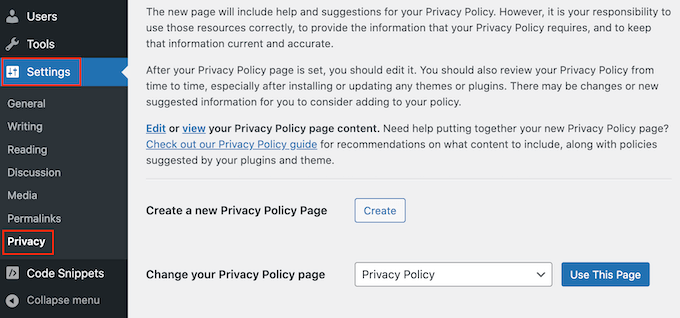
To use the default Privacy Policy page, simply click on ‘Use This Page.’ If you want to use a different page instead, then open the dropdown menu and choose a new page from the list.
You can also create a new privacy policy page from this screen. Simply click on the ‘Create’ button and WordPress will generate a new post with some basic privacy policy text.
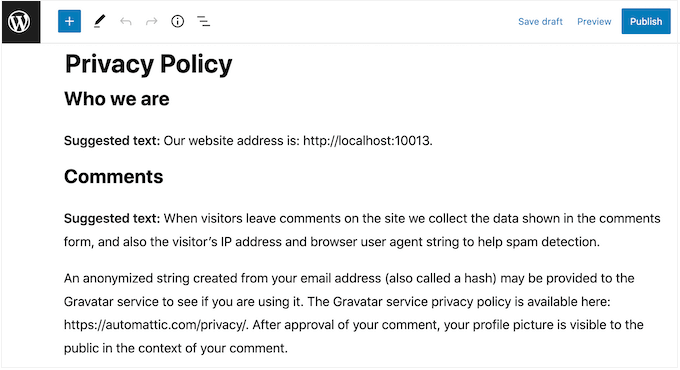
No matter how you create the privacy policy page, you can edit it just like any other page in WordPress. For example, you can add more information about your requirements, and terms and conditions.
When you’re happy with the information you’ve entered, click on the ‘Publish’ button to make the privacy policy live.
With that done, you’ll need to add a link to your website’s footer. To add a navigation menu to the footer area, simply follow the same process described above.
4. Adding Copyright Date in WordPress Footer
You may also want to add a copyright date in the WordPress footer area to let visitors know that your content is copyrighted. One way to do this is by simply adding the text to your theme settings.
Many top WordPress themes allow you to add text in the footer area, so it’s worth checking whether your theme has this setting.
Simply go to the Appearance » Customize page and look for any footer settings in the left-hand menu. These are usually labeled ‘Footer Options,’ ‘Footer Settings’ or similar.
To add the copyright symbol, simply paste the following into the ‘Footer Credits,’ ‘Copyright Text’ or similar section.
© Copyright 2016-2023. All rights reserved.
The WordPress Theme Customizer will update automatically so you can see how the copyright text will look on your website.
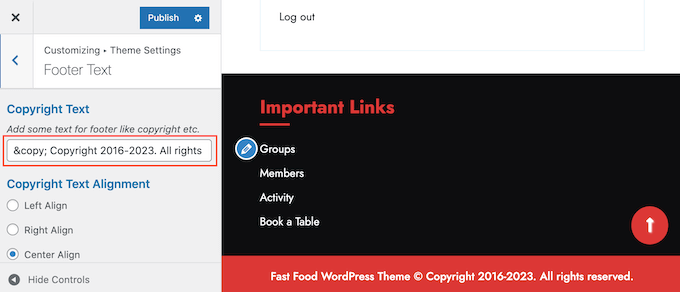
Depending on your theme, you may also be able to change the font size and text alignment using the theme settings.
If you’re happy with how the copyright notice looks, then click on the ‘Publish’ button to make your changes live.
Pro Tip: With this approach, you’ll still need to update the copyright notice every year. To add the new year automatically, see our guide on how to add a dynamic copyright date in the WordPress footer.
Adding a Copyright Date to Your Footer with the Full-Site Editor
If you’re using a block-enabled theme, then it’s easy to add a copyright date to the footer. Simply go to Themes » Editor to open the full-site editor.
Then, scroll to the footer section and click on the ‘+’ to add a new block. You can now start typing in ‘Shortcode’ and select the right block when it appears.
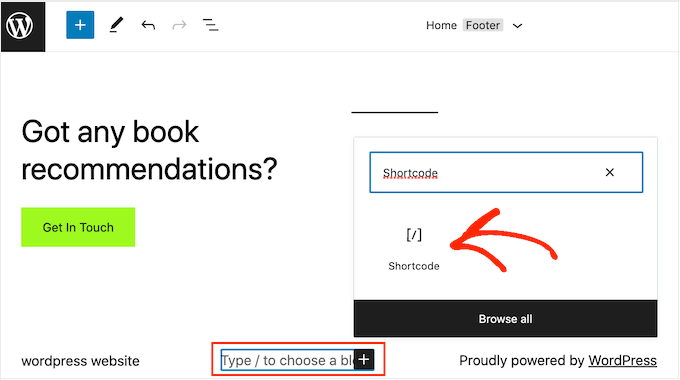
In the shortcode block, add the following:
© Copyright 2016-2023. All rights reserved.
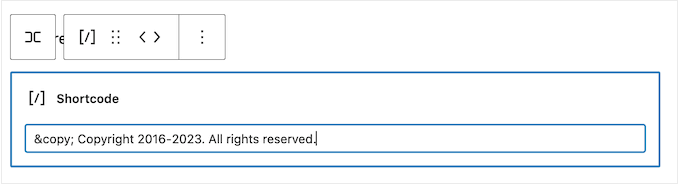
After that, simply click on the ‘Save’ button to make the copyright notice live.
5. Remove Powered by Links from Footer in WordPress
Some free WordPress themes add links to the footer area. Typically this is a ‘Powered by WordPress’ disclaimer that links to the official WordPress website, but some theme developers also include links to their own websites.
These outgoing links encourage visitors to leave your website and can have a negative effect on your WordPress SEO. With that in mind, it’s a good idea to remove them from the footer area by going to Appearance » Customize.
Some themes make it difficult to remove these links so you may have to spend time looking through the different settings.
To start, we recommend looking for any settings labeled ‘Footer Options,’ ‘Footer & Copyright Options,’ or similar.
Here, you should be able to delete the links or even replace them with your own URLs.
Some themes hard-code the links in the theme files and don’t give you the option to remove them using the WordPress Customizer.
In that case, you can remove these links by editing the footer.php file. For step-by-step instructions, please see our guide on how to remove the powered by WordPress footer links.
Removing Powered By Links with the Full-Site Editor
To remove the ‘Powered By’ links in a block-enabled theme, simply open the full-site editor by following the same process described above.
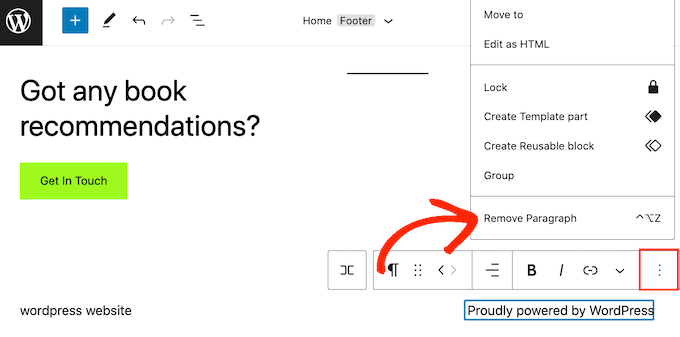
In the editor, find the ‘Proudly powered by WordPress’ or similar text. You can replace this with your own text by typing into the ‘Paragraph’ block.
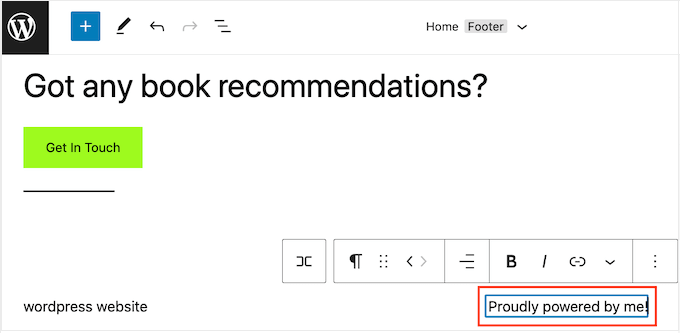
If you want to remove the text completely, then simply click to select the ‘Paragraph’ block. After that, click on the three-dotted ‘options’ button.
Finally, click on ‘Remove Paragraph’ to delete the block.
You can then go ahead and click on ‘Save.’ Now, if you visit your website you’ll see that this text has been removed.
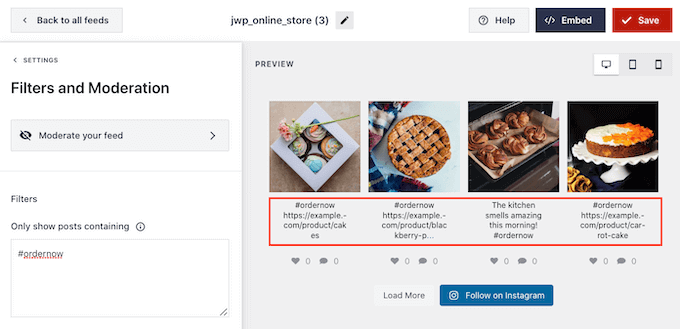
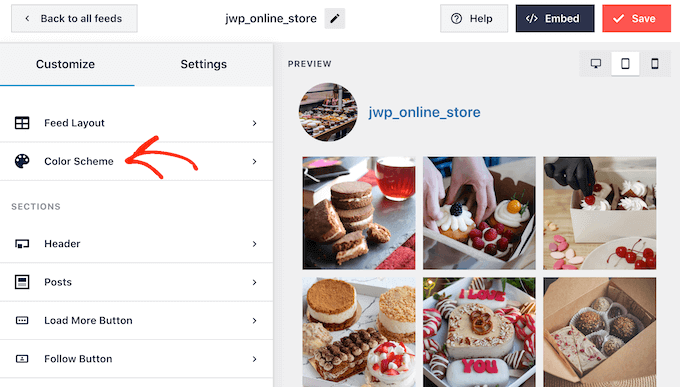
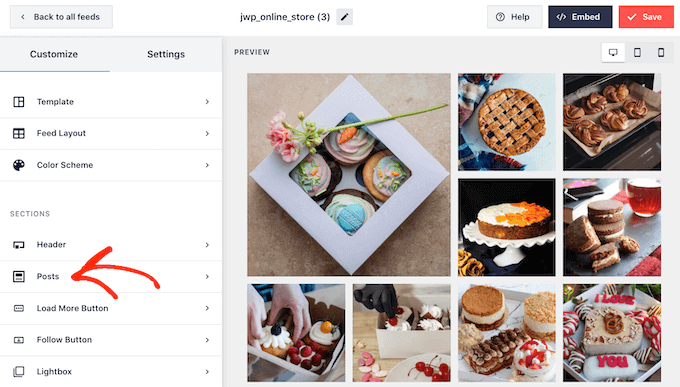
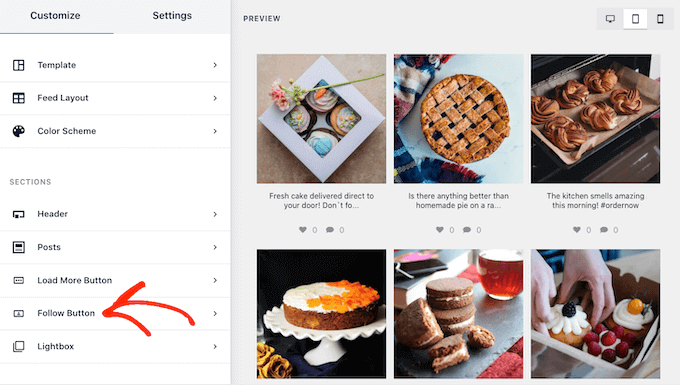
6. How to Add Instagram Feed in WordPress Footer
Do you regularly post beautiful photos and videos to Instagram?
People won’t see your Instagram content if they just visit your website. With that in mind, you may want to show recent Instagram photos in your website’s footer.
This is an easy way to promote your social media page and encourage more people to follow you on Instagram.
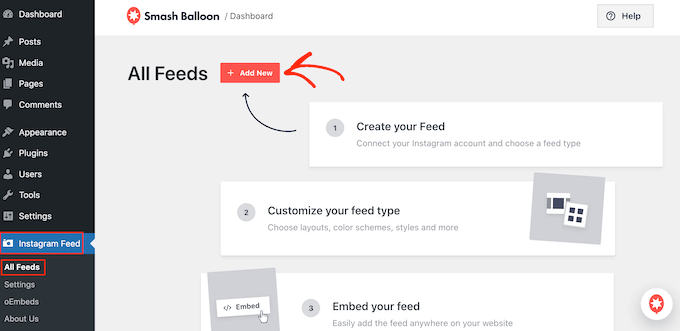
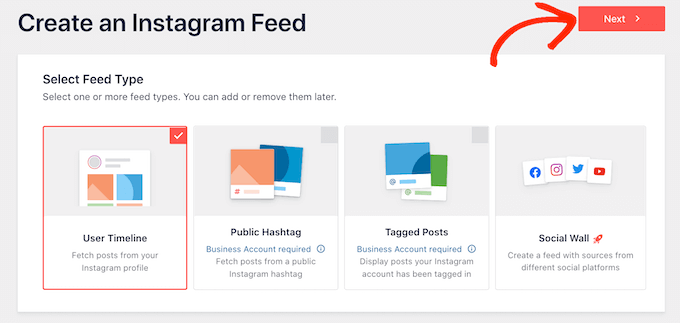
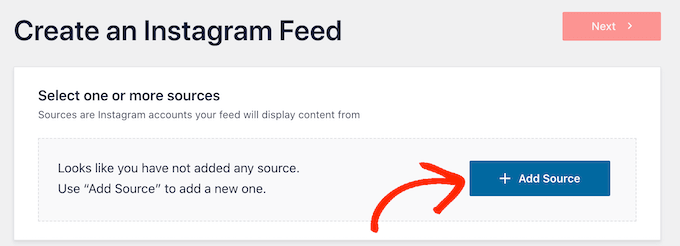
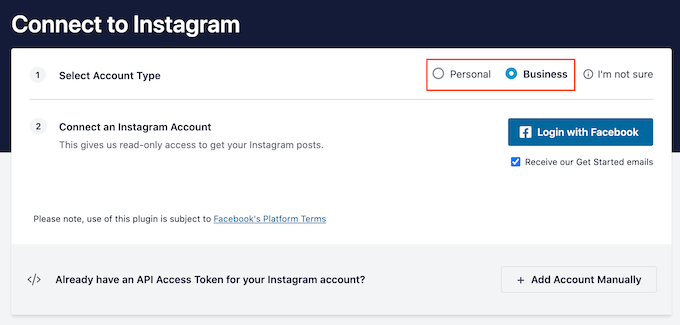
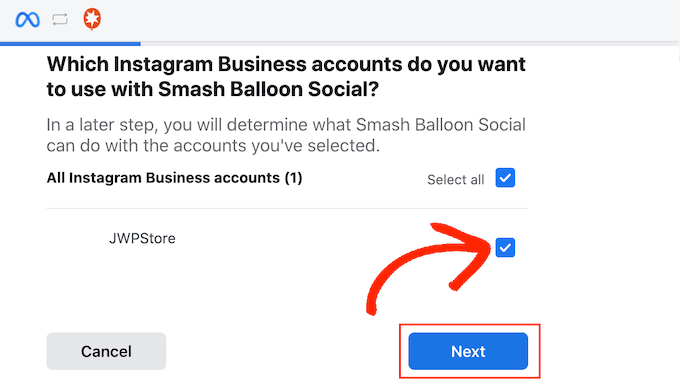
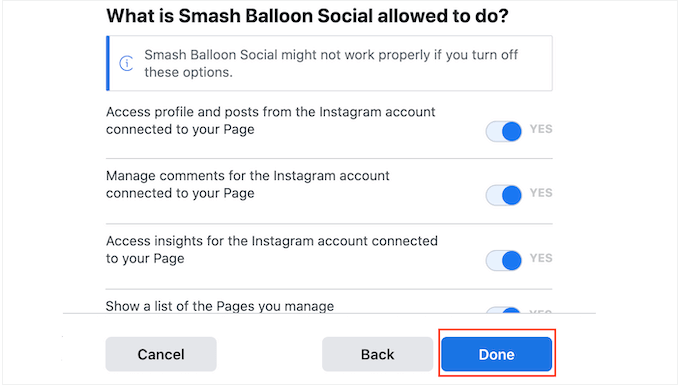
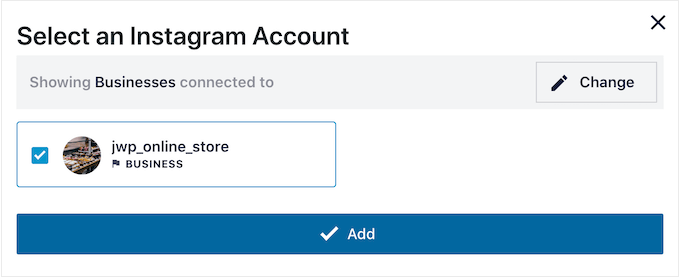
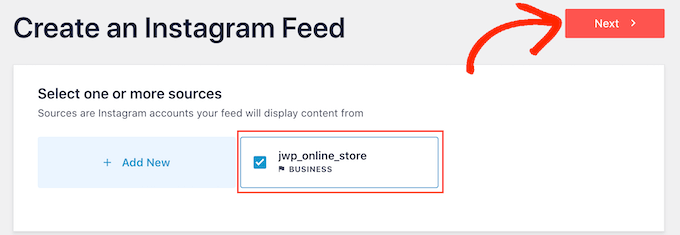
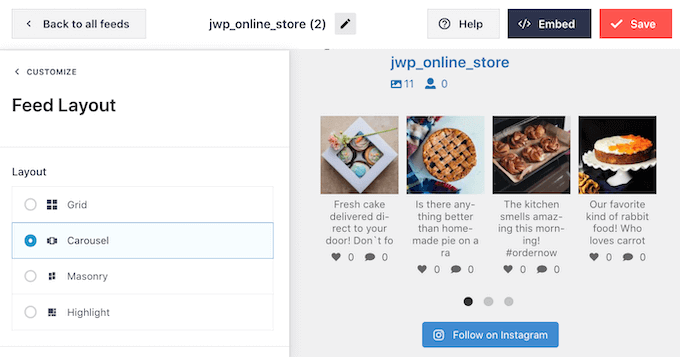
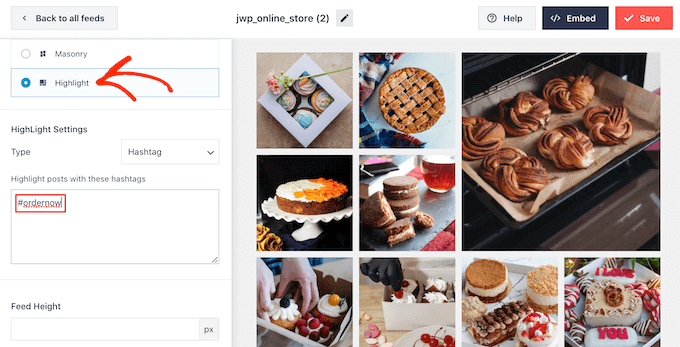
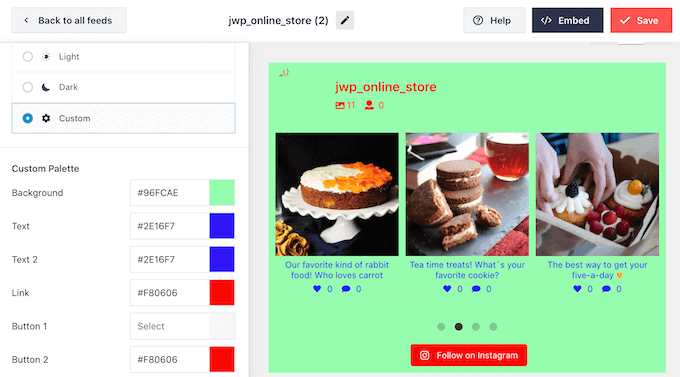
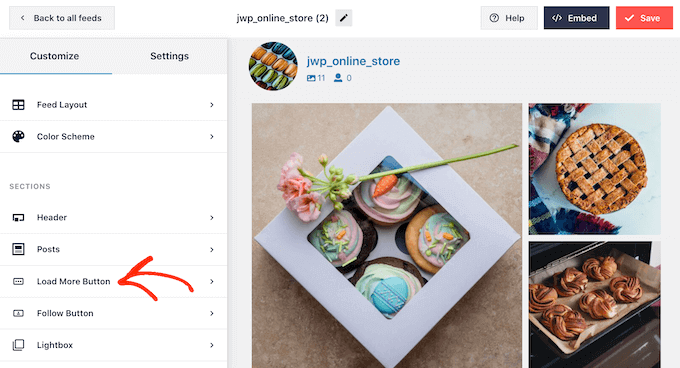
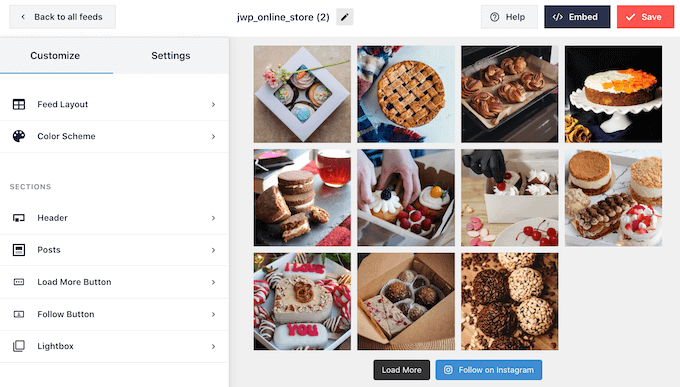
The easiest way to add a photo feed in the WordPress footer is by using Smash Balloon Instagram Feed. It is the best Instagram plugin for WordPress and allows you to easily add a photo feed to your website.
After adding the social media feed to your footer, Smash Balloon will fetch new Instagram photos automatically. In this way, your footer will always show your latest Instagram photos to the people who visit your website.
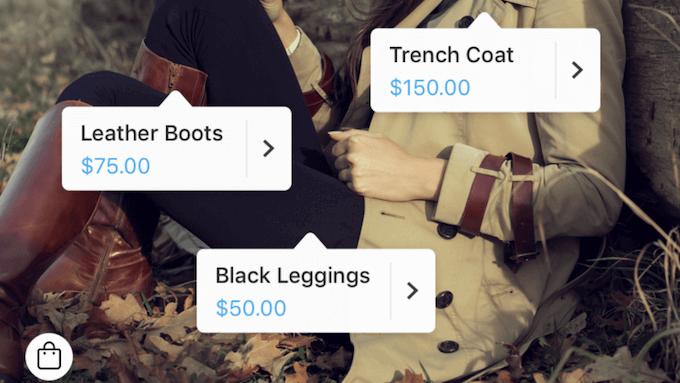
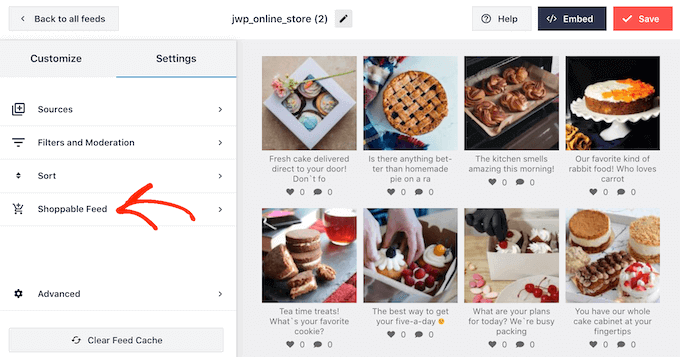
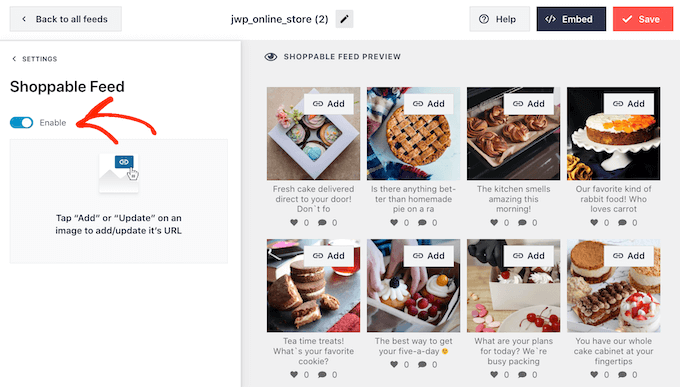
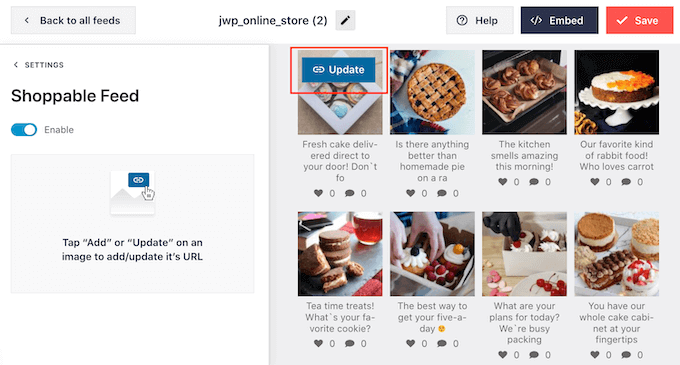
If you run an online store, then you can even get more sales by adding Instagram shoppable images to the WordPress footer.
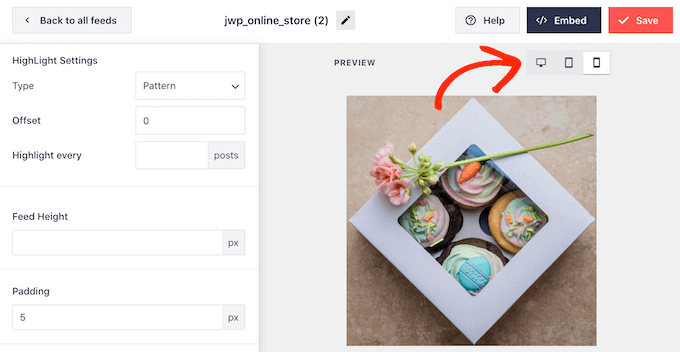
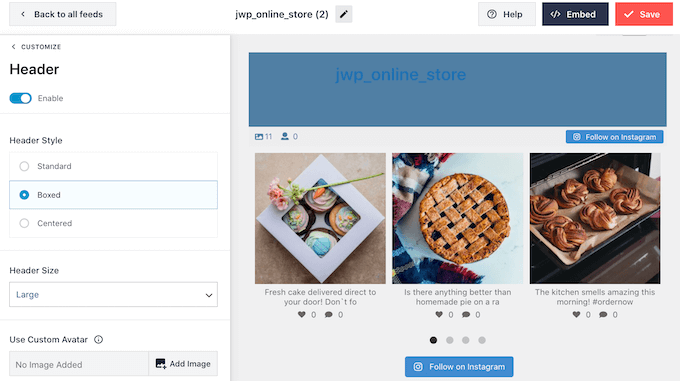
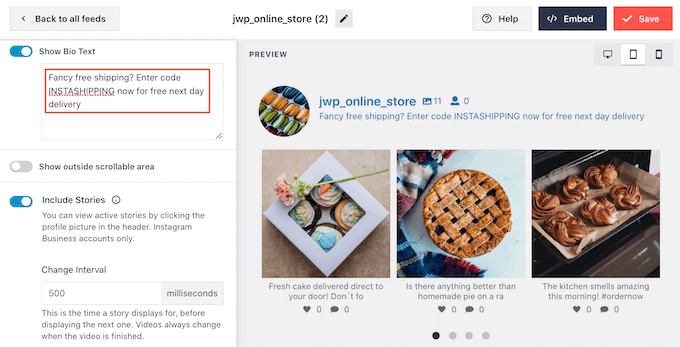
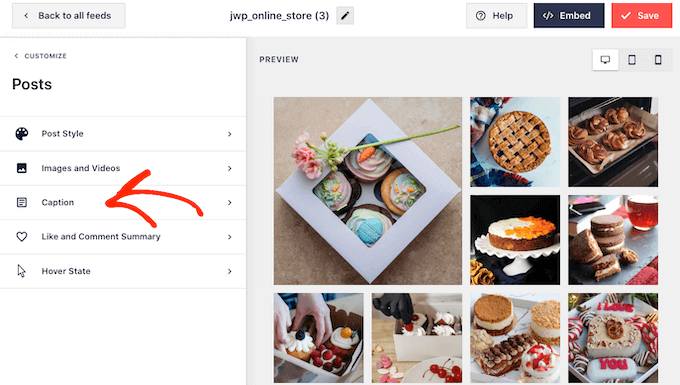
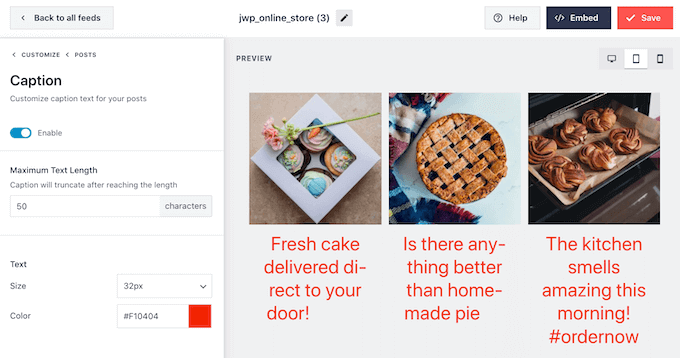
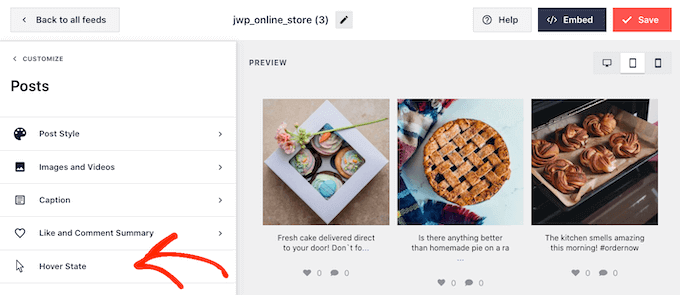
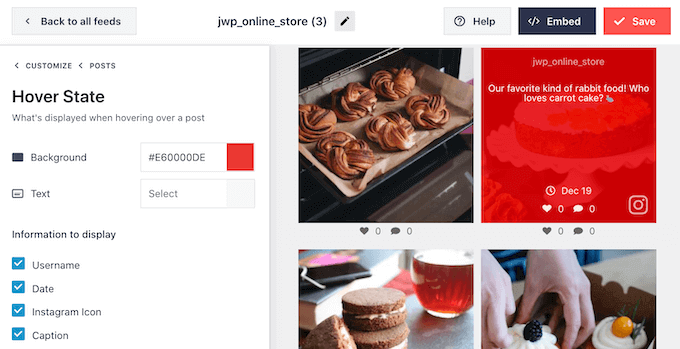
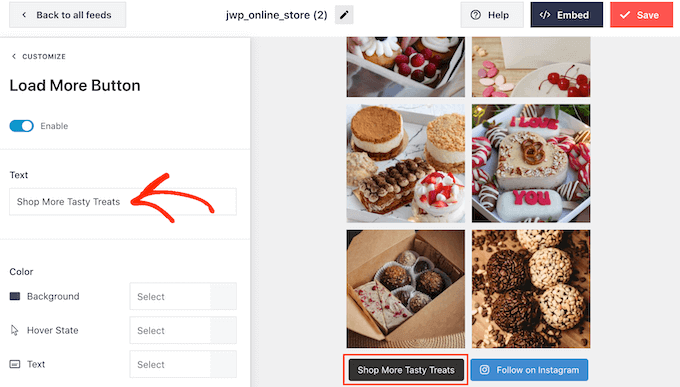
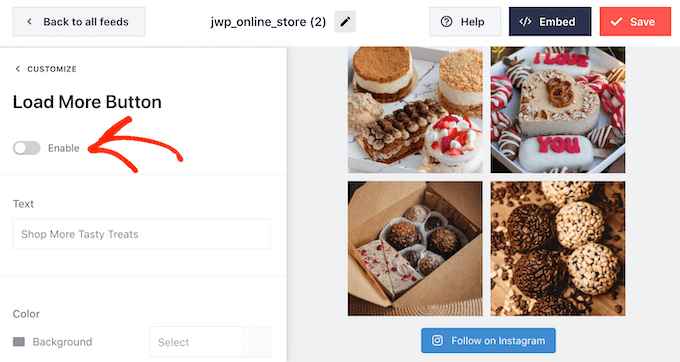
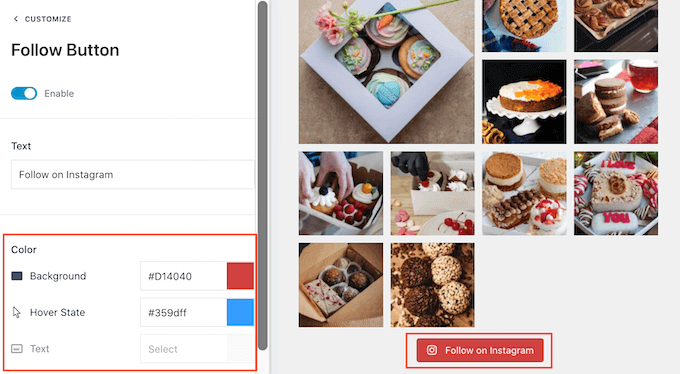
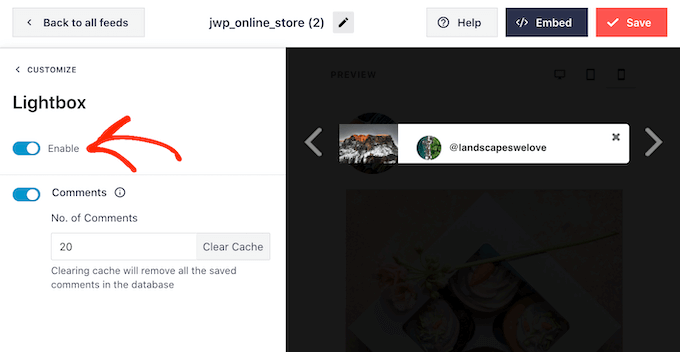
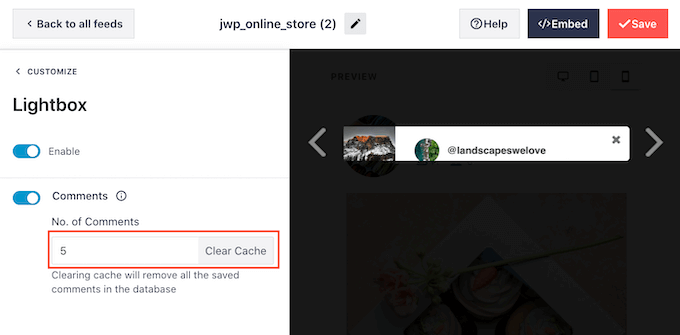
Smash Balloon has all the tools you need to fine-tune how the Instagram feed looks in your footer. For example, you can choose between different layouts, add a ‘Follow’ button, optimize your feed for mobile devices, and more with the user-friendly Smash Balloon editor.
For step-by-step instructions, please see our guide on how to how to easily embed Instagram in WordPress.
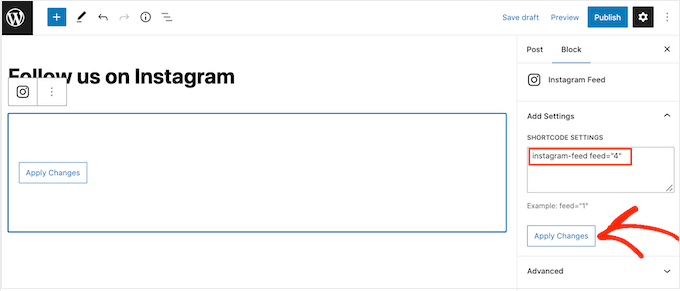
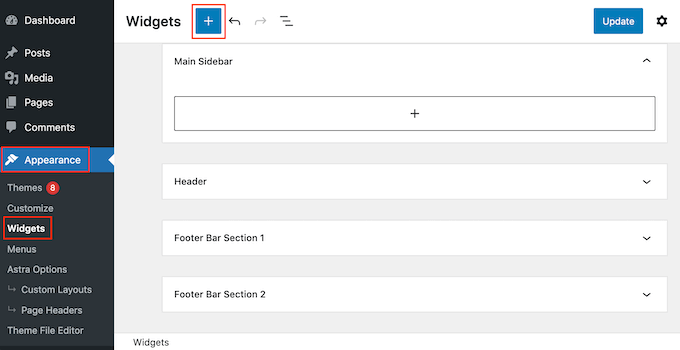
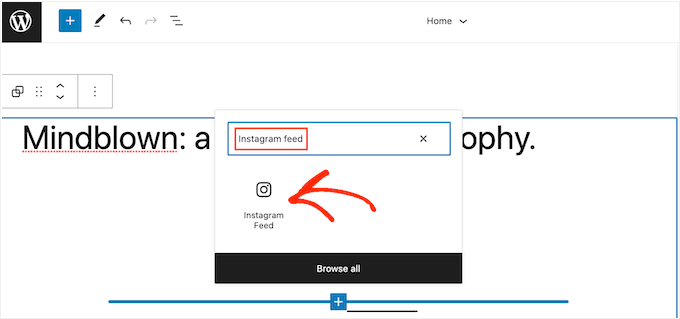
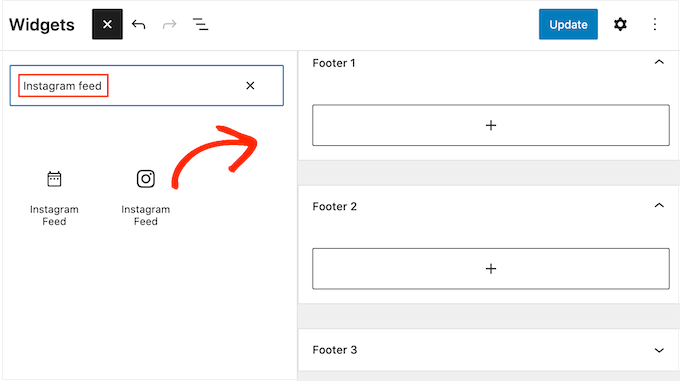
When you’re happy with how the feed looks, it’s time to add it to your website’s footer. Simply go to Appearance » Widgets and click on the blue ‘+’ button.

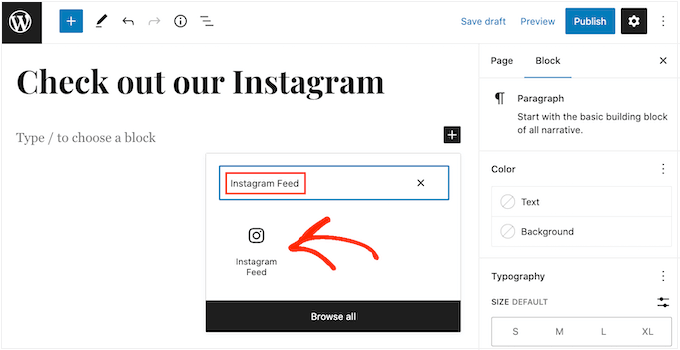
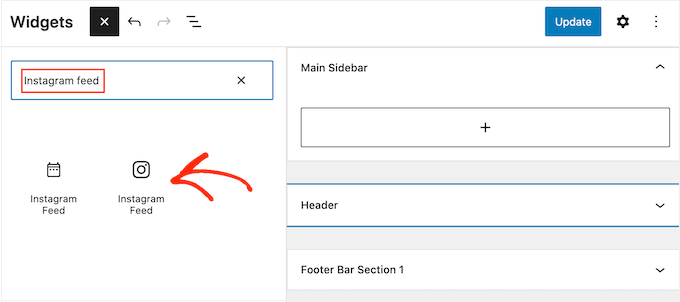
In the search field, type in ‘Instagram Feed’ to find the right block. Just be aware that WordPress has a built-in Instagram Feed button, so make sure you use the block that has the official Instagram logo.
You can now drag and drop the block onto your site’s footer.
With that done, simply click on ‘Update.’ After that, you can visit your website to see your Instagram feed in the footer.
Adding an Instagram Feed with the Full-Site Editor
It’s easy to add the Smash Balloon Instagram feed to a block-enabled WordPress theme.
Simply open the full-site editor following the exact same process described above, and then click on the ‘+’ button in the footer template.
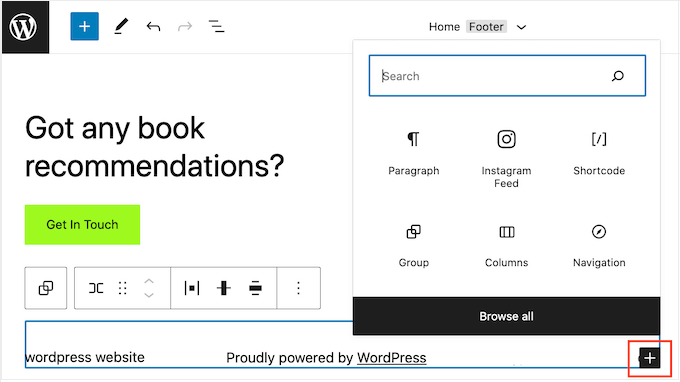
With that done, type in ‘Instagram Feed’ and select the right block when it appears to add it to the footer.
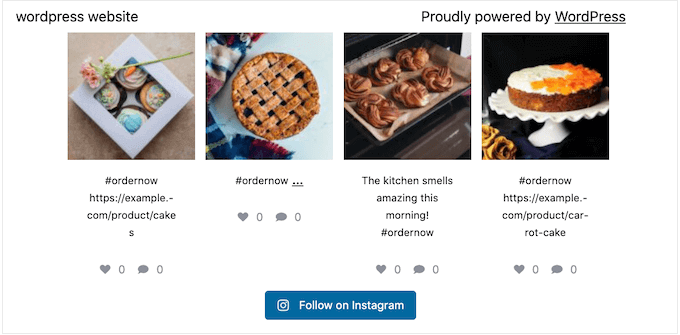
The full-site editor will automatically show the Instagram feed you created.
With that done, simply click on ‘Save’ to make the Instagram feed live.
7. Add a Sticky Footer Bar in WordPress
Want to show special offers or notifications in the footer area?
You can create a footer bar that stays stuck to the bottom of the screen as the visitor scrolls.
To create this kind of sticky footer bar, you’ll need OptinMonster. It is the best conversion optimization software in the market and allows you to turn website visitors with a high bounce rate into users and customers.
OptinMonster also comes with powerful display rules so you can show personalized custom messages in your website’s footer.
First, you’ll need to sign up for an OptinMonster account.
After that, install and activate the OptinMonster plugin on your WordPress website. Upon activation, select Connect Your Existing Account.
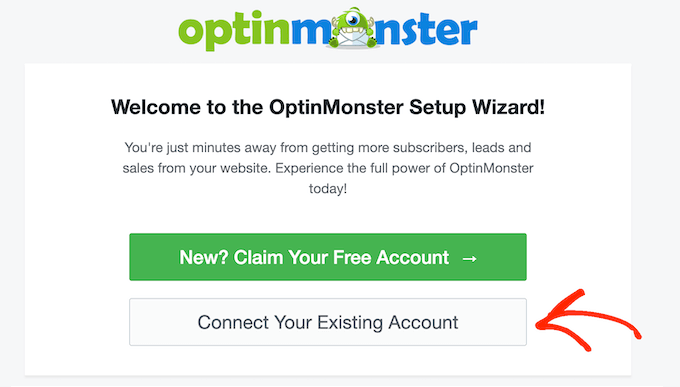
You can now type in the email address and password for your OptinMonster account.
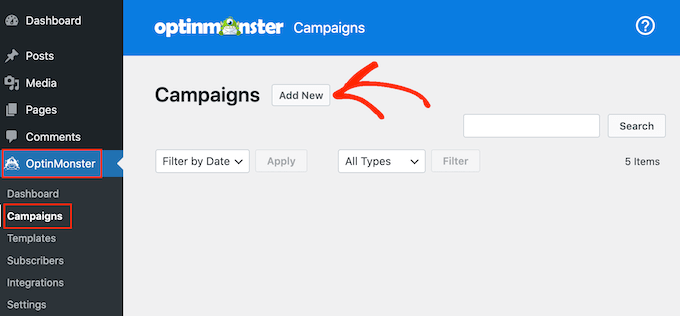
Once connected, go to the OptinMonster » Campaigns page and click on the ‘Create your first campaign’ or ‘Add New’ button.
On the next screen, choose ‘Floating Bar’ as your campaign type and then select a template.
To preview an OptinMonster template, simply hover your mouse over it and then click on the ‘Preview’ button.
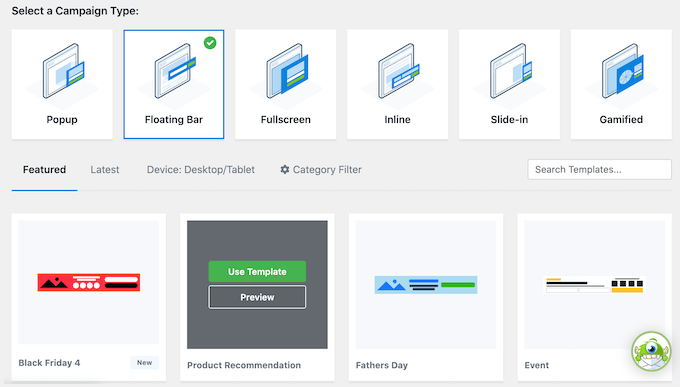
When you find a template you like, click on its ‘Use Template’ button.
You can then type in a name for the campaign. This is just for your reference so you can use any title you want.
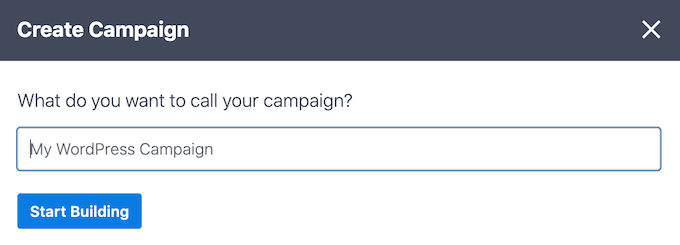
With that done, click on Start Building.
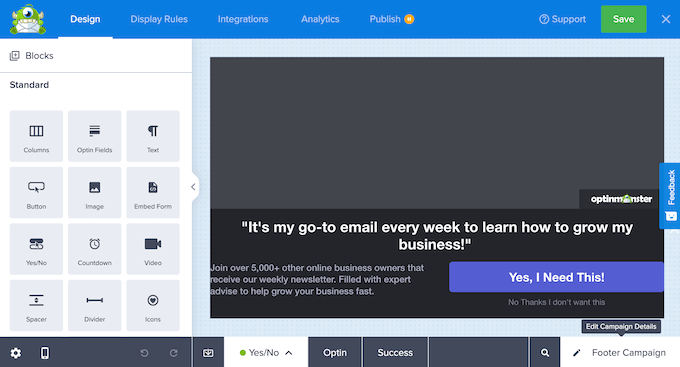
This will take you to OptinMonster’s drag-and-drop campaign builder where you can design the footer bar. Simply click on any element you want to edit, or drag and drop new blocks from the left-hand column.
When you’re happy with how the campaign looks, simply click on the ‘Publish’ button.
Then, select ‘Publish’ to make the campaign live.
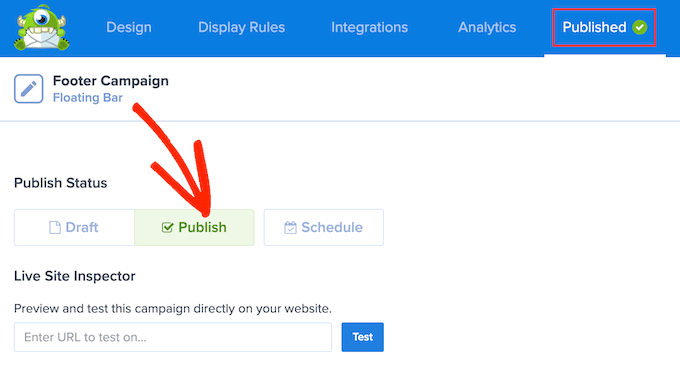
You can now select the ‘Save’ button to store your changes and then click on the ‘X’ in the upper-right corner to close the OptinMonster campaign builder.
Back in the WordPress dashboard, open the ‘Status’ dropdown and select ‘Published.’
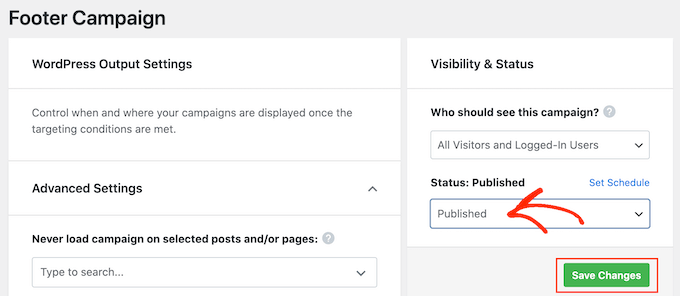
Finally, click on ‘Save.
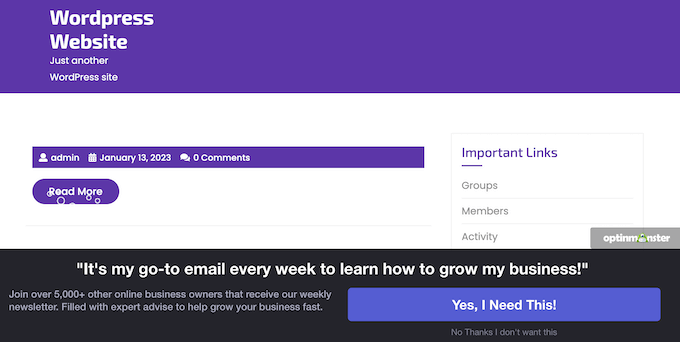
Now, visit your WordPress website to see the floating footer bar in action.
You can use OptinMonster to create all kinds of high-converting campaigns including slide-in footer popups, countdown timers, and targeted footer notifications that can help you recover abandoned cart sales.
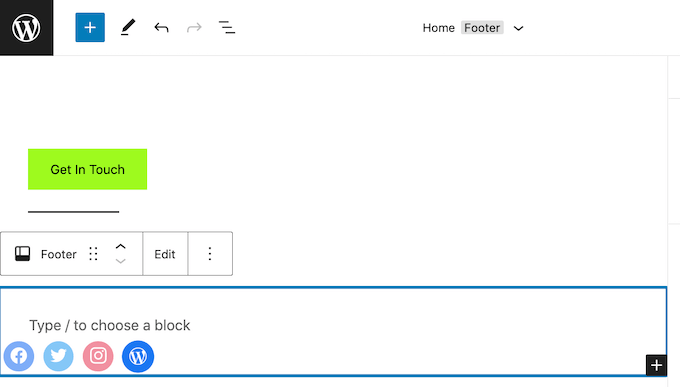
8. Add Social Buttons in WordPress Footer
Another good way to use the footer space in your WordPress theme is by displaying social media icons. This is an easy way to promote your different profiles and get more followers on Twitter, Facebook, and other popular platforms.
The best way to add these buttons is by using the Social Icons Widget plugin. This plugin supports all the major social networks and comes with multiple icon styles that you can choose from.
After activating Social Icons Widget, go to the Appearance » Widgets page. You can then click on the ‘+’ button and search for ‘Social Icons Block.’
When the right block appears, drag and drop it onto the footer area.
By default, the Social Icons Block already has a few social media icons built-in.
To link any of these icons to your own social profiles, simply give it a click. In the little bar that appears, type in the URL of the page you want to promote.
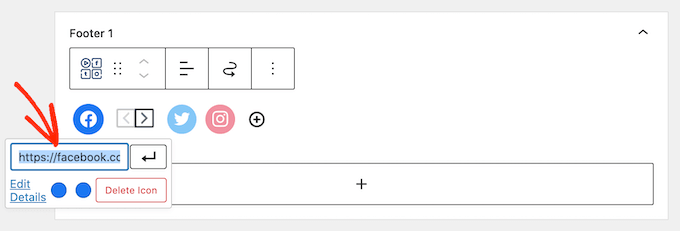
Want to use a different icon for this social media platform?
Then simply click on the ‘Edit Details’ link. This opens a window where you can choose a new image for the social icon.
Simply repeat this process for each built-in social media icon.
If you want to remove one of these default icons, then click on the ‘Delete icon.’
There are countless social media platforms and other websites that you may want to add to the footer area.
To do this, click on the ‘+’ button.
You can now choose a social media icon and add a link by following the same process described above.
When you’re happy with how the social media icons are set up, click on ‘Update.’ Now, simply visit your website and scroll to the footer area to see the social buttons in action.
Bonus: Want to add more social features to your website? Take a look at our expert pick of the best social media plugins for WordPress to grow your audience.
Adding Social Buttons with the Full-Site Editor
Are you using a block-enabled theme? Then you can add social icons to the footer by going to Themes » Editor.
In the footer, click on the ‘+’ button and then type in ‘Social Icons block.’
When the right block appears, click to add it to the footer.
This adds a block with the default social icons.
You can now customize these icons and add new social buttons, by following the same process described above.
When you’re happy with how the buttons look, simply click on the ‘Save’ button. Now if you visit your website you’ll see the social icons in the block-enabled footer.
9. Add a Phone Number in WordPress Footer
If you offer customer support over the phone, then adding your phone number in the WordPress footer area can help users contact you.
For this, you’ll need a business phone number. We recommend using Nextiva, which is the best business phone service for small businesses.
Nextiva allows you to make cheaper calls and use advanced features like call forwarding, unlimited free domestic calling, voicemail to email and text, and more. You can also use the same number on multiple devices and handsets, and manage calls from any device that has an internet connection.
Once you have a business phone number, you’ll need to add it to your website. The easiest way is by using the WP Call Button plugin, which adds a click-to-call button to your WordPress site.

After activating the plugin, go to Settings » WP Call Button in the WordPress dashboard.
Here, click on the ‘Call Now Button Status’ switch so it shows ‘Active.’
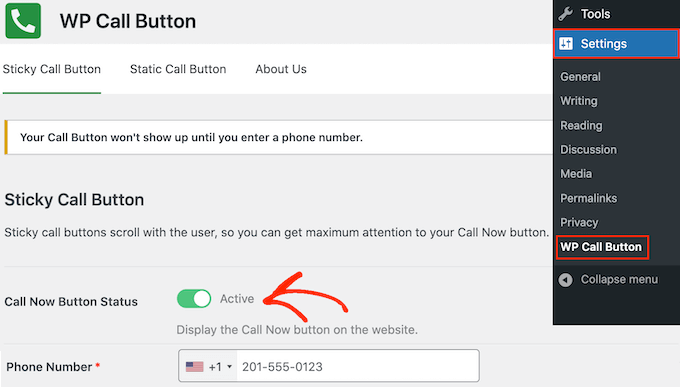
Next, type your business phone number into the ‘Phone Number’ field.
By default, the button shows ‘Call Us’ text but you can replace this with your own custom messaging by typing into the ‘Call Button Text’ field.
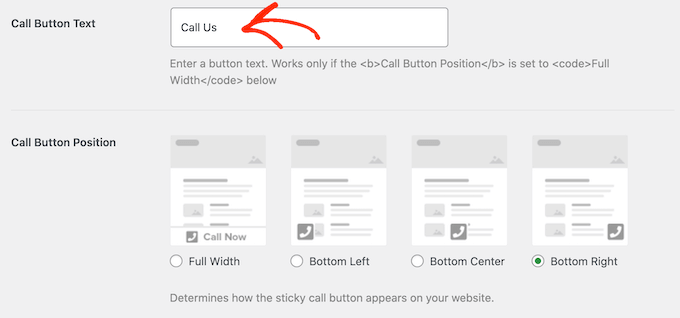
After that, scroll to the Call Button Position section and choose where you want to show the button on your website. For example, you can show the button in the bottom-right corner, or create a banner that covers the whole footer area.
When you’re happy with how the button is set up, click on ‘Save Changes.’ After that, simply head over to your website to see the call-to-click button in action.
Don’t want to use a click-to-call button? Then see our guide on how to add clickable phone numbers in WordPress for some different options.
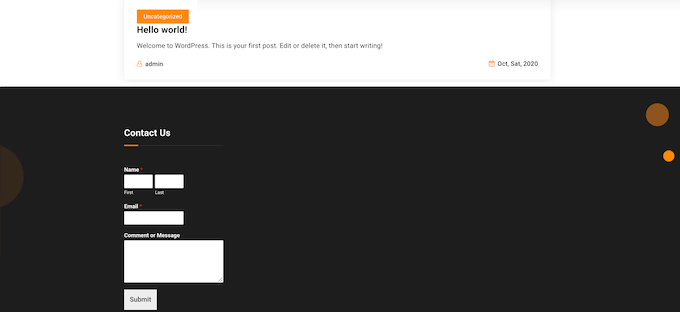
10. Add a Contact Form in WordPress Footer
Your website’s footer doesn’t have to be a dead-end. If you’ve added a navigation menu following the process described above, then you’re off to a great start. However, you can also encourage customers to connect with you by adding a contact form to the footer area.
This is where WPForms comes in.
WPForms is the best WordPress contact form plugin and comes with a ready-made Simple Contact Form template that allows you to create a contact form with just a few clicks.
After activating the plugin, go to WPForms » Add New and type in a name for the contact form. This is just for your reference so you can use anything you want.
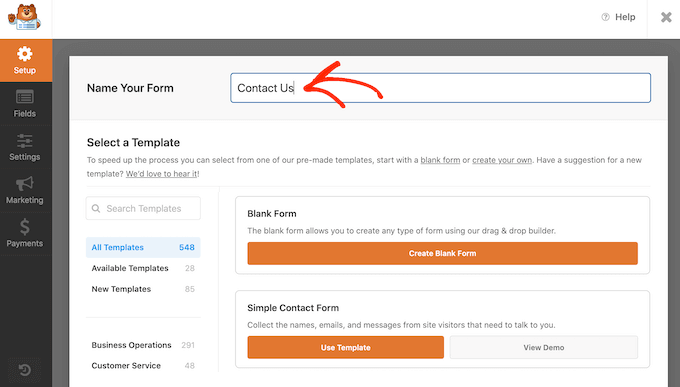
Simply find the ‘Simple Contact Form’ template and click on its ‘Use Template’ button.
WPForms will now open the template in its form builder. The template already has all the fields you’ll typically need, but you can add more fields by dragging them from the left-hand menu and dropping them onto your form.
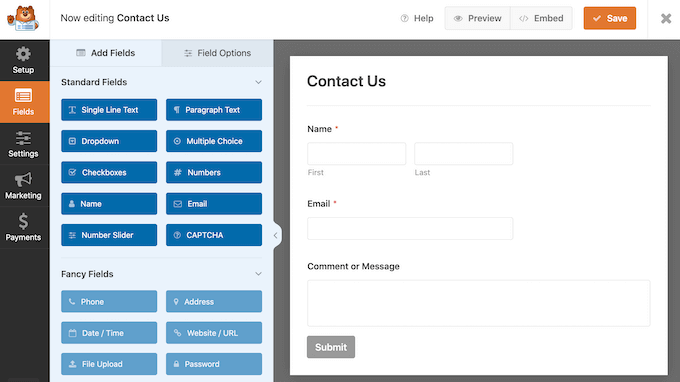
You can also click on any field to edit it, and rearrange them in the form using drag and drop.
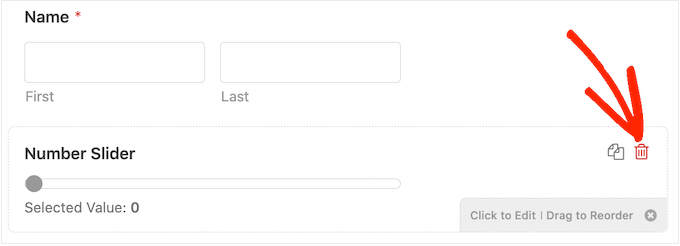
To delete a field, simply hover your mouse over it and then click on the small trash can icon when it appears.
When you’re ready, click on the ‘Save’ button to store your changes.
To add the contact form to your footer, head over to the Appearance » Widgets page in the WordPress dashboard.
Here, click on the ‘+’ button and search for ‘WPForms.’ When the right block shows up, drag and drop it onto your theme’s footer area.
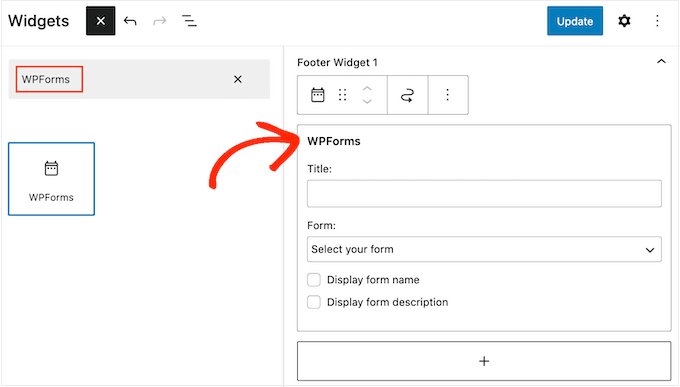
After that, open the ‘Form’ dropdown and select your contact form.
You can also add an optional title, which will appear above the contact form.
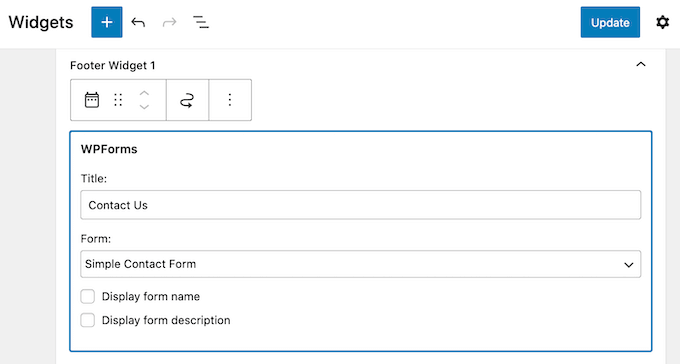
Once you’ve done that, click on the ‘Update’ button.
Now, if you visit your website you’ll see the new contact form in the footer.
Adding a Contact Form with the Full-Site Editor
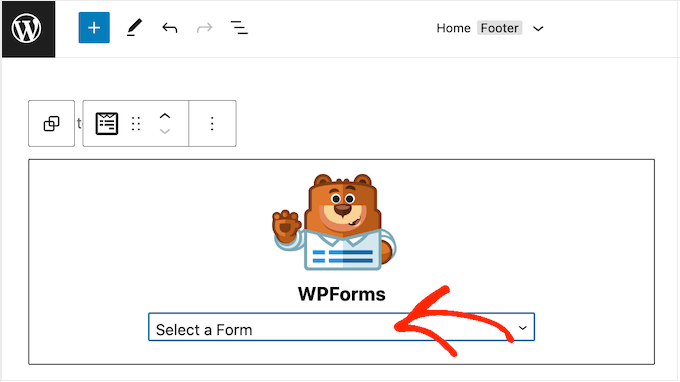
Want to add a contact form to the footer of a block-enabled theme?
Then you’ll need to head over to Themes » Editor. Here, scroll to the bottom of the screen and click on the ‘+’ in the footer area.
With that done, type in ‘WPForms’ to find the right block.

Give this block a click to add it to the footer area.
In the WPForms block, open the ‘Select a Form’ dropdown and choose the contact form we just created.
When you’re ready to make the contact form live, simply click on the ‘Save’ button.
We hope this article helped you decide which things to add to your WordPress footer to make it more useful. Next, you can see our guide on how to improve your WordPress website speed and performance, and our expert pick of the best WordPress plugins to use on your site.
If you liked this article, then please subscribe to our YouTube Channel for WordPress video tutorials. You can also find us on Twitter and Facebook.
The post Checklist: 10 Things To Add To The Footer on Your WordPress Site first appeared on WPBeginner.