WordPress, like any platform, is constantly under threat from security attacks. But the good news is that the WordPress community offers numerous solutions to keep your site safe. Here are some key steps to secure your WordPress site: Add HTTPS/SSL: Use a Secure Admin Username: Enforce Strong Passwords: WORDPRESS NEWS AND ARTICLES TUTORIALS AND HOW-TOS [...]
Ever wondered why Amazon changes its product prices or offers discounts so frequently? The ecommerce giant does this to maximize its profits by charging different prices for the same products, based on demand, supply and inventory, and customer behavior. As a WooCommerce store owner, you too can adopt this pricing strategy that goes by the [...]
A content management system is your best bet for success if you want to build and create your website. The CMS solution helps filter and optimize the content you want to publish on the internet without writing any code. The ideal example would be a car; not many understand the mechanics behind its functioning, but [...]
Are you looking for a service to transcribe your voicemails?
Voicemail transcription helps convert your voicemails to text, so you can read them later on your phone or computer. It saves time, as you don’t have to listen to recordings and quickly view the message in text form.
In this article, we’ll show you the best business voicemail transcription services.
Why Use a Business Voicemail Transcription Service?
Voicemail transcription means converting your audio messages into text format. However, manually transcribing each voicemail is a time-consuming task. Instead, you can use a business voicemail transcription service.
There are a lot of software available that will automatically convert voicemail speech to text. The transcriptions can be sent to you by email or text.
This is more convenient especially when you can’t listen to voicemails. You can quickly read the message anywhere instead of listening to the voice recording.
It also helps streamline your customer support process. Your support staff can search for voicemails from a user and look at previous messages, so they can provide a better customer experience. You can also keep records of your voicemails and connect them to customer relationship management (CRM) software.
That being said, let’s look at the best business voicemail transcription services.
Nextiva is the best virtual phone service in the market that offers powerful features, including voicemail transcriptions. The cloud phone system is easy to use and set up.
It brings multiple communication channels under one roof. For example, you can make HD video calls, send text messages, live chat, voicemails, phone calls, and more from a single place.
Nextiva offers a voicemail to email and text option, where you can receive voicemails inside your inbox. This allows you to respond to customers quickly, even when calls are missed. Once this feature is active, it will automatically transcribe the voicemail.
Besides that, you also get other features like call recording, unlimited calls and texts in North America, toll-free numbers, team chat, auto attendant, call transfer and forwarding, and more.
They also business phone apps for iOS and Android smartphones, so it lets you stay connected with customers anywhere in the world.
At WPBeginner, we use Nextiva for all our business phone needs. We’re huge fans of their platform and the features it offers.
Pricing: You will need the Nextiva Enterprise plan to use the voicemail transcription features, which will cost you $32.95 per user per month.
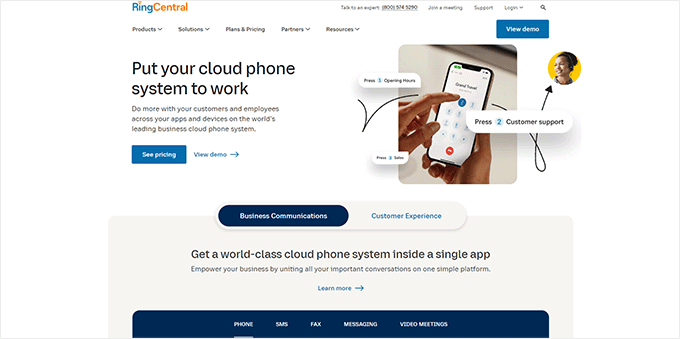
RingCentral is another top business voicemail transcription service. Their business VoIP phone service offers lots of powerful features and is a perfect solution for remote teams.
With its Voicemail for Business feature, you get to choose how to receive voicemails. For instance, you can access voice messages from the RingCentral online account, desktop app, mobile device, email, and desk phone.
RingCentral offers an option to send voicemails to your email address. You’ll receive an audio attachment and transcription, so you can quickly scan through the message without listening to the voicemail.
Other than that, RingCentral offers features like video conference calls, unlimited calling in the US and Canada, voice-to-text features, toll-free numbers, and other call-handling features.
Pricing: The voicemail-to-text feature is available in the Essentials plan and will cost you $19.99 per user per month.
Ooma is a popular VoIP phone service for businesses of all sizes. It is loaded with features, including voicemail transcription and voicemail-to-email options.
You can configure your voicemails to be automatically sent to an email address when they’re left in your Ooma Office app. You will get an audio recording as an attachment and transcribed text in the body of the email.
Ooma is also easy to use and works out of the box. You get more features like a virtual receptionist, hold music, extension dialing, video conferencing, 1-800 phone numbers, a call center, and more. There are also desktop and mobile apps, so you can call and receive voicemails from anywhere in the world.
Pricing: Ooma prices start from $19.95 per month per user. However, the voicemail transcription feature is available in the Ooma Office Pro and Pro Plus pricing plans.
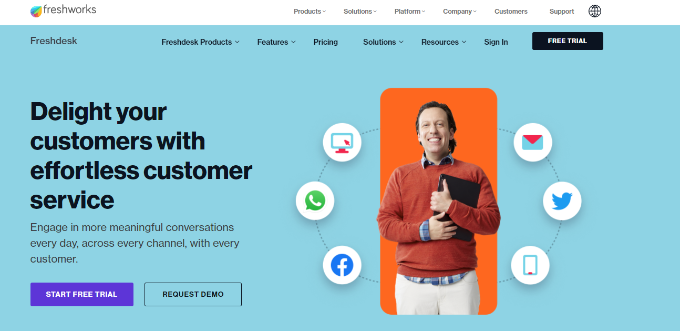
FreshDesk Contact Center is the next business voicemail transcription service on our list. It was previously known as Freshcaller and is a user-friendly virtual business phone provider.
FreshDesk Contact Center offers an AI-power voicemail transcription feature. Its artificial intelligence engine, called Freddy AI, automatically transcribes voicemails.
You can easily access the transcriptions from the FreshDesk phone system and view key metrics like queue time and IVR time. It also lets you enable voicemail transcription for selected phone numbers and set up voicemail greetings.
Other features offered by FreshDesk Contact Center include a call waiting option, vanity numbers, mobile apps, shared lines, route calls to voicemail, block spam calls, call recording, and more.
Pricing: You will need the Growth plan or higher to use the voicemail transcription feature in FreshDesk Contact Center. This will cost you $15 per agent per month (billed annually). There is also a free version of the software you use to get started, but it doesn’t include voicemail transcriptions.
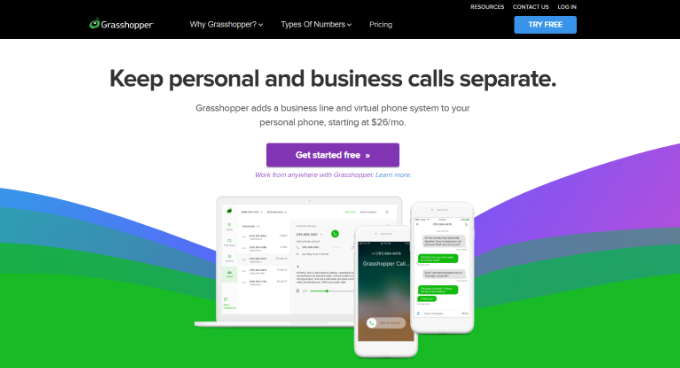
Grasshopper is one of the best business phone services, and it is perfect for small businesses and startups. The service offers a voicemail transcription feature and allows you to receive the transcriptions in your email inbox.
It is very easy to set up, and you can add email addresses where you’d like the forwarded messages to go. Then using the Grasshopper desktop app or mobile apps, you can read the voicemail messages.
Aside from voicemail transcription, Grasshopper is filled with robust features. For instance, you get simultaneous call handling, call forwarding, extensions, call transfers, VoIP calling, virtual fax, reporting, and more.
Pricing: Grasshopper pricing plans start from $28 per month (billed annually), and all plans include the voicemail feature. Do note that it is only available in the US and Canada.
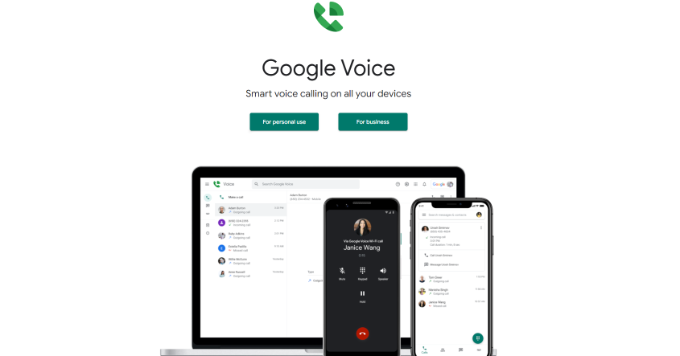
Google Voice is another business voicemail transcription service you can use for your WordPress website. It is part of Google Workspace and easily integrates with other tools like Google Meet and Calendar.
The service uses Google’s AI to turn voicemails into text automatically. The AI is powerful and converts complex words into easy-to-read text.
Besides that, it is very easy to use and offers free calling to US and Canada, spam call blocking, unlimited text messaging in the US, call forwarding, mobile apps, and more.
Pricing: Google Voice prices start from $10 per user per month and includes a voicemail transcription feature.
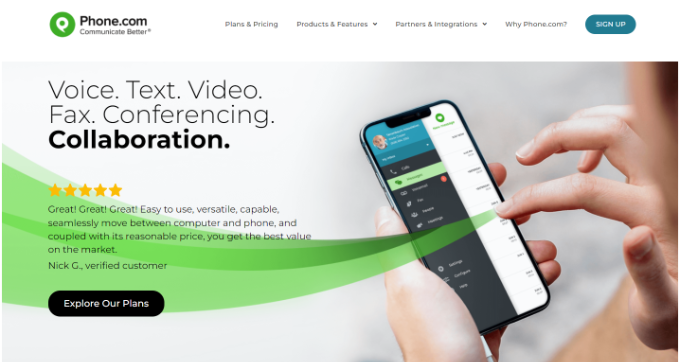
Phone.com is a popular cloud-based virtual phone service offering a voicemail feature. You can listen to audio messages from your online account and set up a voicemail-to-email feature.
Phone.com will automatically transcribe your voicemails and send them to you as email or text messages. This way, you can read the message instead of listening to the voice note or forward the transcription to other team members.
With Phone.com, you also enjoy other powerful features. It is a complete virtual phone solution and offers call forwarding, call transfer, analytics, number porting, audio conferences, fax from phone, text messaging, and more.
Pricing: The voicemail transcription feature is included in the Plus users or higher plan, and its prices start from $15.99 per user per month.
Which is the Best Business Voicemail Transcription Service?
In our expert opinion, the best business voicemail transcription service is Nextiva, and after careful research we chose to use it for our own business.
Nextiva is user-friendly and offers lots of features to help you connect with your customers and team members from anywhere. You can easily receive voicemail transcriptions in your email, handle calls, conduct virtual meetings, create workflows, and more.
Plus, Nextiva has desktop and mobile apps, so you are always connected on the go. It also easily integrates multiple communication channels into a single platform.
If you’re looking for other solutions, then we recommend RingCentral and Ooma as alternatives to Nextiva for voicemail transcriptions.
We hope this article helped you pick the best business voicemail transcription service. You may also want to see our comparison of the best email marketing services and best live chat software for small business.
If you liked this article, then please subscribe to our YouTube Channel for WordPress video tutorials. You can also find us on Twitter and Facebook.
Searching for the best Shopify alternatives? Shopify is a popular e-commerce platform and is widely used by many, but it does not always offer all the features for niche markets and is often too expensive for small businesses. If you’re planning to set up a niche market selling specific products & services to a targeted [...]
Scalability is central to your traffic growth, meaning you must prioritize it when starting your WordPress blog. Scaling a site requires testing the site’s performance, particularly under pressure. However, you must be strategic enough to get excellent results. You must also understand the best strategies to manage and organize large volumes of content. The following [...]
What’s the Difference Between Alt Text and Image Title?
‘Alt text’ is short for ‘alternate text’ and is an attribute that is added to an HTML image tag. The text describes the image, so visitors who can’t see the image and search engine bots will understand what the image is about.
If an image on your WordPress website can’t be found or displayed for some reason, then the alt text will be shown instead, as you can see in the following screenshot.
Alt text is different from the image’s title. The title will be displayed in a small popup box when you bring your mouse cursor over the image.
Alt text and image titles are also used to improve the accessibility of your website for those with poor vision and who use screen reader devices to read your site’s content.
When the screen reader comes to an image, it will read the alt text. Depending on the user’s settings, it may also read the title text.
For both accessibility and search engine optimization (SEO), alt text is more important than title text. This is why we strongly recommend including alt text for all your images.
How to Add Alt Text to an Image in WordPress
WordPress allows you to easily add alt text to your images. You can do this from the block editor, the classic editor, or the WordPress Media Library.
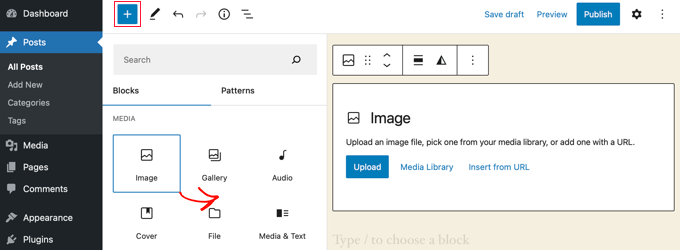
Adding Alt Text in the Block Editor
Simply create a new post or page or edit an existing one, and add an Image block.
Now you need to upload your image or drag and drop it into the Image block. You can then set the alt text on the right-hand side of the page.
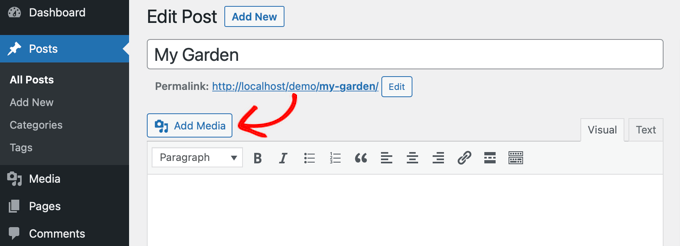
Adding Alt Text in the Classic Editor
If you’re still using the classic WordPress editor, then you can add image alt text when adding the image.
First, click on ‘Add Media’ above the posting box.
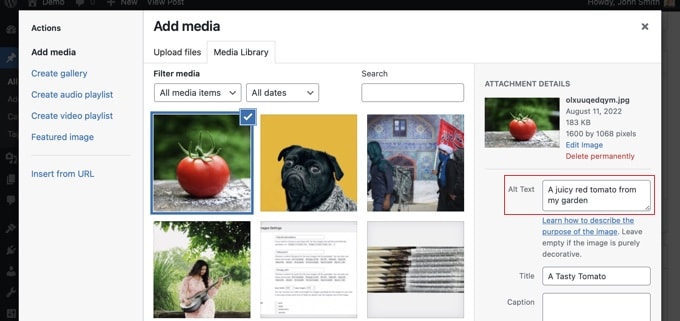
After that, you should either upload the image from your computer or click the ‘Media Library’ tab to view images you’ve already uploaded.
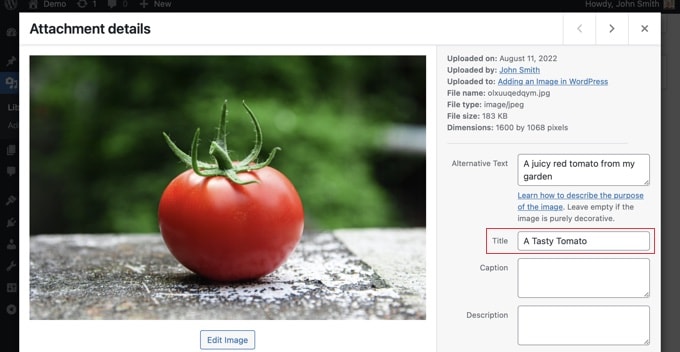
Next, click on the image you want in order to select it, and then type the alt text you want into the ‘Attachment Details’ of your image.
Adding Alt Text in the Media Library
You can also add alt text to an image by going to Media » Library and clicking on the image to edit it.
Remember, this won’t change the alt text for any instances of that image that you’ve already inserted into posts or pages. However, if you add the image to a post or page after adding alt text here, then the alt text will be included with it.
How to Add Image Titles in WordPress
It’s important to understand that there are two types of titles that you can add to your images.
First, there is the default image title WordPress uses internally to identify media files in the Media Library and attachments pages. Second, there is the HTML image title attribute added to images in your posts and pages.
Let’s take a look at how to add both types of titles.
Adding the WordPress Image Title in the Media Library
You can add WordPress media titles to your images using the Media Library. When you edit an image in the Media Library, you will see a ‘Title’ field.
This title is used by WordPress to identify the image. When you click the ‘View attachment page’ link at the bottom of the screen, you’ll see the title is used as the title on that page.
The WordPress media title isn’t necessary for image SEO or for users with screen readers. While it may be helpful in some cases, it’s not as useful as the image’s HTML title attribute. So how do you create that?
Pro Tip: Would you like to automatically use the WordPress media title as the image’s title attribute in your posts and pages? Take a look at the section below where we show you how to do this using All in One SEO Pro.
Adding an HTML Image Title Attribute in the Block Editor
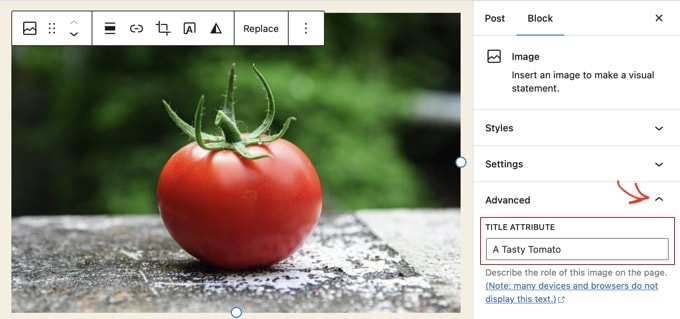
It’s easy to add a title attribute in the block editor. Simply click the image and then click the down arrow next to ‘Advanced’ to show the advanced image options.
Now you can simply type the title in the ‘Title Attribute’ field.
Adding an HTML Image Title Attribute in the Classic Editor
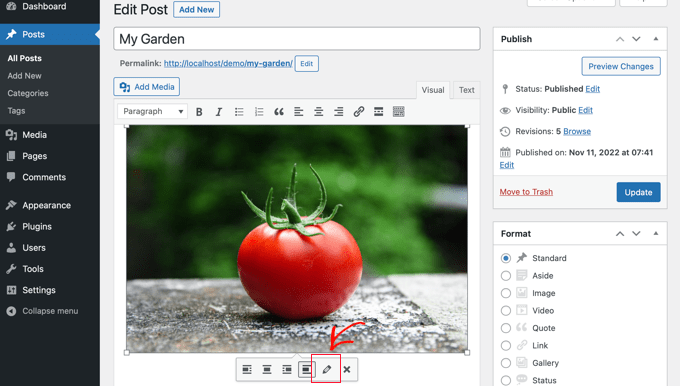
Adding a title attribute using the old classic editor is similar. You can add the title attribute by clicking on an image and then clicking the pencil icon.
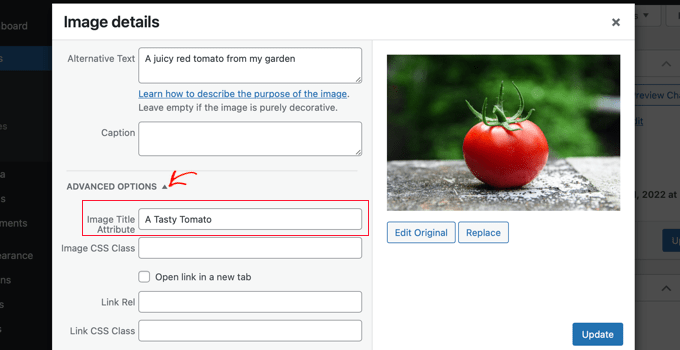
You’ll then see the ‘Image Details’ screen. To set the image title attribute, you need to click the little down arrow next to ‘Advanced Options’ at the bottom.
You can then set the image’s title attribute. Make sure you click the ‘Update’ button at the bottom of the screen when you’re done.
How to Automatically Set Alt Text and Image Titles Using AIOSEO
All in One SEO (AIOSEO) is the best WordPress SEO plugin on the market. It will add a proper image sitemap and other SEO features to improve your SEO ranking. It also lets you automatically set your alt text and image titles, and more.
The first thing you need to do is install and activate the All in One SEO plugin. For more details, see our step-by-step guide on how to install a WordPress plugin. To use the Image SEO feature, you will need the Plus plan or above.
Upon activation, the plugin will launch the setup wizard automatically. You can learn how to configure the plugin in our guide on how to set up All in One SEO correctly.
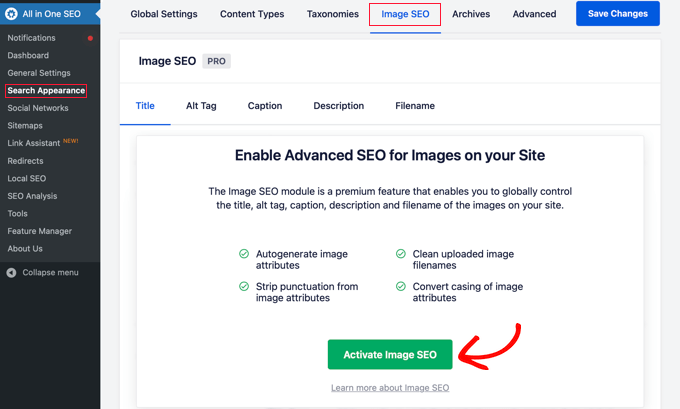
Now you need to navigate to All in One SEO » Search Appearance and then click on the ‘Image SEO’ tab. After that, you’ll have to click the ‘Activate Image SEO’ button to enable the premium image SEO features.
Setting Image Titles Using All in One SEO
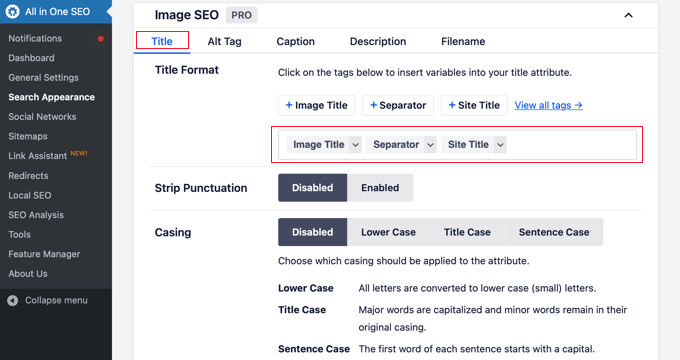
Make sure that you are looking at the ‘Title’ tab of the Image SEO page. Here you can choose tags that will set the format used to automatically generate title attributes for your images.
For example, if you include the ‘+ Image Title’ tag, then each image in your posts and pages will automatically use the WordPress media title in the HTML title attribute.
You can also add other tags, such as your website title, to your image title attribute. All in One SEO can even strip punctuation from the title and change its capitalization.
Setting Alt Text Using All in One SEO
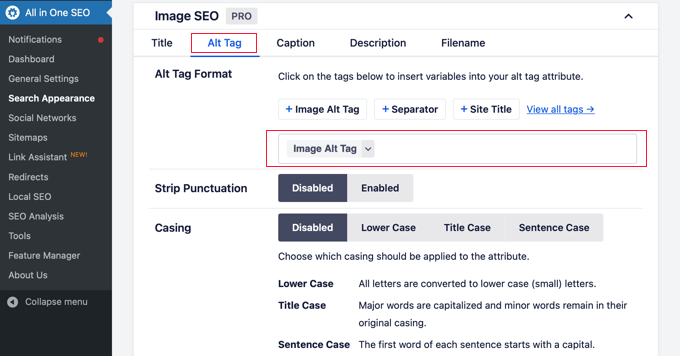
Next, you need to click the ‘Alt Tag’ tab on the AIOSEO’s Image SEO page. Here you can automatically format the alt text of your images.
By default, AIOSEO will simply use the image’s alt text. If you like, you can also add your website’s title and other information to the alt text of each image on your website.
Why Use Alt Text and Image Titles in WordPress?
We strongly recommend using alt text for all images. Here on WPBeginner, we also add a title to all images. However, this is less important than the alt text.
Alt text is important because Google focuses on it as a ranking factor for images. It is also used by screen readers to help visitors with impaired vision to fully engage with your content.
You should never just stuff keywords into alt and title tags. It’s important that you make them descriptive and helpful so that they’re useful for visitors who need them. You can use your keywords where relevant, but don’t overdo it.
For example, if you’re writing an article about the best WordPress hosting, then your target keyword could be “best WordPress hosting”.
You might also have a screenshot in your article showing users how to set up an account with a popular web host like Bluehost. Let’s take a look at some good and bad examples of alt text for that image:
“Account setup” is not very descriptive and also doesn’t include anything related to your keyword.
“Best WordPress hosting, WordPress hosting, best web hosting for WordPress” doesn’t describe the image and is stuffed with keywords.
“Setting up a WordPress hosting account” is much better as it’s descriptive and uses part of the keyword in a natural and appropriate way.
Do you want to add dark mode to your WordPress site?
By adding a dark mode to WordPress, your website will adapt automatically based on the visitor’s browser preferences. You can also add a dark mode toggle to your site, so visitors can easily switch between dark and light modes.
In this article, we’ll show you how to add dark mode to your WordPress website.
What is Dark Mode and Why Add it to Your Website?
Many modern mobile devices and computers use dark mode to minimize the amount of white light that comes from the screen. This can reduce eye strain, especially in low-light conditions.
Some people even believe that it allows you to use computers and mobile devices late into the night without the white and blue light ruining your sleep.
Some devices come with a built-in night mode that simply uses warmer color tones. However, dark mode actually adds dark colors to the device’s background.
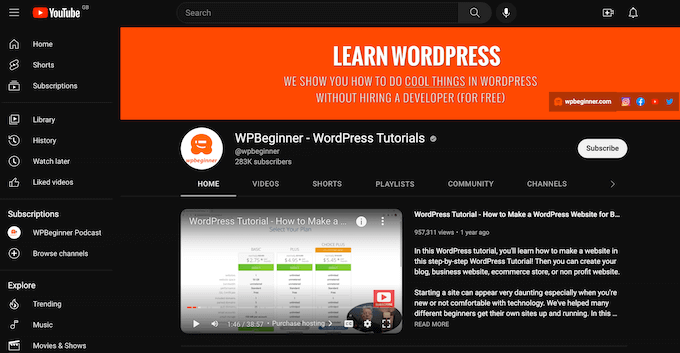
If you have an iPhone or Android smartphone, then you may be able to switch to dark mode using a toggle. Some popular websites like YouTube even offer a built-in dark color scheme.
On desktop computers, you can visit websites in dark mode by using a Chrome extension such as Night Eye.
Here’s how the WPBeginner website looks using that extension:
By adding a dark mode toggle to your website, users will be able to choose the mode they prefer without having to install a special browser extension.
Many plugins also allow you to customize how dark mode looks on your website, so you don’t have to use the browser or device’s default settings.
You can even add dark mode to your WordPress admin area. This can be useful if you work on your site in the evenings or at night, or if you’re suffering from eye strain.
With that in mind, let’s see how you can add dark mode to your website’s public-facing front-end, and the admin area of your WordPress website.
Tip: Want to use a dark color scheme, even when the visitor’s device is in normal or daytime mode? Then check out our list of the best dark themes for WordPress.
How to Add Dark Mode to Your WordPress Website
The easiest way to create a dark mode for your website is by using Droit Dark Mode. This plugin adds a toggle so visitors can enable dark mode on the front end of your site. It can even add a toggle to the admin area, so you can enable dark mode for the WordPress dashboard.
First, you’ll need to install and activate the Droit Dark Mode plugin. For more details, please see our guide on how to install a WordPress plugin.
Upon activation, go to Droit Dark Mode » Preset Colors and choose how your dark mode will look to visitors. The free version of the plugin comes with two preset colors, so select the color that you want to use.
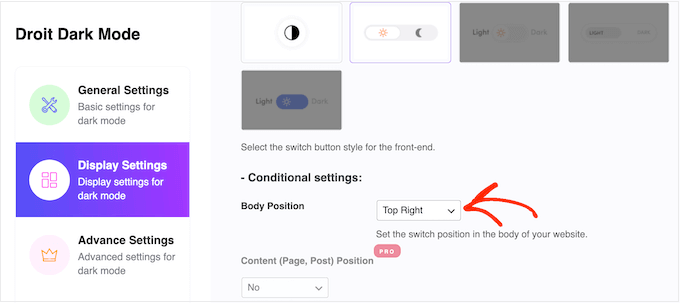
After that, click on ‘Display Settings’ and select a style for your dark mode switch.
Next, open the Body Position dropdown and choose where the slider will appear on your WordPress blog or website. You’ll typically want to add it to the top of your site so visitors can easily switch between the different modes.
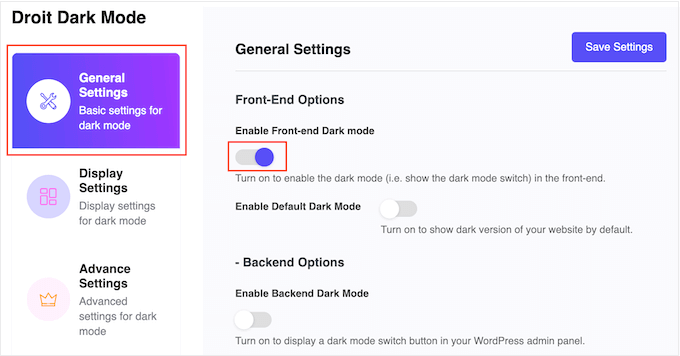
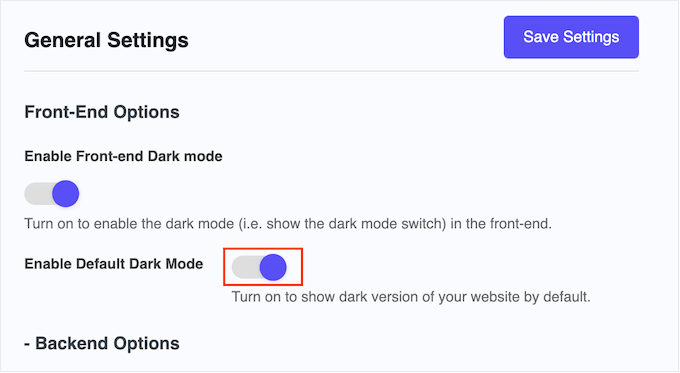
With the setup out of the way, it’s time to enable dark mode by selecting ‘General Settings.’
To start, you’ll need to activate ‘Enable Front-end Dark mode,’ which will add the switch to your website’s front-end.
At the moment, WordPress will always load your site in regular, light mode.
If you want to make dark mode the default, then simply click to activate the ‘Enable Default Dark Mode’ switch.
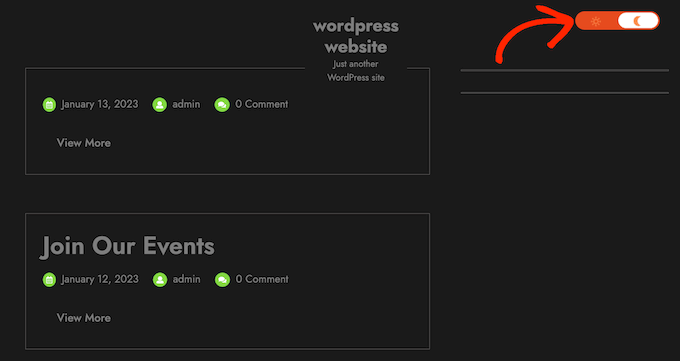
With that done, just click on ‘Save Settings.’ Now if you visit your website, you’ll see the new dark mode switch in action.
To enable and disable dark mode, simply give the switch a click.
Adding Dark Mode to Your WordPress Admin Area
You can change the admin color scheme in WordPress using the built-in settings. However, none of the default color schemes reduce the white light coming from the screen.
If you work late into the evening or suffer from eye strain, then you can try adding a dark mode to the WordPress admin area.
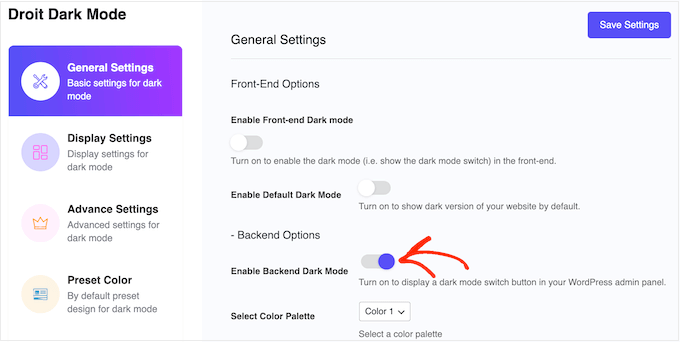
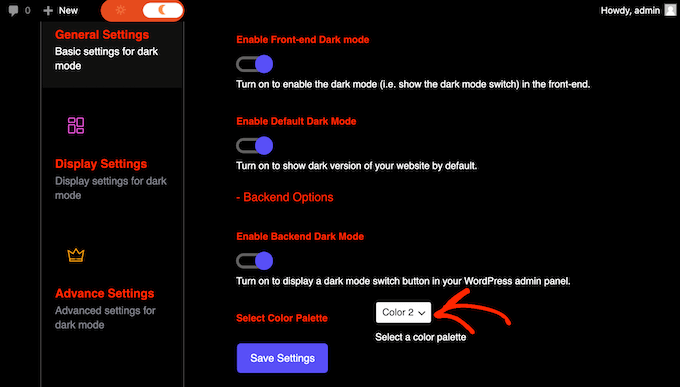
Simply go to Droit Dark Mode » General Settings and click to activate the ‘Enable Backend Dark Mode’ toggle.
After that, you can choose a color scheme for the admin dark mode. Just open the new ‘Select Color Palette’ dropdown and select either Color 1 or Color 2.
With that done, click on ‘Save Changes.’
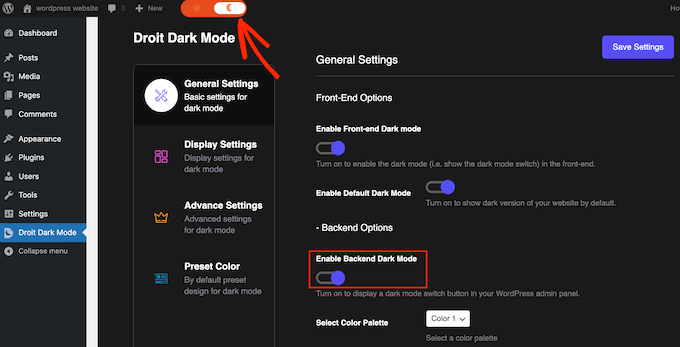
Droit Dark Mode will now add a dark mode toggle to the admin toolbar. To see admin dark mode in action, just click the toggle.
If you’re not happy with how dark mode looks, then open the ‘Select Color Palette’ dropdown and choose a new style from the list.
After that, click on ‘Save Settings’ and use the toggle to see the new colors in action.
It’s no secret that when it comes to WordPress, speed matters. Playing a critical role in determining your search rankings and -more importantly- the user experience you deliver, maintaining optimal performance remains a crucial challenge for many WordPress users. Of course, there are countless tools, techniques, and strategies to help you optimize your site for [...]
Businesses create websites to serve an important function: generate and convert leads. One of the easiest ways to convert more leads through your website is to build it using an appealing WordPress theme. Many WordPress themes are equipped with subscription offers and contact forms, which should improve your conversion rates. These themes are popularly known [...]