Are you wondering which marketing data you should be tracking on your WordPress website?
After launching a website, most small business owners rely on their best guesses to make important marketing decisions. Not only does that add huge risk, but it also significantly slows down growth.
In this guide, we will share the top website marketing data that you must track on every WordPress site, so you can make data-driven decisions to grow your business.

Why Do You Need to Track Marketing Data in WordPress?
We believe it’s easy to double your traffic and sales when you know exactly how people find and use your website. Most business owners do not realize how easy it is to track important marketing metrics on your WordPress site.
For example, with a few clicks, you can find out who your visitors are, where they are coming from, and what they do on your website. You can learn which of your articles are getting more visits and which pages on your site are not getting any views.
If you run an online store, then you can see what’s your website conversion rate, which page drives the most sales, what are your top referral sources, and more.
You can use all this marketing data to make informed business decisions and grow your business with confidence.
That said, let’s take a look at the top website marketing stats that you must track on every WordPress site. You can click the links below to quickly jump to any section you’re interested in:
- Set Up Google Analytics in WordPress
- Track Outbound Links Using Google Analytics
- Enhanced Ecommerce Tracking with Google Analytics
- Track User Engagement Data with Google Analytics
- Track Campaign Links with UTM Codes
- Track and Improve Facebook Retargeting Campaigns
- Tracking Google AdSense Campaigns
- Monitor Your Site with Google Search Console
- Track Your Keyword Rankings
- Track Your Email List Growth and Performance
1. Set Up Google Analytics in WordPress
The best way to track marketing data on your WordPress website is by using Google Analytics. It is the most popular website analytics software in the world and is loved by businesses, bloggers, and marketers because it provides a treasure trove of information.
For example, you can use Google Analytics to learn:
- The number of visits and pageviews on your website
- Who is visiting your website (visitor location, browser, operating system, screen size, and more)
- How they found your website
- How users interact with your website
- And a whole lot more
Google Analytics is an essential tool in our own business. However, you’ll need to add a tracking code to your website, which requires editing code. This can be tricky for beginners, and the slightest mistake can mess up your tracking.
An easier way of setting up Google Analytics is using MonsterInsights. It is the best WordPress Analytics plugin and helps you set up advanced tracking in WordPress without editing code.
See our step-by-step tutorial on how to install Google Analytics in WordPress.
2. Track Outbound Links Using Google Analytics
Any link that takes users away from your website is called an outbound link. If you use affiliate marketing to make money from your website, then those outbound links are also known as affiliate links.
Tracking these outbound links help you see how much traffic you are sending to other sites, and you can use this data to build stronger partnerships with those sites.
As a blogger, you can see which affiliate links are clicked more often by your visitors. This information can help you make a proper affiliate marketing strategy and boost your referral earnings.
The easiest way to track affiliate links in WordPress is by using MonsterInsights. It tracks outbound links and affiliate links on your site out of the box.
You also get easy-to-understand reports inside your WordPress dashboard, including your top affiliate and outbound links.

For detailed instructions see our guide on how to track outbound links in WordPress.
3. Enhanced Ecommerce Tracking with Google Analytics
If you run an online store, then you need to enable enhanced eCommerce tracking in Google Analytics. This would allow you to track the following customer information on your online store.
- Shopping behavior of your customers
- Checkout behavior and tracking the abandoned cart information
- Product lists performance
- Uncover top conversion sources
- Sales performance
Setting up enhanced eCommerce tracking on your WordPress store can be difficult. However, MonsterInsights makes it easy for you and it literally takes a few clicks to configure with no coding needed.
It works seamlessly with the best eCommerce plugins for WordPress, like WooCommerce, Easy Digital Downloads, LifterLMS, MemberPress, and more.
The best part is that you get to see eCommerce reports in your dashboard. It shows how your online store is performing, which products are getting the most sales, where your customers are coming from, and more at a glance.

For details, see our guide on how to enable customer tracking in WooCommerce with Google Analytics.
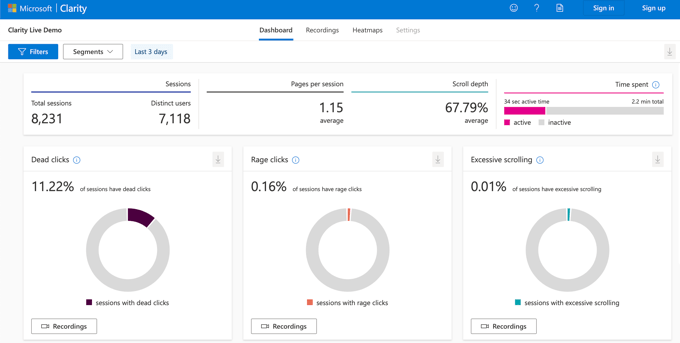
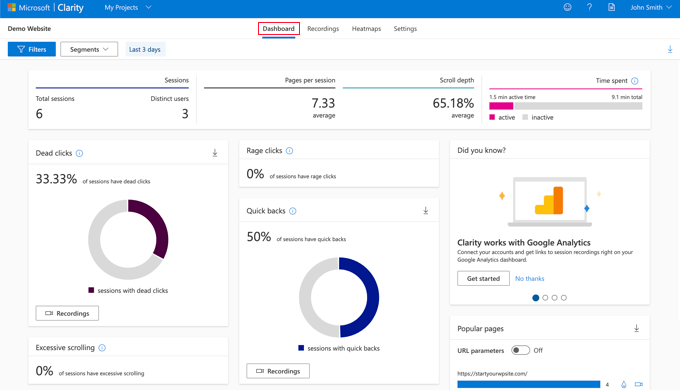
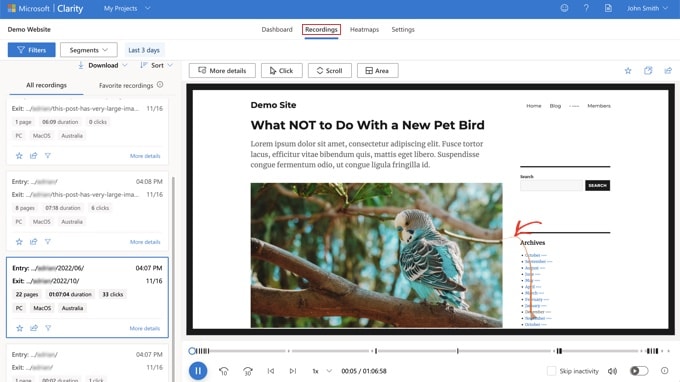
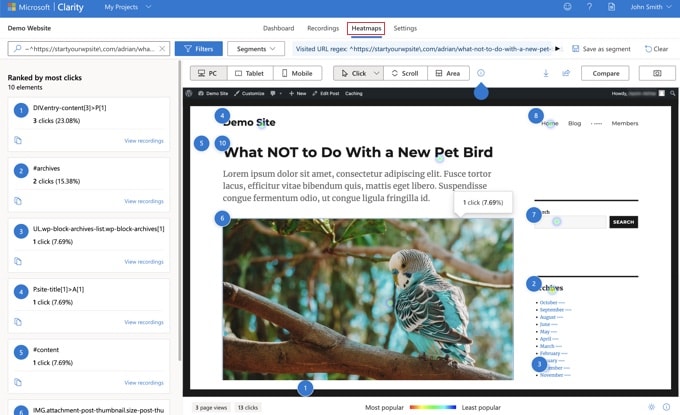
4. Track User Engagement Data with Google Analytics
User engagement shows you what users do when they arrive on your website. It helps you identify patterns of highly engaged user behavior which leads to more conversions and sales.
For example, you may find out that users visiting a specific page are 10 times more likely to make a purchase. You can then use this insight to send more users to that page, or replicate a similar experience on other pages of your website.
Basically, you will be tracking data about how users interact with your website. For example:
- Tracking your most popular content
- Form submission tracking
- Ecommerce tracking
- Ads tracking to understand how users interact with ads on your website
- Monitoring engaged users
- Time users spend on your website
For detailed instructions, follow our step-by-step guide on how to track user engagement in WordPress.
5. Track Campaign Links with UTM Codes
Google Analytics is really good at tracking where your website traffic comes from. It can even categorize your traffic based on their source, including organic search, organic social, referral, email, and more.
However, when you’re running paid ad campaigns, email marketing campaigns, or social media promotions, you need detailed campaign tracking.
That’s where UTM tracking comes in.
Campaign-level tracking allows you to see exactly which email, ad, or specific call-to-action link helped you get the most traffic or sales.
To make it easy for you to generate UTM links, MonsterInsights comes with a free campaign URL builder, so you can get more detailed reports. You can enter custom campaign parameters like the source, medium, campaign name, and more to create a custom URL.

These tags include native analytics parameters which are tracked by Google Analytics and are included in your reports. You can then see exactly which link users clicked and how your campaigns are performing.
6. Track and Improve Facebook Retargeting Campaigns
Did you know that Facebook allows you to display targeted ads to people who have visited your website in the past? Yes, it’s called retargeting.
You can install a Facebook pixel and display targeted ads to anyone who visits your website. However, if you install Facebook retargeting pixel today, then you will only be able to show your ads to people who visited today and onward.
Even if you are not running a Facebook advertising campaign right now, we recommend installing the retargeting pixel, so you have a built-in audience when you’re ready to get started.
For detailed instructions, see our guide on how to install Facebook remarketing/retargeting pixel in WordPress.
7. Tracking Google AdSense Campaigns
If you run pay-per-click (PPC) campaigns using Google AdSense, then you can easily see how your ads are performing in the AdSense dashboard. However, these reports only tell you how users interact with your ads not what they do after that.
For that, you’ll need Google Analytics which comes with built-in integration with your AdSense account. This integration enables you to easily track your paid traffic conversions.

You can see our guide on how to properly add Google AdSense to your WordPress site.
8. Monitor Your Site with Google Search Console
Google Search Console is a set of free tools offered by Google to give publishers a look at how their website is seen by the search engine.
It provides immensely useful information like how your pages rank for different keywords (more on this later), the overall performance of your site in search engines, and any errors Google crawler found on your website.
Keeping an eye on Google Search Console can help you boost your site’s search engine visibility. To learn more, see our guide on tips for using Google Search Console to grow your traffic.
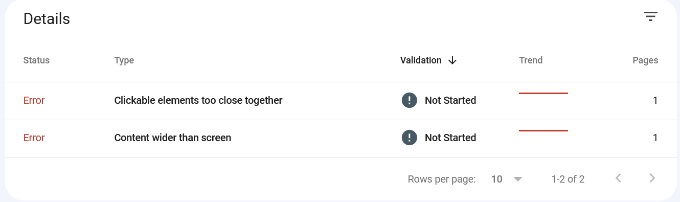
For example, here is a report showing errors that occur when a user views the site on their mobile devices. Without Google Search Console, it will be very difficult to pinpoint such issues and quickly resolve them.
For detailed instructions, see our guide on how to add your WordPress site to Google Search Console.
9. Track Your Keyword Rankings
Keywords are the phrases users enter in search engines to find what they’re looking for. To get more traffic from search engines, you need to know exactly which keywords are bringing you the most traffic to your website, so you can focus on what’s working.
We have a complete WordPress SEO guide that you can use to learn how to optimize your content for specific keywords.
Normally, beginners rely on manually entering keywords in Google search to see if their site is ranking. This is highly inefficient as you would miss out on thousands of keywords where your site can be easily ranked.
Google Search Console is a free tool that provides you with valuable keyword data with the average position. You can see which search terms are ranking high, search impressions, and how many average clicks you get.
If you’re using MonsterInsights, then you can view the Search Console report inside your WordPress dashboard.

However, it only allows you to see your own site’s keyword data. If you want to research your competitors, then you’ll need SEMRush. This incredibly powerful SEO tool allows you to view in-depth keyword data for any website.
For more on this topic, please take a look at our guide on how to track keyword rankings for your WordPress site.
10. Track Your Email List Growth and Performance
Most popular email marketing services come with stats and insights that you can track. These reports provide useful data like open rate, click-through rate, unsubscribe rate, and more.
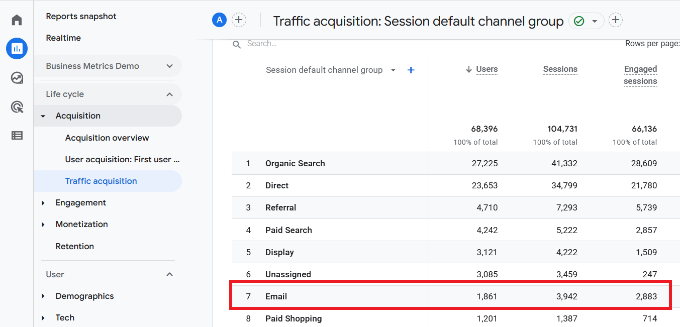
You can also see the traffic coming from your email campaigns to your website in your Google Analytics 4 reports under Acquisition » Traffic acquisition.
From here, you can see how well your email newsletter traffic converts, and what you can do to improve.
Tracking email marketing data helps you grow your email list. You can create new email forms, change form placements, and use popups to boost subscribers.
While there are definitely other marketing metrics that you can track, we believe these are the top marketing data that every business owner must track on their WordPress site.
We hope this article helped you track the right website marketing data on all your WordPress sites. You may also want to see our step-by-step guide to boost WordPress speed and performance, and our comparison of the best business phone services for small business.
If you liked this article, then please subscribe to our YouTube Channel for WordPress video tutorials. You can also find us on Twitter and Facebook.
The post 10 Website Marketing Data You Must Track on Every WordPress Site first appeared on WPBeginner.