Did you know that you can create an ebook from your WordPress blog posts?
Offering ebook downloads on your WordPress website is a good way to make money online or grow your email list. Writing a book is a big job, but you may discover that you’ve already written enough content for a book on your blog.
In this article, we’ll show you a smart way on how to create an ebook from your WordPress blog posts.
Why Create an Ebook From Your WordPress Blog Posts?
If you publish regular blog posts on your WordPress website, then you have a lot of content that you can repurpose or monetize. One of the best ways to repurpose your content is to turn your blog into an ebook.
Writing an ebook can build your site’s credibility. You can use it to grow your email list, offer it as exclusive content on a membership site, or sell it to make money from your blog.
However, writing a book is difficult, and 97% of people who start to write a book never finish.
The good news is that you may have already written a book. Your most popular blog posts may already contain enough quality content to repurpose as a successful ebook. Or you can use your blog to write a new book one post at a time.
With that being said, let’s take a look at how to create an ebook from your WordPress blog posts. Here’s what we’ll cover in this tutorial:
Choosing Which Blog Content to Use in Your Ebook
Your first job is to decide which blog posts should be included in your ebook. If your blog is about a certain topic or niche, then you may just need to find your most popular blog posts. Each post will become a chapter of your ebook.
However, if you wish to create multiple ebooks, then you should choose blog posts that cover more specific topics, such as popular posts in a specific category. You can even consider future ebook ideas when you are planning the content to write about on your blog.
How to Find Your Most Engaging Content to Include in an Ebook
You want to create an ebook that people actually want to read. A good starting point is to find your most engaging and popular blog posts. That way, you already know that your readers are interested in these topics.
If you are not already tracking user engagement on your WordPress blog, then the best way to get started is by using MonsterInsights. It’s the best Analytics plugin for WordPress and helps you configure Google Analytics without writing code.
There’s also a free version of MonsterInsights that you can use as well.
When you install and activate MonsterInsights, you will also set up Google Analytics tracking in WordPress. Once your blog has been tracked for some time, you will be able to view important user engagement metrics such as your most popular content.
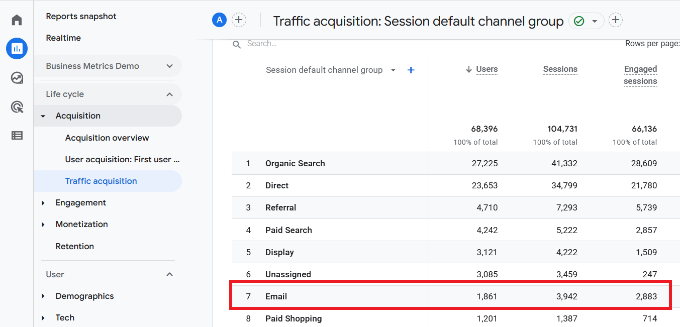
You just need to visit the Insights » Reports page in your WordPress admin area and go to the ‘Overview’ report. You can scroll down to see different reports, and you will find your most popular content under the ‘Top Posts/Pages’ section.

You’ll find detailed instructions about how to set up and use MonsterInsights in our guide on how to track user engagement in WordPress with Google Analytics.
Now that you know what your most popular posts are, you need to choose which ones to include in your ebook. They should contain evergreen content that will stay fresh and also fit together logically as chapters to form a complete ebook.
Writing a Series of Blog Posts to Create Content for an Ebook
Another way to come up with blog content for an ebook is to write a series of articles on a particular topic. These blog posts can then be compiled into an ebook.
We do something similar on WPBeginner, where we regularly compile a series of posts into a new article. Here are some examples of articles we have compiled with repurposed content from our existing articles:
- 50 Most Common WordPress Errors and How to Fix Them
- 32 Extremely Useful Tricks for the WordPress Functions File
- How to Fix Common Image Issues in WordPress
- 15 Useful WordPress Configuration Tricks That You May Not Know
- The Ultimate Guide to Boost WordPress Speed & Performance
In fact, whenever you are writing about a complex topic, it is almost always better to write a series of posts that break the topic up into smaller parts.
You can learn more in our guide on how to efficiently manage post series in WordPress.
Quickly Updating the Posts You Choose for Your Ebook
Once you have chosen the blog posts you wish to include in your ebook, take some time to quickly update them if necessary. By doing that now, you will make sure that both the blog post and ebook are free from errors and contain all of the necessary information.
You can start by making sure there are no spelling or grammar errors in the post. Most likely you did this before publishing each post, but it’s worth checking this again in case something was missed.
You can learn the best ways to proofread your posts in our guide on how to check grammar and spelling mistakes in WordPress.
Also, take time to check the comments on each post. They may identify areas where the blog post isn’t clear enough or is missing important information. Take time to address those issues.
Later in this article, you will make further edits that will be needed in the ebook but not the blog posts.
Creating Professional-Looking Cover Art for Your Ebook
One of the best ways to create an ebook that looks professional is to use a well-designed ebook cover. Your readers will actually judge your book by its cover.
You could hire a graphic designer using websites such as 99designs or Fiverr. Or you can use graphic design software or web services to do it yourself even if you don’t have design skills.
Before you create the cover art for your book, make sure you first finalize the ebook title. It should be clear and concise, grab the reader’s attention, and describe what the book is about. You may also want to create a subtitle and book description.
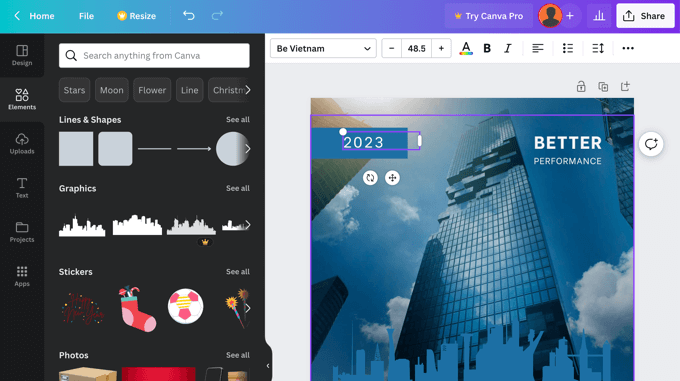
One of the easiest ways to create cover art is with Canva, a free online graphic design tool. It comes with easy-to-use tools that allow you to create a book cover from a template.
The basic Canva account is free and gives you access to dozens of ready-made templates. To get the full power of Canva, you may want to sign up for a Pro account. This lets you upload your own fonts, set your brand colors, and more.
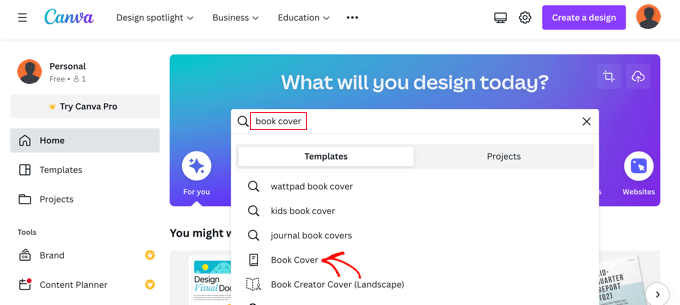
After creating your account, simply type ‘book cover’ into the search box and then click on the ‘Book Cover’ search result.
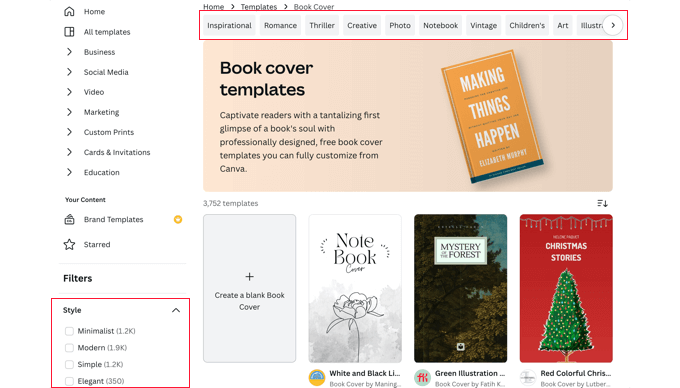
Canva will display a list of thousands of book cover templates. These have the correct width ratio of 1.6 and also a high-quality resolution of 1410 x 2250 pixels.
You can filter the list by clicking the genres at the top of the screen, or by checking one of the styles or themes on the left. This will help you find the most suitable templates quickly.
Once you find a template you want to use for your cover art, you should click it to preview it. You will also see whether it is a free, paid, or pro template. After that, you should click the ‘Customize this template’ button.
Canva will now load its drag-and-drop editing interface. You can point and click on any item in the template to edit it. Make sure you type the correct title, subtitle, and author. You can rotate, resize, crop, and delete items.
You can also add more text, icons, shapes, patterns, and backgrounds to your design from the left column. However, you will often get the best result by making simple changes.
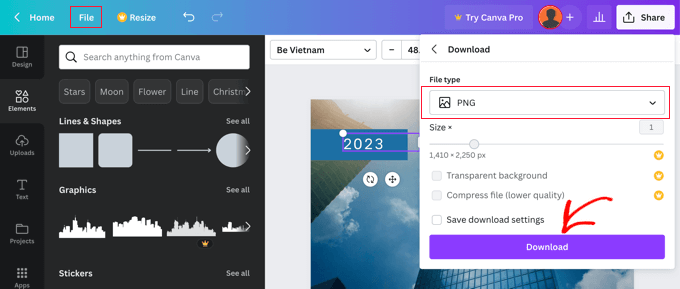
When you have finished creating your cover art, you will need to save it to your computer. Simply select File » Download from the menu at the top of the screen.
You can select a variety of file types from the drop-down menu, including PDF, JPG, and PNG. For this tutorial, we will choose PNG and then click the ‘Download’ button.
Method 1: Turning Blog Posts Into an Ebook Using Google Docs (Free)
You can create an ebook from your blog posts using Google Docs. This requires a little more manual work than our second method, but it’s free and makes it easy for you to edit and customize your ebook.
You need to start by creating a new Google Doc and naming it with your ebook’s title.
After that, make sure that under the View menu, ‘Show Print Layout’ is checked. This will allow you to see how each page of your ebook will look.
Inserting Your Ebook Cover Art
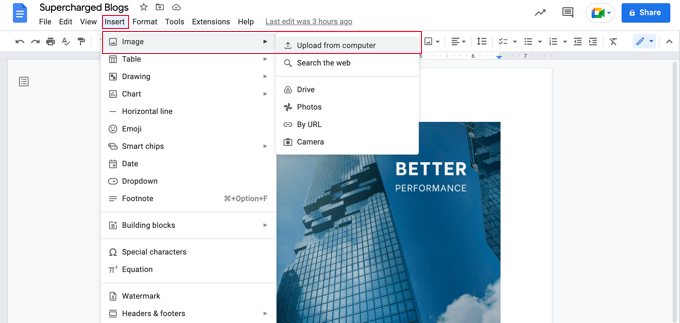
The first thing you need to do is insert the cover art you created earlier.
You can either use drag and drop to place it on the first page, or select Insert » Image from the menu and upload it to your computer.
Once you’ve done that, you should select Insert » Break » Page break from the menu to start a new page.
Creating a Title Page and Table of Contents
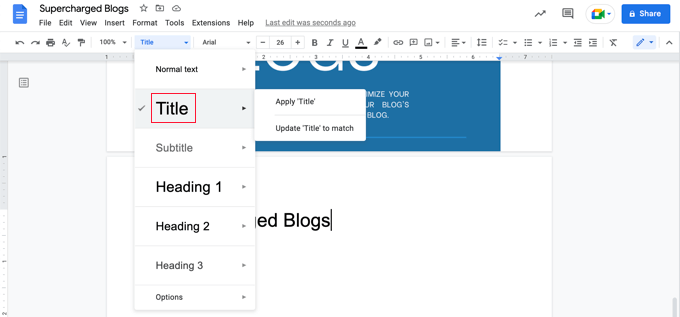
On the new page, you should type the title of your ebook. Before you press enter, make sure you format it as a title by selecting ‘Title’ from the Styles drop-down menu.
If you wish to center the title, then you need to select Format » Align & Indent » Center.
You can now press the Enter key several times and type the ebook’s subtitle if you have one, as well as your name or your blog’s name as the author.
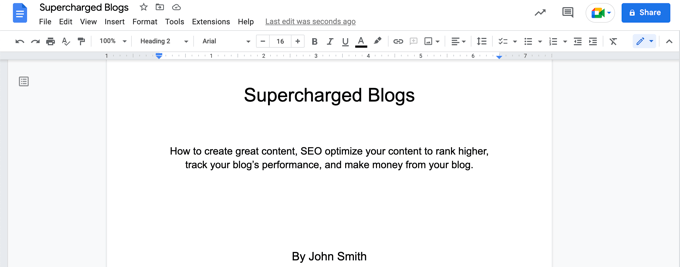
You might like to format them using a larger font and center them. Don’t use a heading style, or these lines will be included in your table of contents. You can also use the enter key to space these lines appropriately down the page.
Once you’re done, you should select Insert » Break » Page break from the menu again to start another new page.
On the next page, you will add the table of contents. Google Docs will populate this with headings as you add content to the document.
Start by typing the heading ‘Table of Contents’ and format it with the Heading 1 style.
Tip: If your text is still being centered, then you will need to select Format » Clear formatting from the menu to return to the default formatting.
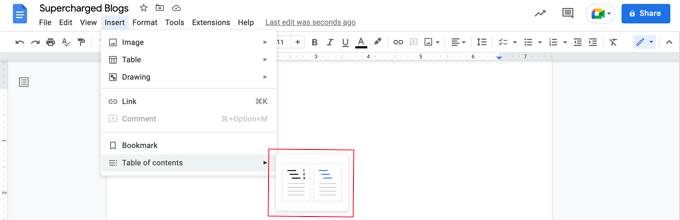
Now you can press Enter and select Insert » Table of Contents from the menu. You can choose from a version with page numbers and a version with hyperlinks.
At the moment, the table of contents will be quite empty, but it will be updated as you add blog posts to your ebook.
Pasting the Your Blog Post Contents
Now it’s time to start pasting the content from your blog posts into Google Docs. Before you paste each blog post, make sure you insert a new page break (Insert » Break » Page break) so each ebook chapter starts on a new page.
Then, just head to your WordPress website and navigate to your blog post.
Simply highlight the entire post, copy it to the clipboard, and then paste it into Google Docs. After that, insert another page break and repeat until all the blog posts have been copied.
You may also want to set the title of the posts to Heading 2 in Google Docs so they’re included as chapters in your Table of Contents and document outline.
For our demo ebook, we pasted the contents of 7 blog posts into Google Docs to produce a 167-page ebook. Selecting Tools » Word count from the menu shows that the document contains almost 25,000 words.
Editing Your Ebook Contents
Now you should work through your ebook content and make any changes that are necessary. Some things that work well in a blog post won’t belong in an ebook.
For example, you may need to tweak the title of each blog post so it works better as a chapter heading. And if you added a call to action at the bottom of each blog post, then you may need to remove it from each chapter in your ebook.
You may need to replace references to ‘posts’ with ‘chapters’. Also, you should replace internal links to your blog with links to the chapters in your ebook if they are included.
You should also work on the transitions between chapters so your book flows better, otherwise, it might read like a collection of separate blog posts. You might also want to add a stronger introduction and conclusion to the book.
You might also like to add additional material to the book, such as sections on:
- How to use this book
- What you’ll find in this book
- About the author
- Contact information
- Copyright information
- Disclosures
- Resources and links
- Footnotes and sources
Finally, make sure you correct any spelling and grammar errors you find while editing.
Customizing Your Ebook’s Design
Before you export your ebook from Google Docs, consider whether you can improve the design of your ebook.
For example, you can customize the appearance of your headings or normal text.
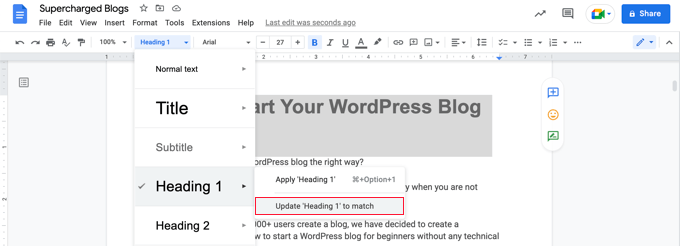
This is easy to do in Google Docs. You can start by changing the format of a particular heading directly. Just select the font you want, if you want it bold or underlined, or other design choices.
After that, with that text still highlighted, select Heading 1 » Update Heading 1 to match from the drop-down menu to automatically change all other headings to match.
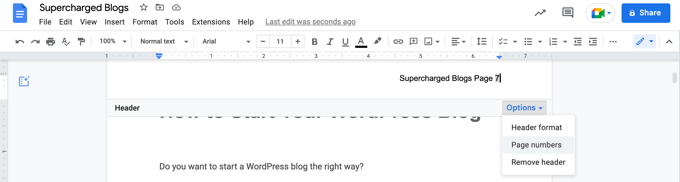
You can also add a header or footer that includes your ebook title and page numbers.
Just select Insert » Headers & Footers and then click ‘Header’ or ‘Footer’ in the menu. You can set up page numbers by clicking the ‘Options’ menu from the header.
When you are happy with the way your ebook is formatted, then it’s time to export it in an ebook format.
Exporting Your Ebook as a PDF
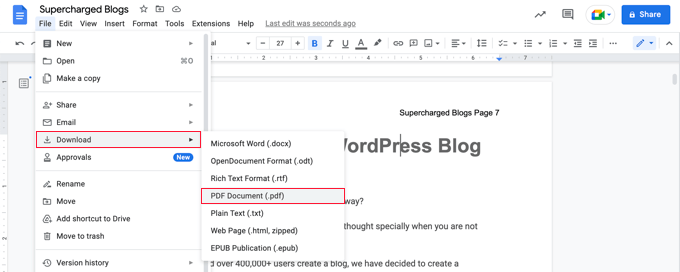
Now that you have finished creating your ebook, you can save it to your computer as a PDF. Simply select File » Download » PDF Document from the menu.
Tip: Before exporting your ebook, we recommend you update the table of contents to include any new chapters you have added. When you click on the table of contents, you will find a button labeled ‘Update table of contents’ at the top.
Google Docs also allows you to download the ebook as an EPUB Publication. This format should be used if you want to make the book available in a marketplace such as Amazon’s Kindle Store.
Method 2: Turning Blog Posts Into an Ebook Using a Plugin
You can also create an ebook from your blog posts using a plugin. MPL-Publisher is the best ebook creator plugin because it covers everything you need to do in an easy-to-use interface.
You will need to use the premium version to export your ebook as a PDF file. This costs $49 per WordPress site and also offers a cover editor and the ability to store the settings for multiple books. The free version can export in EPUB and Microsoft Word formats, and more.
The first thing you need to do is install and activate the MPL-Publisher plugin. For more details, see our step-by-step guide on how to install a WordPress plugin.
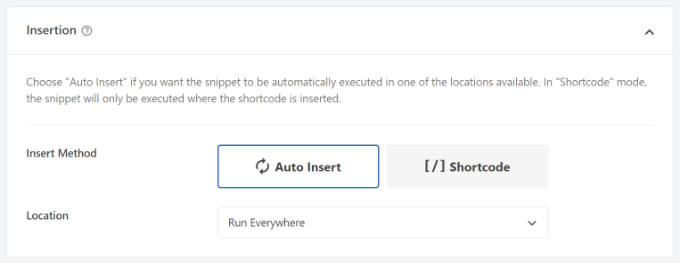
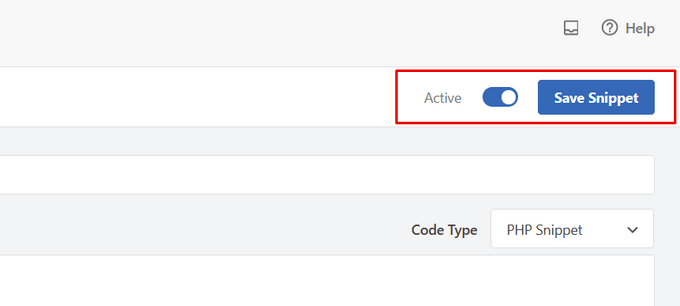
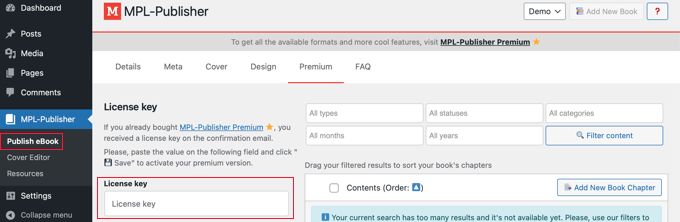
Upon activation, you will need to enter the license key that was emailed to you. Simply navigate to MPL-Publisher » Publish eBook on the admin sidebar, then click on the ‘Premium’ tab. Now you can paste the license key into the field provided.
Entering the Book Details
Next, you need to enter some details about your book. Make sure you are looking at the ‘Details’ tab of the MPL-Publisher » Publish eBook page.
From here, you can fill in the book details such as the title, subtitle, author, and description.

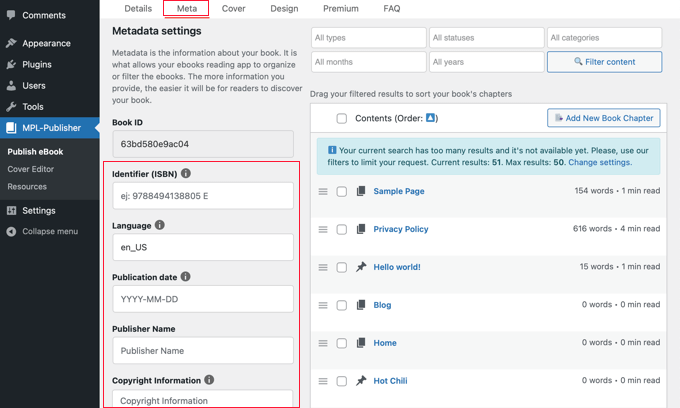
Next, you should click on the ‘Meta’ tab where you can enter metadata about the book.
You will find fields where you can fill in the book’s ISBN (or some other unique identifier), language, publication date, publisher name, and copyright information.
You can scroll to the bottom of the page and click the ‘Save’ button to store the book details and metadata.
Inserting Your Ebook Cover Art
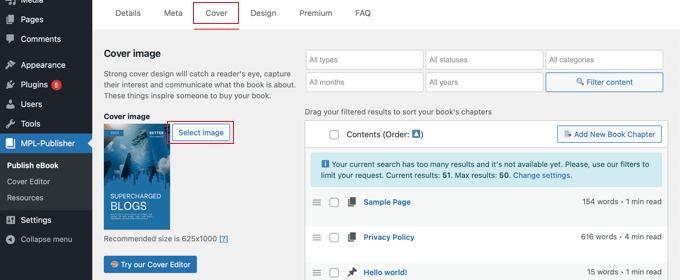
Now you can move to the ‘Cover’ tab. Here you can add the cover image that you created earlier.
Simply click the ‘Select Image’ button and you will be taken to your site’s Media Library. From there, you can upload the cover art and then click the ‘Select’ button.
If you haven’t already created your cover art, you can use the plugin’s Cover Editor to create a book cover right from the WordPress dashboard. Note that this is one of the plugin’s premium features.
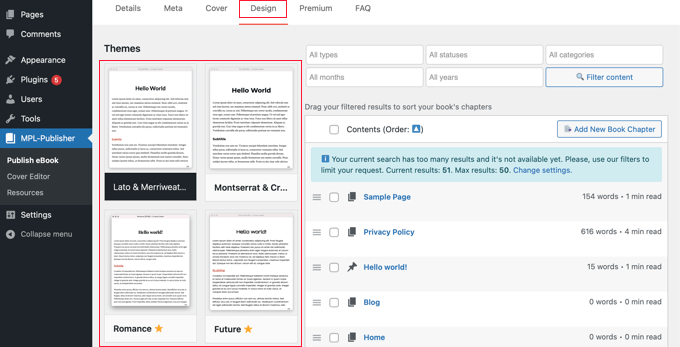
Customizing Your Ebook’s Design
Now you can switch to the plugin’s ‘Design’ tab to choose how your book will be formatted. Several themes are available, and you simply click on the theme you wish to use.
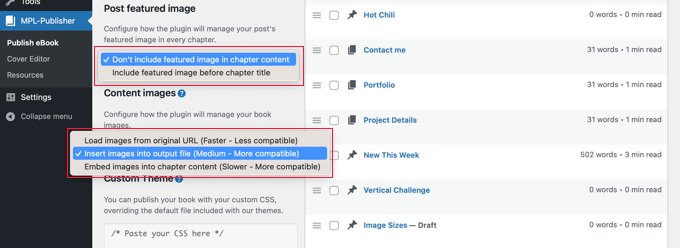
When you scroll down the page, you can choose whether to include the post’s featured images in the ebook and whether to insert or embed the images in the ebook.
Make sure you choose the second or third option. We recommend you avoid the first option, which is to link the images from your website.
Advanced users can also format their books using custom CSS.
Make sure you scroll down and click the ‘Save’ button to store your progress.
Selecting the Posts to Include in Your Ebook
On the left of the screen, you will see a list of posts on your website. To include a post in the ebook, simply click its checkbox.
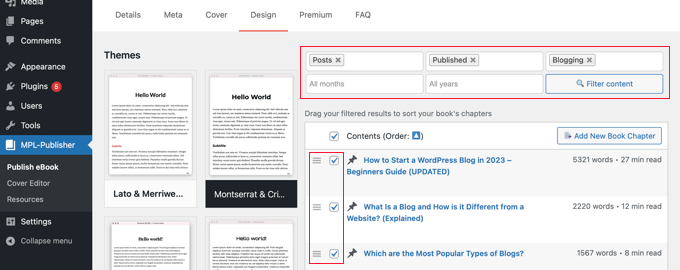
If you have a lot of posts on your website, then you make it easier to find the posts you wish to include by filtering the list. You will find filters for type, status, category, month, and year.
For this tutorial, we’ll filter the list to include only posts (not pages) that have been published. We’ll also filter the list by the ‘Blogging’ category.
Simply select the desired criteria from the drop-down menus and then click the ‘Filter content’ button.
Next to each post, you will see a word count and how long the chapter will take to read.
Once you check the posts you wish to include, you can reorder them by dragging and dropping the hamburger icon. That’s the icon that looks like three horizontal lines.
When creating your ebook, MPL-Publisher will automatically create a table of contents containing these chapters.
Editing Your Ebook Contents
You can edit a post by clicking the ‘Edit’ link that appears under the post when you hover your mouse over it. The changes will be seen in both your ebook and the post on your website.
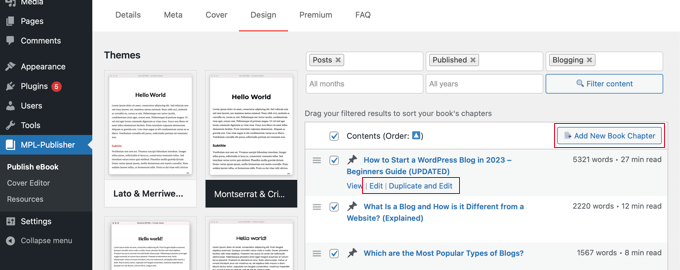
If you want to edit the ebook contents only, leaving the post on your website as it is, then you need to click the ‘Duplicate and Edit’ link. This will create a duplicate of the post with the ‘Book Chapter’ custom post type.
Once you update the book chapter, you will need to uncheck the original post, then locate and check the new book chapter you just created. Book chapters display a book icon beside the title.
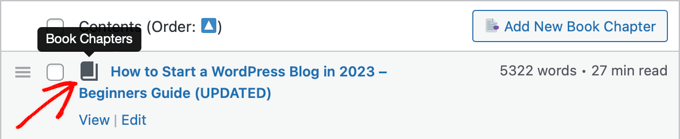
If you want to add a new chapter to your book that doesn’t appear on your blog, then you can click the ‘Add New Book Chapter’ button.
This will create a new blank book chapter that will be found only in your book, and not on your blog.
In Method 1 above, we provide a list of additional material you might like to add to your ebook, such as contact information, disclaimers, and more.
Exporting Your Ebook as a PDF
Once you have finished setting up the ebook, you can export it. You need to scroll down to the ‘Output format’ and choose ‘Adobe File (PDF)’ as the file type.
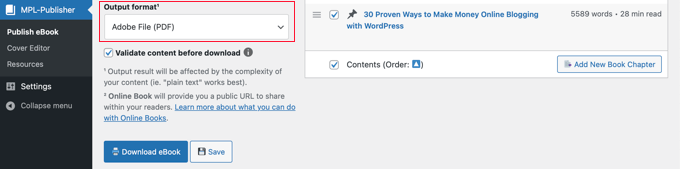
Alternatively, you could select ‘Microsoft Word (DOCX)’ if you plan to continue editing the book or sending it to a professional editor, or ‘EPUB 3.0’ if you plan to make the book available in an online ebook store.
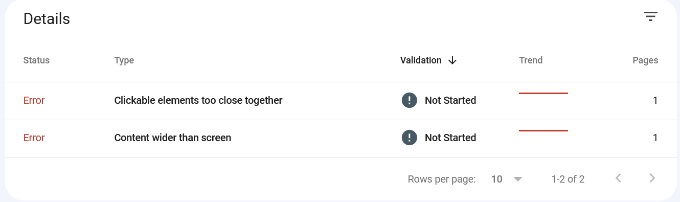
If you like, you can check the ‘Validate content before download’ box. This ensures that the ebook will not contain HTML errors.
Finally, simply click the ‘Download eBook’ button, and MPL-Publisher will compile your ebook and download it in the format you specified.
How to Promote and Monetize Your eBook in WordPress
Now that you have created an ebook from your blog posts, you need a way to promote it, so more visitors can get your ebook. There are a few ways to do this.
The method you choose depends on your business goal. You can giveaway the ebook for free to raise awareness, use ebook as a lead magnet to get more email subscribers, or sell your ebook to make money online.
1. Allowing Free Ebook Downloads in WordPress
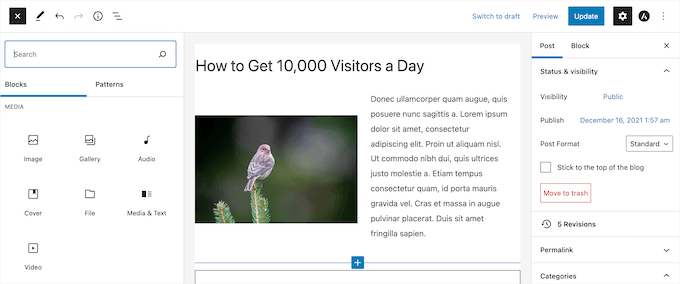
You can offer your ebook as a free download using the WordPress file block.
Simply edit the post or page where you want to add your ebook download and then add a ‘File’ block.
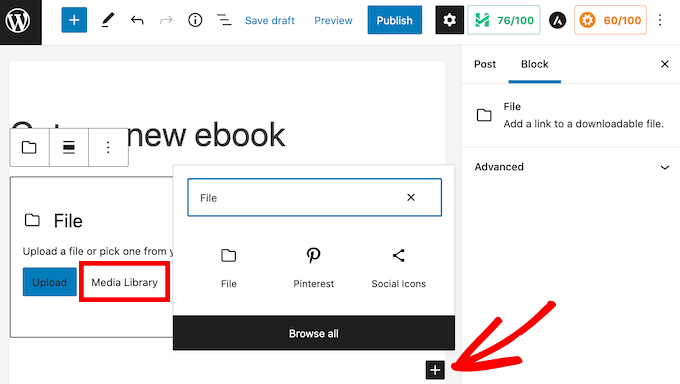
This will allow you to upload the ebook to your site, and it will be displayed in the post in a small PDF viewer by default.
For step-by-step instructions, see Method 1 in our guide on how to add ebook downloads in WordPress.
Tip: Want your visitors to be able to search for your ebook’s content on your website? WordPress doesn’t do this by default, so we wrote a guide on how to add PDF indexing and search in WordPress.
2. Using Ebook Downloads to Get More Subscribers
If you’re using your ebook to grow your email list or capture leads, then you’ll want to make sure your visitors can’t access the ebook until they share their email addresses.

You can set that up using OptinMonster, the best lead generation plugin for WordPress. We use it on WPBeginner and have increased our conversions by over 600%.
For detailed instructions, see our guide on how to add content upgrades in WordPress.
3. Selling Ebook Downloads in WordPress
Selling digital products like ebooks is one of the best ways to earn money from your WordPress website.
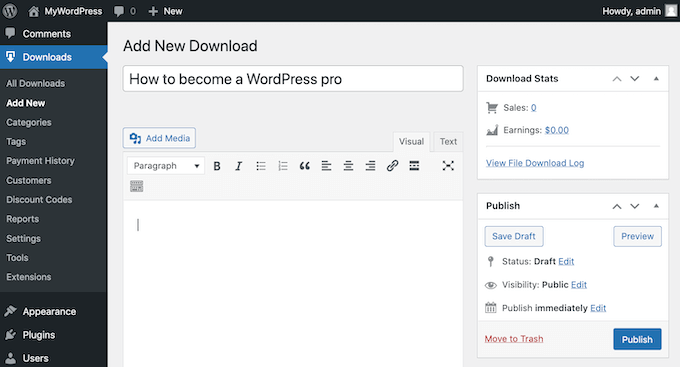
To sell ebooks, you’ll need a plugin like Easy Digital Downloads, one of the best eCommerce WordPress plugins. This beginner-friendly plugin makes it super easy to sell any type of digital product including ebooks.
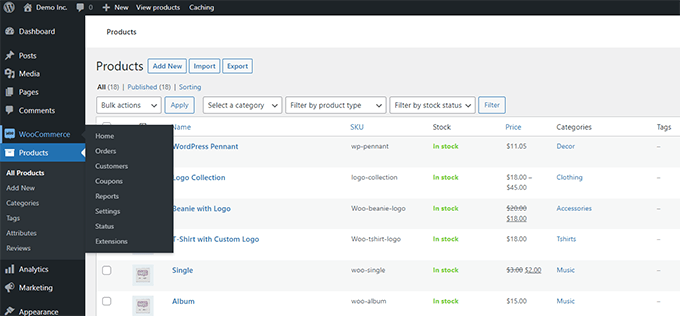
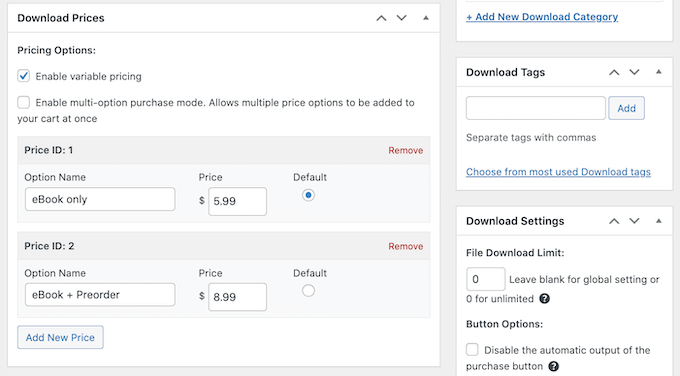
Once installed and activated, you can easily add new downloads to your website. It’s easy to add a title and description for your ebook, as well as categories and tags.
The plugin also handles pricing. You can choose variable pricing with multiple options. You may have one option to sell just the ebook and another that includes an additional product. Using EDD, they will both show on the same product page.
You can also simply set a single price for your ebook purchase.
After that, you can upload your ebook and add a cover image that will be displayed on your website.
You can find more detailed instructions in Method 3 of our guide on how to add ebook downloads in WordPress.
Bonus Tips to Promote Your Ebook
The easiest way to promote your ebook is to your existing audience. Both email newsletters and push notifications are an excellent way to spread the word about your new ebook launch.
You can use PushEngage to setup push notification for your blog readers. This has among the highest engagement rates.
For email marketing services, we recommend either Constant Contact or Sendinblue since they’re affordable for new users.
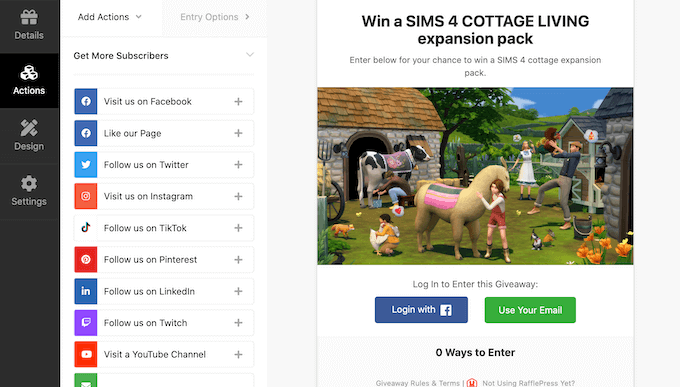
Another proven technique you can use to promote your ebook is giveaways. These help you leverage the power of social media to bring more new users to your blog.
We recommend using RafflePress plugin to create a viral giveaway since it seamlessly connects with all major social media platforms.
We hope this tutorial helped you learn how to create an ebook from your WordPress blog posts. You may also want to learn how to start your own podcast, or check out our comparison of the best WordPress SEO plugins to grow your traffic.
If you liked this article, then please subscribe to our YouTube Channel for WordPress video tutorials. You can also find us on Twitter and Facebook.
The post How to Create and Sell Ebooks in WordPress from Start to Finish first appeared on WPBeginner.