Are you looking to add an express checkout button to your online store?
Express checkout helps streamline the checkout process and improves the overall shopping experience for your customers. It can also boost conversions and reduce cart abandonment.
In this article, we will show you how to add express checkout buttons in WooCommerce.
Why Add Express Checkout in WooCommerce?
Adding express checkout to your WooCommerce store provides a better shopping experience for your customers.
It allows customers to go directly to the payment page and skip the shopping cart or checkout pages. They also won’t have to go to a payment provider page or fill out a checkout form to complete their purchases.
Express checkout buttons make the entire buying process quicker. Customers can simply click the buttons and log in to pay for the products they wish to buy in an instant. As a result, you may see a boost in conversions and fewer abandoned carts.
Adding express checkout also helps mobile users where their screen sizes are small. Customers will just tap the buttons to quickly purchase the products.
However, WooCommerce doesn’t offer an express checkout option by default. You will need to use a WooCommerce plugin to add the feature to your online store.
That said, let’s see how you can add express checkout buttons in WooCommerce.
Setting Up FunnelKit on Your WooCommerce Store
FunnelKit is the best WooCommerce sales funnel plugin on the market. It lets you add express checkout buttons and create different funnel pages for your online store.
The best thing about using the plugin is that it works with Stripe, Apple Pay, Google Pay, PayPal Express, Amazon Pay, and other payment gateways for express checkout. This way, you don’t have to add each payment provider to your online store using third-party plugins or extensions.
FunnelKit also provides user-friendly templates and lets you do A/B testing. You can easily customize your funnels using different drag-and-drop page builders. Plus, there are multiple pre-built templates and automation features for your marketing campaigns.
Note: For this tutorial, we will be using the FunnelKit Pro plugin because it includes premium templates and more customization options. You can also use the free Funnel Builder for WordPress by FunnelKit plugin to add express checkout buttons in WooCommerce.
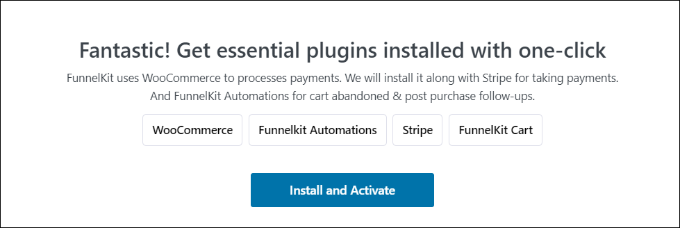
First, you will need to install and activate the FunnelKit plugin. If you need help, then you can follow our guide on how to install a WordPress plugin.
Upon activation, you will see the FunnelKit setup wizard. Go ahead and click the ‘Get Started’ button.
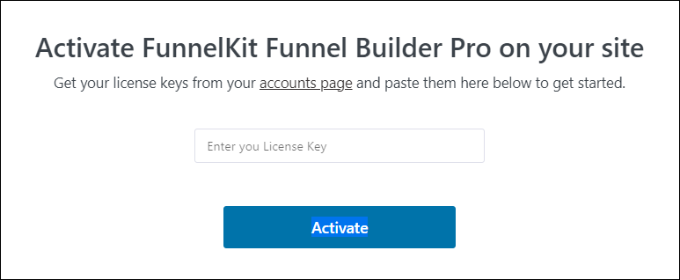
After that, you will need to enter your license key. You can find the key in the FunnelKit account area.
Simply click the ‘Activate’ button after entering the license key.
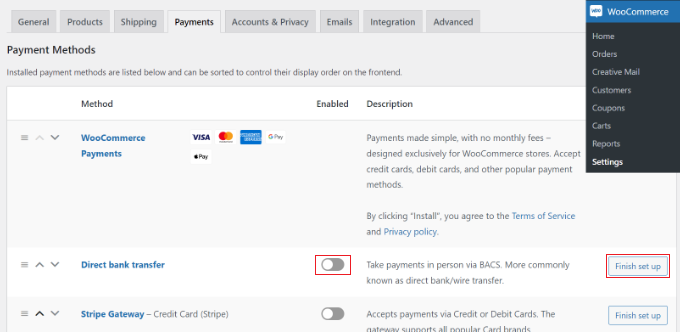
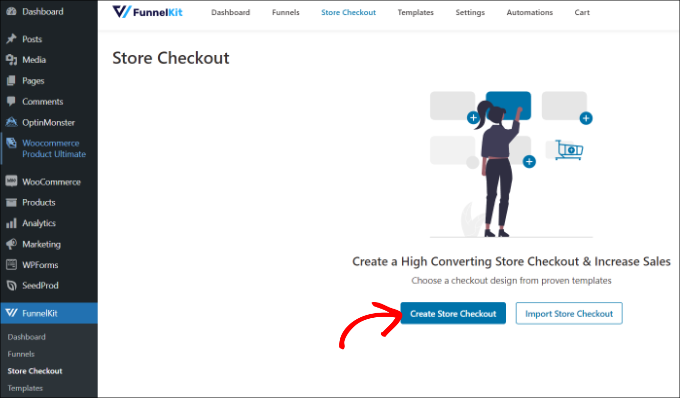
Once you have enabled your preferred payment gateways, you can head to the FunnelKit » Store Checkout page from your WordPress admin panel.
From here, simply click the ‘Create Store Checkout’ button.
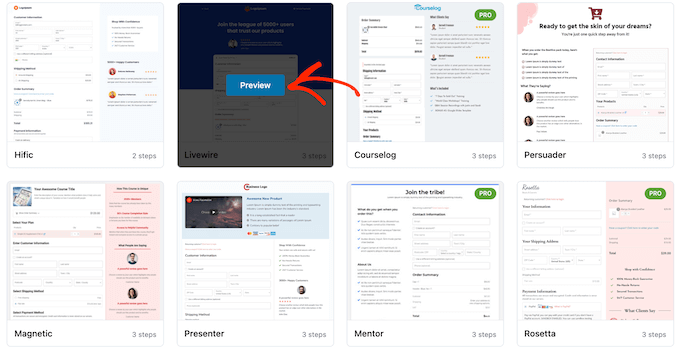
On the next screen, FunnelKit will show you professionally-designed templates for your checkout page. It will also let you create a checkout page from scratch.
However, we recommend using a template and quickly customizing it according to your requirements.
Simply hover over a template you’d like to use and click the ‘Preview’ button.
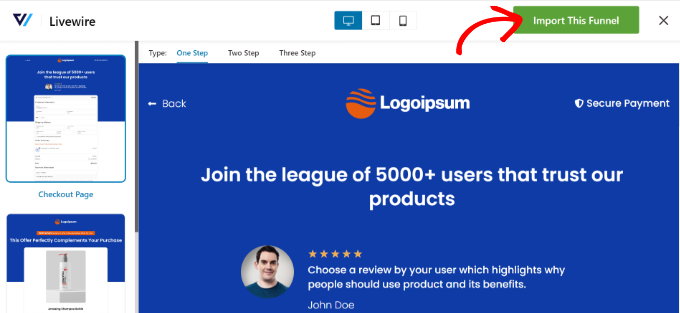
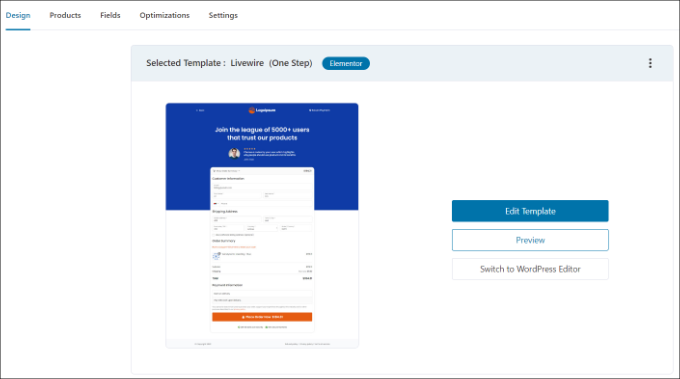
For this tutorial, we will use the Livewire template.
Next, go ahead and click the ‘Import This Funnel’ button at the top.
Depending on the template you use, FunnelKit may ask you to install additional plugins like Elementor to edit the checkout page.
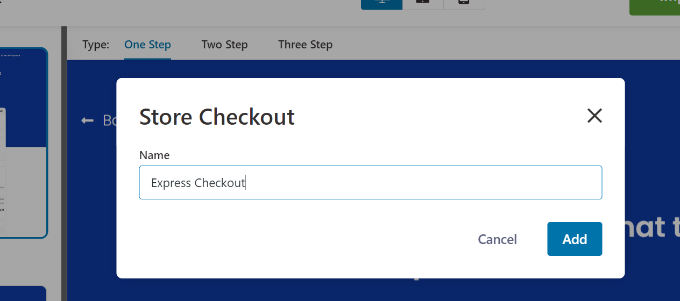
Next, you will need to enter a name for your store checkout and click the ‘Add’ button.
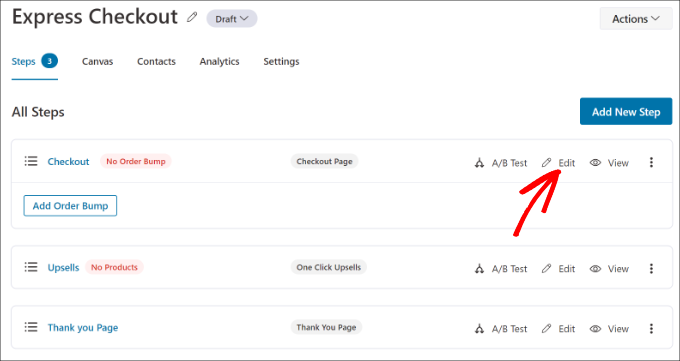
After that, you will see all the steps that are included in the template.
You can simply click the ‘Edit’ button for the Checkout page to continue.
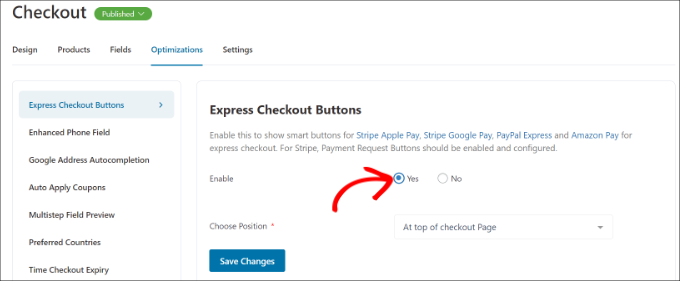
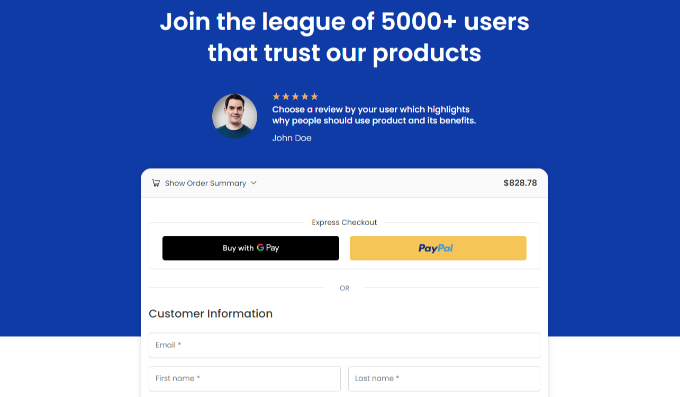
Next, you can switch to the ‘Optimizations’ tab. From here, simply enable the ‘Express Checkout Buttons’ option.
FunnelKit will also let you choose the position of the buttons from the following options:
Top of the checkout page
Before/after the product switcher
Before/after the order summary
Above the payment gateways
When you are done, simply click the ‘Save Changes’ button.
That’s it, you have successfully added express checkout buttons to your online store.
If you want to edit the appearance of the checkout page, then you can switch to the ‘Design’ tab and click the ‘Edit Template’ button.
Once you have made your changes, simply visit your online store to view the express checkout buttons in action.
Additionally, FunnelKit helps you upsell products in WooCommerce. This way, you can boost sales by encouraging users to buy more products.
You can also set up automated emails in WooCommerce using FunnelKit Automations, a sister product of FunnelKit. This plugin lets you create automated workflows and send email campaigns to customers.
Do you want to add a sliding side cart in WooCommerce?
This allows shoppers to see their shopping cart from any page on your online store. Customers can then add items to their basket, remove products, and add coupons without ever having to visit a separate cart page.
In this article, we will show you how you can easily add a sliding cart in WooCommerce.
Why Add a Sliding Side Cart in WooCommerce?
A sliding side cart is a panel that appears when a customer adds an item to their basket.
Customers can also open the cart at any time by clicking on the cart icon. This allows them to check their shopping basket without having to visit a separate WooCommerce cart page.
Depending on how the cart is set up, shoppers may also be able to add and remove items as well as apply coupons directly from the sliding panel. You can even add call to action buttons such as a link to your WooCommerce checkout page.
Sliding carts can improve the customer experience by removing friction from the shopping process, and help shoppers keep track of how much they’ll pay at checkout. This can reduce cart abandonment rates, while also possibly increasing the average order value.
With that being said, let’s see how you can add a sliding side cart in WooCommerce. Simply use the quick links below to jump straight to the method you want to use.
Method 1. How to Add a Sliding Side Cart in WooCommerce Using a Free Plugin
The quickest and easiest way to create a sliding side cart is by using Cart For WooCommerce By FunnelKit. This free plugin allows you to add a cart icon to your online store.
Shoppers can click the button to open the sliding side cart.
You can change the cart’s colors, borders, buttons, messaging, and more.
There are a ton of options to make it perfectly fit your WordPress theme.
You can show the cart button across your entire site, limit it to WooCommerce pages only, or add the button to specific pages and posts using a shortcode.
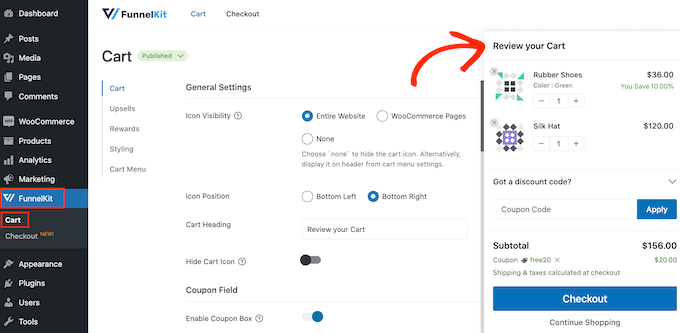
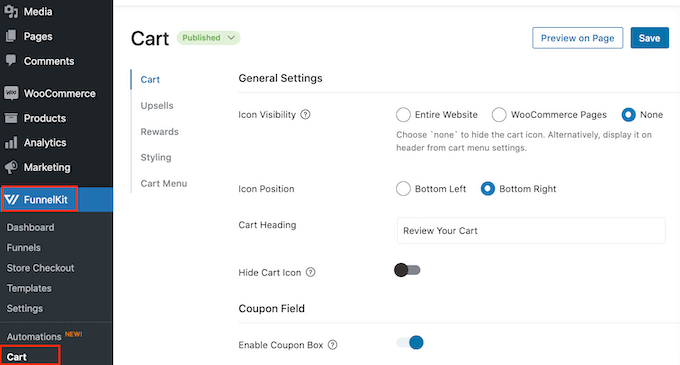
Upon activation, go to FunnelKit » Cart. You’ll see a preview of the sliding slide cart towards the right of the screen.
You can now customize the cart to better suit your needs.
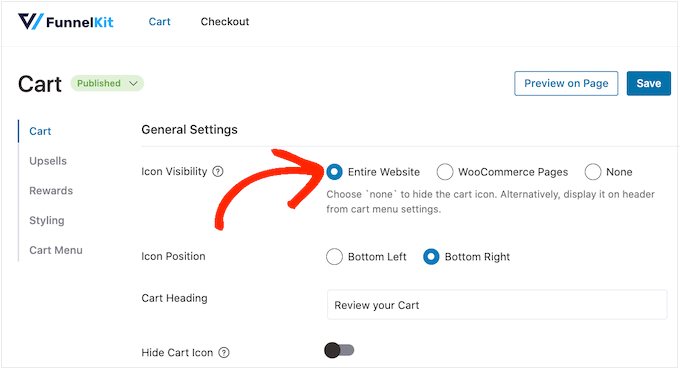
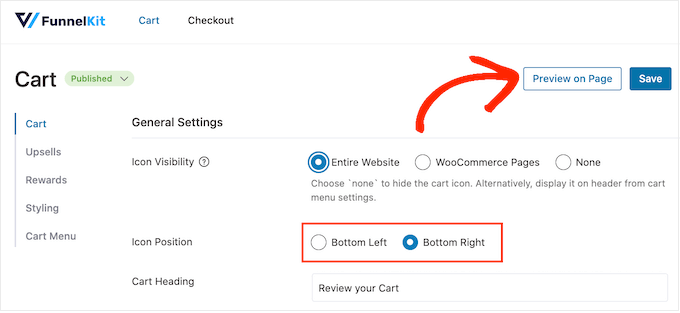
To start, you can decide whether to show the cart icon across your entire website or on WooCommerce pages only.
If you select ‘Entire Site’, then shoppers can open the sliding cart from any page, so this is a good choice for online marketplaces and stores.
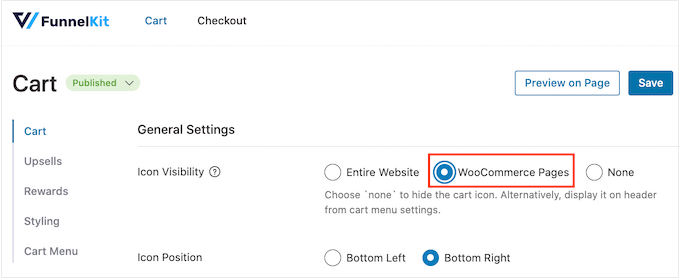
However, some WooCommerce sites have lots of non-ecommerce content. For example, you might run a popular WordPress blog, but use WooCommerce to sell merchandise to your fans.
Showing a cart button on every single blog post may become annoying. In that case, you can check the ‘WooCommerce Pages’ radio button.
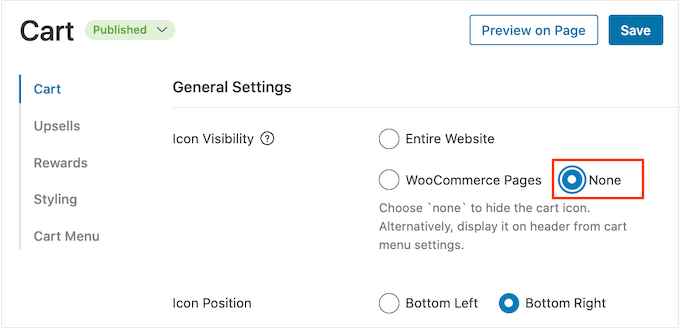
Another option is ‘None,’ which hides the cart icon completely.
If you select the ‘None’ option, then you can add the icon to any page, post, or widget-ready area using a shortcode. You can also add the icon to your navigation menu.
We’ll show you how to do this later in the post, but for now, select ‘None’ if you plan to add the cart icon manually.
After making this decision, select ‘Bottom Left’ or ‘Bottom Right’ depending on where you want to show the cart button. Here, it may help to check how the button will look on your online store by selecting ‘Preview on Page.’
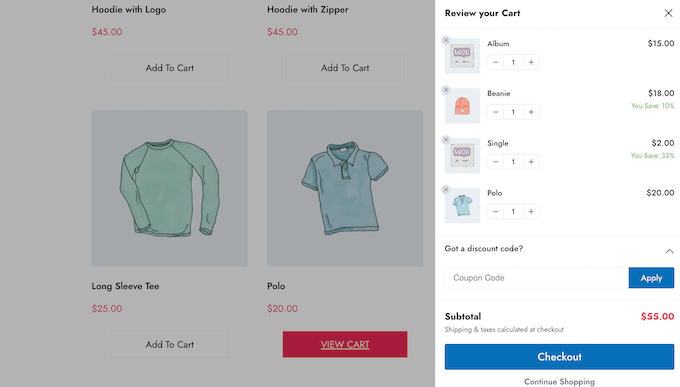
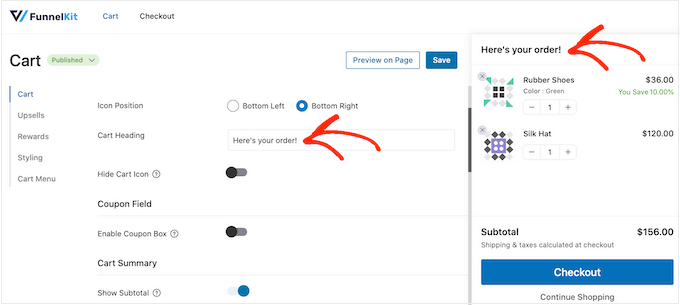
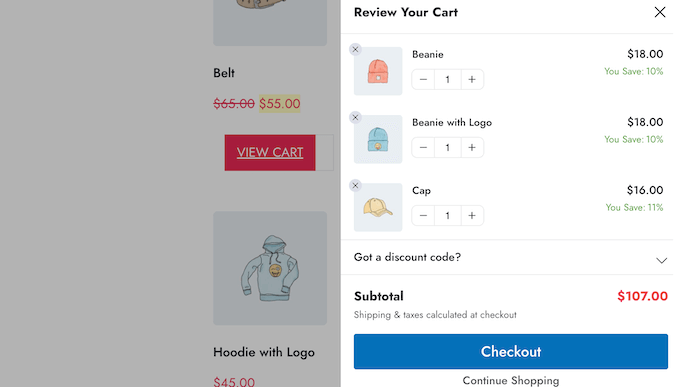
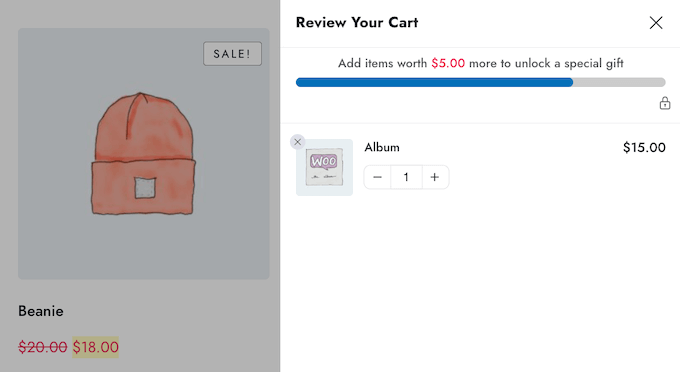
By default, the plugin shows ‘Review Your Cart’ at the top of the sliding side cart.
You can replace this with your own messaging by typing into the ‘Cart Heading’ field.
If you don’t want to show a heading, then simply leave the field empty.
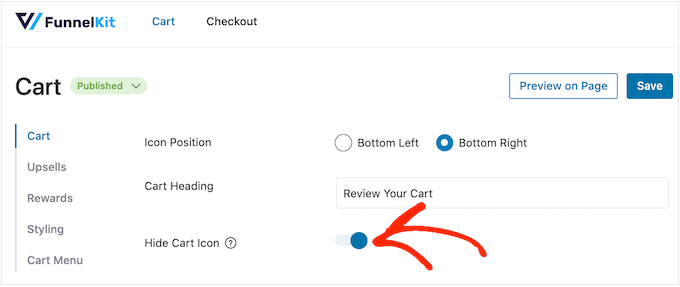
By default, FunnelKit shows the cart icon before the shopper adds any items to their basket.
If you prefer, then you can hide the icon until the visitor starts adding items. Simply click on the ‘Hide Cart Icon’ toggle so that it turns blue.
This is all you need to create a basic sliding side cart, but there are settings that can get you even more sales. With that in mind, let’s take a look at FunnelKit’s more advanced features.
Accept Coupons in the WooCommerce Sliding Side Cart
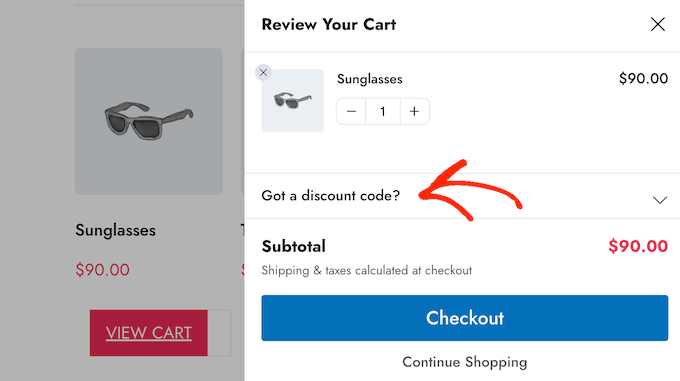
When the customer clicks on ‘Apply,’ the sliding cart will show how much they’ve saved.
Since customers can see the discount straight away, this will encourage them to add more items to their basket and may reduce your cart abandonment rates.
You can create these codes using the built-in WooCommerce coupon feature or by using a coupon code plugin.
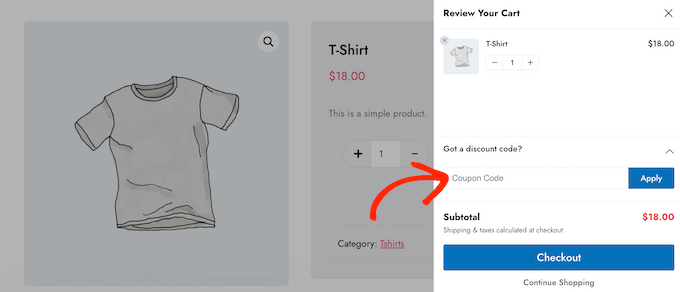
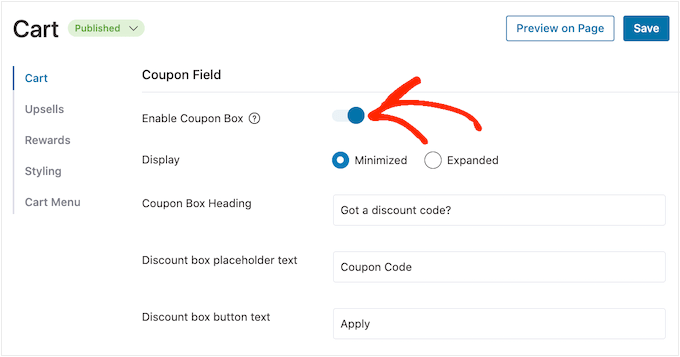
To add the coupon field, click on the ‘Enable Coupon Box’ toggle, which turns it from grey (disabled) to blue (enabled).
After that, you can switch between ‘Minimized’ and ‘Expanded’ layouts. Minimized takes up less space so it’s less distracting, but shoppers will need to expand the coupon section before they can type in any codes.
In the following image, you can see the minimized layout.
After choosing a layout, you can change the text that FunnelKit uses for the coupon box heading, discount placeholder text, and button text.
Customize the Cart Summary
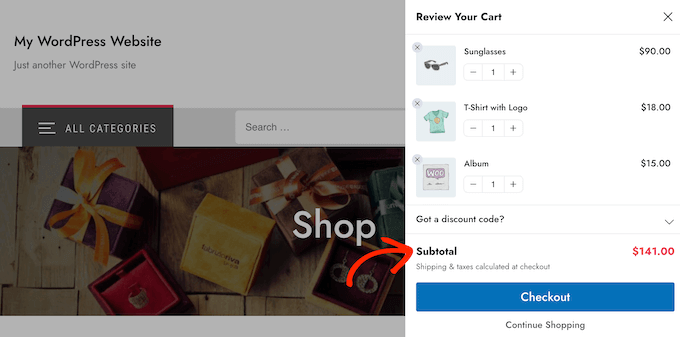
The cart summary shows customers how much their purchase will cost. This helps reduce cart abandonment rates since there are no nasty surprises at checkout.
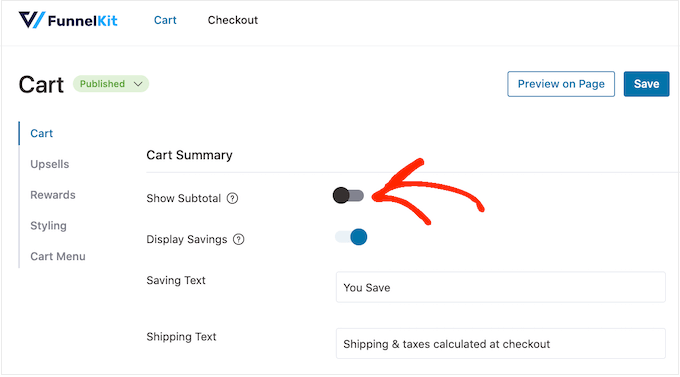
For that reason, we recommend leaving the ‘Show Subtotal’ toggle enabled.
However, if you want to simplify the side cart, then you can click to disable the ‘Show Subtotal’ toggle.
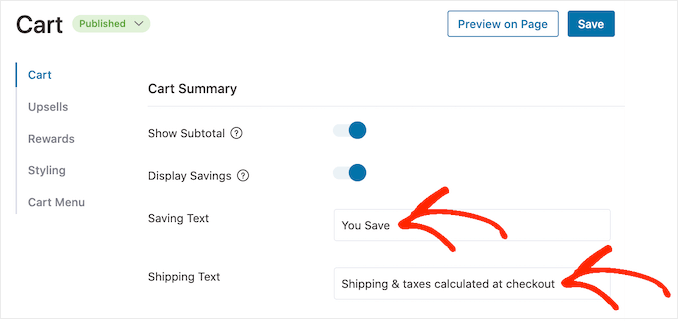
You can also show any savings the customer has qualified for, including discounts from any coupons they’ve applied.
If you prefer to hide this information from the sliding side cart, then you can disable the ‘Display Savings’ toggle.
You can also replace the ‘Saving Text’ and ‘Shipping Text’ with your own custom messaging.
Customize the WooCommerce Cart’s Call To Action
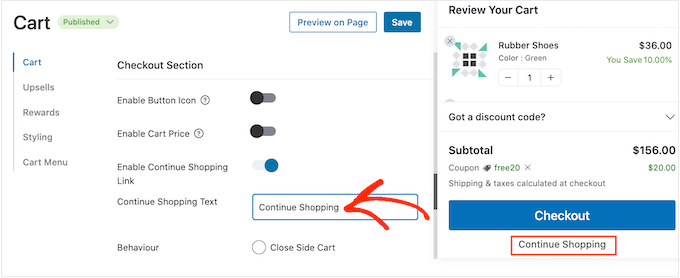
The sliding side cart has a default checkout button, but you can customize this call to action button to get more conversions. To start, you can add a checkout icon using the ‘Enable Button Icon’ toggle.
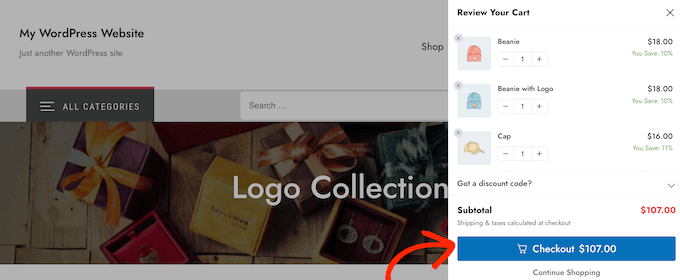
You can also add the cart price to the checkout button using the ‘Enable Cart Price’ toggle.
This may help shoppers keep track of how much the cart will cost, especially if you’ve removed the subtotal from the cart summary section.
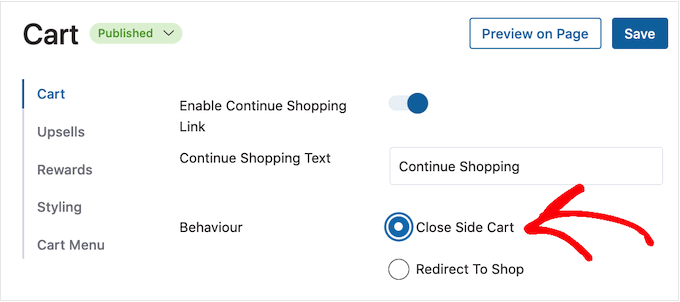
By default, FunnelKit adds a ‘Continue Shopping’ link at the bottom of the sliding side cart. You can replace this text with your own messaging by typing into the ‘Continue Shopping Text’ field.
After that, choose whether this link will simply close the side cart panel or redirect the shopper to your WooCommerce store page.
Most shoppers will expect to exit the sliding cart, so we recommend selecting the ‘Close Side Cart’ button.
If you select ‘Redirect to Shop,’ then you may want to change the ‘Continue Shopping Text’ text so it’s clear what will happen when customers click the link.
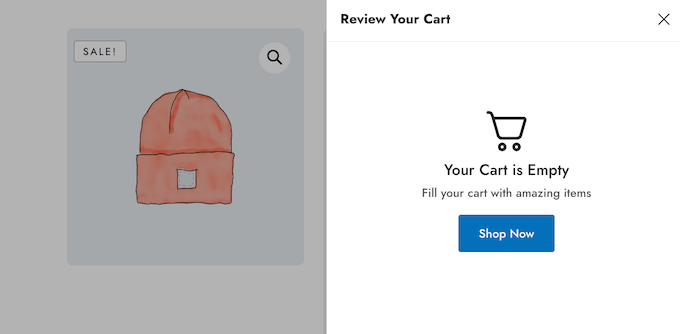
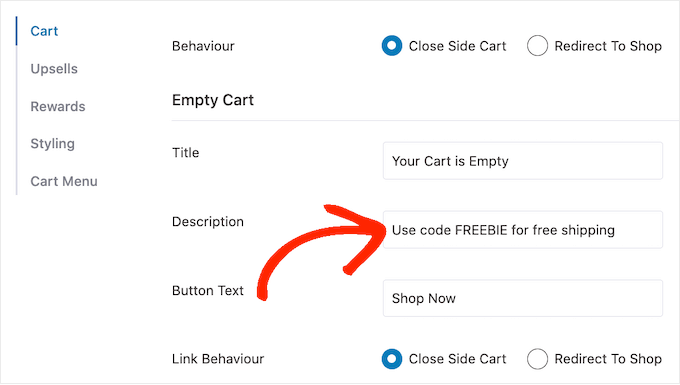
Create a Custom Empty Cart Screen
It is possible to hide the cart button until the shopper adds at least one item to their basket, following the process described above.
However, if you don’t hide the button then customers may sometimes see an empty cart screen.
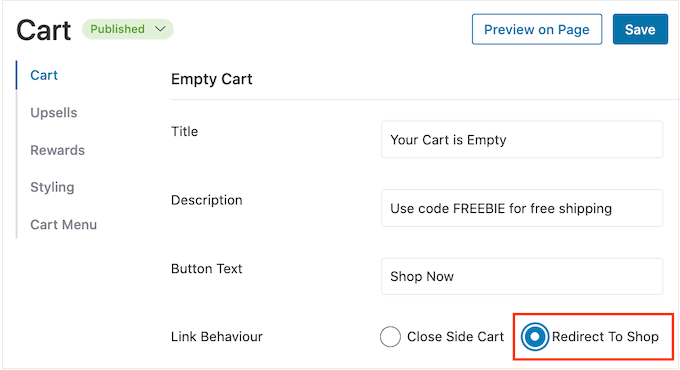
You can change the title, description, and button text using the settings in the ‘Empty Cart’ section. Typically, you’ll want to encourage customers to start shopping. For example, you might talk about things you offer such as free shipping or a money-back guarantee.
You can also choose whether clicking on the ‘Shop Now’ button will take the customer to the WooCommerce store page, or simply close the side panel.
We recommend selecting ‘Redirect To Shop’ as this will make it easier for shoppers to start adding items to their carts.
Add The Cart Icon Anywhere on your Site
If you want more control over where the cart icon appears, then you can add it to any page, post, or widget-ready area using a shortcode. You can also add it to your site’s menu.
This is a great choice if you selected ‘None’ in the ‘Icon Visibility’ settings following the process described above.
However, if you selected ‘WooCommerce Pages’ then this method allows you to add the cart icon to other important areas of your site. For example, you might add the icon to your custom home page or contact form.
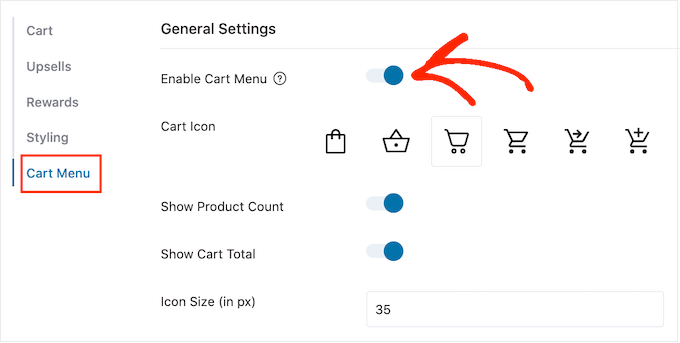
To start, select ‘Cart Menu’ and then click on the ‘Enable Cart Menu’ toggle.
You can now change how the icon looks by selecting one of the icon templates, and choosing whether to show the product count and cart total as part of the icon. This information can help visitors keep track of their carts.
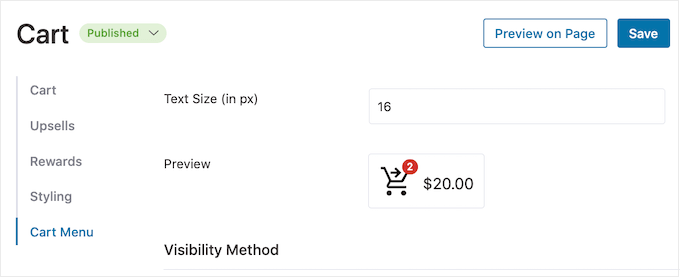
You can also change the icon size and text size. As you make changes, the small preview will update automatically so you can try different settings to see what looks the best.
When you’re happy with how the sliding side cart icon looks, click on the ‘Save’ button.
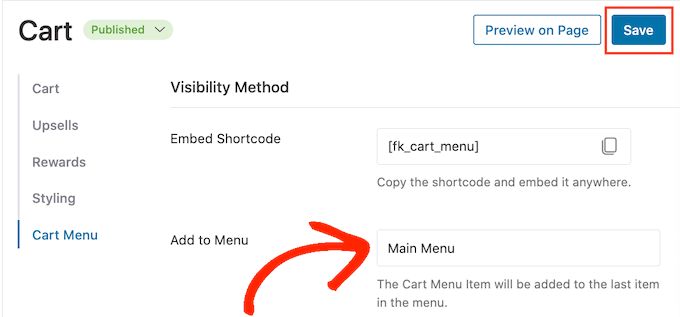
You can now add the icon to any page, post, or widget-ready area using the code next to ‘Embed Shortcode.’
Another option is to add the icon to your site’s navigation menu. In this way, the sliding side cart is always within easy reach, without distracting from the main page content.
To do this, open the ‘Add to Menu’ dropdown and choose the menu you want to use.
After that, click on the ‘Save’ button.
Now if you visit your WordPress website, you’ll see the cart icon in the navigation menu.
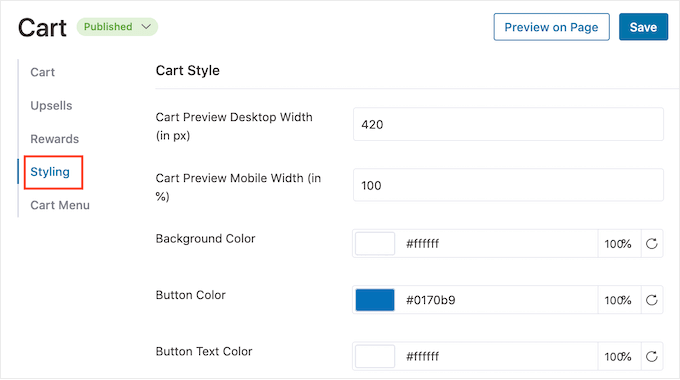
Add Your Own Colors and Branding
You may want to change the sliding side cart’s colors to better match your WooCommerce theme or branding. To change the text color, button color, link color, and more, go ahead and click on ‘Styling.’
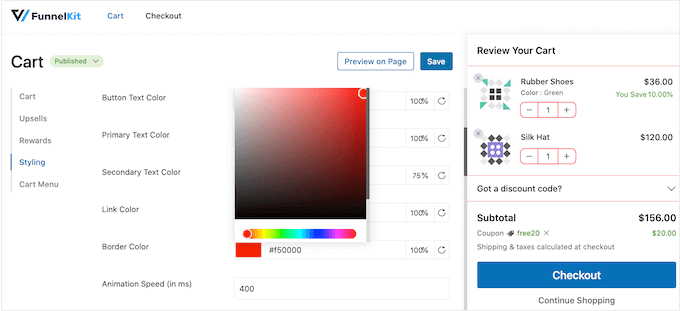
To change any of the default colors, simply give it a click. This opens a popup where you can try out different colors.
For example, in the following image, we’re customizing the border.
Another option is to type a hex code into the ‘Hex’ field. This is perfect if you already have a specific shade in mind.
If you don’t know what hex code to use, then it may help to use a site like HTML Color Codes. Here, you can explore different colors and then get a code that you can simply paste into the FunnelKit plugin.
How to Create a Responsive Sliding Side Cart
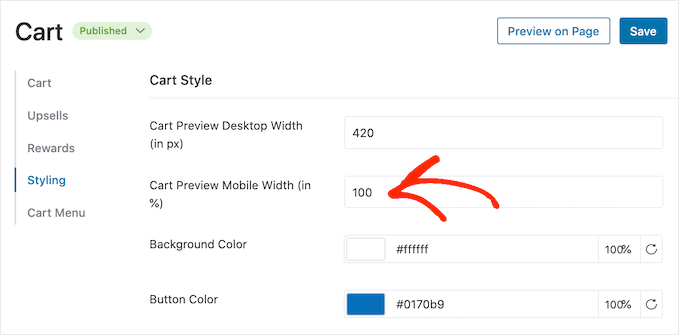
Many people buy products and services using a mobile device. With that in mind, you’ll want to make sure the sliding side cart looks just as good on smartphones and tablets, as it does on desktop computers.
Here, it may help to change the cart’s width so it doesn’t completely fill the small screen of a mobile device. To do this, click on ‘Styling’ and then look at the ‘Cart Preview Mobile Width.’
While you’re on this screen, you can also change the width of the sliding side cart on desktop. To do this, simply change the number in the ‘Cart Preview Desktop Width’ field.
How To Publish Your Sliding Side Cart
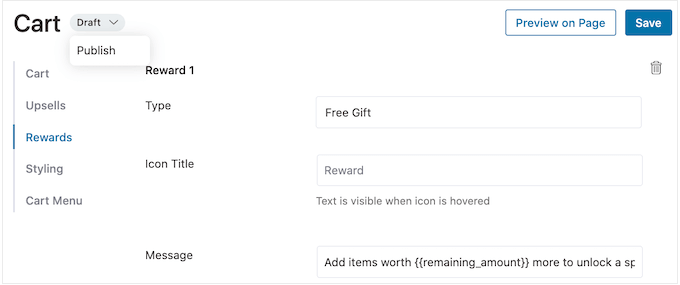
When you’re happy with how the sliding side cart is set up, it’s time to make it live. Simply click on the ‘Draft’ button next to ‘Cart’ and then choose ‘Publish.’
Now if you visit your online store, you’ll see the sliding cart live.
If you want to remove the sliding side cart at any point, then just head back to FunnelKit » Cart in the WordPress dashboard. Then, click on the ‘Publish’ button and select ‘Draft.’
Method 2. Add an Advanced Sliding Side Cart (With Upsells, Cross-Sells, and Rewards)
If you want to increase the average order value on your store, then you can upgrade to FunnelKit Cart Pro. This advanced sliding side cart plugin adds powerful upsell, cross-selling, and reward features to the FunnelKit sliding side cart.
With this plugin, you can recommend related products every time a customer adds an item to their cart.
You can also create unique rewards such as coupon codes and free gifts, and then promote them inside the sliding cart.
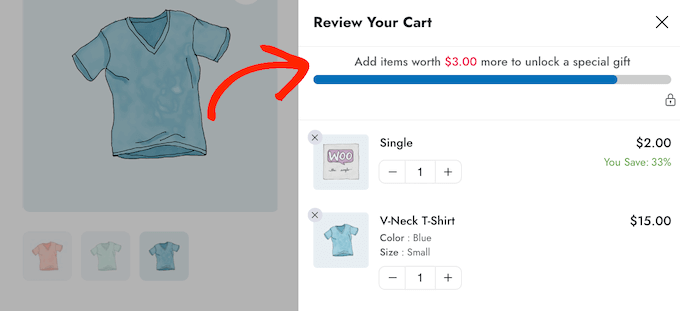
FunnelKit can even track how much more the customer needs to spend, in order to unlock the next reward.
To add these powerful features, you’ll need to upgrade to FunnelKit Funnel Builder Pro. Just be aware that you’ll need the Plus or higher plan.
After buying a plan, log into your FunnelKit account. Here, you’ll find the FunnelKit Funnel Builder Pro plugin, plus FunnelKit Funnel Builder and FunnelKit Cart. You’ll need to install all three plugins to unlock the advanced sliding cart features.
First, you’ll need to install and activate the three plugins. If you need help, then please see our guide on how to install a WordPress plugin.
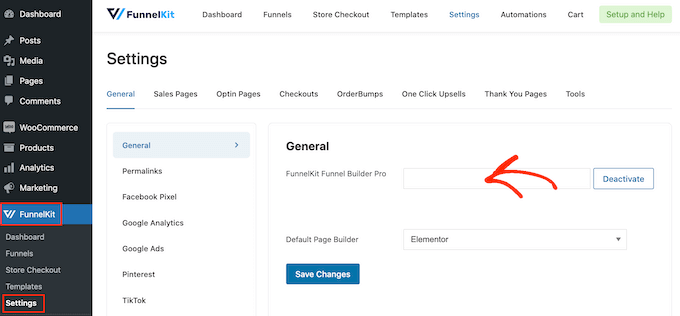
Upon activation, go to FunnelKit » Settings and add your license key to the ‘FunnelKit Funnel Builder Pro’ field.
You can find this information by logging into your account on the FunnelKit website. With that done, click on ‘Activate.’
After that, simply go to FunnelKit » Cart.
You can now configure and customize the side cart by following the same process described in method 1. When you’re happy with how the sliding side cart is set up, you’re ready to add upsells, cross-sells, and rewards.
Get More Sales By Upselling and Cross-Selling WooCommerce Products
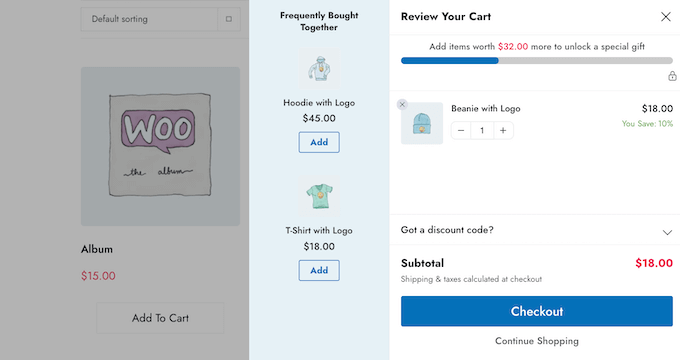
When a customer opens the sliding side cart, you can show them unique upsell and cross-sell promotions based on the items in their shopping basket.
Upselling is where you encourage shoppers to buy a higher-priced product instead of the one they already have in their shopping cart.
For example, imagine a customer adding a waterproof jacket to their cart. You might suggest a higher-quality jacket that’s more durable, versatile, and comes in different colors.
Cross-selling is where you promote a product that’s related to something the customer is already buying. For example, if they add a greeting card to their cart, then you might encourage them to buy chocolates or flowers too.
WooCommerce has a linked product feature that allows you to create upsells and cross-sells. For more information, please see our guide on how to upsell products in WooCommerce.
However, you can also create upsells and cross-sells directly from the FunnelKit dashboard. This is the quickest option, so it’s the one we’ll be using in this guide.
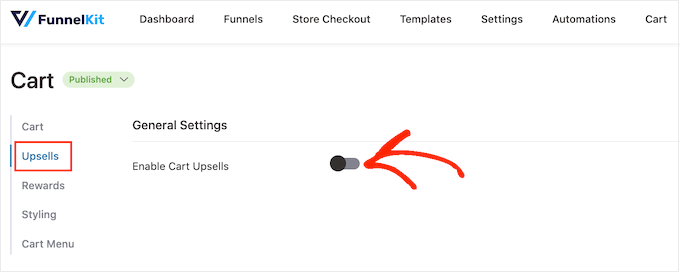
To start, click on the ‘Upsells’ option and then select ‘Enable Cart Upsells.’
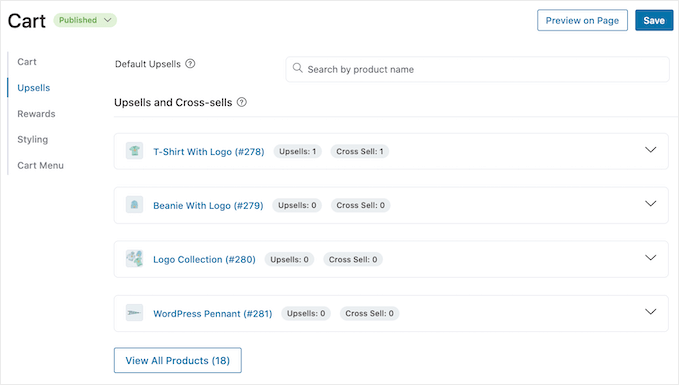
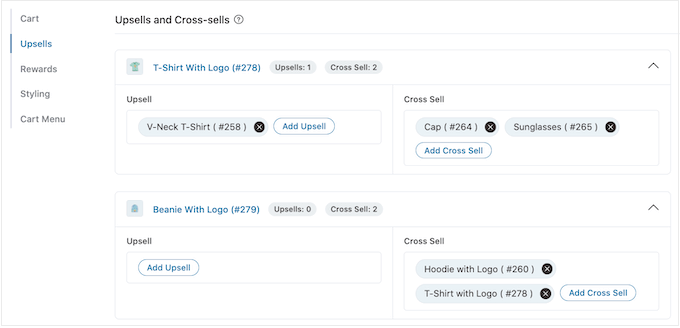
After that, scroll to the ‘Upsells and Cross-Sells’ section.
Here, you’ll see all the products on your online store.
Simply click on the item where you want to add one or more linked products.
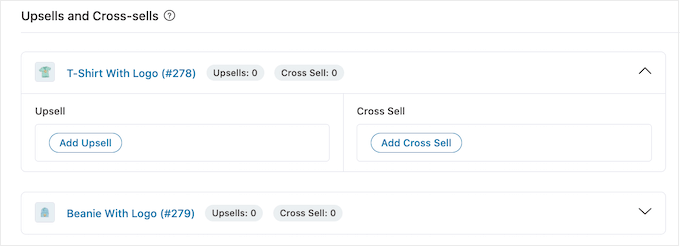
Then, click on either ‘Add Upsell’ or ‘Add Cross Sell’ depending on the kind of promotion you want to create.
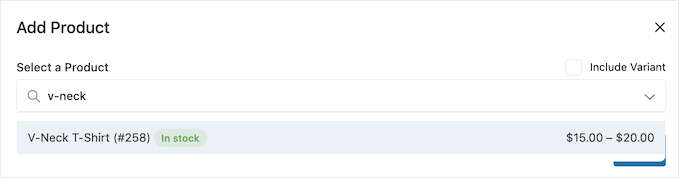
In the popup, start typing the product that you want to use as the upsell or cross-sell. When the right product appears, give it a click.
To offer multiple products, simply follow the same process described above.
With that done, simply click on the ‘Add’ button.
You can now create unique cross-sell and upsell campaigns for every product in your store, simply by following the same process described above.
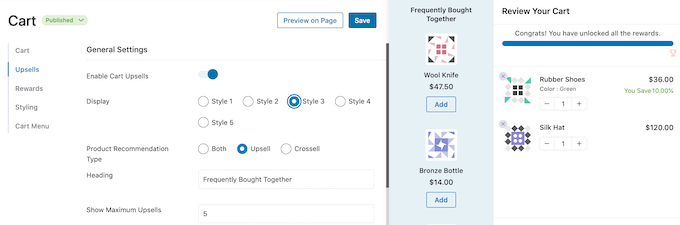
Now, you’re ready to customize how the upsell and cross-sell promotions will look on your sliding side cart.
To start, try switching between different styles by clicking the radio buttons next to ‘Display.’
The live preview will update automatically so you can try different styles to see which one you like the best.
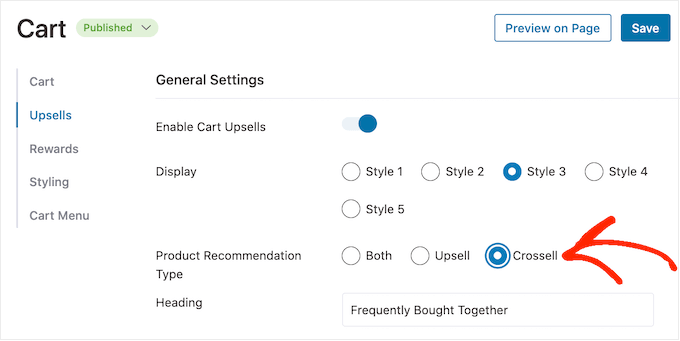
By default, FunnelKit will show both upsells and cross-sells in the sliding side cart. If you prefer then you can show only upsells, or only cross-sells using the radio buttons in ‘Product Recommendation Type.’
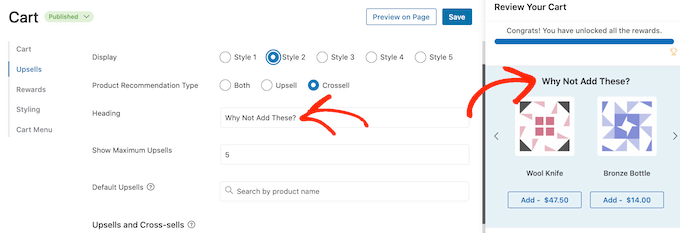
Next, you can change the heading that FunnelKit shows above the upsell or cross-sell promotion by typing it into the ‘Heading’ field.
Just be aware that FunnelKit will use the same heading for both types of promotion.
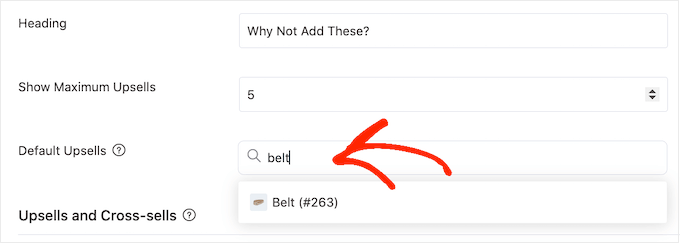
After that, you can set the maximum number of suggested products that FunnelKit will show, by typing into the ‘Show Maximum Upsells’ field.
Wherever possible, it’s a good idea to create unique upsell and cross-sell promotions for every product. However, if your online store has lots of items then this might not be possible.
With that in mind, you can set a default upsell product that FunnelKit will promote when no linked products are available. To do this, simply type the name of a product into the ‘Default Upsells’ field. When the right product appears, give it a click.
When you’re happy with the upsell and cross-sell promotions you’ve created, don’t forget to click on ‘Save’ to store your changes.
Offer Free Shipping, Discounts, and Free Gifts
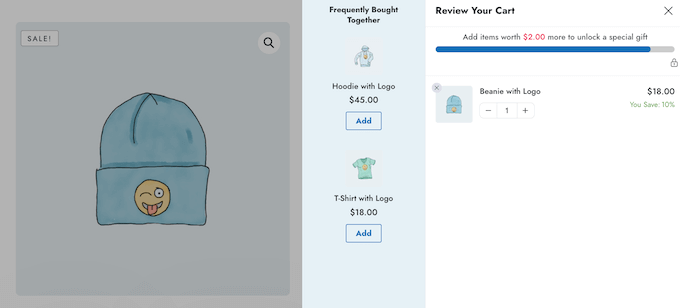
You can often increase the average order value by giving customers a reason to spend more. With that in mind, FunnelKit allows you to create various rewards and then promote them as unlockable bonuses in the sliding side cart.
For example, you might offer free shipping if the customer exceeds a minimum spend. FunnelKit will even show customers how much more they need to spend to unlock their prize.
FunnelKit allows you to offer three different rewards: free shipping, a discount, and a free gift.
To offer free shipping, you’ll need to have already set up shipping in your WooCommerce store. For step-by-step instructions, please see our complete WooCommerce made simple guide.
Meanwhile, the ‘discount’ reward auto-applies a coupon when the customer reaches the minimum spend. If you want to offer this reward, then you’ll need to create a percentage discount coupon using either the built-in WooCommerce coupon feature or a WordPress coupon plugin.
After that, you’re ready to create a reward by selecting ‘Rewards’ in the FunnelKit settings and then clicking on ‘Create Reward.’
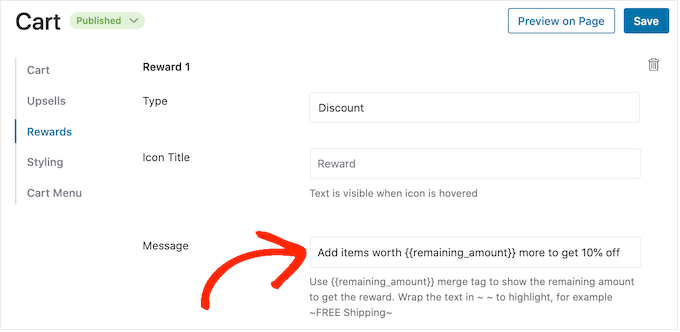
You can now open the ‘Type’ dropdown and choose the kind of reward you want to create.
No matter whether you choose free gift, free shipping, or discount, you can change the text that FunnelKit shows to customers by typing into the ‘Message’ field.
If you do make any changes, then be careful not to edit {{remaining_amount}} as this allows FunnelKit to show how much more the customer needs to spend.
If you’re offering a discount, then make sure you change the message to show how much the customer will save.
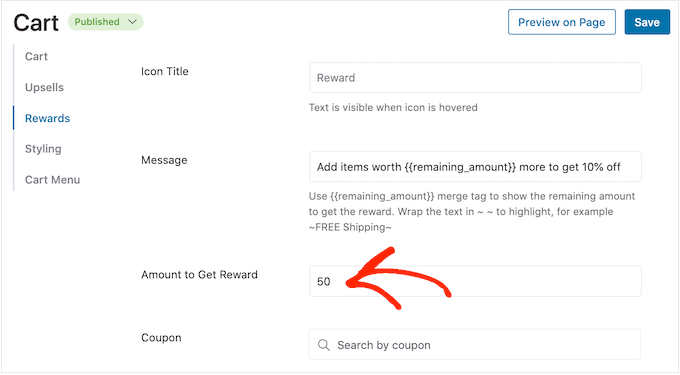
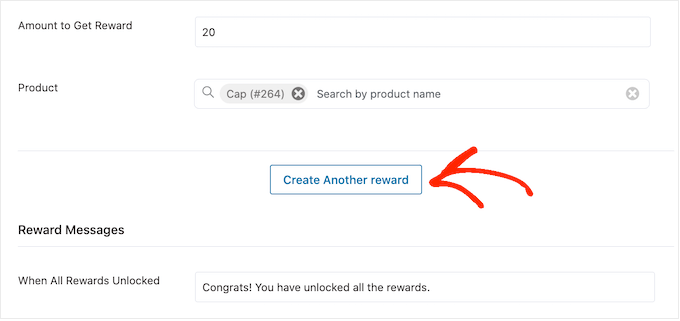
With that done, type a number into the ‘Amount to Get Reward’ field. This is how much shoppers must spend, in order to unlock the reward.
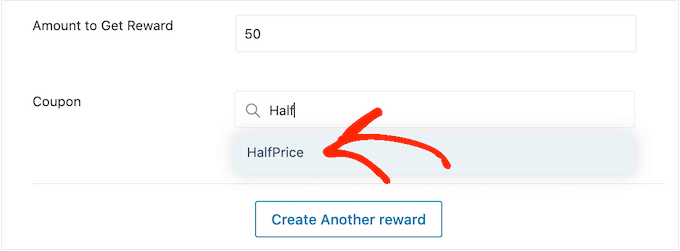
If you’re offering a percentage discount, then you need to specify which coupon FunnelKit should auto-apply.
In the ‘Coupon’ field, start typing the coupon that you want to use. When the right code shows up, give it a click.
Now, FunnelKit will auto-apply the coupon when someone meets the minimum spend.
Offering a free gift instead? Then start typing the name of the gift into the ‘Product’ field.
When the right product shows up, give it a click.
Now, FunnelKit will add this item to the customer’s shopping cart as soon as they meet the minimum spend.
To add more rewards, simply click on ‘Create Another Reward.’
You can now configure the discount, free gift, or free shipping reward by following the same process described above.
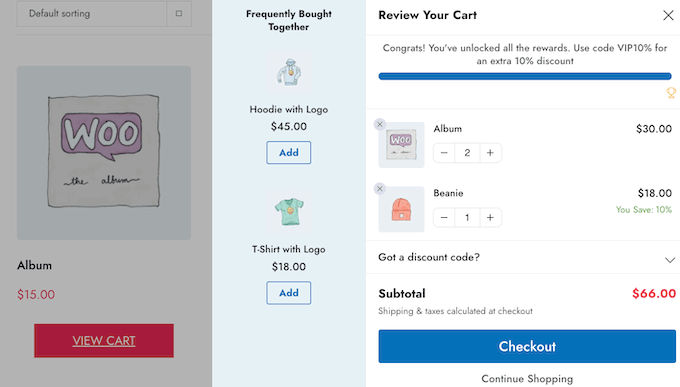
By default, FunnelKit will show the following message once a customer qualifies for all the awards: ‘Congrats! You have unlocked all the rewards.’
To show a different message instead, simply type into the ‘When All Rewards Unlocked’ field. You might even offer the customer a special bonus for unlocking all your rewards, such as an exclusive coupon code to use on their next purchase.
When you’re happy with how your rewards are set up, click on the ‘Save’ button.
How To Publish Your Sliding Side Cart
When you’re ready to make the sliding side cart live, simply select the ‘Draft’ button next to ‘Cart.’ You can then click on ‘Publish.’
If you want to remove the sliding side cart at any point, then simply head back to FunnelKit » Cart in the WordPress dashboard. Then, click on the ‘Publish’ button and select ‘Draft.’
Do you want to prevent fraud and fake orders on your WooCommerce store?
Fraud and fake orders can cause serious losses for an online store. Luckily, there are effective tools to prevent spam and block fraudulent orders.
In this article, we’ll show you how to easily prevent fraud and fake orders in WooCommerce.
Why Do You need to Prevent Fraud and Fake Orders in WooCommerce?
Fraudulent and fake orders can cause serious financial losses to a business. This is why you need to monitor your online store and prevent fraud and fake orders.
Last year, online stores lost more than $20 billion in revenue due to fraudulent payments, chargebacks, and fake orders.
For some eCommerce stores, the total fraudulent order costs were higher than 4% of total revenue.
A large number of fake orders are usually spam that can be easily prevented. Some orders are more malicious and are placed just to annoy or harass an online business.
The rest of the fraudulent orders are scammers trying to make a few quick bucks.
That being said, let’s take a look at how to prevent fraud and fake orders in WooCommerce.
Here is a quick overview of all the tips we’ll cover in this guide.
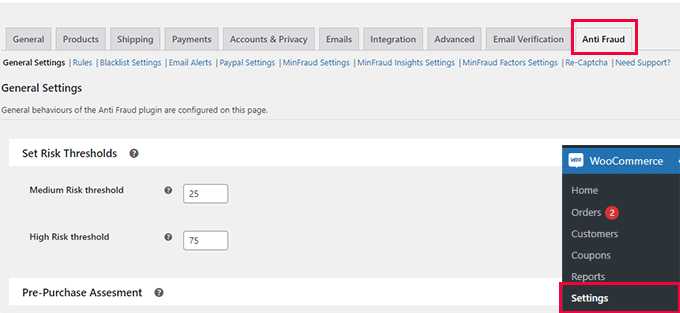
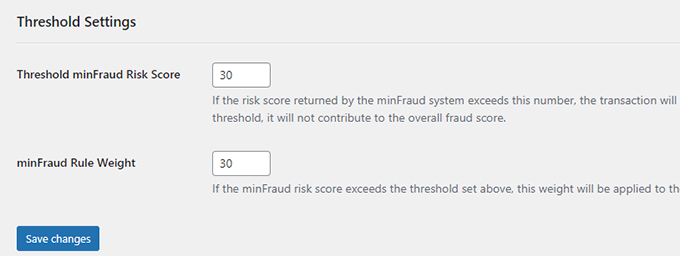
Upon activation, you need to visit WooCommerce » Settings page and switch to the Anti-Fraud tab.
From here, you can set a minimum and high-risk threshold score.
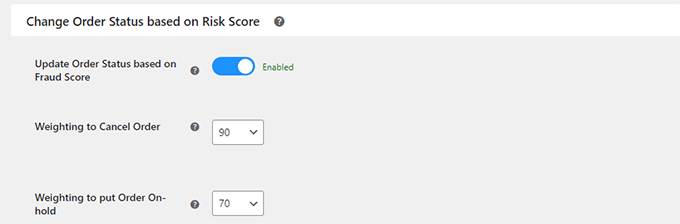
Below that, you can change the order status based on the risk score. For instance, you can set the score when an order will be automatically canceled and set a score to put an order on hold.
Don’t forget to click on the ‘Save Changes’ button to store your settings.
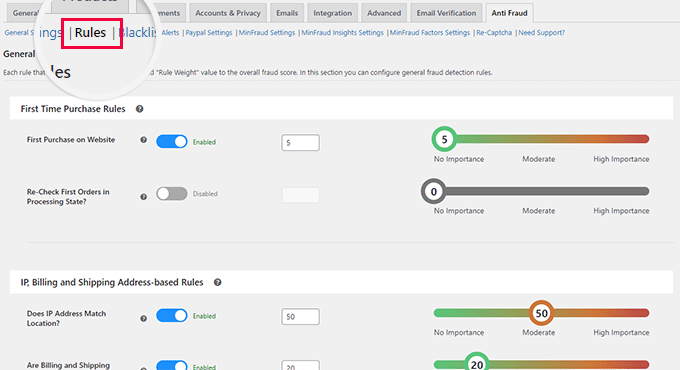
Next, you need to switch to the Rules tab. From here, you can configure the rules and assign them a risk score.
For instance, you can set a 5-point score for a customer who is placing their first order.
You can set scores for suspicious IP addresses, emails, unsafe countries, matching IP addresses to geographic locations, and more.
Carefully review the rules and their assigned scores and make changes if necessary. If you are unsure, then default settings would work for most eCommerce websites.
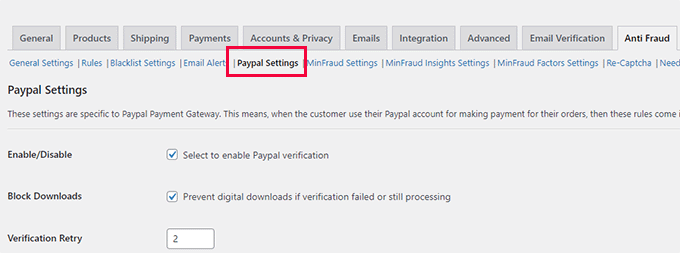
If you are using PayPal as a payment option on your store, then you can switch to the PayPal tab. From here, you can require users to verify their PayPal email addresses.
The plugin also allows you to connect with third-party fraud detection service Maxmind.
This paid service uses a global database to collect data about suspicious payment details, emails, IP addresses, and more.
You can then add this score to your plugin risk score and choose what to do when this score is higher.
Once you are satisfied with your settings, don’t forget to click on the ‘Save Changes’ button to store them.
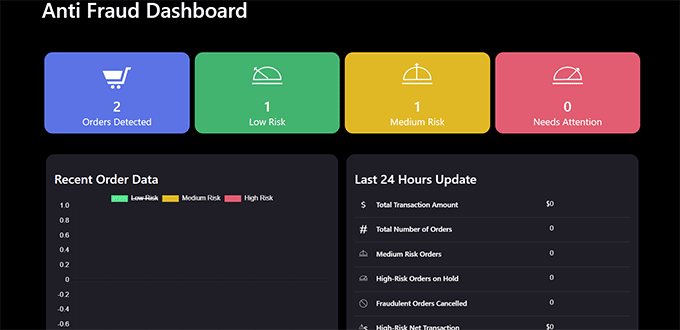
Viewing Fraud Detection Activity
The plugin comes with an easier dashboard where you can see plugin activity in an easy-to-understand format.
Simply click on the Anti Fraud menu item in your WordPress admin sidebar. From here, you can see statistics about all your orders.
The anti-fraud plugin will help you catch most of the fake and fraudulent orders on your WooCommerce store.
However, if you need more strict measures then continue reading for additional WooCommerce fraud prevention tips.
2. Use Stripe Radar and 3D Secure to Automatically Block Fraud
Stripe is the most popular online payment solution in the world. There is a WooCommerce Stripe gateway by FunnelKit that helps you properly connect WooCommerce with Stripe, so you can take advantage of SCA as well as 3D Secure payments option by default.
This method would require you to use Stripe as your main payment gateway in WooCommerce. First you’ll need to install and activate the Stripe for WooCommerce plugin by FunnelKit. Once that’s configured, it will guide you to set up Apple Pay, Google Pay, and other settings to help you protect against fraud transactions.
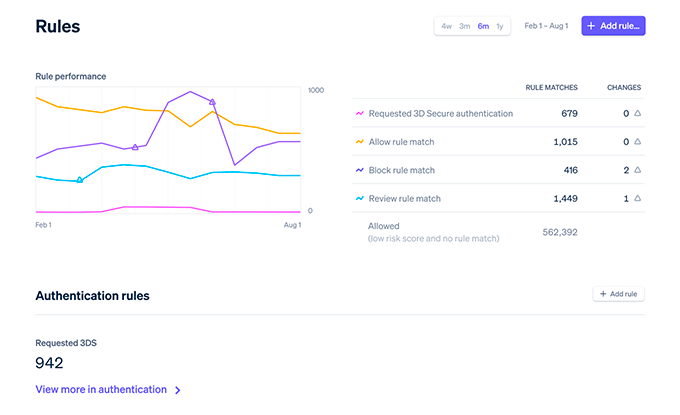
Aside from that, Stripe also offers a feature called Stripe Radar to help fight against fraudulent transactions. This is a powerful set of algorithm that reduces chargeback risks for your business.
Basically Stripe uses machine learning to block orders. Their machine learning is trained on data across millions of companies worldwide that use Stripe.
We use Stripe Radar on our own eCommerce websites to help reduce fake and fraudulent orders.
Aside from their machine learning algorithm, you can also set custom rules with allow and block lists, and more.
Unfortunately not all WooCommerce gateways have these robust features. If you’re looking to switch to Stripe, then we recommend talking with FunnelKit team as they’re WooCommerce experts who can help.
3. Using the Cash on Delivery Payment Option Carefully
In many countries, ‘Cash on Delivery’ is a popular payment option. However, these stores find themselves more vulnerable to fake and fraudulent orders.
Users are able to place an order with a fake address, refuse to accept the order, or cancel an order that is already shipped.
Once you have shipped an order, you will pay out of pocket for shipping and return of that package.
We recommend not using the ‘Cash on Delivery’ option when possible, as that can lower the number of fake orders you may get.
Try to offer alternate payment options for users to pay before you can ship the order.
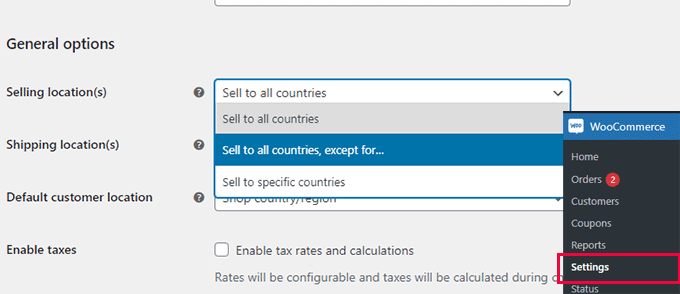
4. Sell in Specific Countries
WooCommerce allows you to easily restrict orders from specific countries. This helps you prevent fake orders from countries where you don’t sell or ship to.
Simply go to the WooCommerce » Settings page and select the countries you want to sell / ship to under the General tab.
Note: Geographical restrictions may reduce fake orders but users can simply use VPN to change their location and provide fake information to place an order.
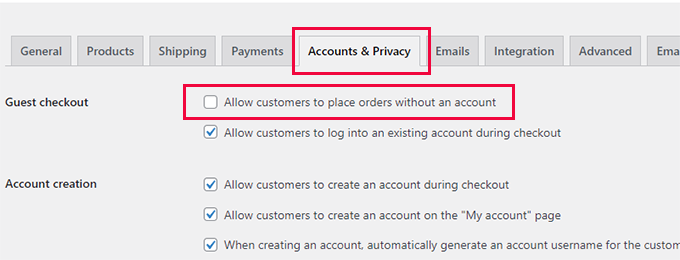
5. Require Users to Create an Account
Another useful trick to slow down and prevent fake orders is by requiring users to create an account before they can checkout.
Simply go to WooCommerce » Settings page and switch to the Account and Privacy tab. From here, you need to uncheck the box next to the ‘Allow customers to place orders without an account’ option.
Below that, you can check options that allow users to create an account during checkout or from the My Account page.
Asking users to create an account also allows you to easily block customers who placed fraudulent or fake orders.
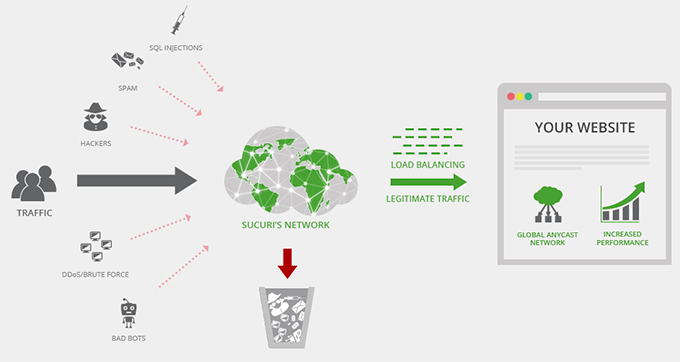
6. Use a Web Application Firewall and Custom Rules
Many scammers use disposable email addresses, fake IP addresses, and dummy data to place spam or fake orders.
A WordPress firewall helps you block this before it even reaches your website.
We recommend using either Sucuri or Cloudflare, both are among the best WordPress firewall plugin on the market. They comes with powerful security features, CDN servers, and a malware removal service.
In Cloudflare, you can also setup custom page rules to trigger CAPTCHA, or even automatically block users with suspicious activity. We use Cloudflare enterprise on our larger eCommerce stores which comes with all bots anomaly detection and threat response.
If you’re running a large eCommerce store, then it’s worthwhile exploring Cloudflare Enterprise tools.
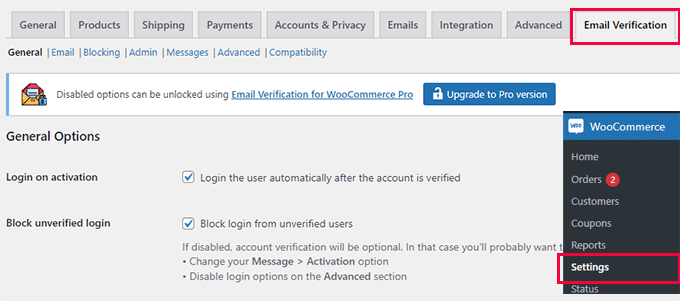
7. Require Customers to Verify Their Email Addresses
Another way to reduce fake orders and fraudulent activity is by requiring new customers to create an account and then require them to verify their email addresses.
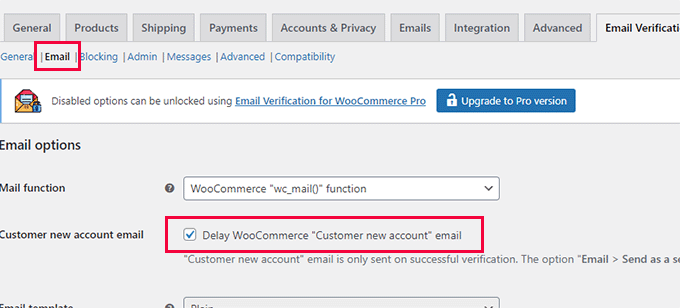
Upon activation, you need to visit the WooCommerce » Settings page and switch to the Email Verification tab.
From here, you can configure the plugin settings to your own requirements.
For instance, you can switch to the Email tab and delay the default WooCommerce new user email until the user verifies their account.
Don’t forget to click on the ‘Save Changes’ button to store your settings.
The plugin will now send a verification email to new WooCommerce customers to verify their email addresses.
It’s important to make sure that if you’re setting up email verification that your WooCommerce store actually have reliable email deliverability. Otherwise this can block real customers from purchasing your products.
There’s also a free version of WP Mail SMTP that you can use as well.
We hope this article helped you prevent fraud and fake orders in WooCommerce. You may also want to see our complete WordPress security guide to make your online store more secure or take a look at our expert pick of the best WooCommerce plugins to grow your store.
If you liked this article, then please subscribe to our YouTube Channel for WordPress video tutorials. You can also find us on Twitter and Facebook.
Recently one of our readers asked us for our suggestion on the best Google Optimize alternative?
Google Optimize is a tool that lets you conduct experiments on your website. However, Google recently announced that the Optimize tool will be sunset in September 2023, and your experiments will stop after this date.
This has left many business owners and marketers scrambling to quickly find a Google Optimize alternative for their A/B testing needs.
In this article, we will share the best Google Optimize alternatives, so you can choose the solution that works for your needs. We will also share what we’re going to be switching to as well.
What is Google Optimize and Why Use an Alternative?
Google Optimize is a free tool by Google that allows you to split test pages on your WordPress website and improve user experience.
You can set up conversion experiments using the tool and see if making changes to a landing page increases conversions. For example, you can A/B split-test two versions of a sales page, use different headlines, or change the color of the call to action (CTA) buttons to see which one works the best.
However, Google announced that they will sunset Google Optimize on September 30, 2023. After this date, the tool will no longer be available, and all your experiments and personalizations will end on that date. Besides that, you won’t be able to access data after the sunset date.
You can use a Google Optimize alternative to continue experimenting and testing your site. There are many tools in the market that let you conduct A/B tests with ease, require no coding to set up, and offer powerful features.
Let’s look at the best Google Optimize alternatives especially the ones that works seamlessly with WordPress websites, but several of these Google Optimize competitors will work on all website platforms.
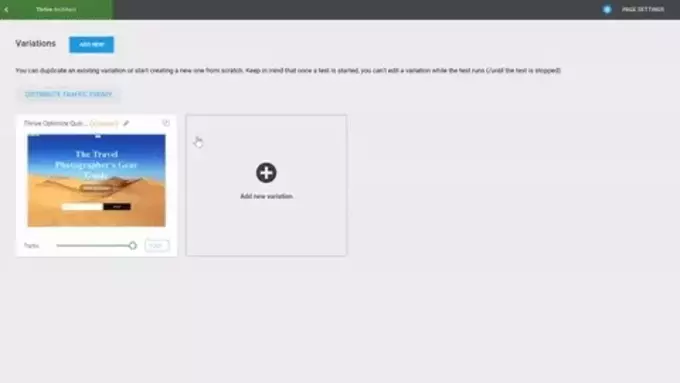
Thrive Optimize is the best Google Optimize alternative for WordPress that is super easy to use. It is part of the Thrive Theme suite, which includes an ecosystem of WordPress plugins focused on boosting conversions on your site.
With Thrive Optimize, you can conduct experiments and A/B test landing pages without editing code. Unlike Google Optimize, the plugin is beginner friendly, as there is no need to add code snippets to your site.
You can get started in no time. Simply create a landing page using the visual builder and then create a variant. After that, pick a conversion goal, which includes page visits, opt-in form submissions, and revenue. Once that’s done, go ahead and run the test.
The best part is that you don’t have to switch between tabs or windows to view the results of your experiments. If you’re using Google Optimize, then you’d have to jump back and forth between tabs to see the results.
Instead, Thrive Optimize shows a report inside your WordPress dashboard. You can quickly view which variant is converting the best. Besides that, you can create as many variations of a landing page for testing as you want. The plugin also picks a winner and shows the best variant.
Pricing: Thrive Optimize is part of the Thrive Themes suite which costs $299 per year and includes 9 other powerful conversion tools. You can also purchase Thrive Optimize bundle for $199 / year.
OptinMonster is the best WordPress popup plugin and lead generation software in the market. You can create campaigns like floating bars, welcome screen mats, and popups to grow your email list, increase conversions, and get more leads.
OptinMonster offers an A/B testing tool that lets you test different popup and modal campaigns. It makes a great Google Optimize alternative because it’s very easy to use. You can customize and create different variants using the drag-and-drop campaign builder.
Once you’ve created a split test, OptinMonster will randomly show the variations to your visitors and pick a clear winner. You can then see in-depth stats about conversions inside your WordPress dashboard and find out which campaign performs the best.
Pricing: You will need the OptinMonster Plus or higher plan to use the A/B testing feature, with prices starting from $19 per month.
VWO Testing is a popular A/B testing tool and a great alternative to Google Optimize. You get more features than Google Optimize, as it allows you to run multiple experiments on your website, products, apps, and server side.
It comes with a visual builder to change different elements on your webpage, like text, images, shapes, backgrounds, and more. After making the changes, you can run split tests and see which variant performs the best.
VWO Testing offers an AI-power copywriting tool. This way, you can automatically select different headlines, CTA copies, and product descriptions to test.
It also lets you run tests based on user segments and behavior. For instance, you can select a target audience based on time spent on a page, scroll depth, exit intent, and when someone clicks on elements.
Pricing: VWO offers a free plan that you can use for up to 50 thousand users per month. If you have more users, then you can upgrade to their premium plans.
FunnelKit is another Google Optimize alternative that comes with an A/B testing feature specially for WooCommerce. You can split-test your product prices, page layouts, messages, designs, and funnels without editing code.
The plugin is beginner friendly and helps you set up experiments within minutes. You can test headings, images, prices, product descriptions, and every other component on a page. FunnelKit also helps declare a winner once there’s enough data to see which funnel converts the best.
Besides that, FunnelKit also offers other features. For example, it offers FunnelKit Automation which allows you to set up automated emails and SMS campaigns.
Pricing: FunnelKit offers multiple pricing plans. To use the A/B Testing feature, you’ll need the Plus plan. It will cost you $179.5 per year.
Convert.com is a proven A/B testing tool to help you boost conversions. It provides fast & flicker free A/B testing experience and is known for their speed.
They are a perfect Google Optimize alternative because it gives you access to all the features you’re accustomed to with Google Optimize and then some more.
Convert also let you seamlessly integrate your tests with Google Analytics as well as other tools like Hotjar, Heap, Segment, HubSpot, and more.
Their onboarding is a bit slow, but once you’re up and running, you can create unlimited tests and quickly deploy changes.
Pricing: Convert.com prices start from $99 per month, and you get a 14-day free trial.
Crazy Egg is a popular heatmap tool in the market. You can use heatmaps to see how users behave on your website, where they click, and how they move the mouse cursor and scroll through pages.
Crazy Egg offers an A/B testing tool that you can use to run experiments on your website and boost conversions. What makes it a great Google Optimize alternative is the features it offers along with A/B testing.
You get heatmaps, recordings of visitors using your website, error tracking, surveys, and traffic analytics. Plus, you can configure it without editing code, which isn’t possible if you’re Google Optimize.
Crazy Egg offers a multivariate engine where all you need to do is choose the elements you want to test and add your ideas. The engine then does the heavy lifting and conducts the test for you.
The best part is that it is easily integrated with website builders, including WordPress, Shopify, Squarespace, Wix, and more.
Pricing: Crazy Egg offers different pricing plans starting from $29 per month. You get unlimited A/B tests in each pricing plan, and there is also a 30-day free trial to get started.
Adobe Target is an enterprise-level solution to run split tests on their website and is part of Adobe Marketing Cloud. It is more powerful than Google Optimize and offers an omnichannel approach to the A/B test.
What this means is that instead of running isolated experiments, Adobe Target lets you run tests on every channel. This way, you get to see how users behave with different variants coming from other channels, like social media, organic traffic, paid search, and more.
The software is easy to use and set up. Plus, its AI-powered automation helps you test multiple experiences and then personalize them for each visitor.
On the downside, Adobe Analytics is only available for users that have Adobe Analytics. If you’re looking for a complete marketing solution with an A/B testing feature, then you can use Thrive Optimize instead.
Pricing: You will need to request a quote and get Adobe Target pricing according to your business needs.
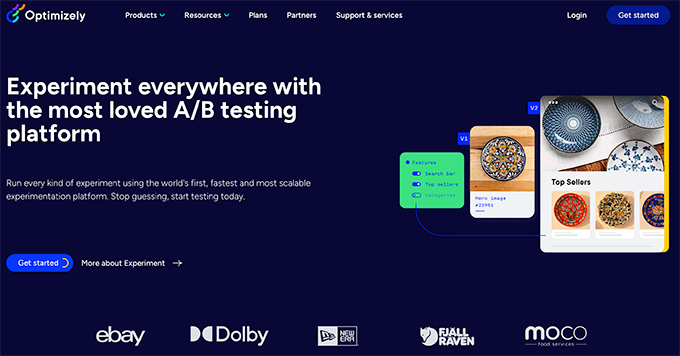
Optimizely is one of the most popular Google Optimize alternatives in the market. Their digital experience platform allows you to create every kind of A/B testing experiment for your website.
You can use their visual editor along with advanced targeting features to optimize your A/B testing campaigns. Optimizely works on all website platforms and is a platform of choice by many large brands.
We have used Optimizely in the past when they had a free plan, and it’s an extremely powerful tool for what it does, however the prices are no longer small business friendly.
Pricing: Optimizely does not reveal it’s prices anymore and require that you submit a form to request a quote.
Kameleoon is the next Google Optimize alternative on our list. It offers powerful solutions and lets you conduct different types of experiments.
For starters, you can run web experiments and A/B test your website and mobile apps. You can assign a business goal to your tests and see which variant is increasing conversions, retention, or engagement.
Kameleoon also offers A/B testing features to advanced users and developers. You can run server-side experiments to improve your product. It easily works in different development languages and frameworks, like PHP, Java, Ruby, Flutter, and more.
Besides that, it offers AI-power personalization. You can provide unique experiences to each visitor, target different segments for testing, and comply with privacy laws like GDPR and CCPA.
Pricing: You will need to request a demo and get a quote for Kameleoon pricing.
Which is the Best Google Optimize Alternative (Expert Pick)
If you’re looking for a WordPress A/B testing tool, then Thrive Optimize is our first pick. It gives you all the powerful features, and it’s very affordable. Since it’s part of the Thrive Suite, you also get other solutions like a quiz builder, popup form builder, WordPress page builder, and more.
If you’re looking for an all-around SaaS alternative for Google Optimize that works on all platforms, then we recommend using VWO Testing. They have a generous free plan that should work for most small business owners.
And if you are an eCommerce store owner looking for the best Google Optimize alternative for WooCommerce, then we recommend using FunnelKit. They have deep integration with WooCommerce and allow you to customize every step of the funnel including adding custom 1-click upsells, order bumps, and more to help boost your average order value.
We hope this article helped you find the best Google Optimize alternative. You may also want to see our ultimate WordPress SEO guide to improve your SEO ranking, and see our comparison of the best push notification software with A/B testing features to boost your traffic.
If you liked this article, then please subscribe to our YouTube Channel for WordPress video tutorials. You can also find us on Twitter and Facebook.
Do you want to send automated coupons in WordPress to bring back customers?
By sending the right coupon to the right person at the right time, you can re-engage customers who are losing interest. This can get you more sales, create brand loyalty, and help you keep your best customers.
In this guide, we’ll show you a few different ways to send automated coupons in WordPress, and bring back customers.
Why Send Automated Coupons to Bring Back Customers?
You may have heard the saying that it costs five times more to get a new customer than keep an old one.
While lead generation will help grow your business, you also need to keep your existing customers happy. Over time, people may lose interest in your website, forget about your products, or start shopping with a competitor.
That’s where automated coupons come in.
The best WordPress automation tools and plugins can watch your customers for signs they’re becoming disengaged. For example, a customer may not place an order for 2 months or stop opening your emails.
One way to bring those customers back is to automatically send them a coupon code via email. By creating this automated workflow in WordPress, you can retain customers without having to do all the hard work yourself.
Pro Tip: If you send coupons via email, then you’ll need to make sure those messages land in the customer’s inbox and not in the spam folder. Here, a good SMTP service provider is essential for improving your email deliverability. We also recommend using WP Mail SMTP as it allows you to easily send WordPress emails using any SMTP service provider.
With that being said, let’s see how you can send automated coupons in WordPress and bring back customers. Simply use the quick links below to jump to the method you want to use.
FunnelKit is a WordPress sales funnel builder and optimization plugin that allows you to create powerful customer winback campaigns. It also lets you create unique, personalized coupons, which can really catch the shopper’s attention.
FunnelKit integrates with WooCommerce and has lots of features that are designed to grow your online store. With that in mind, FunnelKit is a great choice if you already use WooCommerce to sell products and services online.
How to Create an Automated Coupon Workflow for WordPress
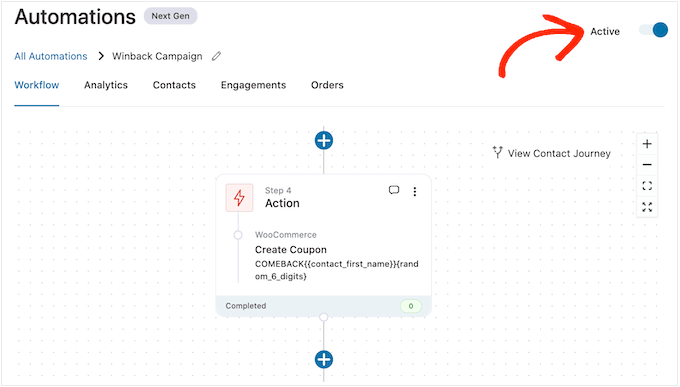
Now, we’re going to create a workflow that will generate a personalized coupon and send it to the customer via email. This workflow will run once 30 days have passed since the customer’s last order.
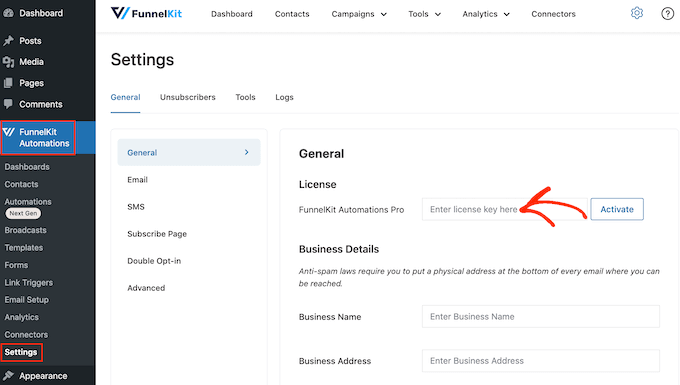
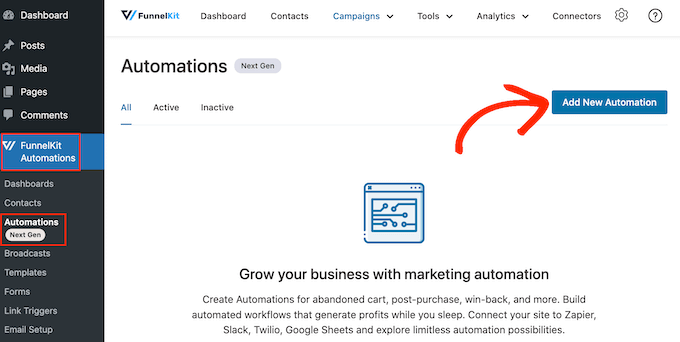
To create the workflow, go to FunnelKit Automations » Automations (Next Gen) in the WordPress dashboard. Then, click on the ‘Add New Automation’ button.
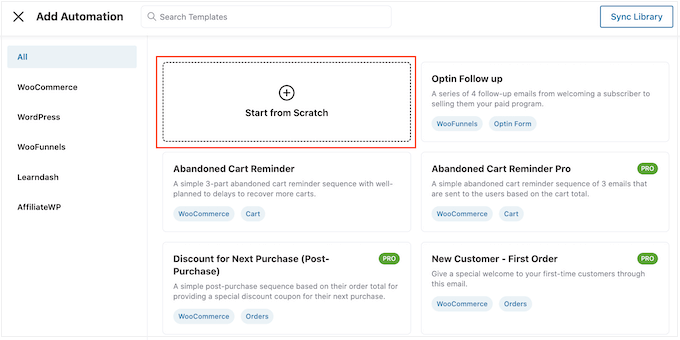
You’ll now see all the different automation templates that you can use.
Since we want to create our own workflow, select ‘Start from Scratch.’
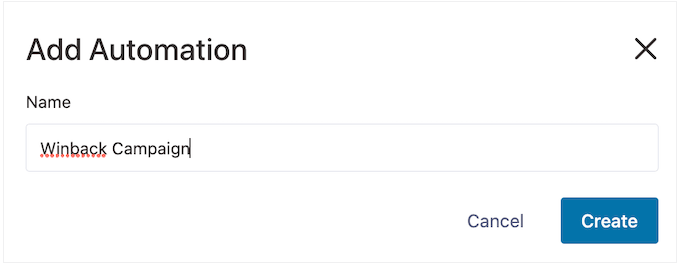
In the popup that appears, type in a name for the automation. This is just for your reference, so you can use anything you want.
With that done, click on ‘Create.’
Now, we need to choose the action that will kickstart the workflow, so click on ‘Select Trigger.’
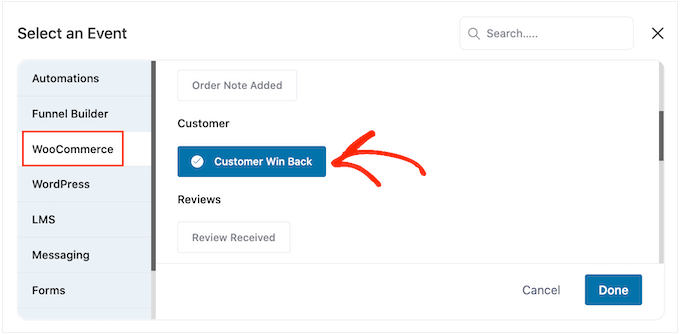
In the left-hand menu, choose ‘WooCommerce’ and then click to select ‘Customer Win Back.’
With that done, click on ‘Done’ to add the trigger to your automation workflow.
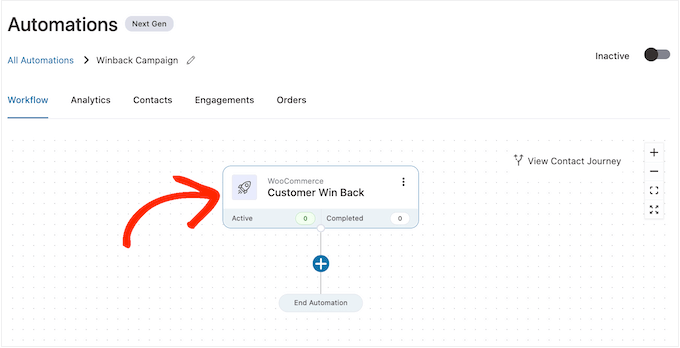
Back in the main editor, click on the ‘Customer Win Back’ trigger.
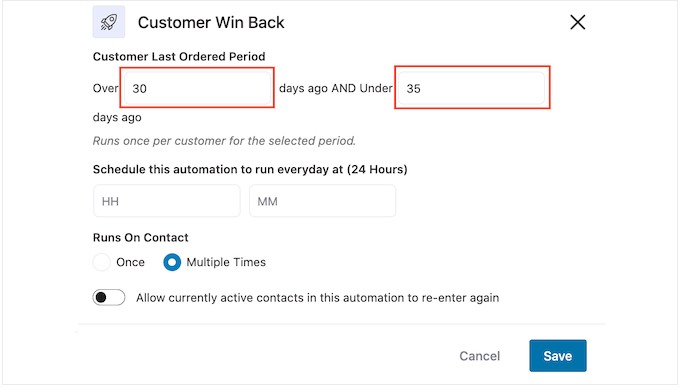
In the ‘Customer Last Ordered Period’ section, you can type in how long FunnelKit will wait before running the workflow.
For example, in the following image the workflow will run when 30 days have passed since the customer’s last order.
FunnelKit will repeat this automation once every 24 hours, so it’s important to only run it for a short period of time. For this reason, we’ve set the workflow to stop when 35 days have passed since the customer’s last order.
In this way, you won’t annoy customers by sending them dozens of emails.
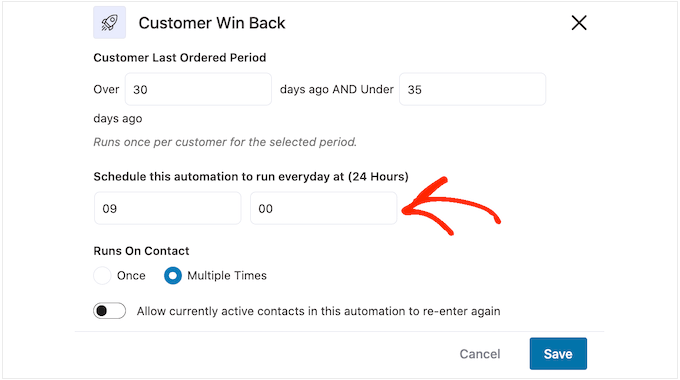
Next, you can set the time when the automation will run, using the ‘Schedule this….’ fields. FunnelKit will use your store’s timezone, so you may want to change your online store settings if you want to use a different timezone instead.
With that done, click on ‘Save.’
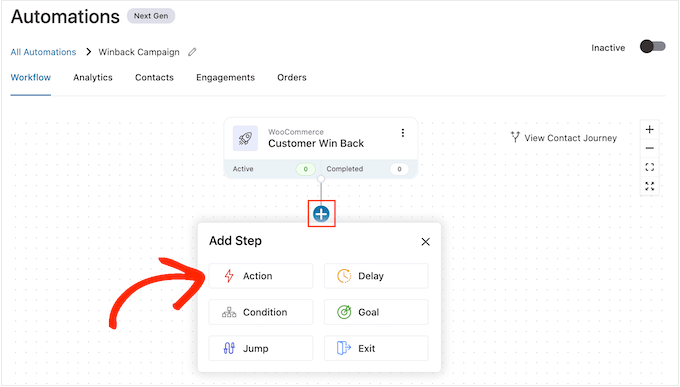
Back in the main workflow editor, click on ‘+’ and then select ‘Action.’
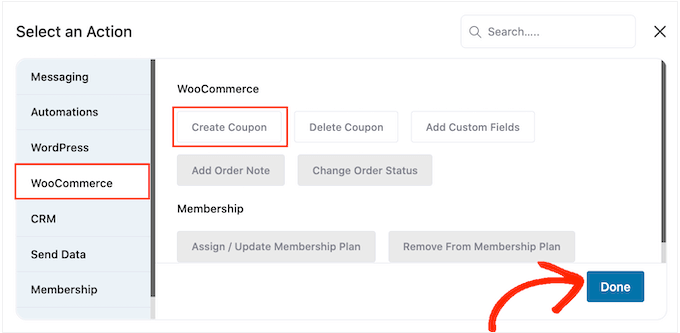
In the popup that appears, select ‘WooCommerce’ and then click on ‘Create Coupon.’
Simply click on ‘Done’ to add this action to the workflow.
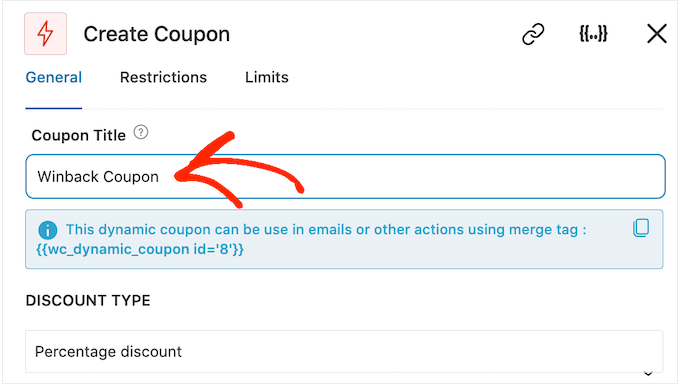
Back in the main FunnelKit editor, click on the action you just added. This opens a popup where you can customize the ‘Create Coupon’ action.
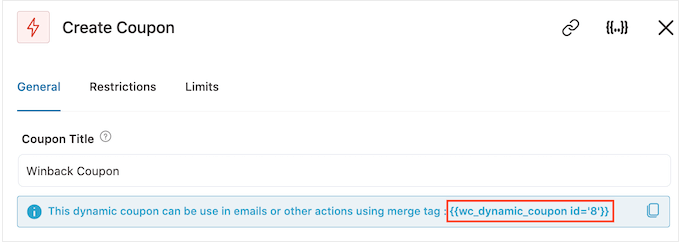
To start, type a name for the coupon into the ‘Coupon Title’ field. This is just for your reference so you can use anything you want.
After that, choose the type of coupon that you want to create, using the ‘Discount Type’ dropdown menu.
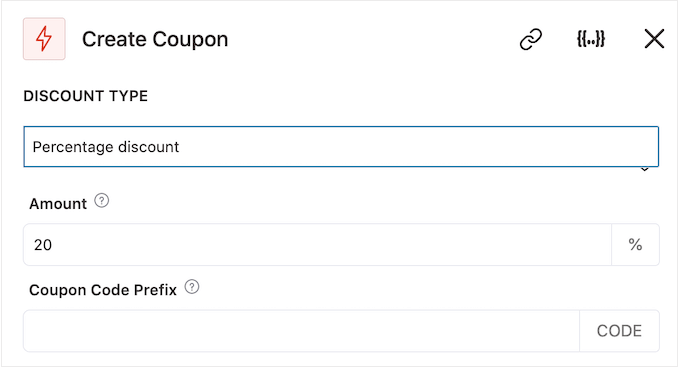
FunnelKit supports percentage discount, fixed cart discount, and fixed product discount. Most of the time, you’ll want to select ‘Percentage Discount’ to make sure all customers get a similar benefit, no matter how much they spend or what products they buy.
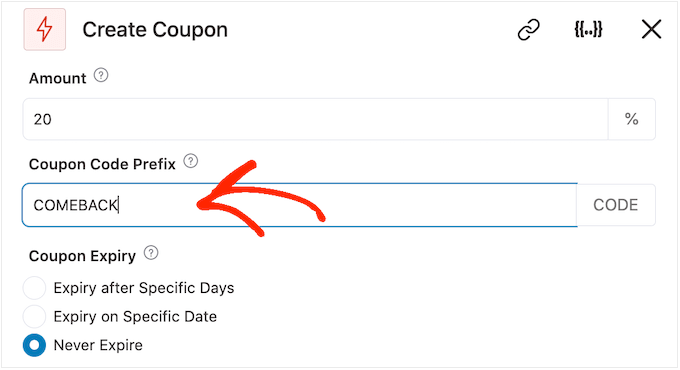
After that, type an amount into the ‘Amount’ field. For example, you might offer customers 20% off, or a $5 discount on all purchases.
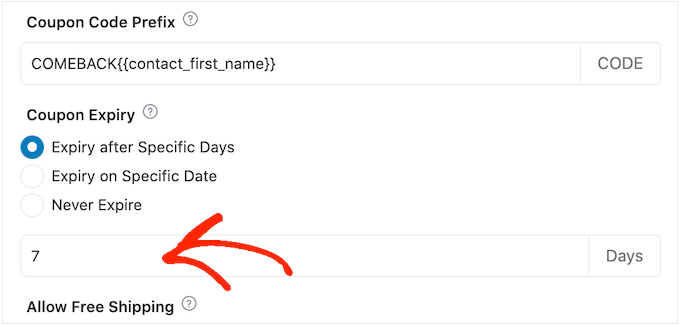
FunnelKit automatically creates a unique coupon code for each contact. However, you can add a prefix to the start of the coupon, which can either be plain text or dynamic tags. FunnelKit will replace these tags with real text every time it creates a code, so this is a great way to create personalized coupons.
Since we want to bring shoppers back in, you may decide to include the customer’s name in the coupon. This can catch their attention, and also makes your code easier to remember.
To add plain text as a prefix, simply type into the ‘Coupon Code Prefix’ field.
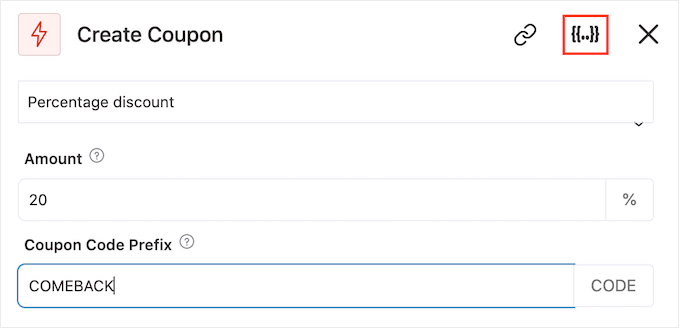
To add one or more tags, click on the ‘Merge tags’ icon.
This is the button that has curly braces.
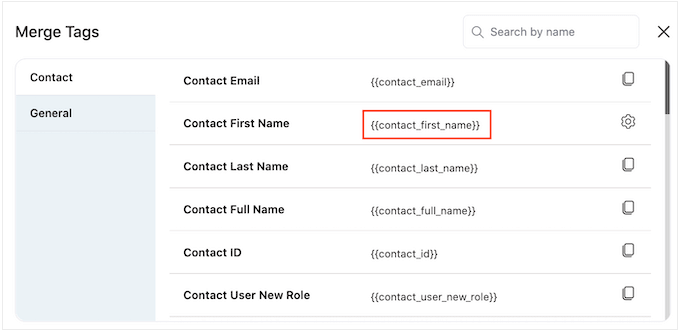
Now, you’ll see all the tags that you can use in the automated coupon.
We’re going to use the {{contact_first_name}} tag, but you can use any tags you want.
Simply copy each tag and then paste it into the ‘Coupon Code Prefix’ field.
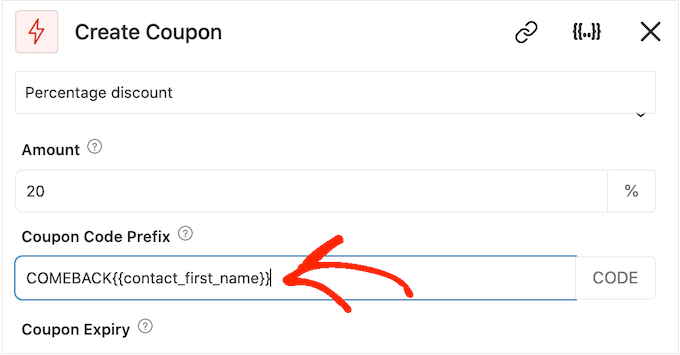
As you can see in the following image, you can use a mix of plain text and tags.
By default, the coupon will never expire. A sense of urgency and FOMO can push customers to use a coupon, so you may want to select the radio button next to ‘Expire after Specific Days’ or ‘Expire on Specific Date.’
You can then use the controls to specify when the coupon will expire.
Shoppers love free shipping, so you may want to consider adding this to your coupon by selecting the ‘Yes’ radio button under ‘Allow Free Shipping.’
When you’re happy with how the coupon is set up, make sure you copy the small pieces of code under the ‘Coupon Title.’
You’ll need this coupon code for the email we’ll be creating in the next step, so store it somewhere safe.
With that done, click on ‘Save’ to store your changes.
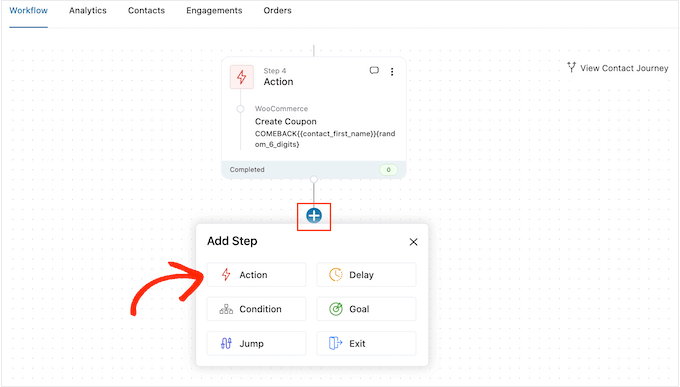
Now we have a coupon, it’s time to create the email that FunnelKit will send to your customers. To add an email action, click on the ‘+’ button and then select ‘Action.’
If it isn’t already selected, then click on ‘Messaging’ in the left-hand menu.
Then, select ‘Send Email’ and click on ‘Done.’
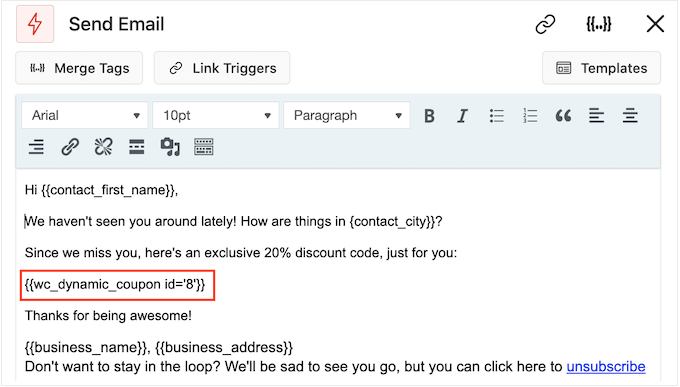
You can now create an email by typing in a subject and preview, and adding body text.
Similar to creating a coupon, it’s best to use a mix of plain text and tags. To add dynamic tags, click on the ‘Merge Tags’ icons that appear next to the To, Subject, and Preview Text fields.
If you want to add tags to the email body, then you can click on the ‘Merge Tags’ button.
To add your coupon code, simply paste or type in the {{wc_dynamic_coupon id= code we copied in the previous step.
When you’re happy with how the email looks, click on ‘Save & Close.’
That’s it. When you’re ready to make the automation live, click on the ‘Inactive’ slider so it turns to ‘Active.’
Now, FunnelKit will automatically send the coupon to any customer who hasn’t purchased from you in the past 30 days.
Method 2. Using Uncanny Automator (Over 100 Integrations)
Another way to send automated coupons in WordPress, is by using Uncanny Automator. It is one of the best WordPress automation plugins on the market and lets you create powerful workflows to save time and help you respond to customers more quickly.
Uncanny Automator works seamlessly with WooCommerce, plus all of the must have WordPress plugins and third-party tools. If you’re already using lots of different software on your online store, then Uncanny Automator may be a good choice for you.
There is a free Uncanny Automator plugin that lets you automate many common tasks. However, we’ll be using Uncanny Automator pro because it works with WooCommerce.
To start, you’ll need to install Uncanny Automator pro, plus the free plugin as it provides the base for the premium version. If you need help, then please see our guide on how to install a WordPress plugin.
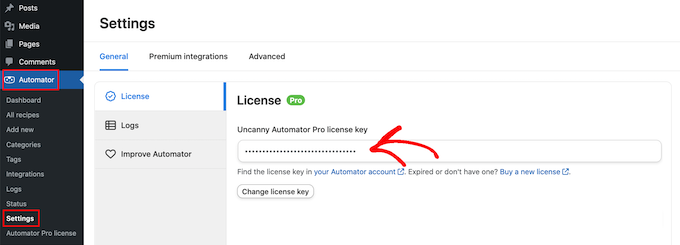
Upon activation, go to Automator » Settings and enter your license key into the ‘Uncanny Automator Pro license key’ field.
You’ll find this information under your account on the Uncanny Automator website.
Uncanny Automator is a powerful and flexible plugin, so there’s lots of different ways that you can bring customers back to your site. Let’s take a look at a few options.
Automatically Send Coupons to Logged-Out Customers
It’s smart to let customers create an account with your online store, as it encourages brand loyalty and makes it easier for shoppers to buy from you in the future.
User registration can also help with lead generation. If you get the shopper’s email address, then you can target them with email marketing, personalized ads, an email newsletter, and much more.
If you’re using WooCommerce, then this plugin automatically creates all the pages customers need to create and manage an account. WooCommerce also adds a new Customer role, which it automatically assigns to any shoppers who register with your store.
If you allow user registration, then you can track when a shopper logs out of their account, as this suggests they’re losing interest in your store. You can then send a coupon to encourage them to log back in.
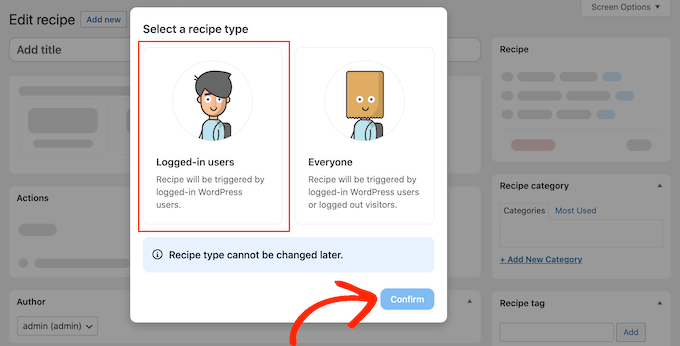
To create this recipe, simply go to Automator » Add new in the WordPress dashboard.
Uncanny Automator will now ask whether you want to create a recipe for logged-in users, or everyone. Go ahead and select ‘Logged-in users,’ then click on the ‘Confirm’ button.
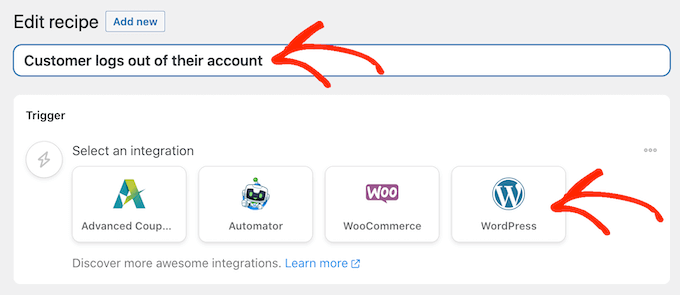
Next, you can give the recipe a name by typing into the ‘Title’ field. This is just for your reference so you can use anything you want.
Once you’ve done that, click on ‘WordPress’ in the ‘Select an integration’ area.
You can now choose a trigger, which is anything that kickstarts the recipe.
In the dropdown menu, start typing the following ‘A user logs out of a site’ and then select the right option when it appears.
We only want to run the workflow when someone with the ‘Customer’ user role logs out of their account.
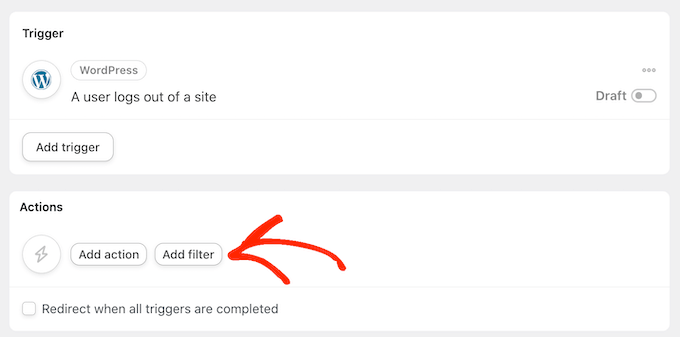
With that in mind, click on the ‘Add filter’ button.
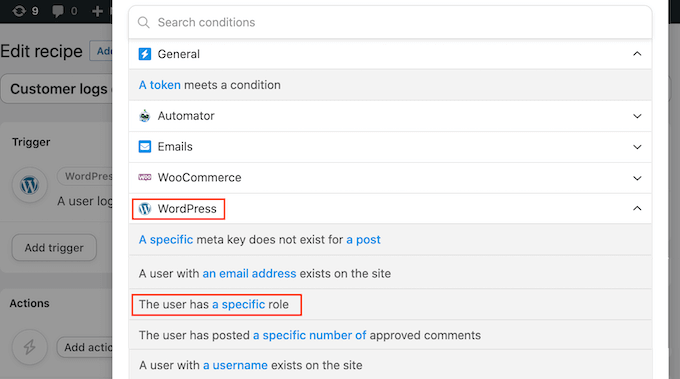
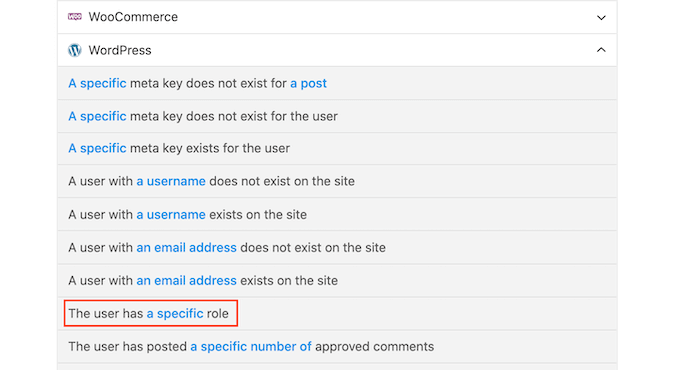
In the popup that appears, click on ‘WordPress.’
Next, find ‘The user has a specific role’ in the dropdown menu.
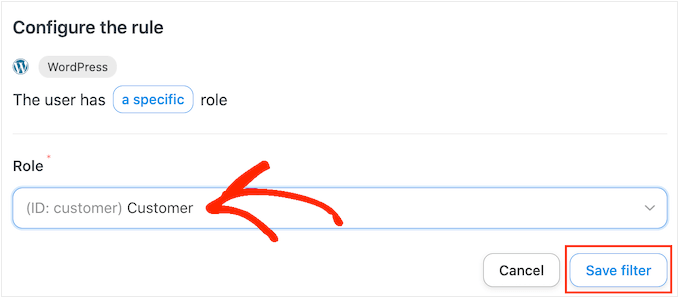
Open the ‘Role’ dropdown and select the role you’re using for your customers.
After that, go ahead and click on ‘Save filter.’
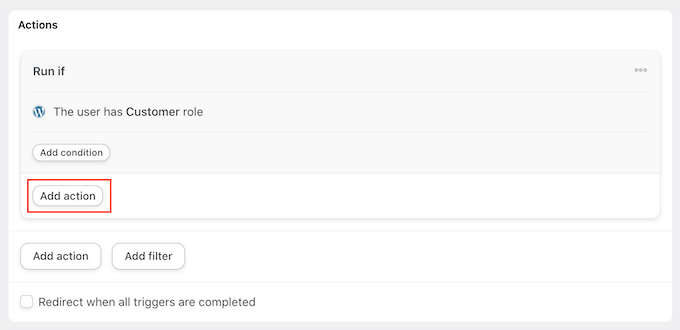
Now it’s time to specify the action that Uncanny Automator will perform every time this workflow runs.
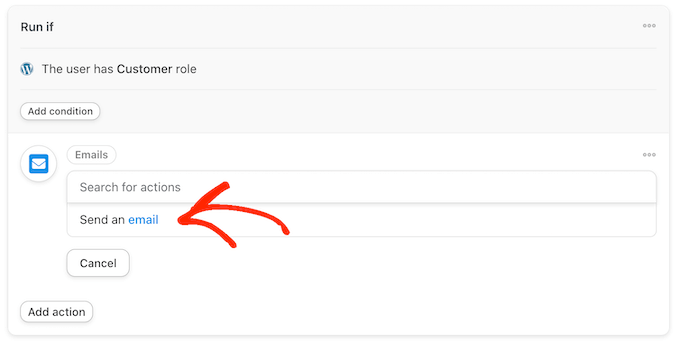
We’re going to send the customer an email containing a coupon, so go ahead and click on ‘Add action.’
Since we want to send an email, select ‘Emails’ as the integration.
In the dropdown that appears, click on ‘Send an email.’
This adds all the fields that you can use to create the email.
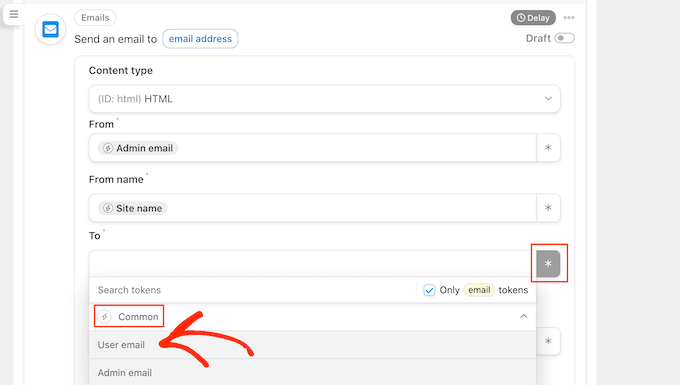
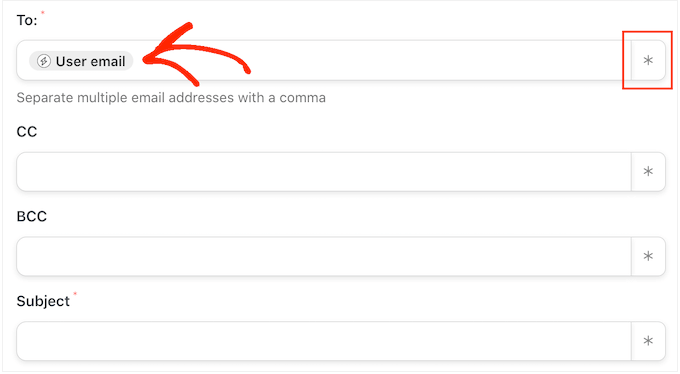
To start, we need to make sure the message goes to the right user, by clicking on the asterisk next to the ‘To’ field. Then, select ‘Common’ and ‘User email.’
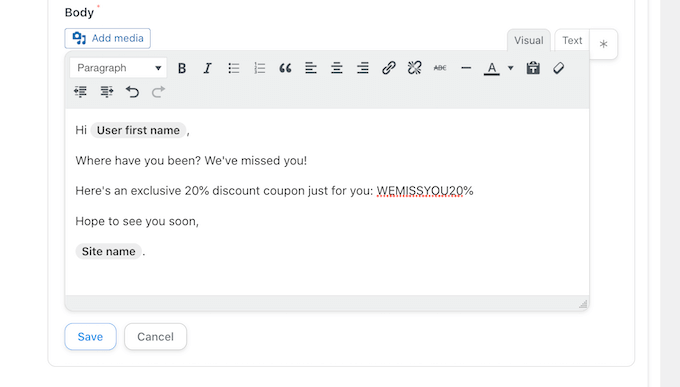
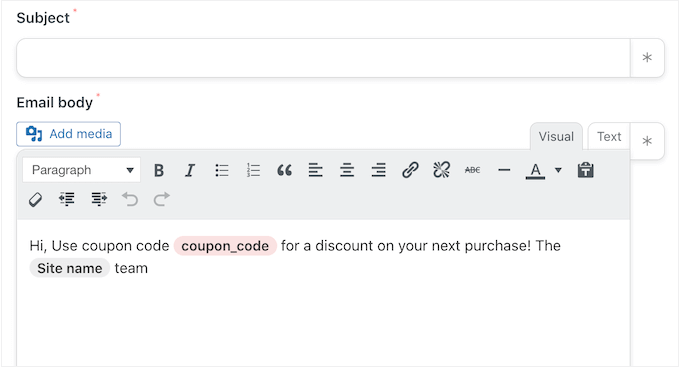
You can now create the email by adding a subject line and body text.
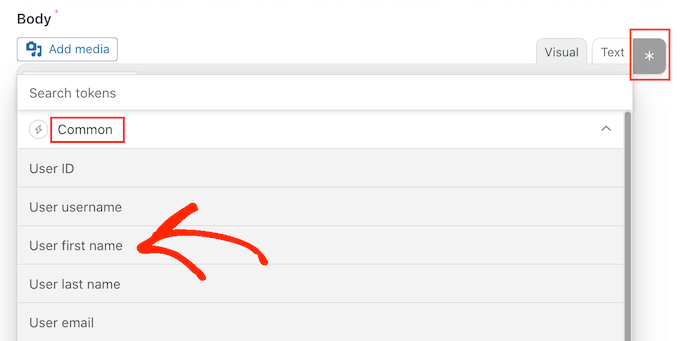
Here, you can use a mix of plain text and tokens, which are placeholders that Uncanny Automator replaces with real values automatically. For example, if you want to use the customer’s name, then you can click on the asterix and select ‘Common.’
Simply select the ‘User first name’ token to create the personalized greeting.
You’ll also need to create a coupon and add it to the email.
The easiest way is by using the Advanced Coupons plugin, which is the best WordPress coupon code plugin on the market. It lets you create lots of different advanced coupons to get more sales and grow your business.
After creating a coupon, you can simply add it to the email.
When you’re happy with how the email looks, click on ‘Save.’
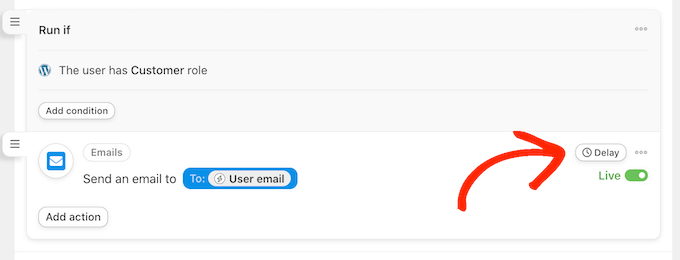
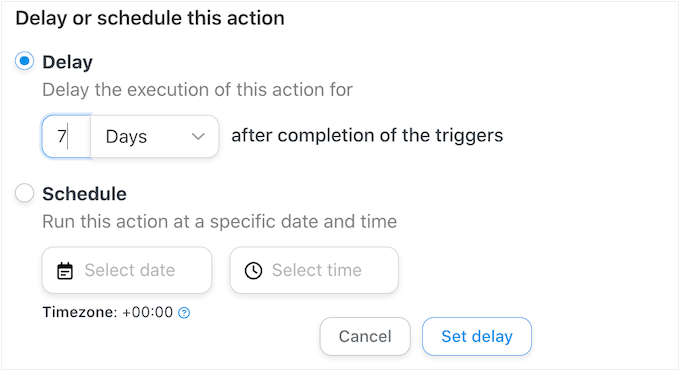
After that, it’s time to set a delay. This is how long Uncanny Automator will wait after the customer logs out, before sending them the coupon.
To add a delay, hover your mouse over the ‘Email’ action. When it appears, click on ‘Delay.’
You can then add your delay in the popup that appears.
Once you’ve done that, go ahead and select ‘Set delay.’
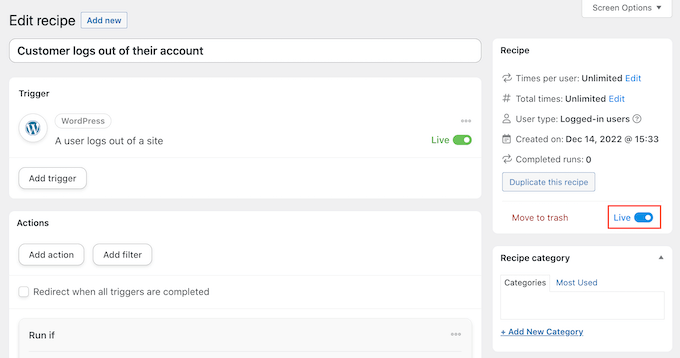
When you’re happy with how the recipe is set up, it’s time to make it active.
In the ‘Recipe’ box, click the ‘Draft’ switch so that it shows ‘Live’ instead.
That’s it. Now, when a customer logs out of their account, Uncanny Automator will wait for the specified amount of time before sending them a coupon code.
Automatically Send Coupons for a Specific Product
Sometimes a shopper may look at a product multiple times. This suggests they’re interested in the item, but something is stopping them from making a purchase.
In this case, you may want to send them a coupon, which will encourage them to splash out on the product.
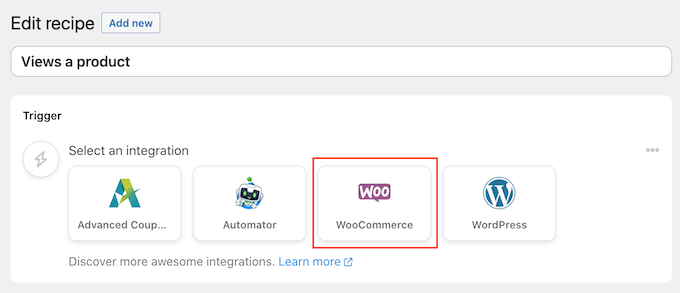
To get started, create a new recipe for logged-in users following the same process described above. After that, click on ‘WooCommerce’ in the ‘Select an integration’ area.
Next, choose a trigger by typing the following ‘A user views a product.’
When the right trigger appears, give it a click.
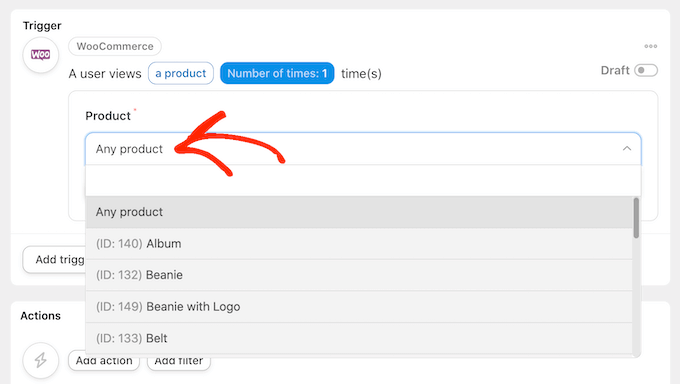
By default, this trigger is set to ‘Any product.’
If you want to link the recipe to a specific product, then open the ‘Product’ dropdown and choose that product from the list.
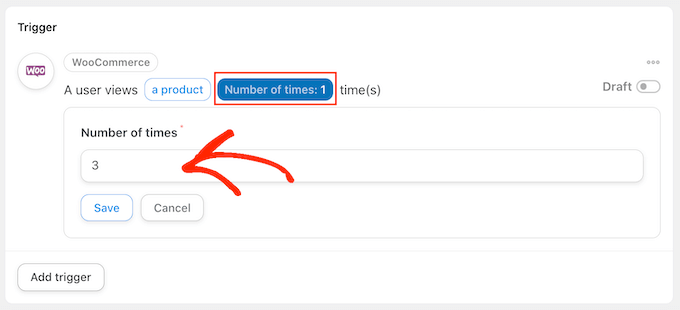
Once you’ve done that, click on the ‘Number of times’ button.
By default, the recipe will run every time a customer looks at a product. You should change this, so the customer has to look at the product multiple times before triggering the recipe. To do this, type a different number into the ‘Number of times’ field.
When that’s done, click on ‘Save’ to store your settings.
This recipe should only run when a customer views a product, so click on ‘Add Filter.’ In the popup that appears, click on ‘WordPress’ and then choose ‘The user has a specific role.’
After that, open the ‘Role’ dropdown and select the role you’re using for your customers.
When you’re ready, click on ‘Save filter.’
Now it’s time to add the action. There are a few different ways to send automated coupons from your WordPress website.
To email a code to your customers using Uncanny Automator and Advanced Coupons, simply follow the same process described above.
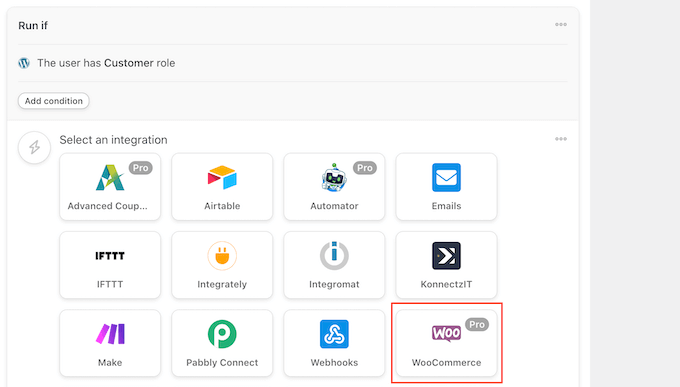
Another option is to generate the code using WooCommerce. To do this, click on ‘Add Action’ and then select ‘WooCommerce’ as the integration.
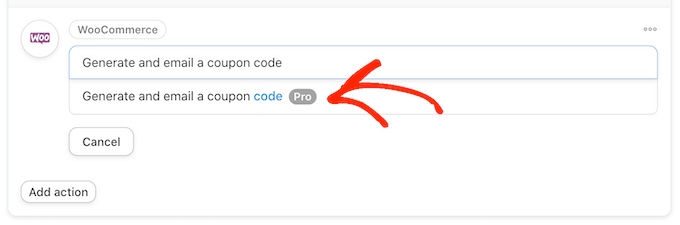
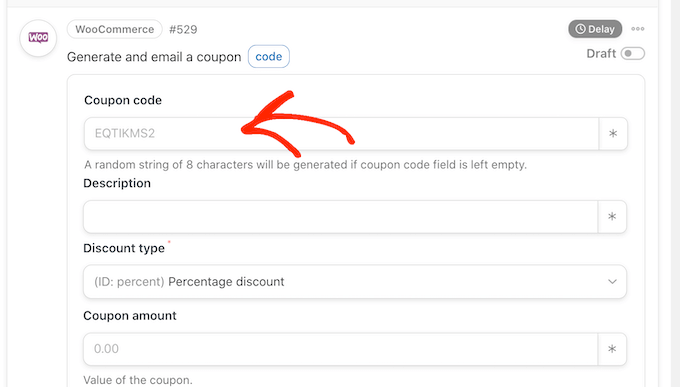
In the search bar, start typing ‘Generate and email a coupon code to the user.’
When the right option appears, give it a click.
This will add some new settings where you can create the coupon code.
To generate a code automatically, simply leave the ‘Coupon code’ field blank.
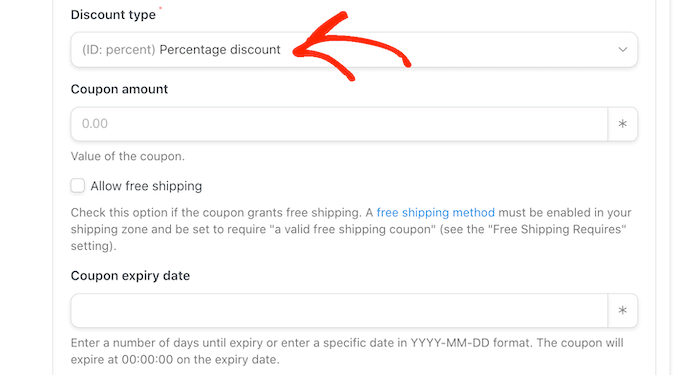
In the ‘Discount type’ field, choose the kind of coupon that you want to create, such as a fixed cart discount or percentage discount.
For this guide, we’ll select ‘Percentage discount’.
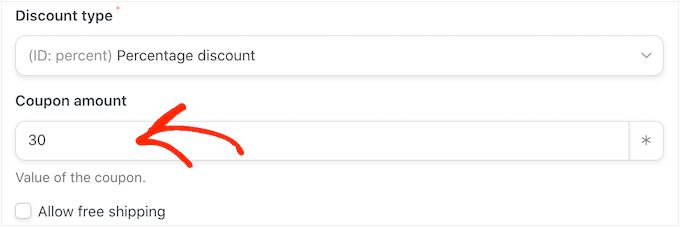
After that, type the percentage discount into the ‘Coupon amount’ field.
In the following image, we’re offering customers a 30% discount on their purchase.
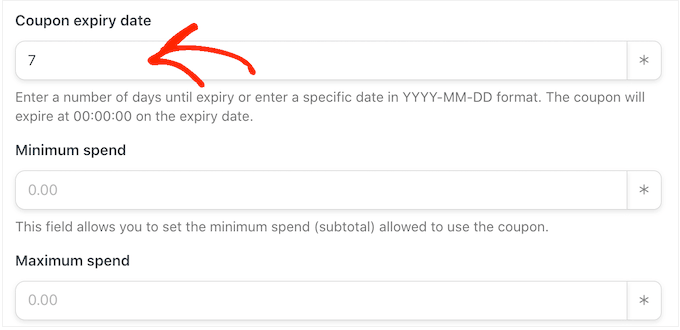
In the next field, you can set an expiry date for the coupon, either by using the YYY-MM-DD format or typing in the number of days until the coupon expires.
For example, in the following image the coupon will expire after 7 days.
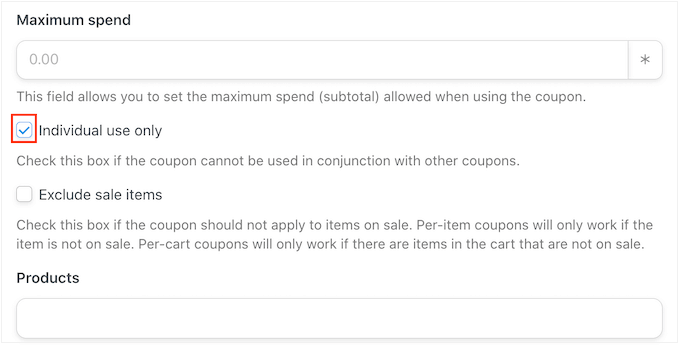
You can also set a minimum and maximum spend for the coupon. We’ll leave these fields blank so the customer can use the code with any purchase.
You may also want to check the ‘For individual use only’ box so customers can’t use this code in combination with other coupons.
Next, scroll to the ‘Usage limit per coupon’ section. The shopper should only be able to use the coupon once, so type in ‘1.’
There are lots of other settings you can change for the coupon. It’s a good idea to look through these settings to see whether you want to make any more changes.
When you’re happy with how the coupon is set up, scroll to the ‘Email’ section. To start, find the ‘To’ field and then click on the asterisk next to it. Then, click on ‘Common’ and select ‘User email.’
With that done, you can add a subject line and change the text in the email body.
To create a more personalized email, it’s a good idea to use a mix of plain text and tokens, by following the same process described above.
When you’re happy with the email, click on the ‘Save’ button to store the recipe.
After that, you can make the recipe live by clicking the ‘Draft’ switch so that it shows ‘Live.’
Now, every time someone views a product multiple times, it’ll trigger the recipe workflow.