If you have been reading WPBeginner for a while, then you know that we believe All in One SEO is the best WordPress SEO plugin on the market.
It is our #1 recommendation as the must-have SEO toolkit, and this is the exact tool that we use on our website. For beginners, All in One SEO provides the most comprehensive SEO features in one plugin.
In this article, we’ll share some of the AIOSEO power hacks that will help you take your WordPress SEO to the next level.

What Makes All in One SEO The Best SEO Toolkit for WordPress Users?
All in One SEO for WordPress is the original WordPress SEO plugin on the market.
Currently over 3 million websites use AIOSEO including WPBeginner, and it is one of the top 20 most installed WordPress plugins of all time.
There’s also a free version of AIOSEO available that you can use if you’re just getting started.
All in One SEO was first released in 2007, just a few years after WordPress introduced the ability to install plugins to extend WordPress functionality.
In 2020, AIOSEO was acquired by Awesome Motive (the management company of WPBeginner). Since then, it has evolved into the most powerful and modern WordPress SEO plugin.
We use it on all our websites to improve our WordPress SEO rankings, including WPBeginner. That’s because the features are unmatched by any other SEO plugin on the market.
That being said, let’s take a look at some of the coolest things that you can do with All in One SEO.
Here is a list of topics we’ll cover in this guide.
- Ability to Add Dynamic SEO Title and Descriptions
- Helps You Write Good Headlines and SEO Titles
- Comes with a Dynamic and Customizable Table of Contents Block
- Easily Add NoFollow Attribute to External and Referral Links
- Generate Keyword Ideas while Writing Posts
- Get a Practical SEO Score for Your Content
- Comes with The Most Comprehensive Schema Mark up Support
- Easier and Extensive Social Media Integration
- Add New Links or Cleanup Bad Links with LinkAssistant
- Comes with Extensive XML Sitemaps with Powerful Customization Options
- Appear in Google News with News XML Sitemaps
- Easily Create Customizable HTML Sitemaps
- Appear in Video Results with Video Sitemaps
- Get Indexed Faster with RSS Sitemaps
- 15. Easily Add Your Site to Webmaster Tools & Google Search Console
- Get New Content Indexed Quickly with IndexNow
- Hack Your WordPress RSS Feeds
- Helps You Fix Search Crawl Budget Issues
- Easily Setup 301 Redirects
- Detect 404 Errors and Fix Them
- Easy Full Site Redirects when Moving Site to Different Domains
- Faster Redirects Using Server Instead of PHP
- Easily Import / Export Redirects
- Advanced Yet Easiest Breadcrumb Navigation
- Turn On REST API for Headless WordPress
- Control Which Users Have Access to SEO Features and Settings
- Seamless E-commerce Integration
- Powerful Image SEO Features
- Safely Edit Robots. txt and . htaccess Files From WordPress Admin
- Perform a Quick SEO Audit for Your Site
- Compare Competition with Built-in Competitor Analysis
- Easily Add No Index to Content You Want to Exclude from Search Engines
- Easily Import SEO Data from Other SEO Plugins
- Bonus: Getting Started with All in One SEO for WordPress
1. Ability to Add Dynamic SEO Title and Descriptions
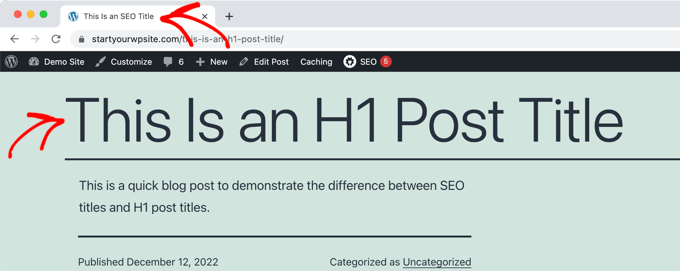
SEO titles and descriptions are highly important when optimizing your content for SEO. Search engines assign them slightly more weight than other parts of your content.
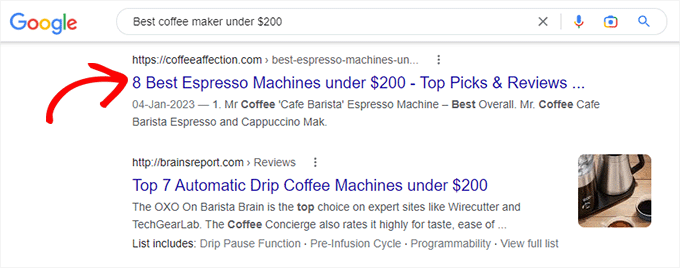
The SEO title also appears in search results and can help you get more clicks and bring more traffic to your site.
Many site owners often go back to old posts and edit their SEO titles to help optimize them. For instance, you may have mentioned the Current Year or pricing in the title which may become outdated.
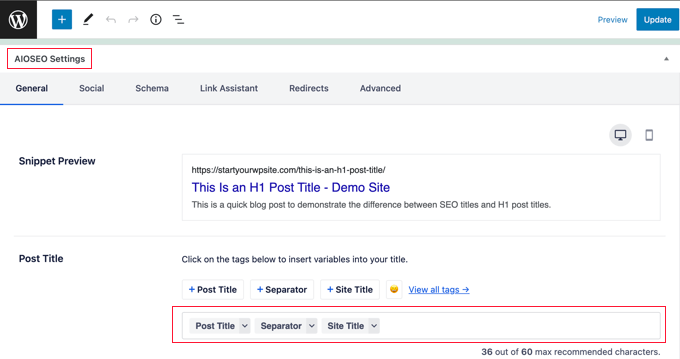
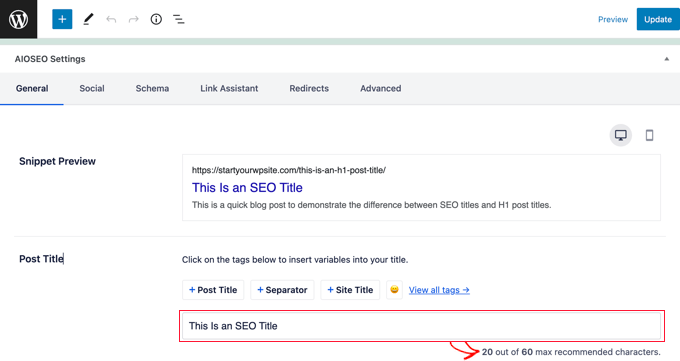
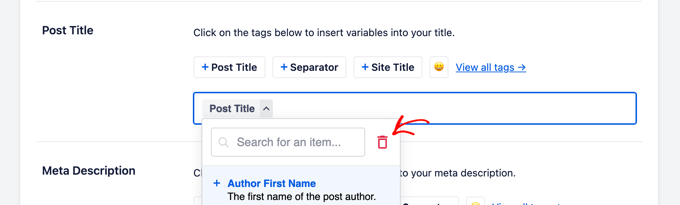
All in One SEO allows you to use smart tags in SEO title and description fields. These tags dynamically update to match the conditions they are used for.
For instance, you can add the ‘Post Title’ tag, and it will automatically use your post or page’s title as the SEO Title.
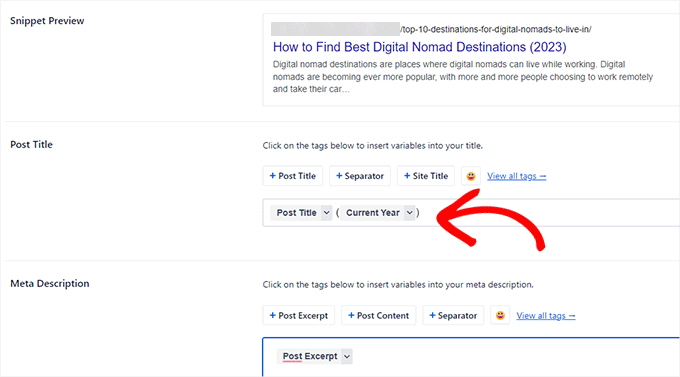
Similarly, you can use the ‘Current Year’ or ‘Current Month’ tags, and it will automatically display the current year or month in your post title.
AIOSEO comes with the following smart tags that you can select by clicking on ‘View all tags’.
- Author First Name: The first name of the post author.
- Author Last Name: The last name of the post author.
- Author Name: The display name of the post author.
- Categories: All categories that are assigned to the current post, comma-separated.
- Category Title: Current or first category title.
- Current Date: The current date.
- Current Day: The current day of the month.
- Current Month: The current month.
- Current Year: The current year.
- Custom Field: A custom field from the current post.
- Permalink: The permalink for the current post.
- Post Content: The content of your post.
- Post Date: The date when the post was published, localized.
- Post Day: The day of the month when the post was published, localized.
- Post Excerpt: The excerpt defined in your post settings.
- Post Excerpt Only: The excerpt defined in your post.
- Post Month: The month when the post was published, localized.
- Post Title: The original title of the current post.
- Post Year: The year when the post was published.
- Separator: The separator is defined in the search appearance settings.
- Site Title: Your site title.
- Tagline: The tagline for your site, set in the general settings.
- Taxonomy Name: The name of the first term of a given taxonomy that is assigned to the current post.
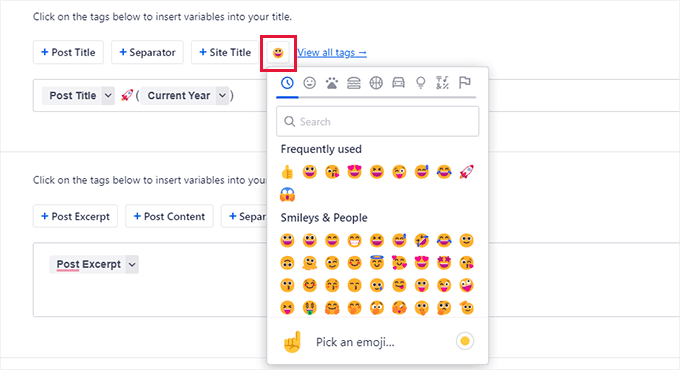
Want to make your SEO title even more attention-grabbing?
How about adding emojis into your post title or description? All in One SEO makes it super easy to use Emojis in your SEO title and descriptions.
Simply click on the emoji button to search and add an emoji.
2. Helps You Write Good Headlines and SEO Titles
Now you might already know that CTR (click through rate) plays an important role in SEO rankings.
This means that you have to write good headlines and SEO titles that encourage users to click when your site appears in search results.
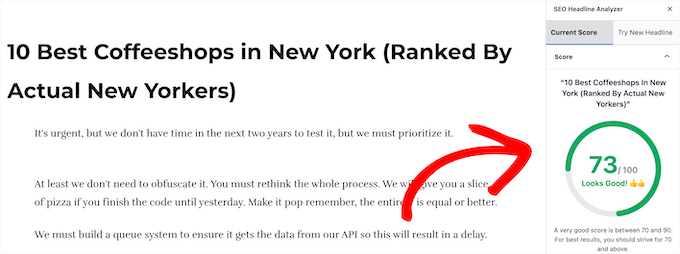
All in One SEO comes with a built-in headline analyzer tool. It will automatically show you a score for your post title or headline.
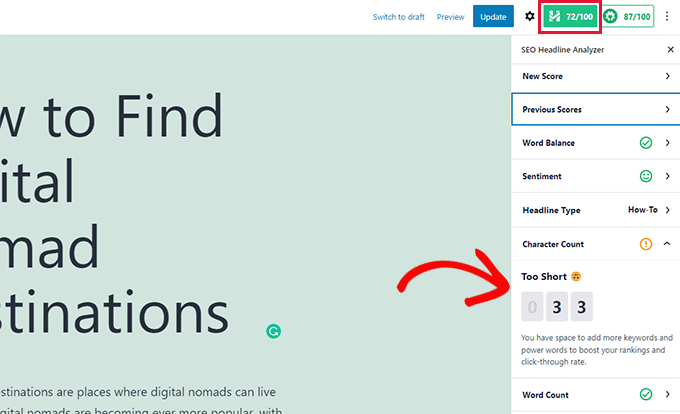
Plus, it will also show you practical tips to improve the effectiveness of your title.
For instance, it may recommend using power words or removing stop words from your SEO title.
For more details, see our tutorial on how to use the headline analyzer in WordPress to improve SEO titles.
3. Comes with a Dynamic and Customizable Table of Contents Block
Reading longer articles can be difficult for your users, and they may lose interest in scrolling down while looking for the information they need.
This is where the Table of Contents block comes in.
It creates a list of topics covered in an article, and you may have seen them in articles here at WPBeginner. In fact, this post has an AIOSEO table of contents at the top!
Clicking on an item in the list takes you to that section in the article.
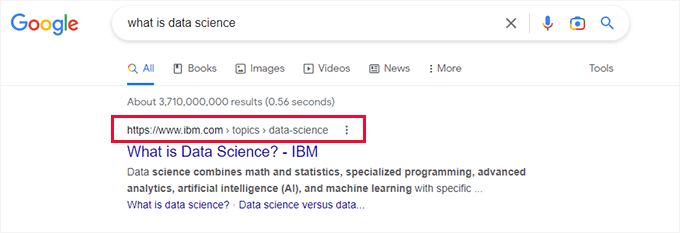
Not only does a table of content help users, but it also improves SEO.
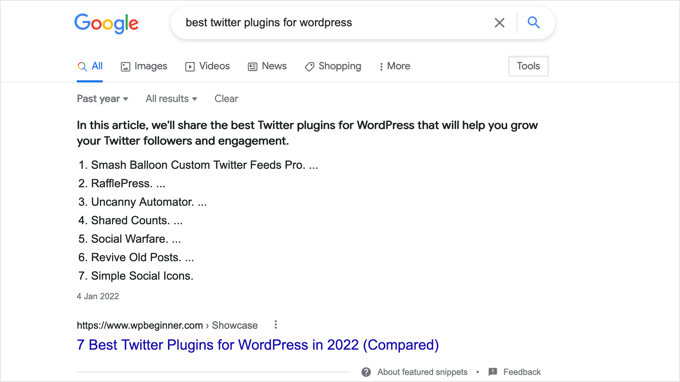
Search engines like Google may display your table of content items as ‘Jump to section’ links in search results.

A table of contents can also make your website appear as the featured snippet for a search keyword.
Google may display it above all results with a much larger excerpt.
Previously, WordPress users had to use a separate plugin to generate tables of contents or manually create them.
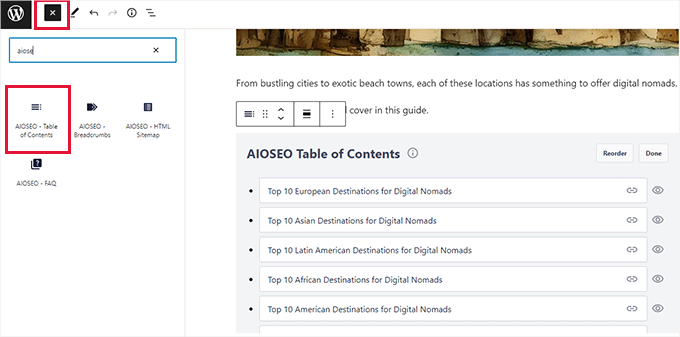
All in One SEO comes with a dynamic Table of Contents block. Simply add the Table of Contents block to your post or page, and it will automatically generate a table of content based on the headings present in your article.
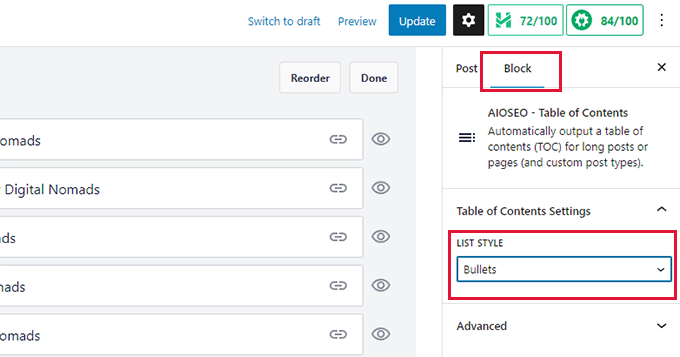
You can edit any item in the table by simply clicking on it or hide an item by clicking on the hide button.
You can also reorder items by clicking on the Reorder button. This only adjust the order of the list, not the placement of content in your article.
Optionally, you can choose a list style for your table of contents.
Currently, it allows you to choose from a plain bulleted list or a numbered list style.
For more information, see our tutorial on how to easily add table of contents in WordPress.
4. Easily Add NoFollow Attribute to External and Referral Links
Links or backlinks are an important search engine ranking factor.
When you link to an external website, search engines consider that as a ranking signal. They will pass a small portion of your domain authority (link juice) to the other website.
Many SEO experts believe that they can rank higher in search results by adding the nofollow attribute to external and referral/affiliate links.
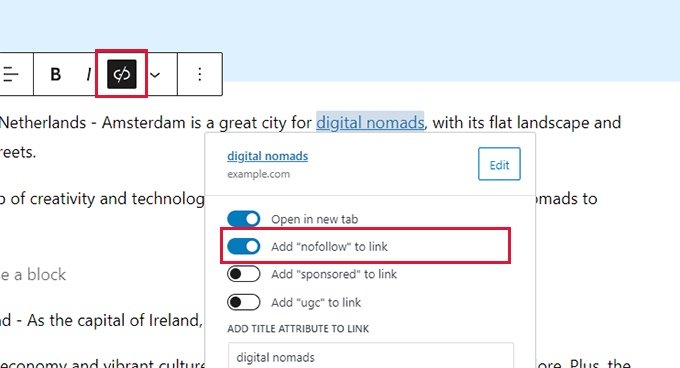
All in One SEO makes it super easy to add the nofollow attribute to links in your posts and pages.
Simply select the text that you want to link to and then click on the link button in the block toolbar.
You’ll see the option to add the link URL and a check box to add the nofollow attribute.
You can learn more about nofollow by viewing our article on how to easily add nofollow links in WordPress.
5. Generate Keyword Ideas while Writing Posts
Keywords are the focus keyphrases that your users may type in a search engine to find your content.
You can set a focus keyword or keyphrase for an article in All in One SEO settings and then optimize your content around it.
The plugin will show you an SEO score for your focus keyphrase with practical tips to improve it.
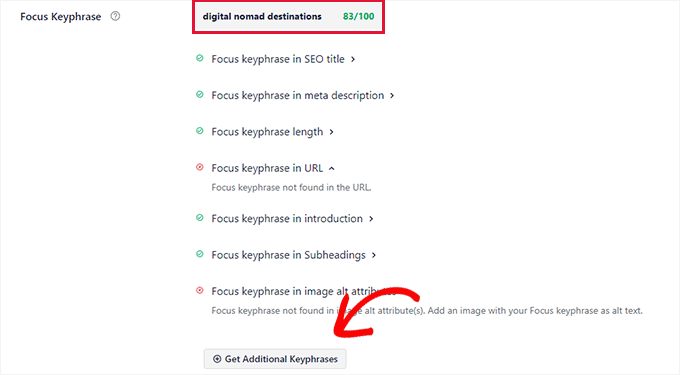
The best part is that it also helps you generate additional keyword ideas with Semrush.
Simply click on the get additional keyphrases button and a popup will take you to the Semrush website.
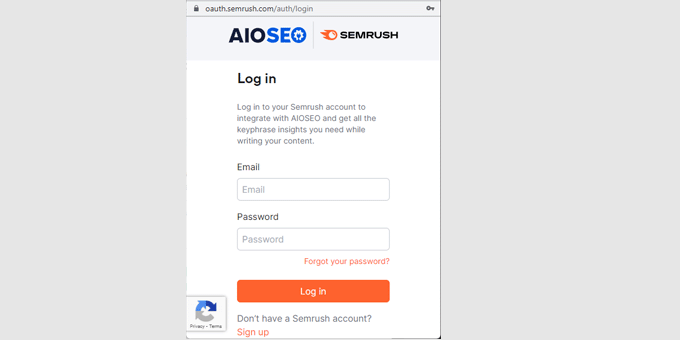
You can login with your existing account or create a free Semrush account.
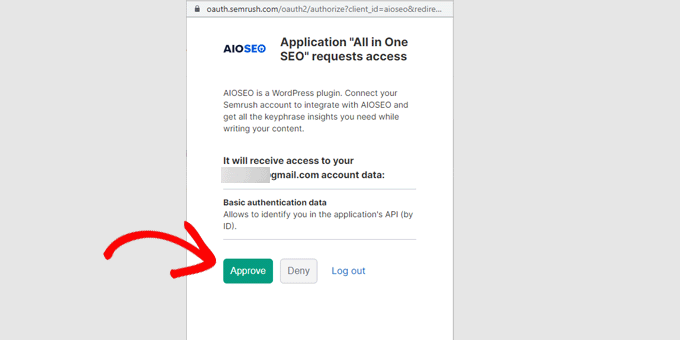
After that, you will be asked to give Semrush permission to access your WordPress website. Click on the Approve button to continue.
You’ll now see a list of keyword ideas that match your original focus keyphrase.
The list is sorted with high search volume keywords appearing on top.
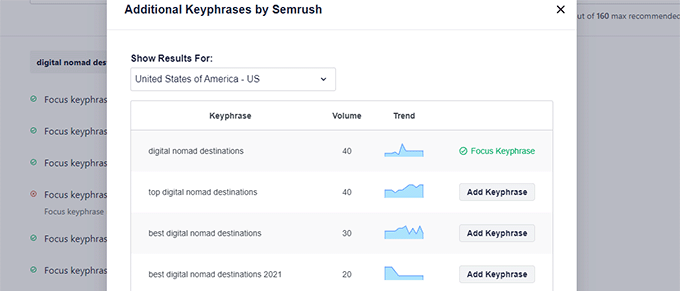
You can click on the Add Keyphrase button next to a keyword and add it to the additional focus keyphrases for your post or page.
You will now see scores for these additional focus keyphrases with recommendations to improve their score.
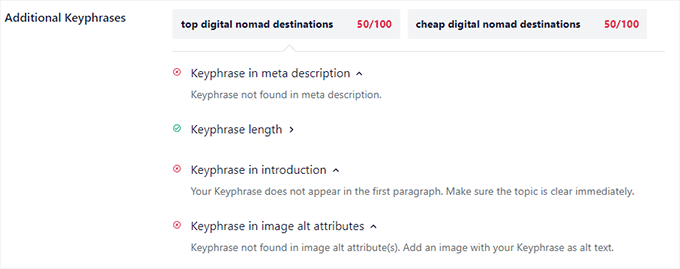
This helps you make your content more comprehensive and useful for your users while making it more authoritative for search engines as well.
To learn more, check out our article on how to do proper keyword research for your WordPress blog.
6. Get a Practical SEO Score for Your Content
All in One SEO gives the most comprehensive and practical SEO score to your content.
It appears as a button on the top right corner of the post editor, clicking on it will bring up the TruSEO panel.
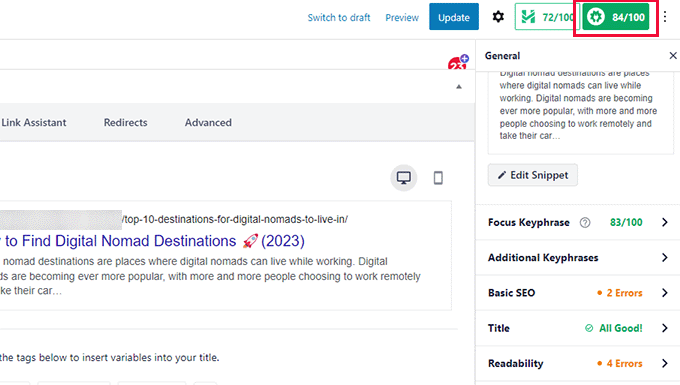
You will see a snippet preview and below that, you’ll find tips divided into the following areas:
- Focus Keyphrase and Additional Keyphrases
- Basic SEO
- Title
- Readability
You can click on any of them to expand and view the suggestions.
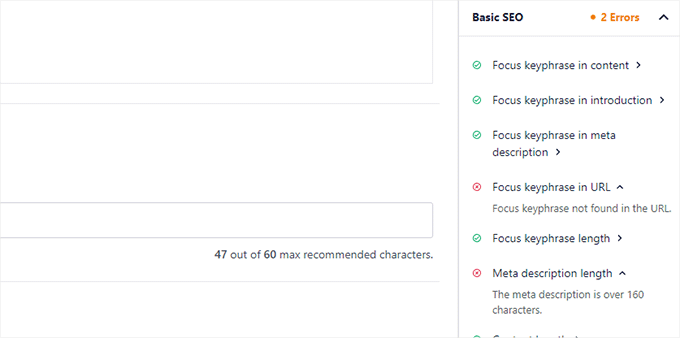
Errors will be highlighted in red with helpful descriptions to fix them.
SEO score is just a recommendation tool and does not guarantee search rankings. Any score above 70 is good for most types of content.
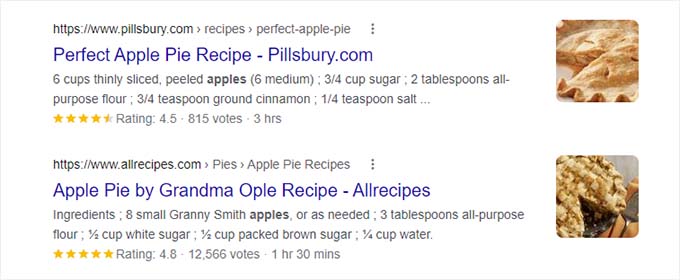
7. Comes with The Most Comprehensive Schema Markup Support
Schema markup is a special type of HTML code that you can add to your WordPress website to tell search engines more about your content.
For instance, you can tell the search engines that a particular page is a blog post, a recipe, a FAQ page, a news article, or a product page. Search engines can then use this data to display rich results.
Other WordPress SEO plugins only ship with limited schema markup support. Users had to install separate plugins to add proper schema markup for different content types.
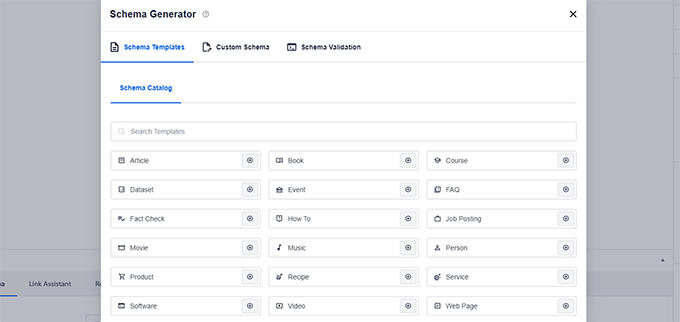
All in One SEO solves this problem by adding the most comprehensive Schema markup support available.
It allows you to easily add schema markup in WordPress and WooCommerce. You can set the default Schema markup for different content types from plugin settings.
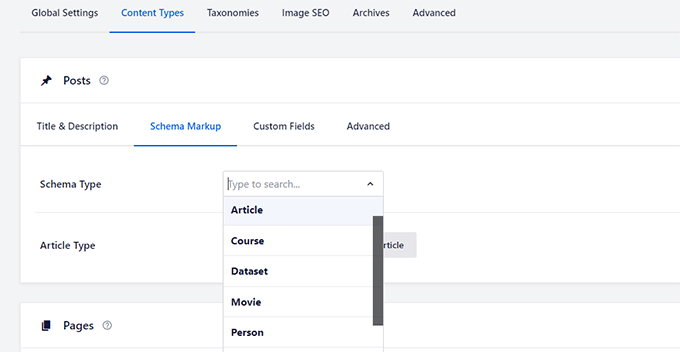
You can also change schema markup for individual posts and pages.
This comes in handy if you want to use your blog posts for different types of content such as recipes, product reviews, articles, and more.
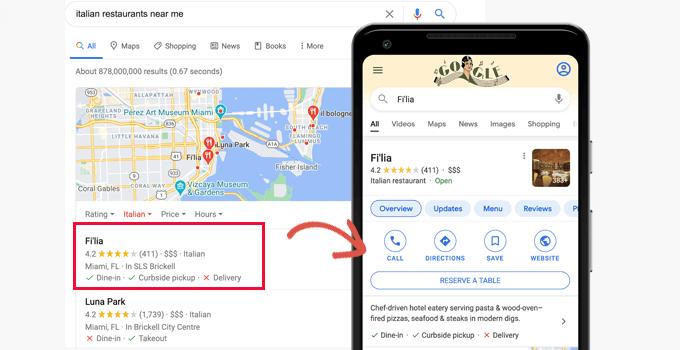
Apart from content, All in One SEO also adds structured data required to be listed in Google My Business and Google Maps searches.
This allows your business to appear in Google Maps and business searches. Your listing gets an extended information panel with directions, phone numbers, business hours, and more.
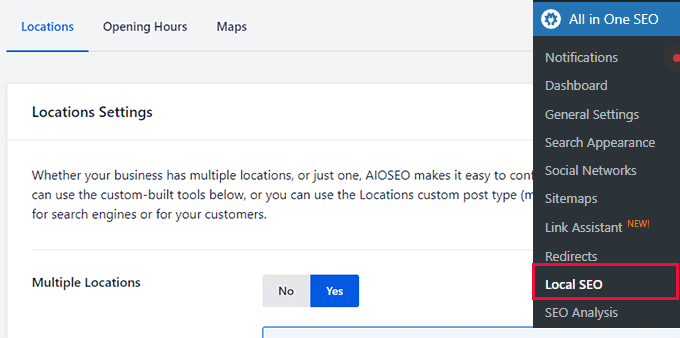
Simply switch to the All in One SEO » Local SEO page and provide your business information.
If your business has multiple locations, then you can turn on the Multiple Locations option.
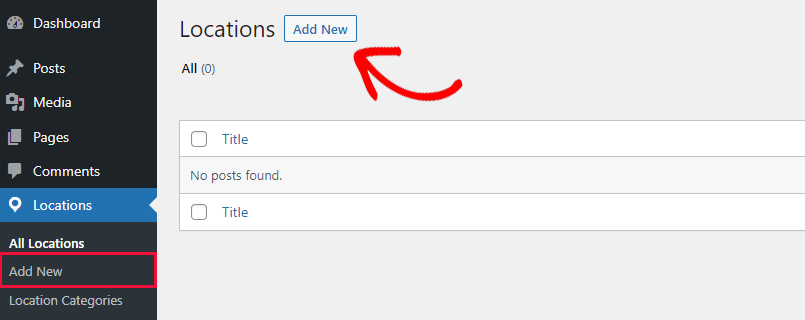
After that, the plugin will add a new Locations menu item to your WordPress admin sidebar.
You can now go to the Locations » Add New page to add a business location.
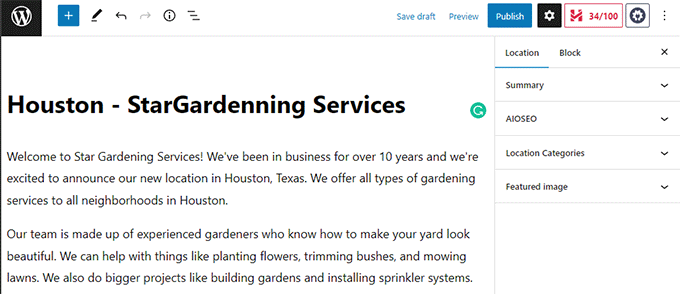
This will bring you to the Location editor page. First, you need to provide a title for your location and then add a little description.
You can also review options in the left column to set the location category and featured image.
After that scroll down to the AIOSEO Local Business section.
From here, you can add structured data for your location such as business name, logo, address, phone number, opening hours, and map.
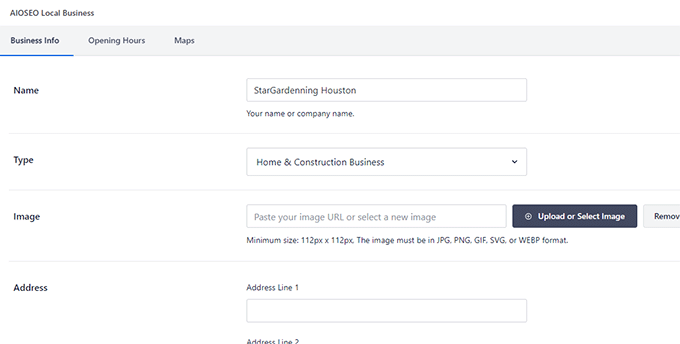
Once you are finished, go ahead and click on the Publish button to save your location settings.
You can now repeat the process to add more business locations as needed.
For more details, please take a look at our article about adding multiple locations schema markup in WordPress.
8. Easy and Extensive Social Media Integration
Social media platforms are a big source of traffic for many website owners.
All in One SEO comes with super easy and extensive social media integration.
1. Easily Add Social Network Profiles and Default Settings
First, you can go to the All in One SEO » Social Networks page. From here, you can provide social media profile URLs.
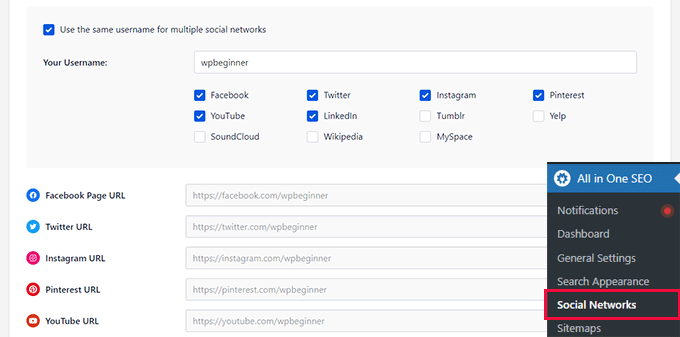
If you use the same handle in all your social media profiles then you can simply check the ‘Use the same username for multiple social networks’ option.
After that, provide your username and All in One SEO will fill in the URLs for you.
The plugin also allows you to easily configure your website for popular social media platforms like Facebook and Twitter.
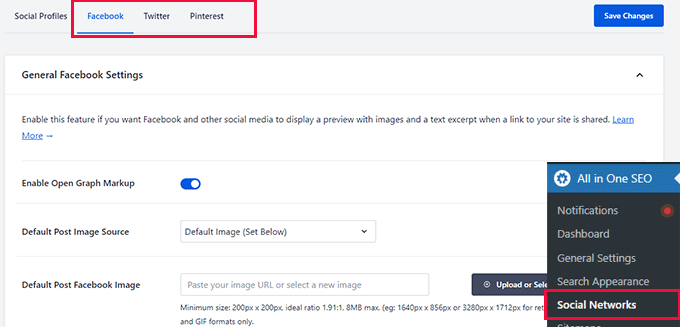
These options allow you to enable Open Graph metadata and provide default information that social media platforms can use when someone shares your content.
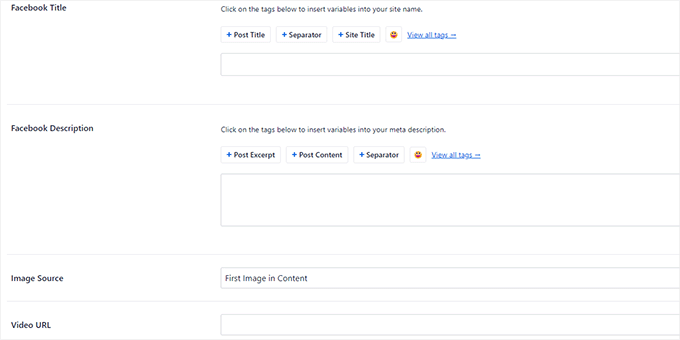
For instance, you can choose which image to use when someone shares a post. All in One SEO provides a bunch of options to automatically pick an image for Facebook and Twitter.
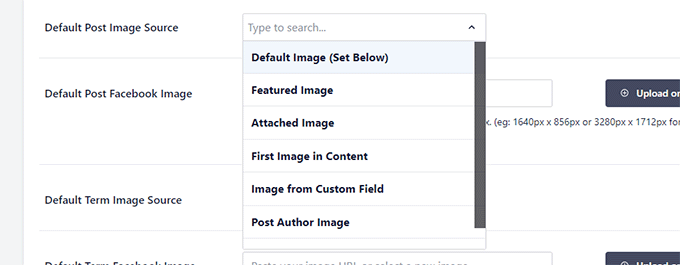
You can choose the featured image, the first image in the content, any attached image, the author image, any first available image, and more.
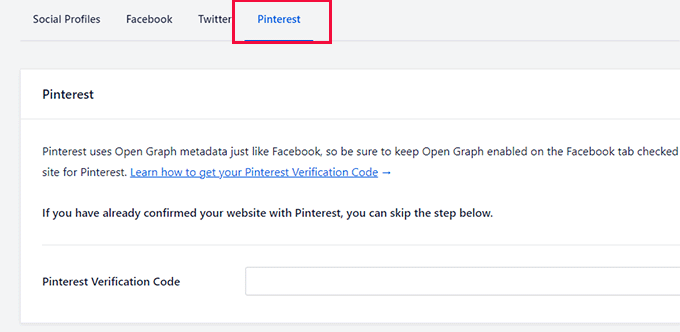
After configuring Facebook and Twitter, you can switch to the Pinterest tab. From here, you can also easily add the Pinterest verification code to verify your website on Pinterest.
2. Social Settings for Individual Posts and Pages
Once you have finished the default social networks setup, All in One SEO also provides you options to override these settings for individual posts and pages.
Simply edit a post or page and switch to the Social tab under the AIOSEO Settings section.
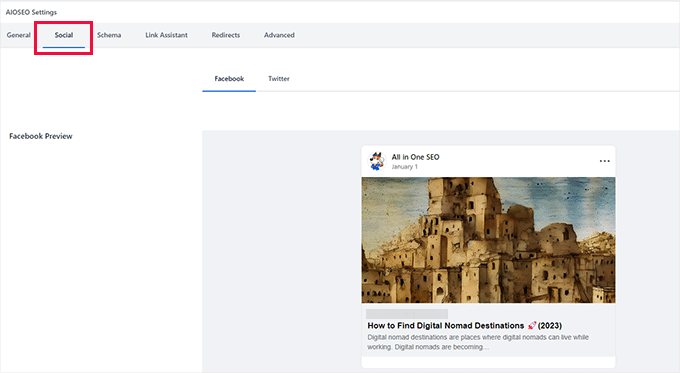
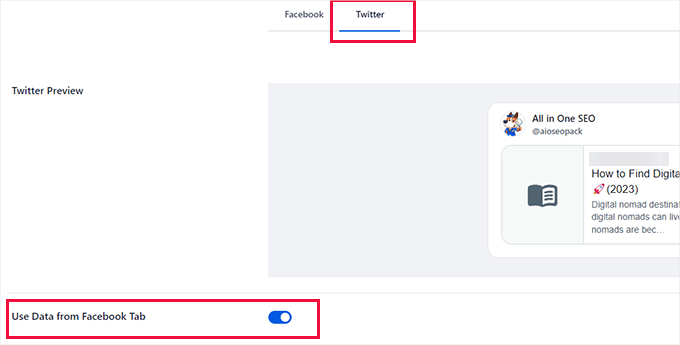
From here, you’ll see a preview of how your post will look on Facebook and Twitter.
Below that, you can override the default settings and change the post title, description, and social image.
If you change the data for Facebook, then you can use it for Twitter as well.
Simply switch to the Twitter tab and toggle the ‘Use Data from Facebook Tab’ option.
3. Add Social Profiles for Authors
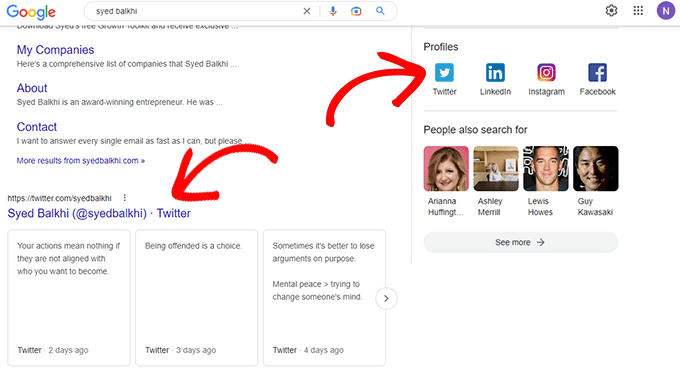
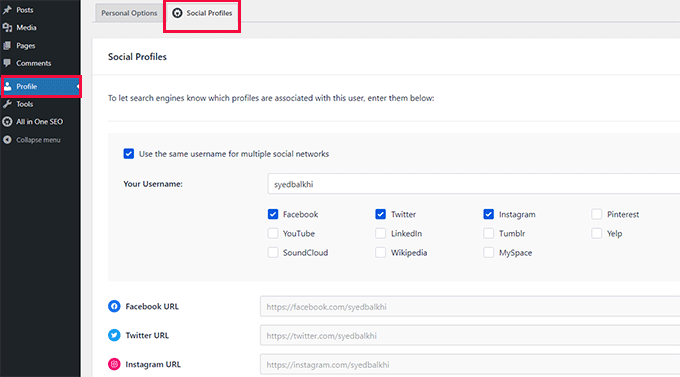
You can also let search engines know which profiles are associated with an author or user on your website.
This allows search engines to discover and display social media profiles when someone searches for a specific person.
To add this, administrators can go to the Users » Profile page and other users can simply click on the Profile menu from the WordPress admin sidebar.
From here, switch to the social profiles tab and enter your social media profile URLs.
9. Add New Links or Cleanup Bad Links with AIOSEO Link Assistant
Links play a significant role in a website’s SEO rankings. However, as your website grows, you may add more internal links to some older posts than newer posts.
Going back to individual posts and adding links can become a tedious task. Particularly, if you have hundreds of articles.
All in One SEO solves this problem with the Link Assistant. It allows you to easily add links or clean up bad links with one click.
Here is how it works.
First, it automatically crawls your website and shows you a comprehensive link report.
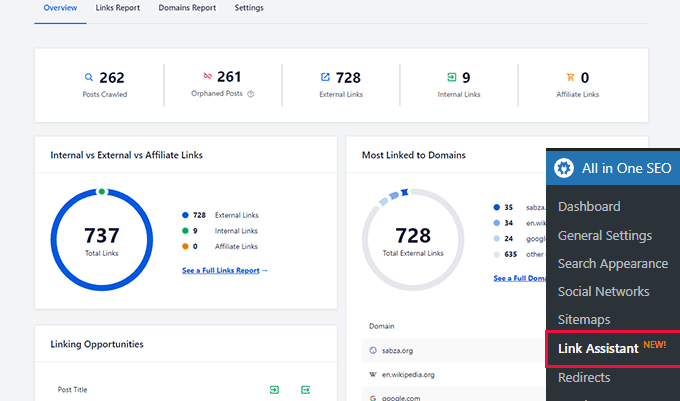
From here, you can see an overview of the links with total counts for orphaned posts (posts that are not linked from any other post or page), external links, internal links, and affiliate links.
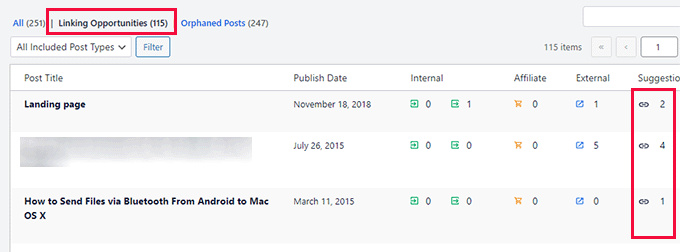
You can switch to the Links Report tab for detailed information on all your links.
You’ll see a list of all your posts and pages with columns for internal, external, and affiliate links.
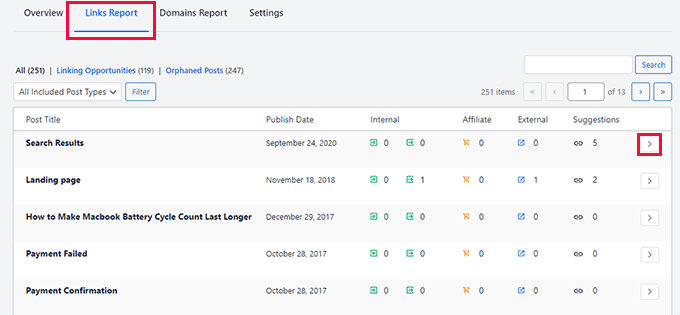
It will also show a number of suggestions where you can add links.
For more details, you can click on the right arrow button next to a post or page.
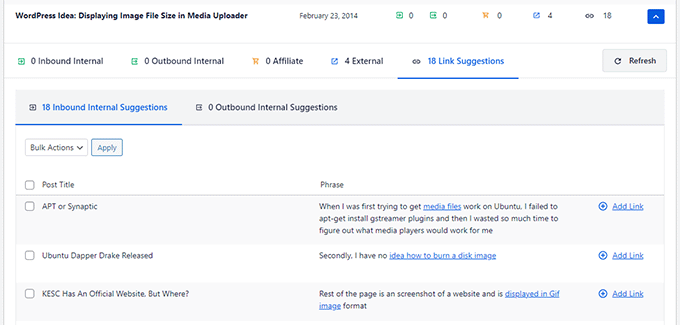
This will show all links organized in different tabs. From the suggestions tab, you can quickly view link suggestions and add links without directly editing a post or page.
Want to discover more internal linking opportunities?
Switch to the ‘Linking Opportunities’ tab for more internal linking suggestions or check out the orphaned posts and add links to them.
Clean up Bad Links with 1-Click
You can view all external links that your website links to by clicking on the Domains Report tab.
From here, you can select a domain and delete all links to it with a single click.
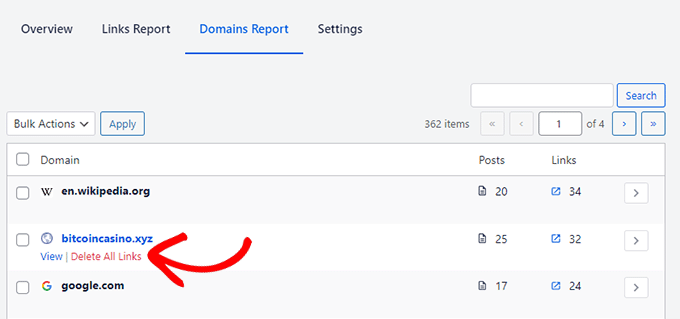
This makes it super easy to clean up your website if it has been affected by malware that has added links to spam websites.
It also comes in handy when you no longer wish to link to a third-party website and immediately want to remove all links pointing to it.
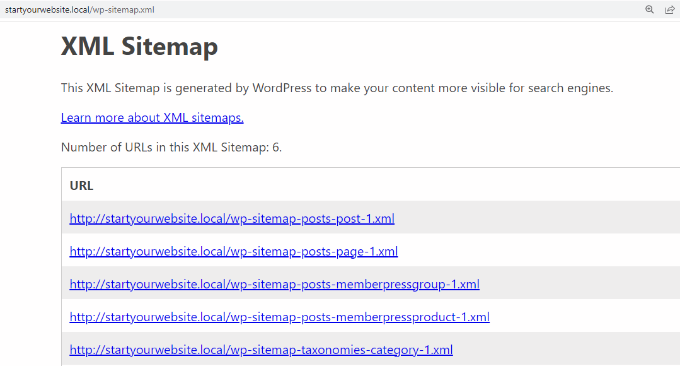
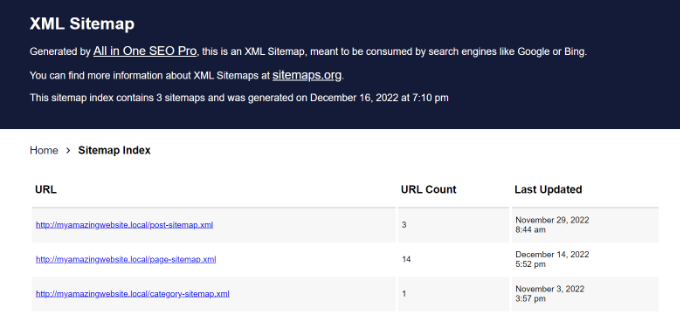
10. Comes with Extensive XML Sitemaps with Powerful Customization Options
An XML sitemap is a file that lists all your website content in an XML format, so search engines like Google can easily discover and index your content.
WordPress comes with built-in XML sitemaps, but these are too basic and you don’t have any tools to customize them.
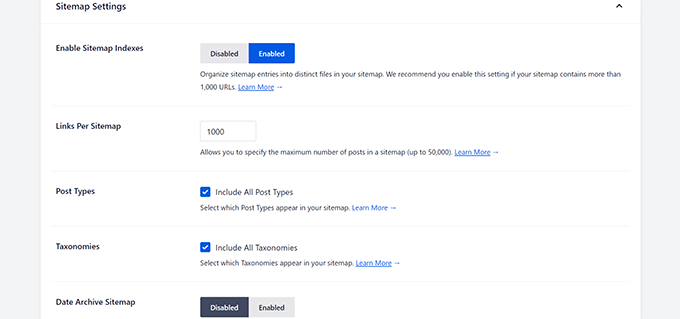
All in One SEO comes with extremely powerful XML sitemaps.
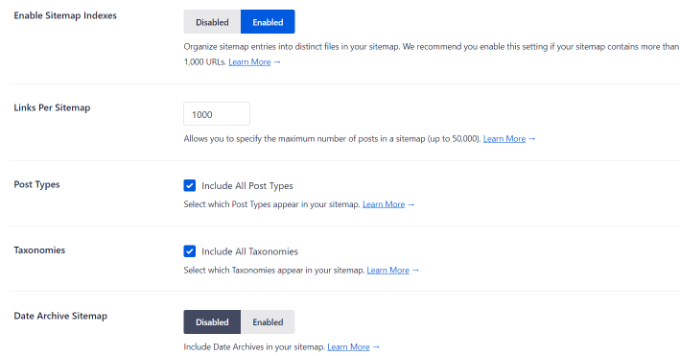
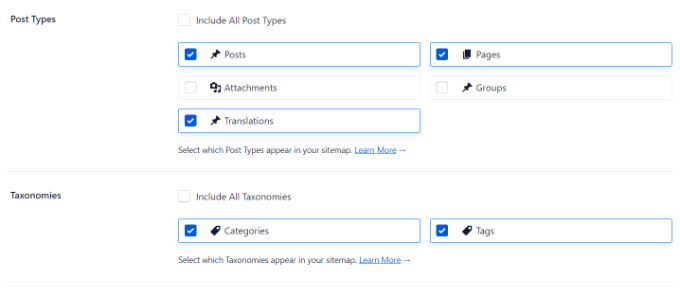
These custom XML sitemaps are highly customizable. For instance, you can easily include or exclude individual post types or taxonomies.
Plus, you can disable sitemaps for date and author archives.
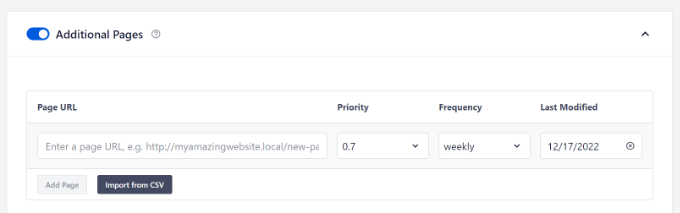
Below that, you can add any standalone page to your sitemap under the Additional Pages option.
For example, you can add your Shopify store or custom landing page hosted on the same domain.
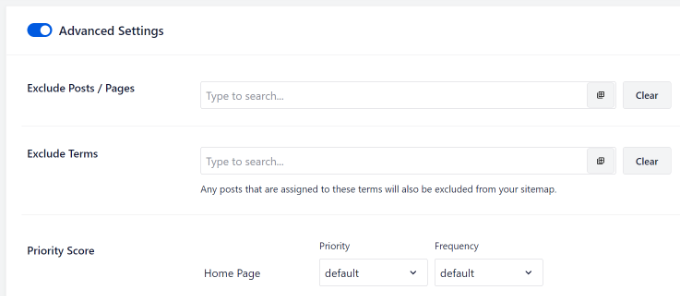
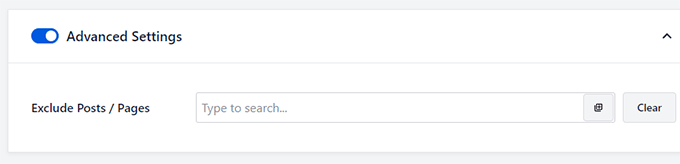
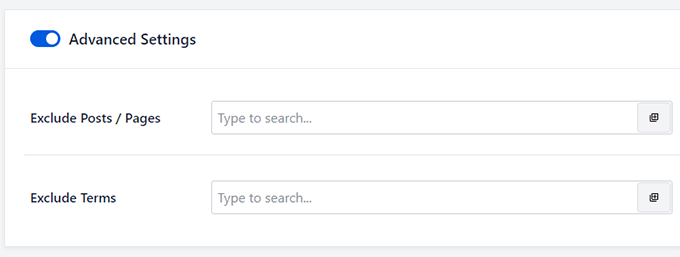
Want to remove some content from your sitemaps? Turn on the Advanced Settings option and you can exclude posts, pages, categories, tags, and more
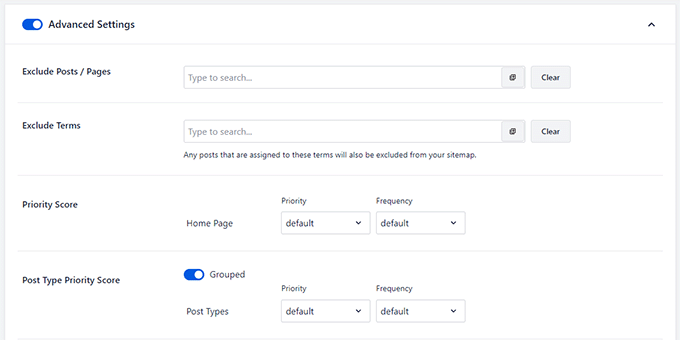
From here, you can also adjust the priority score for your homepage, posts, or taxonomies.
Lastly, you can even exclude images from your XML sitemaps if needed.
11. Appear in Google News with News XML Sitemaps
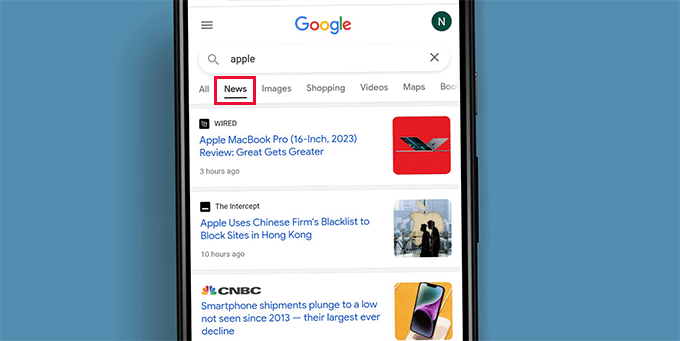
Do you run a news website or want your blog to appear in Google News?
News results may not only appear prominently on the main search page but can also appear on the News tab or in Google Discover on mobile devices.
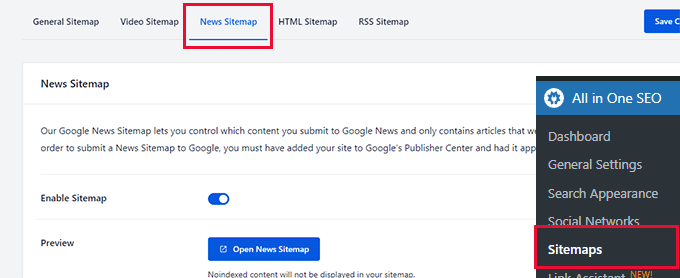
All in One SEO allows you to easily create a News Sitemap which is a requirement for Google News results.
Simply switch to the News Sitemap tab and turn it on.
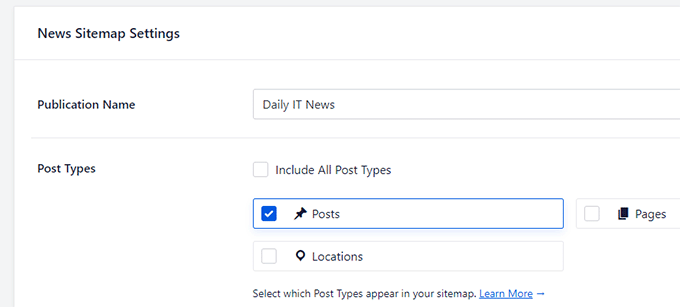
After that, you can provide a title for your news publication.
Next, you need to choose which post types you want to include in your news sitemap.
Need even more control over your news sitemap?
All in One SEO allows you to easily exclude specific items from your news sitemap.
Simply toggle the Advanced Settings switch to show more options. From here, you can search for the post or page you want to exclude and click on the + button to add it.
12. Easily Create Customizable HTML Sitemaps
HTML Sitemaps are sitemaps for your users and can be added anywhere on your website.
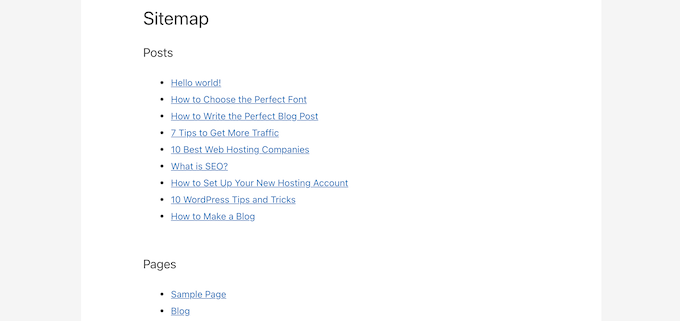
They help users easily navigate a website and find the information they need. Many organizations, government websites, and small businesses find them quite helpful.
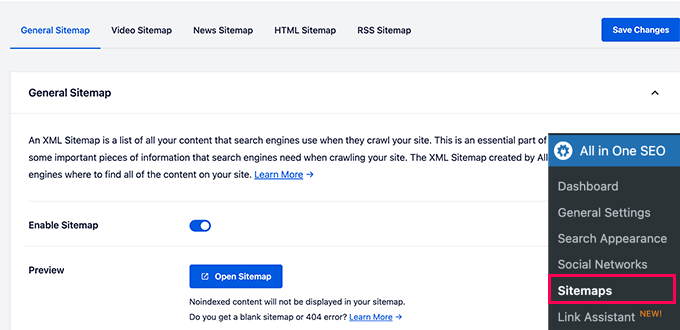
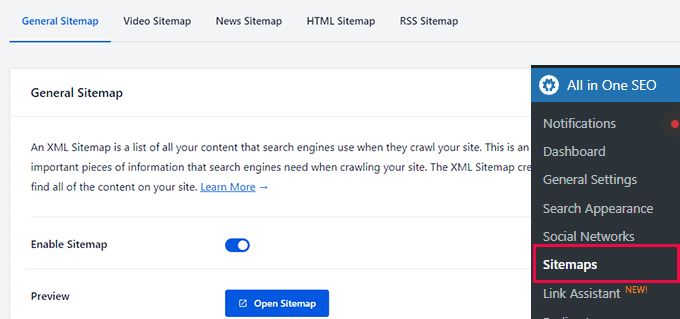
All in One SEO lets you easily create HTML sitemaps.
Simply go to the All in One SEO » Sitemaps page and switch to the HTML Sitemap tab.
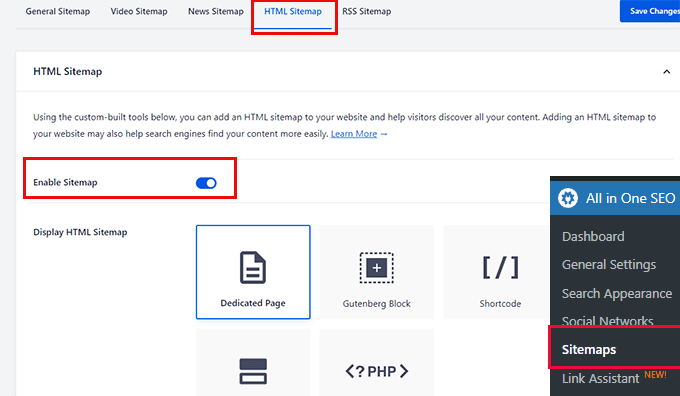
From here, you can switch to the toggle next to Enable Sitemap to turn on HTML sitemap.
Below that, you can choose how you want to display the sitemap by choosing one of the following options.
- Dedicated Page
- Gutenberg Block
- Shortcode
- Widget
- PHP Code
Click to select your option and it will tell you how to use it.
For instance, choosing the Dedicated Page option, you will be asked to provide URL for a page where you want to display the Sitemap.
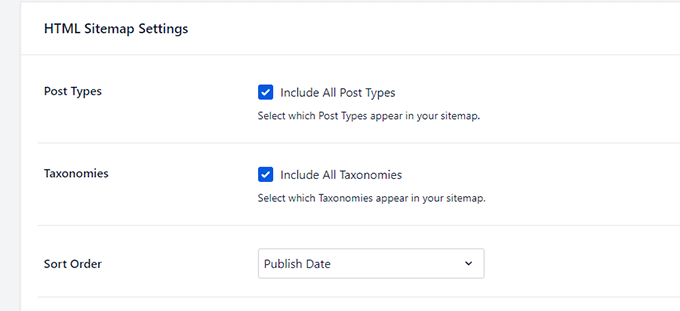
Below that, you can choose which post types and taxonomies to include, sorting options, and enable compact archives.
Want to exclude some posts or pages from your HTML sitemap?
No worries, you can simply click on the Advanced Settings section to exclude any content from your HTML sitemap.
13. Appear in Video Results with Video Sitemaps
Videos are the most engaging type of content and for some search keywords, Google may automatically include video results at the top.
Now, if you regularly publish video content or add video embeds to your posts, then this gives you a huge opportunity to rank higher.
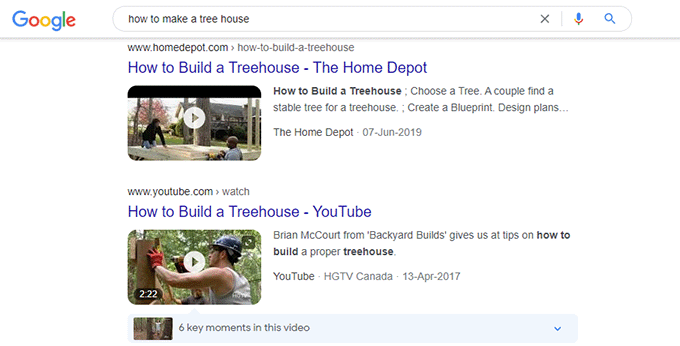
Research shows, that users are more likely to click on a result with a video thumbnail than just plain text.
All in One SEO’s Video Sitemaps help you get ready to appear in video search results.
Simply go to All in One SEO » Sitemaps page and switch to the Video Sitemap tab.
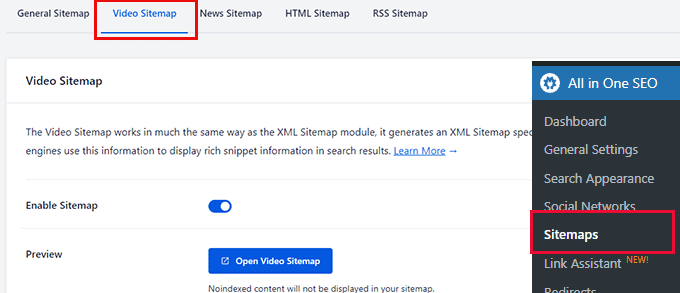
From here you can turn on Video Sitemap and choose which post types or taxonomies to include.
By default, the plugin will divide your sitemap into indexes. These are smaller files containing a limited number of links.
You can also adjust how many links you want to include in a sitemap.

Just like any other sitemap, you can click on the Advanced Settings section to exclude any content that you don’t want to appear in video sitemaps.
14. Get Indexed Faster with RSS Sitemaps
Unlike regular XML sitemaps which have a complete set of links to your content, RSS sitemaps provide search engines links to recent changes on a website.
This helps search engines more easily discover recent changes on a website. Google recommends using both XML sitemaps and RSS sitemap for optimal crawling.
All in One SEO allows you to easily generate an RSS sitemap for your website.
Simply go to the AIOSEO » Sitemaps settings page and switch to the RSS Sitemap tab.
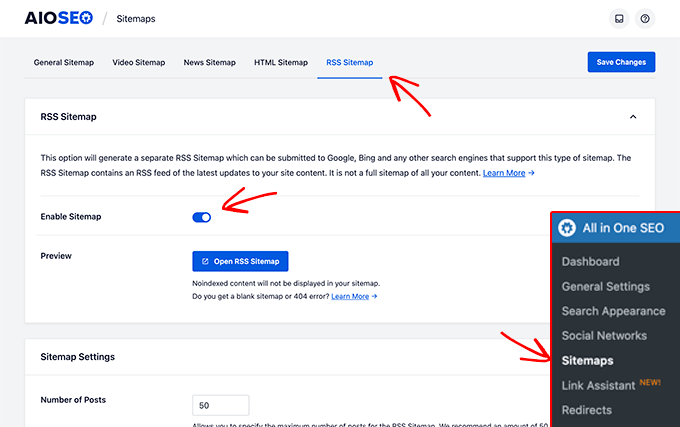
From here, toggle the Enable Sitemap switch to turn on the RSS sitemap.
Below that you can choose the number of posts and which post types to include.
For more information, take a look at our guide on how to easily add RSS sitemap in WordPress.
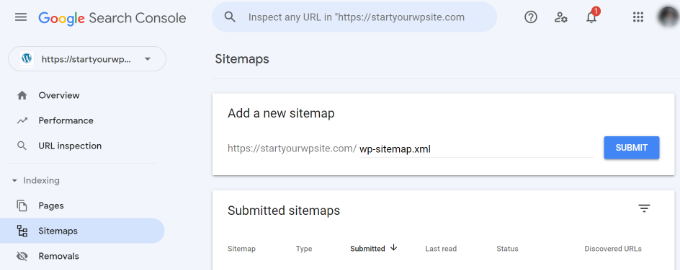
15. Easily Add Your Site to Webmaster Tools & Google Search Console
All top search engines provide website owners with easier tools to see how their website is performing in search and get alerts if something goes wrong.
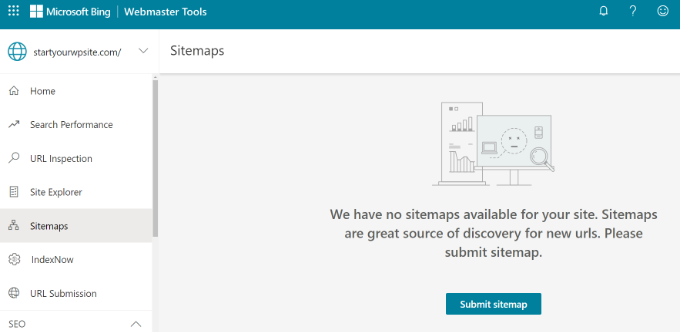
Google calls it Google Search Console. Bing and other search engines call their programs webmaster tools.
Once you sign up for them, you will be asked to verify your ownership by adding a code snippet to your website.
All in One SEO makes it super easy to add the verification code for all webmaster tools under one place.
Simply go to the All in One SEO » General Settings and switch to the Webmaster Tools tab.
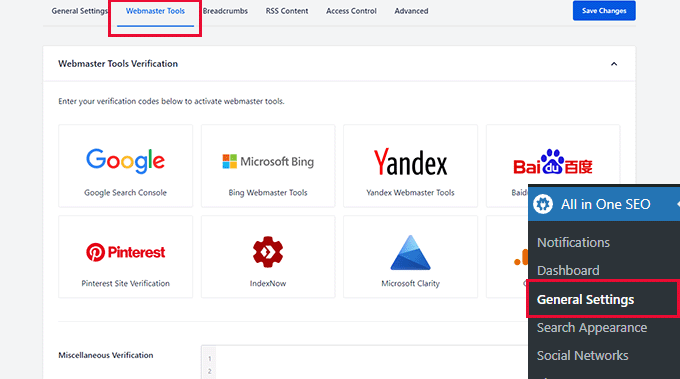
Now simply click on a search engine, and then add the verification code.
Below that you will also find a text field called Miscellaneous verification. This allows you to add verification codes from any other third-party platforms to your website.
Now if you are wondering how to take advantage of webmaster tools, then you may want to see our expert tips on using Google Search Console like a pro.
16. Get New Content Indexed Quickly with IndexNow
IndexNow is an automatic ping that lets search engines know when a post or page (URL) on your website has been added, deleted, or updated.
This allows search engines to quickly update their search results speeding up overall SEO results.
Simply put, it’s instant indexing!
Currently, it is supported by Bing, but Google has indicated they will be testing it too.
All in One SEO allows you to implement IndexNow on your website with a few clicks.
First, you need to visit All in one SEO » Feature Manager page and toggle the Acivate switch under IndexNow box.
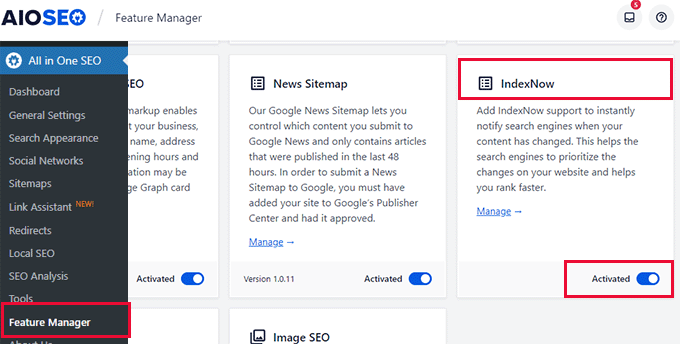
That’s all, the plugin will now automatically set up IndexNow for your website by generating an API key.
You can verify it by visiting the All in One SEO » General Settings page and switching to the Webmaster Tools tab.
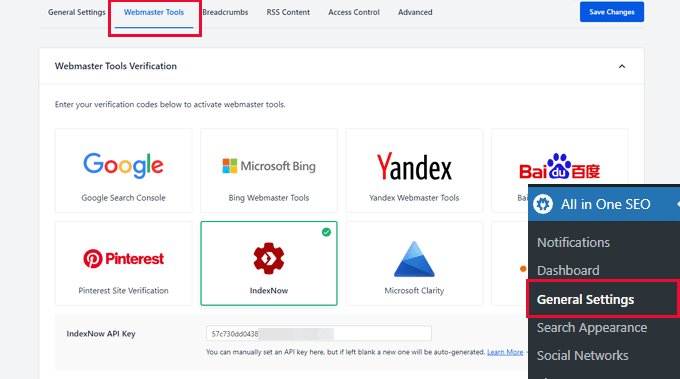
From here, click on the IndexNow box and you’ll see the API key in place.
To learn more, you may want to see our guide on how to add IndexNow in WordPress for faster SEO results.
17. Customize Your WordPress RSS Feeds to Boost SEO
RSS feeds provide an easier way for users to subscribe to your content using feed readers like Feedly.
WordPress comes with built-in support for RSS feeds and generates separate feeds for your recent posts, categories, tags, archives, authors, and more.
All in One SEO allows you to customize your WordPress RSS feeds and make them more useful for your website.
Simply go to the All in One SEO » General Settings page and switch to the RSS Content tab.
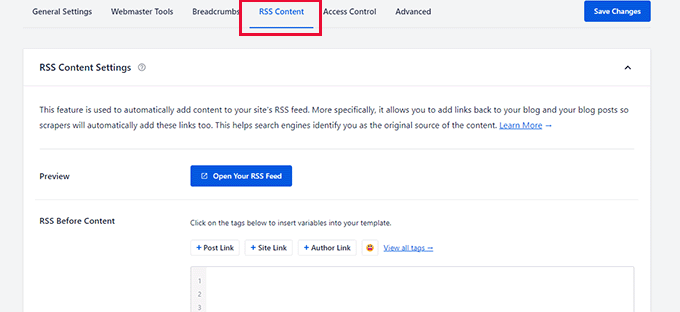
From here you can add any content you want to display before and after content in RSS feed.
You can even use emojis and smart tags to automatically add elements like post, category, author link, and more.
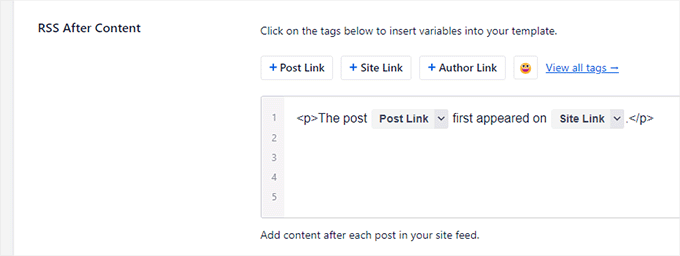
For instance, All in One SEO automatically adds links back to your original post and website after each post in the RSS feed.
Now if someone uses your RSS feed to steal content from your website, they will be forced to display a link back to your website.
For more information, see our guide on how to optimize WordPress RSS feeds for your website.
18. Helps You Fix Search Crawl Budget Issues
SEO crawl budget is the number of times search engines like Google will crawl pages on your website.
Google sets a crawl budget for different domains based on its own algorithms. However, sometimes this budget is wasted if search bots spend most of the budget crawling less important pages on your site.
All in One SEO helps you fix that problem with the Crawl Cleanup feature. Simply go to the All in One SEO » Search Appearance page and switch to the Advanced tab.
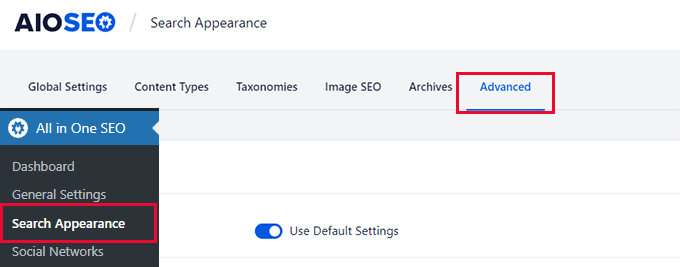
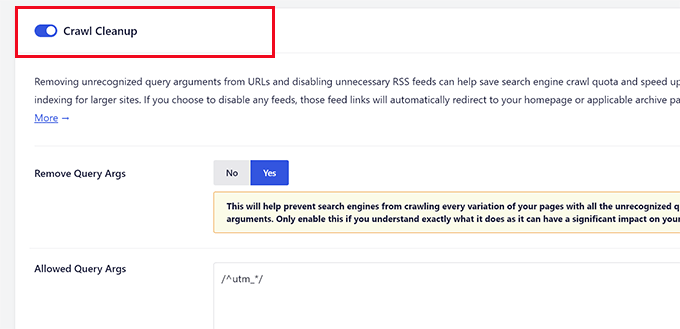
From here, you need to scroll down to the bottom and switch the toggle next to the Crawl Cleanup option.
This will expand the section and will show you a bunch of options that you can exclude from crawling.
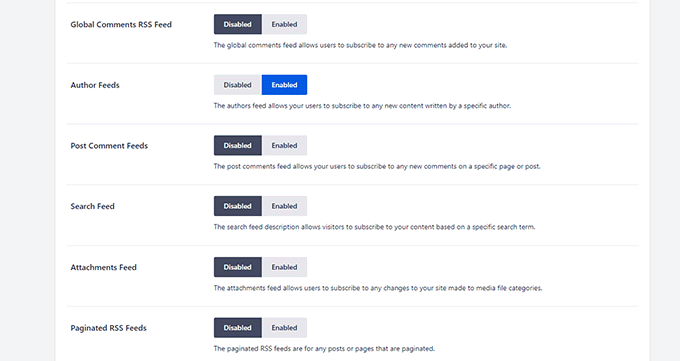
For instance, each WordPress category, tag, comments, archive, and author pages has its own RSS feeds. These get crawled, too, but are not highly important.
You can Disable them so that they are excluded from the crawl budget.
For more information, see our article on how to easily fix the SEO crawl budget issues in WordPress.
19. Easily Setup 301 Redirects
The 301 redirect is when a post or page on your site has been moved, and you want to point the user to the new location instead.
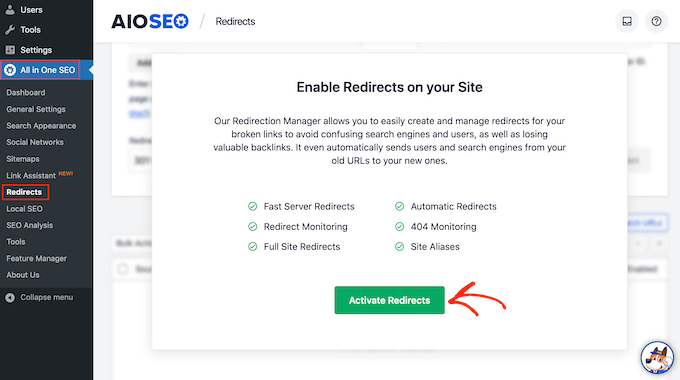
All in One SEO comes with a powerful Redirects Manager tool, which allows you to create and manage all sorts of redirects including 301 redirects.
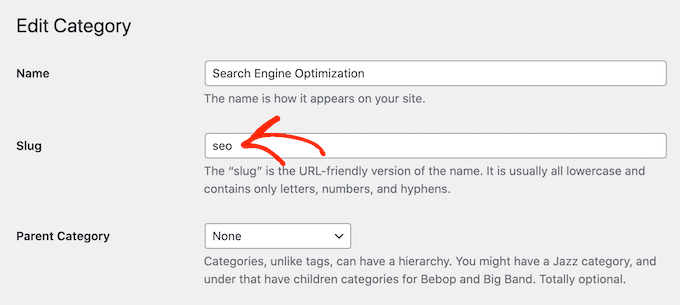
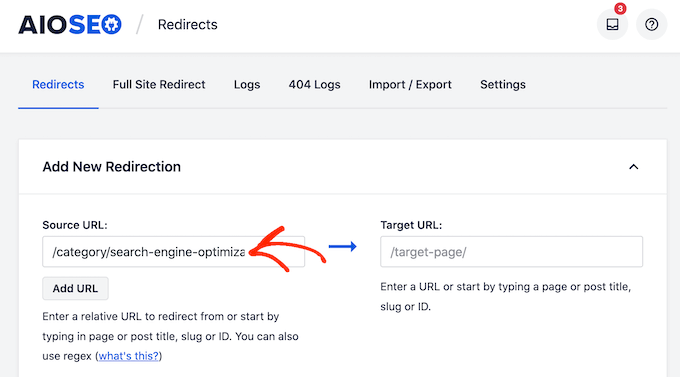
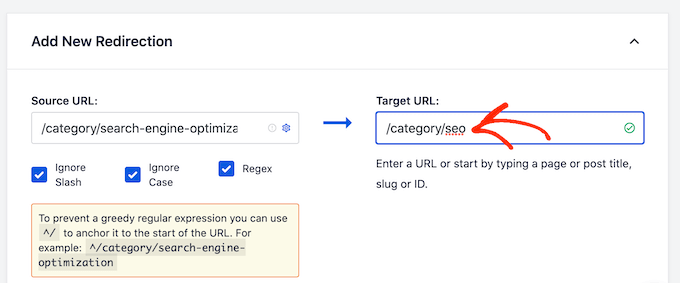
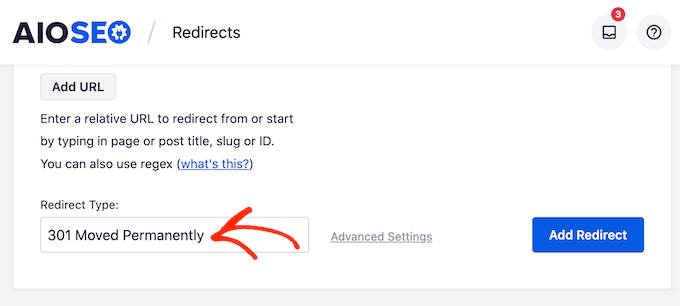
Simply go to the All in One SEO » Redirects page to add a new redirect.
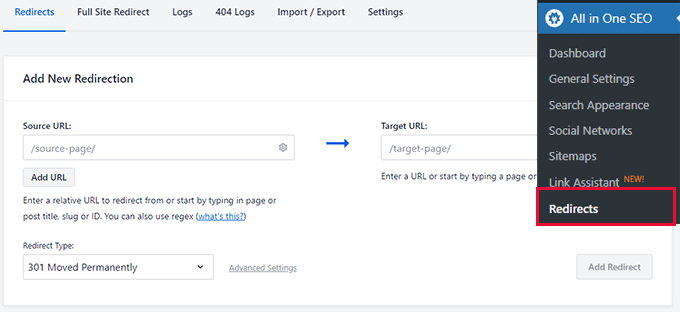
Enter the old URL in the source field and the new URL in the target field. After that, choose 301 Moved Permanently under the Redirect type option.
Click on the Add Redirect button to save your settings.
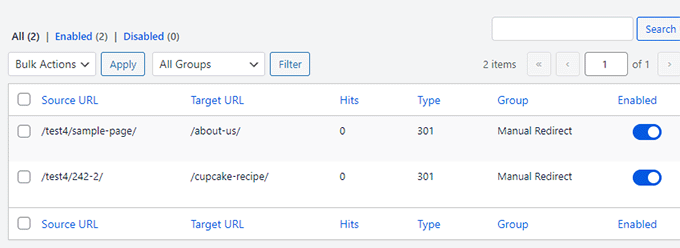
The best part is All in One SEO will show all redirects you set up and you can edit or disable a redirect any time you want.
For more information, see our tutorial on how to create 301 redirects in WordPress.
20. Detect 404 Errors and Fix Them
A 404 error occurs when a user visits a page on your website which is not there anymore. Perhaps it was deleted, the user entered an incorrect URL, or followed an incorrect link.
These errors create a bad user experience and can negatively impact SEO rankings.
Often, they go unnoticed by website owners until a user reports them.
All in One SEO fixes this problem by keeping a log of 404 errors on your website.
Simply go to the All in One SEO » Redirects page and switch to the 404 logs page to view them.
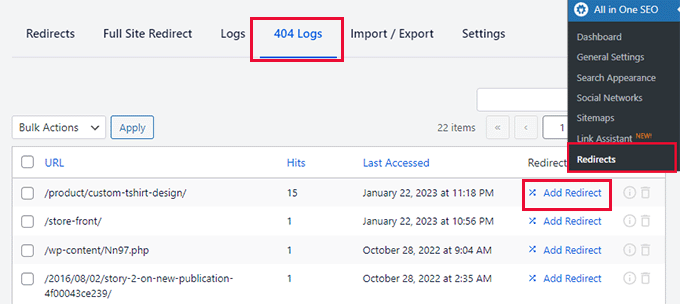
Now some of these links may be misspelled URLs with few hits, you can safely ignore those. Others would be links to posts that you may have deleted or changed their URLs.
In that case, you can simply click on the Add Redirect button and point that URL to the new location or any other relevant page.
For more details, see our article on how to easily fix 404 errors in WordPress.
21. Easy Full Site Redirects when Moving Site to Different Domains
Are you moving your WordPress website to a new domain name and worried about the SEO consequences?
All in One SEO’s redirect manager comes with super easy Full Site Redirects.
Basically, you can just paste the URL of your new domain name and it will redirect all users coming to your old domain to the exact pages on your new domain name.
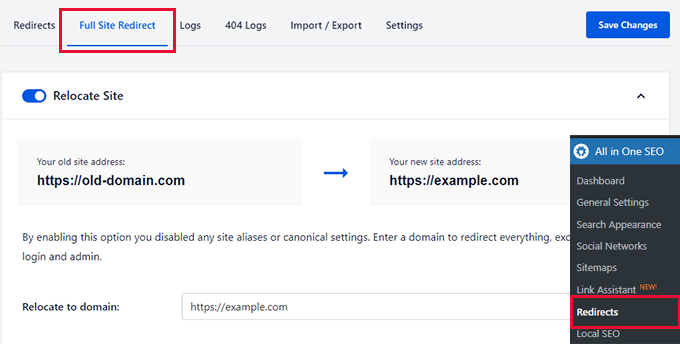
This helps your new domain to rank quickly in search engines and also reduces the negative SEO consequences of moving to a new domain name.
For more on this topic, check out our guide on moving WordPress to a new domain name.
22. Faster Redirects Using Server Instead of PHP
WordPress comes with a built-in redirects system written in PHP. Many redirect plugins take advantage of it, including All in One SEO.
WordPress is used on many different types of servers and they can have different configurations that may affect redirects. Using PHP avoids dependency on server settings and makes sure that redirects work.
However, these PHP redirects are a bit slower. It is a small compromise and for most users, it is not even noticeable.
Still, some users may want to use the server to set up redirects for improved performance and speed.
All in One SEO gives those users an option to use faster redirects using the web server instead of PHP.
Note: This is a method for advanced users only, as you will need to edit not only your .htaccess file, but also your server configuration files for Apache or NGINX.
To use this method, you’ll need access to your server’s configuration files. You’ll also need to know how to safely make changes to those files.
To set it up, you can go to the All in One SEO » Redirects page and switch to the Settings tab. From here, you can click on the Web Server option under Redirect Method.
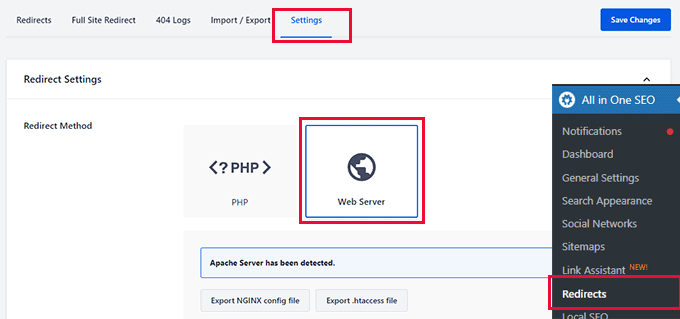
The plugin will then detect your web server and will show you an option to export redirect rules files for your web server which you can then manually place in your .htaccess file or your Nginx config file.
Next, click on the save change button to store your settings.
After that, the plugin will display a line of code that you need to add to your server’s configuration file.

If you’re using Apache as your web server, then the line should be included in the Apache virtual hosts file. You will then need to restart Apache.
If you’re using NGINX as your web server, then the line should be included in your nginx.conf file. You will then need to restart NGINX.
Keep in mind, too, that using server redirects will prevent AIOSEO from keeping logs of all redirects that occur.
23. Easily Import / Export Redirects
Want to import redirects you set up earlier using some other redirects plugin? Or perhaps you want to export your All in One SEO redirects to use elsewhere?
All in One SEO’s redirects manager can magically import redirects from other popular redirects and SEO plugins.
Simply go to All in One SEO » Redirects page and then switch to the Import / Export tab.
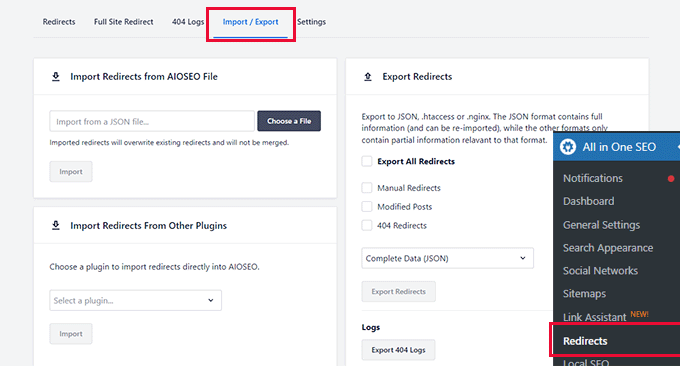
From here, you can import redirects from other plugins. All in One SEO can automatically import redirects from the following plugins:
- Redirection
- Yoast SEO Premium
- Simple 301 Redirects
- Safe Redirect Manager
- 301 Redirects Pro
- 30 Redirects
- Page Links To
- SEOPress Pro
It can also import redirects from All in One SEO as well.
In the right column, you’ll see options to export All in One SEO redirects data. You can choose to export different types of redirects or export all of them.
Lastly, the plugin also allows you to export your 404 error logs in CSV format. This comes in handy if you want to analyze the data in spreadsheet software like Google Sheets.
24. Advanced Yet Easiest Breadcrumb Navigation
Breadcrumb navigation is a navigational aid that provides users links in relation to where they are on a website’s navigational layout.
It’s like a path to show them how to get back to earlier parts of the website they may have visited before landing on their current page or post.
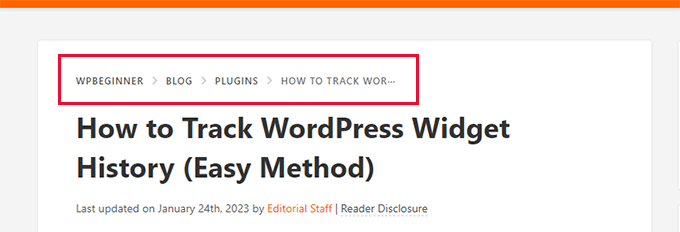
This provides users context, helps them discover more sections of your website, and improves user experience.
Search engines also use this information in the result snippet next to the URL.
All in One SEO comes with the easiest and most customizable breadcrumb navigation settings of any WordPress plugin on the market.
First, it automatically adds markup required by search engines to display breadcrumbs without you having to do anything.
It also gives you a full set of tools to customize breadcrumbs and display them on your website.
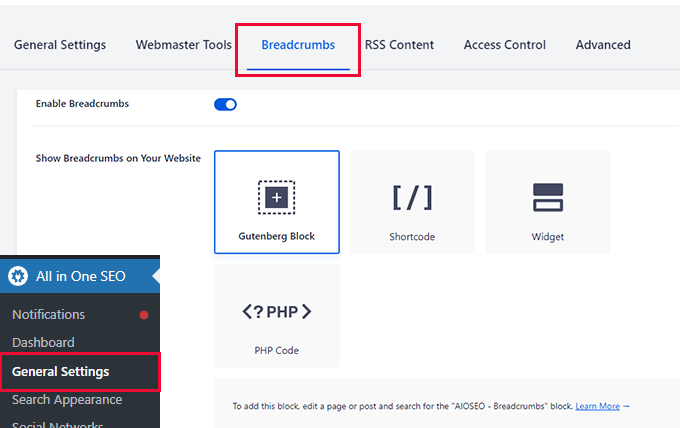
Simply go to the All in One SEO » General Settings page and switch to the Breadcrumbs tab.
From here, you’ll see different ways to easily display breadcrumbs on your website.
You’ll also see a link that will show you how to use these methods to display breadcrumbs.
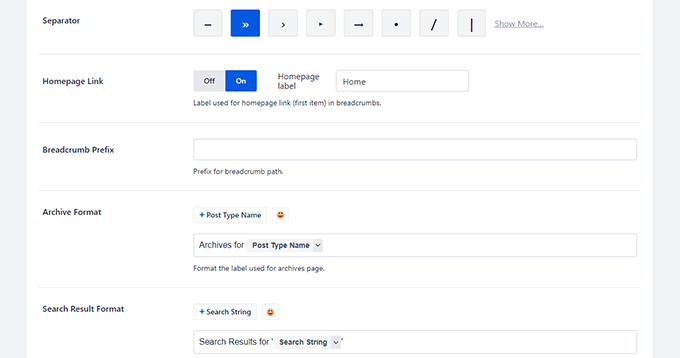
Scroll down a little and you’ll find customization options for your breadcrumbs navigation links.
For instance, you can choose which separator you want to use, include a home link, set a prefix, and more.
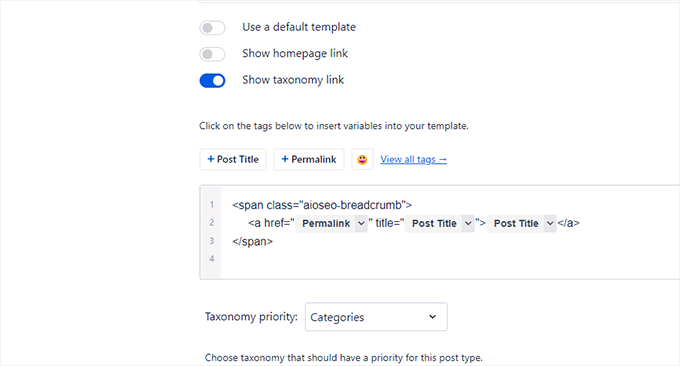
Want to edit the Breadcrumbs template?
Scroll down to the Breadcrumbs template section. There you’ll see tabs for content types, taxonomies, and archives sections.
For instance, under Content Types, you can change templates for posts, pages, products, and attachments.
To edit the template switch the toggle next to ‘Use a default template’ option to reveal the settings.
You can then edit the default breadcrumbs template by switching toggles to show or hide the homepage or taxonomy links.
You can also use smart tags and even some HTML if needed. Simply insert the smart tags inside the HTML code anywhere you would put the same static information.
For more details, see our guide on how to add breadcrumb navigation in WordPress.
25. Turn On REST API for Headless WordPress
Are you building a headless WordPress website and don’t want to compromise on SEO?
All in One SEO allows you to turn on REST API for headless WordPress development.
Simply go to the All in One SEO » Feature Manager page and activate the REST API feature.
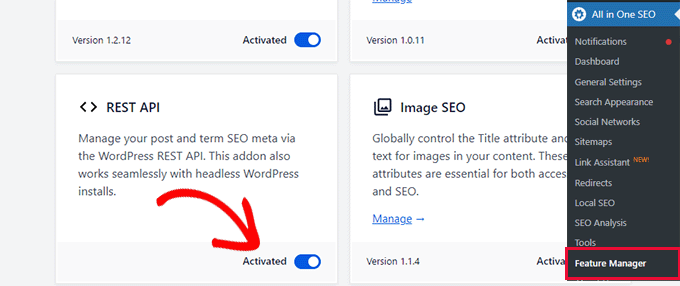
This allows you to use the All in One SEO metadata and output it into the front end of your website.
See the notes on All in One SEO website on how to fetch SEO data with REST API and output it in your source code.
26. Control Which Users Have Access to SEO Features and Settings
Want to hire an SEO expert to work on your website? All in One SEO gives you powerful access control features so that you can control which parts of your website they can access.
Simply go to the All in One SEO » General Settings page and switch to the Access Control tab.
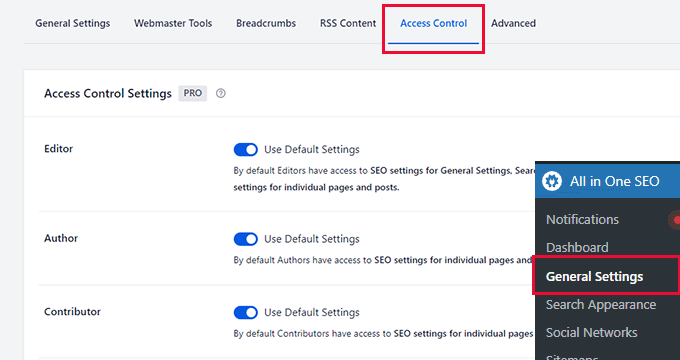
First, you’ll see access control options for default WordPress user roles such as Editor, Author, and Contributor.
By default, they will have access to SEO settings for the content that they are allowed to edit in WordPress. To learn more see our WordPress user roles and permissions guide.
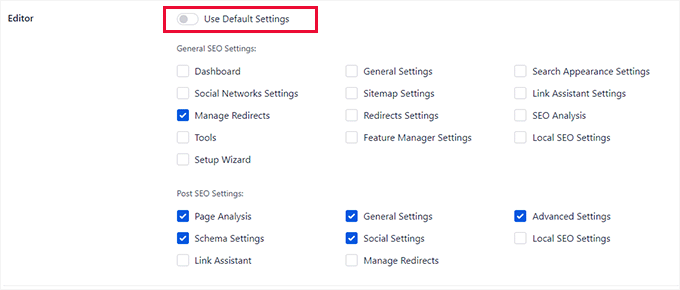
Editors also have permission to access SEO settings for General Settings, Search Appearance, Social Networks, and Redirects.
You can change options for each user role by switching the User Default Settings toggle next to a user role.
All in One SEO also adds two new custom user roles that you can use.
- SEO Manager – By default, they can access SEO settings for General Settings, Sitemaps, Link Assistant, Redirects, Local SEO, and individual pages and posts.
- SEO Editor – By default, they can access SEO settings for individual pages and posts.
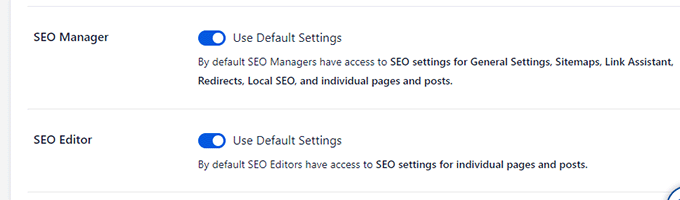
You can also change their access by switching the Use Default Settings toggle.
To assign a user an SEO role on your website, you will need to add them as a new user in WordPress and set their user role to SEO manager or SEO Editor.
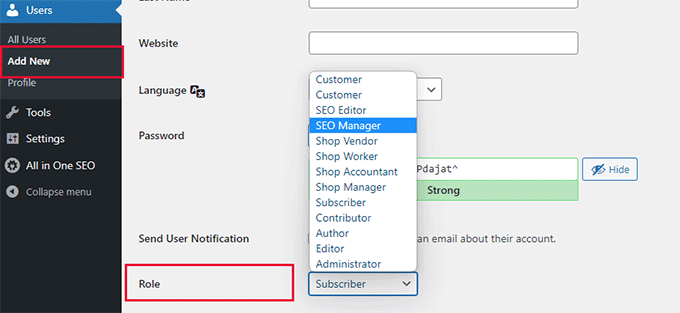
All in One SEO will then immediate apply the right permissions for them to do their job and boost your site’s rankings.
27. Seamless E-commerce Integration
All in One SEO provides the easiest WooCommerce SEO features. It allows you to add an SEO title, description, and product image which is then used by search engines.
It automatically applies schema markup which gives search engines more information to display in rich results for your products.
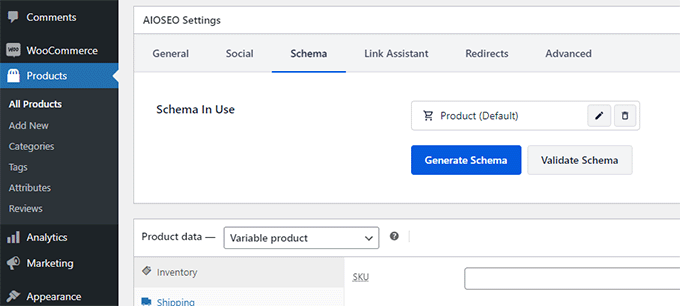
Plus, it includes product sitemaps, breadcrumbs, image SEO, and local SEO features. This makes All in One SEO the most comprehensive toolkit for eCommerce stores.
For more information, see our ultimate WooCommerce SEO guide for beginners.
28. Powerful Image SEO Features
Google image search can be a major source of traffic for many websites.
However, many users forget to add image alt and title tags when uploading images. If you have multiple authors then it becomes harder to notice if someone has missed those tags.
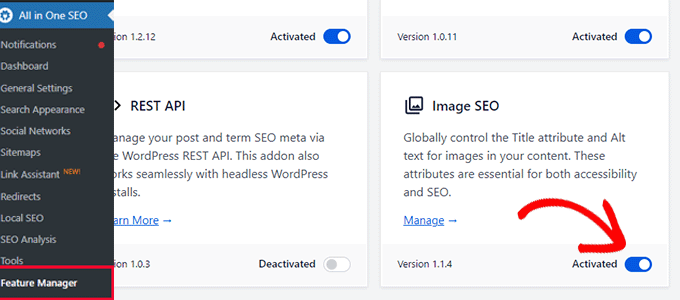
All in One SEO comes with an extensive image SEO addon that allows you to fix this by automatically generating these tags. To keep the software lightweight, it is not enabled by default.
You’ll need to activate it by visiting the All in One SEO » Feature Manager page.
After that, you need to visit the All in One SEO » Search Appearance page and switch to the Image SEO tab.
The first option here is to redirect attachment URLs.
All in One SEO automatically redirects attachment URLs back to the attachment because the attachment page itself only contains an image and does not have any SEO benefit.
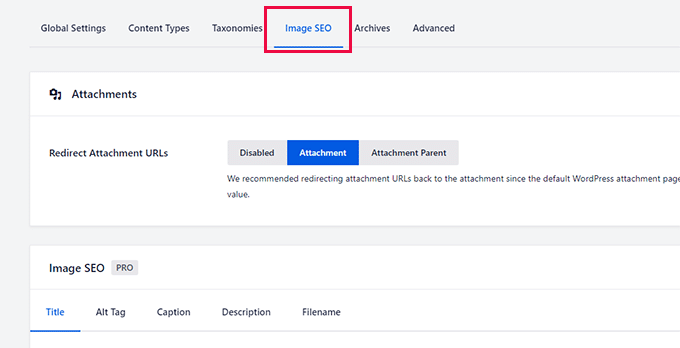
Below that, you will find options to set up Image SEO settings. The two most important options here are the Title and Alt tags.
Under the Title tab, you can choose a default title scheme using the smart tags. AIOSEO will use your image file name as the title.
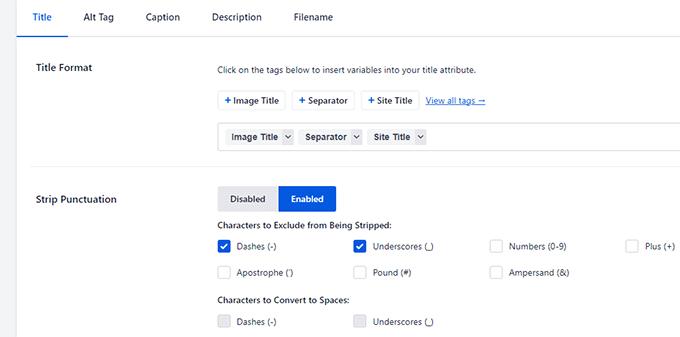
You can choose to remove punctuation like dashes or underscores. This allows you to convert your image title from ‘our-family-picnic’ to ‘our family picnic’.
Below that, you can also choose the casing for the tags. For instance, you can use all lowercase, title case, or sentence case.
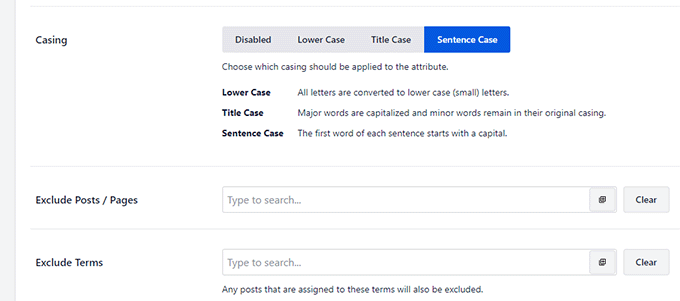
Optionally, you can exclude posts, pages, or terms where you don’t want the plugin to automatically generate from image titles.
Next, you need to switch to the Alt tag tab and repeat the process.

Similarly, you can also generate captions and descriptions and modify filenames upon upload in a similar manner.
For more details, see our complete tutorial on Image SEO for beginners.
29. Safely Edit Robots.txt and .htaccess Files From WordPress Admin
You may sometimes come across tutorials asking you to edit your robots.txt or .htaccess file.
Editing these files can be difficult for beginners. Not to mention that a mistake there can break your website or affect its SEO.
To make this easier and safer for beginners, All in SEO comes with a built-in file editor where you can edit your robots.txt and .htaccess files without using FTP.
You can do that by visiting the All in One SEO » Tools page. For the robots.txt file, you can click on the button to view your current robots file.
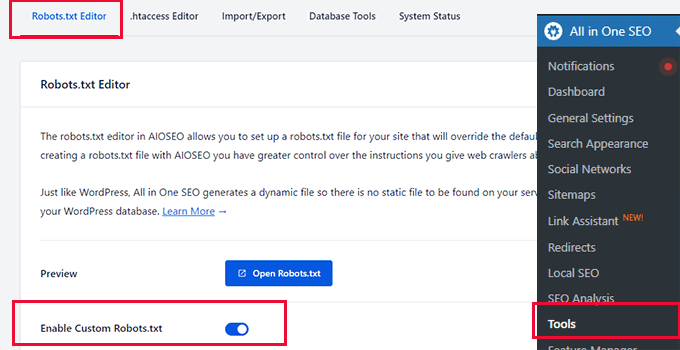
You can also enable a custom robots.txt file and create an all new one.
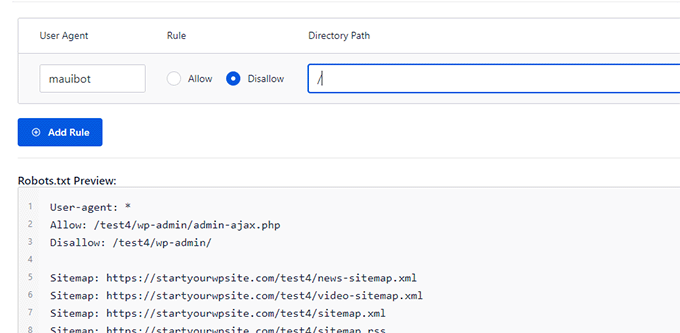
Below that, you can allow or deny any user agents, and they will be added to robots.txt.
The .htaccess Editor tab will display the contents of your current .htaccess file.
You can simply edit it right there.
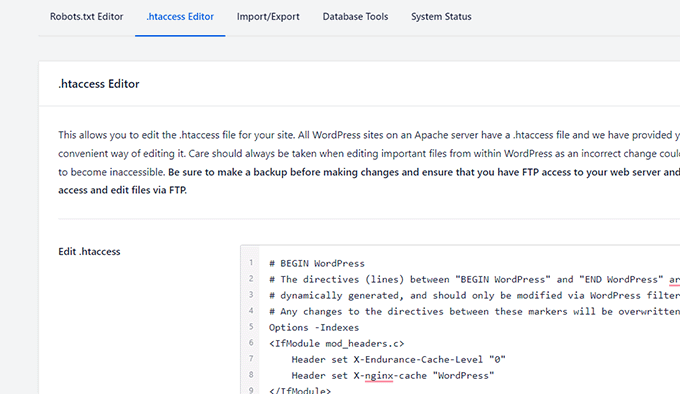
Note: You need to be very cautious about editing these files. A tiny mistake can break your website or damage its SEO.
30. Perform a Quick SEO Audit for Your Site
A lot of businesses hire SEO specialists and pay them to perform SEO audits for their websites.
All in One SEO helps you save money by allowing you to do a quick SEO audit for your website. This allows you to save money by fixing important SEO issues on your own.
Simply go to the All in One SEO » SEO Analysis page and the plugin will show you an SEO score of your website.
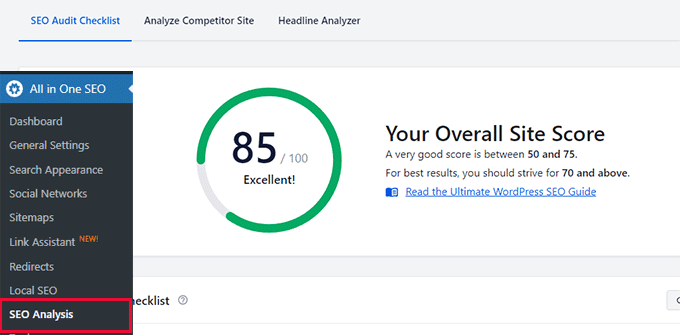
Below that, it will show you a checklist of SEO recommendations.
From here, you can see the issues that it found. Clicking on them will display a description of how to fix them.
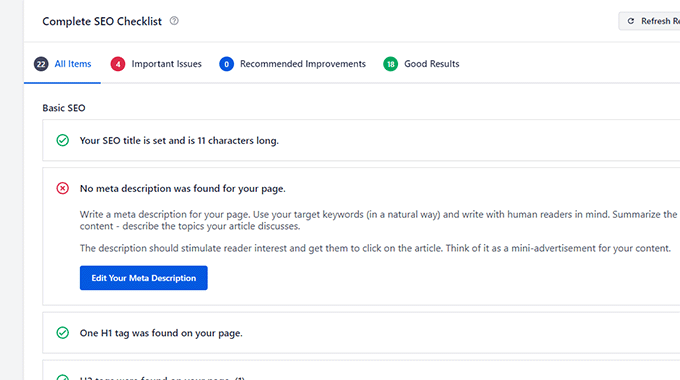
As you can see in the image above, AIOSEO often has a button directly on the audit screen for you to use and fix the issues immediately.
31. Compare Competition with Built-in Competitor Analysis
Want to see how your competition is doing in terms of SEO?
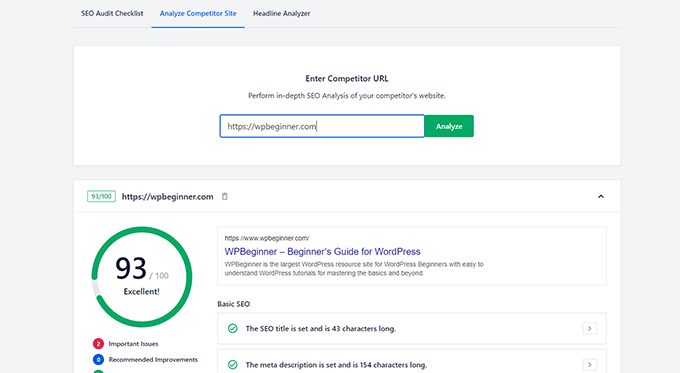
All in One SEO can perform a quick SEO audit of your competitor’s websites too.
You can simply go to the All in One SEO » SEO Analysis page and switch to the Analyze Competitor Site tab.
To learn more see our guide on how to do an SEO competitor analysis in WordPress.
32. Easily Add No Index to Content You Want to Exclude from Search Engines
Want to exclude some posts or pages from search engine?
All in One SEO makes it super easy to No Index any content on your website with a click.
Simply edit the post, page, product, custom post type, or taxonomy that you want to remove or exclude from search engines and scroll down to the AIOSEO settings section.
From here, you need to switch to the Advance tab and toggle the switch next to the Use Default Settings option. This will reveal a bunch of options.
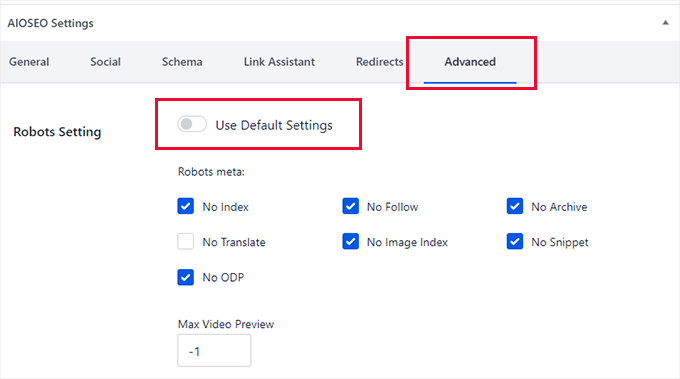
You can check No Index and No Follow to make sure that search engines don’t include this item in search results.
Additionally, you can block any archival of this page, translation, image index, snippet, or no ODP (open directory project). You can also set Max video preview to -1 to ensure that no embedded video preview is displayed.
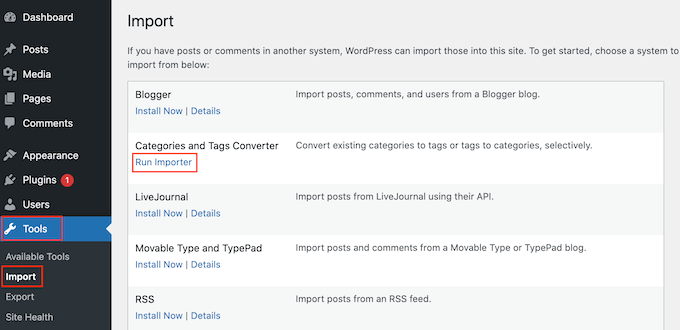
33. Easily Import SEO Data from Other SEO Plugins
Want to switch from your old WordPress SEO plugin to All in One SEO for WordPress?
The good news is that All in One SEO comes with a built-in SEO data importer tool that fetches SEO data from your old plugin and imports it into All in One SEO.
Once you install and activate the All in One SEO plugin it will launch the setup wizard. During this, it will detect your old SEO plugin and give you the option to import SEO data from that plugin.
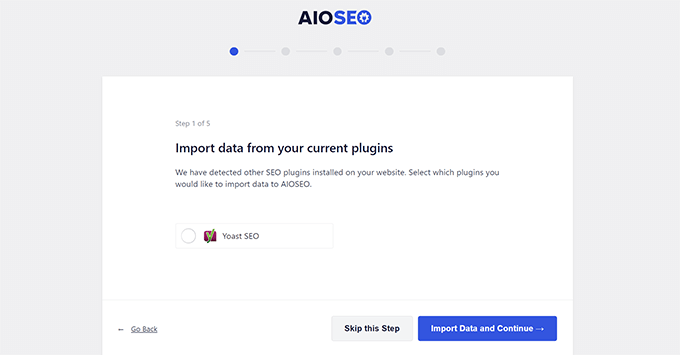
It will automatically detect your old SEO plugin when you run the setup wizard and offers to import your SEO data.
You can also manually import SEO data by visiting the All in One SEO » Tools page and switching to the ‘Import/Export’ tab.
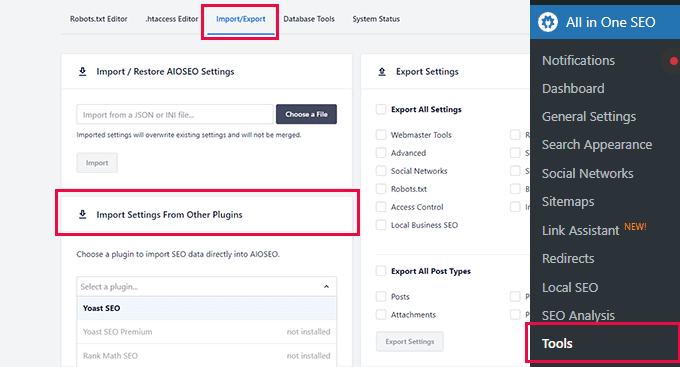
Find the ‘Import Settings From Other Plugins’ section and select your old SEO plugin from the drop-down list and then select the items you wish to import.
After that, simply click on the ‘Import’ button to fetch the data.

All in One SEO can fetch the following SEO data.
- Your plugin’s SEO settings
- Post meta such as SEO title and description
- Term meta such as SEO title and descriptions for your categories and tags.
Bonus: Getting Started with All in One SEO for WordPress
Did you know that getting started with All in One SEO for WordPress is super easy?
All you have to do is simply install and activate All in One SEO for WordPress plugin. For more details, see our tutorial on how to install a WordPress plugin.
Note: All in One SEO for WordPress is a premium plugin but it also has an incredibly powerful free version called All in One SEO Lite.
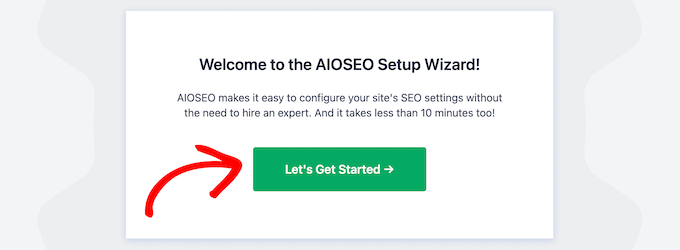
Upon activation, the plugin will launch a step by step set up wizard. Simply answer a few questions to complete the setup wizard.
After that, you’re ready to go!
Need more help? See our tutorial on how to properly install and set up All in One SEO for WordPress.
We hope this article helped you discover unique things that you probably didn’t know about All in One SEO. You may also want to see our complete WordPress SEO handbook for beginners or take a look at our pick of essential WordPress plugins for all websites.
If you liked this article, then please subscribe to our YouTube Channel for WordPress video tutorials. You can also find us on Twitter and Facebook.
The post 33 Unique Things You Didn’t Know About All in One SEO (Pro Tips) first appeared on WPBeginner.