Are you looking for WordPress FAQ plugins to use on your website?
Using FAQ plugins can improve the customer experience by making it easier for users to find answers to their questions without leaving your website. It can also boost your search engine rankings and help more people find your content.
In this article, we will share some of the best WordPress FAQ plugins that can help add an attractive FAQ section to your website.
Why Use a WordPress FAQ Plugin?
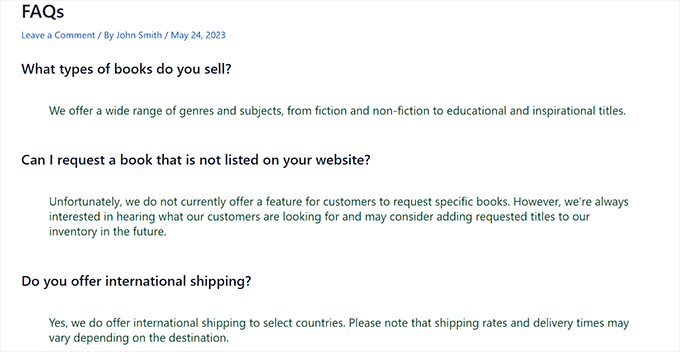
FAQ plugins create a Frequently Asked Questions (FAQ) section on your WordPress website with a list of some commonly asked questions and their answers.
This helps build trust and credibility with your customers by letting them know that you understand their questions and worries. FAQs can even increase conversion rates.
FAQs also allow users to find an answer to their questions without needing to contact customer service. This saves time and enables your customer support team to focus on other issues.
Additionally, using these plugins can also improve your search engine rankings because most FAQs often contain long-tail keywords that users commonly search for using search engines.
That being said, let’s look at some of the best WordPress FAQ plugins that can help improve user experience on your website.
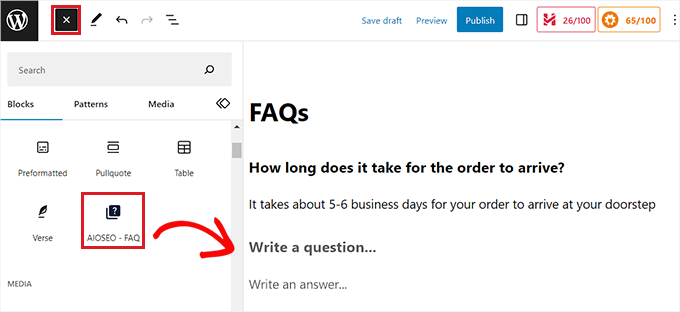
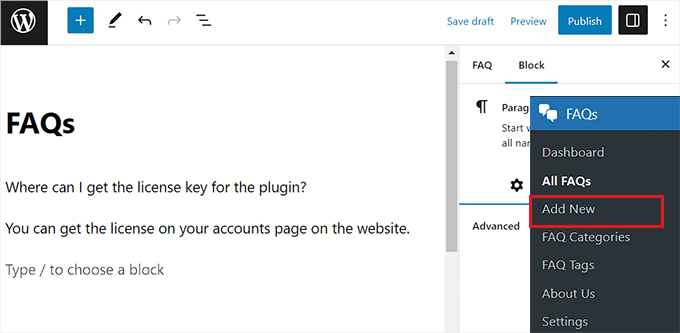
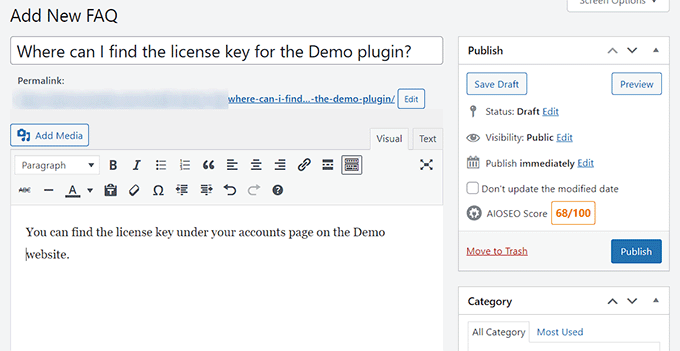
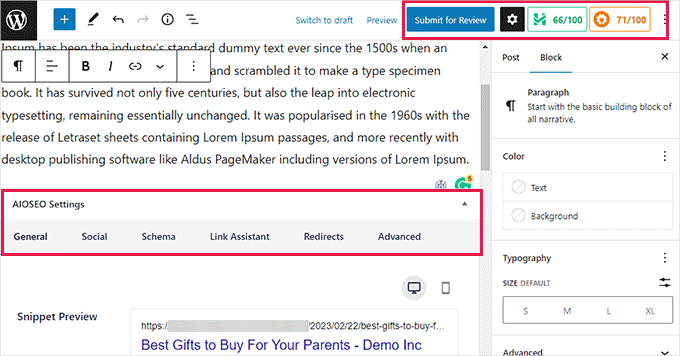
The plugin comes with an FAQ block that helps you create an attractive FAQ section in the block editor. Within the block, you can enter questions and answers for your FAQ section.
You can also customize your FAQ section from the block panel, including its text color, background color, typography, and title wrapper.
Moreover, All in One SEO even allows you to add FAQ schema to your WordPress website. This schema markup can increase your visibility on Google and bring more traffic to your website.
Note: The AIOSEO free version comes with an FAQ block. However, you will need to buy the Pro version of the plugin to unlock the FAQ schema feature.
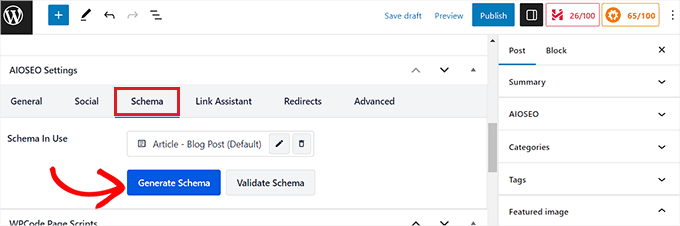
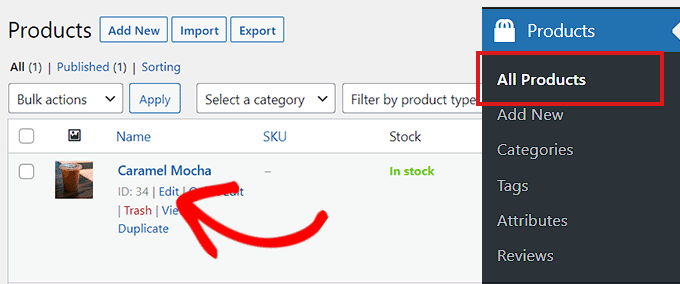
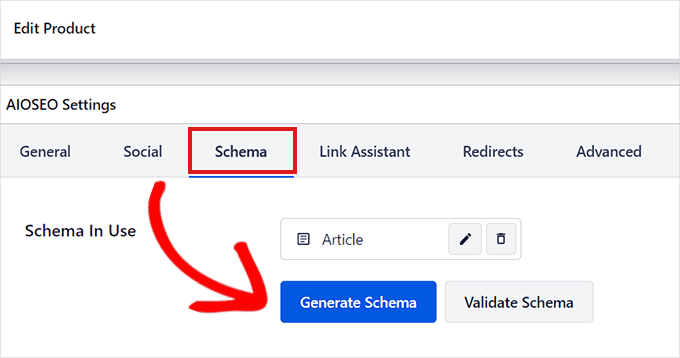
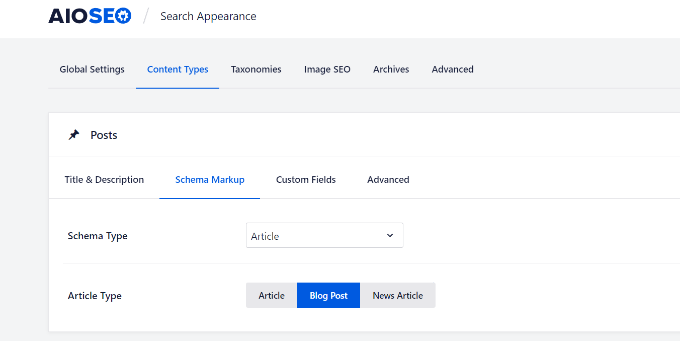
To activate the FAQ schema, you need to scroll down to the AIOSEO section in the block editor and switch to the ‘Schema’ tab.
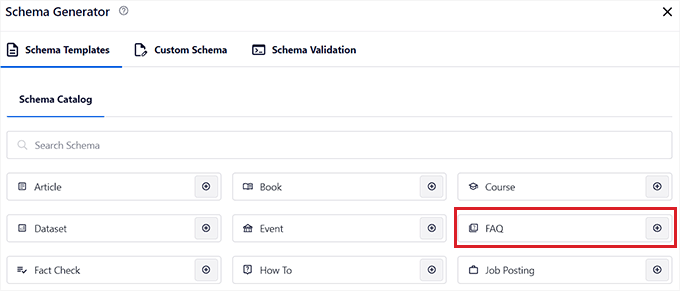
After that, click the ‘Generate Schema’ button to open up a prompt.
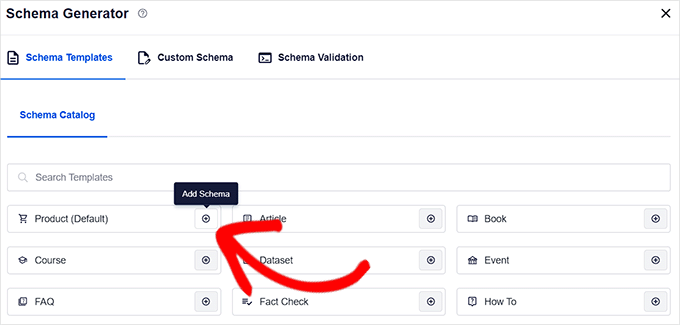
Once the Schema Generator opens up, click on the ‘FAQ’ option to add the schema.
Next, you can add questions and answers to the schema template. For more detailed instructions, please see our tutorial on how to add FAQ schema in WordPress.
Apart from FAQs, AIOSEO has custom sitemaps, advanced redirects, SEO titles and descriptions, multiple keyphrases, and more. These features make it the ultimate toolkit for improving SEO on your website.
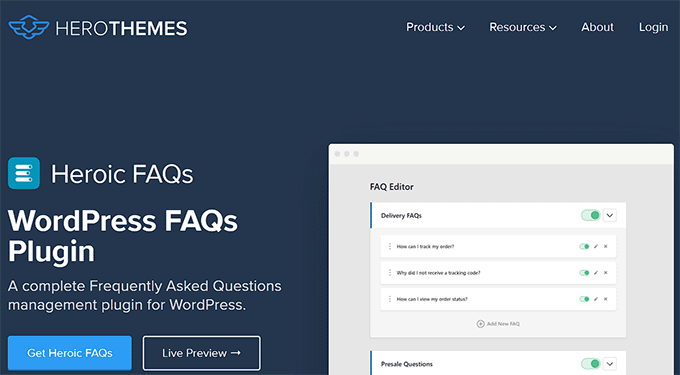
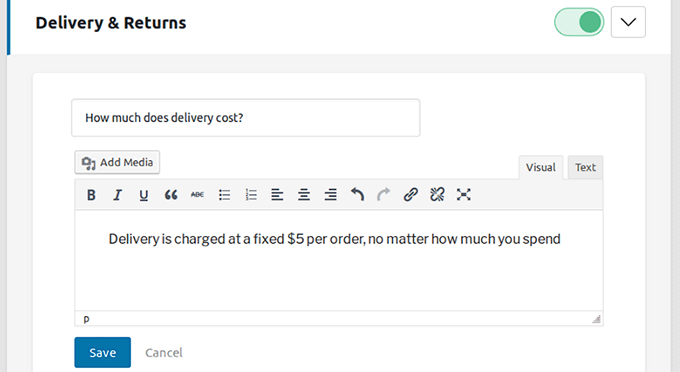
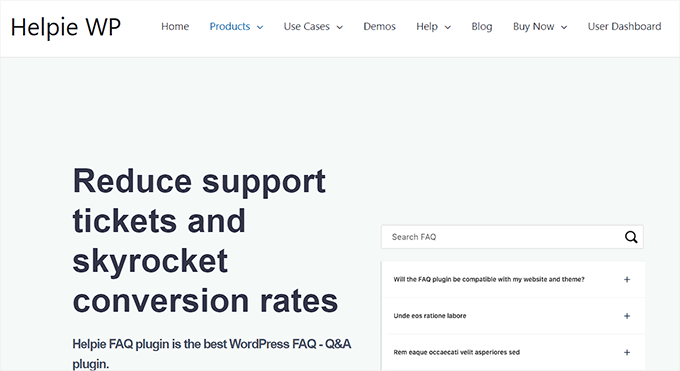
Heroic FAQs is a premium WordPress plugin that comes with a drag-and-drop interface to organize, reorder, or group related questions together.
It offers 5 pre-designed FAQ templates and a visual editor that lets you insert images, blockquotes, lists, videos, and more into your FAQ content.
You can display the FAQs in accordion or toggle format. You are also able to choose from 15 different FAQ icon styles to match your website’s design.
Using the Heroic FAQs plugin can also improve your website visibility and search engine rankings because it has a built-in FAQ schema.
Some of its other features include fast loading, FAQ search, analytics reports, mobile responsiveness, and page builder integrations. It is the perfect solution if you are looking for an all-in-one FAQs management kit.
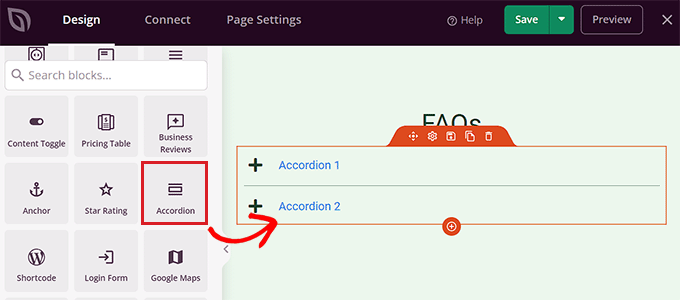
It also comes with an Accordion block that lets you create FAQs by adding text sections that expand and collapse to any part of your page.
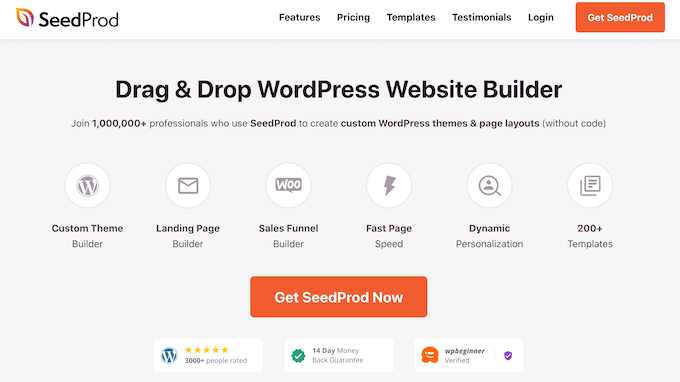
First, you will need to choose a template and start building your page with SeedProd. For detailed instructions, you may want to see our guide on how to create a landing page in WordPress.
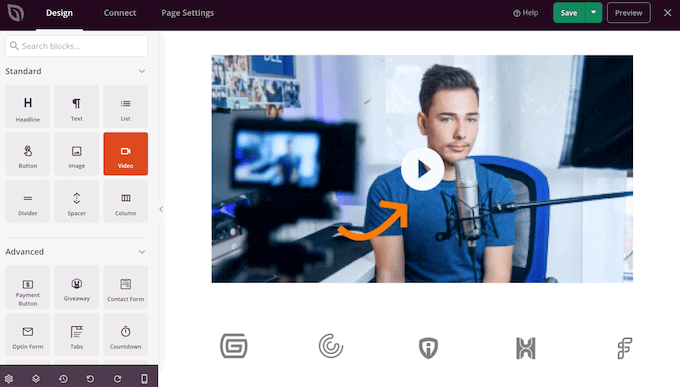
Then, you can drag and drop the ‘Accordion’ block onto the landing page from the block panel on the left side of the screen.
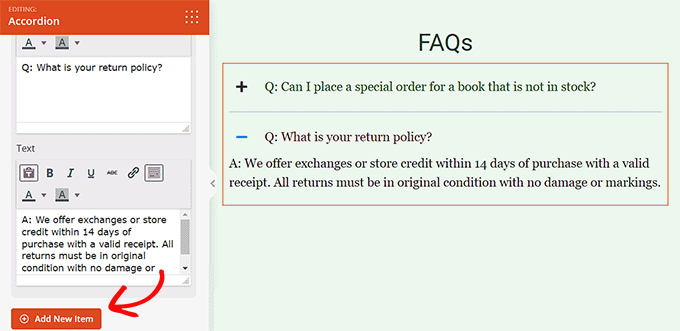
You can now add a question and an answer in the text box to start creating an FAQ section.
After that, you can also customize the font size, icon image, typography, text color, and background color for your FAQs.
You can even add custom CSS and animation effects to your FAQs.
SeedProd also comes with built-in SEO features that will allow you to optimize your landing pages for search engines and increase visibility.
Thrive Architect is another powerful drag-and-drop page builder that helps you easily create custom landing pages, layouts, and content for your WordPress site.
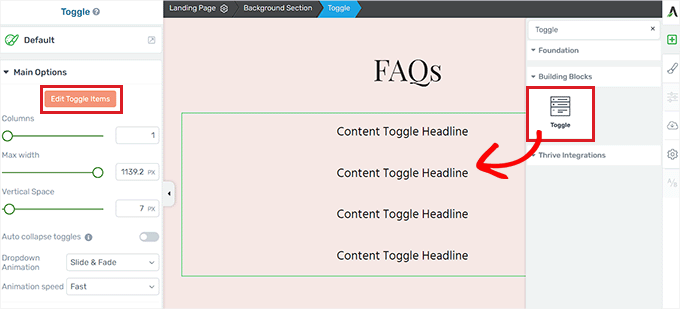
It comes with a Toggle element that lets you add an FAQ section in an accordion style to your landing pages. Once you drag and drop the Toggle onto your page, its settings will open up in the settings menu on the left.
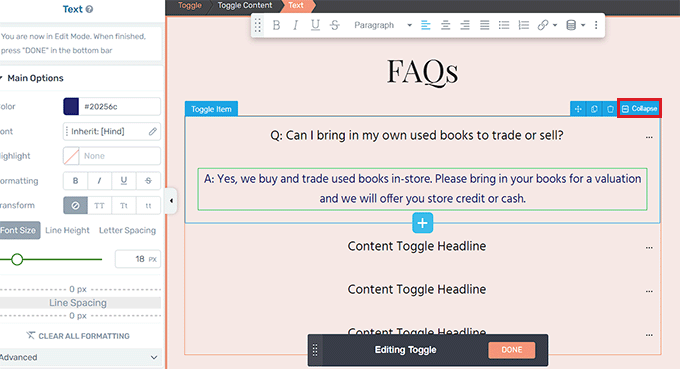
You can now add content to the toggle headlines. To expand the toggle and add an answer to the question, click the ‘Expand’ button in the block toolbar above each toggle.
You are able to customize the FAQ section by adjusting the columns, width, vertical space, and dropdown animations.
With Thrive Architect, you can also further customize the FAQs section by changing the icons, typography, layout, background color, borders, adding HMTL attributes, and more.
It allows you to create an FAQ section for your product pages and also enables customers to submit their own questions that can be answered by the support team.
This can help increase user engagement in your WooCommerce store and provide a better customer experience.
It is a highly customizable plugin with a category filter and search feature to make it easier for users to find the answers to their questions.
With YITH WooCommerce Questions and Answers, you can even implement a voting system, activate the email notification process, hide inappropriate questions, and encourage users to post their own answers in the FAQs section.
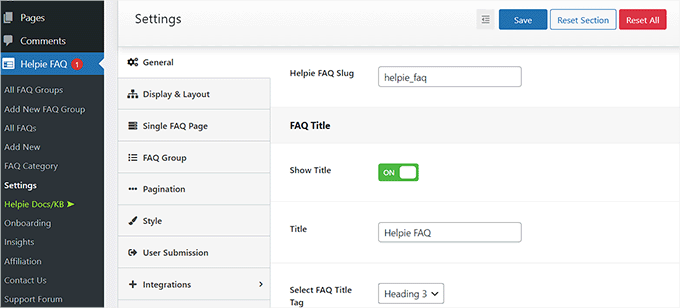
Ultimate FAQ is a popular WordPress plugin that provides shortcodes and blocks in the Gutenberg editor to add an FAQ section to your website.
It comes with unlimited support for categories and tags and even lets you add an unlimited number of FAQs to a single section.
By default, the plugin comes with accordion and toggle styles. However, you can also use custom CSS to style your FAQs according to your liking.
Other than that, it lets you import FAQs in bulk by using Google Sheets and even offers a search and filtering feature that customers can use to find the answers to their questions.
The plugin is super easy to use and helps create SEO-friendly FAQs to improve your search engine rankings.
Moreover, Ultimate FAQ also integrates with WooCommerce, so you can easily add an FAQ section for your online store.
Some of its other features include email support, social sharing, custom fields, multiple FAQ layouts, video/image support, and more.
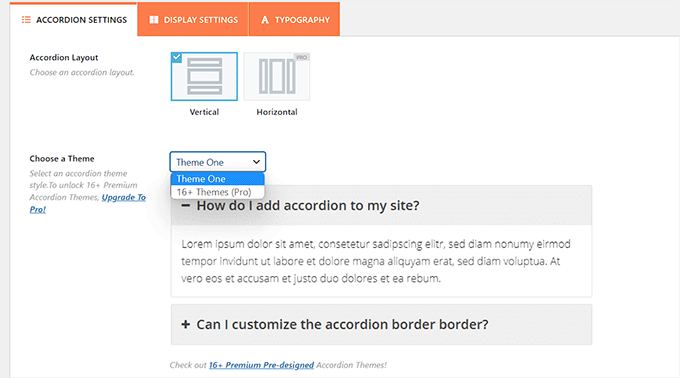
Easy Accordion is a powerful FAQ builder plugin that provides a drag-and-drop interface to create an accordion-style FAQ section.
It’s lightweight, fast, and SEO-friendly, helping you quickly optimize your website content for search engines.
The plugin offers more than 16 pre-designed templates and other customization options, including typography, icon sets, font colors, themes, animation effects, padding, color schemes, and more.
This makes it the perfect choice if you want to create a highly customizable FAQ section.
Besides that, Easy Accordion has a responsive layout that works on various devices, including mobile phones, iPads, desktops, and tablets.
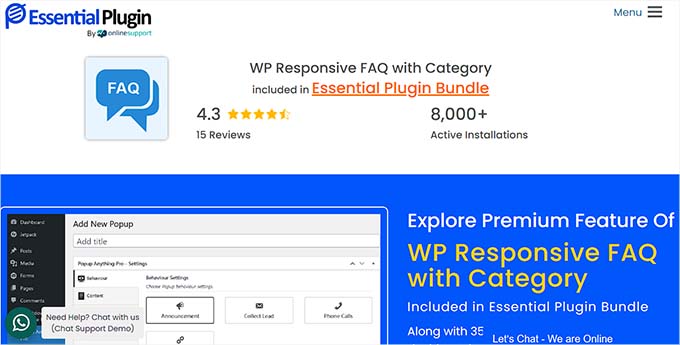
WP Responsive FAQ with Category is a simple WordPress plugin that uses shortcodes to add FAQ sections to your pages or posts.
If you are looking for a beginner-friendly and easy-to-use solution to create FAQs, then this plugin is for you.
It comes with a drag-and-drop interface and 15+ pre-designed templates that will help you create an aesthetically-pleasing FAQ section for your website.
Other than that, WP Responsive FAQ also offers WooCommerce support and makes it super easy for you to display an FAQ section in your online store.
Some of its other features include image/video support, customization settings, accordion animation adjustments, and more.
Which Is the Best WordPress FAQ Plugin?
In our expert opinion, All in One SEO is the best WordPress FAQ plugin because it allows you to easily add FAQ sections and schema to your pages and posts.
However, if you want to create an FAQ section on a landing page, then you can also use SeedProd or Thrive Architect. They are the best WordPress page builders on the market that come with built-in features to help create an attractive FAQ section.
You can also use the Heroic FAQs plugin if you are looking for an all-in-one solution. Its user-friendly, drag-and-drop interface allows you to easily build FAQs and FAQ schema.
Are you wondering how to use OpenAI and ChatGPT on your WordPress website?
OpenAI can help with everything from generating meta descriptions for your posts to writing email sales copy. You can use OpenAI on your WordPress site to save time, cut costs, improve your SEO and workflows, and grow your business!
In this article, we will show you 14 of the best ways to use OpenAI on your WordPress website.
A (Brief) Introduction to OpenAI
You have probably heard the terms “OpenAI” and “ChatGPT” used interchangeably, but they’re not exactly the same.
OpenAI is the research laboratory (read: a group of very smart people) behind the chatbot ChatGPT and the deep-learning, image-generating model DALL-E 2, among other AI-powered products.
The team over at OpenAI created ChatGPT which is an AI assistant to help streamline your workflows and save you time.
It can write email newsletters for you, suggest blog post ideas, do keyword research, automate your workflows, and so much more.
To improve your WordPress website workflows with artificial intelligence, you will first need to create an account with OpenAI. Getting signed up is FREE. All you will need is an email and a password.
1. Generate Titles and Meta Descriptions with AIOSEO
All in One SEO (AIOSEO) is the best SEO plugin for WordPress, and it just got an AI-powered boost. After adding your keywords to your blog posts, let AIOSEO and OpenAI further optimize your content for search engines.
Then, from within the WordPress post editor, you can tell OpenAI to generate titles and meta descriptions that best fit your content with the click of a button.
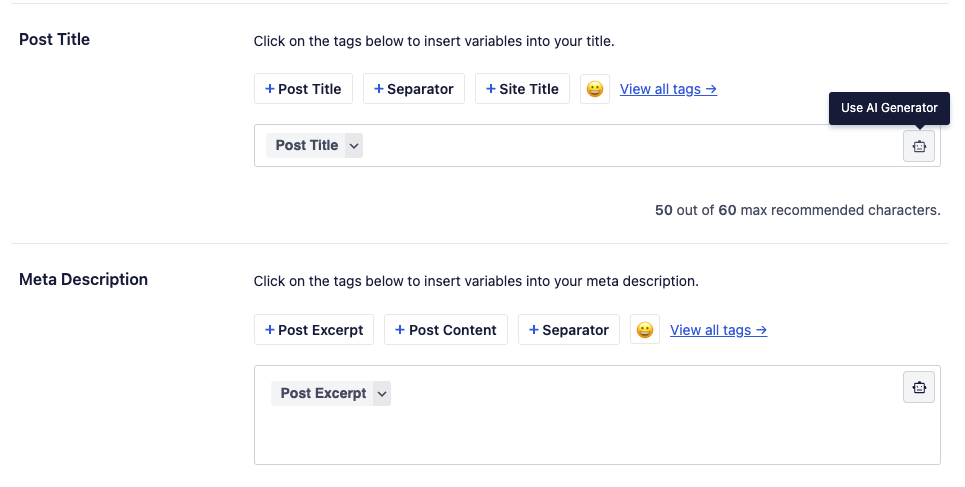
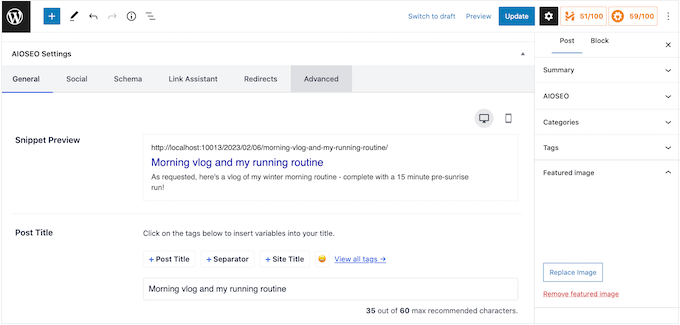
Simply go to the ‘AIOSEO Settings’ at the bottom of your page and find the ‘Post Title’ box.
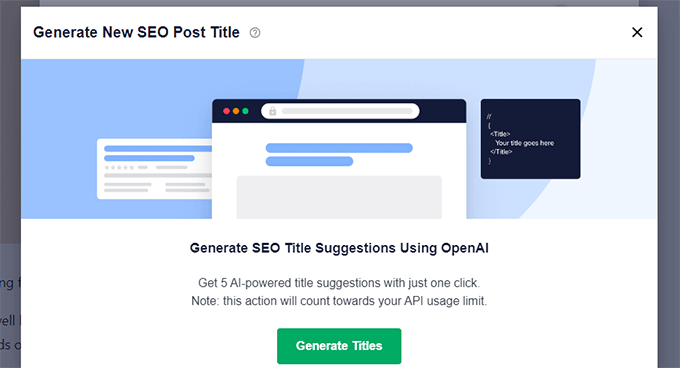
Next, you need to click on the robot icon. If you hover your mouse over it, you will be able to see a ‘Use AI Generator’ message.
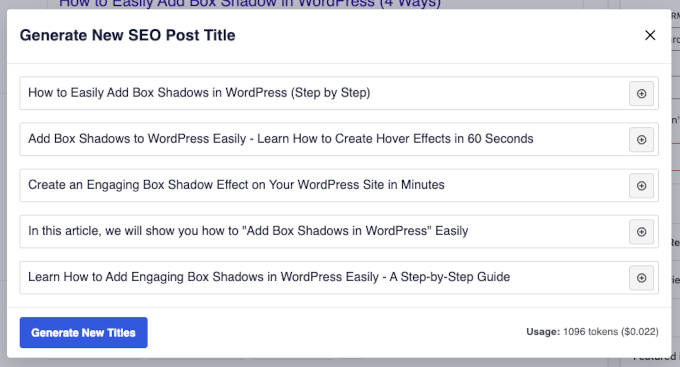
Now, you can see 5 post title suggestions. Simply click on the ‘+’ icon next to one to use it for your post.
If you don’t like any of the suggestions, you can also click ‘Generate New Titles’ to see new ones.
Then, simply repeat the same steps by clicking on the robot icon in the ‘Meta Description’ box. AIOSEO will then suggest a few meta descriptions for your post.
Plus, connecting your OpenAI account to your AIOSEO account is as easy as copying and pasting an API key. You can check out AIOSEO’s documentation for more details.
2. Generate Ad Copy and Product Descriptions
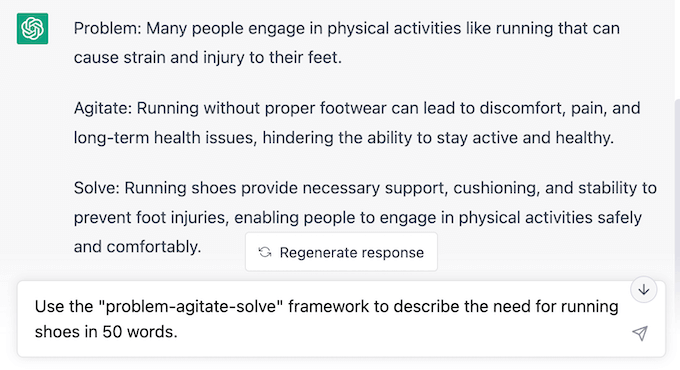
Due to GPT-3’s talent for SEO, it is probably no surprise that it can handle more of your content creation needs. You can use OpenAI to create short, effective ad copy that matches your brand or long-form product descriptions for your WooCommerce store.
For example, we prompted ChatGPT to describe the need for running shoes using the “problem-agitate-solve” framework.
Simply edit the text to match your preferred sentence structure, include your keywords, throw in some on-brand and product-specific language, and then watch your sales increase!
3. Generate Blog Post Ideas
If you are anything like us, then coming up with content ideas for your WordPress blog can be time consuming. Fortunately, OpenAI runs on one of the world’s most powerful supercomputers.
So, you can ask it to come up with ideas for new content on your blog.
In our previous examples, we used OpenAI to help with tasks by inputting prompts directly into ChatGPT.
In our next few examples, we will look at how to integrate OpenAI directly into your WordPress workflow, truly leveraging the power of automation and AI to save time and resources.
For this example, we will use OpenAI with Uncanny Automator to generate ideas for new content based on a user’s form submission. Then, we will automatically send OpenAI’s response to your content management spreadsheet or database, like Google Sheets or Airtable, for the whole team to access.
If you don’t already have Uncanny Automator, you can download the Automator plugin for FREE to try on your WordPress site.
Once you have downloaded Automator, you will need to connect Automator to OpenAI. Then we will build the automation recipe below.
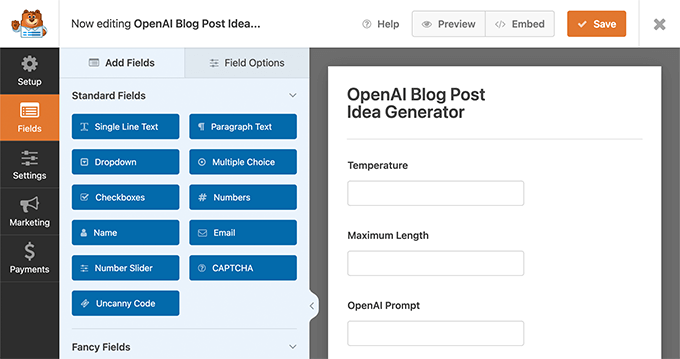
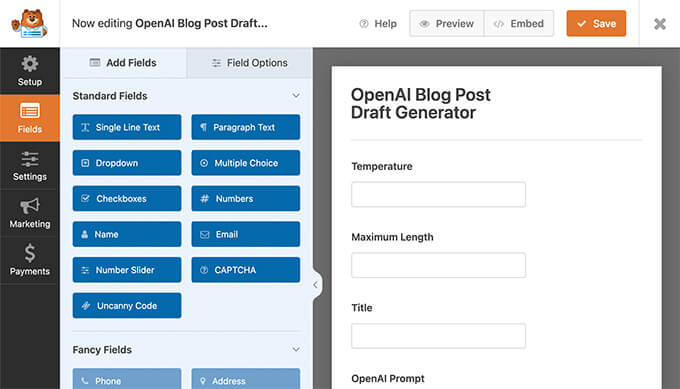
First, you need to create a new form using a contact form plugin like WPForms. From your WordPress admin sidebar, navigate to WPForms » Add New.
Then, create a new contact form and make sure to add two number fields labeled ‘Temperature’ and ‘Maximum length’, and one single line text field labeled ‘Open AI Prompt’.
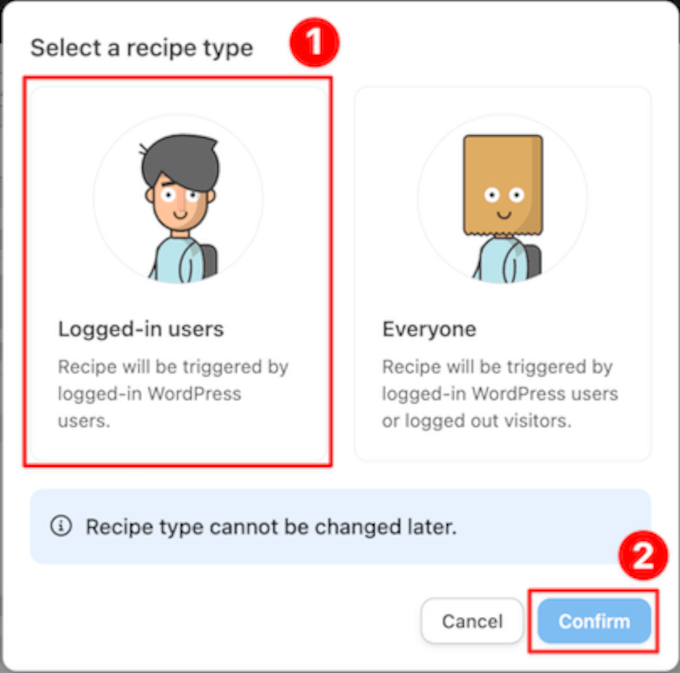
Now, you must head to Automator » Add New. In the pop-up window that appears, simply select ‘Logged-in users’, followed by ‘Confirm’.
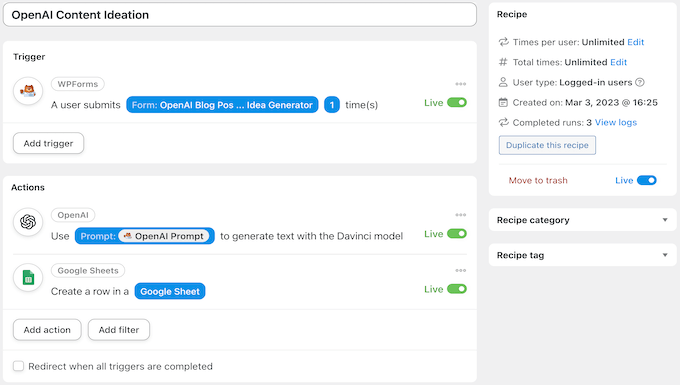
Next, give your new recipe a title that makes it easy to recognize. For example, we have named our recipe ‘OpenAI Content Ideation’.
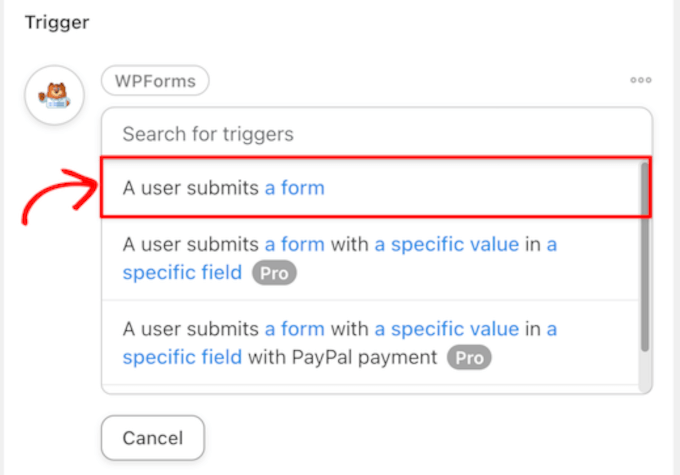
In the ‘Triggers’ panel, you need to select ‘WPForms’. From the drop-down list that appears, select ‘A user submits a form’ and choose the WPForms form that you just made. When you are finished, just click ‘Save’.
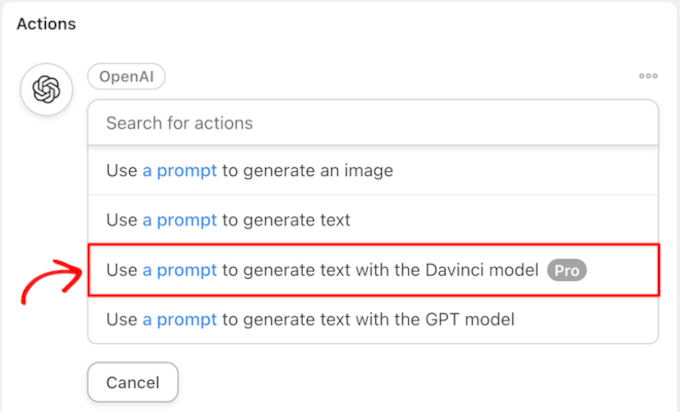
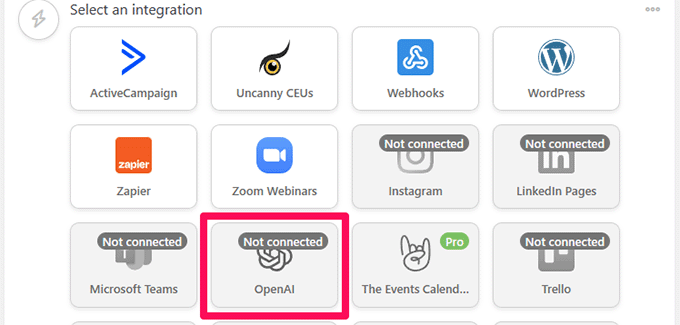
After that, in the ‘Actions’ panel, you have to select ‘OpenAI’.
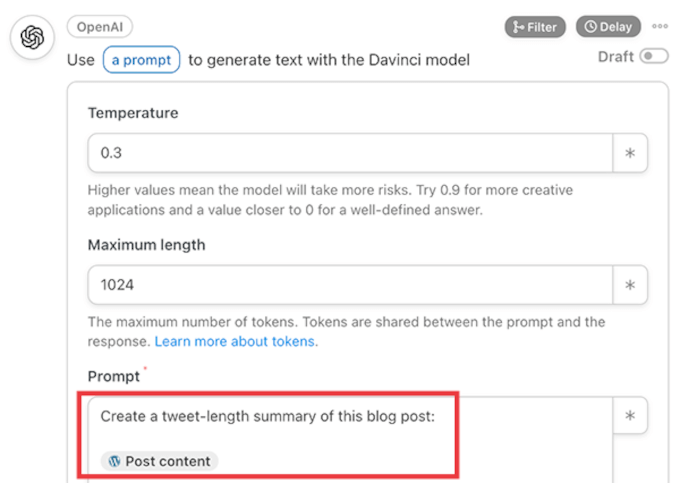
From the drop-down list that appears, choose ‘Use a prompt to generate text with the Davinci model’.
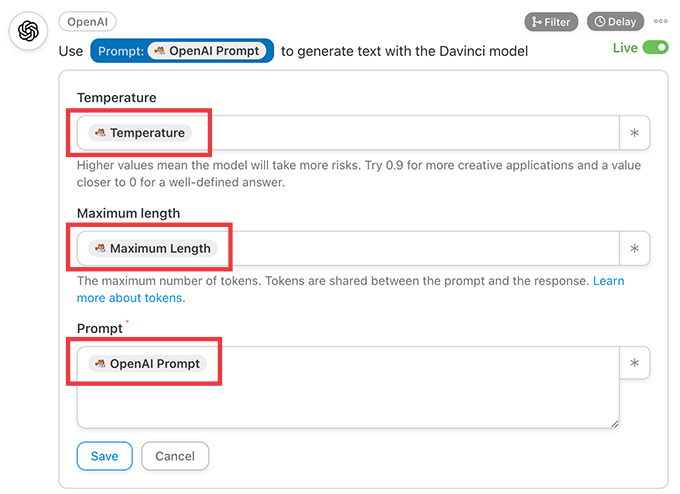
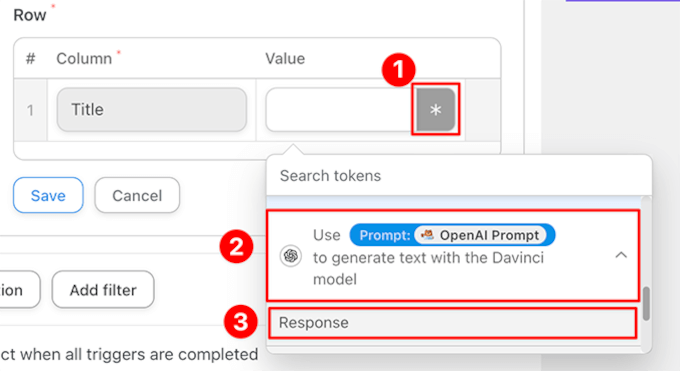
In the Actions section, map the fields from the WPForms form to the Temperature, Length, and Prompt fields in the OpenAI action.
To do this, click the ‘*’ icon to the right of each field to choose the correct token associated with the trigger.
When you are finished, simply click Save.
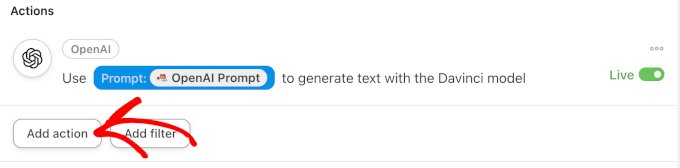
To send the blog post ideas to an external spreadsheet, you will need to add a second Action. To do this, click ‘Add action’ in the ‘Actions’ panel.
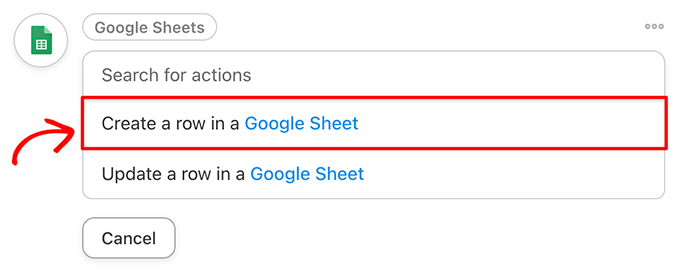
From the menu of available integrations, simply choose Google Sheets.
Then, from the drop-down list, select ‘Create a row in a Google Sheet’.
In the editor, you must select your content management spreadsheet. Then, click ‘Get columns’ and add the OpenAI Response token to the appropriate column(s).
Make sure to click ‘Save’ when you are done.
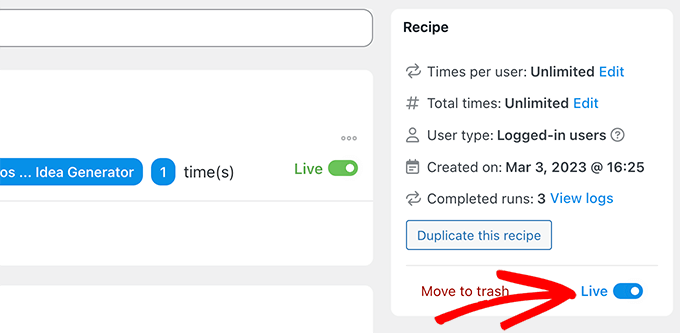
Finally, in the top right corner, toggle your recipe from ‘Draft’ to ‘Live.’
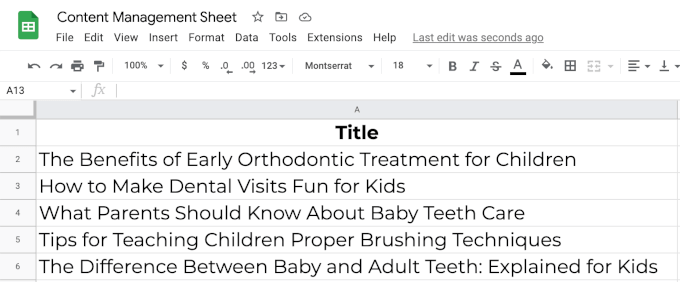
Now, whenever you enter information into your blog post idea generator form, Automator will tell OpenAI to suggest new content ideas and send them to your Google Sheets spreadsheet.
In our example, we entered “Give me 5 fun blog posts on pediatric dentistry” into the WPForms form.
Then, OpenAI generated a response, and Automator added it to the worksheet in the recipe.
4. Perform Sentiment Analysis
There is no way of knowing if AI has any feelings of its own. If we had to guess, we would say that it probably doesn’t. At least, not yet. But that doesn’t mean that it cannot understand human emotions.
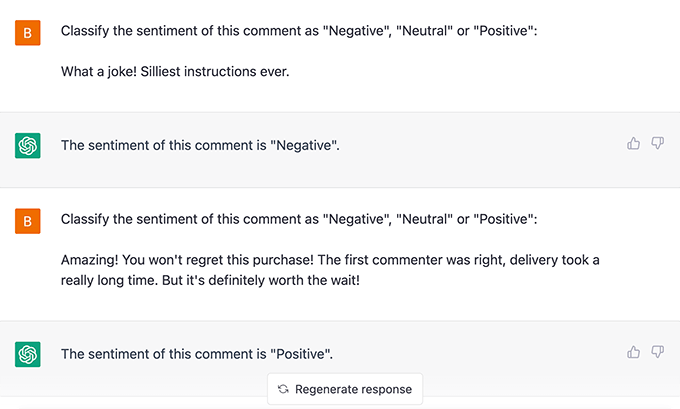
You can use OpenAI to perform sentiment analysis by asking it to interpret the mood of your customers’ feedback.
But how can you use this with your WordPress website?
Maybe your contact forms are connected to a help desk plugin, and you want to assign priority based on the message urgency.
Alternatively, maybe you want to automatically approve positive blog comments. You could even quickly identify negative feedback in surveys powered by your favorite WordPress form plugin.
In both cases, you will be able to address negative feedback quicker, keep your customers happier, and improve your online reputation.
5. Automate Customer Support with Intelligent Sentiment Analysis
Now that you know how to use OpenAI to perform sentiment analysis, you can easily add it to your workflows. By combining OpenAI’s emotional intelligence with Uncanny Automator’s efficiency, you will be able to create a seamless customer support system.
Let’s put together an Automator recipe that creates tickets in our customer support plugin whenever a customer reviews a product.
First, we have OpenAI perform sentiment analysis on the reviews as they come in.
Then, using Automator’s Filters feature, we create tasks with different priority levels based on OpenAI’s assessment of the customer’s sentiment.
In this recipe, if OpenAI decides that a new WooCommerce product review is negative, then it creates a new help desk ticket in FluentCRM and adds an Urgent tag.
If you are ready to take things to the next level, you could even use the submission to create a draft reply for the ticket.
Just add an extra OpenAI action to generate a draft reply, then include that response as the ticket draft.
This works best with the GPT-3.5-Turbo model because you can use Automator to also send context. For example, you can tell it to answer the prompt as a helpful support agent from your website.
6. Create Event Summaries, Recap Podcast Episodes, and Take Meeting Minutes
Running special events on your WordPress website is easy with WordPress calendar plugins. Unfortunately, not every customer of yours can save the date.
After all, we cannot do everything and be everywhere all at once, but OpenAI can.
If your customers missed the big day, OpenAI can create event summaries for you. You can even choose the length and format of the summary you want OpenAI to make.
For example, we asked ChatGPT to create a 100-word summary of an October 2008 IMF town hall. In less than one minute, ChatGPT turned the 1,500-word opening remarks into a 100-word summary.
Alternatively, maybe you are trying to grow your podcast audience. To help your listeners who don’t have two hours a day to consume media, you can use OpenAI to recap your podcast episodes, hitting all of the highlights.
Using transcripts, we asked ChatGPT to summarize the first 15 minutes of a popular podcast.
Finally, some conference call tools, like Zoom and Google Meet, allow users to record their meetings with audio transcripts. You can then feed those transcripts into OpenAI and create meeting summaries in just a few seconds.
7. Draft Blog Posts (and Seamlessly Integrate Them Into Your Workflows)
For content writers (including us), few things are more stressful than a blank page. Thankfully, artificial intelligence is the sledgehammer that can break through any writer’s block.
Using one of our blog post ideas from our previous recipe, we told OpenAI to draft a blog post for us.
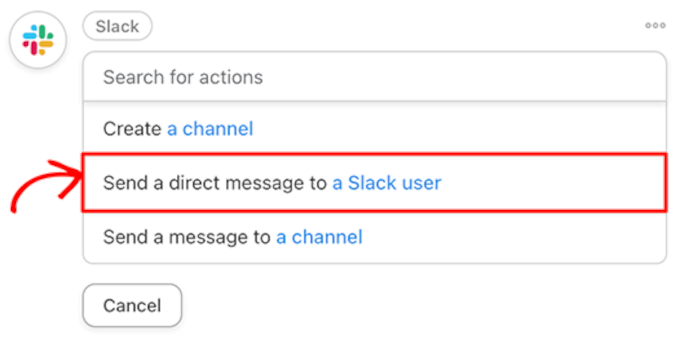
In this Automator recipe, a form submission (the trigger) tells OpenAI to draft a new blog post. Then, it messages the writer in Slack to let them know the draft is ready for them.
From your WordPress admin sidebar, simply go to WPForms » Add New.
Then, create a new form with at least two number fields labeled ‘Temperature’ and ‘Maximum length.’ You will also need two single-line text fields labeled ‘Title’ and ‘Open AI Prompt’.
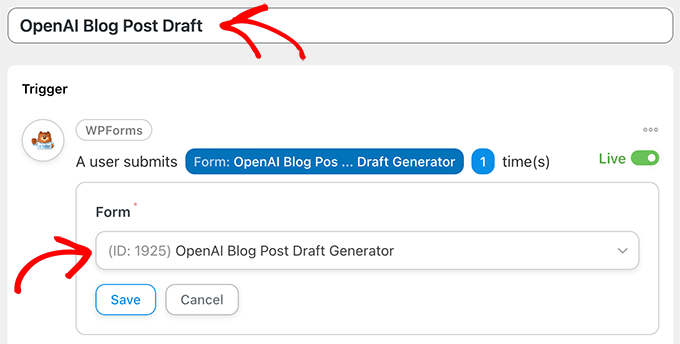
Next, you must go to Automator » Add New. In the pop-up window that appears, select ‘Logged-in users’. Then, simply give your new recipe a title like ‘OpenAI Blog Post Draft’.
In the ‘Triggers’ panel, you need to select ‘WPForms’ From the drop-down list that appears, you must choose ‘A user submits a form’ and pick the form you just created.
When you are finished, make sure to click ‘Save’.
Moving on, in the ‘Actions’ panel, you must select ‘OpenAI’. From the drop-down list that appears, choose ‘Use a prompt to generate text with the Davinci model’.
In the editor, fill in the fields using the tokens from your form’s fields that match the fields in the editor. When you are finished, just click ‘Save.’
Now, it is time to set up an automatic blog post that will be created with the OpenAI content.
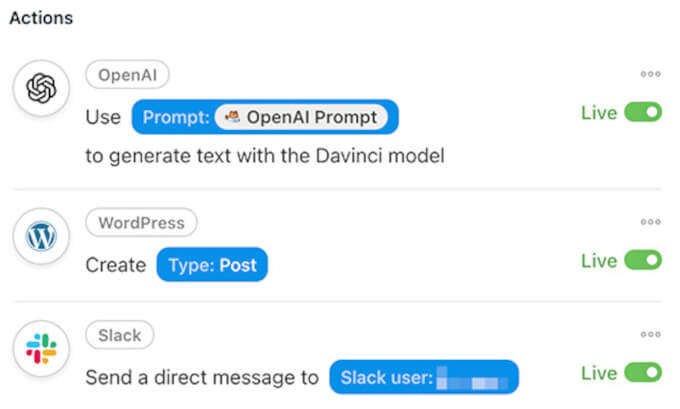
In the ‘Actions’ panel, simply click ‘Add action’. Then, from the menu of available integrations, select ‘WordPress’.
Next, from the drop-down list, hit ‘Create a post’. In the editor, you must fill in the ‘Title’ field with the Title token from your form and enter the OpenAI Response token into the ‘Content’ field.
Then, make sure to click ‘Save’.
Optional: You can also add a ClickUp action to your recipe to create a task with the post URL in the description.
Additionally, you can include a Slack action to notify your content writer that a new task and draft post is waiting for their review.
Finally, in the top right corner, toggle your recipe from ‘Draft’ to ‘Live’.
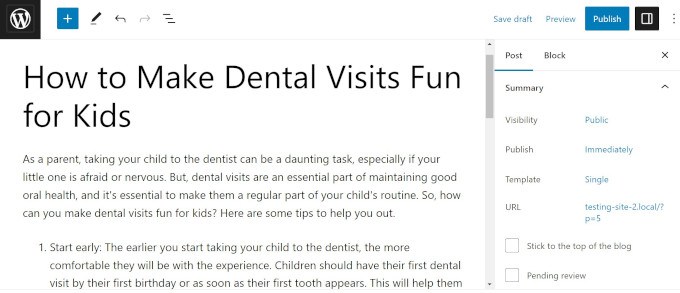
In our WPForms form, we then asked OpenAI to ‘Write a casual blog post on three ways to make dental visits fun for kids.’
And here is the draft that Automator created with OpenAI’s response.
We call that the anti- writer’s block recipe! You can also use AI to generate your SEO title, write a meta description, and even set up a featured image.
8. Draft Emails in Minutes
Writing carefully-worded emails takes time. Unless, of course, OpenAI is writing them for you.
Whether you are sending out an internal notice, responding to a customer’s questions, or reaching out to prospective clients, OpenAI can draft your email in seconds. After that, it is just a matter of proofreading and including specific information.
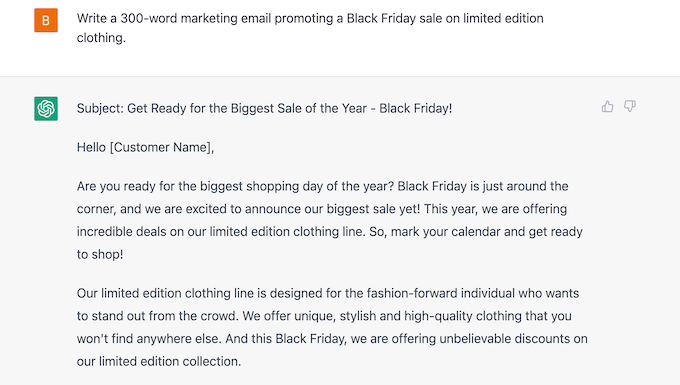
We prompted ChatGPT to “write a 300-word marketing email promoting a Black Friday sale on limited edition clothing.” Less than 30 seconds later, we had an email that we could easily customize to suit our branding and needs.
Promoting your blog posts on social media is important. However, sometimes, writing the appropriate character-length tweets and captions can be even more challenging than creating a whole article.
With OpenAI and Automator, you won’t have to stress about the perfect hashtags.
Here is an example of an action that takes a new blog post and sends it to OpenAI to generate a summary that can be shared on Twitter:
Automator will send that summary, complete with hashtags, to our WhatsApp account. There, we can review, edit, copy, and then paste the content into our social media accounts when we are ready to publish it.
For a post on connecting ChatGPT to LearnDash, OpenAI wrote this summary:
Embrace the robot revolution and use OpenAI and LearnDash to create the e-learning platform of your dreams. #AI revolution is here! Harness the power of AI for your #elearning platform w/ OpenAI & ChatGPT models. Automate content creation, create course outlines & answer students’ questions. Save time & money w/ Uncanny Automator! #LearnDash #NolejAI #RobotRevolution.
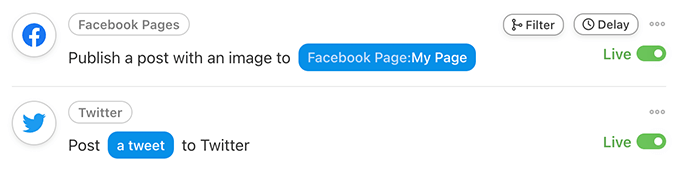
You could even extend your recipe to make Automator post the summary straight to Twitter, Facebook, LinkedIn, and more.
10. Generate AI Images for Your Posts or Landing Pages
Are you tired of scrolling through stock photography databases trying to find the perfect image for your blog post? Or finding a picture and then realizing that every other article with your keywords is using the same image?
Fortunately, OpenAI’s image generator DALL-E 2 can create original images from descriptive plain text.
OpenAI’s Content Policy and Terms give you all of the rights to the images that you create with DALL-E 2, “including the right to reprint, sell, and merchandise.”
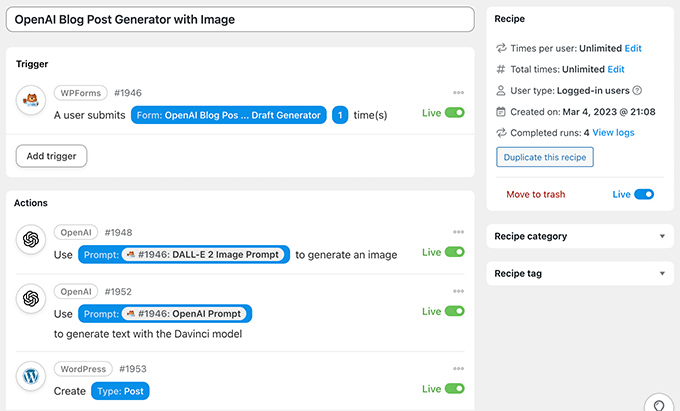
Using our original WPForms form with an added field for an image prompt, we used Automator to create a draft blog post complete with a featured image.
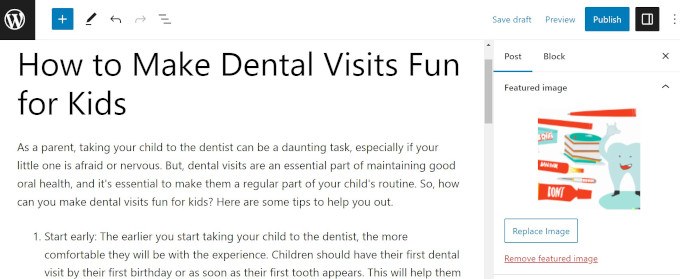
Here is that same blog post about dental visits with a featured image created by DALL-E.
As you can see, it has a fun graphic with a tooth, toothpaste, and different toothbrushes.
To make the process even easier, whenever you tell DALL-E to create an image using Uncanny Automator, Automator will add the image to your WordPress media library, with no hotlinking necessary.
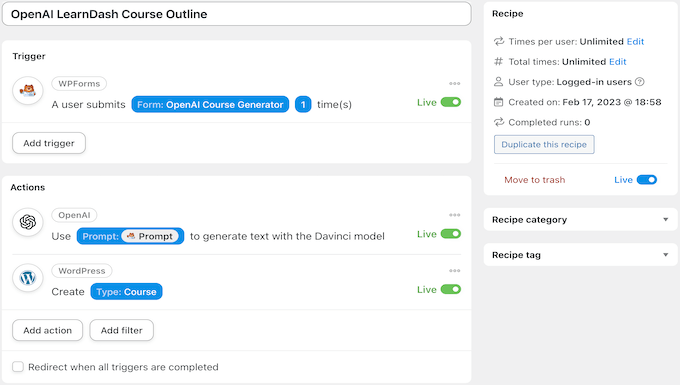
11. Create Course Outlines in Your LMS
OpenAI is smart. After all, “intelligence” is in the name.
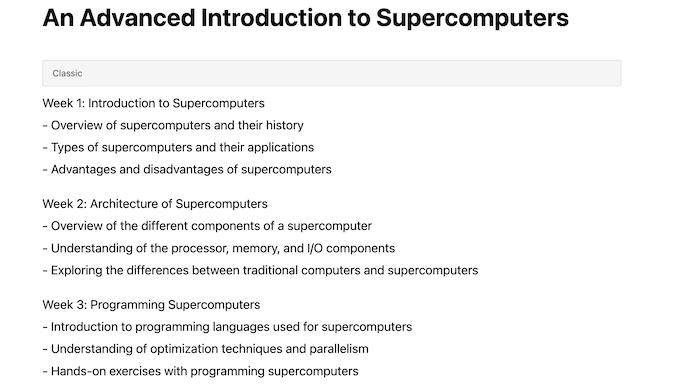
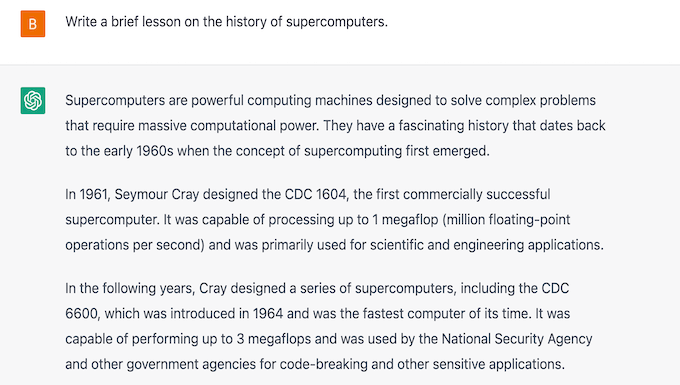
We asked OpenAI to create an advanced 8-week course outline on supercomputers, which, funnily enough, is kind of like an OpenAI autobiography.
Once you have your course outline, don’t forget to use AIOSEO’s OpenAI integration to write your meta description.
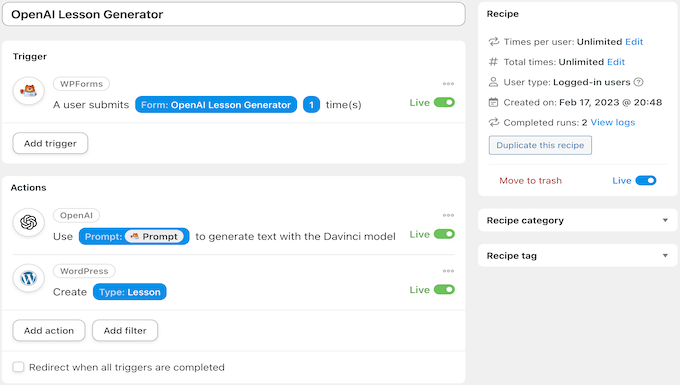
12. Create Lessons in Your LMS
Using a similar Uncanny Automator recipe to the previous one, you can easily fill in the course outline that you created with OpenAI-generated content.
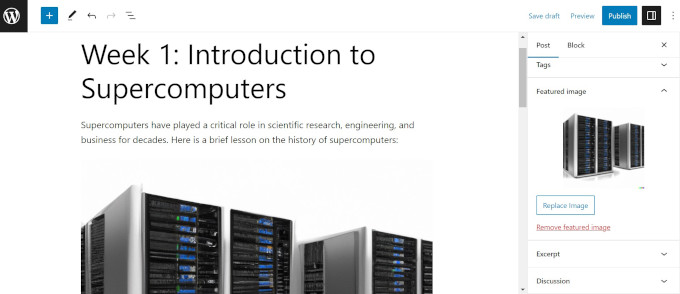
We used OpenAI’s response from our previous recipe to help us create this lesson.
Here is the first part of it.
With the right prompts, you can also create a recipe that generates unique images for your lessons and uploads them automatically to your WordPress media library.
Using Automator tokens, you can also set your new DALL-E 2 generated image as the featured image for your lesson or include it somewhere in the lesson itself.
13. Create a Chatbot
As a natural language processor, OpenAI loves to talk. You can use this feature to communicate with customers in your online store or business website.
This can help you target users who are having problems on your site or want to learn more about your products and services.
14. Have Fun! Write Short Stories, Poems or Cook Up Recipes
Once you have fully integrated OpenAI and Uncanny Automator into your workflows, you will have enough time to do the things that really matter like growing your business or spending more quality time with family.
Playing around with OpenAI and trying out new things is a great way to learn how to create better prompts that get the results you are looking for, so you can continue to save time and optimize your workflows.
OpenAI and WordPress plugin development are in the super early stages right now, and there is so much more in the works. We will be sharing more details and updates in this guide in the coming months.
Are you looking for ChatGPT prompts ideas to improve blog and marketing strategy?
ChatGPT prompts are the instructions that you type in ChatGPT AI to speed up your workflow. You can use ChatGPT to draft social media posts, come up with blog post ideas, and so much more. The key to getting best results with AI is to make your ChatGPT prompts better and more specific.
In this article, we’ll share the best ChatGPT prompt ideas for bloggers, marketers, and social media, so you can improve your marketing results.
This article will cover a lot of topics, so you can click on any of the links below to jump to a particular section that best suits your needs.
A ChatGPT prompt is the starting point of a conversation in the form of a question or instruction given to an AI language model like ChatGPT.
ChatGPT is an AI-based software that uses machine-learning technology called Natural Language Processing.
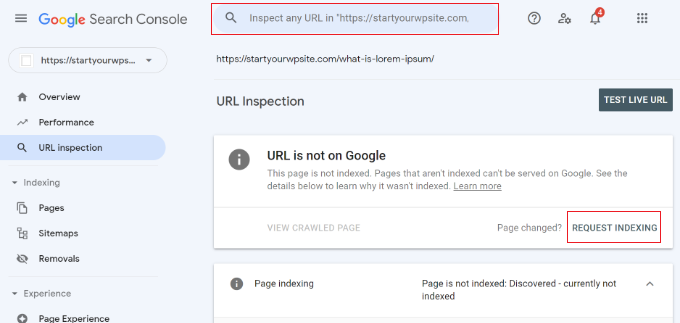
To see it in action, you need to sign up for ChatGPT by visiting the OpenAI website.
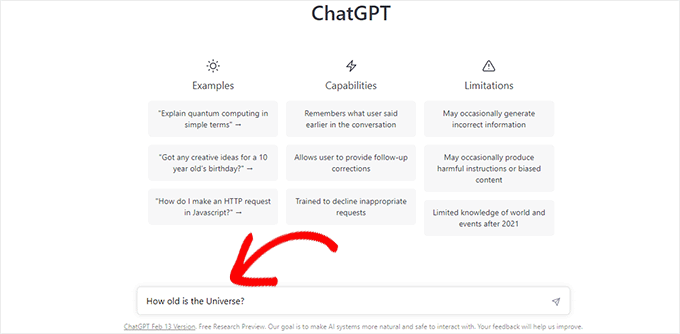
After that, you’ll see a simple chatroom. At the bottom, you can input your prompt in plain language.
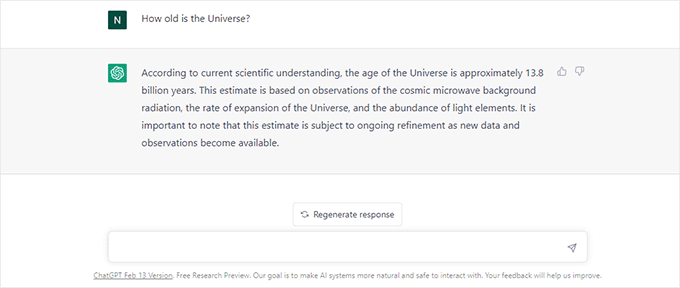
For instance, ‘How old is the Universe?’ and hit the send button.
ChatGPT AI will then respond to your question in plain language.
The answer length and style may vary based on the prompt you entered.
Writing better prompts allows AI to narrow down its approach and provide you with more specific details.
If you want to start a blog, then ChatGPT can help you find article ideas, the article outline, rough drafts, SEO optimization, proofreading, research, and more.
Many bloggers and marketers are exploring opportunities to generate content ideas using AI.
By learning some quick prompt ideas, you can speed up the process and unlock maximum benefits from ChatGPT AI to improve your workflow.
Note: ChatGPT and other AI apps are usually not able to create content that can be simply copied and pasted without any human edits. When you use an AI tool, be sure to go through the results thoroughly to be sure that all information is correct and that the messages are appropriate for your audience.
How to Write Better ChatGPT Prompts?
ChatGPT uses natural language processing which means you can write your prompts in a plain conversational style.
For instance, instead of typing a smaller sentence, you can instruct GPT on how to respond, which style to use, length limitations, ask for examples, and more.
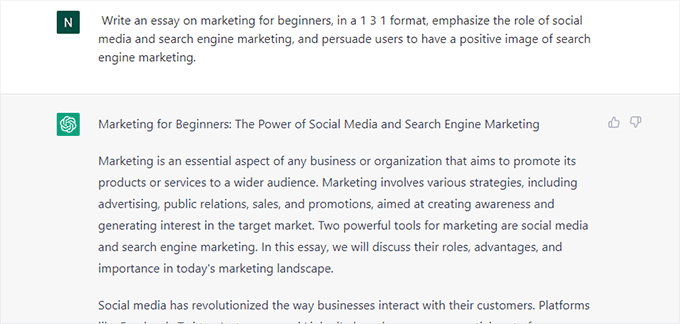
Instead of asking ‘What is Marketing?’ a better prompt would be:
‘Write an essay on marketing for beginners, in a 1 3 1 format, emphasize the role of social media and search engine marketing, and persuade users to have a positive image of search engine marketing.’
While writing your prompts in natural language might seem really simple, many beginners may still be unsure about where to start. It can take a lot of practice to find a style of prompt that works best for your projects.
That being said, let’s take a look at some easy and quick ChatGPT prompt ideas bloggers and marketers and marketers can use to succeed.
Using AIPRM Extension to Generate ChatGPT Prompts
The easiest way to generate ChatGPT prompts is by using AIPRM for ChatGPT.
It is a Google Chrome browser extension with a curated list of ChatGPT prompts for SEO, blogging, content creation, and marketing.
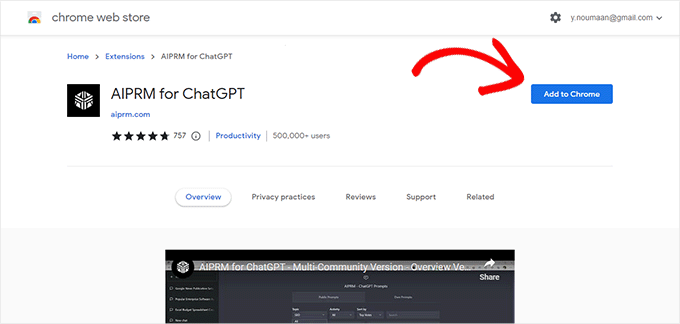
Go to the AIPRM for ChatGPT extension page on the Chrome web store and then click the Add to Chrome button.
Once the extension is added to your browser, it will automatically take you to the ChatGPT website.
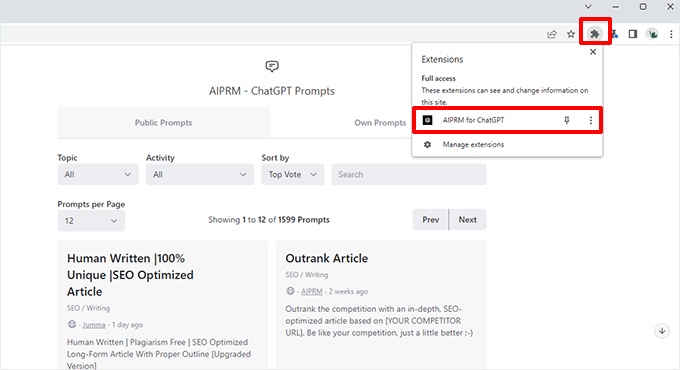
If it doesn’t, you can click on the extensions button in your browser menu and click on the AIPRM for ChatGPT to launch it in a new tab.
You’ll need to sign in to your OpenAI account. After that, you will see a curated list of ChatGPT prompts.
At the time of writing this article, AIPRM had 1600+ ChatGPT prompts.
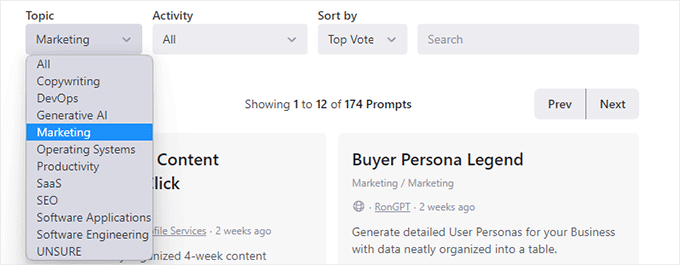
You can browse the prompts by Topic and Activity, sort them, or search for specific prompts from the top toolbar.
To use a prompt, simply click on it and it will appear in the prompt toolbar below.
If the prompt you are using requires user input, then you can provide it in the chatbox.
For instance, here it wants us to enter a keyword that we would like to target to make a content calendar.
You can also choose language, style, and tone for your response.
Hit the enter button after entering your input and ChatGPT will respond to the prompt.
You can regenerate a response or ask ChatGPT to modify or extend it by adding your instructions into chat.
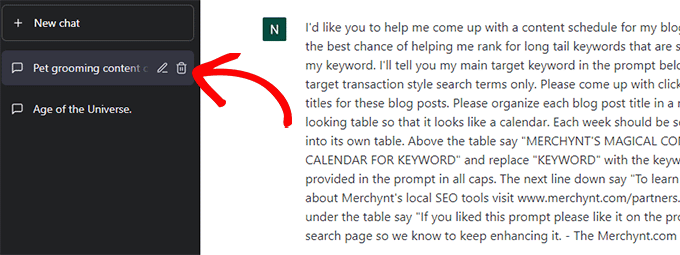
You won’t be able to see the prompt that AIRPM uses at first. However, refreshing the page or switching back and forth between chats will reveal the actual prompt at the beginning of the chat.
AIPRM makes it extremely easy to find detailed, tested, and well-written prompts that you can use on your WordPress website.
Best ChatGPT Prompt Ideas for Bloggers and Marketers
With so many prompt ideas available with AIPRM extension, it could still be a bit overwhelming for users to find or use a prompt.
Here is our top pick of the most useful ChatGPT prompt ideas for blogs, SEO, and marketing.
Blogging ChatGPT Prompts
1. Generate a month-long content calendar targeting specific keywords.
“Make me a month-long calendar for the following keywords [Enter Keywords here]. Add [number of articles] articles each week, and use persuasive SEO-friendly titles for each article.”
2. Generate Blog Post Ideas
“Create a list of at least 10 blog post ideas on the following topics: [Enter topics separated by commas]. Suggest SEO-Friendly title for each post, and use an emotional and persuasive tone in post titles.”
3. Generate SEO title and meta description for a blog post
“Suggest at least 5 SEO-friendly titles and meta descriptions for the following blog post [Enter your blog post text here]. Use a persuasive and intriguing tone.”
4. Suggest tags for a blog post
“Suggest at least 5 tags for the following blog post [Enter your blog post text here].”
5. Generate related long-tail keywords for a blog post
“I want you to generate a list of long-tail keywords that are related to the following blog post [Enter blog post text here].”
6. Create an article outline
“Write an article outline for the following topic [Enter topic or blog post title here].”
7. Write an article on a specific topic
“Write an article on the following topic [Enter topic here]. The article should be at least [number of words] words in length. Use a persuasive tone and pretend to be an expert on the topic.”
8. Outrank a competitor for a specific keyword
“Write an article based on the topics covered in the following article [Enter competitor URL here]. Make the article more comprehensive than the URL provided by adding details that the source URL has missed or didn’t cover. Answer the most commonly asked questions about the topic at the end of the article.”
9. Write a motivational blog post
“I want you to write a motivational blog post about overcoming [fear/failure/challenge goes here].”
10. Generate call-to-action ideas
“I want you to come up with 5 effective call-to-action button ideas based on the contents of the following URL [Your website or landing page URL goes here].”
11. Generate a pros and cons outline for a topic
“Write down an essay on the pros and cons of [Your topic goes here].”
12. Write questions for an interview blog post
“Write interview questions for a blog post with [Guest Name] who is an expert in [Guest profession or area of expertise].”
13. Proofread a text and optimize it for the focus keyword
“I want you to act as SEO editor and copywriter. I need you to proofread and analyze the following text and optimize it for the focus keyword. I also need you to correct any grammar mistakes you find in the article. Ask me to provide you with the article text and focus keyword.”
14. Reuse a blog post for social media content
“I want you to act as a topic authority and social media influencer. I will provide you with the text or URL of an article. You need to summarize it and create content for social media platforms. Ask me to provide you with the text or URL of the article.”
15. Generate a list of tools to mention in a blog post
“Create a list of the most popular tools used by the [Field of Interest] professionals with the pros and cons of each tool.”
16. Write a conclusion for a blog post
“I want you to pretend to be a topic expert, and write a persuasive conclusion for the following blog post. [Your blog post text goes here].”
17. Come up with best practices for using something
“Pretend to be a topic expert and write down an essay on the best practices to follow when using [mention the tool or topic here].”
18. Write a comparison blog post
“I want you to pretend to be a topic expert and compare [Item 1] vs [Item 2] with pros and cons. I need you to show that [item 1] is better than [item 2] and persuade the reader to have a positive feeling about [item 1].”
19. Build reader personas to learn more about a target audience
“Build a reader persona for a blog post titled “[Your blog post title goes here].”
20. Polish your content to look more creative
“Analyze and improve the following content to make it more creative. Use an [Select tone style] tone and write in a casual and conversational style. “[Your content goes here]”
Social Media ChatGPT Prompts
21. Generate captions for Instagram posts, reels, and reels.
“Write an Instagram post description or caption using a few sentences for the post about “[Enter a description of what your Instagram post is about]”. Start the caption with an intriguing sentence and don’t make the first sentence a question. Use emojis in each sentence and add a paragraph after two sentences to make it more readable. Add the most popular hashtags related to the post.”
22. Write an Instagram post about a product / service
“Write an Instagram post promoting [product/services] using a few sentences. Start the post with a captivating sentence and end with a sentence including a call to action to check the link in bio. Use emojis and add the related hashtags at the bottom.”
23. Generate Instagram carousel ideas with slide descriptions
“Write me an Instagram carousel topic idea example. Also, write slide by slide with titles. Explain each slide with the exact content example I should use, not instructions. Also, give me images for every slide that explain all the titles for [Your Instagram Carousel Topic Here]. Do not include content instructions, instead, only write me an actionable text that I can just copy and paste.
After writing the carousel slides. Write me the Instagram post description/caption in just a few sentences. Format every new sentence with new lines so the text is more readable.
Include emojis and the best Instagram hashtags for that post. The first caption sentence should be intriguing and captivating to the readers.”
24. Write Twitter Bio
“I want you to write an interesting Twitter bio for a [Your brand niche and industry / Profession ].”
25. Suggest Twitter Header Image Ideas
“Give me at least 5 ideas to create a Twitter header image for a [Profession/Industry niche].”
26. Generate Tweets for a specific profession, niche, or business
“I want you to act as a social media manager and come up with at least 20 Tweets for a [Profession/ Business niche or industry] include popular hashtags in each tweet.”
27. Generate a viral Twitter thread
“I am looking for a Twitter thread idea that will go viral and showcase [mention your service, product. or blog] to the ideal customer persona in a creative and engaging way. Include hashtags and emojis in each tweet.”
28. Generate a Twitter content strategy
“I need you to act as my social media manager promoting [Describe your business or brand and what it does]. Generate a Twitter content calendar for the next two weeks. Generate at least three tweets for each day targeting relevant customer persona. Include hashtags and emojis in each tweet.”
29. Generate YouTube Video Description
“Write a unique and intriguing description for a YouTube video titled [Enter your video title here]. Pretend you are an expert on the niche and give your personal best advice in 1st person. Explain why you thought sharing this video would be useful and what users will get out of watching this video.”
30. Generate an entire YouTube video script
“Create an attractive and captivating YouTube video script that is informative. I want you to create a persuasive headline, write a video description repeating keywords used in the headline, cite relevant keywords and tags, create the youtube video script and suggest ideas for a persuasive thumbnail to use for the video, from the following description: [Your video description].”
31. Create thumbnail Ideas for Your YouTube video
“Give me at least 3 ideas for creating an interesting and persuasive thumbnail for a YouTube video using the following description: [Enter your video description].”
32. Generate a YouTube content strategy with video ideas
“I want you to act as my social media manager promoting [mention your brand and what services or products it offers] and come up with a content calendar for our YouTube channel. Give me a monthly calendar of posts with at least one video each week. Suggest video ideas with detailed descriptions of what that particular video will be about. Include keywords and hashtags for each video.”
33. Generate a LinkedIn content calendar with post ideas
“I want you to act as my social media manager for my [Explain your business, brand, profession, and what you typically write about]. I need you to create a month-long content calendar with at least one post each day. Write the post for me including the relevant hashtags and use emojis. Write posts specifically for LinkedIn. My target audience is [companies/professionals interested in my brand product or services].”
34. Write a LinkedIn About section
“I want you to act as my social media manager for my [Explain your business, brand, or profession and what you usually post about]. Give me at least 5 examples of an interesting About section for my LinkedIn profile.”
35. Write a caption for Facebook Photo
“I want you to act as my social media manager and write at least 5 captions for a Facebook photo about [explain what the photo is about]. Use hashtags and emojis in the caption.”
36. Write a Facebook Ad Copy
“I want you to act as a professional copyrighter with experience in writing high-converting Facebook ads. I want you to write a Facebook ad copy for the following products/services [Describe your brand name, products and services you offer]. Produce ad copy that is between 100-150 words, with an attention-grabbing headline and a strong call to action that persuades users to take action. I want you to research the potential target audience and optimize the ad copy so that it appeals to that particular target audience.”
37. Plan a Facebook content strategy
“I want you to act as my social media manager promoting [explain your business brand and what you offer]. I need you to provide me with a two-week content calendar for Facebook posts that are highly engaging and generate emotional responses from the readers. Add one post for each day, using hashtags and emojis.”
E-Commerce ChatGPT Prompts
38. Write an eCommerce product description
“I want you to pretend that you are an eCommerce SEO expert who writes compelling product descriptions. I will provide you with one product title and I want you to come up with three distinct content sections for product description, each section should have its own headline.”
39. Write an eCommerce product short description
“I want you to pretend that you are an eCommerce SEO expert who writes compelling product descriptions. I will provide you with one product title and I want you to come up with a short product description of between 250-300 characters.”
40. Generate product ideas for your eCommerce store
“I want you to pretend as a product specialist for an eCommerce store with a specialty in finding and sourcing products to sell online. My store sells [define your store industry and product types] and I need you to come up with a list of [number of product ideas] product ideas that I can sell on my online store.”
41. Write an SEO Optimized landing page copy for a product
“I want you to pretend as a copywriter specializing in writing landing page copy for better SEO rankings and higher conversions. I need you to write the landing page copy for [Your product name]. I want you to start with an intriguing headline to captivate the target audience followed by a call to action button. Below that I want you to add three content sections with different headings each targeting a specific keyword for the product. I need you to end the landing page copy with a FAQ section answering at least 5 customer questions about the product.”
42. Create and sort products into product categories
“I need you to sort the products into product categories. Ask me to provide you with a list of products. Use hierarchal categories and create child categories as needed. Products can be placed into multiple categories. Show which products are placed under a category. Write a catchy short description for each category. Use this product list [enter your product list].
43. Create an ad strategy for an eCommerce product
“I want you to act as an advertiser. You will create a campaign to promote a product or service. You will choose a target audience, develop key messages and slogans, select the media channels for promotion, and decide on any additional activities needed to reach your goals. The product you will be promoting is: [Enter your product title and description here].”
ChatGPT Prompts for Businesses
44. Polish an email text to be more effective and professional
“Fix this email to write it in a human voice in perfect English, as someone with a charismatic personality, that is extremely professional and concise with their language. Also, give at least three samples to use as the email subject. [Enter your email text here].”
45. Write a job posting ad for hiring
“I want you to act as a recruitment manager specializing in finding talented professionals for a job. I need you to write a job posting for [job title] we are offering the following benefits [mention benefits here] and we are looking for [job requirements such as experience and skills].”
46. Generate a business model canvas
“I need you to help me create a business model canvas for a [explain what your business is about] company. Organize your answers in a table that reproduces the original format used in consulting. I want you to write detailed answers that are focused on adding value and act as an expert consultant in digital marketing.”
47. Generate logo design ideas
“I want you to act as a graphic designer specializing in brand identity development. I want you to come up with detailed ideas for unique and interesting logos for a business. Come up with at least 3 ideas and mention what is unique about each idea and how it is different from the other two ideas. The business name is [Enter your company name] and it offers [mention products/services]. I need you to present your ideas in a format that can be given to a professional graphic designer as initial instructions.”
48. Instantly generate domain name ideas
“I need you to help me find domain name ideas for a business. My company name is [enter business name] and it offers [products/services/industry]. Only give .com domain name ideas. domain name should not be more than 8 characters long.”
49. Write an email to terminate an employee
“Write an email to an employee informing them that they are being fired for the following reason [mention the reason for firing]. Make the email text sound professional and polite. Use a sympathetic and kind tone and thank the employee for their work.”
50. Write a job offer email
“I want you to write a job offer email using the following parameters: 1. Candidate name 2. Job position 3. Company name 4. Salary offered Ask me to input these parameters one by one before writing the email.”
Miscellaneous ChatGPT Prompts
51. Generate a cover letter for a job application
“I need you to write me a professional cover letter to send with a job application using the following parameters: 1. Job Title 2. Years of Experience 3. Skills to mention Ask me to input each parameter one by one before writing the cover letter.”
52. Plan your day
“I need you to help me plan my day. Starting at 9 am and ending at 5 pm. Ask me to input the task I will be performing and then ask me for the start time and end time for that particular task. Repeat until the end time of a task is 5 pm. Create a table and add one row for each task with start time, end time, and task detail as columns.”
53. TL:DR Summarize a text or article
“I want you to act as a very proficient researcher. I want you to pretend that you can extract all relevant information from a text or a URL I give you. Your task is to extract all facts and summarize the text in all relevant aspects, presented in bullet points and a 1-liner summary, pick a good matching emoji for each bullet point, and then add it after the 1-liner summary. Ask me to input text or provide you a URL.”
54. Generate a list of popular websites on any topic
“I want you to act as a topic expert. I will provide you with a topic and you will provide me with a list of at least 10 most influential websites on that particular topic. Present the websites in a table with serial number, website name, website URL, 1-liner website summary as columns. Ask me to provide you with a topic.”
Bonus WordPress AI Plugins & Tools Using ChatGPT
AI usage is becoming increasingly popular among marketers and bloggers. As the most popular blogging platform, WordPress has tons of add-ons and plugins that you can use to speed things up.
As the best WordPress SEO plugin on the market, All in One SEO comes with built-in ChatGPT integration to generate SEO-friendly headlines and meta descriptions.
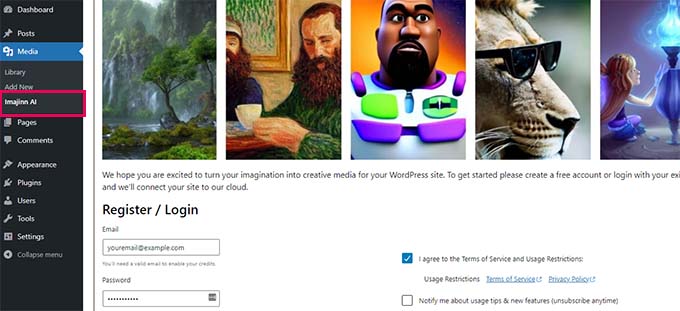
Finding royalty-free images for blog posts is always a challenge for bloggers. Similar to Dall-E, Imajinn AI uses text prompts to generate images using machine learning AI.
All the images generated by the plugin are copyright-free and you can use them in your blog posts.
We hope this article helped you find some useful ChatGPT prompt ideas for your blog and marketing campaigns. You may also want to see our pick of some more useful AI-powered WordPress plugins or take a look at our guide on how to grow your business online.
If you liked this article, then please subscribe to our YouTube Channel for WordPress video tutorials. You can also find us on Twitter and Facebook.
Are you looking for the best practices to maximize the SEO benefits of internal links?
Internal links play an important role in search engine optimization (SEO). They help search engines discover your content and rank them higher in search results.
In this article, we’ll list the best practices to use for internal linking for SEO.
How Does Internal Linking Improve SEO in WordPress?
Internal links are links between posts on your own website. Having internal links is important for your WordPress SEO. They help search engines like Google crawl your website and discover new content to index and rank.
Generally, the more links a page has pointing to it, the more likely it is to rank higher in search results. That means that you can use internal links to point to important pages on your site as a way to increase their traffic.
That being said, let’s take a look at the best practices for improving SEO by adding internal links in WordPress. Since this is a comprehensive guide, we have included a table of contents for easier navigation.
We recommend that you make a habit of linking to your older articles from your new articles.
It’s a great way to develop a contextual relationship between your new and old posts. It also allows you to pass relevant link juice to your older articles.
Because internal links play such an important role in SEO, we have even made it part of our pre-publish blog post checklist for WPBeginner writers.
You can also edit your older articles to add links to your newer content whenever you publish. Many successful bloggers dedicate time to adding internal links that point to new articles on a weekly or monthly basis.
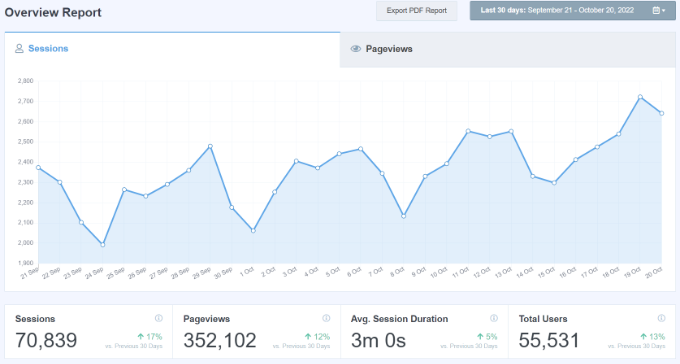
This will help you boost your pageviews, increase the time users spend on your site, and ultimately will improve the SEO score of your individual blog posts and pages.
WordPress makes it easy to search for your old posts right inside the post editor. Simply select the text you want to link and click on the link button in the toolbar that appears.
A text pop-up will appear below your highlighted words. Then, you can start typing to search for the older articles you want to link to.
2. Monitor Your Internal Link Performance in WordPress
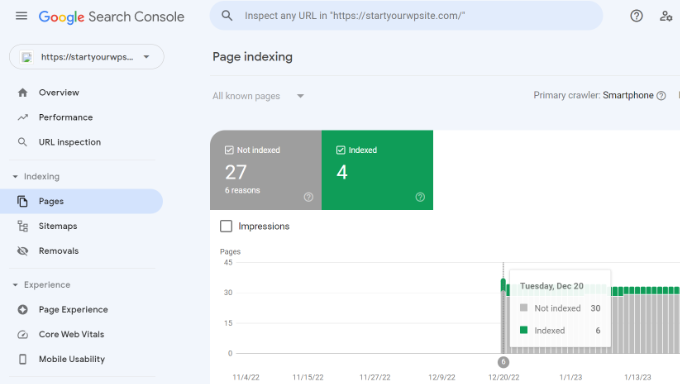
It’s helpful to see your website’s SEO performance in terms of links by using a tool such as the Links Report in Google Search Console. This is a helpful starting point for working out how to improve internal linking on your site.
The Links Report will show you how many pages are linking to this page. You can compare it with other pages and see whether pages with more internal links are ranking higher than posts with many internal links.
Just make sure you are only linking to the article when it makes sense. Adding links where they don’t make sense creates a bad user experience.
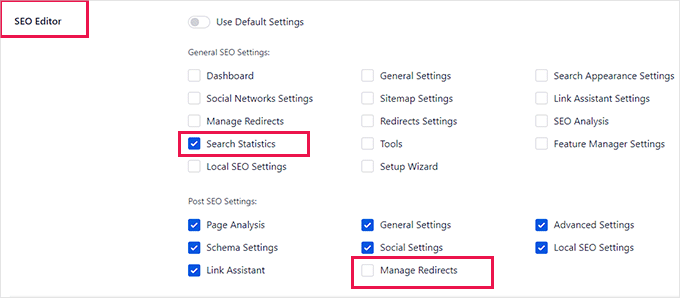
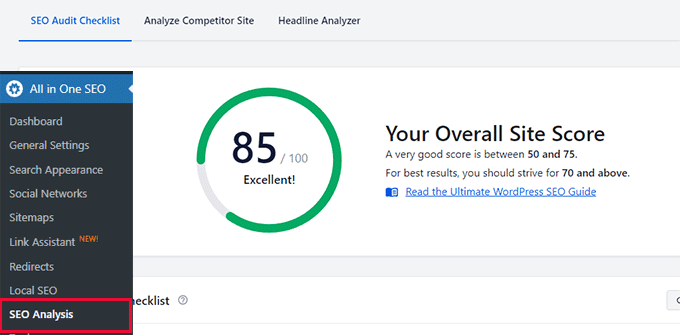
Another way to monitor the impact of internal linking is to see which keywords are gaining or losing position. All in One SEO makes this extremely easy with the Search Statistics feature.
Once you connect the plugin with Google Search Console, All in One SEO will fetch your Google Search Console data and present it under All in One SEO » Search Statistics.
The keyword positions chart shows a graph of your site’s keyword positions.
Below this, you’ll see the Keyword Rankings overview box. This shows your top 10 keywords, and if you use them for internal links they are very likely to be clicked.
3. Improve Your WordPress Site’s Internal Linking With a Plugin
If you’re not sure which posts you want to link to, then you will often find it faster to add internal links in WordPress using an internal linking plugin.
We recommend using All in One SEO. It includes a unique Link Assistant feature that lets you add links to your old and new content without having to open up the post. Plus, it provides link recommendations, detailed link reports, and much more.
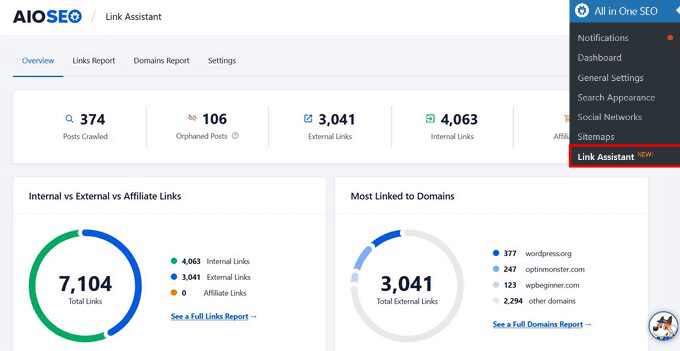
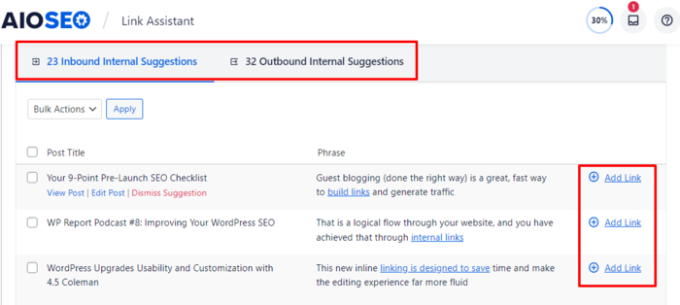
Link Assistant will crawl every link on your website and then show a comprehensive list report.
The report will show you an overview of the links with total counts for internal, external, and affiliate links. It will also show you the number of orphaned posts that have not yet been linked to from another post or page.
You can switch to the Links Report tab for detailed information on all your links. Here you’ll see a list of all your posts and pages with columns for internal, external, and affiliate links.
It will also show a number of suggestions where you can add links.
For more details, you can click on the right arrow button next to a post or page. This will show all links organized in different tabs. From the suggestions tab, you can quickly view link suggestions and add links without directly editing a post or page.
Link Assistant also helps you discover more internal linking opportunities.
You can switch to the ‘Linking Opportunities’ tab to see suggestions about how to improve the internal linking on your website, and also see the list of orphaned posts so you can add links to them.
Another plugin useful for internal linking is Semrush SEO Writing Assistant because it can help you keep track of links inside your article.
For example, it lets you know when your article has too many or too few internal links and also suggests ways you can improve your links.
This tool also comes in handy if you have other authors working on articles. Editors can quickly see if the article includes internal links to other posts on your website.
4. Display a List of Your Most Popular Posts in WordPress
You can use a WordPress popular posts plugin to point users toward the articles that other users have already found helpful. These plugins automatically create a list of internal links to your most popular content.
Popular posts are usually your most successful content, which means they are more likely to increase user engagement, conversions, and sales. They are also a good opportunity for internal linking to your other less popular articles.
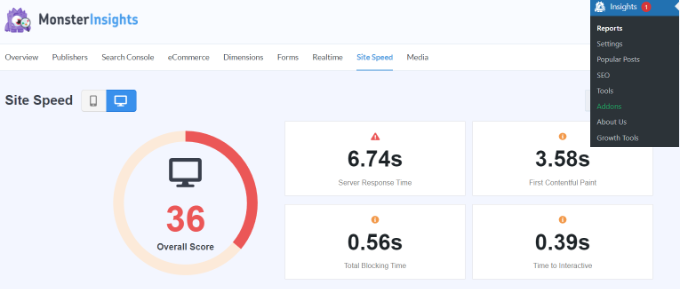
For example, MonsterInsights has a feature that allows you to show your popular articles anywhere on your WordPress site. You can use also use inline popular posts to show articles inside your content.
If you want to show articles in the sidebar or at the end of your content, then you can select the Popular Post Widget. MonsterInsights even lets you display your top-performing products anywhere on your eCommerce store.
5. Create List Posts That Roundup Other Articles in WordPress
Another way to increase the number of internal links on your WordPress blog is to create roundups of your existing content. You do this by creating a new post that mentions your best articles on a certain subject to give a detailed overview of the topic.
In fact, you’re reading a post like that now.
Luckily, there are some plugins that make this job easy. For example, WP Tasty Roundups allows you to quickly repurpose your existing content into beautiful roundup posts that rank in search results.
All you need to do is type one or two keywords into the built-in search functionality, and the plugin will automatically pull images, titles, descriptions, and links from relevant posts into your roundup list.
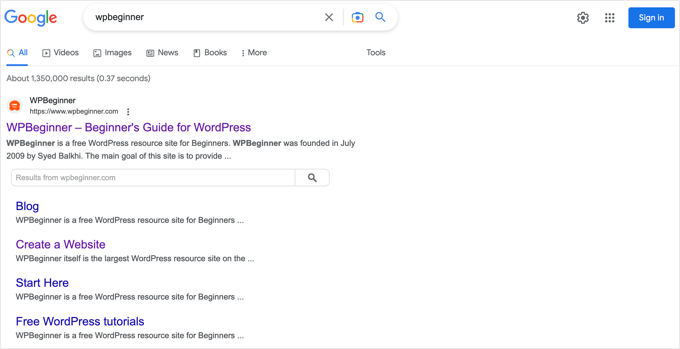
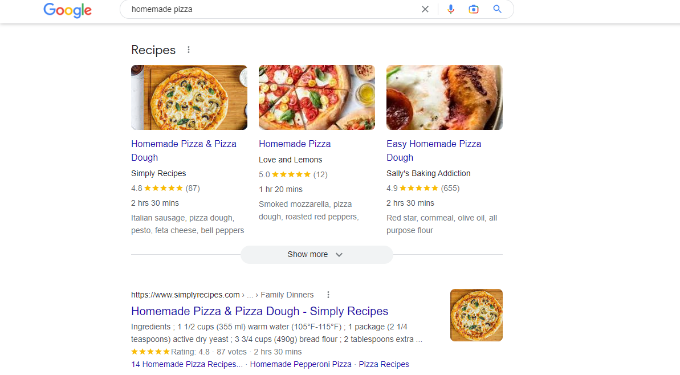
6. Get Google Sitelinks for Your WordPress Site
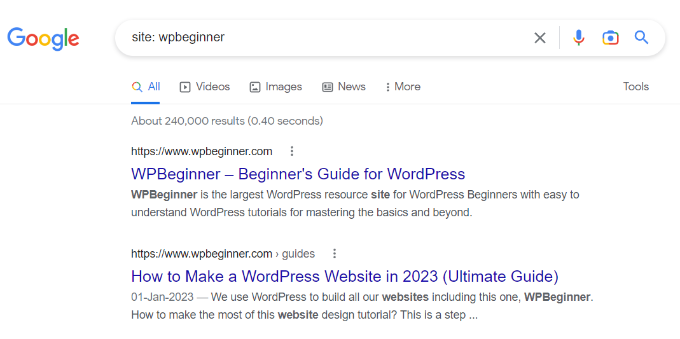
Sitelinks are a feature on Google search engine results pages (SERPs) where additional sub-pages appear under a website in the search results.
These are often internal links to the most popular pages of that website.
The top 3 spots on Google get the most clicks. When sitelinks are shown for a website, it takes up the same amount of space as three regular search listings.
Having this much screen space dedicated to your site significantly increases your overall click-through rate. Simply put, more visitors will visit your website from the keyword.
While there is no guaranteed way to get Google to show sitelinks for your website, it certainly helps to create lots of internal links to your most important posts and pages.
7. Preload Links in WordPress for Faster Loading Speeds
Link preloading is a browser technology that will load links in the background before a site visitor clicks them. This makes your website seem faster, which can improve SEO.
Because loading speed is one of the top indicators for search engine rankings and user engagement, when your internal pages are preloaded, your visitors are more likely to stay on your website longer.
They are more likely to view more pages because they’re loading instantly.
The easiest way to preload links is by using the Flying Pages plugin. It simply adds intelligent preloading to make sure preloading won’t crash your site or even slow it down.
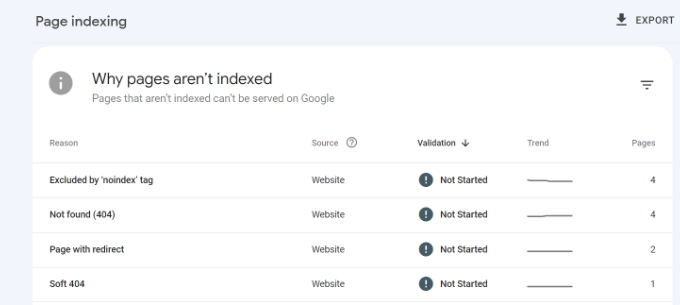
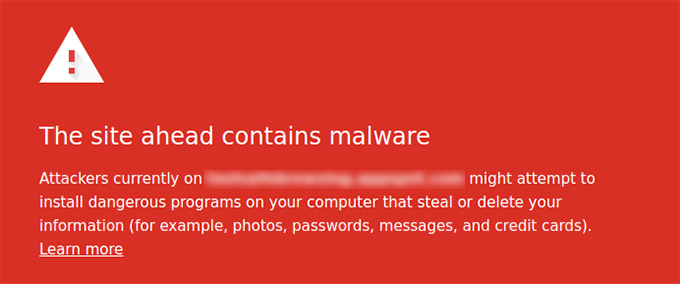
Broken links are bad for your website’s SEO. Search engine crawlers find new content on your website by following internal links, so a broken link can stop them from indexing a new post.
They also negatively impact user experience because broken links will return a 404 error. If a visitor clicks on a link and is unable to find a page they’re looking for, then they may leave.
AIOSEO offers a powerful redirection manager that helps track 404 errors on your website and lets you set up permanent 301 redirects to fix broken links.
9. Update Internal Link URLs When Moving a Site to a New Domain
If you ever move your WordPress site to a new domain name, then it is important to update all internal link URLs. Otherwise, you will have lots of broken links.
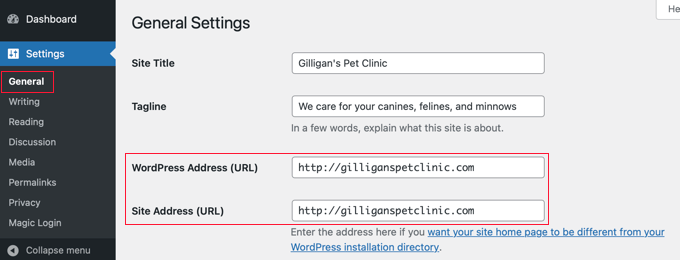
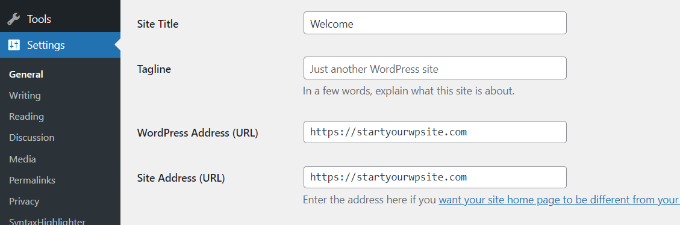
You should start by changing the WordPress address and site URL by visiting the Settings » General page from your WordPress dashboard.
But you will also need to change the URLs of every internal link added to your posts and pages.
10. Use MediaWiki Syntax to Quickly Add Internal Links to WordPress
If you want to make internal linking a habit, then it helps to use the most efficient method. Since WordPress 6.0, WordPress has supported standard MediaWiki syntax to quickly add internal links when creating or editing a post.
You can now quickly add links by adding two square brackets followed by the post title. The animated gif below shows you how easy this feature is to use inside WordPress.
The link will automatically add the correct URL to the post, and use the post title as an anchor link.
If you know the title of a post (or even just part of it), then using the double square bracket method is the fastest way of creating an internal link.
11. Track Which Internal Links Are Clicked in WordPress
One of the best ways to uncover how users interact with your website is to track which internal links your visitors are clicking. Tools such as MonsterInsights can help you see which internal links your visitors are the most interested in.
You can then use these insights to improve the way you add internal links to your posts and pages.
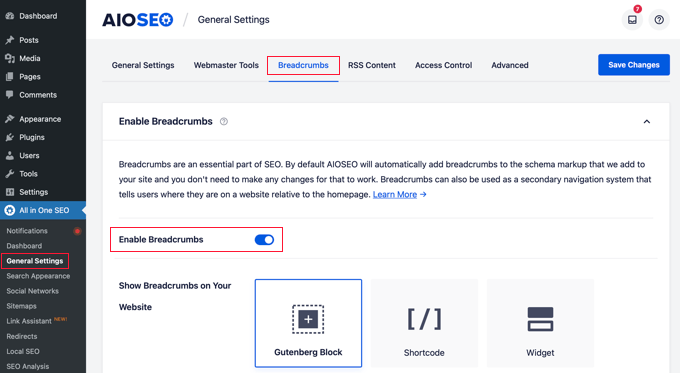
You can also use All in One SEO to enable breadcrumbs for your WooCommerce products. For details, see the fifth tip in our guide on WooCommerce SEO made easy.
Vlogging is a powerful way to connect with people and build a personal brand. However, if you simply upload vlogs to third-party platforms like YouTube, then you may struggle to grow your audience, make money, and become a successful vlogger.
In this article, we will show you how you can start a vlog and make money.
Which Is the Best Website Builder for Your Video Blog?
There are many website builders that can help you create a vlog site, but we recommend using WordPress and a separate video hosting platform.
To learn more about why WordPress is such a good choice, please see our complete WordPress review with pros and cons.
There are two types of WordPress software: WordPress.com and WordPress.org. We recommend using WordPress.org, also called ‘self-hosted WordPress.’ This will give you full ownership and control of your site.
Using WordPress.org allows you to install third-party plugins and themes, including plenty that are designed specifically for vloggers.
Also, while you can upload videos to WordPress, it’s far better to use a separate video hosting platform such as YouTube or Vimeo.
Videos take up a lot of your hosting resources, which will slow down your website. Instead, we recommend uploading your vlogs to a separate hosting platform such as YouTube or Vimeo, which has all the server resources you need.
After uploading your vlogs to one of these sites, you can then embed your vlog in a WordPress page or post by simply copying and pasting a link. WordPress has built-in support for most major video hosting platforms.
If you really want to save time and impress your viewers, then you can use a plugin like Smash Balloon to create a video feed that will update automatically every time you post a new vlog.
If you don’t already have a video hosting platform in mind, then don’t worry. Later in this guide, we’ll help you find the perfect platform for your vlogs.
Step 1. Setting Up Your Video Blog Website
To create a video vlog, you’ll need a domain name and web hosting.
Although the WordPress software is free, hosting and domain names are where the costs can really start to add up.
A domain name typically costs $14.99/year and hosting costs start from $7.99/month. This is a lot for hobby vloggers, new creators, or anyone who is working with a tighter budget.
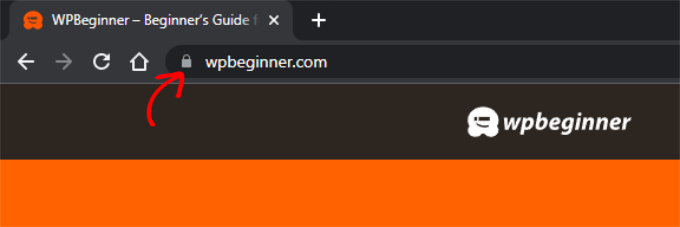
Thankfully, Bluehost has agreed to offer our users over 60% off on web hosting and a free SSL certificate as part of this deal. This is absolutely essential if you plan to sell premium videos and make money from your vlogs. You will also get a free domain name when you sign up!
Simply click the link below to create a vlogging website for as little as $2.75 per month.
Because you get a free domain when you sign up with Bluehost, you’ll need to be sure it’s the right fit for your video blog. For expert tips, check out our guide on how to choose the best domain name.
Once you’ve completed the purchase, you’ll get an email with instructions on how to log in to your web hosting control panel. This is your hosting account dashboard where you can manage your vlog, including setting up email notifications and asking for WordPress support if you need it.
It’s also where you’ll install the WordPress software, so let’s do that now.
Step 2. Install WordPress on Your Video Blog
When you sign up with Bluehost using our link, you’ll get access to a one-click WordPress installer. Simply log into your Bluehost account and click on ‘One Click Install.’
You can now follow the onscreen instructions to set up WordPress.
Once WordPress is set up, you’re ready to start customizing your vlog site.
Step 3. Select a Video Theme
WordPress themes are professionally designed templates that change how your vlog looks and acts.
There are lots of different premium and free WordPress business themes to choose from. You can generally categorize these as multipurpose WordPress themes, or niche industry themes. However, most WordPress themes are designed to show text.
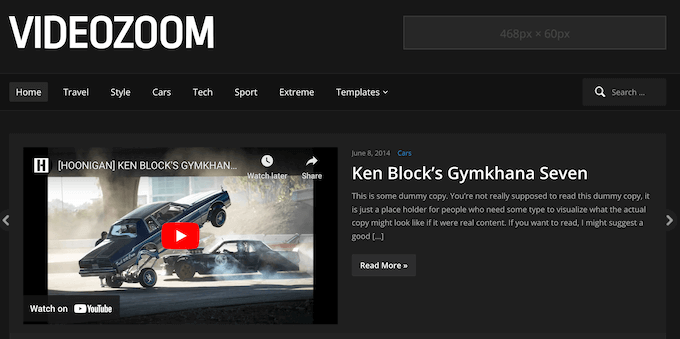
Since we’re starting a vlog, we need a theme that’s designed specifically for videos.
Even if you’re using a separate video hosting platform, embedded videos still take time to load. With that in mind, it’s important to find a lightweight theme that won’t slow down your website. Wherever possible, we also recommend using a theme that has built-in lazy loading.
On top of that, vlogs often need special features such as parallax scrolling, lightbox popups, and fullscreen video backgrounds.
That’s a lot to keep in mind, so you may want to look at our expert pick of the best WordPress video themes.
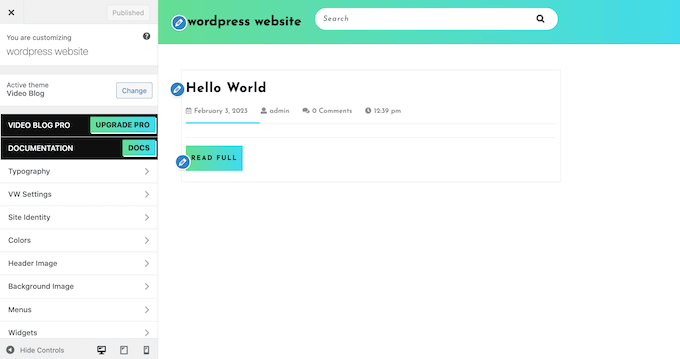
After installing a theme, you may want to customize it by going to Appearance » Customize in the WordPress dashboard. This will launch the theme customizer where you can fine-tune the theme settings and see your changes in the live preview.
If you’re using one of the newer full-site editing themes, then you’ll need to go to Appearance » Editor instead.
Here, you can fine-tune the theme using blocks.
Just remember that you can customize your theme at any point. You can even completely change your WordPress theme, if you realize it doesn’t quite meet your needs.
This means you don’t need to finalize your site design now. In fact, it may be easier to fine-tune your vlog once you’ve added some content.
Step 4. Create a Custom Homepage
WordPress comes with two content types called posts and pages.
You’ll typically use posts to create articles and blogs, while pages are static “one-off” types of content. For example, you might publish an about page, a privacy policy, or a custom archive page.
There are a few different ways to show videos in WordPress. However, since we’re creating a video vlog you’ll typically embed one or more videos in a blog post.
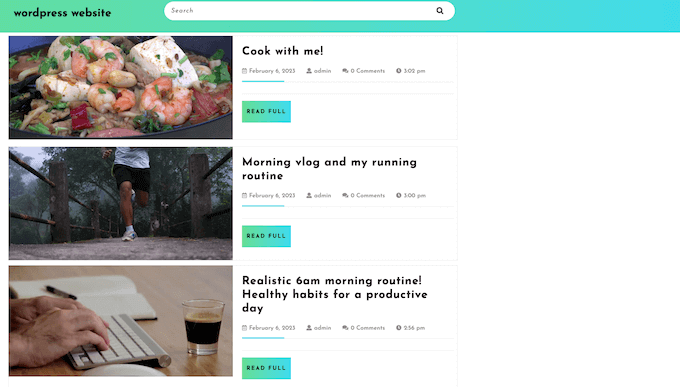
By default, the WordPress homepage shows your posts in reverse chronological order, so your latest vlog appears at the top of the homepage.
However, you may want to move this blog list to another page, and use a custom homepage instead. This custom homepage can introduce your vlog to visitors and let them know what you have to offer.
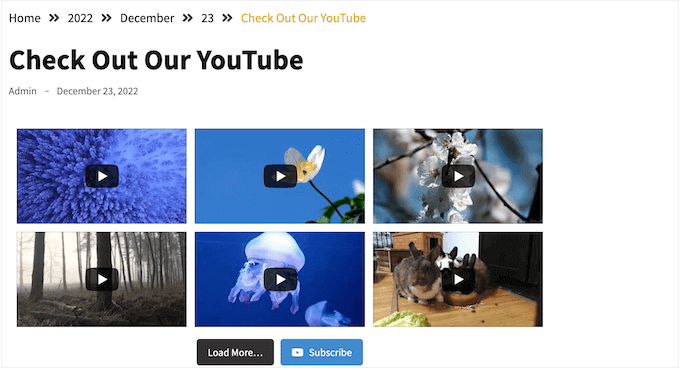
You might even create a YouTube gallery of all your best videos, which is a great way to catch a visitor’s attention and make them want to watch more of your content.
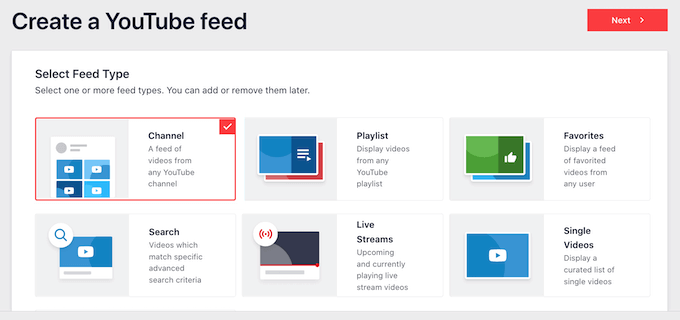
Smash Balloon allows you to create all kinds of galleries, including showing a specific YouTube playlist or favorites feed, a single video, or even your latest live stream.
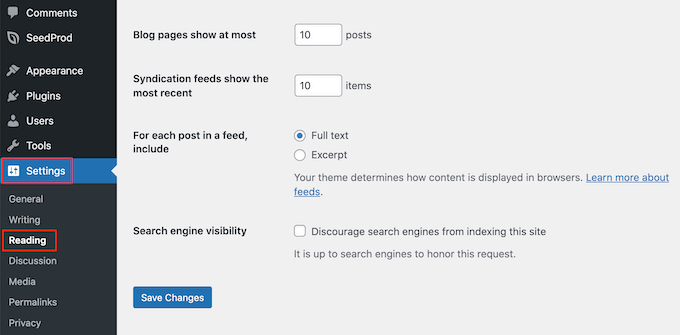
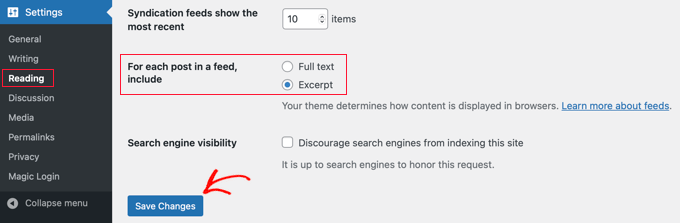
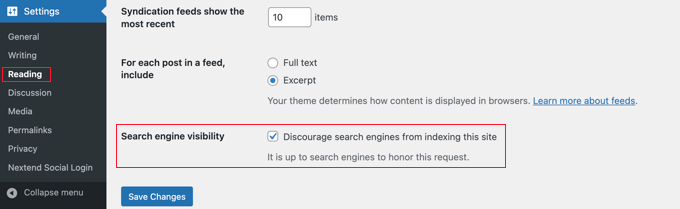
Once you’re happy with the design, it’s time to set it as your homepage. To do this, go to Settings » Reading in the WordPress dashboard.
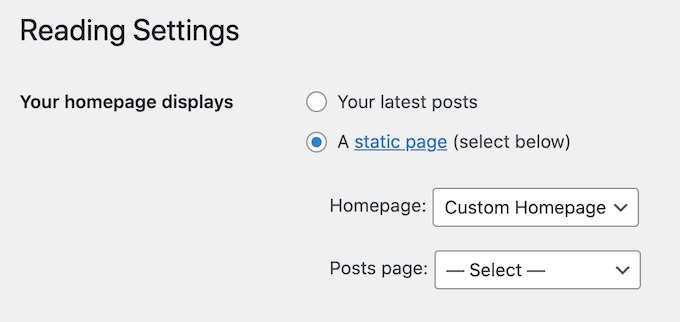
Here, scroll to ‘Your homepage settings’ and select ‘A static page.’
Next, open the ‘Homepage’ dropdown and choose the page that you want to use.
After that, simply scroll to the bottom of the screen and click on ‘Save Changes.’ Now, if you visit your website you’ll see the new homepage in action.
With that done, make sure you create a separate blog page to display your vlogs.
Step 5. Set Up Your Video Hosting Platform
Before you can start adding videos to your WordPress website, you’ll need to upload them to a separate video hosting platform. In this way, you can show countless high-resolution videos on your website without affecting its performance.
There are lots of different video hosting platforms that you can use, but we recommend YouTube as it’s the most popular choice.
It’s free to create a YouTube account and you can upload as many videos as you want.
YouTube even has a Partners Program that you can join to make money from your videos. This program also offers more benefits like analytics, longer videos, and editing tools.
If you don’t want to use YouTube, then there are many other popular platforms including Vidyard, Wistia, and SproutVideo. For a closer look at all the top video sites, please see our expert pick of the best video hosting sites for bloggers.
After choosing a platform, you’ll need to create an account and upload all the vlogs that you want to show on your WordPress website.
For instructions on how to do this, check out the online documentation for your chosen video hosting platform.
Step 6. Create Your First Vlog
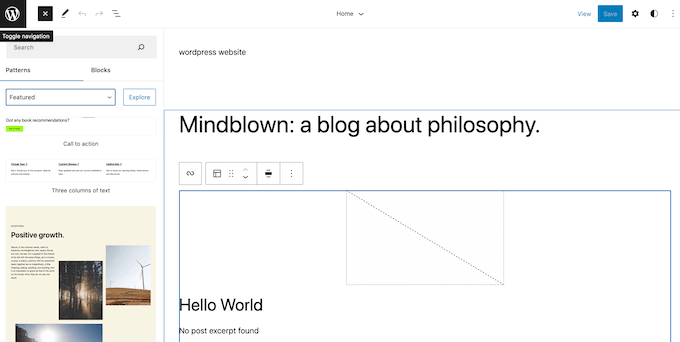
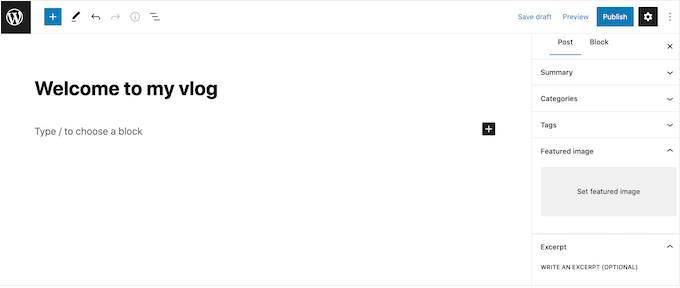
To create your first vlog, simply go to Posts » Add New in your WordPress dashboard.
WordPress has a block-based editor that allows you to create beautiful content layouts for your vlogs. Here, you can add text, images, audio clips, and more.
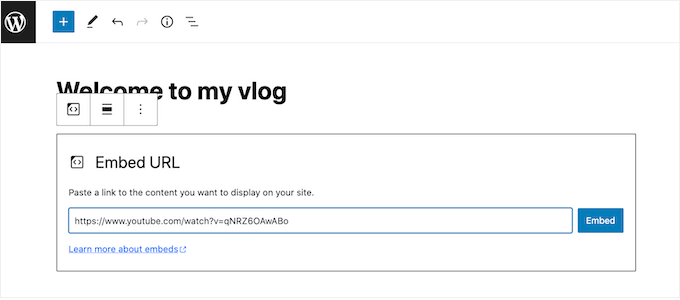
The easiest way to add vlogs to WordPress is by using the built-in auto-embed feature. If you’re using one of the big video hosting platforms, then you can simply paste the video’s URL into the WordPress content editor, and WordPress will handle the rest.
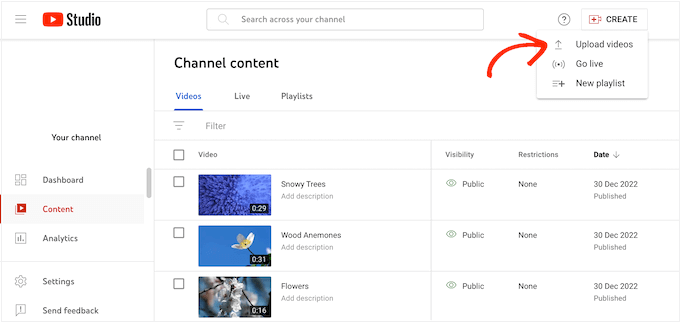
Just head over to your chosen video hosting platform and find the vlog that you want to show on your WordPress blog. You can then simply copy the video’s URL.
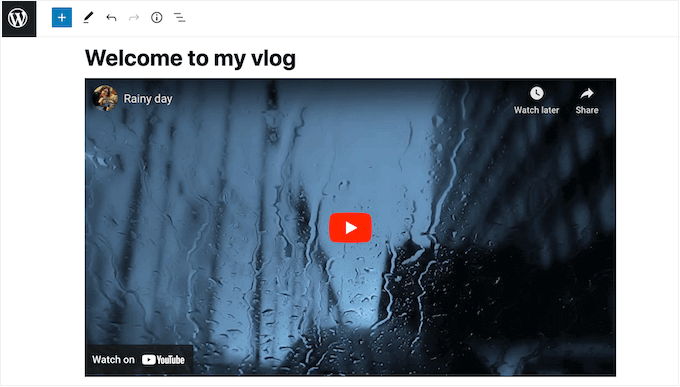
After that, switch back to the WordPress dashboard and paste the URL in the content area. If you paste it into a standard Paragraph block, WordPress will automatically try to place it in the correct block, such as the YouTube block.
Even if you don’t see the platform-specific block, it will use the Embed block and display the video inside the content editor.
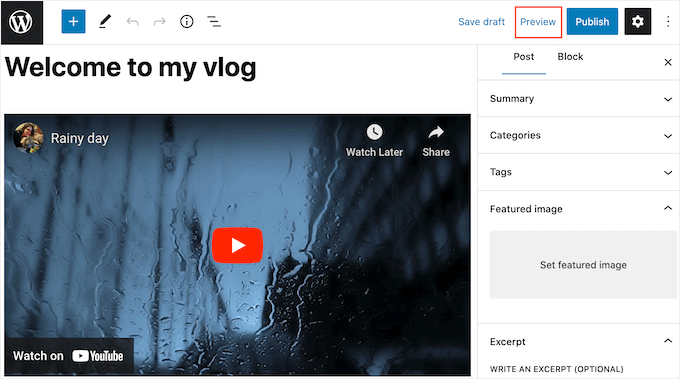
As you’re working on the vlog, you can see how it’ll look to visitors by clicking on ‘Preview.’
This will open the page in a new tab.
The WordPress post editor also has sections for Categories and Tags. You can use these to organize your vlogs so it’s easier for visitors to find interesting content. To learn more, please see our guide on how to add categories and tags in WordPress.
When you’re happy with how the vlog looks, go ahead and click on the ‘Publish’ button in the top-right corner of the screen.
To add more vlogs to your website, simply follow the same process described above.
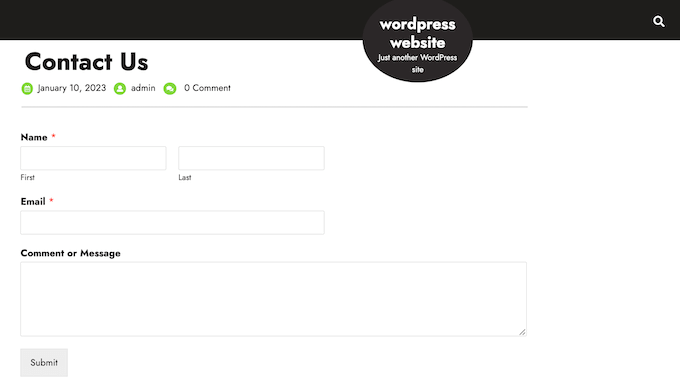
Step 7. Add a Contact Form to Your Vlog
Some viewers might want to contact you directly. This may include affiliate marketers, sponsors, advertisers, and other brands who are looking to build relationships with creators, or other vloggers who want to collaborate.
These people could ring your phone number or send a message to your business email address, but we always recommend adding a contact form to your website.
This makes it easier for potential partners to contact you, so you don’t miss out on any opportunities to grow your brand and make money from your vlogs.
The easiest way to add a contact form to your WordPress website is by using the free WPForms plugin. WPForms comes with a built-in Simple Contact Form template that you can customize using the drag-and-drop editor.
You can then add the form to any page, post, or widget-ready area using the ready-made WPForms block.
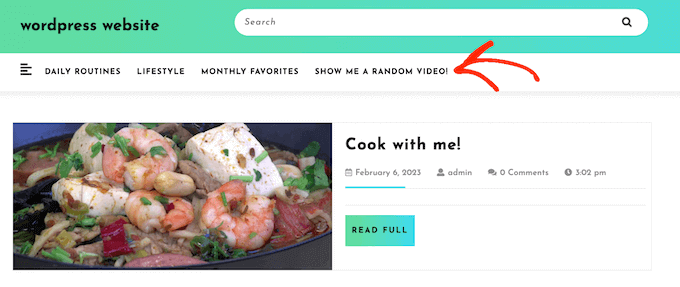
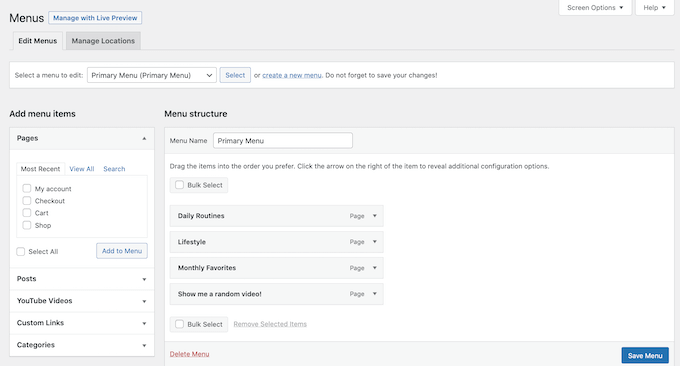
Once you’ve added some content to your vlog, it’s a good idea to add a navigation menu so visitors can find their way around the different videos.
The exact location of your menu will depend on your WordPress theme. Most themes have several options, so you can create multiple menus and then show them on different areas of your vlog.
Whether you create a single menu or multiple menus, it’s easy to add navigation to your vlog. For a complete guide, please see our post on how to add a navigation menu.
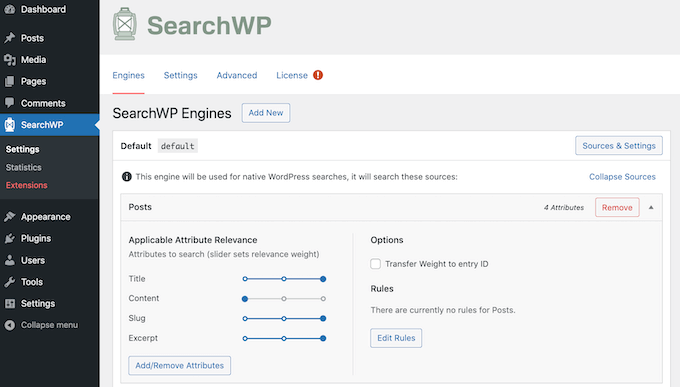
Menus encourage people to explore your site, but sometimes visitors may want to search for a specific vlog. WordPress comes with a built-in search feature, but it’s quite basic and not very good at finding relevant content.
It is very easy to use and gives much more accurate search results. It allows visitors to search for a keyword in the post or page title, content, URL slug, categories, tags, taxonomies, WordPress excerpts, and even comments.
All of this can help visitors find interesting vlogs, fast.
If you want to get more viewers, then you’ll need to optimize your vlog for SEO. This will help search engines understand your content and show it to people who are looking for videos just like yours.
AIOSEO is the best WordPress SEO plugin on the market and has everything you need to get your vlogs onto the first page of Google, without having to learn any complicated SEO jargon.
AIOSEO comes with the easiest setup wizard that helps you choose the best SEO settings for your business. AIOSEO will even scan your vlogs and show an actionable checklist on how you can optimize that specific vlog.
Additionally, AIOSEO has a video sitemap feature that you can use to show search engines what’s the most important content to index.
Did you know that 70% of people who leave your site will never come back? Thankfully there are lots of ways to turn abandoning visitors into loyal viewers.
To start, it’s smart to create an email newsletter so people who enjoy your vlogs can subscribe. After that, you can email these subscribers every time you post a new vlog.
You can also keep them engaged with your brand by sending them fun surveys and polls, notifying them about any giveaways and contests you’re running, or even simply asking them for feedback on your latest vlog.
All of this can help you create a sense of community and build a stronger relationship with your viewers.
If you do build an email list, then you’ll want to make sure your messages arrive safely in the subscriber’s inbox and not in their spam folder. With that in mind, we recommend using an SMTP service provider to improve your email deliverability rates.
Another option is to use push notifications with software like PushEngage to send targeted, personalized messages to viewers after they leave your vlog.
Push notifications are short, clickable notifications that appear as a popup on the user’s desktop or mobile devices. Some of the biggest websites in the world use push notifications to keep users engaged, including Facebook.
These notifications go directly to the user’s web browser or mobile device so they have a high chance of getting the person’s attention, which makes them perfect for notifying viewers when you post a new vlog.
Creating lots of quality, engaging vlogs takes a lot of time and effort, so you may want to make money from your videos.
If you’ve created a contact form, then potential sponsors and partners already have a way to contact you, which is a great start. However, there are lots more ways to make money online with WordPress.
Here are some of the best ways to make money from your vlog.
Google AdSense
There are many reasons why it’s smart to embed videos on your own website, rather than simply uploading them to platforms like YouTube.
One major benefit is that you can show Google AdSense ads next to your videos.
When you sign up for Google AdSense, Google acts as a middleman between you and the advertiser. Instead of you having to find the right partners for your vlog, Google allows advertisers to bid for keywords matching your content. This allows you to get the best possible rates for the ads on your vlogging website.
Many vloggers make money by recommending products and services to their viewers. For example, many lifestyle vloggers film daily routine videos showing off their favorite skincare or fitness products.
By using affiliate links, you can earn money every time a viewer buys a product or service based on your recommendation.
For the best results, it’s a good idea to only recommend quality items that you already use and trust. If you encourage viewers to buy poor-quality or scammy products, then you’ll damage your band and almost certainly lose viewers.
If you build a strong, positive relationship with your viewers then they may want to support your work as a vlogger. This is particularly true if you’re a hobby vlogger or someone who is just starting out.
Although they’re mostly used by non-profits, some vloggers use donation forms so that viewers can support their work. These forms are often presented as ‘buy me a coffee’ or ‘buy me a beer.’
Most of the time, you’ll want your vlogs to be publicly available so you can get as many views as possible and build your audience.
However, some vloggers may want to create a video membership site in WordPress. This allows people to pay for different perks, such as early access to the latest vlogs, exclusive live streams, or premium members-only videos.
You can also offer perks that don’t involve videos, such as a members-only forum, blog posts, or the ability to chat with you directly on channels like Discord.
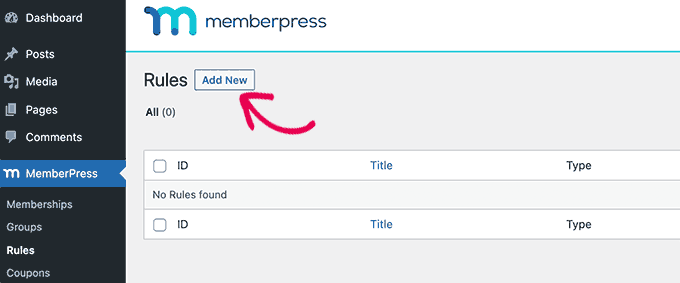
The easiest way to create a membership site is by using MemberPress. It is the best WordPress membership plugin on the market and allows you to accept payments, create unlimited subscription levels, restrict access to video pages based on levels, and more.
Sell Your Videos as Digital Downloads
Depending on the kind of vlogs you create, you may decide to sell some of your premium videos as digital downloads. For example, if you’re a health and fitness vlogger then you might create videos teaching your followers different exercise routines.
For some niches, this can be a way to monetize the audience you’ve built from your vlogs.
With Easy Digital Downloads, you have complete control over how you distribute your videos. You can allow customers to download files as many times as they want or restrict file downloads by time or attempt.
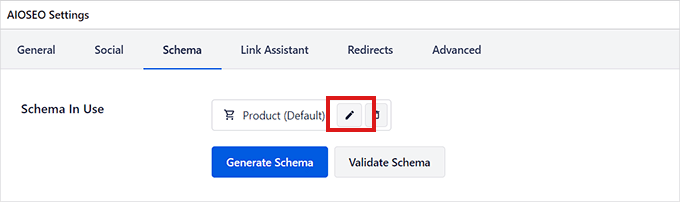
Do you want to add your WordPress products to Google Shopping?
Adding your online store products to Google Shopping can help you increase traffic, reach more customers, and generate greater revenue.
In this article, we’ll show you how to easily add WordPress products to Google Shopping.
Why Should You Add WordPress Products to Google Shopping
Google Shopping is a virtual marketplace like Amazon and Etsy, where users can search, view, and compare products from different online stores that have paid to advertise their products.
If you have a WooCommerce store, then adding your products to Google Shopping can prove to be extremely beneficial for your business.
Your products will be shown to all users browsing through Google shopping which will increase traffic on your WordPress website, generate more revenue and bring in more customers.
That being said, let’s see how you can add WordPress products to Google Shopping.
How to Add WordPress Products in Google Shopping
Step 1: Creating a Google Merchant Account
To add your products to Google Shopping, you have to start by creating an account in the Google Merchant Center. This is the place where your product information will be stored for viewing by Google Shopping.
First, go to the Google Merchant Center page and click the ‘Sign up for free’ button.
After that, Google will ask you about your online business.
Just check the answers that apply to you, and then provide your website’s URL.
After you’ve provided the details, you’ll be redirected to another page.
Here, you simply have to click the ‘Create a Google Merchant Account’ button at the bottom of the page.
Now, you will be asked to provide your business details. You can start by writing your business name.
Next, select the country where your business is based from the dropdown menu below the ‘Registered Country’ option.
After that, click the ‘Continue to Merchant Center’ button.
You’ve successfully created your Google Merchant Account. Now all you have to do is provide your business info and shipping details.
Once you’ve filled in those details, simply click the ‘Save’ button at the bottom to store your settings.
Step 2: Linking Your Google AdWords Account
Now you’ll have to link your Google AdWords account to your Google Merchant Center account so that you can show your products via Google Shopping.
To link your account, simply go to the Google Merchant Center dashboard and click the gear icon at the top of the page.
Clicking it will open up a ‘Tools and Settings’ prompt. Here you simply have to choose the ‘Linked Account’ option present.
This will take you to the ‘Linked Accounts’ page.
Now you simply have to click the ‘+’ button to create your Google Ads account.
This will open up a ‘Create Your Google Ads Account’ prompt.
Simply choose your preferred time zone and currency and then click the ‘Create’ button.
You have now successfully created your Google Ads account.
This is how it will look once your account has been created.
Step 3: Adding WordPress Products to Google Shopping
To add your WordPress products to Google Shopping, we will be using the ELEX Google Shopping plugin to display your WooCommerce products in Google Shopping.
Upon activation, head over to the Google Shopping Feed » Create Feeds page from the WordPress admin sidebar.
From here, simply fill in your business details and click the ‘Continue’ button at the bottom.
Next, you’ll be taken to the ‘Map Category’ page. Here you simply have to select your product categories.
Simply type your product categories in the ‘Google Categories’ tab and click ‘Continue’
After that, you’ll be directed to the ‘Map Attributes’ page.
This is where you’ll have to fill in your product details including product id, product description, product link, pricing, image, and more.
Here select and fill in as many attributes as possible for more visibility in Google Shopping and click the ‘Continue’ button.
Now that you’re on the ‘Filtering Options’ page, simply fill in the details as required for your online store.
For example, you can include how many items you have in stock or note how many have sold already.
Next, simply click the ‘Generate Feed’ button at the bottom.
After you’ve created your Google Shopping feed, go to the Google Shopping Feed » Manage Feeds page from the admin sidebar.
Here you will be able to view your Google Shopping Feed. Now you have to simply click the ‘Download’ button beside it.
Once you’ve downloaded your feed as an XML file, go back to the ‘Google Merchant Center’ dashboard and click the Products » Feeds option from the sidebar.
This will open up the ‘Primary Feeds’ page where you have to click the ‘+’ button to add a new feed.
This will take you to the ‘New Primary Feed’ page where you can start by filling in basic details. First, start by adding all your target countries.
Next, select your preferred language and then click the ‘Continue’ button.
Then, you have to choose a name for your feed and select a method to connect your data to the Merchant center.
For this tutorial, we will be uploading the feed XML from WordPress.
After that, just click on the ‘Continue’ button.
Now that you’re on the ‘Setup’ page, simply type the name for your Google Shopping Feed.
Next, just upload the Feed file you got from WordPress and click the ‘Create Feed’ button.
You have now successfully added your WordPress products to Google Shopping.
Bonus: How to Add Google Merchant Center Schema in WordPress
To improve your product search visibility in Google Shopping and increase conversion rates, you should add a Google Merchant schema in WordPress.
Schema markup is an HTML code that provides more details about your products to search engines.
A GMC listing schema will make your search snippets more prominent and will allow your products to be featured as popular products for the relevant search terms.
The easiest way to add a Google Merchant Center listing schema to WordPress is by using the All in One SEO for WordPress.
Upon activation, a setup wizard will open up. Simply go ahead and click the ‘Get Started’ button.
After that, you need to follow the onscreen instructions in the setup wizard to configure the plugin. If you need help, please see our guide on how to properly set up AIOSEO in WordPress.
After the AIOSEO plugin has been set up, you need to visit the Products » All Products page from the admin sidebar.
From here, simply click on the ‘Edit’ link below a product to open up the ‘Edit Product’ page.
Once there, you need to scroll down to the ‘AIOSEO Settings’ section and click on the ‘Schema’ tab.
Now, you need to make sure that the schema type is set to ‘Product’ by default.
If that is not the case, then simply click on the ‘Generate Schema’ button.
It will open up the Schema Catalog which will list all the available schema templates.
From here, you need to click the ‘Add Schema’ (+) button beside the Product option to set it as your primary schema.
Note: You may see the ‘Article’ schema already applied. If so, you can remove it as you add the new one because this particular page isn’t an article or blog post in Google’s eyes.
Next, you will need to fill in the product information to add the GMC listing schema.
For that, you need to click the ‘Edit Schema’ button next to the ‘Schema in Use’ option.
This will open up the ‘Edit Product’ modal where you will need to fill in the product details.
If you’re using WooCommerce, then AIOSEO will automatically pull most of the product data from your product information.
However, if you want to fill in the information manually, you need to simply toggle the ‘Autogenerate Fields’ switch to ‘No.’
The product attributes that you will need to add include the product name, description, image, ISBN, price, material, color, shipping details, and more.
We recommend that you provide all the details so that the schema markup can make your product snippets more engaging.
Once you’re done, simply click the ‘Update Schema’ or ‘Add Schema’ button to store your settings.
You have now successfully added the Google Merchant Center listing schema to WordPress, and your products can now be featured on the platform and hopefully earn you more sales.
Do you want to add an HTML sitemap page in WordPress?
Unlike XML sitemaps that are submitted to search engines for better crawling, HTML sitemaps present an organized list of your pages and posts for your website visitors.
In this article, we’ll show you how to add an HTML sitemap page in WordPress.
What’s the Difference Between XML and HTML Sitemaps?
An XML sitemap is a file that lists your website content in an XML format for search engines like Google and others.
On the other hand, an HTML sitemap is for your actual website visitors. It is a simple page that lists all your posts and pages in an organized way.
Now that you know the difference, let’s take a look at how to add an HTML sitemap page to WordPress using two different WordPress plugins. You can use the quick links below to jump straight to the method you want to use.
Method 1. Add HTML Sitemap Page in WordPress With All in One SEO
We recommend using the All in One SEO plugin to add an HTML sitemap page in WordPress. It’s the best WordPress SEO plugin in the market used by over 3 million websites and lets you create an HTML sitemap with a couple of clicks.
Note: There is a free version of All in One SEO Lite available which includes the HTML sitemap feature below, but we will be using the premium version in our screenshots because it includes powerful features like smart sitemaps, redirection manager, SEO schema, and more.
Upon activation, the AIOSEO setup wizard will open, which will guide you through setting up the plugin and getting your SEO settings right.
Simply click the ‘Let’s Get Started’ button and follow the steps.
After that, you’ll be taken to the WordPress admin dashboard, where you’ll have a new menu option called ‘All in One SEO’.
Then, you need to go to All in One SEO » Sitemaps, click on the ‘HTML Sitemap’ menu option, and make sure the ‘Enable Sitemap’ toggle is turned on.
Next, you can choose how you want to display your HTML sitemap.
For this tutorial, we’ll select the ‘Dedicated Page’ option, but you can also add it as a shortcode, block, widget, and more.
Then, enter the page URL where you want the HTML sitemap to display. The plugin will automatically create a new page for you.
Once you’ve done that, scroll down to the ‘HTML Sitemap Settings’ section.
Here you can customize how your HTML sitemap will display. You have control over what posts and pages will display, taxonomies such as categories and tags, sort order, and more.
You can also turn on ‘Compact Archives’ to display your HTML sitemap in a compact date archive format.
This is similar to how we display our compact archives on our 404 pages here at WPBeginner.
After you’re done customizing your HTML sitemap settings, make sure to click the ‘Save Changes’ button.
Now your visitors can view your HTML sitemap and more easily navigate around your website.
If you chose the ‘Dedicated Page’ option above, then you can visit the page by clicking the ‘Open HTML Sitemap’ button.
Method 2. Add HTML Sitemap Page in WordPress With Simple Sitemap
Simple Sitemap is a free plugin that lets you easily add an HTML sitemap to your WordPress website.
Once the plugin is activated, you can open an existing page, or create a new HTML sitemap page by navigating to Pages » Add New.
Adding an HTML Sitemap With Simple Sitemap Using Blocks
This plugin has newly added Gutenberg blocks that you can use to simply add an HTML sitemap page.
All you need to do is click the ‘Plus’ icon, then select the ‘Simple Sitemap’ option.
Another block included with this plugin is the ‘Simple Sitemap Group’ that creates a branching visual sitemap. But, we’re going to use the ‘Simple Sitemap’ block for this tutorial.
Once you add the block, it will automatically create your HTML sitemap.
On the right-hand menu, you have customization options where you can choose to display ‘Posts’ or ‘Pages’, or both together.
In the box under ‘Select post types to display’, simply enter ‘Post’ or ‘Page’ to choose what you want to display.
Next, you can change how the list displays by changing the ‘Orderby’ or ‘Order’ drop-downs.
You can also display the excerpt for the pages or posts listed, and enable or disable links. However, we’re going to keep the default plugin settings to keep our HTML sitemap simple and easy to browse.
Once you’ve finished customizing your HTML sitemap page, click ‘Publish’ or ‘Save’ if you’re updating an older page.
When your visitors go to your HTML sitemap, they’ll see a navigation page that looks similar to the one below.
Adding an HTML Sitemap With Simple Sitemap Using Shortcodes
Another way to add an HTML sitemap to WordPress is by using a shortcode. This gives you more control over the placement of your HTML sitemap and works for those who are using the classic editor.
Simply create a new page by navigating to Pages » Add New, then give your new page a name.
After that, click the ‘Plus’ icon to add a new block to your page.
Then, type ‘shortcode’ into the search box and select the ‘Shortcode’ block.
After that, simply copy and paste one of the following shortcodes into the text editor. The first shortcode will list your posts by category, and the second shortcode will list your pages.
[simple-sitemap-group]

[simple-sitemap]
Once you’ve done that, click ‘Publish’ or ‘Update’ to save your changes.
In this case, you would want your HTML sitemap to show pages in the proper hierarchical order.
Here is how you can add an HTML Sitemap with only pages.
Simply add this shortcode to the page where you want to display your HTML sitemap. Follow the same steps above to add the shortcode to a new WordPress page.
[simple-sitemap]
This is how it will display your HTML sitemap with all your WordPress pages listed in a hierarchical list.
Are you looking for a way to keep spammers and scammers from stealing your WordPress blog posts using content scrapers?
It is very frustrating as a website owner to see that someone is stealing your content without permission, monetizing it, outranking you in Google, and stealing your audience.
In this article, we’ll cover what blog content scraping is, how you can reduce and prevent content scraping, and even how to take advantage of content scrapers for your own benefit.
What Is Blog Content Scraping in WordPress?
Blog content scraping is when content is taken from numerous sources and republished on another site. Usually, this is done automatically via your blog’s RSS feed.
Unfortunately, it is very easy and very common to have your WordPress blog content stolen in this way. If it’s happened to you, then you understand how stressful and frustrating it can be.
Sometimes your content will be simply copied and pasted directly to another website, including your formatting, images, videos, and more.
Other times, your content will be reposted with attribution and a link back to your website, but without your permission. Although this can help your SEO, you may want to keep your original content hosted on your site only.
Why Do Content Scrapers Steal Content?
Some of our users have asked us why scrapers are stealing content. Usually, the main motivation for content theft is to profit from your hard work:
Affiliate commission: Dishonest affiliate marketers may use your content to bring traffic to their site through search engines in order to promote their niche products.
Lead Generation: Lawyers and realtors may pay someone to add content and gain authority in their community, and not realize it is being scraped from other sources.
Advertising Revenue: Blog owners may scrape content to create a hub of knowledge in a certain niche ‘for the good of the community’ and then plaster the site with ads.
Is It Possible to Completely Prevent Content Scraping?
In this article, we’ll show you some steps you can take to reduce and prevent content scraping. But unfortunately, there is no way to completely stop a determined thief.
That’s why we finish this article with a section on how you can take advantage of content scrapers. While you can’t always stop a thief, you may be able to gain some traffic and revenue through the content they have stolen from you.
What Should You Do When You Discover Someone Has Scraped Your Content?
Since it’s not possible to completely stop scrapers, you may one day discover that someone is using content they stole from your blog. You may wonder what to do when that happens.
Here are a few approaches that people take when dealing with content scrapers:
Do Nothing: You can spend a lot of time fighting scrapers, so some popular bloggers decide to do nothing. Google already sees well-known sites as authorities, but that’s not true of smaller sites. So this approach is not always the best in our opinion.
Take Advantage: While we actively work at having content scraped from WPBeginner taken down, we also use a few techniques to get traffic and make money from scrapers. You can learn how in the ‘Take Advantage of Content Scrapers’ section below.
With that being said, let’s take a look at how to prevent blog scraping in WordPress. Since this is a comprehensive guide, we have included a table of contents for easier navigation.
1. Copyright or Trademark Your Blog’s Name and Logo
Trademark and copyright laws protect your intellectual property rights, brand, and business against many legal challenges. This includes illegal use of your copyrighted material or your brand’s name and logo.
You should clearly display a copyright notice on your website. While your content is automatically covered by copyright laws, displaying a notice will let you know that your content is copyrighted and that they cannot use your protected properties for business.
This may discourage some users from stealing it. It will also help in the case that you do need to send a cease and desist letter or file a DCMA complaint to take down your stolen content.
You can also apply for copyright registration online. This process can be complicated, but luckily there are low-cost legal services that can help small businesses and individuals.
Since blog content scraping is usually done automatically via your blog’s RSS feed, let’s look at a few helpful changes you can make to your feed.
Don’t Include the Full Post Content in Your WordPress RSS Feed
You can include just a summary of each post in your RSS feed instead of the full content. This includes an excerpt as well as post metadata such as the date, author, and category.
There is certainly debate in the blogging community about whether to have full RSS feeds or summary feeds. We won’t get into that now except to say that one of the pros of having a summary only is that it helps prevent content scraping.
You can change the settings by going to Settings » Reading in your WordPress admin panel. You need to select the ‘Excerpt’ option, and then click the ‘Save Changes’ button.
Now the RSS feed will only show an excerpt of your article. If someone is stealing your content through your RSS feed, then they will only get the summary, not the full post.
There are other ways you can optimize your WordPress RSS feed to protect your content, get more backlinks, increase your web traffic, and more. One of the best ways is to delay posts from appearing in the RSS feed.
The benefit is that when you delay posts from appearing in your RSS feed, you give the search engines time to crawl and index your content before it appears elsewhere, such as on scraper’s websites. The search engines will then see your site as the authority.
The safest and easiest way to do this is using WPCode because it has a recipe that automatically adds the correct custom code to WordPress.
In the early days of blogging, trackbacks and pingbacks were introduced as a way for blogs to notify each other about links. When someone links to a post on your blog, their website will automatically send a ping to yours.
This pingback will then appear in your blog’s comment moderation queue with a link to their website. If you approve it, then they get a backlink and mention from your site.
This gives the spammer an incentive to scrape your site and send trackbacks. Luckily, you can disable trackbacks and pingbacks to give scrapers one less reason to steal your content.
4. Block the Scraper’s Access to Your WordPress Website
One way to stop scrapers from stealing your content is to take away their access to your website. You can do this manually by blocking their IP address, but most users will find it easier to use a security plugin such as a web application firewall.
Block the Scraper Using a Security Plugin (Recommended)
Blocking scrapers manually is tricky and a lot of work. Especially since many hacking attempts and attacks are made using a wide range of random IP addresses from all over the world. It’s almost impossible to keep up with all those random IP addresses.
That’s why you need a Web Application Firewall (WAF) such as WordFence or Securi. These act as a shield between your website and all incoming traffic by monitoring your website traffic and blocking common security threats before they reach your WordPress site.
For the WPBeginner website, we use Sucuri. It is a website security service that protects your website against such attacks using a website application firewall.
Basically, all your website traffic goes through the security service’s servers where it is examined for suspicious activity. They automatically block suspicious IP addresses from reaching your website altogether. See how Sucuri helped us block 450,000 WordPress attacks in 3 months.
Manually Block or Redirect the Scraper’s IP Address
Advanced users may also wish to manually block a scraper’s IP address. This is more work, but you can specifically target the scraper’s address once you learn it. Web developer Jeff Star suggests this approach when he wrote about how he handles content scrapers.
Note: Adding code to website files can be dangerous. Even a small mistake can cause major errors on your site. That’s why we only recommend this method for advanced users.
You can find the scraper’s IP address by visiting ‘Raw Access Logs’ in the cPanel dashboard of your WordPress hosting account. You need to look for IP addresses with an unusually high number of requests and keep a record of them, say by copying them into a separate text file.
Tip: You need to make sure that you don’t end up blocking yourself, legit users, or search engines from accessing your website. Copy a suspicious-looking IP address and use online IP lookup tools to find out more about it.
Once you are confident that the IP address belongs to a scraper, you can block it using the cPanel ‘IP Blocker’ tool, or by adding code like this in your root .htaccess file:
Deny from 123.456.789
Make sure you replace the IP address in the code with the one you want to block. You can block multiple IP addresses by entering them on the same line separated by spaces.
Instead of simply blocking the scrapers, Jeff suggests you could send them dummy RSS feeds instead. You could create feeds full of Lorem Ipsum and annoying images, or even send them right back to their own website, causing an infinite loop and crashing their server.
To redirect them to a dummy feed, you will need to add code like this to your .htaccess file:
It’s not just your written content that you need to protect. You should also prevent image theft in WordPress.
Like text, there is no way to completely stop people from stealing your images, but there are plenty of ways to discourage image theft on a WordPress website.
For example, you can disable hotlinking of your WordPress images. This will mean that if someone scrapes your content, their images will not load on their site.
While most scrapers use automatic tools, some content thieves may try to manually copy all or part of your content.
One way to make this more difficult is to prevent them from copying and pasting your text. You can do this by making it harder for them to select the text on your website.
However, this will not completely protect your content. Remember, tech-savvy users can still view the source code or use the Inspect tool to copy anything they want. Also, this method will not work with all web browsers.
Also, keep in mind that not everyone copying your text will be a content thief. For instance, some people may want to copy the title to share your post on social media.
That’s why we recommend you only use this method if you feel it’s truly needed for your site.
7. Take Advantage of Content Scrapers
As your blog gets larger, it is almost impossible to stop or keep track of all content scrapers. We still send out DMCA complaints. However, we know that there are tons of other sites that are stealing our content that we just cannot keep up with.
Instead, our approach is to try to take advantage of content scapers. It’s not so bad when you see that you’re making money from your stolen content, or receiving a lot of traffic from a scraper’s website.
Make Internal Linking a Habit to Gain Traffic and Backlinks from Scrapers
But there is a second benefit when it comes to scraping. Internal links will get you valuable backlinks from the people who are stealing your content. Search engines like Google use backlinks as a ranking signal, so the additional backlinks are good for your SEO.
Lastly, these internal links allow you to steal the scraper’s audience. Talented bloggers place links on interesting keywords, making it tempting for users to click. Visitors to the scraper’s website will also click the links, which will lead them straight back to your own website.
Auto Link Keywords With Affiliate Links to Make Money from Scrapers
If you make money on your website from affiliate marketing, then we recommend enabling auto-linking in your RSS feeds. This will help you maximize your earnings from readers who only read your website via RSS readers.
Even better, it will help you make money from the sites that are stealing your content.
You can use the All in One SEO plugin to add custom items to your RSS footer. For example, you can add a banner that promotes your own products, services, or content.
The best part is that those banners will appear on the scraper’s website as well.
In our case, we always add a little disclaimer at the bottom of posts in our RSS feeds. By doing this, we get a backlink to the original article from the scraper’s site.
This lets Google and other search engines know we are the authority. It also lets their users know that the site is stealing our content.
Do you want to add an SEO Editor role in WordPress?
If you have hired an SEO specialist to work on your website, then adding them as an SEO editor is the safest way to give them access to your WordPress website.
In this article, we’ll show you how to easily add an SEO editor role in WordPress.
Why Add an SEO Editor Role in WordPress?
WordPress comes with a user role management system that defines what a user can and cannot do on your website. You can assign different user roles to your team members depending on their job descriptions.
By adding an SEO Editor / Manager role to your WordPress website, you will be providing secure access to the SEO features and tools to some specific members of your team.
An SEO Editor role has access to the SEO settings for all your posts and pages. This allows them to optimize posts for SEO and work on search rankings.
An SEO Manager tends to have access to sitewide SEO settings including sitemaps, redirects, local SEO, and more.
By default, WordPress doesn’t offer either the SEO Editor or SEO manager user roles.
Note: You’ll need the Pro version of the All in One SEO plugin to unlock SEO user role features.
Upon activation, the plugin will launch the setup wizard which will walk you through the setup. If you need help, then you can follow our guide on how to set up All In One SEO in WordPress.
Now you can simply add a new user to your WordPress website by visiting Users » Add New page or you can edit an existing user account by visiting the Users » All Users page.
After that, simply click on the Edit link below the user account that you want to change.
On the Edit user screen, scroll down to the Role option and select SEO Editor or SEO Manager user role from the drop down menu.
Don’t forget to click on the Add / Update User button to save your changes.
These users will now be able to access SEO features based on the user role assigned to them.
For instance, SEO Editor will be able to see and edit SEO Settings for a post or page by simply editing them.
On the other hand, a user with the SEO Manager role will also be able to view the General SEO settings on the WordPress admin sidebar.
They will be able to make changes to site-wide SEO settings that may affect your entire website.
How to Customize SEO User Roles in WordPress
By default, All in One SEO selects the best access control settings for each SEO user role.
However, sometimes you may want to add or remove permissions from the SEO editor or Manager user roles.
All in One SEO lets you customize SEO user roles so that you can select which options they’ll have access to.
Simply head over to the All in One SEO » General Settings page and switch to the Access Control tab.
Caution: Be very careful when giving a user role access to any option under the General SEO Settings. These options may allow them to apply SEO changes that will affect your entire website.
From here, scroll down to the ‘SEO Editor’ option and toggle the switch next to the ‘Use Default Settings’ option.
This will reveal the Default Settings that All in One SEO has chosen for the SEO Editor role.
As you can see that by default the SEO editor user role only has access to Post SEO settings.
From here, you can check or uncheck items that you want to allow the SEO editor to have access to.
For instance, you can remove access to the Manage Redirects option or give them access to the Search Statistics feature.
Similarly, if you want to change settings for the SEO Manager user role, then you will need to switch off the ‘Use Default Settings’ toggle next to the SEO Manager option.
This will reveal the default settings that All in One SEO has chosen for the SEO manager user role.
By default, the SEO manager user role has access to several options under the General SEO settings as well as all the options under the Post SEO settings.
You can change that by checking the items that you want them to have access to or unchecking to remove access from specific items.
Once you are finished, don’t forget to click on the Save Changes button to store your settings.
Do you need a technical search engine optimization (SEO) checklist?
Optimizing your site for search engines can be a challenge if you’re not sure what to look for. Many website owners will ensure basic SEO practices but overlook technical elements.
In this article, we will show a WordPress technical SEO framework and share a checklist you can use for your business.
Why Do You Need a WordPress Technical SEO Framework?
Technical SEO is a key component of your WordPress SEO strategy. You could be creating the world’s best content, but if search engines can’t find and understand your content, then all your efforts are wasted.
That’s why it is important to have a WordPress technical SEO framework.
Our WordPress SEO framework checklist will ensure that search engines can easily crawl and index your content. Plus, you can also evaluate other technical aspects of your WordPress website that might be preventing you from achieving higher rankings.
For example, your website might be taking a long time to load. This would result in poor rankings since the page load time is a ranking factor.
There are many SEO tools that let you conduct SEO audits and find out if your site is technically optimized. However, not all tools will show details inside your WordPress dashboard.
The easiest way to evaluate technical SEO for your WordPress site is by using All in One SEO (AIOSEO). It is the best WordPress SEO plugin that helps you optimize your website for search engines.
It offers a free SEO Analysis tool that you can use to conduct a technical SEO audit. The tool is available in the AIOSEO Lite version, which you can use for free. There are also premium AIOSEO plans that offer more features like schema markups, sitemaps, redirection manager, and more.
First, you’ll need to install and activate the AIOSEO plugin. For more details, please see our guide on how to install a WordPress plugin.
Upon activation, you can go to All in One SEO » SEO Analysis from your WordPress admin panel. Under the ‘SEO Audit Checklist’, you’ll see an overall score for your website.
Next, you can scroll down to the Advanced SEO and Performance sections.
Here, the plugin will evaluate the technical SEO aspects of your website based on different parameters and ranking signals. It will then highlight missing elements and critical issues that could stop your site from ranking higher.
You can use AIOSEO to continuously monitor your site’s technical SEO and fix issues. Similarly, you can also perform a competitor analysis and see what they’re doing differently for their technical SEO optimization.
That said, let’s look at our WordPress SEO framework checklist that you can use to ensure higher rankings and organic traffic. You can click the links below to jump ahead to any section:
1. Ensure Your Website is Visible to Search Engines
The first thing you need to check is whether search engines are able to find your WordPress site.
You can simply enter site:example.com in the search engine and see if your website appears in the search results. Just replace ‘example.com’ with your own domain.
If your site isn’t showing up, then you can check the visibility settings in WordPress.
Go ahead and visit the Settings » Reading page from your WordPress admin panel. Next, scroll down to the Search engine visibility setting and be sure the ‘Discourage search engines from indexing this site’ option is unchecked.
This option is usually enabled if your website is under construction or is put in maintenance mode.
2. Uncover Crawling and Indexing Issues
If your website is visible to search engines, then it is important to check that your content is crawled and indexed.
Crawling is the process where Google, Bing, and other search engines discover and understand your website. Indexing is the process where search engines collect and store information about your website.
A simple way of checking crawling and indexing issues is using webmaster tools. For example, Google Search Console is a free tool by Google that shows your site’s performance on search results, helps uncover bugs, and allows you to submit your site to Google.
In Google Search Console, you can head to the ‘Pages’ report. Here, you’ll see pages that are indexed and not indexed.
Next, you can scroll down to the ‘Why pages aren’t indexed’ report.
Google Search Console will show you crawling and indexing errors on your website and which pages are affected by them. You can then resolve these issues, so your web pages can appear in Google search results.
Besides that, you can also check indexing and crawling issues for individual URLs.
Simply enter the page link in the URL inspection tool at the top. Google Search Console will then show you a report on whether the URL is indexed and on Google.
If it is not, then you’ll see a ‘URL is not on Google’ message. To fix this, you can click the ‘Request Indexing’ button so Google can crawl and index your page.
3. Make Sure Your Website is Secure with HTTPS
Another important thing to check from a technical SEO framework standpoint is whether your website is secure or not.
Google and other search engines will give preference to sites that use HTTPS over those that use HTTP. To secure your site, you will need an SSL certificate to encrypt the connection between your website server and the user’s browser.
You can check this by looking for the padlock sign in your browser’s search bar at the top.
Most WordPress hosting companies now offer free SSL with all their plans. You can ask your host to see if they offer that.
Broken links are bad for your website’s SEO framework, and it negatively impacts your user experience. These are links that no longer exist and will return a 404 error.
Since search engine crawlers find different pages on your website by following internal links. A broken link can stop them from discovering new content. As a result, your page might not get indexed in the search results.
Similarly, if a visitor clicks on a link and is unable to find a page they’re looking for, then they might exit your website.
With All in One SEO (AIOSEO), you can easily find and fix broken links on your WordPress website.
It offers a powerful redirection manager that helps track 404 errors on your website and lets you set up permanent 301 redirects to fix broken links.
It is important that Google and other search engines only index one version of your website.
Your website can have different versions, but they should all point to one version. For example, you can have a site that has www and non-www version or HTTP and HTTPS version:
Whether you choose a www or non-www version, all the URLs should redirect to the primary WordPress URL. Otherwise, Google will consider each version as a different website.
This can negatively impact your overall SEO rankings. Search engines won’t know which version to index, and it could cause duplicate content issues.
You can check the primary URL for your site by going to Settings » General from the WordPress dashboard. Next, look at the web address in the ‘WordPress Address (URL)’ and ‘Site Address (URL)’ fields.
With AIOSEO, you can automatically set the proper canonical URL in your site header, so search engines will know your preference.
6. Use SEO-Friendly URL Structures
After setting a primary URL for search engines to index, you can now check the URL structure of your website.
URL structure plays an important role in your SEO. Having an SEO-friendly URL structure will help Google, Bing, and other search engines easily crawl your pages and understand your content.
Here’s an example of a bad URL structure:
https://www.example.com/category.php?id=42012
Instead, you should be using URLs that describe the content, like:
You can create SEO-friendly URLs by making sure that they are short and descriptive. Besides that, don’t forget to include a keyword in the permalinks, use hyphens to separate words, keep all the words in lowercase, and don’t use stop words.
Pro Tip: Don’t include numbers in your URL slugs, either. That way, you can update your content in the future
7. Ensure Your Site is Mobile Friendly
The next item in the technical SEO framework checklist is to ensure your WordPress site is mobile responsive.
With Google now going mobile-first, it will now index your site’s mobile version instead of the desktop version.
8. Check Your Website Speed and Improve Performance
Your website speed is also a critical part of your WordPress technical SEO framework. Google uses page load speed as a ranking factor and will rank fast-loading sites higher compared to slow-performing websites.
You can check website load time by running a site speed test. For instance, you can use MonsterInsights, which is the best Google Analytics plugin that shows a site speed report inside your WordPress dashboard.
After that, you can head to the Insights » Reports page from your WordPress admin panel. Next, you can go to the ‘Site Speed’ tab. Here, you’ll see an overall score for your website speed for desktop and mobile.
The report will also show other metrics that are important for measuring your website speed.
If you scroll down, then MonsterInsights offers recommendations and benchmark goals for each metric you should target.
A quick tip that you can use to improve your website speed is minifying your CSS and JavaScript files.
The term minified means reducing the size of website files by removing white spaces, lines, and unnecessary characters. When a user visits your website, different files are sent to the user’s browser, which includes CSS, HTML, and JavaScript files.
By reducing the file size, you can significantly improve website speed and performance. There are many WordPress plugins and hosting services that allow you to minify CSS and JavaScript files, like WP Rocket and SiteGround.
9. Improve Your Internal Linking Structure and Remove Orphaned Pages
Internal links play an important role in your website’s technical SEO framework. Search engines reward websites that have a proper internal linking structure without too many orphaned pages.
AIOSEO has a powerful SEO Link Assistant feature that makes it easy for you to discover link opportunities and even automate the process for you.
It is the best internal linking plugin for WordPress that crawls the links on your WordPress website and provides a detailed report. You can see the number of internal links, outbound links, and affiliate links for each post and page.
You can see all the link suggestions in one place, and it can even automatically go back and add internal links in your older posts with a single click.
10. Generate XML Sitemaps and Submit Them to Search Engines
Another important part of technical SEO framework is making it easier for search engines to find your content. One of the ways you can do that is by creating an XML sitemap.
It tells search engines about the important pages on your website. This way, search engine bots can crawl your site faster and index your content. While a sitemap won’t boost your rankings, it will improve the overall crawling and indexing process.
You can create and customize the sitemap using AIOSEO. The plugin will automatically generate a sitemap upon activation. Besides, it also lets you create a video sitemap, a news sitemap, an HTML sitemap, and an RSS sitemap.
Once you’ve created a sitemap, you can then submit it to different search engines using their webmaster tools.
For instance, Google Search Console gives the option to enter the sitemap URL and submit it to the search engine. To learn more, you can see our guide on how to submit your site to search engines.
Similarly, you can also add your site to Bing Webmaster Tool and then submit an XML sitemap to improve crawling and indexing.
11. Use Schema Markup for Rich Snippets
The next technical SEO framework item you should check is schema markup. It helps search engines understand your content better and how it will appear on the search results.
Search engines can use this information and display rich results. It also helps capture Google featured snippets, which can increase organic clicks and traffic.
For example, here’s how Google shows recipes, ingredients, ratings, cooking time, and other information for blog posts that use a recipe schema markup.
The plugin lets you choose the schema type depending on your content, and it takes care of the rest.
With AIOSEO, you can also add completely custom schema markups based on your needs using the WordPress custom schema generator feature. This can help you get star ratings, and other rich snippets in Google.
12. Optimize Your Robots.txt File for SEO
Robots.txt is a text file that specifies instructions for search engine bots on how to crawl your website. You can tell which pages to crawl and which pages to skip while crawling.
Here’s what a robots.txt file would look like for a WordPress site:
Adding a robots.txt file helps save the crawl quota. A search engine crawler will crawl a certain number of pages during a session. If they don’t finish crawling all the pages on your site, they will resume crawling in the next session.
This can slow down the indexing of your content, and it will appear in search results after some delay. That’s why optimizing the robots.txt file is an important component of the technical SEO framework.
You can disallow pages unnecessary pages like the WordPress admin area, theme folder, plugin files, and more. This way, you get to save the crawl quota and allow search engine bots to crawl even more pages.
On the other hand, you can add sitemaps and other important pages to robots.txt. This way, search engines will crawl and index them as quickly as possible.
A simple way of optimizing the robots.txt file is by using AIOSEO. You can enable custom robots.txt using the plugin and add rules to allow or disallow search engines to crawl.
13. Make Sure Google Doesn’t Flag Your Site for Malware
Another important technical SEO checklist item is to ensure your site isn’t flagged by Google for malware or unwanted software.
If your website is a security risk for users, then Google will show the following warning message:
This can be really bad for your WordPress SEO. It will keep people away from visiting your website, and impact your rankings, and overall website traffic.
To scan for malicious files on your website, you can use a WordPress security scanner. At WPBeginner, we use Sucuri as it is the best WordPress firewall and security plugin. It checks for vulnerabilities like malware, spam injection, malicious code, and helps clean up the website.
14. Use Server Side Rendering vs Client Side Rendering
Another technical SEO best practice is ensuring that your site’s JavaScript renders on the server side and not on the client side.
Server-side rendering is when the JavaScript files render on the website server. While client-side rendering is when the JavaScript files render in the user’s browser.
Client-side rendering is bad for your site’s user experience and SEO. All the burden of loading your site quickly falls on the visitor. Plus, search engine bots use JavaScript resources for crawling and indexing your content. This could result in JavaScript content being missed by crawlers and not included in the search engine index.
With server-side rendering, your website server ensures everything loads quickly. This way, you get a better user experience, faster page load speed, and reduce any risk of content being missed from indexing.
One way of ensuring that JavaScript is rendering on your site’s server is by running a site speed test. If your website speed is low, then it could be because of this issue. You can also look at crawled pages in Google Search Console and see if Google missed any content while crawling. If it did, then it could be because of JaveScript-related SEO issues.
That’s it. You’ve made it to the end of the list. You don’t need to go through each and every point in the technical SEO framework at once. Simply go one step at a time and work your way through the list.