Category Archives: monsterinsights

12 Best Lead Generation WordPress Plugins (Powerful)

Are you looking for the best lead generation WordPress plugins?

Using the right lead generation tools can help you get more customers and sales faster so that you can grow your business.

In this article, we will share some of the best lead generation WordPress plugins to help you improve your marketing.

Best Lead Generation WordPress Plugins (Powerful)

What Is Lead Generation, and Why Does It Matter?

Lead generation means getting the interest of prospective customers. It can be done in several different ways.

On your website, lead generation might mean getting visitors to:

  • Join your email newsletter.
  • Submit a contact or inquiry form on your website.
  • Contact someone at your company through live chat.
  • Talk to a chatbot (automated chat).
  • Call your sales team, or book a call with them.

Lead generation is essential for all online businesses. Of course, it’s also important to have a strong process for converting the leads into customers. However, most businesses struggle to get enough leads in the first place.

Even if you run a nonprofit, lead generation matters. It can help you get more donations and more support.

Our goal with this list is to share the absolute best WordPress lead generation plugins that you can use to grow your business faster.

Unlike other best lead generation tool lists, we are not just sharing a list of plugins that do the same thing. Instead, we’re focusing on lead generation from a holistic point of view.

For each lead generation solution category, we share an expert pick along with one alternative option for that category. This will help us keep this list comprehensive without causing choice paralysis.

With that said, here are the best lead generation plugins for WordPress.
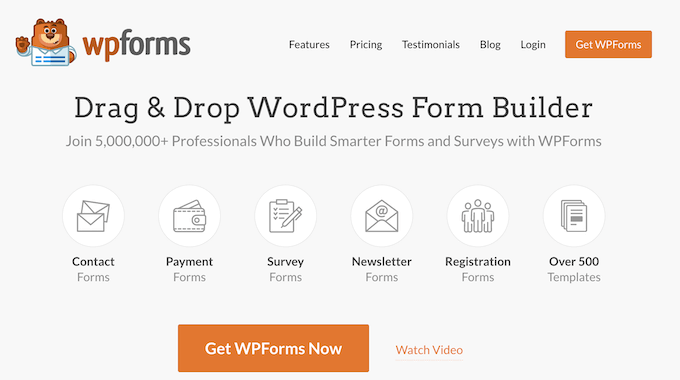
1. WPForms

WPForms

WPForms is the best contact form plugin on the market. Over 6 million website owners use the beginner-friendly, drag-and-drop builder to create any kind of online form for their WordPress sites.

It comes with over a hundred pre-built form templates you can use as a starting point. After that, you can customize the form to match your needs using the drag-and-drop form builder interface.

Here are just some of the lead generation forms you can create:

WPForms also integrates with your favorite email marketing services and CRM providers. This lets you automatically add leads to your email list.

Each time someone submits the form, you will automatically get an email notification. You can easily turn this off if you prefer not to receive email alerts. WPForms will store each completed form entry in your WordPress database too.

It’s also possible to send notifications to multiple recipients using WPForms. For example, you might want to send a customer inquiry notification to a specific person in the sales team and their supervisor.

Price:

WPForms pricing starts at $49.50/year. There’s also a free version of the plugin, which has limited features.

Alternative:

Formidable Forms ($39.50 per year) is a good alternative to WPForms. It has powerful tools that let you create different forms, including lead generation calculators. However, it’s not as beginner friendly as WPForms.

2. OptinMonster

OptinMonster

OptinMonster is a powerful lead generation and popup plugin that you can use on your WordPress site.

It lets you create high-converting popups and email signup forms that help you turn abandoned website visitors into subscribers and customers.

It has lots of useful features, including Exit Intent® technology. This lets you show your popup at the exact moment when someone is about to leave your site.

You can combine it with their page targeting feature to show customized popup messages for each page on your site, which is proven to increase conversions.

With OptinMonster, you even get special popups like spin the wheel popups and Yes/No optins. These can boost your conversion rate even further.

OptinMonster Spin Wheel Campaign

There are lots of different professionally designed templates included in the app. This makes it quick and easy to create your lead forms using the drag-and-drop builder.

You can also use OptinMonster to generate leads in other ways. For instance, you might use the content-locking feature to ask visitors to join your email list before they can read your full content.

You don’t necessarily need to use it to generate email leads, either. You could add a click-to-call button to your popup, use it to show special discount codes, and more.

Price:

OptinMonster starts at $9/month when billed annually. To get advanced features like Exit Intent technology and Yes/No forms, you need the Pro plan from $29/month.

Alternative:

Thrive Leads ($99 per year) is a good alternative to OptinMonster. It offers a range of different types of lead generation forms and popups. It also has a built-in template library to speed up the building process.

3. SeedProd

SeedProd website builder

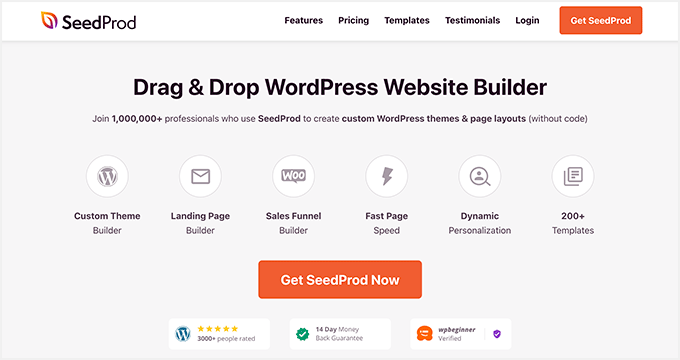
SeedProd is the best WordPress website and theme builder on the market. It’s used by over a million website owners to easily create any type of website without writing any code.

It has dozens of professional templates you can customize easily with the drag and drop builder.

SeedProd also provides you with a beginner-friendly landing page builder. And you will find a ready-made sales page, opt-in page, webinar registration, coming soon page templates, and more.

All of these landing page templates can be completely customized to help you start generating leads as quickly and easily as possible.

Customize SeedProd

It includes dozens of blocks designed to help you build better landing pages, like testimonial blocks, countdown timers, CTA buttons, pricing tables, and so much more.

You will find a searchable stock photo library with over 2 million photos that you can add to your pages to improve conversions.

It also has powerful integrations with the top email marketing software and thousands of third-party apps via Zapier. This lets you easily send your leads to your lead management tool of choice.

For online store owners, you can use the WooCommerce blocks to build custom WooCommerce product pages easily, thank you pages, and more to collect leads and sell more products.

Price:

SeedProd starts from $39.50 per year (only $3.29 per month). Plus, there’s a free version you can try to see how the plugin works.

Alternative:

Instapage offers similar page builder features but is more expensive and starts at $199 per month (billed annually).

4. LiveChat

Live Chat Inc Website

LiveChat is the best live chat software for WordPress websites. It’s very easy to set up, and you can integrate it with dozens of other marketing services.

By adding live chat support to your WordPress website, you can build a better relationship with your users and convert more visitors into customers.

This plugin places a chat button in the bottom right-hand corner of your website. Visitors can click on this to chat with your team in real time.

Plus, your support team members don’t need to log in to WordPress to use LiveChat. Instead, they can use the LiveChat app on their laptop or mobile devices.

LiveChat will create a support ticket if a visitor contacts your team outside of support hours.

LiveChat is fast and easy to use for your visitors and your support team. It lets you quickly turn leads into customers by answering pre-sales questions straight away.

Price:

LiveChat starts at $20 per month when billed annually with a 14-day free trial. Our LiveChat coupon gives you an extended 30-day free trial plus a 30% discount.

Alternative:

Brevo (Previously Sendinblue) offers a simple, free live chat feature that you can use on your website. It also offers email, SMS, and a CRM tool that integrate with live chat.

5. ChatBot

ChatBot

ChatBot is one of the best AI chatbot software options on the market and lets you use automated live chat to connect with your potential customers and respond to questions 24/7.

To help you get started quickly, ChatBot has lots of pre-designed templates. For instance, you can use the lead generation bot to book calls. Meanwhile, the sales bot template allows you to sell products directly from the chat window.

ChatBot can be used in Facebook Messenger as well as on your website. That makes it a great option for companies and organizations that get a lot of inquiries through Facebook.

It’s easy to integrate it with other apps, such as LiveChat. A live agent can step into the conversation seamlessly if needed.

Price:

ChatBot pricing starts at $52 per month. There’s a 14-day free trial available.

Alternative:

Hubspot offers a suite of business CRM tools, including a chatbot builder and live chat. You can get started free, and paid plans start at $30 per month.

6. RafflePress

RafflePress

RafflePress is one of the best WordPress giveaway plugins on the market. It allows you to easily create viral giveaways and contests that you can use to grow your website traffic and email list.

You can use the drag and drop builder to quickly create giveaway campaigns in minutes without writing any code. Plus, there’s a built-in template library to help make giveaway creation even faster.

A unique refer-a-friend feature lets you do word-of-mouth marketing by letting users share your contest on their social media profiles.

This helps to build engagement and can get you a lot of new visitors to your WordPress blog.

You will find many other powerful features that help improve your campaigns, like email verification, fraud protection, social logins, giveaway landing pages, success tracking, and more.

Plus, your giveaways will run on mobile devices, so you can reach your visitors no matter where they happen to be.

For more details, see our guide on how to run a giveaway/contest in WordPress.

Price:

RafflePress has a free version of the plugin you can use to get started. Paid plans start at $39.50 per year for the starter plan.

Alternative:

Gleam is an advanced giveaway platform you can use to run contests and giveaways. However, it’s not as beginner friendly, and you will need at least the $97 per month Pro plan to unlock useful features.

7. PushEngage

PushEngage

PushEngage is the best web push notification software on the market, used by over 10,000 companies, including Harvard, Dominoes, and Business Insider.

It lets you easily send targeted push messages to visitors after they leave your website.

We use push notifications here at WPBeginner, and they are consistently a top 5 source of our traffic. They are a highly-effective way to convert website visitors into loyal followers and customers.

Visitors simply give their permission to receive push notifications by clicking a button:

An example of a push notification optin on the WPBeginner website

You can set up push notifications to automatically send out to your subscribers whenever you publish a blog post or use them to send completely custom messages.

It’s a very easy-to-use solution for beginners to advanced users. You will find powerful features like A/B testing, custom-triggered campaigns, interactive messages, custom drip campaigns, and so much more.

Plus, you can use the marketing automation features to create abandoned card sequences, scheduled messages, and more.

You will be able to see a detailed breakdown of your subscriber engagement and even the transactional revenue generated from your push campaigns.

Price:

PushEngage starts at $9 per month and gives you support for 100,000 subscribers and unlimited campaigns. There’s also a free plan available that gives you 30 campaigns per month for 200 subscribers.

Alternative:

OneSignal has a free plan for unlimited notifications on mobile. For advanced features like delayed notifications, pricing starts at $99 per month.

8. FunnelKit

FunnelKit homepage

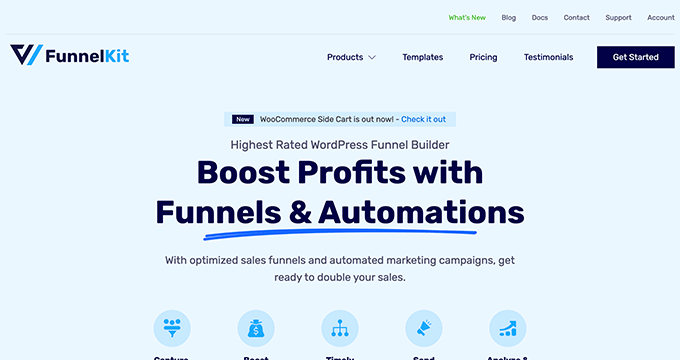
FunnelKit, formerly known as WooFunnels, is the best sales funnel builder for WordPress.

You can use it to create lead-generation funnels, sales funnels, high-converting checkout pages, one-click upsells, and more.

It’s essentially a ClickFunnels alternative that helps you convert website visitors into leads and customers.

FunnelKit comes with a built-in library of beautiful funnel templates that you can import in one click.

FunnelKit templates

You can easily customize the templates using the WordPress block editor as well as popular page builder plugins like Elementor, Divi, and others.

FunnelKit offers in-depth analytics so that you can see how your funnels are performing in real time. Plus, it comes with A/B testing that lets you experiment with different versions of your funnels to find out which one converts best.

In addition, FunnelKit has a marketing automation solution called FunnelKit Automations. It allows you to set up automated email and SMS campaigns for lead nurturing, welcome series, abandoned cart recovery, post-purchase upsell, and more.

Price:

FunnelKit starts at $99.50 per year. To access FunnelKit Automations, you need at least the Professional plan, which costs $249.50 per year.

Alternative:

SeedProd, which we mentioned earlier in this list, can also be used to easily create lead generation pages, sales pages, custom WooCommerce checkout pages, and more.

9. WP Call Button

WP Call Button

WP Call Button allows you to easily add a ‘click to call’ button on your WordPress website or WooCommerce store. Visitors can simply click or tap the button to call you straight away.

If your customers need to call you before purchasing a service or booking an appointment, adding a click-to-call button on your website will increase your leads and sales.

It can also be used to easily set up business call forwarding.

WP Call Button makes adding your button to any post or page easy. You can include it in your WordPress sidebar, too. It’s also easy to create a sticky floating call button that stays visible all the time.

Price:

WP Call Button is free and works with all top business phones and business VoIP providers.

Alternative:

You can also create a click-to-call link using the manual method covered in our article on adding a click-to-call button in WordPress.

10. AffiliateWP

AffiliateWP

AffiliateWP is one of the best affiliate tracking and management solution for WordPress. It lets you simply create your own fully featured affiliate program on WordPress.

By creating an affiliate program, you can have your own team of affiliates promoting your products in exchange for a commission.

This can help you get more visibility online, traffic, and of course, make more sales. You can even create your very own WooCommerce affiliate program using this plugin.

It comes with everything you need to manage your program, including accurate affiliate tracking, integrated payouts, real-time reporting, affiliate coupon tracking, and so much more.

With manual affiliate approval and top-performing affiliate data, you can build lasting partnerships with your most valuable affiliates for years to come.

Price:

AffiliateWP starts at $149.50 per year and has everything you need to run a successful affiliate program.

Alternative:

Easy Affiliate is another popular WordPress plugin for creating and managing an affiliate program. The basic plan starts at $99.50 per year.
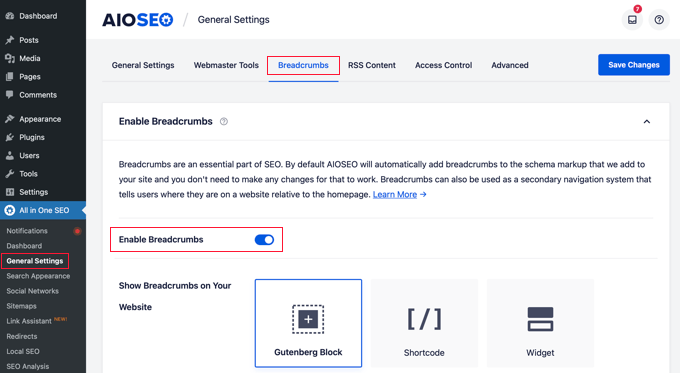
11. All in One SEO

All in One SEO

All in One SEO is the best WordPress SEO plugin used by over 3 million websites. It’s the most comprehensive SEO toolkit that makes it easy to improve your SEO rankings without learning any complicated SEO jargon.

Doing WordPress SEO is an important part of lead generation. You need to bring people to your website before they can join your email list, call you, subscribe to push notifications, or do anything else on this list.

Once you install and activate the plugin, an easy-to-use setup wizard will help you choose the best SEO settings for your business, so you can start getting more traffic.

It has a TruSEO score, which offers detailed on-page SEO analysis and gives you an actionable SEO checklist to help you easily optimize your posts and pages.

AIOSEO checklist

All in One SEO can help you improve your post SEO titles and meta descriptions, generate rich snippet schema markup and create smart XML sitemaps and RSS sitemaps.

Plus, there are built-in WooCommerce SEO settings, like individual product optimizations, product image SEO, and more, to help your online store get more visitors from the search results.

Price:

AIOSEO starts at $49.60 per year for access to advanced SEO features. You can also try out the free version to begin optimizing your site for SEO.

Alternative:

Yoast SEO is another popular SEO plugin for WordPress that will help you optimize your site. There is a free version and a premium version that starts at $99 per year.

12. MonsterInsights

The MonsterInsights Google Analytics plugin

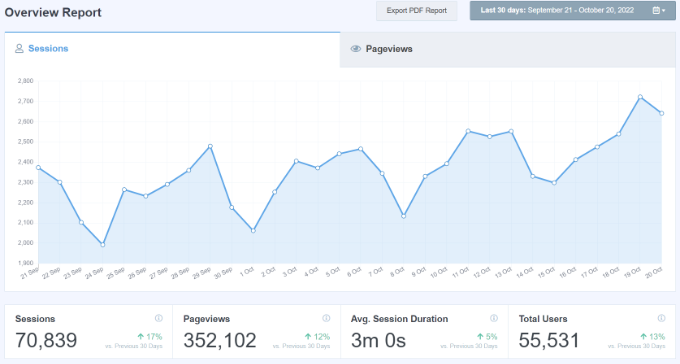
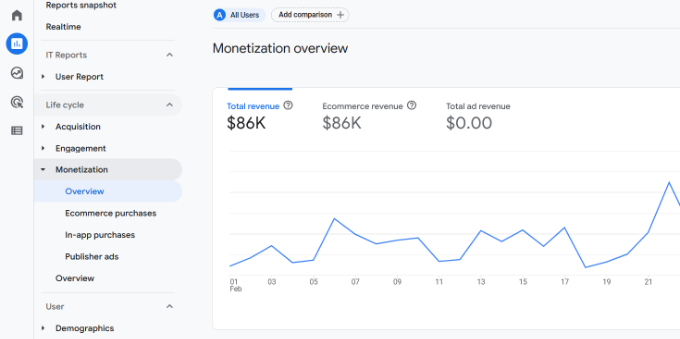
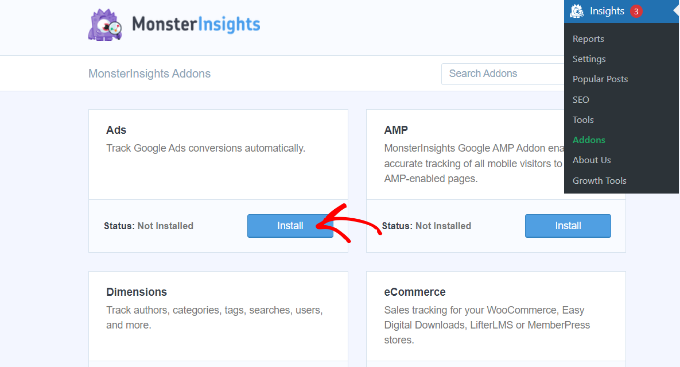
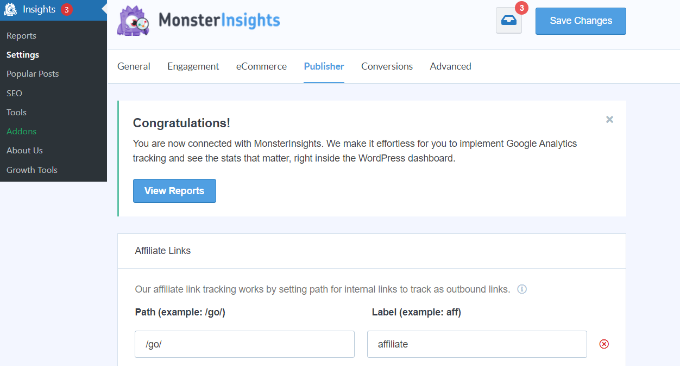
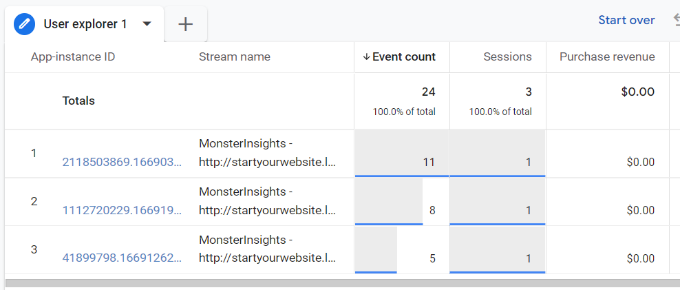
MonsterInsights offers a powerful way to add Google Analytics to your WordPress website. It lets you quickly and easily see crucial statistics about your site and find your most important pages.

This means you can easily find out what’s working and what’s not, focusing on the areas that really matter.

For instance, you might use MonsterInsights to enable author tracking and see which writers for your site are producing the best-performing posts.

Or you could use MonsterInsights to track link clicks and button clicks. This lets you figure out which links and buttons are getting clicked and which ones aren’t, letting you pinpoint areas for improvement.

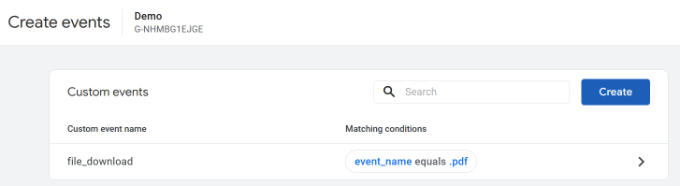
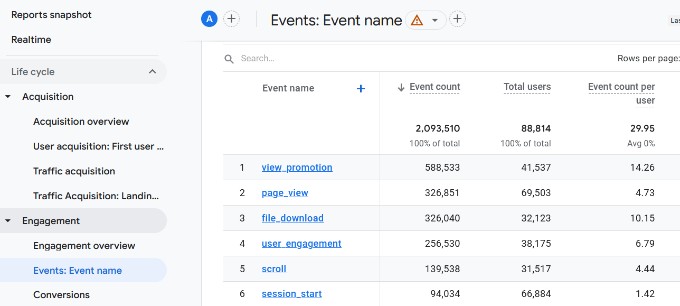
MonsterInsights is quick and easy to set up and gives you real-time stats. It can even track things like your eCommerce data, form completions, and file downloads. This gives you more insights into your lead generation efforts.

Price:

MonsterInsights starts at $99.50/year. There’s also a free version available for WordPress with limited features.

Alternative:

ExactMetrics offers similar features to MonsterInsights and starts at $99.50 per year.

Bonus: Nextiva

Nextiva

Nextiva is the best business phone service for small business owners in terms of features and ease of use.

If your business relies on phone calls for lead generation, then Nextiva can help you improve your business communication across the board.

It has a web-based admin panel that will let you manage your entire unified communications platform in one place.

You will find business phone features like call routing, voicemail to text and email, SMS messaging, unlimited domestic calling, online faxing, and so much more.

Every new account can get a free local or toll-free number. Plus, you get all standard features like caller ID, call forwarding, routing, custom greetings, and more.

You can even integrate your business phone with powerful features like live chat and CRM services.

We use Nextiva at WPBeginner for our business phone service. It works well for our remote team since they can receive business calls on their cell phones while still keeping their numbers private.

Price:

Nextiva starts at $14.95 per month per user for all your business phone needs. The Enterprise plan costs $26.95 per month per user and includes video conferencing, call recording, and more.

Alternative:

RingCentral is another popular business phone provider that’s packed with features. Paid plans start at $20 per month per user.

What Is the Best Lead Generation Plugin for WordPress?

We believe you need multiple plugins for a robust lead-generation strategy on your site.

With that said, WPForms is the best lead generation plugin for WordPress. You can use their drag-and-drop form builder to create any online form.

If you are looking for a live chat solution to improve leads and support, then LiveChat and ChatBot are both great options.

If you want to improve your overall conversion rate on your website, then nothing beats the powerful features that OptinMonster has to offer.

If you want to improve your existing website and product pages to generate more leads and make more sales, then SeedProd is a must-have plugin.

With any lead generation strategy, attracting leads is only the first part. You have to ensure a proper sales process to close the deal.

If you rely on phone calls, then we recommend using Nextiva. It comes with auto-attendant, call-routing, CRM, and powerful sales features that you can use to increase your sales.

To summarize, our top lead generation tools are:

  1. WPForms
  2. OptinMonster
  3. SeedProd
  4. LiveChat.com
  5. ChatBot.com
  6. Nextiva

We hope this article helped you learn about the best lead-generation plugins and tools for WordPress.

You might also want to see our other guides that can help you generate new leads and turn them into customers.

Best WordPress Guides for Lead Generation

If you liked this article, then please subscribe to our YouTube Channel for WordPress video tutorials. You can also find us on Twitter and Facebook.

The post 12 Best Lead Generation WordPress Plugins (Powerful) first appeared on WPBeginner.

Internal Linking for SEO: The Ultimate Guide of Best Practices

Are you looking for the best practices to maximize the SEO benefits of internal links?

Internal links play an important role in search engine optimization (SEO). They help search engines discover your content and rank them higher in search results.

In this article, we’ll list the best practices to use for internal linking for SEO.

Internal Linking for SEO: The Ultimate Guide of Best Practices

How Does Internal Linking Improve SEO in WordPress?

Internal links are links between posts on your own website. Having internal links is important for your WordPress SEO. They help search engines like Google crawl your website and discover new content to index and rank.

Generally, the more links a page has pointing to it, the more likely it is to rank higher in search results. That means that you can use internal links to point to important pages on your site as a way to increase their traffic.

Internal links also help your visitors easily find related articles and provide a better user experience overall. This can also help increase pageviews and reduce your bounce rate.

That being said, let’s take a look at the best practices for improving SEO by adding internal links in WordPress. Since this is a comprehensive guide, we have included a table of contents for easier navigation.

1. Make Internal Linking a Habit

We recommend that you make a habit of linking to your older articles from your new articles.

It’s a great way to develop a contextual relationship between your new and old posts. It also allows you to pass relevant link juice to your older articles.

Because internal links play such an important role in SEO, we have even made it part of our pre-publish blog post checklist for WPBeginner writers.

You can also edit your older articles to add links to your newer content whenever you publish. Many successful bloggers dedicate time to adding internal links that point to new articles on a weekly or monthly basis.

This will help you boost your pageviews, increase the time users spend on your site, and ultimately will improve the SEO score of your individual blog posts and pages.

WordPress makes it easy to search for your old posts right inside the post editor. Simply select the text you want to link and click on the link button in the toolbar that appears.

A text pop-up will appear below your highlighted words. Then, you can start typing to search for the older articles you want to link to.

Add a Link to a Post

To learn more, see our beginner’s guide on how to add a link in WordPress.

It’s helpful to see your website’s SEO performance in terms of links by using a tool such as the Links Report in Google Search Console. This is a helpful starting point for working out how to improve internal linking on your site.

Filter internal links

The Links Report will show you how many pages are linking to this page. You can compare it with other pages and see whether pages with more internal links are ranking higher than posts with many internal links.

If you find that posts with more links do rank higher, then you can go ahead and start adding internal links to pages that you want to rank higher. For the details, see our guide on using Google Search Console to effectively grow your website traffic.

Just make sure you are only linking to the article when it makes sense. Adding links where they don’t make sense creates a bad user experience.

Another way to monitor the impact of internal linking is to see which keywords are gaining or losing position. All in One SEO makes this extremely easy with the Search Statistics feature.

Once you connect the plugin with Google Search Console, All in One SEO will fetch your Google Search Console data and present it under All in One SEO » Search Statistics.

Search statistics dashboard

The keyword positions chart shows a graph of your site’s keyword positions.

Below this, you’ll see the Keyword Rankings overview box. This shows your top 10 keywords, and if you use them for internal links they are very likely to be clicked.

keywords overview

3. Improve Your WordPress Site’s Internal Linking With a Plugin

If you’re not sure which posts you want to link to, then you will often find it faster to add internal links in WordPress using an internal linking plugin.

We recommend using All in One SEO. It includes a unique Link Assistant feature that lets you add links to your old and new content without having to open up the post. Plus, it provides link recommendations, detailed link reports, and much more.

To set up the plugin, see our guide on how to set up All in One SEO for WordPress correctly. After that, simply navigate to All in One SEO » Link Assistant in your WordPress dashboard.

Link Assistant will crawl every link on your website and then show a comprehensive list report.

Link assistant overview

The report will show you an overview of the links with total counts for internal, external, and affiliate links. It will also show you the number of orphaned posts that have not yet been linked to from another post or page.

You can switch to the Links Report tab for detailed information on all your links. Here you’ll see a list of all your posts and pages with columns for internal, external, and affiliate links.

Links report

It will also show a number of suggestions where you can add links.

For more details, you can click on the right arrow button next to a post or page. This will show all links organized in different tabs. From the suggestions tab, you can quickly view link suggestions and add links without directly editing a post or page.

View links details

Link Assistant also helps you discover more internal linking opportunities.

You can switch to the ‘Linking Opportunities’ tab to see suggestions about how to improve the internal linking on your website, and also see the list of orphaned posts so you can add links to them.

Linking opportunities

Another plugin useful for internal linking is Semrush SEO Writing Assistant because it can help you keep track of links inside your article.

For example, it lets you know when your article has too many or too few internal links and also suggests ways you can improve your links.

SEO Reporting Assistant Reports Issues With Links

This tool also comes in handy if you have other authors working on articles. Editors can quickly see if the article includes internal links to other posts on your website.

We show you how to use this plugin step-by-step to improve your SEO in our guide on how to use the SEO Writing Assistant in WordPress.

You can use a WordPress popular posts plugin to point users toward the articles that other users have already found helpful. These plugins automatically create a list of internal links to your most popular content.

Popular posts are usually your most successful content, which means they are more likely to increase user engagement, conversions, and sales. They are also a good opportunity for internal linking to your other less popular articles.

For example, MonsterInsights has a feature that allows you to show your popular articles anywhere on your WordPress site. You can use also use inline popular posts to show articles inside your content.

MonsterInsights Inline Popular Posts

If you want to show articles in the sidebar or at the end of your content, then you can select the Popular Post Widget. MonsterInsights even lets you display your top-performing products anywhere on your eCommerce store.

You can learn more in our guide on how to display popular posts in WordPress.

Another way to increase the number of internal links on your WordPress blog is to create roundups of your existing content. You do this by creating a new post that mentions your best articles on a certain subject to give a detailed overview of the topic.

In fact, you’re reading a post like that now.

Luckily, there are some plugins that make this job easy. For example, WP Tasty Roundups allows you to quickly repurpose your existing content into beautiful roundup posts that rank in search results.

All you need to do is type one or two keywords into the built-in search functionality, and the plugin will automatically pull images, titles, descriptions, and links from relevant posts into your roundup list.

WP Tasty Roundups

Sitelinks are a feature on Google search engine results pages (SERPs) where additional sub-pages appear under a website in the search results.

These are often internal links to the most popular pages of that website.

Google Sitelinks Example

The top 3 spots on Google get the most clicks. When sitelinks are shown for a website, it takes up the same amount of space as three regular search listings.

Having this much screen space dedicated to your site significantly increases your overall click-through rate. Simply put, more visitors will visit your website from the keyword.

While there is no guaranteed way to get Google to show sitelinks for your website, it certainly helps to create lots of internal links to your most important posts and pages.

You can learn more in our guide on how to get Google sitelinks for your WordPress site.

Link preloading is a browser technology that will load links in the background before a site visitor clicks them. This makes your website seem faster, which can improve SEO.

Because loading speed is one of the top indicators for search engine rankings and user engagement, when your internal pages are preloaded, your visitors are more likely to stay on your website longer.

They are more likely to view more pages because they’re loading instantly.

The easiest way to preload links is by using the Flying Pages plugin. It simply adds intelligent preloading to make sure preloading won’t crash your site or even slow it down.

Flying Links settings set the preloader delay

We show you how to set up the plugin step-by-step in our guide on how to preload links in WordPress for faster loading speeds.

Broken links are bad for your website’s SEO. Search engine crawlers find new content on your website by following internal links, so a broken link can stop them from indexing a new post.

They also negatively impact user experience because broken links will return a 404 error. If a visitor clicks on a link and is unable to find a page they’re looking for, then they may leave.

The MonsterInsights custom 404 error design

You can easily find and fix broken links on your WordPress website using All in One SEO.

AIOSEO offers a powerful redirection manager that helps track 404 errors on your website and lets you set up permanent 301 redirects to fix broken links.

404 error logs in AIOSEO

To learn more, see our detailed guide on how to find and fix broken links in WordPress.

If you ever move your WordPress site to a new domain name, then it is important to update all internal link URLs. Otherwise, you will have lots of broken links.

You should start by changing the WordPress address and site URL by visiting the Settings » General page from your WordPress dashboard.

Change the WordPress Address and Site URL to Your New Domain

But you will also need to change the URLs of every internal link added to your posts and pages.

You’ll find the simplest way to do this in our step-by-step guide on how to easily update URLs when moving your WordPress site.

If you want to make internal linking a habit, then it helps to use the most efficient method. Since WordPress 6.0, WordPress has supported standard MediaWiki syntax to quickly add internal links when creating or editing a post.

You can now quickly add links by adding two square brackets followed by the post title. The animated gif below shows you how easy this feature is to use inside WordPress.

Add link shortcut

The link will automatically add the correct URL to the post, and use the post title as an anchor link.

If you know the title of a post (or even just part of it), then using the double square bracket method is the fastest way of creating an internal link.

One of the best ways to uncover how users interact with your website is to track which internal links your visitors are clicking. Tools such as MonsterInsights can help you see which internal links your visitors are the most interested in.

You can then use these insights to improve the way you add internal links to your posts and pages.

We offer detailed instructions on tracking different types of links in our guide on how to track link clicks and button clicks in WordPress.

You might also like to see our guide on how to track user engagement in WordPress.

12. Enable Breadcrumbs in WordPress or WooCommerce

Breadcrumb navigation is a term used to describe a hierarchical navigation menu presented as a trail of links.

It’s often used as a secondary navigation that allows users to go up in the website’s hierarchy of pages.

Navigational links preview in WPBeginner

Breadcrumbs are great for internal linking because they define a clean path or trail to the page you are on.

These breadcrumbs also appear in search results giving your site an extra advantage in rankings.

Breadcrumb Navigation Links in Search Results

We cover two ways to add breadcrumbs in our guide on how to display breadcrumb navigation links in WordPress. Most users will find Method 1 easier, using All in One SEO.

The AIOSEO Breadcrumbs Settings Page

You can also use All in One SEO to enable breadcrumbs for your WooCommerce products. For details, see the fifth tip in our guide on WooCommerce SEO made easy.

We hope this tutorial helped you learn how the best internal linking practices for SEO. You may also want to see our ultimate WordPress security guide, or check out our list of tips on how to increase your blog traffic.

If you liked this article, then please subscribe to our YouTube Channel for WordPress video tutorials. You can also find us on Twitter and Facebook.

The post Internal Linking for SEO: The Ultimate Guide of Best Practices first appeared on WPBeginner.

WordPress Conversion Tracking Made Simple: A Step-by-Step Guide

Do you want to add conversion tracking features to your WordPress website?

Conversion tracking helps you measure the impact of your marketing efforts and makes it easier to understand how users interact with your website.

In this guide, we will show you how to add conversion tracking in WordPress and track your conversions like a total pro.

Ultimate Guide to conversion tracking in WordPress

This is a comprehensive WordPress conversion tracking guide, so we have divided it up into different sections. Here is what we’ll cover in this guide:

What is Conversion Tracking?

Conversion tracking is the ability to track and measure the success of your various marketing efforts.

Depending on your business, the conversion is the desired action you want users to perform on your website.

  • For an online store or eCommerce website, a conversion could be a successful purchase.
  • For a news/blog site, the conversion could be a successful subscription to the email newsletter.
  • For a professional services website, a conversion could be a user filling up a contact form.

Simply put, conversion tracking shows you how many of your website visitors successfully perform the desired action.

Why is Conversion Tracking Important?

Conversion tracking is important because it helps you make data-driven decisions to grow your business.

For instance, it shows that users from a specific traffic source are more likely to convert. You can then focus your attention on getting more traffic from that particular source.

Conversion tracking also helps you uncover the users who are not converting so well.

For instance, you may learn that users open the contact page, but many abandon it before submitting the form. You can then make your form easier by removing unnecessary fields, making it conversational, changing colors, setting up partial form submission, etc.

Basically, you need conversion tracking to measure your success and failures and then improve upon them to grow your online business.

That being said, let’s take a look at what tools we’ll need to set up conversion tracking in WordPress.

Tools You Need to Setup Conversion Tracking in WordPress

Most conversion optimization experts rely heavily on Google Analytics. It is a free tool provided by Google that helps you track your website traffic.

It shows where your users are coming from, and what they do while on your website.

If you are running Google AdWords, Facebook Ads, and Twitter Ads to promote your business, then you’ll need to set up those for conversion tracking.

This may sound complicated, but you’ll only have to set it up once, and we’ll walk you through every step of the way.

Ready? Let’s get started.

Setting Up Conversion Tracking in Google Analytics

First, you need to install Google Analytics on your website.

The easiest way to do this is by using MonsterInsights. It is the best Google Analytics plugin on the market that comes with enhanced eCommerce tracking, form tracking, and other conversion tracking tools built-in.

You’ll need the PRO version of the plugin to access eCommerce and other conversion tracking features. For basic tracking, the free version works as well.

Simply install and activate the MonsterInsights plugin. For more details, see our step-by-step guide on how to install a WordPress plugin.

Upon activation, you’ll see the setup wizard. Go ahead and click the ‘Launch the Wizard’ button.

Launch setup wizard

Next, you can follow the on-screen instructions to connect your WordPress site to Google Analytics using MonsterInsights. For more details, see our guide on how to install Google Analytics in WordPress.

With MonsterInsights, you can also easily create a Google Analytics 4 (GA4) property. GA4 is the latest version of the famous analytics platform, and it will replace the old version on July 1, 2023.

To learn more, please see our guide on how to switch to Google Analytics 4 in WordPress.

Now that you have installed Google Analytics, let’s set up conversion tracking on your website.

Turning on Enhanced Ecommerce Conversion Tracking

Ecommerce tracking helps you see which products are doing well on your site, which products are being looked at but not purchased, and what’s bringing you the most revenue.

Google Analytics comes with enhanced eCommerce tracking, which works for most eCommerce websites, including WooCommerce, Easy Digital Downloads, MemberPress, and more. However, you’ll need to enable it for your website manually.

Step 1. Turn on eCommerce Tracking in MonsterInsights

MonsterInsights comes with an eCommerce addon that lets you properly set up eCommerce conversion tracking in Google Analytics.

It works with all top eCommerce platforms for WordPress, including WooCommerce, MemberPress, LifterLMS, Easy Digital Downloads, and more.

First, you need to visit the Insights » Addons page to install and activate the eCommerce addon.

Install the eCommerce addon

Step 2. Turn on Enhanced Ecommerce in Google Analytics

Next, you need to enable enhanced eCommerce tracking in your Google Analytics account. Go to your Google Analytics dashboard and select your website.

From here, you need to click on the Admin button located at the bottom left corner of the screen.

Go to admin settings

On the next screen, you’ll see different Google Analytics settings.

Under the ‘View’ column, click the ‘Ecommerce Settings’ link.

Ecommerce settings

After that, you need to turn on the ‘Enable Ecommerce’ and ‘Enable Enhanced Ecommerce Reporting’ options.

Don’t forget to click the ‘Save’ button when you’re done.

Enable ecommerce and enhanced ecommerce reporting

Google Analytics will now turn on the eCommerce reporting feature for your account.

Afterward, you can return to your WordPress dashboard and visit the Insights » Settings page. From here, switch to the eCommerce tab.

Use enhanced ecommerce option

MonsterInsights will automatically detect your eCommerce software and enable advanced eCommerce tracking for your store.

Note: the manual process for adding eCommerce conversion tracking has a lot of room for errors, so we strongly recommend using a plugin like MonsterInsights.

Viewing eCommerce Conversion Tracking Reports

Now that you have enabled eCommerce conversion tracking on your website. Let’s see how to view these reports and use them to make informed decisions about your business.

Ecommerce Conversion Reports in MonsterInsights

Simply go to the Insights » Reports page inside the WordPress admin area and then switch to the eCommerce tab.

Ecommerce report in MonsterInsights

At the top, you’ll see your most important metrics, like the conversion rate, transactions, revenue, and average order value.

Below that, you will see a list of your top products with quantity, sale percentage, and total revenue. This shows you which products are doing well in your store.

Next, you’ll see your top conversion sources with the number of visits, conversion share, and revenue. You can see which sources are bringing you more revenue and which traffic sources are not very effective.

Top conversion sources

MonsterInsights will also show you shopper behavior reports with the number of times products were added to and removed from the cart.

That’s not all the data. You can drill down these reports even further inside Google Analytics.

Ecommerce Conversion Reports in Google Analytics

In Google Analytics 4, you can head to Reports » Monetization » Overview to view the report.

View ecommerce report in GA4

Here, you can see the total revenue your online store is making. Besides that, there are more metrics you can track, like items purchased, first-time purchasers, and total purchases.

On the other hand, you can visit your Universal Analytics dashboard and click on the Conversions » Ecommerce from the left column.

Ecommerce report in analytics

The overview section offers the most important stats, such as revenue, conversion rate, transactions, and average order value.

You can further drill down to view different reports. For example, you can switch to shopping and checkout behavior reports to see how users reach the conversion page. You can also figure out what stopped them at the last minute from completing the transaction.

You may also want to see our guide on how to set up WooCommerce conversion tracking.

Turning on Form Conversion Tracking in Google Analytics

Not all websites use an eCommerce platform to conduct business. For instance, a restaurant website may use an order delivery form, or a salon may use a booking form.

Many businesses use contact forms to capture leads from their website. A lot of news and blogs use an email newsletter to convert website visitors into subscribers.

To track them, you need to enable form conversion tracking in Google Analytics.

MonsterInsights comes with a Forms addon that lets you easily track form conversions on your WordPress site. It works with all popular WordPress form plugins, including WPForms, Formidable Forms, Gravity Forms, Contact Form 7, and more.

Simply go to the Insights » Addons page. Scroll down to the ‘Forms’ addon, and then click on the Install button.

Install forms addon

Upon activation, you need to visit the Insights » Settings page and switch to the ‘Conversions’ tab.

MonsterInsights will automatically detect your WordPress form plugin and will also start tracking miscellaneous WordPress forms on your site.

MonsterInsights settings - conversions tab

Viewing Your Form Conversion Reports

You can now view your form conversion reports inside your WordPress admin area.

Head over to the Insights » Reports page and switch to the ‘Forms’ tab.

Forms report

You’ll see a list of forms on your website with their impressions, conversion, and conversion rates.

This helps in tracking how each WordPress form is performing. You can optimize low-converting forms while increasing the visibility of high-converting forms.

For more details, please see our guide on how to set up form tracking in Google Analytics.

Setting Up Goals for Conversion Tracking in Universal Analytics

So far, we have covered how to track eCommerce and form conversions.

What if you wanted to manually set up conversion goals and track them in Google Analytics?

For instance, you may want to consider users visiting a specific page as a conversion. Since it is not a form submission or an eCommerce transaction, it will not appear as a conversion in your reports.

Universal Analytics allows you to create your own goals and track their conversion.

However, an important thing to note is that Google Analytics 4 doesn’t have goals anymore. It is one of the major differences you’ll see between the new and old versions.

That said, let’s see how to set them up in Universal Analytics and track them on your website.

Go to the Google Analytics dashboard and click the ‘Admin’ tab on the bottom left. Then, in the View column, click on Goals.

Click on goals

Now, you will need to create a new goal.

Simply click the ‘+ New Goal’ button to set up a new goal.

Add a new goal

Next, you will need to select the goal type. Universal Analytics offers 4 types:

  • Destination: This tracks whether a visitor went to a specific page. This could be a thank you page or any conversion page on your site.
  • Duration: This tracks how long a visitor spends on your website. More time spent on a website means more engagement.
  • Pages/Screens per session: This tracks how many pages an average visitor looks at on your site.
  • Event: This can track all sorts of things, like button clicks, video plays, and downloads. It requires a bit more setup than the other options.

Destination and Event types are the most commonly used goal types for most businesses.

For this tutorial, we will create a ‘Destination’ goal to track visitors who view our thank you page after completing a form.

First, provide a name for your Goal. It needs to be something meaningful so that you can easily identify it in your Google Analytics reports.

After that, choose ‘Destination’ as your goal type and click the Continue button.

Enter goal description

Now you can simply provide the last part of the URL you want to track as the destination.

For instance, if your page is:
https://www.example.com/thank-you-for-booking/

Then you should enter the following:
/thank-you-for-booking/

Add goal details

Below that, you can optionally add value for the conversion. This makes sense if people are completing a payment form or if you know how much each lead is worth to you on average.

If you want to track a funnel, such as a customer moving through a checkout process, then you can also do this as part of the destination goal. This can help you pinpoint areas you might want to improve.

Once you’re happy with your goal, click the Save button. You should then see your goal listed in a table. You can edit it, switch it off and on, or create more goals here.

View new goal

Viewing Your Goal Conversions in Universal Analytics

Now that you have created your goal, allow Google Analytics to collect some data. After that, you can view your Goal Conversion report under the Google Analytics dashboard.

Simply, go to the Conversions » Goals and then click on Overview.

View goal conversions in analytics

Like all Google Analytics reports, you can drill down to view visitor journeys and get deeper insights.

For more details, see our complete guide on setting up goals in Google Analytics.

Setting Up Events in Google Analytics 4

Google Analytics 4 replaces goals with events. You can manually configure events to track different user interactions in GA4.

First, you’ll need to go to the ‘Admin’ settings from your GA4 property.

Go to admin settings

Next, you will need to navigate to the Property column.

After that, simply click the ‘Event’s option.

Go to events settings

You are now ready to create a new event in GA4.

Simply click the ‘Create event’ button to get started.

Create a new event

You should now see a new window slide in from the right. This is where all your custom events will be listed.

Go ahead and click the ‘Create’ button.

Create a custom event

On the next screen, you can enter details of your new event.

Google Analytics 4 already has pre-built events. Simply click the Custom event name dropdown menu and choose an event. For example, we’ll select the ‘file_download’ event for this tutorial.

Select an event name

GA4 will automatically enter the specific Parameter and Operator for your custom event.

Next, you can enter a value for your event. For instance, we will enter ‘.pdf’ since we want to track PDF file downloads. However, you can enter any specific word you use to organize filenames on your site.

Enter event parameter operator and value

After entering these details, click the ‘Create’ button at the top.

You will now see your new custom event listed under the Custom events area in GA4.

View custom event

Viewing Your Event Conversions in Google Analytics 4

Now that you’ve created a custom event in GA4, the next step is to view the conversions.

To do that, simply head to Reports » Engagement » Event: Event name from the menu on your left and view the report.

View custom events data

You can now repeat this step to track other custom events.

That said, an easier way of tracking user behavior is by using MonsterInsights. The plugin automatically sets up different events in Google Analytics.

This way, you don’t have to manually configure events or worry about messing up your tracking.

Google Ads Conversion Tracking in WordPress

If you run Google Ads (formerly Google AdWords) to bring targeted traffic to your website, then you may want to track those conversions.

Setting up is a bit complicated because it requires adding code to your website. However, with MonsterInsights, you can easily set up Google Ads conversion tracking without editing code or hiring a developer.

First, you can go to Insights » Addons from your WordPress dashboard and install the Ads addon.

Install the ads addon

Once you install the addon, it should automatically activate.

From here, you can go to Insights » Settings and head to the Publisher tab.

Publisher settings in MonsterInsights

Next, you can scroll down to the ‘Ads Tracking’ section.

Here, you will need to enter the Conversion ID, which will be in this format: AW-123456789.

Enter conversion ID and label

If you’re tracking Google Ads on an eCommerce store, then you can also enter the Conversion Label.

To find the Conversion ID and Conversion Label, you’ll need to go to your Google Ads dashboard and create a conversion action.

For more details, please follow our step-by-step guide on how to set up Google Ads conversion tracking in WordPress.

Viewing Google Ads Conversion Reports in Google Analytics 4

Your Google Ads conversion tracking will now appear in your Google Analytics reports.

In Google Analytics 4, you can head to Acquisition » Acquisition overview and then navigate to the ‘Session Google Ads’ report.

After that, click the ‘View Google Ads campaigns’ option at the bottom of the report.

View session google ads campaign report

This will expand the report and show more details about your ad campaigns.

You can see the total number of users, sessions, Google Ads clicks, and more.

View detailed stats for each campaign

Viewing Google Ads Conversion Reports in Universal Analytics

For Universal Analytics, you can open your website property.

After that, view the Google Ads report by going to the Acquisition » Google Ads » Campaigns section. Here, you can see conversions for all your paid campaigns.

View Google ads report in UA

Use UTM Parameters for Conversion Tracking in Google Analytics

UTM parameters are special tags you can add to URLs to pass important information to Google Analytics.

For instance, if you want to track users coming from a particular ad, then you can add UTM parameters to your ad URL like this:

https://yourwebsite.com/special-offer/?utm_source=ads&utm_medium=cpc&utm_content=bfad

You can also use UTM parameters anywhere you want to share your URLs.

For instance, your email newsletter, Tweets, SMS campaigns, and more.

https://yourwebsite.com/special-offer/?utm_source=newsletter&utm_medium=email&utm_campaign=jan_sale

MonsterInsights makes it super easy to build URLs with UTM parameters. Simply head over to the Insights » Tools page and select the ‘URL Builder’ tab.

Go to tools in MonsterInsights

Simply enter the UTM parameters you want to use, and it will automatically generate the URL, which you can then use in your campaigns.

For instance, you can enter a campaign source, like a newsletter or Google, which tells you where the users are coming from. After that, you can define a campaign medium, such as emails or banner ads, and enter a campaign name.

Enter campaign source and medium

MonsterInsights will also give you additional options to add campaign terms and content.

This is useful if you’re split-testing different emails or paid campaigns.

For creating a custom URL, you can leave these options blank.

Additional options in URL builder

Next, you can scroll down to the bottom to see your custom URL.

Go ahead and use the link for campaigns and track conversions on your website.

The URL created by the MonsterInsights URL builder tool, with UTM parameters in place

Viewing UTM Parameter Reports in Google Analytics 4

Now that you’ve added UTM parameters to a URL, you can track its performance in Google Analytics.

First, log in to your GA4 account. After that, head to Reports » Acquisition » Traffic Acquisition from the menu on your left.

View traffic acquisition report

You should now see traffic from different sources on your website, such as organic search, email, display, and more.

You can use the search bar to filter the traffic source for your custom campaign. For example, if you’re tracking conversions from a newsletter, then you can look up ‘Email’ in the report.

View different traffic sources

After that, you further drill down and filter your traffic.

Simply click the ‘+’ button under the search bar.

Click the plus button

GA4 will then show different options to filter your traffic.

You can select Traffic source » Session source from the dropdown list.

Select session source

Next, Google Analytics will list your email campaigns.

You can now see which campaign performs best and gets the most conversions.

View newsletter URL report in ga4

Viewing UTM Parameter Reports in Universal Analytics

In Universal Analytics, you can track the conversions of your campaigns under your Google Analytics dashboard.

Simply switch to the Acquisition » Campaigns » All Campaigns report.

Go to all campaigns

Your campaigns will appear here.

You can click on any of them to drill down further.

View newsletter tracking report

Setting Up Facebook Conversion Tracking in WordPress

Facebook is the largest social media website on the planet, with billions of active users. This is why Facebook ads are sometimes the easiest way to reach a niche audience.

Now, if you are running Facebook ads, then you may want to see how well your ads are doing by implementing conversion tracking for your Facebook ads.

Usually, you’d need to add a code snippet to your WordPress website to track Facebook conversions. However, WPCode makes it very simple, and you can simply enter the Facebook Pixel ID to set up tracking.

First, you’ll need to log in to Facebook and visit the Meta Business Suite. Then, click on All Tools » Events Manager.

Go to event manager

Next, you need to add a data source to the Event Manager.

Simply click the ‘+ Connect to Data Sources’ button in the left-hand menu.

Connect data source

You should now see different options to connect your new data source.

Go ahead and select the ‘Web’ option and click the ‘Connect’ button to continue.

Connect new data source

After that, enter a name for your pixel.

Once that’s done, you can click the ‘Create Pixel’ button.

Create a Facebook pixel

Next, you need to choose how to connect your website and send activity to Facebook.

At the bottom, you will see the Facebook Pixel. Go ahead and copy the pixel ID.

Choose how to connect to your site

Next, you can return to your WordPress website dashboard and install and activate the WPCode Free Plugin plugin. For more details, see our step-by-step guide on how to install a WordPress plugin.

Note that you’ll need at least the WPCode Plus plan because it includes the Conversion Pixel Addon. However, there is also a free version of WPCode you can use to get started.

Upon activation, you need to visit the Code Snippets » Conversion Pixel page and go to the Facebook tab. From here, you need to paste the Facebook Pixel ID in the respective field.

Add Facebook pixel ID

WPCode will now automatically add the code to your site that’s needed to track Facebook ad conversions.

Setting Up Twitter Conversion Tracking in WordPress

If you run Twitter Ads to promote your business, then you’ll need to set up Twitter conversion tracking to measure the success of your ads.

Simply log in to your Twitter Ads account and click on the Tools » Event manager from the menu at the top.

Twitter event manager

You should now see a pixel created by Twitter.

Go ahead and click the ‘View Twitter Pixel’ option.

View the Twitter pixel

On the next screen, you will see different options to add the Twitter pixel to your site.

You can use the ‘Pixel Code’ method and simply copy the code.

Copy the pixel code

You will need to add this code to the header of your WordPress site.

First, you need to switch back to your WordPress website’s admin area.

If you haven’t already done so, then go ahead and install and activate the WPCode plugin. For more details, please see our guide on how to install a WordPress plugin.

Upon activation, you need to visit the Code Snippets » Header & Footer page. Now you can paste the Twitter pixel code into the Header section.

Enter the Twitter pixel

Don’t forget to click the ‘Save Changes’ button to store your settings.

After you have successfully installed the pixel code, you can track conversions on your Twitter Ads account.

Optimizing Conversion Rates to Boost Sales

Once you start tracking conversions on your website, the next step is to improve those conversion rates.

You’d be surprised how little things can make a huge impact on your business.

The best way to improve your conversions is by using OptinMonster. It is the best conversion optimization software on the market and helps you convert more visitors into customers.

OptinMonster comes with tools like lightbox popups, fullscreen welcome mats, countdown timers, slide-in boxes, and more.

Choose a campaign type and template

It integrates with any email marketing service and works with all popular eCommerce platforms.

OptinMonster’s display rules allow you to show targeted messages to your customers at the precise time and nudge them into making a buying decision.

Upsell popup preview

For instance, if you notice that customers are leaving a product page without taking any action, then you can offer them a discount when they are about to exit.

Similarly, you can run time-sensitive campaigns to trigger the FOMO effect and give customers a nudge in the right direction.

For more practical tips, see our guide on how ways to recover WooCommerce abandoned cart sales.

We hope this guide helped you set up conversion tracking in WordPress. You may also want to see our comparison of the best email marketing services and the ultimate guide to WordPress speed and performance.

If you liked this article, then please subscribe to our YouTube Channel for WordPress video tutorials. You can also find us on Twitter and Facebook.

The post WordPress Conversion Tracking Made Simple: A Step-by-Step Guide first appeared on WPBeginner.

36 Best WordPress Blogs You Should Read & Follow (in 2023)

Are you looking for the best WordPress blogs to follow, so you can get fresh WordPress tutorials, news, and latest community updates?

WordPress is the most popular content management system (CMS) in the world and powers over 43% of sites on the internet. Following different WordPress blogs can help you learn how to better use WordPress, get website growth tips, stay up to date with WordPress updates, and receive latest community news.

In this article, we will share the list of some of the best WordPress blogs that you should follow. We’re following these WordPress blogs in our own RSS reader.

Best WordPress blogs to follow

Why Should You Follow WordPress Blogs?

If you have a WordPress website or plan to create one, then you definitely want to follow top WordPress blogs.

You can get in-depth knowledge about WordPress and how it works. Plus, you get to see step-by-step tutorials on how to get started. Aside from that, they also have tips on choosing the best WordPress hosting services, themes, and plugins to operate your site.

Many WordPress blogs will also share tips and tricks to optimize your website for search engines, make it load faster, strengthen your website security, make money online, and more.

That being said, let’s look at some of the best WordPress blogs you should read and follow. We’ve broken down the list of blogs into different sections, so you can jump ahead by clicking the links below:

Top WordPress Blogs to Follow

If you are looking for blogs that help you learn about WordPress, then here are our top picks. Each of them covers detailed tutorials, plugin reviews, comparison posts, guides, the latest WordPress news, and more.

1. WPBeginner

WPBeginner

WPBeginner is the largest free WordPress resource site for beginners. Our goal is to provide helpful tutorials on WordPress for small business owners, bloggers, and non-techy WordPress users.

WPBeginner was launched in 2009 by founder Syed Balkhi. Since then, it has become one of the best WordPress blogs in the world. There are over 320,000 subscribers from across 190 countries.

You can find a variety of topics on WPBeignner. There are WordPress beginner guides, showcases, step-by-step tutorials, articles on themes and plugins, comparison posts, and the latest news about WordPress.

To help you get started with WordPress, here are some helpful tutorials on WPBeginner:

You can visit the WPBeginner blog section to find more helpful content on WordPress.

Besides that, you can also join the free WPBeginner Facebook group and connect with a large community of WordPress users and experts (over 90,000 members). It is an excellent place for beginners and non-tech users to get help and support about WordPress, plugin suggestions, learn tips and tricks, and more.

If you like video content, then you can subscribe to WPBeginner’s YouTube channel. There are detailed videos on WordPress that will guide you every step of the way.

2. IsItWP

IsItWP

IsItWP is another free online resource that offers WordPress tutorials, product reviews, guides, how-to articles, and showcases. It is a great place to get started with WordPress and learn about different things.

You can learn about creating a WordPress blog, online store, membership site, and more. Plus, you’ll get to know about WordPress security, performance, email marketing, lead generation, plugins, and themes. It also offers detailed guides on marketing hacks, like 30 ways to make money online blogging.

The best part about using IsItWP is that you get to use multiple free tools. Some tools include a domain name generator, WordPress speed test, website uptime checker, headline analyzer, and more.

3. Blog Tyrant

Blog Tyrant

Blog Tyrant is the next WordPress blog on our list. If you’re looking to start a WordPress blog and learn strategies to grow your business, this is the right website for you to follow.

Blog Tyrant was started in 2010 to help bloggers make a living online. It covers extensive guides, how-to tutorials, product reviews, and other resources to help you create a successful blog and make money online.

The website also lists valuable tools for blogging and helps pick the right plugins for your website.

For instance, you can use tools like a password generator to secure your website, a security scanner to check for vulnerabilities, or a site speed test to see how fast your website loads.

4. WP Tavern

WP Tavern

WP Tavern is another famous WordPress blog that covers the latest news and events about WordPress. You can follow the blog to learn about new WordPress releases, and industry news.

It also covers the latest news about different WordPress plugins and themes. You can learn about product acquisitions, feature releases in themes, and new features coming in WordPress, and more.

5. WPForms

The WPForms form builder plugin for WordPress

WPForms is the best WordPress form builder plugin in the market used by over 5 million websites.

With the WPForms blog, you can learn how to create all types of forms for your WordPress site. From simple contact forms to complex multistep forms, the WPForms blog has detailed guides and tutorials to help you out.

Plus, you get to stay informed about the latest updates and releases in the plugin. Other than that, you’ll find more helpful blog posts, how-to guides, and showcases on WordPress. For example, there are step-by-step tutorials like how to create an NPS survey form in WordPress or thought-leadership pieces like 7 benefits of conversational marketing.

6. Elegant Themes

Elegant Themes

Elegant Themes offers a high-quality premium WordPress theme collection. It is also the company behind Divi, a popular WordPress theme and page builder.

The Elegant Themes blog offers a lot of content focused on using Divi. For instance, you can learn how to use the website builder, use its features, and customize your site.

Aside from content on Divi, Elegant Themes also publishes general content about WordPress. There are WordPress tutorials, plugin suggestions, reviews, comparisons, and other marketing guides. For example, you can read articles like how to customize your WordPress header.

7. CodeinWP

CodeinWP

CodeinWP is the next WordPress blog on our list. It covers extensive topics about WordPress and offers tutorials, lists, comparison posts, and other detailed guides.

What makes CodeinWP different is that it offers various resources and tools besides blog posts and guides. For instance, there are free code snippets you can use to customize your WordPress site.

They also offers free illustrations from designers that you can use for your site among other helpful resources.

8. OptinMonster

OptinMonster

OptinMonster is the best WordPress popup and lead generation software. It helps you grow your email list, get more leads, increase sales, and optimize your site for conversions.

With the OptinMonster blog, you can learn how to use the plugin and get the most out of it. There are detailed tutorials on setting up different marketing campaigns, configuring targeting rules to show popups at the right place and time, and more.

Besides that, you can get knowledge about content marketing, email marketing, and lead generation in WordPress by following the blog.

What makes OptinMonster blog different is its case studies. You can learn how other companies are using the plugin to get more email subscribers, which display rules they’re using to target new audiences, how they’re converting traffic into leads, and more.

9. Post Status

Post Status

Post Status is a membership community for people looking to work and grow in the WordPress ecosystem. It offers premium memberships and access to different content about WordPress.

You can get the latest news about WordPress, learn about new plugin features and acquisitions, and read blogs about different Post Status members. For example, there are blog posts called Membership Spotlight, where you get to know about Post Status members, their experience in working in WordPress, and more.

It is also an excellent resource for anyone who wants to connect with founders of WordPress plugins, developers, and other WordPress enthusiasts. There are plans for individuals, agency owners, product founders, and partners.

With Post Status premium memberships, you get important WordPress news and events in the weekly newsletter, access to the Slack community, members-only content, and a weekly members hurdle.

The website also has a podcast and videos to get insights about WordPress. As a partner, you can also post WordPress job openings for your company on the Post Status website.

10. Torque Magazine

Torque Magazine

Torque Magazine is another top WordPress blog you should follow. It is a publication by WP Engine but maintains complete editorial independence.

The website covers extensive articles on WordPress. It has divided its content into different categories: development, tools, business, community, videos, and ebooks.

For example, you can find useful guides like CSS best practices and troubleshooting WordPress issues under the development section. You’ll also find interviews with industry experts, step-by-step tutorials, plugin suggestions, marketing and SEO tips and tricks, and more in Torque Magazine.

Best WordPress Plugin Blogs

There are many WordPress plugins that have a great blog section. They cover extensive topics on WordPress and share useful tips and resources.

You can follow these blogs to get more information about WordPress and learn how to use a specific plugin.

  1. MonsterInsights Blog – MonsterInsights is a popular WordPress analytics plugin used by over 3 million websites. Their blog contains helpful marketing tips like how to setup website tracking, and make data-driven decisions to grow your business.
  2. All in One SEO Blog – AIOSEO is the best WordPress SEO plugin used by over 3 million websites. Their blog covers SEO tips and WordPress tutorials to help you improve your SEO rankings.
  3. WooCommerce Blog – WooCommerce is a popular eCommerce plugin for WordPress. Their blog covers eCommerce tutorials to help boost your online sales.
  4. Yoast SEO Blog – Yoast SEO is a popular WordPress SEO plugin. They also have a blog focused on SEO optimization tips to help you boost your SEO rankings.
  5. Smash Balloon Blog – Smash Balloon is a leading WordPress social media plugin used by over 1.4 million websites. Their blog has tips on how to improve your social media engagement.
  6. PushEngage Blog – PushEngage is the best web push notification software to help you boost your traffic. Their blog has tips on how to grow your traffic, conversions, and user engagement.
  7. Easy Digital Downloads Blog – EDD is the best plugin for selling digital downloads in WordPress. Their blog covers tips for online creators to help you increase your sales & revenue.
  8. SeedProd Blog – SeedProd is a popular page builder for WordPress. Their blog covers tips on how to improve your website design and tips to improve your website customization workflow.
  9. AffiliateWP Blog – AffiliateWP is the best WordPress affiliate plugin for WordPress and WooCommerce. Their blog covers tips on how to create and grow your affiliate program.
  10. WP Simple Pay Blog – WP Simple Pay is a leading payments plugin for WordPress. Their blog cover tips on securely accepting payments as well as other WordPress tutorials.
  11. RafflePress Blog – RafflePress is the best WordPress giveaway plugin. Their blog cover tips on how to unlock viral traffic growth for your website to get more traffic, subscribers, and sales.
  12. ThriveThemes Blog – ThriveThemes is a popular conversion optimization suite for WordPress. Their blog covers marketing tutorials and tips to improve your converisions.
  13. WP Mail SMTP Blog – WP Mail SMTP is one of the must have plugins for WordPress used by over 3 million websites. Their blog covers tips on how to improve your email deliverability along with other WordPress tutorials.
  14. WPMU Dev Blog – WPMU Dev offers a suite of WordPress plugins and tools. Their blog covers a vast number of topics from how-to posts, product reviews, news, and more.

Blogs by WordPress Founders and Influencers

You can also learn a lot about WordPress from different founders and influencers. You get to read about their journey, experiences, and how they’re growing their business in the WordPress space.

  1. Syed Balkhi – Syed Balkhi is the founder of WPBeginner and a well-known entrepreneur. His blog shares tips on his entrepreneurship journey.
  2. Matt Mullenweg – Matt Mullenweg is the co-founder of WordPress. His blog is always full of his latest experiences and entrepreneurship journey.
  3. Chris Lema – Chris Lema is a well-known speaker and blogger who writes about various topics from communication, eCommerce, LMS, and more.
  4. Tom McFarlin – Tom McFarlin is a WordPress developer who loves writing, building, and sharing WordPress-based projects. You can follow his blog to learn about WordPress, PHP, databases, and other backend technology.
  5. Joost de Valk – Jost is the founder of Yoast and now serves as the head of WordPress strategy for Newfold Digital (parent company of Bluehost).

There are other great resources out there that help not only help you learn about WordPress but also allow you to grow your website.

You can learn tips on growing your traffic, boosting search engine rankings, uncovering different marketing techniques, and more from marketing and SEO blogs. These blogs also cover WordPress’s latest news and guides, which is really useful.

  1. Neil Patel Blog – Neil Patel is a top SEO influencer who regularly creates detailed SEO tutorials, guides, case studies, and more to help you learn SEO.
  2. Search Engine Roundtable – Search Engine Roundtable is the go-to WordPress blog for staying up to date with SEO news, Google algorithm changes, and more.
  3. Search Engine Journal – Search Engine Journal is another popular SEO blog although their coverage on WordPress topics are generally extremely biased and misinformed. We only recommend following their SEO tips but for WordPress related news, you should avoid them.
  4. Digital Marketer – Digital Marketer provides marketing tutorials, guides, and best practices on how to grow your online traffic and sales.
  5. ShoutMeLoud – ShoutMeLoud is a blog created by Harsh Agrawal. He’s a well-known blogger who shares his blogging journey, WordPress tips, and more to help you grow your online presence.
  6. Blogging Wizard – Blogging Wizard is a popular resource that you can use to learn proven strategies for growing your WordPress blog.
  7. Ahrefs Blog – Ahrefs is a popular SEO tool. Their blog is full of useful guides to improve your website’s SEO ranking.

Which is the Best WordPress Blog to Follow?

The best WordPress blogs to follow are WPBeginner, IsItWP, Blog Tyrant, and WP Tavern.

After being in the WordPress industry for the last 16+ years, we recommend you follow multiple WordPress blogs. Each of the top 10 blogs listed in our post will help you expand your knowledge about WordPress and pick up new ways to grow your business.

The easiest way to follow these WordPress blogs is by either adding them to your RSS feed reader or joining their free email newsletter.

We hope this article helped you pick the best WordPress blog to follow. You may also want to see our guide on how to create your email newsletter, and our expert pick of the best WordPress plugins for all websites.

If you liked this article, then please subscribe to our YouTube Channel for WordPress video tutorials. You can also find us on Twitter and Facebook.

The post 36 Best WordPress Blogs You Should Read & Follow (in 2023) first appeared on WPBeginner.

How to Set Up Google Ads Conversion Tracking in WordPress

Do you want to know how much revenue you’re generating from Google Ads on your website?

Setting up Google Ads conversion tracking will help you uncover insights about your ad campaign’s performance. You can find out which campaign is performing the best, how users interact with your ads, and how you can improve conversions.

In this article, we’ll show you how to properly set up eCommerce Google Ads conversion tracking in WordPress. This is the exact same method that we use on our own websites.

How to setup Google Ads conversion tracking

Why Set Up Google Ads Conversion Tracking in WordPress?

If you’re running Google Ads for your WordPress blog, eCommerce store, or membership site, then it is important to know how they’re performing. You can’t improve, what you can’t measure.

Tracking Google Ads conversions helps you see how much revenue you earned from users who clicked on your ad campaigns. It also helps you see which paid keywords and ad groups drive the most conversions. This way, you can optimize your campaigns and budget for more profitable search terms.

Besides that, Google Ads conversion tracking also uncovers how users behave on your WordPress site after clicking an ad. For instance, you might see a lot of users arrive on a landing page, but abandon it after adding products to the cart.

You can use this information to improve the checkout process, offer discounts and incentives as users are about to leave your site, and provide a better user experience.

That said, let’s see how you can add Google Ads conversion tracking in WordPress.

Adding Google Ads to WordPress Website

The easiest way of connecting Google Ads with WordPress is by using MonsterInsights. It is the best Analytics plugin for WordPress that helps set up Google Analytics without editing.

MonsterInsights offers an Ads addon that lets you setup comprehensive conversion tracking without touching a single line of code or hiring a developer.

We will use the MonsterInsights Pro license for this tutorial because it includes the Ads addon. There is also a MonsterInsights Lite version you can use for free.

First, you’ll need to install and activate the MonsterInsights plugin. If you need help, then please see our guide on how to install a WordPress plugin.

Upon activation, you will be redirected to the welcome screen in your WordPress dashboard. Go ahead and click the ‘Launch the Wizard’ button.

Launch setup wizard

Next, you can follow the onscreen instructions to connect Google Analytics to your site. For more details, you can see our guide on how to install Google Analytics in WordPress.

With MonsterInsights, you can also use dual tracking to set up a Google Analytics 4 property. It is the latest analytics version and will soon replace Universal Analytics. You can learn more by following our guide on how to switch to Google Analytics 4 in WordPress.

Once you’ve connected Google Analytics with WordPress, the next step is to install the Ads addon. Simply go to Insights » Addons from your WordPress dashboard and navigate to the ‘Ads’ addon.

Install the ads addon

Go ahead and click the ‘Install’ button. The addon will now automatically install and activate on your site.

Creating a Conversion Action in Google Ads

Next, you’ll need to create a conversion action in Google Ads.

First, you can visit the Google Ads website and log in to your account.

After that, go ahead and click the ‘Tools and settings’ option at the top. Under the ‘Measurement’ column, simply select the Conversions option.

Click the tools and settings option

On the next screen, you’ll need to create a conversion action.

You can click the ‘New conversion action’ button to get started.

Create new conversion action

Next, Google Ads will ask you to select the type of conversions you want to track. It will show you 4 options, including a website, app, phone call, or import.

For this tutorial, we’ll choose the ‘Website’ option for tracking ad conversions.

Select the kind of conversion to track

After that, you’ll need to enter the website URL where you’d like to measure conversions.

Once that’s done, simply click the ‘Scan’ button.

Enter your domain to scan

Google Ads will now show 2 options to create conversion actions, including an automatic and manual method. In the automatic method, you’ll need to select the conversion goal, choose a match type, and enter the URL. This way is suitable if you know which events to count as conversions.

However, we recommend selecting the manual method. Simply scroll down and click the ‘+ Add a conversion action manually’ option.

Add conversion action manually

Next, you’ll need to enter the Conversion action details.

First, you can select the ‘Goal and action optimization’ for your conversion. This is the action you’d like to track. For example, when a user subscribes to your newsletter, makes a purchase, adds a product to a cart, submits a contact form, and more.

For the sake of this tutorial, we will select ‘Subscribe’ as the goal. After that, you can enter the Conversion name.

Enter conversion action details

You can now scroll down and select a Value for your conversion. Google Ads lets you choose the same value for each conversion, assign different values for conversions, or don’t use a value for conversion action.

We will select the ‘Use the same for each conversion’ option, select the currency, and enter a value for this tutorial.

Enter value for conversion action

Besides that, you can also choose how many conversions to count per click.

If you’re tracking email newsletter signups, then we recommend selecting the ‘One’ option. This way, each subscriber is counted once. However, you can use the ‘Every’ option in an eCommerce store and count each purchase as a conversion.

After selecting these options, simply click the ‘Done’ button at the bottom.

Enter value and count

You can now see your conversion action under the ‘Create conversion actions manually using code’ section.

Go ahead and click the ‘Save and continue’ button to get instructions for adding the tracking tags for conversion action to your site.

Click the save and continue button

On the next screen, you’ll see 3 options to add the conversion action to your site.

Simply select the ‘Use Google Tag Manager’ option. You should see the Conversion ID and Conversion Label. Copy these to a notepad file or keep the browser window/tab open.

Select the use tag manager option

To finish the setup process, you’ll need to head to your WordPress website dashboard and view the MonsterInsights settings.

From here, go to Insights » Settings and click on the ‘Publisher’ tab.

Publisher settings in MonsterInsights

After that, you can scroll down to the ‘Ads Tracking’ section.

Go ahead and enter the Conversion ID. Make sure you follow the format, which will look like this: AW-123456789.

If you are tracking Google Ads on Easy Digital Downloads, WooCommerce, and MemberPress, then enter the Conversion Label in the respective field.

Enter conversion ID and label

That’s it. You’ve successfully set up Google Ads conversion tracking on your WordPress website.

View Google Ads Conversion Tracking Data in Google Analytics

You can take it a step further and connect Google Ads with Google Analytics to get more insights about how people use your website after clicking on an ad.

For instance, you can see the number of visitors from paid search and find out which pages they view after landing on your site. You can also use different filters and create custom reports in Google Analytics.

Let’s see how you can link your Google Ads account with Google Analytics 4 and Universal Analytics.

Connect Google Ads with Google Analytics 4

First, you’ll need to log in to your GA4 account and then go to the ‘Admin’ settings.

Go to admin settings

After that, you can click the ‘Google Ads Links’ option.

It is located under the Property column.

Go to ads links

A new window will now slide in from the right.

Go ahead and click the ‘Link’ button in the top right corner.

Click the link button

Next, you will see different options for Link setup.

First, you can click the ‘Choose Google Ads accounts’ option.

Choose Google ads account to link

On the next screen, you’ll need to select the Google Ads account you wish to connect.

Once that’s done, simply click the ‘Confirm’ button at the top.

Select your google ads account

You will now see the Google Ads account that you want to link.

Go ahead and click the ‘Next’ button.

See selected google ads account

In the next step, Google Analytics will give you options to enable personalized advertising and enable auto-tagging.

You can use the default settings and click the ‘Next’ button.

Change configure settings

After that, you’ll see a summary of your Link setup settings.

If everything checks out, then go ahead and click the ‘Submit’ button.

Review and submit link setup

You should now see a ‘Link Created’ notification in front of your Google Ads account. This means that you’ve successfully connected Google Ads with Google Analytics.

Do note that it can take up to 24 hours for your Google Ads data to appear in Analytics reports.

See link created notification

Next, you can view the Google Ads conversion tracking report in Google Analytics 4.

First, you can head to Acquisition » Traffic acquisition from the menu on your left and scroll down to see how many visitors came from the Paid Search channel.

View paid search traffic

After that, you can go to Acquisition » Acquisition overview and view the Session Google Ads campaign report. This will show which campaign got the most traffic.

You can also click the ‘View Google Ads campaigns’ option at the bottom to view more details.

View session google ads campaign report

For each campaign, you can see the total number of users, sessions, number of Google Ads clicks, cost per click (CPC), conversions, and more.

Using the information from this report, you can see which campaigns perform the best.

View detailed stats for each campaign

Connect Google Ads with Universal Analytics

If you’re using Universal Analytics, then you can first log in to your account.

After that, head to the ‘Admin’ settings.

Click admin settings

Next, you’ll need to go to the Google Ads Links option.

You can find the option under the Property column.

Go to Google Ads links

On the next screen, you’ll need to select the Google Ads account you want to connect.

After selecting your account, simply click the ‘Continue’ button.

Select Google ads account

Next, you will need to enter a Link group title.

You can then select the Views to link with your Google Ads account. Simply click the toggle to ON for the correct Views.

Enter link group title

Once that’s done, simply click the ‘Link accounts’ button.

Google Analytics will now show a summary of your settings. Simply scroll down and click the ‘Done’ button.

Click the done button

That’s it. Your Google Ads account will now be linked to the Universal Analytics property.

To view data from your ad campaigns, head to Acquisition » Google Ads » Campaigns from the menu on your left. You can see the number of clicks, cost, CPC, and more for each campaign.

View Google ads report in UA

Final Thoughts on Google Ads Conversion Tracking in WordPress

When it comes to setting up any conversion tracking, the most important thing you want to make sure is that the setup is done properly. This is why we use and recommend MonsterInsights because it just does everything for you behind the scenes without touching any code.

However if you prefer to add code directly on your WordPress site, then you can do that as well by using a plugin like WPCode. This will help future-proof your customizations. There’s a free version of WPCode that you can use by following our tutorial on adding custom code in WordPress.

We hope this article helped you learn how to set up Google Ads conversion tracking in WordPress. You may also want to see our ultimate WordPress SEO guide and the best WooCommerce plugins to grow your store.

If you liked this article, then please subscribe to our YouTube Channel for WordPress video tutorials. You can also find us on Twitter and Facebook.

The post How to Set Up Google Ads Conversion Tracking in WordPress first appeared on WPBeginner.

How to Setup WooCommerce Conversion Tracking (Step by Step)

Do you want to track conversions on your WooCommerce store?

Conversion tracking helps you understand what’s working on your online store and what needs more attention. It helps you keep track of your best-performing products while also allowing you to see what’s stopping customers from completing a purchase.

In this guide, we’ll show you how to easily set up WooCommerce conversion tracking, step by step.

How to setup WooCommerce conversion tracking

Why Set up WooCommerce Conversion Tracking?

WooCommerce makes it easy to sell anything online. However, once you have set up your WooCommerce store, you will need to learn what works on your website to grow your business.

You will need to learn which products are popular among your users, what they are viewing the most, how many users end up making a purchase, how they are finding your website, and more.

To get all this information, you need to set up conversion tracking on your online store. This helps you get access to insights you need to make informed decisions about growing your business.

Conversion tracking helps you unlock key performance indicators including your eCommerce conversion rate, average order value, shopping cart abandonment, cost per acquisition, top referral sources, and more.

Apart from that you also get to learn about:

  • Shopping behavior – It tells you what products users are adding to carts, which products are being abandoned, what pages lead users to a successful purchase, and more.
  • Checkout behavior – Helps you view how users successfully complete a checkout.
  • Product performance – Tells you which products are bringing you the most sales.
  • Product list performance – This allows you to group products and see their performance as a list. This comes in handy when you want to see how different product categories are doing in your online store.

That being said, let’s take a look at how to unlock all this useful information by setting up conversion tracking on your store.

Setting Up WooCommerce Conversion Tracking in WordPress

The easiest way to track WooCommerce conversions is by using MonsterInsights.

It is the best Google Analytics plugin for WordPress and comes with an eCommerce addon that literally enables all the tracking within a few clicks.

The MonsterInsights Google Analytics plugin

The challenge is that setting up Google Analytics with WooCommerce requires a lot of custom coding, event tracking, and more.

The good news is that MonsterInsights makes it super easy to set up eCommerce tracking, and you can do it without writing any code. It works seamlessly with WooCommerce and supports other popular eCommerce plugins.

For this tutorial, we’ll use the MonsterInsights Pro version because it includes the eCommerce addon, advanced tracking features, and eCommerce dashboard report. There is also a MonsterInsights Lite version you can use to get started for free.

First, you will need to install and activate the MonsterInsights plugin. If you need help, then please see our guide on how to install a WordPress plugin.

Upon activation, you can see the MonsterInsights welcome screen in your WordPress admin area. Simply click the ‘Launch the Wizard’ button.

Launch setup wizard

Next, you can follow the onscreen instructions in the setup wizard to configure Google Analytics with your website. See our guide on how to install Google Analytics in WordPress for complete installation instructions.

With MonsterInsights, you can also set up dual tracking and set up a Google Analytics 4 (GA4) property. GA4 is the latest version of Google Analytics, and it will replace Universal Analytics on July 1, 2023.

MonsterInsights Dual Tracking GA v4

After this date, you won’t be able to track your online store’s data in Google Analytics and will have to start from scratch. However, dual tracking lets you send data to GA4 and Universal Analytics at the same time.

This way, you will have historical data in your GA4 property when the time comes to completely switch to the new version. For more details, please see our guide on how to switch to Google Analytics 4 in WordPress.

Once you have installed Google Analytics using MonsterInsights, you can move on to installing the MonsterInsights eCommerce addon.

First, you need to visit the Insights » Addons page from your WordPress dashboard and navigate to the ‘eCommerce’ addon.

Install the eCommerce addon

Go ahead and click the ‘Install’ button. The addon will now install and activate on your site. You should see the ‘Status’ change from ‘Not Installed’ to ‘Active.’

Next, you’ll need to enable enhanced eCommerce in Google Analytics.

Enable Enhanced Ecommerce in Google Analytics

First, you need to go to your Google Analytics account and select your website.

From here, you need to click on the Admin button located at the bottom left corner of the screen.

Click admin settings

Next, you need to click on the ‘Ecommerce settings’ option.

It is located under the ‘View’ column.

Ecommerce settings

After that, you need to turn on the toggles for ‘Enable Ecommerce’ and ‘Enable Enhanced Ecommerce Reporting’ options.

Google Analytics will now turn on the eCommerce reporting feature for your account.

Enable ecommerce and enhanced ecommerce reporting

Next, you can go back to your WordPress dashboard and head over to the Insights » Settings page.

From here, switch to the eCommerce tab and make sure to turn on the ‘Use Enhanced eCommerce’ option.

Use enhanced ecommerce option

MonsterInsights will automatically detect your eCommerce software. Currently, it supports WooCommerce, Easy Digital Downloads, LifterLMS, and MemberPress.

That’s all, you have successfully set up WooCommerce conversion tracking on your online store.

Viewing WooCommerce Conversion Reports

Now that you have set up conversion tracking on your WooCommerce store, you need to give Google Analytics some time to collect data.

After a while, you will be able to view your eCommerce reports in both MonsterInsights and Google Analytics.

Let’s start with your eCommerce reports in MonsterInsights.

eCommerce Reporting in MonsterInsights

Log in to your WordPress site and go to the Insights » Reports page and switch to the eCommerce tab.

Ecommerce report in MonsterInsights

At the top, you’ll get your most important conversion metrics including the conversion rate, transactions, revenue, and average order value.

Below that you will see a list of your top products with quantity, sale percentage, and total revenue.

Next, you’ll see your top conversion sources. You can use this report to attract more customers and offer exclusive discounts for customers from specific sources.

Top conversion sources

That’s not all the data. You can dig deeper with more advanced reports under your Google Analytics account.

WooCommerce Tracking in Universal Analytics

Google Analytics provides even more in-depth reporting for your WooCommerce store.

Simply visit your Universal Analytics dashboard and click on Conversions » Ecommerce from the left column.

Ecommerce report in analytics

First, the overview report will provide you with important numbers such as revenue, conversion rate, transactions, and average order value.

You can then switch to different reports for more in-depth analysis. For example, the ‘Shopping Behavior’ report will break down user sessions to add to cart, cart abandonment, and sessions that resulted in the checkout.

Shopping behavior report

WooCommerce Tracking in Google Analytics 4

To view your WooCommerce reports in Google Analytics 4, you can go to Reports » Monetization » Ecommerce purchases.

Ecommerce report in ga4

In the report, you’ll see different metrics like total items viewed, add to carts, eCommerce purchases, and more for each product.

Boost Your WooCommerce Conversions and Increase Sales

Now that you have the data you need to track your WooCommerce conversions, let’s take a look at how to improve your conversion rates and make more sales.

1. Improve Speed and Performance

According to a StrangeLoop case study, a 1 second delay in page load time can lead to a 7% loss in conversions, 11% fewer page views, and a 16% decrease in customer satisfaction.

Strangeloop case study

Slower websites create a bad user experience which results in lower conversion rates. See our complete step-by-step guide to improve your WooCommerce speed and performance.

2. Recover Abandoned Cart Sales

On average 60 – 80% of people who “add to cart” do not end up buying. This means if you have an online store, then you’re losing out on a lot of sales.

Luckily, there are several best practices that help you recover some of those abandoned cart sales. See our tips on how to recover abandoned cart sales and increase your conversions.

3. Provide Users with Alternatives

If users decide to leave your website without making a purchase, then there is very little chance that they will ever see your website again.

You need to provide users a chance to stay in touch even if they don’t end up making a purchase.

You can do this by creating an email newsletter for your WooCommerce store.

We recommend using Constant Contact or SendinBlue. Both of them are on our list of the best email marketing service for small businesses.

For more techniques, see our guide on how to convert WooCommerce visitors into customers.

We hope this article helped you set up WooCommerce conversion tracking on your eCommerce store. You may also want to see our list of the best WooCommerce plugins and how to choose the best blogging platform.

If you liked this article, then please subscribe to our YouTube Channel for WordPress video tutorials. You can also find us on Twitter and Facebook.

The post How to Setup WooCommerce Conversion Tracking (Step by Step) first appeared on WPBeginner.

Welcome Uncanny Owl and Automator Plugin to the WPBeginner Growth Fund

Today, I’m extremely excited to announce that WPBeginner Growth Fund has taken an investment stake in Uncanny Owl, the parent company of a fast growing WordPress automation plugin, Uncanny Automator, and a suite of e-learning plugins for WordPress.

Over 25,000+ websites use Uncanny Owl plugins to automate and grow their businesses.

WPBeginner Growth Fund invests in Uncanny Owl and Uncanny Automator Plugin

About Uncanny Owl and Uncanny Automator Plugin

Uncanny Owl is a Toronto based WordPress company founded by Ryan Moore and Ken Young.

They specialize in helping automate WordPress-powered learning platforms and membership sites to deliver compelling e-learning solutions.

Their team is behind the fast growing WordPress automation plugin, Uncanny Automator, which helps you automate various WordPress admin tasks, so you can save time & money.

Uncanny Automator Explained

It seamlessly integrates with many popular WordPress plugins and third-party platforms, so you can easily build automation recipes without writing any code (over 300 triggers & actions).

In plain English, it helps your WordPress plugins talk to each other, so you can do cool things like:

  • Have 2 WordPress sites talk to each other – sell products on one while create users & setup access on another.
  • Create buttons that can automatically create user accounts and perform other actions in WordPress.
  • Add custom user attributes to user profiles based on user’s actions.
  • Trigger automation recipes in one plugin from the action taken by another plugin (for example, a submission of WPForms can be used to register a user in MemberPress, add them to a BuddyBoss group, and get a calendar event added).
  • Connect your WordPress site with 2000+ external services using a single Zapier integration.
  • … and so much more

Uncanny Automator Triggers and Actions

Uncanny Owl is also known for their popular Uncanny Toolkit and other e-learning extensions.

Background Story — Why Uncanny Owl?

I got introduced to Uncanny Owl brand through their Uncanny Automator plugin because I have always wished something like this existed in WordPress.

Having the ability for two plugins to talk to each other and seamlessly automate tasks is a dream come true.

What’s even better is that they let you do it across two sites without writing any code. The moment I saw it, I was like … this is Zapier for WordPress.

The fact that they had already built the product that would save website owners a lot of time, I wanted to work with them.

Coincidently, two of our mutual friends, Artur and Chris from Extendify, reached out and asked if I would be interested in chatting with the Uncanny Owl founders to discuss a deeper partnership.

My answer was, absolutely!

After few conversations, we decided to join forces.

I invested in the Uncanny Owl business through the WPBeginner Growth Fund and will be advising the team on how to expand their WordPress product business.

At Awesome Motive, we have years of experience building popular WordPress plugins that are used by over 15 million websites including OptinMonster, WPForms, MonsterInsights, and many more.

Not to mention, our other WPBeginner growth fund portfolio companies like MemberPress, Formidable Forms, Pretty Links, Wholesale Suite, and others have seen tremendous growth over the years.

Sharing our combined knowledge with Uncanny Owl will help all of us better serve the larger WordPress community.

I’m really excited to be working with Ryan, Ken, and the entire team to help accelerate their growth in 2021 and beyond.

Thank you so much for your continued support of WPBeginner.

Sincerely,

Syed Balkhi
Founder of WPBeginner

P.S. Want us to acquire or invest in your WordPress business? Learn more about the WPBeginner Growth Fund.

The post Welcome Uncanny Owl and Automator Plugin to the WPBeginner Growth Fund appeared first on WPBeginner.

How to Do A/B Split Testing in WordPress using Google Optimize

Do you want to run A/B split tests on your WordPress site to improve conversions? Split testing helps you understand how small changes in content and design affect user behavior. In this article, we will show you how to easily do A/B split testing in WordPress using Google Optimize.

Split testing in WordPress using Google Analytics

What is A/B Split Testing?

A/B split testing is a technique that allows you to compare two versions of the same web page against each other, so you can determine which one performs better and produces better results.

Marketers use A/B split testing for their landing pages to find out which one gets them more conversions and sales.

Split testing can be used to test any element on the page including call-to-action buttons, color schemes, layout changes, marketing text, images, and more.

How A/B Split Testing Works?

Basically, you show different variations of a page to your audience. After that, you track user engagement and conversions to find out which variation gives you the best results.

How split testing works

Preparing for A/B Split Testing

Before we move forward, there are a few things you would need for this tutorial.

First, you will need MonsterInsights plugin. For more details, see our step by step guide on how to install a WordPress plugin.

MonsterInsights is the best Google Analytics plugin for WordPress. You’ll need at least their Pro plan in order to access Google Optimize addon which we will be using in this tutorial.

If you haven’t already done so, then you need to sign up and install Google Analytics in WordPress.

Lastly, you will need Google Optimize. It is a free tool that allows you to run split testing experiments on your website. We will show you how to set it up in the next step.

Ready? Let’s get started.

Setting up Google Optimize in WordPress

First, you need to visit the Google Optimize website to create your account.

Get started with Google Optimize

Follow the on-screen instructions, and you will reach your account dashboard. Google Optimize will automatically create an Account and a Container for you.

Next, you need to connect your Google Optimize account to the Google Analytics property of your website. To do that, click on ‘Link to Google Analytics’ tab from the right-hand column.

Link Google Analytics property

Clicking on the button will show all Google Analytics properties available under your Google account. You need to select the one associated with your website.

Select and link property

Next, click on the Link button to continue.

Google Optimize will now connect to your Google Analytics property. This will allow Google Optimize to share data with Google Analytics which you can then view in your reports.

Now, it is time to create your first experience. Click on the ‘Create Experience’ button to continue.

Create experience

You will now be asked to provide a name for your experience and enter the URL of the page where this experience will run.

Experience detail

You will also be asked to choose a type for your experience. You need to select A/B test and then click on the ‘Create’ button to continue.

Optimize will now create your experience, and you will be redirected to the experience page. It will automatically show the original page as your first variation.

Create variant

You need to click on the add variation button to create a new version. Optimize will ask you to provide a name for this variation. It is a good practice to use a name that reflects the changes you are going to apply in this variation.

Variant name

Click on the Done button to continue.

Optimize will now list your new variation on the experience page. Click on the ‘0 changes’ link next to your new variation to edit it.

Change variation

Google Optimize will now open the page where you want to run the test with a powerful editor. It is a simple drag and drop tool that you can use to make changes to your page.

Edit variation

You can just point and click on any element in your page to make changes. For the purpose of this tutorial, we are going to change the color of our main call to action button.

After you have made the changes that you want to test, you need to click on the ‘Done’ button to exit the editor.

You will now see your new variation listed with the number of changes you made to it.

Changed variation

You can continue editing or add another variant to your experience.

After that, you need to select an objective for your experience. Just below the variants you will see the option to select experience objective.

Experience objective

Clicking on it will open views from your Google Analytics reports.

If you are already using goals and events, or eCommerce tracking, then you will see them listed there.

After selecting objective, you can enter a hypothesis about what you are testing and what you are expecting from this experiment.

Your experience is almost ready but first, you need to connect Google Optimize with MonsterInsights.

Connecting Google Optimize to MonsterInsights

MonsterInsights helps you easily connect your WordPress site to Google Optimize.

First, you need to visit Insights » Addons page in your WordPress admin area. From here, you need to install and activate the ‘Google Optimize’ addon.

Google Optimize addon for MonsterInsights

Upon activation, you need to visit Insights » Settings page and switch to the tracking tab. From here you need to scroll down and click on the Google Optimize tab.

Google Optimize settings in MonsterInsights

Now you need to provide your Google Optimize container ID. You can find this information under your Google Optimize account by clicking on the ‘Container Setup’ tab in the right column.

Container ID

Copy and paste your container ID in MonsterInsights’ Google Optimize settings page and then click on the ‘Save changes’ button to store your settings.

That’s all you have successfully installed Google Optimize on your website and you are now ready to run your experiments.

Scheduling and Running Your A/B Split Test

Now that everything is in order, you are ready to schedule and run your A/B split test.

Switch to Google Optimize dashboard and open your experience. From here you can just go ahead and click on the ‘Run Experiment’ button to manually launch it.

Run experiment

You can also click on the ‘Create Schedule’ button to set up a schedule for your experiment. Make sure you provide enough time for the experiment to collect visits and data.

Viewing Your A/B Split Testing Reports in Google Optimize

Google Optimize will now show different variations of your page to users and start collecting data. After it has collected enough data, you can view the results under the reporting tab.

Split test reporting

It will show how each variant performed based on the experiment objective (Google Analytics goals, event, or views you selected).

Google Optimize reports

We hope this article helped you learn how to do A/B split testing in WordPress using Google Analytics and Google Optimize. You may also want to see our guide on how to convert WooCommerce visitors into customers.

If you liked this article, then please subscribe to our YouTube Channel for WordPress video tutorials. You can also find us on Twitter and Facebook.

The post How to Do A/B Split Testing in WordPress using Google Optimize appeared first on WPBeginner.

The Ultimate Affiliate Marketing Guide for Beginners – Step by Step

Affiliate marketing is one of the most popular ways to make money online from your blog. It allows you to add a steady income stream to your blog’s monetization strategy. In this affiliate marketing guide for beginners, we will explain how affiliate marketing works, and how to get started right away.

Ultimate affiliate marketing guide for beginners

What is Affiliate Marketing?

By definition, affiliate marketing is a referral arrangement in which an online retailer (advertiser) pays you a commission when users purchase their product from your referral link.

Unlike other ad types which pays based on clicks or views, affiliate marketing works on a CPA (cost-per-acquisition), or CPL (cost-per-lead) basis. In other words, you only earn a commission when someone takes an action (i.e buys the product or signup for a free trial).

Because there is less risk for the advertiser, affiliate programs pay out much higher commissions to publishers compared to Google AdSense or other types of ads.

Affiliate marketing requires a more hands-on approach. You have to find a product or service that you believe will be helpful to your users. After that you have to strategically add it in your blog posts and other areas of your site, so users can purchase the product using your referral link.

How Does Affiliate Marketing / Tracking Work?

First, you have to find a company or product that you want to promote. You need to select a product or service that you believe will be relevant to your blog’s topic and useful for your audience. The product or company you choose will be called a ‘Merchant’.

Next, you have to partner up with the company by joining their partner program. This makes you their ‘Affiliate’. Some companies also use the terms associates, partners, etc.

Once you have joined their partner program (also called Affiliate Program), you will get a unique affiliate ID. You will need to use this affiliate ID in all affiliate links that you add in your website to promote the product.

You can promote the product by adding an in-depth product reviews, recommend it in your articles, display banner ads, sending an email newsletter, and more. All traffic you send to the merchant website with your unique ID will be tracked.

Once a user makes a purchase, you will earn a commission. Your payment is issued once your earnings reach a particular threshold typically 45 – 60 days.

How to Get Started with Affiliate Marketing

First, you need to make sure that you are using the right blogging platform, and you are allowed to run affiliate marketing campaigns on your website.

For example, if you are using WordPress.com, then there are some restrictions regarding the products and services you can link to. For more details see our comparison of WordPress.com vs WordPress.org.

On the other hand if you are on self-hosted WordPress.org website, then you can add any affiliate link you want and efficiently manage your affiliate campaigns.

If you haven’t created a website already, then you can get started right away. Simply follow the instructions in our step by step guide on how to start a blog, and you’ll be up and running in less than 30 minutes.

Next, you need to let your users know how you make money from your website by adding a disclosure page. See WPBeginner’s disclosure page and feel free to use it as a template.

You will also need to add a privacy policy and terms of service page to your blog.

These are amongst the must have pages for every WordPress blog. They not only save you from legal issues in the future, but they also help you build trust with your audience.

Finding Affiliate Products and Services to Promote

There are many ways to find products and companies that you can partner up with as an affiliate. Here are some of the easiest ways to find the products you can promote.

1. Become an affiliate for products you already use

First, you need to look at the products and services that you already use and find useful. This makes it easy for you to convince your users about the product since you already know the pros and cons.

Next, you need to go to the product’s website and search for terms like ‘Affiliate program’, ‘Partners’, or ‘Affiliates’. Many companies are actively looking for affiliate marketers to promote their products that’s why they add a link to their affiliate page in their website’s footer.

Finding affiliate programs to join

2. Look for products other blogs are recommending

Another way to find products is by looking at other blogs similar to yours. You will be able to find many similar blogs that are using affiliate marketing to make money.

But how do you know that they are promoting affiliate products?

First, look for the obvious and easily noticeable banner ads on their website. Take your mouse to the banner ad, and you will see a link in your browser’s status bar.

finding affiliate links

This link will usually have an affiliate ID. Affiliate ID helps merchants track which affiliate partner is sending them traffic / sales.

Sometimes these links may look like internal links, but when you click on them they will take you to a product website with affiliate marketer’s ID in the link. You will also find similar affiliate links through-out their content.

3. Join Bigger Affiliate Networks

Another way to find products to promote is by joining affiliate networks. These websites act as a middleman between affiliate marketers and merchants.

You will notice that many products and companies that you want to partner with already use an affiliate network. This helps you quickly find a lot of products that you can start promoting on your website.

4. Reach out to Companies

If you really want to promote a product but can’t find any information about their affiliate program, then you can simply ask them via email.

Some companies may not be actively promoting their affiliate program. If they have an affiliate program, then they can invite you to join.

What are Affiliate Networks? Why You Should Join Them?

Affiliate networks act as a middleman between you (the affiliate marketer) and merchants (companies that want to sell their products).

For merchants, they provide their platform as a service to list their products, track affiliate traffic, manage affiliates, and send payments.

For affiliate marketers, they offer an easy to use platform to search for products, sign up as an affiliate, track your campaign performance and earnings.

Following are some of the most popular affiliate networks that you can join.

  • ShareaSale – One of the largest affiliate networks with many high-paying affiliate products for almost every category imaginable. Popular WordPress hosting company, WPEngine, uses ShareASale to manage their affiliates. WPEngine’s Affiliate program offers a very generous payout to their affiliate partners.
  • CJ Affiliate (Formerly, Comission Junction) – Another top affiliate network with a huge number of merchants and products neatly organized in categories and easily searchable. Companies like GoDaddy, Expedia, and many others use CJ.
  • ClickBank – This is a large online marketplace for selling digital products in various categories from different vendors. It is easy to use and has tons of learning resources for new affiliate marketers.
  • Amazon Associates – Amazon is world’s largest ecommerce store with millions of products. You can sign up for their affiliate program and start earning by sending people to a website they already use for their online shopping.

Which affiliate networks should you join?

You should join affiliate networks that have the products you want to promote. You can join multiple affiliate networks for different products. We use all the above networks and few others.

Make sure that you always check the network program policies. You also need to review program policies of individual products and merchants. This will give you a clear idea about your earnings, payments, additional incentives, and more.

Affiliate Marketing Tips to Increase Earnings

Now that we have covered the basics, let’s dive into some more tips on how to actually make money from affiliate marketing.

1. Choose good products and companies to promote

As an affiliate marketer, you don’t have control over the future of products that you are recommending. That’s why you need to make sure that you are recommending the best products from reputable companies.

The best way to do this is by recommending the products and services that you have actually used. If you want to recommend a product that looks useful, then feel free to contact them to learn more.

If you ask nicely, most companies will gladly offer you a free account or copy to review / test their product or service.

2. Offer highly useful and valuable content

You can add affiliate links and banners anywhere on your WordPress site. However, simply adding links will not result in convincing your users to actually buy those products.

You need to convince your users by offering useful and valuable information about the product. Many affiliate marketers do that by writing in-depth product reviews, video reviews, product comparisons with pros and cons, and more.

3. Keep your audience in mind

Keep your website’s audience and their interests in mind when choosing the product. For example, if you run a fashion blog, then you would want to promote fashion accessories, clothing, and similar products that your audience would want to buy.

You also need to make sure that you are not just recommending products because they are offering higher commissions. If a user buys a product based on your recommendation, and it doesn’t turn out useful, then they will never trust your recommendations again.

Affiliate Marketing Plugins and Tools for WordPress

As your blog grows, you will be recommending a lot of different products. This will make it difficult for you to manage all the affiliate links, banners, and ads spread all over your website.

Luckily, there are excellent affiliate marketing tools and plugins for WordPress that you can use to help with management.

1. ThirstyAffiliates

Manually adding links to your content becomes quite difficult as your site grows. You will have to copy the URL with your affiliate ID every time you mention the product and paste it into WordPress.

This is where ThirstyAffiliates can help. It is an affiliate link management plugin that allows you to easily add affiliate links in WordPress.

It also lets you change lengthy affiliate links into cloaked pretty links which are more user-friendly.

ThirstyAffiliates also has the option to automatically replace keywords with affiliate links which can significantly help you boost your affiliate revenue.

2. AdSanity

AdSanity is the best WordPress ad management plugin and a must-have for every affiliate marketer’s toolbox. It allows you to create banner ads from your WordPress site and manage them from a single dashboard.

AdSanity also makes it easy to insert ads into your WordPress posts, pages, and sidebar widgets. You can use it to manage your third-party ads like Google AdSense ads and banners as well. For detailed instructions, see our guide on how to manage ads in WordPress with AdSanity.

3. MonsterInsights

MonsterInsights is the best Google Analytics plugin for WordPress. It allows you to see where your users are coming from and what they do when they are on your website.

It also helps you track your outbound affiliate links using Google Analytics. This enables you to find out which affiliate links are clicked more often and help you discover missed opportunities.

Need more tools? See our full list of top affiliate marketing tools and plugins for WordPress.

We hope this ultimate affiliate marketing guide for beginners helped you learn how to become an affiliate marketer. You may also want to see our ultimate WordPress SEO guide to bring more visitors to your website.

If you liked this article, then please subscribe to our YouTube Channel for WordPress video tutorials. You can also find us on Twitter and Facebook.

The post The Ultimate Affiliate Marketing Guide for Beginners – Step by Step appeared first on WPBeginner.

How to Enable Customer Tracking in WooCommerce with Google Analytics

Do you want to enable customer tracking in WooCommerce?

Customer tracking allows you to offer a personalized shopping experience based on customer behavior in your eCommerce store.

In this article, we will show you how to easily enable customer tracking in WooCommerce with Google Analytics.

How to Enable Customer tracking in WooCommerce with Google Analytics

Why Enable Customer Tracking in WooCommerce with Google Analytics?

Google Analytics allows you to see where your visitors are coming from and what they do on your website. In other words, it helps you track your traffic sources as well as user engagement on your website.

For eCommerce platforms, Google Analytics offers an enhanced eCommerce tracking feature. This allows you to better understand users’ shopping and checkout behavior. Plus, you can see which products perform the best and track your WooCommerce store’s sales performance.

By default, a WooCommerce store allows your customers to create an account or checkout as guest users. Creating an account helps the user save their shipping and billing information for faster checkout next time. It also helps you offer customers a personalized shopping experience based on their browsing and shopping history.

Wouldn’t it be great if you could track logged-in users with their user IDs in Google Analytics and also see the path customers took before making a purchase?

This will give you access to a treasure trove of information and insights on customer behavior. You can use it to offer a better on-site experience and boost your sales.

Let’s take a look at how to easily enable customer tracking in WooCommerce. Here are quick links that you can use to jump ahead to any section:

Set up Ecommerce Tracking in WordPress with Google Analytics

The best way to set up WooCommerce customer tracking in Google Analytics is using Monsterinsights. It is the best Analytics solution for WordPress and helps you set up tracking without editing code.

The plugin offers an eCommerce addon, which automatically detects WooCommerces and starts tracking customer behavior in Google Analytics. It also comes with a Customer Journey addon that allows you to see users’ behavior before they make a purchase.

First, you will need to install and activate the MonsterInsights plugin. For more details, see our step-by-step guide on how to install a WordPress plugin.

You will need to be on the ‘Pro’ plan to access the eCommerce and User Journey addon, which we will use for this tutorial. However, there is also a MonsterInsights Lite version you can use for free.

Upon activation, you will see the welcome screen and the setup wizard. Simply click the ‘Launch the Wizard’ button and follow the on-screen instructions.

Launch setup wizard

For detailed instructions, see our article on how to install Google Analytics in WordPress.

MonsterInsights also helps you set up Google Analytics 4 (GA4) property through its Dual Tracking feature. GA4 is the latest Analytics version, and it will soon replace Universal Analytics.

MonsterInsights Dual Tracking GA v4

If you haven’t created a Google Analytics 4 property, then now is the best time. That’s because, after July 1, 2023, Universal Analytics will sunset and won’t track your website data. Setting up GA4 after the sunset date will mean you’ll have to start from scratch and won’t have any historical data for comparison.

For more details, please see our guide on how to switch to Google Analytics 4 in WordPress.

Install the MonsterInsights eCommerce Addon

Once you’ve configured Google Analytics on your website, the next step is to install the eCommerce addon.

You need to visit the Insights » Addons page from your WordPress dashboard and navigate to the ‘eCommerce’ addon. Simply click the ‘Install’ button, and the addon will automatically activate.

Install the eCommerce addon

Enable Enhanced Ecommerce Tracking in Google Analytics

The next step is to enable eCommerce tracking in Google Analytics. E-commerce tracking is not enabled by default in your Google Analytics account, and you will have to manually enable it.

First, you’ll need to head over to your Google Analytics account dashboard and click the Admin option.

Click the admin settings button

Next, you need to click on the ‘Ecommerce Settings’ option.

It is located under the View column.

Ecommerce settings

On the settings page, click the slider under Enable Ecommerce and Enable Enhanced Ecommerce Reporting to turn it on.

Don’t forget to click the ‘Save’ button when you’re done.

Enable ecommerce and enhanced ecommerce reporting

Now, your Google Analytics account will start showing enhanced eCommerce reports for your WooCommerce store.

For more details, please see our guide on how to set up WooCommerce conversion tracking.

Enabling User Journey Addon in MonsterInsights

Now that you’ve set up WooCommerce tracking in Google Analytics, the next step is to enable the MonsterInsights Customer Journey addon.

The addon will allow you to see the steps a customer takes before making a purchase in WooCommerce. Plus, it also shows the time it took at each step, the pages a user visited, and more.

First, you’ll need to go to Insights » Addons from your WordPress admin panel. Next, navigate to the User Journey addon and click the ‘Install’ button.

Install the user journey addon

The addon will automatically activate and start tracking your WooCommerce customer’s journey.

Next, you can go to WooCommerce » Orders from your WordPress dashboard to view the path your customers took when purchasing a product.

WooCommerce order select

After that, click on the order for which you’d like to see the user journey.

On the next screen, you’ll see the path a customer took before buying the product. You get to view the pages they visited, where they clicked, and how much time they spent on a page.

User journey in MonsterInsights

This is really useful information to better understand your customers. You can see which product categories are performing the best and where customers are exiting your store during the purchase process. Using the data, you can then fix these issues and optimize your site for more conversions.

Enabling User ID Tracking in Google Analytics

While MonsterInsights makes it very easy to track customers on your WooCommerce store, it also tracks WordPress ID tracking in Google Analytics.

WordPress ID is a unique ID to identify every user on your website. The user ID is called the ‘Client ID’ in Universal Analytics and the ‘App Instance ID’ in Google Analytics.

Do remember that enhanced eCommerce tracking will enable eCommerce reporting features for your WooCommerce store. However, it does not enable user tracking by default.

Let’s take a look at how you can enable user ID tracking in Universal Analytics and Google Analytics 4.

Enabling Customer Tracking in Universal Analytics

To enable individual customer tracking, you need to visit your Google Analytics account dashboard and open the Admin page.

Click the admin settings button

Now, click on the ‘Tracking info’ link under the Property column to expand the submenu.

After that, you can click the User-ID link that appears below.

Go to user ID settings

On the next page, you’ll have to review and agree to the User-ID policy.

Simply click the ‘I agree to the User-ID Policy’ toggle to turn it on.

Enable the user ID feature

From here, click on the ‘Next step’ button to continue.

Google Analytics will now ask how you would like to configure the user-ID tracking.

Copy the user id code

Since you’ll be using MonsterInsights, there’s no need to set up the user-ID tracking code. The plugin will take care of this for you.

Simply scroll down and click the ‘Next step’ button to continue.

Head to the next step

Next, you will see information about creating a user ID view in Google Analytics.

Go ahead and click the ‘Create’ button.

Create user-id view

After that, you will be asked to enter a ‘Reporting View Name’, which will be used to display User ID reports.

We recommend including UserID in the name, so it is easy to remember which view has UserID tracking enabled.

Enter a reporting view name

There is also an option to select the Reporting Time Zone.

Next, you just need to scroll down to the bottom and click on the ‘Create view’ button to save it.

Select timezone and create view

Enabling Customer Tracking in Google Analytics 4

To start, you’ll need to go to the Admin settings from your GA4 dashboard and click the ‘Reporting Identity’ option.

Open reporting identity settings

On the next screen, you will need to select a way to identify users on your online store.

GA4 uses multiple ways to identify customers. These include user ID, Google signals, device ID, and modeled data. For the sake of this tutorial, we’ll select the ‘Observed’ option and click the ‘Save’ button.

Select observed option in reporting identity

Viewing Customer Tracking Reports in Google Analytics

Now that everything is set up, Google Analytics will now track all your website customers. It will also be able to track logged-in users with their unique WordPress user ID.

View User ID Data in Universal Analytics

To view all your individual customer activity, you can go to your Universal Analytics account and click on the Audience » User Explorer menu.

View user explorer client ID in UA

You will see individual customer reports with a unique ID assigned to all non-logged-in users.

To view customer tracking reports for logged-in users in WooCommerce, you need to click on the Google Analytics logo on the top left corner of the screen.

This will show all your Google Analytics profiles. You will see your website profile and under ‘All website data’ you will see the UserID reporting view you created earlier.

Select UA User ID view

Go ahead and click on the UserID reporting view to load it.

Once it’s loaded, you need to click on the Audience » User Explorer menu. This way, you will see a logged-in customer tracking report where each user is represented by their WordPress user ID on your website.

UA user explorer user ID report

You can click on the user ID to view a customer’s individual tracking data.

For instance, the device category they use, acquisition date, the channel they used to arrive on the online store, and more.

UA user explorer user id details

View User ID Data in Google Analytics 4

In Google Analytics 4, you’ll need to head to the ‘Explore’ tab from the menu on your left.

Under Explorations, you’ll see different report templates. Simply click the existing ‘User explorer’ report.

Select user explorer report

Next, you’ll see the User explorer report in Google Analytics 4.

One thing you can notice is the Client ID will be replaced with the App instance ID.

See user explorer report in ga4

You can click on any of the app instance IDs to view more details.

For example, the report shows the total events that were triggered, the location of the user, the time stamp for each event, and more.

View details of app instance ID

Matching Customer Tracking with Their WordPress Accounts

Now that you’ve identified users in Google Analytics, you can match them with WordPress accounts. This will help you know who this customer is, and how you can create personalized offers, emails, or shopping experiences for them.

First, you need to note down the customer ID you see in your Google Analytics User-ID reporting view.

After that, go to your WordPress website’s admin area and click on the ‘Users’ menu. It will show you a list of all users on your WordPress site.

Next, you can click the ‘Edit’ link below any username in the list.

Edit any user profile

WordPress will now open the user profile for you.

If you look in your browser’s address bar you will ‘user_id’ parameter in the URL.

User ID in URL

Next, you need to replace the value next to user_id with the one you copied from your Google Analytics report and press enter key on your keyboard.

WordPress will now load the user profile associated with that particular User ID. You now have the customer’s name, username, email address, and social media information. You can also track their orders, product views, cart activity, and more.

We hope this article helped you learn how to enable customer tracking in WooCommerce with Google Analytics. You may also want to see our expert pick of the best free WooCommerce plugins for your online store and how to get a free email domain.

If you liked this article, then please subscribe to our YouTube Channel for WordPress video tutorials. You can also find us on Twitter and Facebook.

The post How to Enable Customer Tracking in WooCommerce with Google Analytics first appeared on WPBeginner.