Do you want to start a video blog and make money?
Vlogging is a powerful way to connect with people and build a personal brand. However, if you simply upload vlogs to third-party platforms like YouTube, then you may struggle to grow your audience, make money, and become a successful vlogger.
In this article, we will show you how you can start a vlog and make money.

Which Is the Best Website Builder for Your Video Blog?
There are many website builders that can help you create a vlog site, but we recommend using WordPress and a separate video hosting platform.
To learn more about why WordPress is such a good choice, please see our complete WordPress review with pros and cons.
There are two types of WordPress software: WordPress.com and WordPress.org. We recommend using WordPress.org, also called ‘self-hosted WordPress.’ This will give you full ownership and control of your site.
Using WordPress.org allows you to install third-party plugins and themes, including plenty that are designed specifically for vloggers.
Also, while you can upload videos to WordPress, it’s far better to use a separate video hosting platform such as YouTube or Vimeo.
Videos take up a lot of your hosting resources, which will slow down your website. Instead, we recommend uploading your vlogs to a separate hosting platform such as YouTube or Vimeo, which has all the server resources you need.
After uploading your vlogs to one of these sites, you can then embed your vlog in a WordPress page or post by simply copying and pasting a link. WordPress has built-in support for most major video hosting platforms.
If you really want to save time and impress your viewers, then you can use a plugin like Smash Balloon to create a video feed that will update automatically every time you post a new vlog.

If you don’t already have a video hosting platform in mind, then don’t worry. Later in this guide, we’ll help you find the perfect platform for your vlogs.
Step 1. Setting Up Your Video Blog Website
To create a video vlog, you’ll need a domain name and web hosting.
Although the WordPress software is free, hosting and domain names are where the costs can really start to add up.
A domain name typically costs $14.99/year and hosting costs start from $7.99/month. This is a lot for hobby vloggers, new creators, or anyone who is working with a tighter budget.
Thankfully, Bluehost has agreed to offer our users over 60% off on web hosting and a free SSL certificate as part of this deal. This is absolutely essential if you plan to sell premium videos and make money from your vlogs. You will also get a free domain name when you sign up!
Simply click the link below to create a vlogging website for as little as $2.75 per month.
Because you get a free domain when you sign up with Bluehost, you’ll need to be sure it’s the right fit for your video blog. For expert tips, check out our guide on how to choose the best domain name.
Once you’ve completed the purchase, you’ll get an email with instructions on how to log in to your web hosting control panel. This is your hosting account dashboard where you can manage your vlog, including setting up email notifications and asking for WordPress support if you need it.
It’s also where you’ll install the WordPress software, so let’s do that now.
Step 2. Install WordPress on Your Video Blog
When you sign up with Bluehost using our link, you’ll get access to a one-click WordPress installer. Simply log into your Bluehost account and click on ‘One Click Install.’

You can now follow the onscreen instructions to set up WordPress.
If you’re using a different WordPress website host like SiteGround, Hostinger, HostGator, or WP Engine, then you can see our complete guide on how to install WordPress for all the top hosting providers.
Once WordPress is set up, you’re ready to start customizing your vlog site.
Step 3. Select a Video Theme
WordPress themes are professionally designed templates that change how your vlog looks and acts.
There are lots of different premium and free WordPress business themes to choose from. You can generally categorize these as multipurpose WordPress themes, or niche industry themes. However, most WordPress themes are designed to show text.
Since we’re starting a vlog, we need a theme that’s designed specifically for videos.
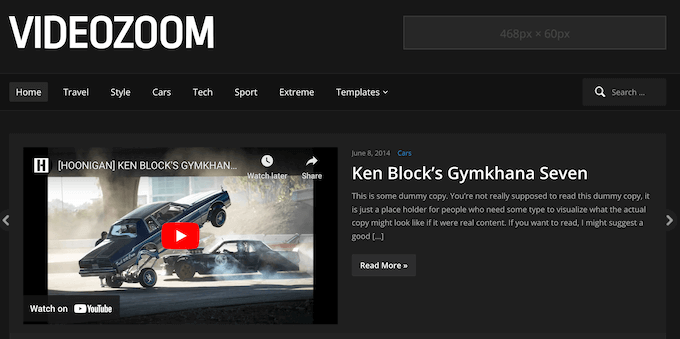
Even if you’re using a separate video hosting platform, embedded videos still take time to load. With that in mind, it’s important to find a lightweight theme that won’t slow down your website. Wherever possible, we also recommend using a theme that has built-in lazy loading.
On top of that, vlogs often need special features such as parallax scrolling, lightbox popups, and fullscreen video backgrounds.

That’s a lot to keep in mind, so you may want to look at our expert pick of the best WordPress video themes.
Another option is to use a landing page builder plugin such as SeedProd. SeedProd is the best drag-and-drop WordPress page builder and comes with more than 180 templates.
This includes an entire section of ‘Webinar’ templates that are designed specifically to show videos on your WordPress website.
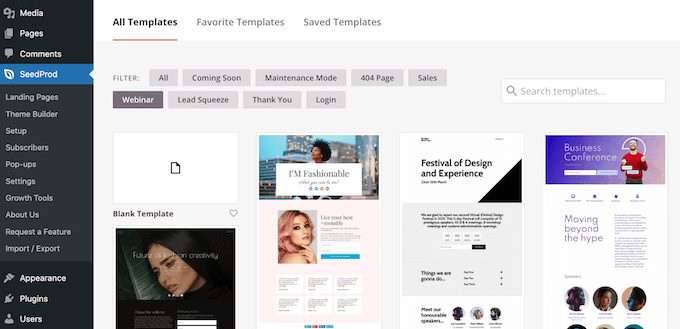
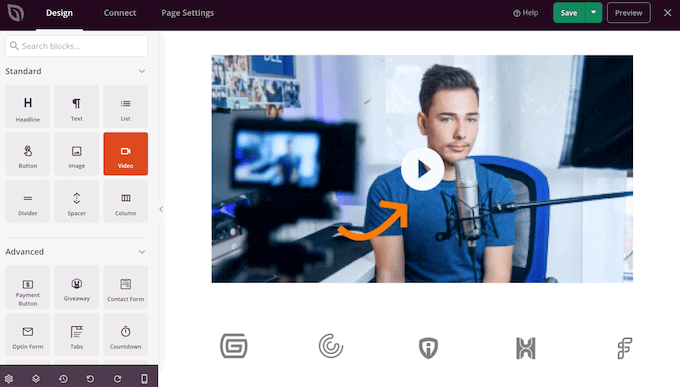
SeedProd also has a ready-made ‘Video’ block that you can drag and drop onto any page.
For more information, please see our guide on how to create a landing page with WordPress.
Once you’ve chosen a video theme, please see our step-by-step guide on how to install a WordPress theme.
After installing a theme, you may want to customize it by going to Appearance » Customize in the WordPress dashboard. This will launch the theme customizer where you can fine-tune the theme settings and see your changes in the live preview.
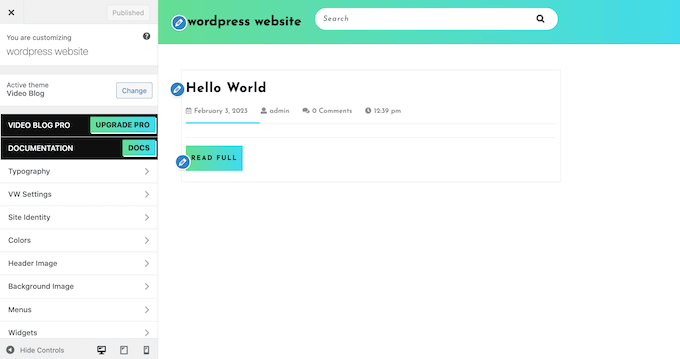
If you’re using one of the newer full-site editing themes, then you’ll need to go to Appearance » Editor instead.
Here, you can fine-tune the theme using blocks.
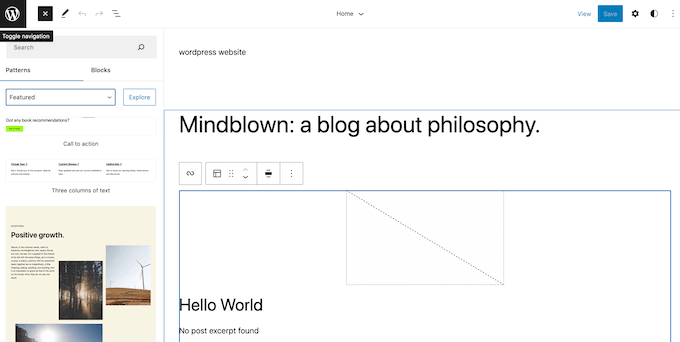
Just remember that you can customize your theme at any point. You can even completely change your WordPress theme, if you realize it doesn’t quite meet your needs.
This means you don’t need to finalize your site design now. In fact, it may be easier to fine-tune your vlog once you’ve added some content.
Step 4. Create a Custom Homepage
WordPress comes with two content types called posts and pages.
You’ll typically use posts to create articles and blogs, while pages are static “one-off” types of content. For example, you might publish an about page, a privacy policy, or a custom archive page.
There are a few different ways to show videos in WordPress. However, since we’re creating a video vlog you’ll typically embed one or more videos in a blog post.
By default, the WordPress homepage shows your posts in reverse chronological order, so your latest vlog appears at the top of the homepage.
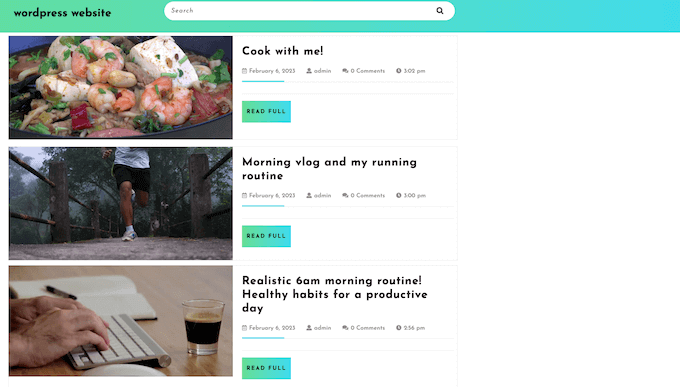
However, you may want to move this blog list to another page, and use a custom homepage instead. This custom homepage can introduce your vlog to visitors and let them know what you have to offer.
You might even create a YouTube gallery of all your best videos, which is a great way to catch a visitor’s attention and make them want to watch more of your content.
Smash Balloon allows you to create all kinds of galleries, including showing a specific YouTube playlist or favorites feed, a single video, or even your latest live stream.
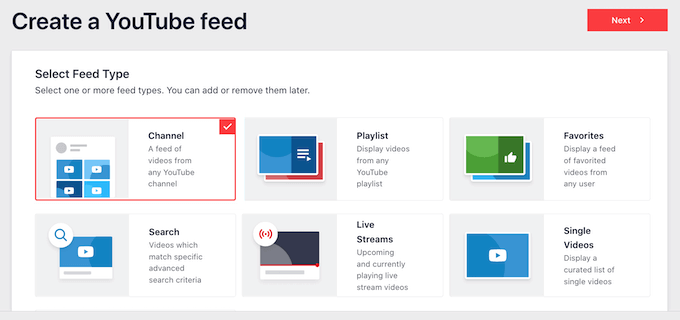
For step-by-step instructions on how to create an attention-grabbing homepage for your video blog, please see our guide on how to create a custom homepage in WordPress.
Once you’re happy with the design, it’s time to set it as your homepage. To do this, go to Settings » Reading in the WordPress dashboard.
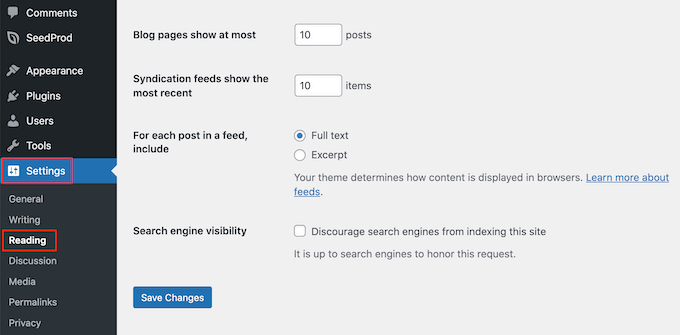
Here, scroll to ‘Your homepage settings’ and select ‘A static page.’
Next, open the ‘Homepage’ dropdown and choose the page that you want to use.
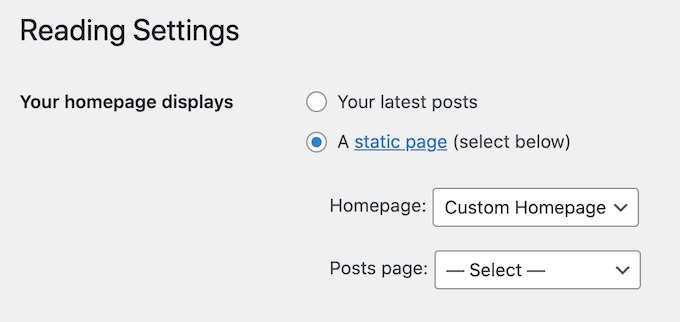
After that, simply scroll to the bottom of the screen and click on ‘Save Changes.’ Now, if you visit your website you’ll see the new homepage in action.
With that done, make sure you create a separate blog page to display your vlogs.
Step 5. Set Up Your Video Hosting Platform
Before you can start adding videos to your WordPress website, you’ll need to upload them to a separate video hosting platform. In this way, you can show countless high-resolution videos on your website without affecting its performance.
For more on this topic, see our post on why you should never upload a video to WordPress.
There are lots of different video hosting platforms that you can use, but we recommend YouTube as it’s the most popular choice.
It’s free to create a YouTube account and you can upload as many videos as you want.
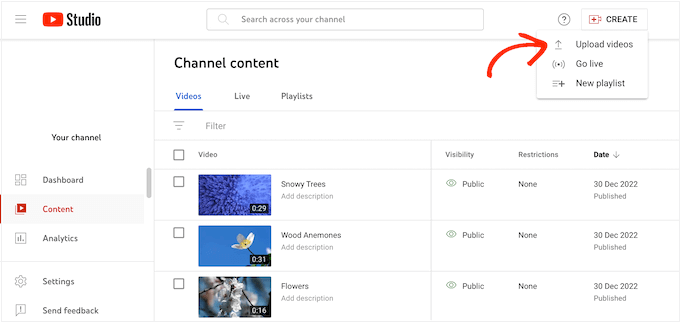
YouTube even has a Partners Program that you can join to make money from your videos. This program also offers more benefits like analytics, longer videos, and editing tools.
Since it’s such a popular platform, there are lots of great WordPress plugins for YouTube. For example, you can use plugins to quickly and easily embed a YouTube playlist in WordPress.

If you don’t want to use YouTube, then there are many other popular platforms including Vidyard, Wistia, and SproutVideo. For a closer look at all the top video sites, please see our expert pick of the best video hosting sites for bloggers.
After choosing a platform, you’ll need to create an account and upload all the vlogs that you want to show on your WordPress website.
For instructions on how to do this, check out the online documentation for your chosen video hosting platform.
Step 6. Create Your First Vlog
To create your first vlog, simply go to Posts » Add New in your WordPress dashboard.
WordPress has a block-based editor that allows you to create beautiful content layouts for your vlogs. Here, you can add text, images, audio clips, and more.
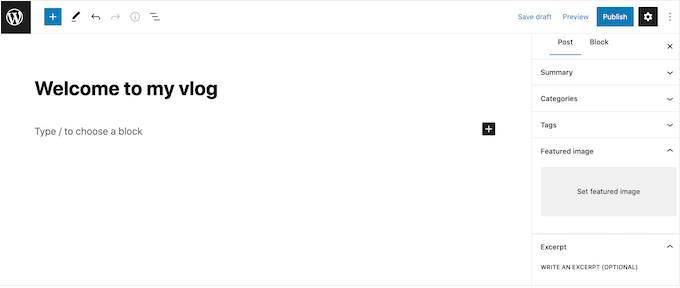
For an in-depth look at the editor, please see our WordPress block editor tutorial.
The easiest way to add vlogs to WordPress is by using the built-in auto-embed feature. If you’re using one of the big video hosting platforms, then you can simply paste the video’s URL into the WordPress content editor, and WordPress will handle the rest.
Just head over to your chosen video hosting platform and find the vlog that you want to show on your WordPress blog. You can then simply copy the video’s URL.
After that, switch back to the WordPress dashboard and paste the URL in the content area. If you paste it into a standard Paragraph block, WordPress will automatically try to place it in the correct block, such as the YouTube block.
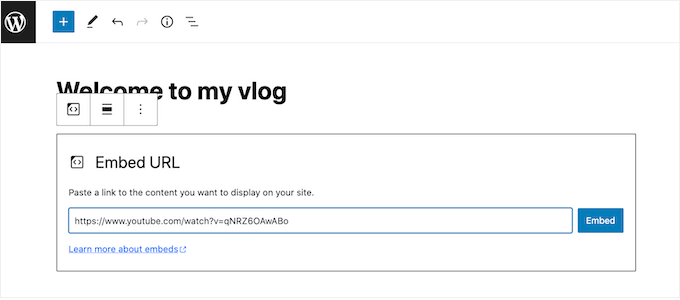
Even if you don’t see the platform-specific block, it will use the Embed block and display the video inside the content editor.
For more information, please see our detailed guide on how to easily embed videos in WordPress blog posts.
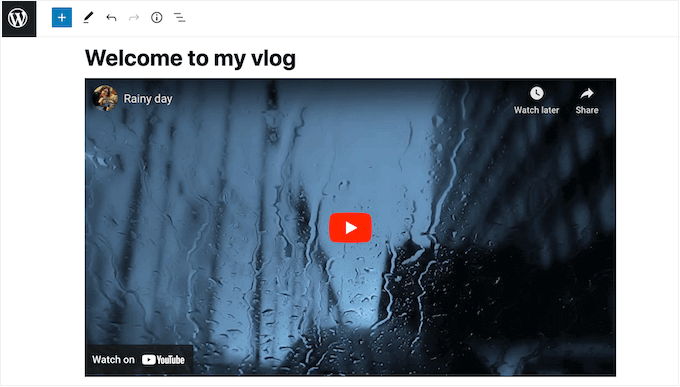
As you’re working on the vlog, you can see how it’ll look to visitors by clicking on ‘Preview.’
This will open the page in a new tab.
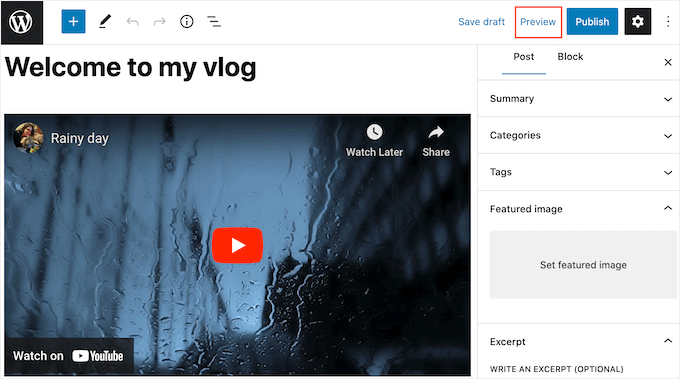
The WordPress post editor also has sections for Categories and Tags. You can use these to organize your vlogs so it’s easier for visitors to find interesting content. To learn more, please see our guide on how to add categories and tags in WordPress.
When you’re happy with how the vlog looks, go ahead and click on the ‘Publish’ button in the top-right corner of the screen.
To add more vlogs to your website, simply follow the same process described above.
Step 7. Add a Contact Form to Your Vlog
Some viewers might want to contact you directly. This may include affiliate marketers, sponsors, advertisers, and other brands who are looking to build relationships with creators, or other vloggers who want to collaborate.
These people could ring your phone number or send a message to your business email address, but we always recommend adding a contact form to your website.
This makes it easier for potential partners to contact you, so you don’t miss out on any opportunities to grow your brand and make money from your vlogs.
The easiest way to add a contact form to your WordPress website is by using the free WPForms plugin. WPForms comes with a built-in Simple Contact Form template that you can customize using the drag-and-drop editor.
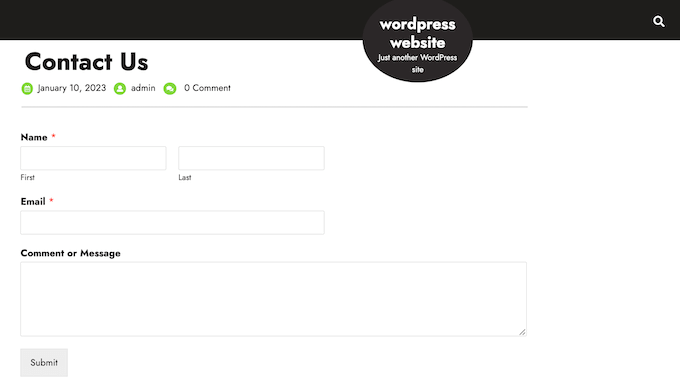
You can then add the form to any page, post, or widget-ready area using the ready-made WPForms block.
For detailed instructions, see our guide on how to create a contact form in WordPress.
Step 8. Help Visitors Find Interesting Vlogs
Once you’ve added some content to your vlog, it’s a good idea to add a navigation menu so visitors can find their way around the different videos.
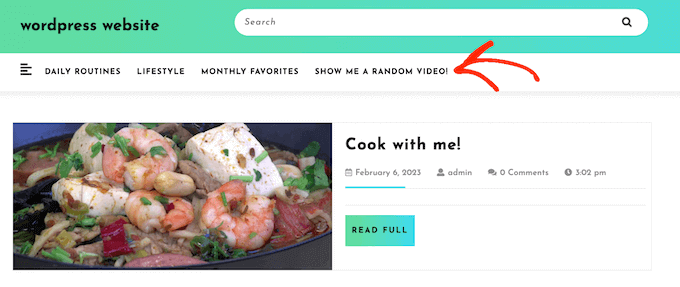
The exact location of your menu will depend on your WordPress theme. Most themes have several options, so you can create multiple menus and then show them on different areas of your vlog.
Whether you create a single menu or multiple menus, it’s easy to add navigation to your vlog. For a complete guide, please see our post on how to add a navigation menu.
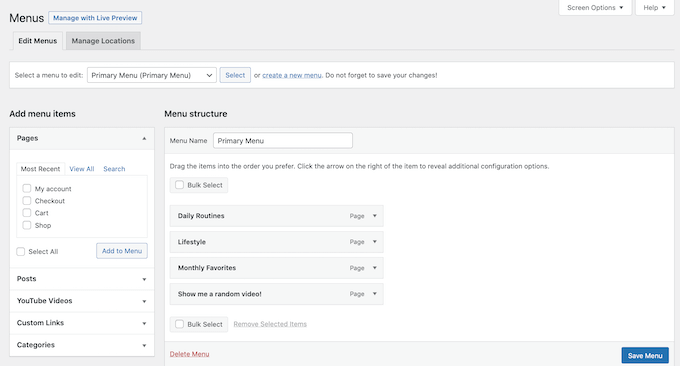
Menus encourage people to explore your site, but sometimes visitors may want to search for a specific vlog. WordPress comes with a built-in search feature, but it’s quite basic and not very good at finding relevant content.
That’s why we recommend using SearchWP, which is the best search plugin for WordPress.
It is very easy to use and gives much more accurate search results. It allows visitors to search for a keyword in the post or page title, content, URL slug, categories, tags, taxonomies, WordPress excerpts, and even comments.
All of this can help visitors find interesting vlogs, fast.
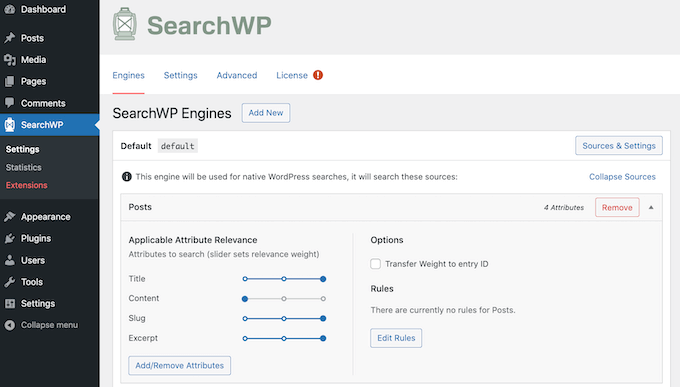
For step-by-step instructions on SearchWP, please see our guide on how to improve WordPress search.
Step 9. Optimize Your Vlog for SEO
If you want to get more viewers, then you’ll need to optimize your vlog for SEO. This will help search engines understand your content and show it to people who are looking for videos just like yours.
WordPress SEO is a huge topic that can be confusing for new vloggers. With that in mind, we recommend using All in One SEO for WordPress (AIOSEO).
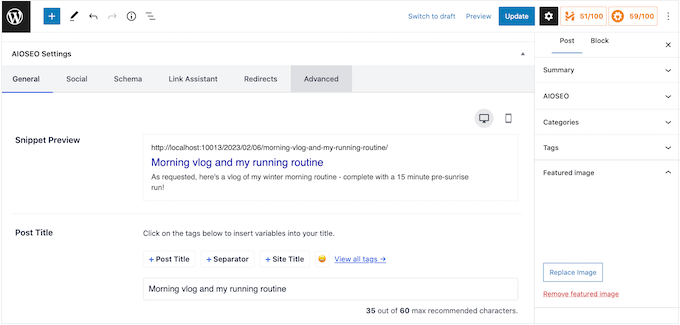
AIOSEO is the best WordPress SEO plugin on the market and has everything you need to get your vlogs onto the first page of Google, without having to learn any complicated SEO jargon.
AIOSEO comes with the easiest setup wizard that helps you choose the best SEO settings for your business. AIOSEO will even scan your vlogs and show an actionable checklist on how you can optimize that specific vlog.
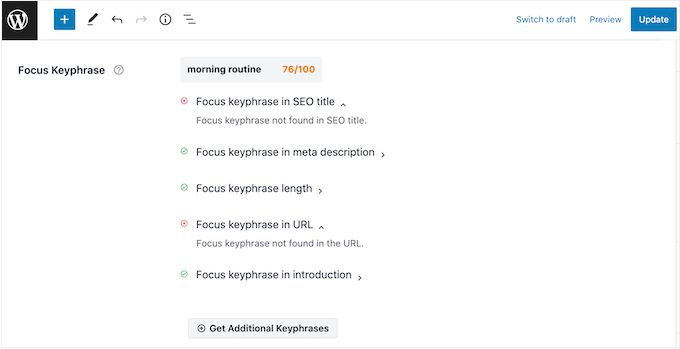
Additionally, AIOSEO has a video sitemap feature that you can use to show search engines what’s the most important content to index.
To help you get started, please see our ultimate guide on how to set up All in One SEO for WordPress correctly.
Step 10. Notify Users About New Vlogs
Did you know that 70% of people who leave your site will never come back? Thankfully there are lots of ways to turn abandoning visitors into loyal viewers.
To start, it’s smart to create an email newsletter so people who enjoy your vlogs can subscribe. After that, you can email these subscribers every time you post a new vlog.
You can also keep them engaged with your brand by sending them fun surveys and polls, notifying them about any giveaways and contests you’re running, or even simply asking them for feedback on your latest vlog.

All of this can help you create a sense of community and build a stronger relationship with your viewers.
If you do build an email list, then you’ll want to make sure your messages arrive safely in the subscriber’s inbox and not in their spam folder. With that in mind, we recommend using an SMTP service provider to improve your email deliverability rates.
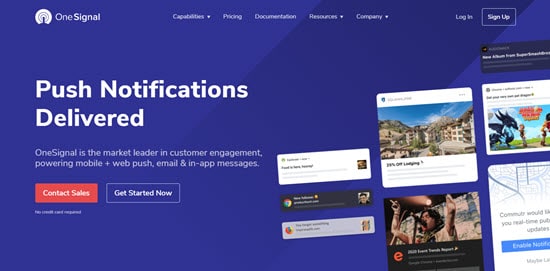
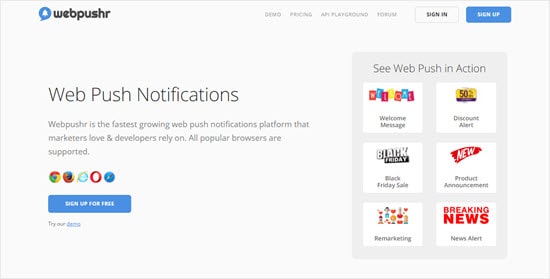
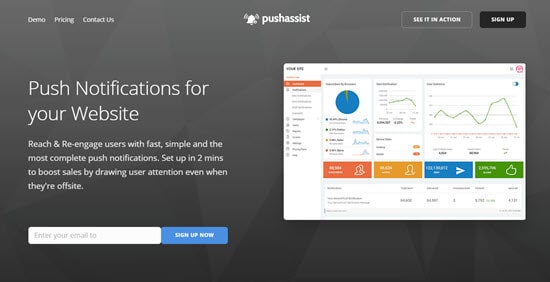
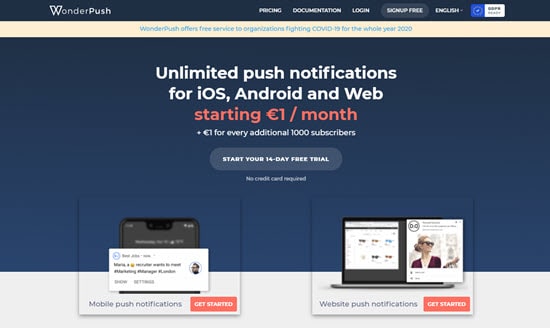
Another option is to use push notifications with software like PushEngage to send targeted, personalized messages to viewers after they leave your vlog.
Push notifications are short, clickable notifications that appear as a popup on the user’s desktop or mobile devices. Some of the biggest websites in the world use push notifications to keep users engaged, including Facebook.
These notifications go directly to the user’s web browser or mobile device so they have a high chance of getting the person’s attention, which makes them perfect for notifying viewers when you post a new vlog.
To learn more, see our guide on how to add web push notifications to WordPress.
Step 11. How to Make Money From Your Video Vlogs
Creating lots of quality, engaging vlogs takes a lot of time and effort, so you may want to make money from your videos.
If you’ve created a contact form, then potential sponsors and partners already have a way to contact you, which is a great start. However, there are lots more ways to make money online with WordPress.
Here are some of the best ways to make money from your vlog.
- Google AdSense
There are many reasons why it’s smart to embed videos on your own website, rather than simply uploading them to platforms like YouTube.
One major benefit is that you can show Google AdSense ads next to your videos.

When you sign up for Google AdSense, Google acts as a middleman between you and the advertiser. Instead of you having to find the right partners for your vlog, Google allows advertisers to bid for keywords matching your content. This allows you to get the best possible rates for the ads on your vlogging website.
For more details, please see our article on how to properly add Google AdSense to your WordPress blog.
- Affiliate marketing
Many vloggers make money by recommending products and services to their viewers. For example, many lifestyle vloggers film daily routine videos showing off their favorite skincare or fitness products.
By using affiliate links, you can earn money every time a viewer buys a product or service based on your recommendation.
For the best results, it’s a good idea to only recommend quality items that you already use and trust. If you encourage viewers to buy poor-quality or scammy products, then you’ll damage your band and almost certainly lose viewers.
There are plenty of affiliate marketing plugins and tools for WordPress that can help you make money by promoting affiliate products, but we highly recommend PrettyLinks or ThirstyAffiliates to all vloggers.
To get started, please see our step-by-step affiliate marketing guide for beginners.
- Ask for Tips and Donations
If you build a strong, positive relationship with your viewers then they may want to support your work as a vlogger. This is particularly true if you’re a hobby vlogger or someone who is just starting out.
Although they’re mostly used by non-profits, some vloggers use donation forms so that viewers can support their work. These forms are often presented as ‘buy me a coffee’ or ‘buy me a beer.’
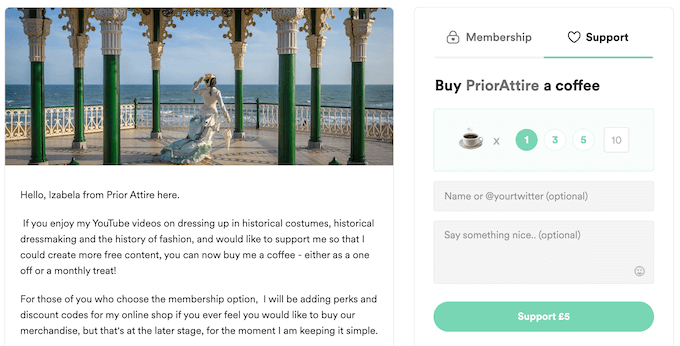
To learn more, please see our guide on how to create a donate form in WordPress.
- Create a Membership Site
Most of the time, you’ll want your vlogs to be publicly available so you can get as many views as possible and build your audience.
However, some vloggers may want to create a video membership site in WordPress. This allows people to pay for different perks, such as early access to the latest vlogs, exclusive live streams, or premium members-only videos.
You can also offer perks that don’t involve videos, such as a members-only forum, blog posts, or the ability to chat with you directly on channels like Discord.
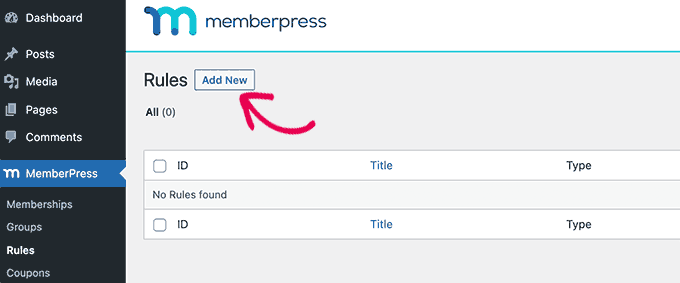
The easiest way to create a membership site is by using MemberPress. It is the best WordPress membership plugin on the market and allows you to accept payments, create unlimited subscription levels, restrict access to video pages based on levels, and more.
- Sell Your Videos as Digital Downloads
Depending on the kind of vlogs you create, you may decide to sell some of your premium videos as digital downloads. For example, if you’re a health and fitness vlogger then you might create videos teaching your followers different exercise routines.
For some niches, this can be a way to monetize the audience you’ve built from your vlogs.
Easy Digital Downloads is the best platform to easily sell digital products. You can get started in minutes and accept credit card payments with Stripe, PayPal, Google Pay, and Apple Pay.
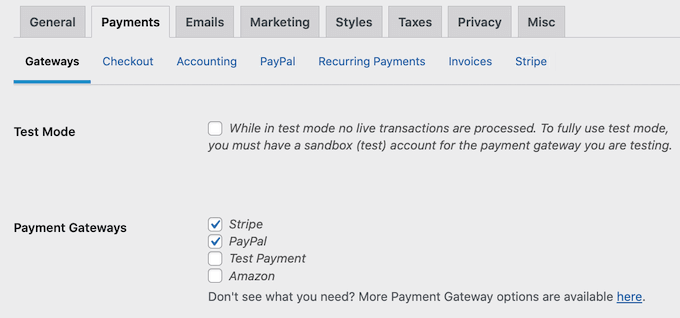
With Easy Digital Downloads, you have complete control over how you distribute your videos. You can allow customers to download files as many times as they want or restrict file downloads by time or attempt.
To start selling your premium videos, please see our complete guide on how to sell digital downloads on WordPress.
We hope this tutorial helped you learn how to start a video vlog and make money. You may also want to learn how to increase your blog traffic or check out our list of the best email marketing services.
If you liked this article, then please subscribe to our YouTube Channel for WordPress video tutorials. You can also find us on Twitter and Facebook.
The post How to Start a Video Blog (Vlog) And Make Money in 2023 first appeared on WPBeginner.
