Category Archives: seedprod

9 Best FAQ WordPress Plugins (Expert Pick)

Are you looking for WordPress FAQ plugins to use on your website?

Using FAQ plugins can improve the customer experience by making it easier for users to find answers to their questions without leaving your website. It can also boost your search engine rankings and help more people find your content.

In this article, we will share some of the best WordPress FAQ plugins that can help add an attractive FAQ section to your website.

Best FAQ WordPress plugins

Why Use a WordPress FAQ Plugin?

FAQ plugins create a Frequently Asked Questions (FAQ) section on your WordPress website with a list of some commonly asked questions and their answers.

FAQs

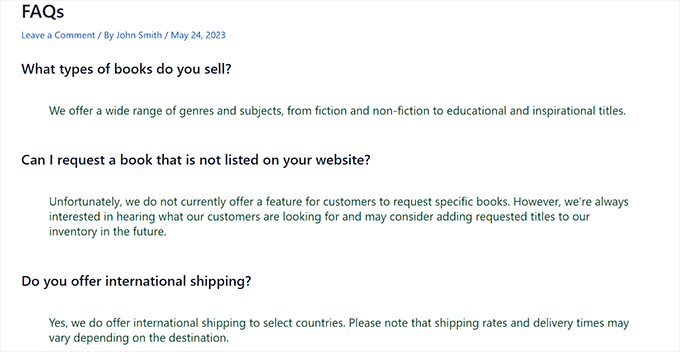
This helps build trust and credibility with your customers by letting them know that you understand their questions and worries. FAQs can even increase conversion rates.

FAQs also allow users to find an answer to their questions without needing to contact customer service. This saves time and enables your customer support team to focus on other issues.

Additionally, using these plugins can also improve your search engine rankings because most FAQs often contain long-tail keywords that users commonly search for using search engines.

That being said, let’s look at some of the best WordPress FAQ plugins that can help improve user experience on your website.

1. All in One SEO for WordPress

All in One SEO plugin

All in One SEO is the best WordPress SEO plugin on the market. It allows you to easily optimize your website to improve search engine rankings.

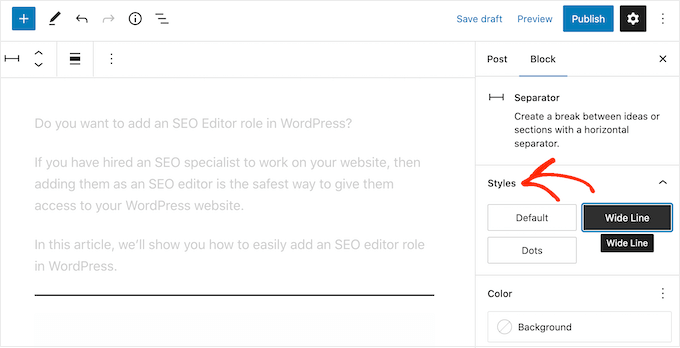
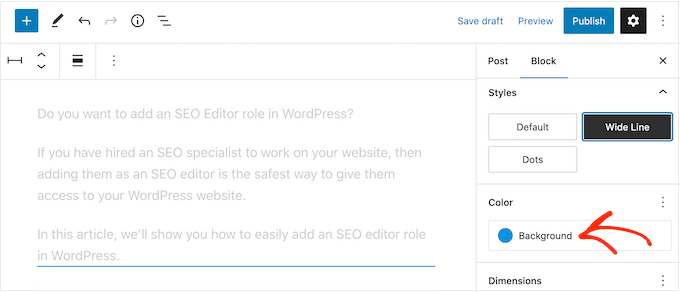
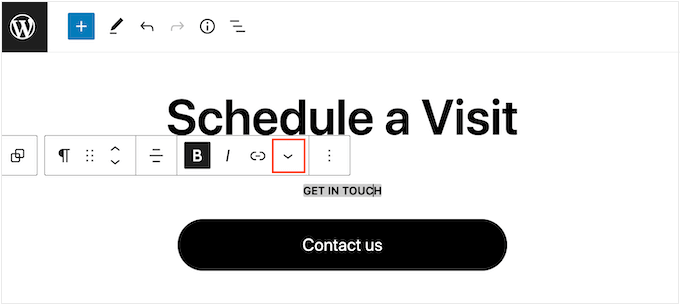
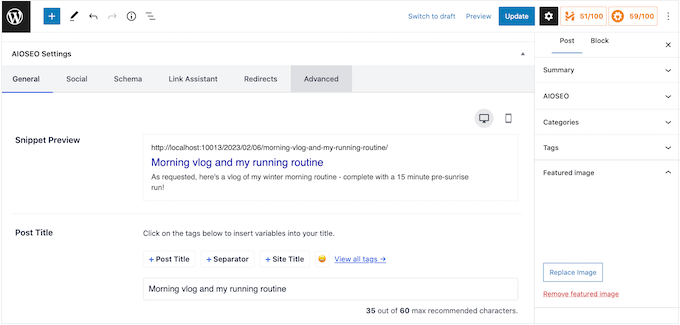
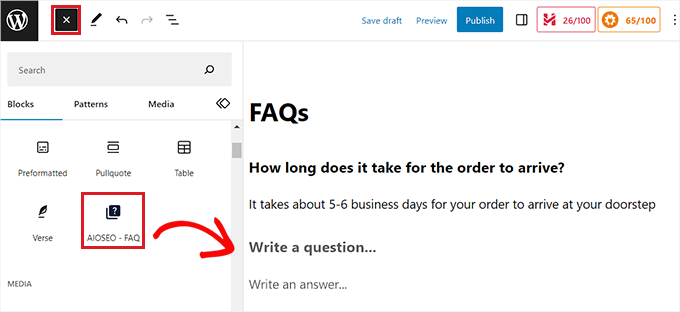
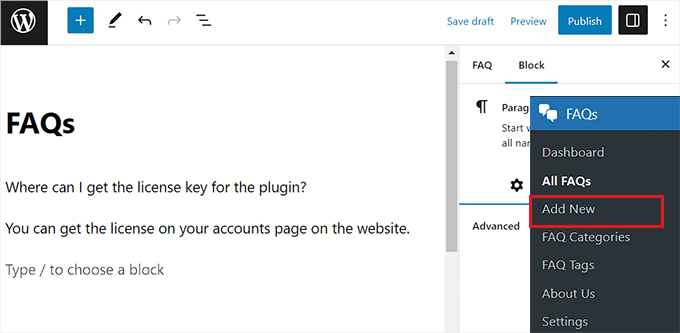
The plugin comes with an FAQ block that helps you create an attractive FAQ section in the block editor. Within the block, you can enter questions and answers for your FAQ section.

You can also customize your FAQ section from the block panel, including its text color, background color, typography, and title wrapper.

Add the AIOSEO FAQs block in your block editor

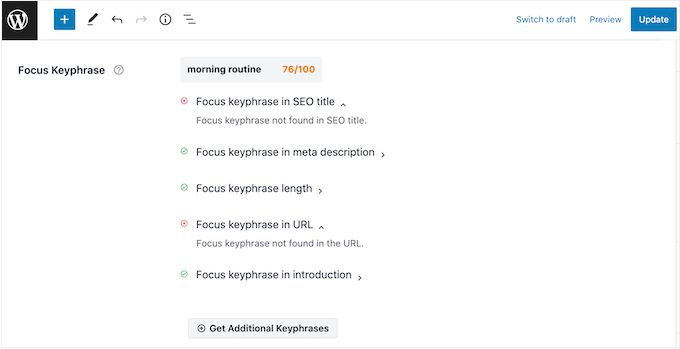
Moreover, All in One SEO even allows you to add FAQ schema to your WordPress website. This schema markup can increase your visibility on Google and bring more traffic to your website.

Note: The AIOSEO free version comes with an FAQ block. However, you will need to buy the Pro version of the plugin to unlock the FAQ schema feature.

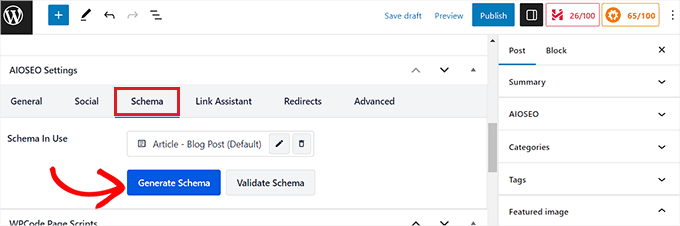
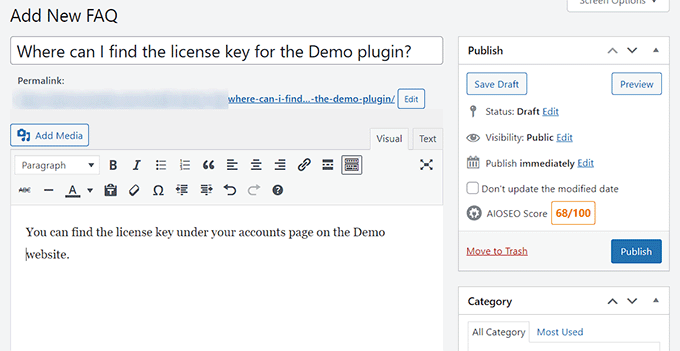
To activate the FAQ schema, you need to scroll down to the AIOSEO section in the block editor and switch to the ‘Schema’ tab.

After that, click the ‘Generate Schema’ button to open up a prompt.

Switch to the Schema tab and click the Generate Schema button

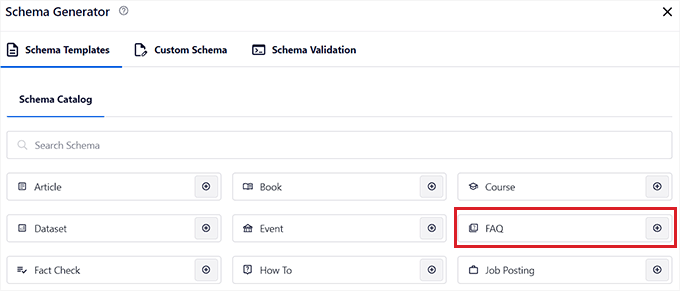
Once the Schema Generator opens up, click on the ‘FAQ’ option to add the schema.

Next, you can add questions and answers to the schema template. For more detailed instructions, please see our tutorial on how to add FAQ schema in WordPress.

Choose the FAQs schema

Apart from FAQs, AIOSEO has custom sitemaps, advanced redirects, SEO titles and descriptions, multiple keyphrases, and more. These features make it the ultimate toolkit for improving SEO on your website.

2. Heroic FAQs

Heroic FAQs for WordPress

Heroic FAQs is a premium WordPress plugin that comes with a drag-and-drop interface to organize, reorder, or group related questions together.

It offers 5 pre-designed FAQ templates and a visual editor that lets you insert images, blockquotes, lists, videos, and more into your FAQ content.

Heroic FAQs dashboard

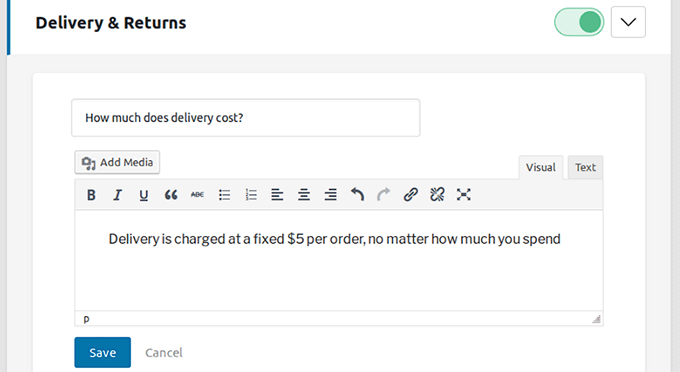
You can display the FAQs in accordion or toggle format. You are also able to choose from 15 different FAQ icon styles to match your website’s design.

Using the Heroic FAQs plugin can also improve your website visibility and search engine rankings because it has a built-in FAQ schema.

Some of its other features include fast loading, FAQ search, analytics reports, mobile responsiveness, and page builder integrations. It is the perfect solution if you are looking for an all-in-one FAQs management kit.

3. SeedProd

The SeedProd page builder plugin for WordPress

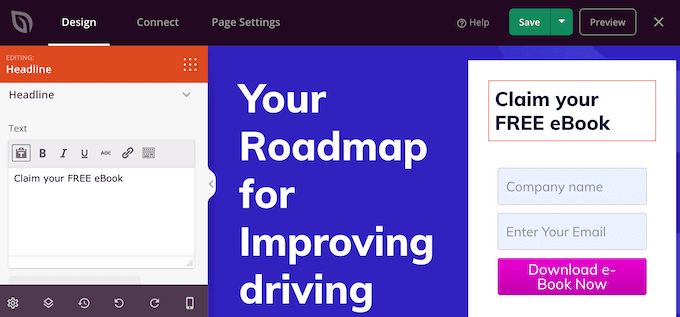
SeedProd is the best WordPress landing page builder on the market. It makes it super easy to create landing pages and custom themes in WordPress without using any code.

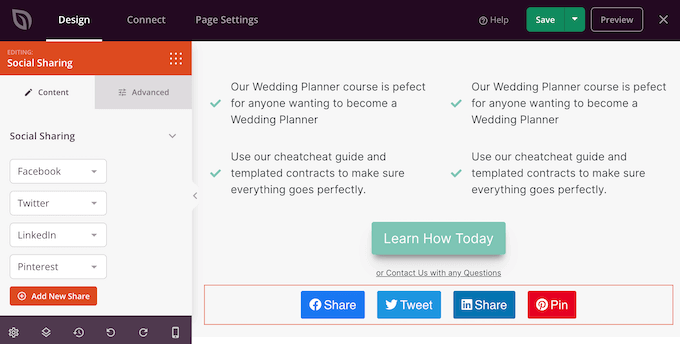
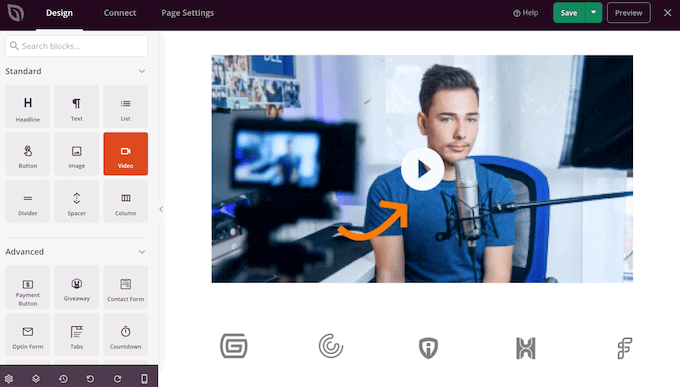
It also comes with an Accordion block that lets you create FAQs by adding text sections that expand and collapse to any part of your page.

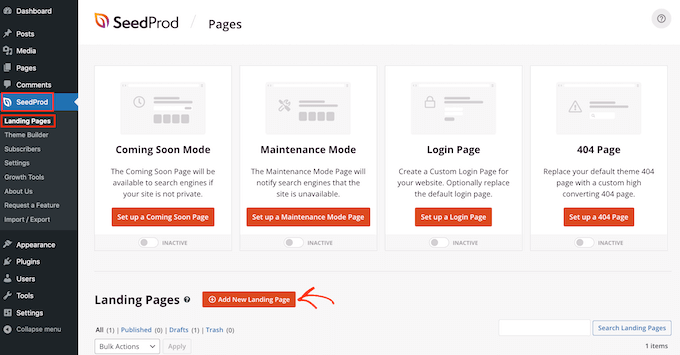
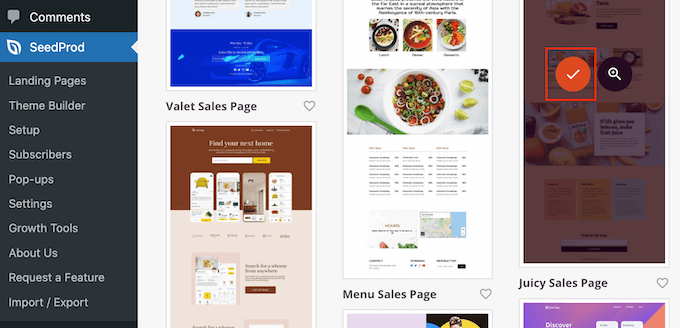
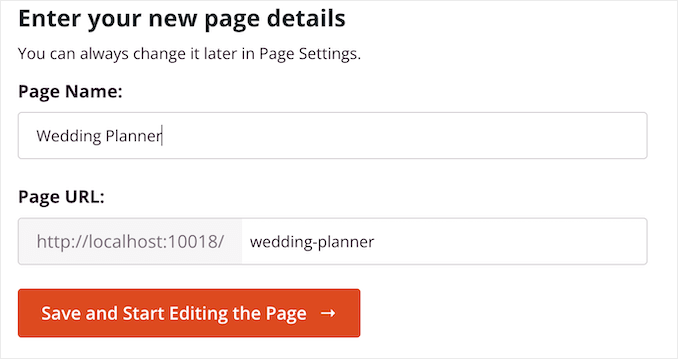
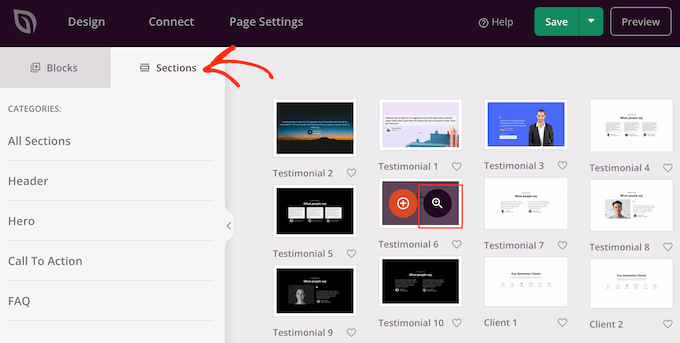
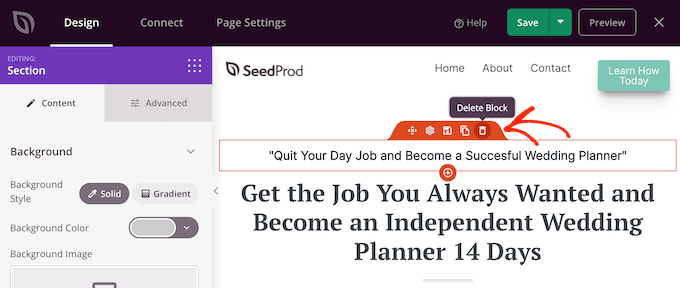
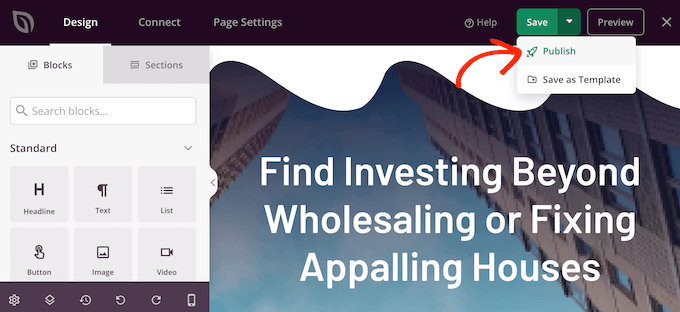
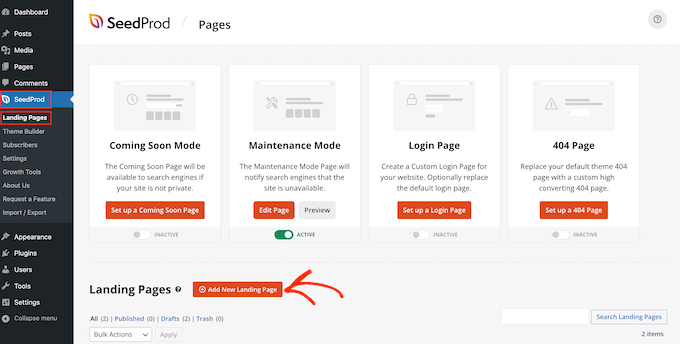
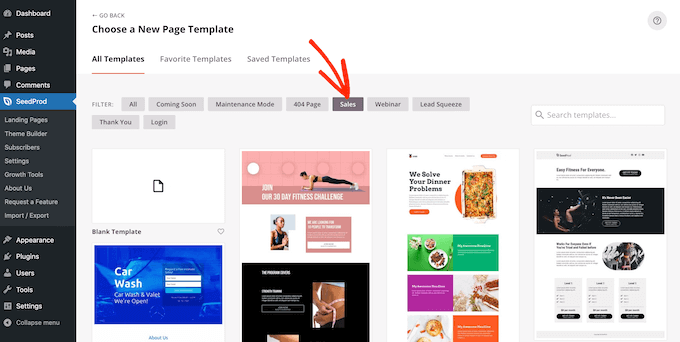
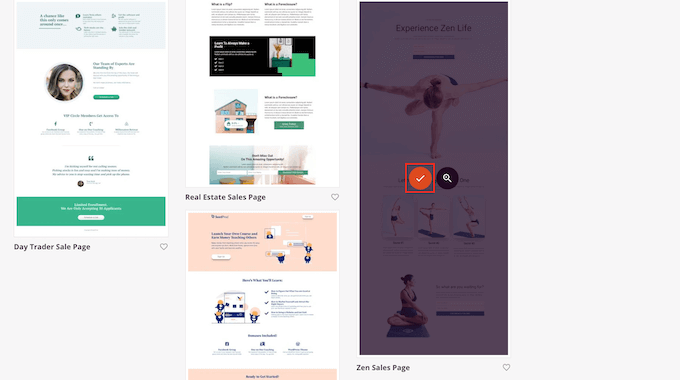
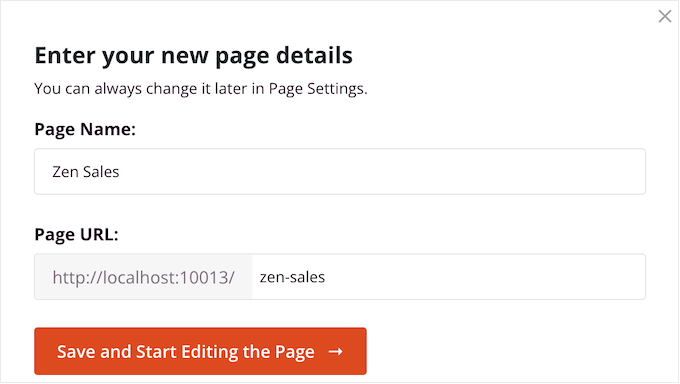
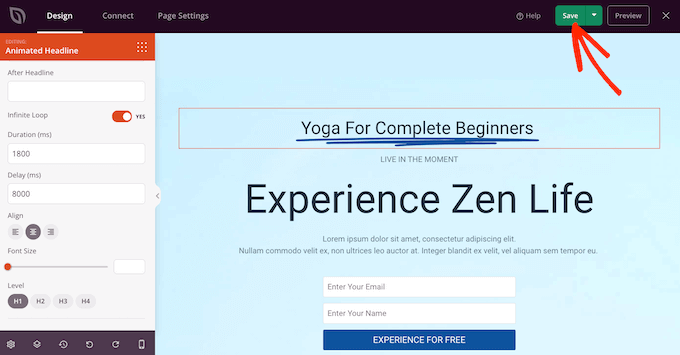
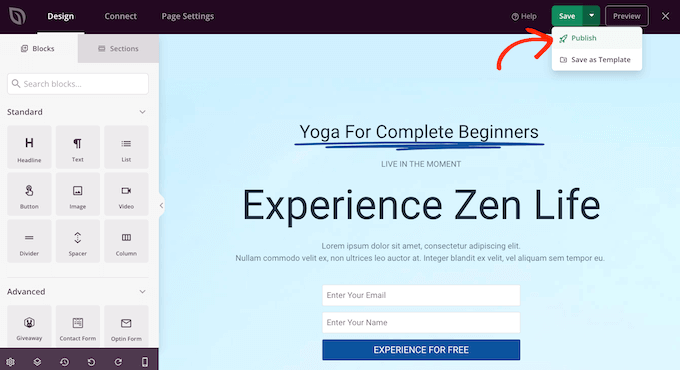
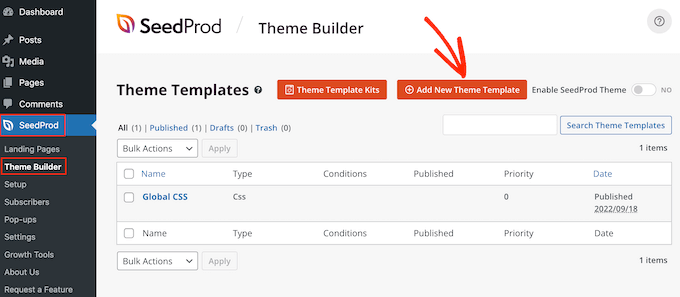
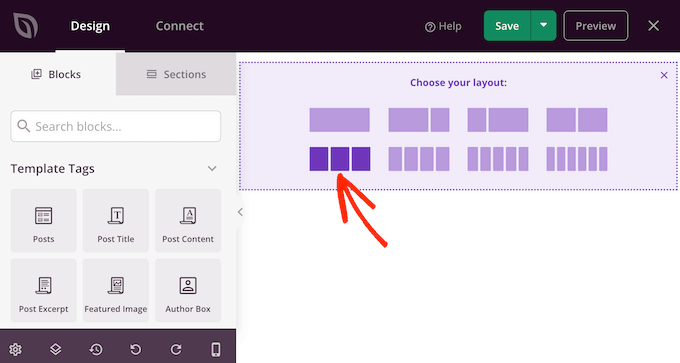
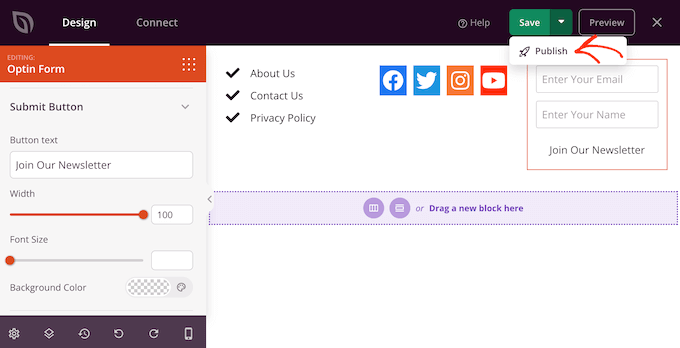
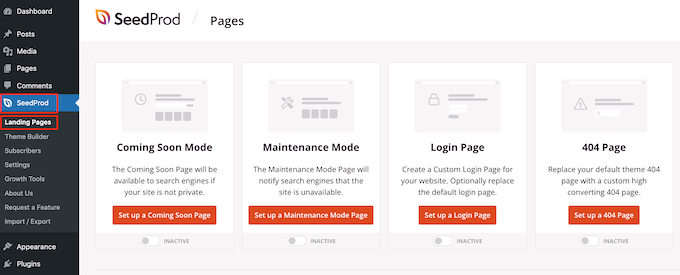
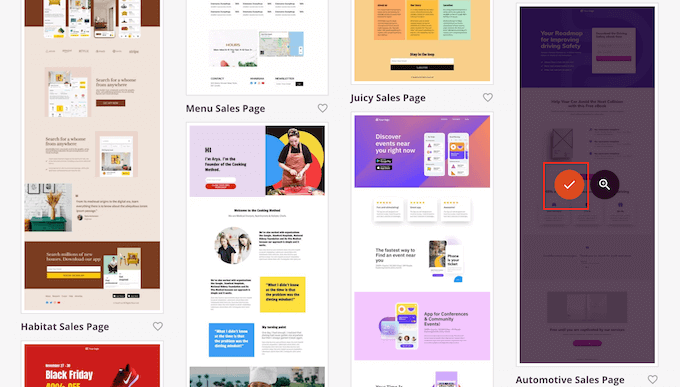
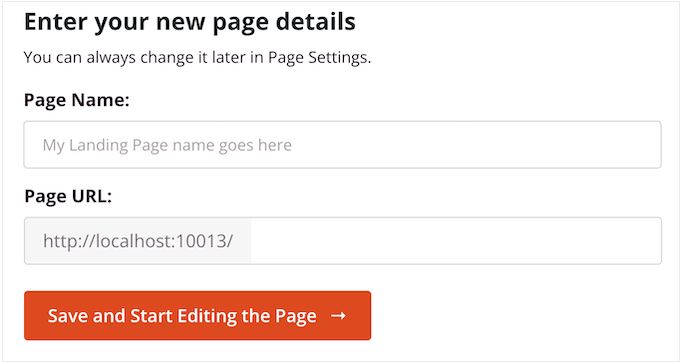
First, you will need to choose a template and start building your page with SeedProd. For detailed instructions, you may want to see our guide on how to create a landing page in WordPress.

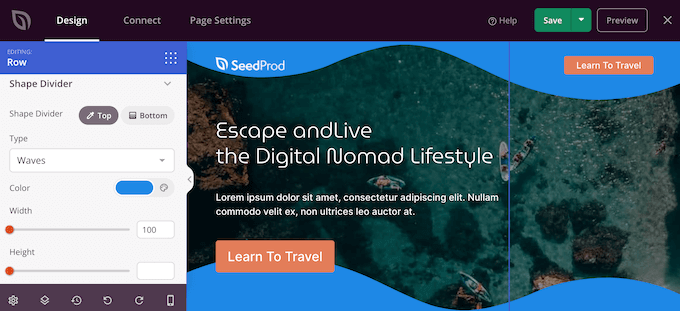
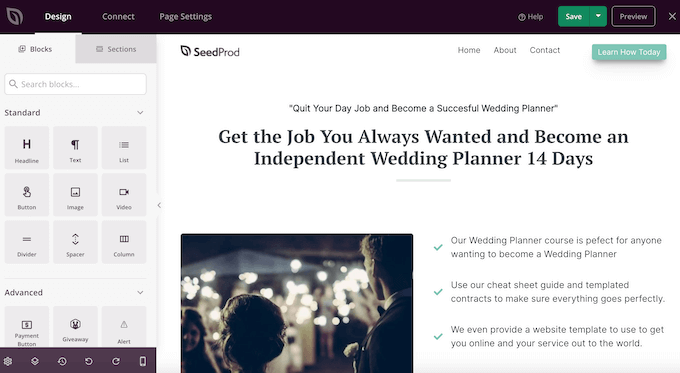
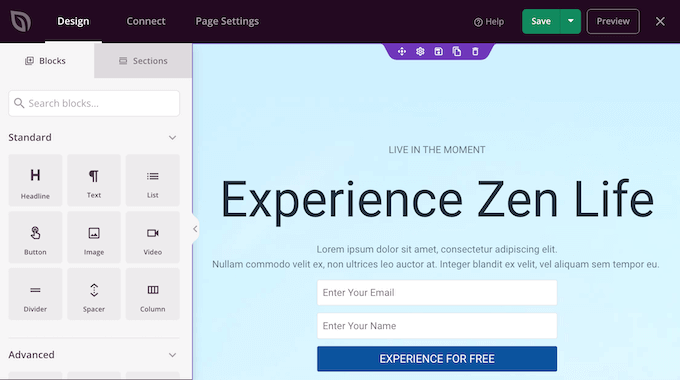
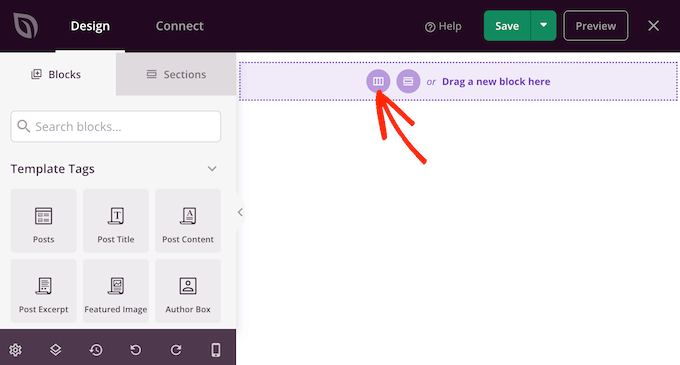
Then, you can drag and drop the ‘Accordion’ block onto the landing page from the block panel on the left side of the screen.

Add Accordion block in SeedProd

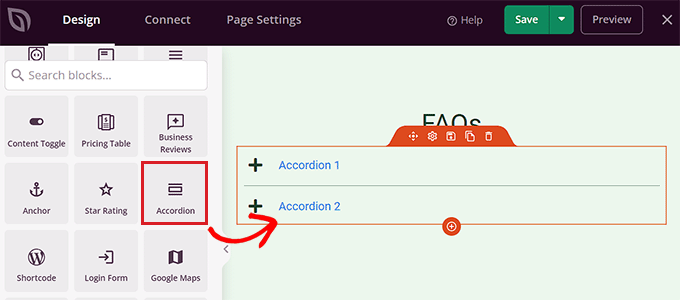
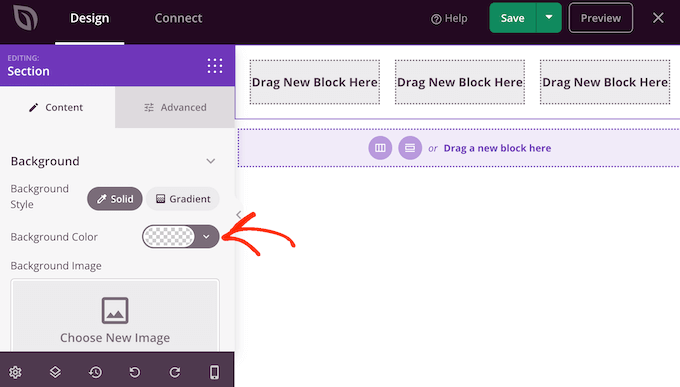
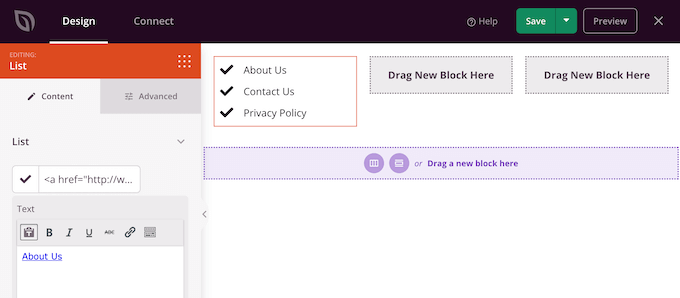
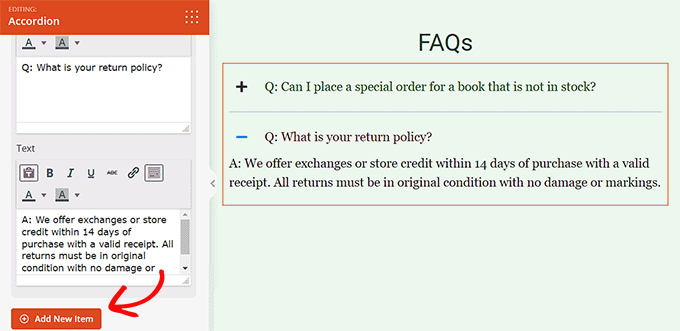
You can now add a question and an answer in the text box to start creating an FAQ section.

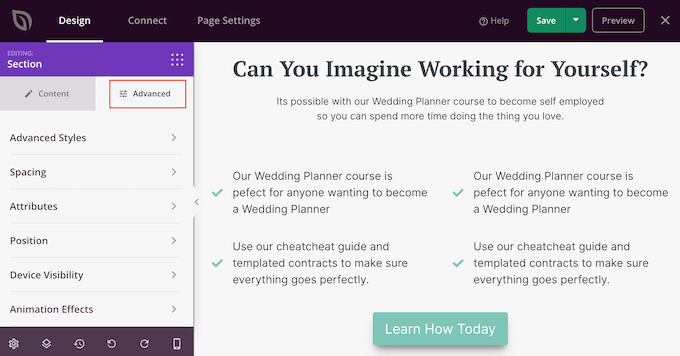
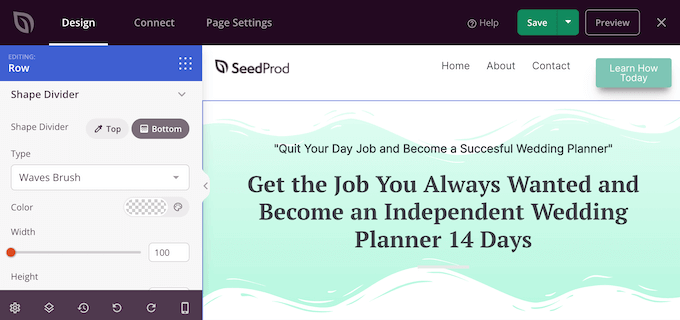
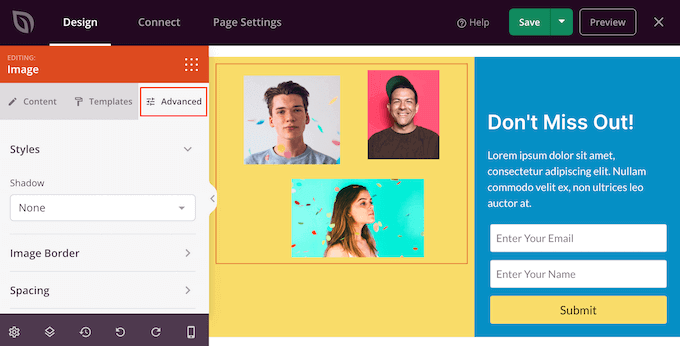
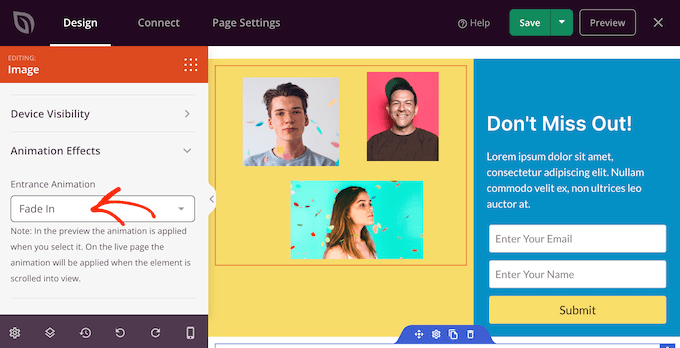
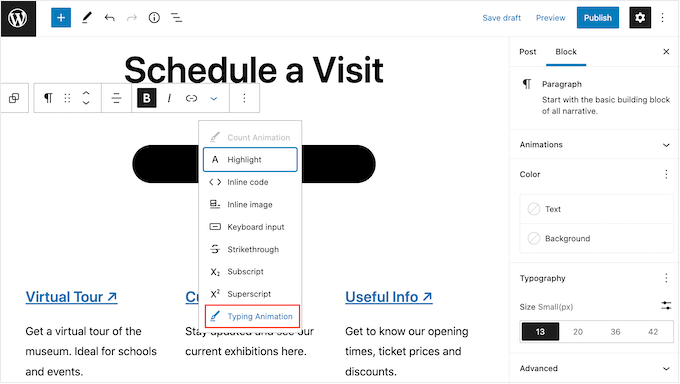
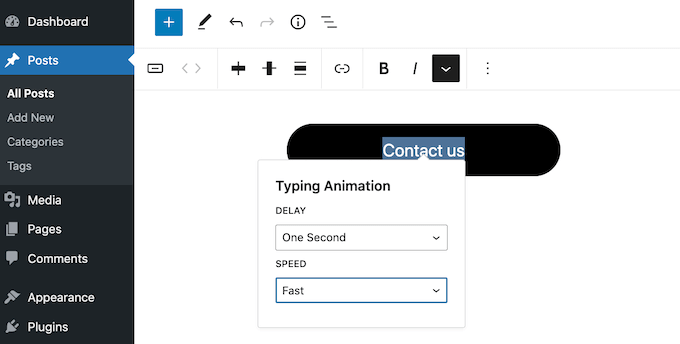
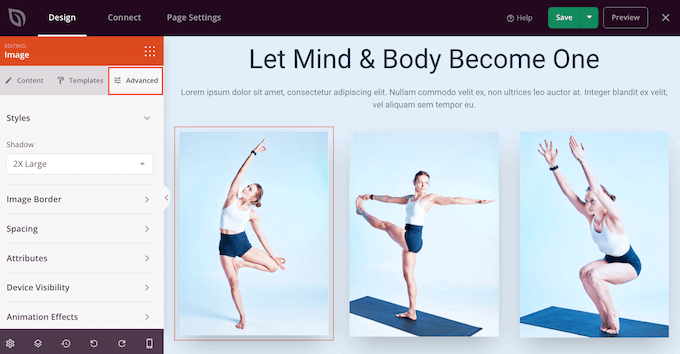
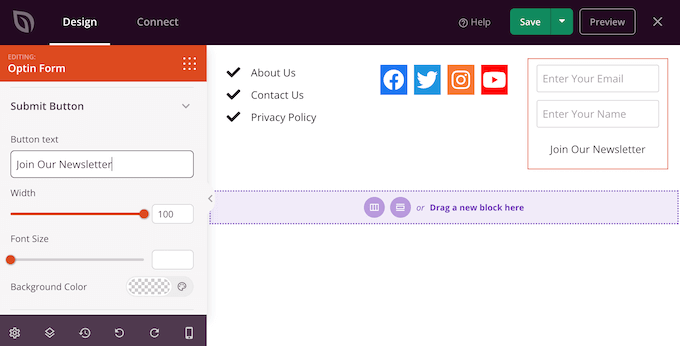
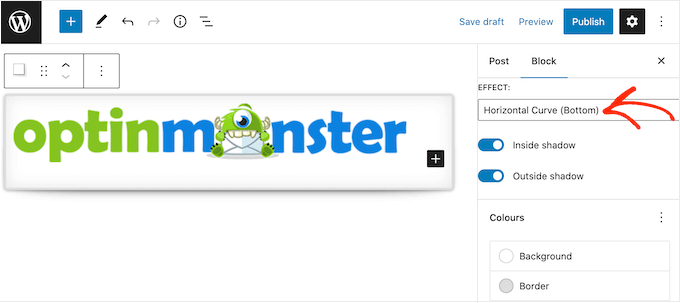
After that, you can also customize the font size, icon image, typography, text color, and background color for your FAQs.

Configure Accordion Block settings

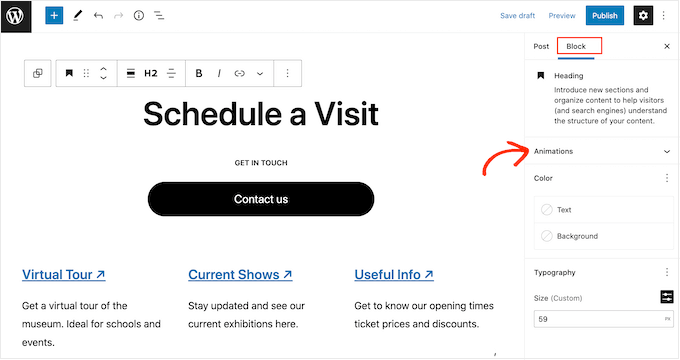
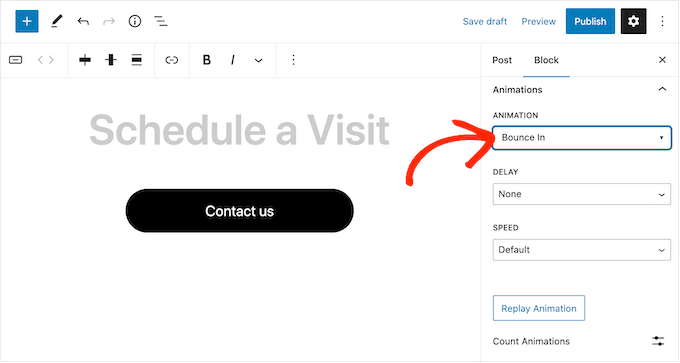
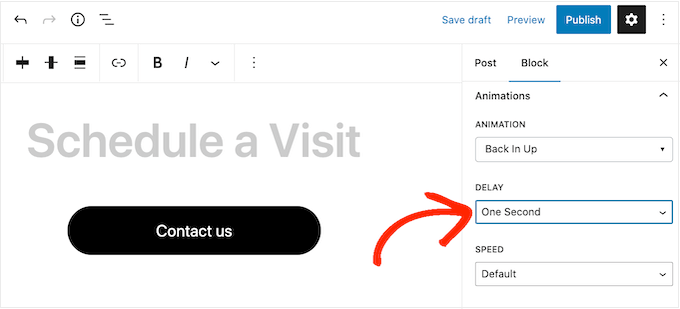
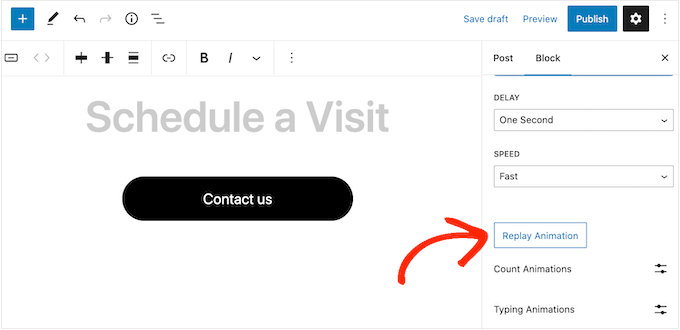
You can even add custom CSS and animation effects to your FAQs.

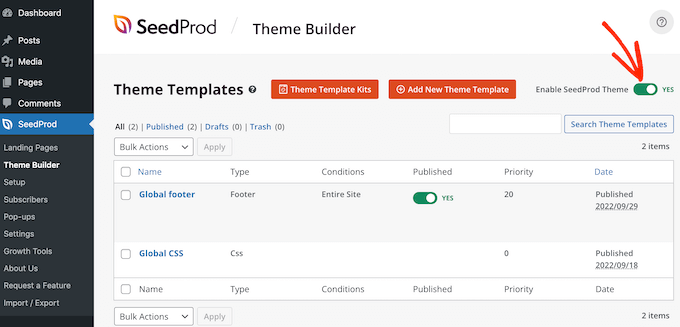
SeedProd also comes with built-in SEO features that will allow you to optimize your landing pages for search engines and increase visibility.

4. Thrive Architect

Thrive Architect page builder

Thrive Architect is another powerful drag-and-drop page builder that helps you easily create custom landing pages, layouts, and content for your WordPress site.

It comes with a Toggle element that lets you add an FAQ section in an accordion style to your landing pages. Once you drag and drop the Toggle onto your page, its settings will open up in the settings menu on the left.

Add toggle element

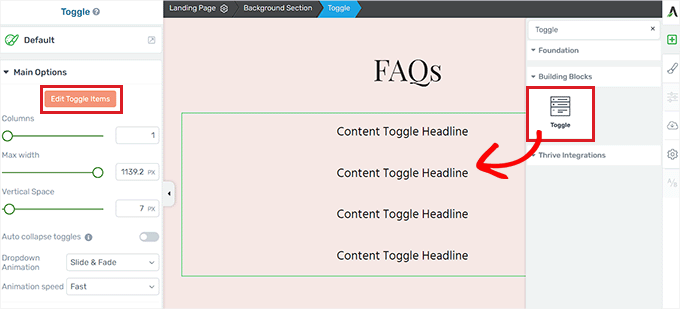
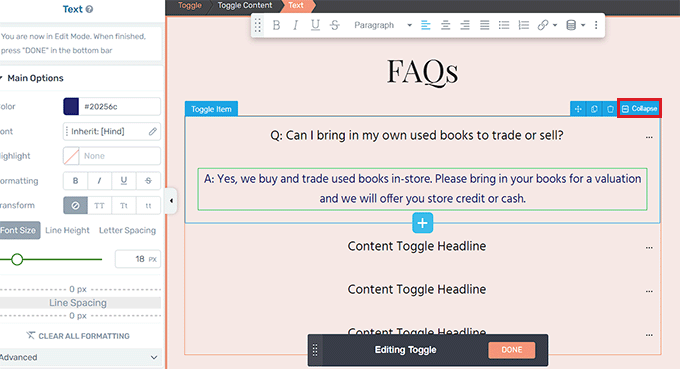
You can now add content to the toggle headlines. To expand the toggle and add an answer to the question, click the ‘Expand’ button in the block toolbar above each toggle.

You are able to customize the FAQ section by adjusting the columns, width, vertical space, and dropdown animations.

With Thrive Architect, you can also further customize the FAQs section by changing the icons, typography, layout, background color, borders, adding HMTL attributes, and more.

Save FAQs

For more details on how to use Thrive Architect, you can see our guide on how to create a custom page in WordPress.

5. YITH WooCommerce Questions And Answers

YITH WooCommerce Questions and Answers

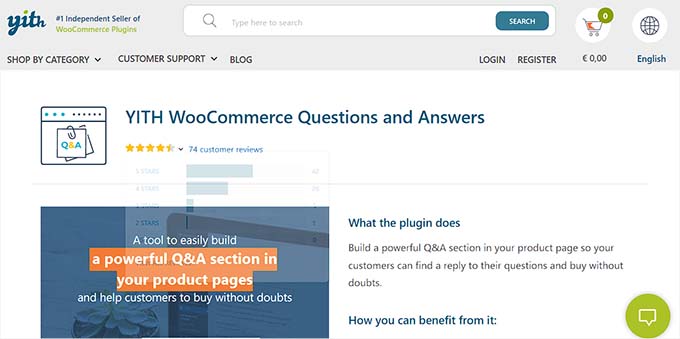
YITH WooCommerce Questions And Answers is not your typical FAQs plugin because it is specifically designed for WooCommerce.

It allows you to create an FAQ section for your product pages and also enables customers to submit their own questions that can be answered by the support team.

This can help increase user engagement in your WooCommerce store and provide a better customer experience.

Add your answer

It is a highly customizable plugin with a category filter and search feature to make it easier for users to find the answers to their questions.

With YITH WooCommerce Questions and Answers, you can even implement a voting system, activate the email notification process, hide inappropriate questions, and encourage users to post their own answers in the FAQs section.

6. Ultimate FAQ

Ultimate FAQs

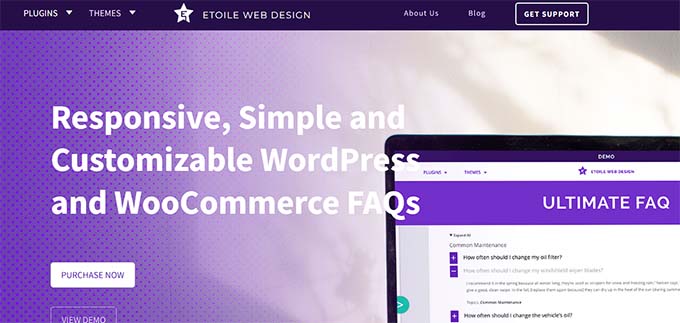
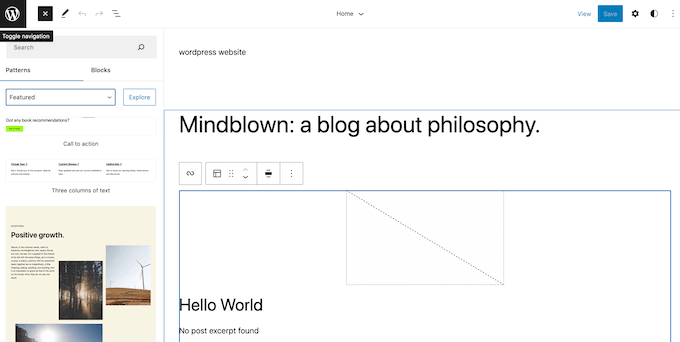
Ultimate FAQ is a popular WordPress plugin that provides shortcodes and blocks in the Gutenberg editor to add an FAQ section to your website.

It comes with unlimited support for categories and tags and even lets you add an unlimited number of FAQs to a single section.

By default, the plugin comes with accordion and toggle styles. However, you can also use custom CSS to style your FAQs according to your liking.

Other than that, it lets you import FAQs in bulk by using Google Sheets and even offers a search and filtering feature that customers can use to find the answers to their questions.

Ultimate FAQs dashboard

The plugin is super easy to use and helps create SEO-friendly FAQs to improve your search engine rankings.

Moreover, Ultimate FAQ also integrates with WooCommerce, so you can easily add an FAQ section for your online store.

Some of its other features include email support, social sharing, custom fields, multiple FAQ layouts, video/image support, and more.

7. Easy Accordion

Easy Accordion

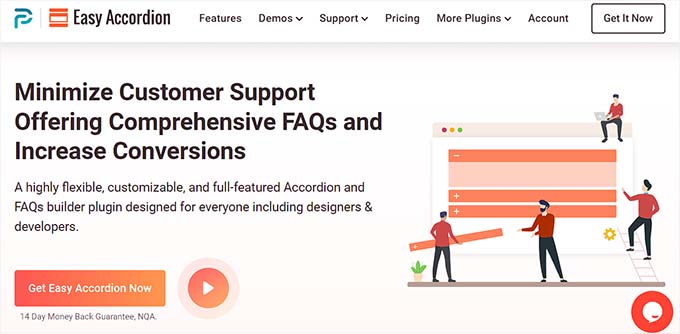
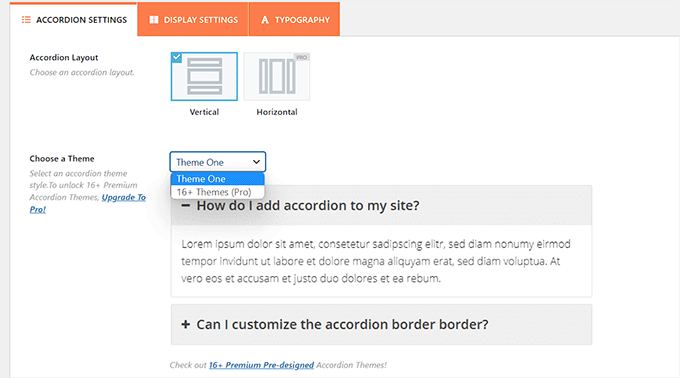
Easy Accordion is a powerful FAQ builder plugin that provides a drag-and-drop interface to create an accordion-style FAQ section.

It’s lightweight, fast, and SEO-friendly, helping you quickly optimize your website content for search engines.

The plugin offers more than 16 pre-designed templates and other customization options, including typography, icon sets, font colors, themes, animation effects, padding, color schemes, and more.

Easy Accordion customization settings

This makes it the perfect choice if you want to create a highly customizable FAQ section.

Besides that, Easy Accordion has a responsive layout that works on various devices, including mobile phones, iPads, desktops, and tablets.

8. Helpie FAQ

Helpie FAQ

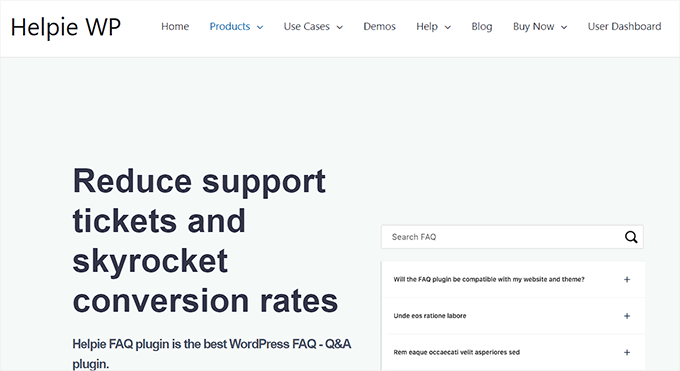
Helpie FAQ comes with a user-friendly interface that allows you to easily create and manage FAQ pages.

It also offers a built-in FAQ schema that increases your search visibility and can improve your website rankings.

The plugin provides you with complete flexibility to add an FAQ section to your pages, posts, or WordPress sidebar.

Helpie FAQ dashboard

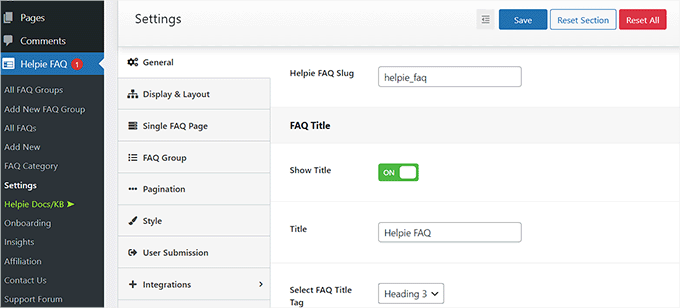
Some of the other features of Helpie FAQ include an AJAX search feature, basic sorting, color themes, import/export, user submissions, and more.

You can also integrate this plugin with WooCommerce to create an FAQ section for your online store.

9. WP Responsive FAQ With Category

WP Responsive FAQ with Category

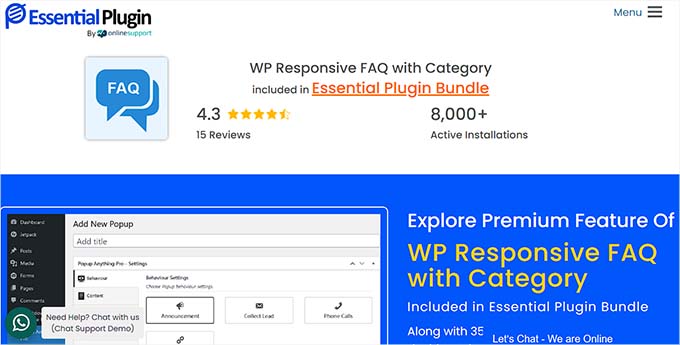
WP Responsive FAQ with Category is a simple WordPress plugin that uses shortcodes to add FAQ sections to your pages or posts.

If you are looking for a beginner-friendly and easy-to-use solution to create FAQs, then this plugin is for you.

It comes with a drag-and-drop interface and 15+ pre-designed templates that will help you create an aesthetically-pleasing FAQ section for your website.

WP Responsive FAQ with Category dashboard

Other than that, WP Responsive FAQ also offers WooCommerce support and makes it super easy for you to display an FAQ section in your online store.

Some of its other features include image/video support, customization settings, accordion animation adjustments, and more.

Which Is the Best WordPress FAQ Plugin?

In our expert opinion, All in One SEO is the best WordPress FAQ plugin because it allows you to easily add FAQ sections and schema to your pages and posts.

However, if you want to create an FAQ section on a landing page, then you can also use SeedProd or Thrive Architect. They are the best WordPress page builders on the market that come with built-in features to help create an attractive FAQ section.

You can also use the Heroic FAQs plugin if you are looking for an all-in-one solution. Its user-friendly, drag-and-drop interface allows you to easily build FAQs and FAQ schema.

If you have an online store, then we recommend using YITH WooCommerce Questions and Answers or the Ultimate FAQ plugin because they are designed to integrate with WooCommerce.

We hope this article helped you find the best WordPress FAQ plugins for your website. You may also want to see our beginner’s guide on how to choose the best domain registrar in WordPress and our top picks for the best accordion plugins.

If you liked this article, then please subscribe to our YouTube Channel for WordPress video tutorials. You can also find us on Twitter and Facebook.

The post 9 Best FAQ WordPress Plugins (Expert Pick) first appeared on WPBeginner.

21 Best WordPress Themes for Apps Compared (2023)

Are you looking for a WordPress theme for your app?

You can use WordPress app themes to promote your app or software. These themes showcase your product screenshots, features, reviews, and other useful information.

In this article, we will share some of the best WordPress themes for apps that you can use to grow your business.

Best WordPress Themes for Apps

Building a WordPress Website for Apps and Software

WordPress is the most popular website builder in the world. Many top brands use WordPress for their websites, including banks, enterprise businesses, and more.

There are two types of WordPress. They are WordPress.com, which is a hosted solution, and WordPress.org, which is a self-hosted platform.

You can check out our complete article on the difference between WordPress.com vs WordPress.org for more details.

For a software or app website, you will need to use self-hosted WordPress.org. It offers the most flexibility and features you need to promote your business.

Before you begin, you will also need to purchase a domain name and web hosting. A domain name is your site’s address on the web, like wpbeginner.com or google.com. Web hosting is the storage for all your website files.

We recommend using Bluehost. It’s the most popular WordPress hosting company and an official WordPress hosting partner.

Bluehost WordPress Hosting offer for WPBeginner Users

For WPBeginner users, Bluehost offers a free domain name, a free SSL certificate (for your website security), and a huge discount on web hosting.

After purchasing the web hosting, you can follow our article on how to make a website for step-by-step instructions.

That being said, let’s take a look at some of the best WordPress themes for apps and software websites.

1. Astra

Astra WordPress App Theme

Astra is a powerful WordPress multipurpose theme for all kinds of websites. It comes with a 1-click demo content importer and a few dozen demo websites to get you started quickly.

It has multiple blog page layouts, global design options, header and footer options, and dedicated sidebars for pages. The theme is fast, lightweight, and easy to set up, even for beginners.

2. SeedProd

SeedProd App Website

SeedProd is the best WordPress theme builder on the market. It isn’t a regular WordPress theme, but SeedProd makes it easier for anyone to design a custom website from scratch without writing code.

The best part is that SeedProd comes with dozens of ready-made theme layouts. You can import a pre-built theme and customize it with the powerful drag and drop builder to launch your site.

It includes WordPress themes for apps, landing pages, and more. The theme templates are built specifically for beginners with beautiful designs and complete content.

3. Ultra

Ultra App Theme for WordPress

Ultra is a modern WordPress theme for any type of website. It has a built-in professional template for your app or software.

It comes with builder addons, custom page templates, pre-designed layouts, and more. Other notable features include section scrolling, a mega menu, archive layouts, image filters, and support for WooCommerce.

4. Divi

Divi App WordPress Theme

Divi is a popular WordPress theme and an ultimate page builder plugin. It comes with hundreds of ready-made website layouts for different business niches.

It has a highly flexible visual page builder to customize your website from the front end. The Divi theme offers multiple design elements, visual effects, fonts and text styling, and custom backgrounds.

5. Infinity Pro

Infinity Pro

Infinity Pro is a professional WordPress theme designed specifically for mobile apps and software. It’s built on top of the Genesis Theme framework, making it powerful and robust.

The theme has a fullscreen layout with an image slider, a call-to-action button, a navigation menu, and a custom logo. It comes with layout options and multiple custom page templates.

StudioPress is now part of WP Engine, the most popular managed WordPress hosting company. You can get this theme and all 35+ other StudioPress themes when you sign up for WP Engine hosting to build your website.

Bonus: WPBeginner users also get an additional 20% OFF. Get started with WP Engine today!

6. OceanWP

OceanWP

OceanWP is a free WordPress multipurpose theme. It comes with several demo websites and a 1-click content importer to launch your website right away.

The theme offers fast page load time, built-in SEO optimization, RTL language support, and more. It’s also fully compatible with WooCommerce to sell your apps.

7. Neve

Neve

Neve is a stylish WordPress multipurpose theme that you can use to create any website. It comes with a few demo sites, including one-page and multi-page templates.

It features header and footer layouts to create an engaging user experience. The theme integrates with all popular WordPress page builders for customization. It’s also eCommerce ready to start an online store easily.

8. Struct

Struct

Struct is a fantastic WordPress theme designed specifically for mobile apps, SaaS startups, and software websites. It lets you display screenshots, testimonials, team members, portfolios, and app features on the homepage.

Inside, you will also find backgrounds, color schemes, typography options, and more. Struct has WooCommerce integration to sell your mobile apps online.

9. Hestia Pro

Hestia Pro

Hestia Pro is a one-page WordPress theme for any kind of website. It comes with a sleek and modern design to let you build your app or software website easily.

It works great with all popular drag and drop page builder plugins. Hestia is easy to customize using the WordPress live customizer.

10. iTheme2

iTheme2

iTheme2 is a stunning WordPress apps theme. It comes with a fully customizable featured content slider on the homepage to showcase your apps and software.

It includes website templates, a header menu, a footer menu, custom footer text, and more. It also has a social media widget to add social icons in the header of your website.

11. Bramble

Bramble

Bramble is a beautiful WordPress multipurpose theme. It ships with a page builder that lets you customize your website and design custom landing pages of your own.

The theme comes with built-in homepage layouts to set up your website. It also includes an image slider plugin to display your apps beautifully.

12. Nozama

Nozama

Nozama is a classic WordPress eCommerce theme built for creating Amazon-style websites for mobile apps and software. It lets you display your apps, testimonials, and other products on the homepage.

You can use this theme to share professional screenshots of your app and maximize your sales. Besides professional shop page layouts, Nozama has unlimited color schemes, custom backgrounds, Google Fonts, and parallax effects.

13. Specialty

Specialty

Specialty is an excellent WordPress theme designed specifically for job board apps and software. It comes with flexible search functionality for instant search and complex filters.

The theme includes hundreds of customizer settings for color, typography, and layout. It supports drag and drop page builders to create custom landing pages easily.

14. Altitude Pro

Altitude Pro

Altitude Pro is a black-and-white WordPress app theme. It has a fullscreen layout with a custom background image, welcome text, and call-to-action buttons.

The theme has multiple homepage widget areas and layout options. Altitude Pro is eCommerce friendly and helps you sell your apps online.

15. Inspiro

Inspiro

Inspiro is a WordPress multipurpose theme built for any kind of website. It features interactive homepage elements to engage your users from the first click on your site.

The theme options include parallax scrolling, video backgrounds, 1-page and multi-page templates, page builder compatibility, and more. It’s easy to set up, even for absolute beginners.

16. Multi Mobile App

Multi Mobile App

Multi Mobile App is a free WordPress theme for apps and software. It lets you showcase your apps professionally in different categories.

If you are looking for a free multipurpose apps theme, then the Multi Mobile App theme is an ideal solution. It’s translation ready and offers powerful customization options.

17. Cousteau Pro

Cousteau

Cousteau Pro is a WordPress theme for travel apps. It comes with video and image slider support on the homepage to create a powerful first impression on your visitors.

Inside, you will find a search and filtering system. The theme has a fullscreen background layout that looks beautiful and professional.

18. Venture

Venture

Venture is a WordPress portfolio theme to display and sell your apps. It has a dynamic homepage builder and custom widgets to set up your website quickly.

You can also use the built-in visual customizer for colors, fonts, and other settings. It includes a featured content slider to showcase your most important content on the front.

19. Mobile App

TS Mobile App

Mobile App is a free WordPress multipurpose theme designed specifically for apps and software websites. It uses bright colors that make your website highly attractive.

The theme features a fullscreen image slider, a products section, an about section, and more. It’s easy to set up using the WordPress live customizer.

20. Pinboard

Pinboard

Pinboard is a modern WordPress multipurpose theme. It has a Pinterest-like layout to create an app or software review website.

It supports WordPress multisite network and lets your users sign up to post reviews. The theme is fully responsive and adjusts to any screen size beautifully.

21. Listable

Listable

Listable is an excellent WordPress directory theme built specifically for small business websites. It has a fullscreen layout and parallax homepage sections.

The theme lets you add all your apps and allow users to submit apps from the frontend. Listable also integrates with popular WordPress page builders for easy customization.

FAQs About WordPress Themes for Apps and Software

If you are still unsure which theme is best for you, here are some frequently asked questions about WordPress themes for apps and software that can help you select the right theme for your website.

1. Which is the best WordPress theme for apps and software websites?

With so many options, picking the right theme to promote your apps and software business can confuse beginners.

We recommend Astra, SeedProd, Ultra, and Divi, as they come with multiple templates for apps, software, and technology websites.

2. Why is SeedProd included in the themes for apps and software?

SeedProd is included in the themes for apps and software because it’s a powerful theme builder for beginners. It lets you drag and drop features to design a custom theme for your apps and software website without writing code.

Moreover, SeedProd comes with ready-made coming soon and maintenance mode landing pages. You can use these pages to engage users while your website is in the development process.

SeedProd also includes hundreds of built-in theme templates that can give you a head start. You can import a template and customize it to launch your website right away.

We hope this article helped you find the best WordPress themes for apps. You may also want to check out our ultimate guide to boosting your site’s speed and performance and our expert picks for the best WordPress block themes.

If you liked this article, then please subscribe to our YouTube Channel for WordPress video tutorials. You can also find us on Twitter and Facebook.

The post 21 Best WordPress Themes for Apps Compared (2023) first appeared on WPBeginner.

How to Create a Custom Shape Divider in WordPress

Do you want to add custom shape dividers to your WordPress website?

Shape dividers can organize your content in an engaging and eye-catching way. They can also highlight your site’s most important content, so visitors and customers don’t miss out on crucial information.

In this article, we will show you how to create a custom shape divider in WordPress.

How to create a custom shape divider in WordPress

Why Create a Custom Shape Divider in WordPress?

A shape divider is a type of section divider that you add between blocks of content.

These dividers can be simple, such as a horizontal line created with built-in WordPress blocks.

A custom shape divider, created using the built-in WordPress tools

You can use these basic dividers to organize and separate content, which is particularly useful on pages that cover lots of different topics.

You can also create more advanced shape dividers using page builder plugins and other web design software. These can highlight your site’s most important content so it stands out to visitors and customers.

A custom shape divider, created using SeedProd

A professional-looking shape divider can also make a page more interesting and engaging.

For example, you might use them to create a unique background for your email newsletter signup form.

How to create a custom shape divider using SeedProd

With that being said, let’s see how you can create a custom shape divider in WordPress. Simply use the quick links below to jump straight to the method you want to use.

Method 1. Create a Simple Shape Divider (No Plugin Required)

The easiest way to add a custom shape divider to WordPress is by using the built-in Separator block.

This method allows you to add a horizontal line separator in between any WordPress blocks, and then customize the line’s color and style.

A custom divider created using the WordPress block editor

This method doesn’t let you add different shapes to WordPress and has limited customization settings. However, you won’t need to install an extra WordPress plugin, so this is the easiest way to add a simple shape divider to your website.

To get started, simply open the post or page where you want to add an horizontal divider in the content editor. Then, click on the ‘+’ button where you want to place that divider.

Adding a Separator block to WordPress

In the popup, type in ‘Separator.’

When the right block appears, click to add it to the page or post.

Add a custom shape divider to a WordPress website

To customize the default Separator block, give it a click and then use the settings in the right-hand menu.

You can switch between default, wide line, and dots using the buttons in the ‘Styles’ section.

Adding different line styles in WordPress

You can also change the line’s color so that it matches the rest of your theme or branding.

To do this, click on ‘Background’ and then choose a color from the popup that appears.

How to style the Separator block in WordPress

When you’re happy with how the divider looks, you can either click on the ‘Publish’ or ‘Update’ button to make the shape divider live.

If you are looking to use different shape and customize every part of your dividers, then we recommend using the SeedProd plugin.

SeedProd is the best WordPress page builder plugin on the market, and it allows you to add a custom shape divider to any section, row, or column using a simple drag-and-drop editor.

Creating a custom shape divider in WordPress

It also comes with over 180 professionally-designed templates and more than 90 blocks that you can use to create beautiful custom home pages, landing pages, and more.

Note: There is a free version of SeedProd on available on WordPress.org, but we’ll be using the Pro version since it comes with a wide range of shape dividers.

The first thing you need to do is install and activate the SeedProd plugin. For more details, see our step-by-step guide on how to install a WordPress plugin.

Upon activation, you need to enter your license key.

Adding a license key to the SeedProd page builder

You can find this information under your account on the SeedProd website. After entering the license key, click on the ‘Verify Key’ button.

With that done, go to SeedProd » Pages and click on the ‘Add New Landing Page’ button.

How to create a new landing page design using SeedProd

After that, it’s time to choose a page design template. SeedProd has a ton of professionally-designed templates that you can fine-tune to perfectly suit your WordPress website.

To select a template, simply hover your mouse over it and then click the ‘Checkmark’ icon.

Choosing a page design template for your WordPress website

Next, go ahead and type in a name for the page. SeedProd will automatically create a URL based on the page’s title, but you can change the URL to anything you want.

For example, you may want to add some relevant keywords, which will help search engines understand what the page is about and may improve your WordPress SEO.

When you’re happy with the information you’ve entered, click on the ‘Save and Start Editing the Page’ button.

Creating a custom landing page using SeedProd

Next, you’ll be taken to the drag-and-drop page builder, ready to customize the template.

The SeedProd editor shows a live preview of your design to the right and some block settings on the left.

The SeedProd drag and drop page builder

The left-hand menu also has blocks that you can drag onto your layout.

For example, you can drag and drop standard blocks like buttons and images or use advanced blocks such as the countdown timer, contact form, social sharing buttons, and more.

Adding blocks to a WordPress page builder

To customize a block, just click to select it in your layout.

The left-hand menu will then show all the settings you can use to configure that block. You can also change the page’s background colors, add background images, or change the color scheme and fonts to better match your brand.

Customizing the background color in WordPress

SeedProd also comes with ‘Sections,’ which are collections of blocks that are often used together. For example, SeedProd has a header section, hero image, call to action, customer testimonialsFAQs, features, footer sections, and more.

To look through the different sections, simply click on the ‘Sections’ tab.

Adding a Section to a custom page template

You can move sections and blocks around your layout using drag and drop.

If you want to delete a block, then simply hover over it and then click on the trash can icon when it appears.

Deleting blocks from a custom page design

Whether or not you choose to use a SeedProd section, you can now create a custom shape divider. Simply click to select the section, row, or column where you want to add the divider.

Then, click on the ‘Advanced’ tab in the left-hand menu.

SeedProd's 'Advanced' settings

Now, click to expand the ‘Shape Divider’ section.

To start, you can choose where to show the shape divider by selecting either the ‘Top’ or ‘Bottom’ button.

Adding a custom divider to the bottom of a WordPress block

You can now open the ‘Type’ menu and choose the shape divider that you want to use.

As you select different shapes, the live preview will update automatically so you can try different styles to see what looks the best.

Adding custom shape dividers to a custom landing page

After choosing a shape divider, you can style it using the new settings.

To start, you can click on ‘Color’ and then choose a new color from the popup that appears.

Adding a color to a custom shape divider in WordPress

With that done, you can make the divider bigger or smaller by dragging the ‘Width’ and ‘Height’ sliders.

If you already have a specific size in mind, then you can type those numbers into the boxes.

Create a custom shape divider in WordPress

You can also try flipping the divider by clicking to enable or disable the ‘Flip’ switch.

By default, the divider will appear behind the rest of the content, so users can clearly see any text, images, or other content that overlaps the divider.

However, moving the shape to the front can create some interesting effects. If you want to see how this looks, then simply click to enable the ‘Bring to Front’ switch.

Bringing the custom shape divider to the front

To add more dividers simply follow the same process described above.

You can even add a shape divider to the top and bottom of an area, which often creates some impressive and eye-catching results.

Adding multiple custom shape dividers to a single section

You can continue working on the page by adding more blocks and customizing those blocks in the left-hand menu.

When you’re happy with how the page looks, click the ‘Save’ button. You can then select ‘Publish’ to make that page live.

Publishing a custom shape divider

How to Add Shape Dividers to a WordPress Theme

SeedProd’s drag-and-drop editor gives you the freedom to add a unique shape divider to any page. However, sometimes you may want to use the same shape dividers on multiple pages, or even across your entire WordPress blog or website.

This will help you create a consistent design and can also save you a ton of time. In this case, we recommend adding a shape divider to your theme using the SeedProd theme builder.

With SeedProd, you can create a custom WordPress theme without writing any code. It creates all the files that make up your theme, including the sidebar, header, footer, single posts, and more.

The SeedProd theme builder

You can then customize these files using the familiar drag-and-drop builder. This includes adding shape dividers by following the same process described above.

When you activate the new theme using SeedProd, it will overwrite your existing WordPress theme, so you should only use this method if you want to replace your current theme.

For detailed step-by-step instructions, please see our guide on how to easily create a custom WordPress theme.

We hope this tutorial helped you learn how to create a custom shape divider in WordPress. You may also want to learn how to increase your blog traffic, or see our expert pick of the best social proof plugins for WordPress.

If you liked this article, then please subscribe to our YouTube Channel for WordPress video tutorials. You can also find us on Twitter and Facebook.

The post How to Create a Custom Shape Divider in WordPress first appeared on WPBeginner.

How to Fade Images on Mouseover in WordPress (Simple & Easy)

Do you want to fade images on mouseover in WordPress?

A simple fade-in or fade-out animation when a user moves their mouse over an image can make your site more engaging. It also encourages visitors to interact with your content, which can keep them on your site for longer.

In this article, we’ll show you how to add a fade image effect on mouseover in WordPress.

How to fade images on mouseover in WordPress

Why Fade Images on Mouseover in WordPress?

Animations are an easy way to make your website more interesting, and can even draw the visitor’s attention toward your page’s most important content, such as your website logo or a call to action.

There are lots of different ways to use CSS animations in WordPress, but adding a hover effect to images is particularly effective. The fade animation means your images will slowly appear or disappear when visitors hover over them.

Adding a fade animation to WordPress

This encourages people to interact with your images, and can even add a storytelling element to the page. For example, different images might fade in and out as the visitor moves around the page.

Unlike some other animations, the fade image on mouseover effect is subtle so it won’t negatively impact the visitor’s reading experience or any image optimization you’ve done.

With that said, let’s show you how to add a fade to your images on mouseover in WordPress.

Adding Image Fade on Mouseover to all WordPress Images

The easiest way to add a fade effect to all your images is by using WPCode. This free plugin allows you to easily add custom code in WordPress without having to edit your theme files.

With WPCode, even beginners can edit their website’s code without risking mistakes and typos that can cause many common WordPress errors.

The first thing you need to do is install and activate the free WPCode plugin. For more details, see our step-by-step guide on how to install a WordPress plugin.

Upon activation, head over to Code Snippets » Add Snippet.

Adding custom code to your WordPress website with WPCode

Here, simply hover your mouse over ‘Add Your Custom Code.’

When it appears, click on ‘Use snippet.’

Creating a custom CSS snippet on your WordPress website

To start, type in a title for the custom code snippet. This can be anything that helps you identify the snippet in the WordPress dashboard.

We need to add custom CSS to WordPress, so open the ‘Code Type’ dropdown and select ‘CSS Snippet.’

Add a fade on mouseover animation to images using WPCode

In the code editor, add the following code snippet:

.post img:hover{
opacity:0.6;
filter:alpha(opacity=60); /* For IE8 and earlier */
-webkit-transition: all 2s ease;
-moz-transition: all 2s ease;
-ms-transition: all 2s ease;
-o-transition: all 2s ease;
transition: all 2s ease;
}

This code snippet will fade each image for 2 seconds when the user hovers their mouse over it. To make the image fade slower, simply replace ‘2s ease’ with a higher number. If you want to make the picture fade faster, then use ‘1s ease’ or smaller.

You can also make the ‘opacity’ higher or lower by changing the opacity:0.6 line.

If you change any of these numbers then make sure you change them across all the properties (webkit, moz, ms, and o), so the fade effect looks the same on every browser.

When you’re happy with the snippet, scroll to the ‘Insertion’ section. WPCode can add your code to different locations, such as after every post, frontend only, or admin only.

To add a fade effect to all your images, click on ‘Auto Insert.’ Then, open the ‘Location’ dropdown menu and choose ‘Site Wide Header.’

Inserting custom CSS across your WordPress website

After that, you’re ready to scroll to the top of the screen and click on the ‘Inactive’ toggle, so it changes to ‘Active.’

Finally, click on ‘Save Snippet’ to make the CSS snippet live.

Adding a fade effect to images using CSS

Now, if you hover the mouse over any image on your WordPress website, you’ll see the fade effect in action.

Adding Image Fade Animations to Individual Pages

Using a fade effect for every single image can become distracting, especially if you’re running a photography website, a stock photo store, or any other site that has lots of images.

With that in mind, you may want to use fade effects on a specific page or post only.

The good news is that WPCode allows you to create custom shortcodes. You can place this shortcode on any page, and WordPress will show fade effects on that page only.

To do this, simply create a custom code snippet and add the fade animation code following the same process described above. Then, click on the ‘Save snippet’ button.

Fade images on mouseover in WordPress using custom code

After that, scroll to the ‘Insertion’ section, but this time select ‘Shortcode.’

This creates a shortcode that you can add to any page, post, or widget-ready area.

Creating a shortcode in WPCode

After that, go ahead and make the snippet live following the same process described above.

You can now go to any page, post, or widget-ready area and create a new ‘Shortcode’ block. Then, simply paste the WPCode shortcode into that block.

How to create fade animations for images using shortcode

For more information on how to place the shortcode, please see our guide on how to add a shortcode in WordPress.

With that done, either click on the ‘Update’ or ‘Publish’ button to make the shortcode live. You can then visit that page, page, or widget-ready area to see the fade on mouseover effect.

Adding Image Fade Animations to Featured Images

Another option is to add fade animations to your featured images or post thumbnails. These are the post’s primary image and they often appear next to the heading on your home page, archive pages, and other important areas of your website.

By fading featured images on mouseover, you can make your site more eye-catching and engaging, without animating every single image across your WordPress blog or website.

To add a fade animation to your post thumbnails, simply create a new custom code snippet following the same process described above.

Adding a fade on mouseover effect to individual images

However, this time add the following code to the editor:

img.wp-post-image:hover{
opacity:0.6;
filter:alpha(opacity=60); /* For IE8 and earlier */
-webkit-transition: all 2s ease;
-moz-transition: all 2s ease;
-ms-transition: all 2s ease;
-o-transition: all 2s ease;
transition: all 2s ease;
}

After that, scroll to the ‘Insertion’ box and select ‘Auto Insert.’ Then, open the ‘Location’ dropdown menu and choose ‘Site Wide Header.’

Adding an animation to images on mouseover

After that, you can go ahead and make the code snippet live using the same process described above.

Now, you can hover the mouse over any featured image to see the fade animation in action.

If you want to add even more image mouseover effects, then see our guide on how to add image hover effects in WordPress.

Bonus: Animate Any Image, Text, Button, and More

Fade effects are a fun way to make images more interesting, but there are lots more ways to use animations in WordPress. For example, you might use flipbox animations to reveal text when a visitor hovers over an image, or use zoom effects so users can explore a picture in more detail.

If you want to try different effects, then SeedProd has over 40 animations that you can add to images, text, buttons, videos, and more. You can even animate entire sections and columns with just a few clicks.

Inside the SeedProd editor, simply click on the content you want to animate, and then select the ‘Advanced’ tab in the left-hand menu.

Adding fade animations using SeedProd

You can then go ahead and click to expand the ‘Animation Effects’ section.

After that, simply choose an animation from the ‘Entrance Animation’ dropdown, including a wide range of different fade effects.

Adding animations to WordPress using SeedProd

For more information, please see our guide on how to create a landing page with WordPress.

We hope this article helped you learn how to fade images on mouseover in WordPress. You may also want to see our guide on how to choose the best web design software, and our expert picks of the best WordPress popup plugins.

If you liked this article, then please subscribe to our YouTube Channel for WordPress video tutorials. You can also find us on Twitter and Facebook.

The post How to Fade Images on Mouseover in WordPress (Simple & Easy) first appeared on WPBeginner.

How to Easily Add CSS Animations in WordPress

Do you want to add CSS animations in WordPress?

Animations are a great way to grab the visitor’s attention and highlight a page’s most important content. They can also encourage customers to click on your call-to-action buttons and links.

In this article, we will show you how you can easily add CSS animations in WordPress.

How to easily add CSS animations in WordPress

Why Add CSS Animations in WordPress?

You can use CSS animations to draw the visitor’s attention to different parts of a page. For example, if you have an online store then animations can highlight a product’s most important features or biggest selling points.

Animations will also make your CTAs stand out, which can help you reach a specific goal such as getting more people to subscribe to your email newsletter.

You can add CSS animations to your theme or child theme‘s stylesheet. However, this takes a lot of time and effort, and it can break your website’s design and even function if you make a mistake.

With that being said, let’s see how you can easily add CSS animations to your WordPress site. If you prefer to jump straight to a particular method, then you can use the links below.

Method 1. How to Easily Animate Any WordPress Block (Quick and Easy)

The easiest way to add a simple CSS animation is by using Blocks Animation.

This free plugin allows you to add an entrance animation to any block without having to write a single line of CSS. It also has a typing animation and a ticker-style effect that you can add to text and numbers.

A count animation, created using the Animation Blocks plugin

First, you’ll need to install and activate the plugin. If you need help, then please see our guide on how to install a WordPress plugin.

Upon activation, open any page or post in the WordPress editor. Then, simply click on the block that you want to animate and select the ‘Block’ tab in the right-hand menu.

You’ll see this menu has a new ‘Animations’ section.

How to animate any WordPress block

Simply click to expand the ‘Animations’ section, and you’ll see three different options: Animations, Count Animations, and Typing Animations.

‘Animations’ are short effects that play once when the page loads. To add this kind of entrance animation to your WordPress blog, just click on the dropdown next to ‘Animation.’

Adding a CSS animation to WordPress using a free plugin

This opens a menu where you can choose the animation you want to use.

The WordPress editor will show a preview of the animation, so you can try different options to see what looks the best.

Adding loading animations to WordPress

By default, the entrance animation will play as soon as the page loads, but you can add a delay if you prefer. If you use multiple animations on the same page, then you can even use delays to stagger your animations so they’re not overwhelming.

Simply open the ‘Delay’ dropdown and choose a time from the list.

How to add loading CSS animations to WordPress

You can also make the animation faster or slower using the ‘Speed’ dropdown.

As you’re trying different settings, you can preview the animation at any point by clicking on ‘Replay Animation.’

Previewing CSS animations in WordPress

The plugin also has ‘Count Animations’ and ‘Typing Animations.’

Typing Animations allow you to animate text, while Count Animations add a ticker-style effect to numbers. These animations work with any block that supports text or numbers, so you can use them to animate buttons, image captions, headings, and more.

To add either of these effects, start by highlighting the text or numbers that you want to animate. Then, click on the downward arrow in the small toolbar.

Adding a typing animation to a text block

You can now choose ‘Count Animations’ or ‘Typing Animations’ from the dropdown menu.

If these options are grayed out, then make sure you’ve highlighted the right content. For example, you won’t be able to select ‘Count Animation’ if you’ve only highlighted text.

Creating typing animations with a WordPress plugin

After adding the animation, you can change the speed and add an optional delay using the dropdown menus in the small popup.

For example, in the following image, we’re using a delay of one second.

Adding a typing animation to WordPress

When you’re ready to make the CSS animation live, either click on the ‘Publish’ or ‘Update’ button. Now, if you visit your WordPress website you’ll see the animation live.

Method 2. How to Add CSS Animations to Custom Pages (Recommended)

If you want to add simple animations to the built-in WordPress blocks, then Blocks Animation is a good choice. However, if you want to really grab the visitor’s attention, keep people on your website, and get more conversions then we recommend using SeedProd.

SeedProd is the best page builder plugin that allows you to create beautiful landing pages, sales pages, and more using a simple drag-and-drop editor.

It also comes with an ‘Animated Headline’ block that you can use to create rotating and highlighted animated headlines.

An animated headline created using SeedProd

Despite the name, you can use the Animated Headline block to animate any text including a call to action, subheading, or any other text that you want to emphasize.

SeedProd also comes with over 40 entrance animations that you can add to any block including images, text, buttons, videos, and more.

SeedProd entrance animations

You can even animate entire sections and columns with just a few clicks. In this way, you can create engaging animated pages within minutes.

If you’re using animations to get more conversions and sales, then SeedProd integrates with WooCommerce and supports many of the top email marketing services you may already be using to promote your website.

How to Setup the SeedProd Page Builder

The first thing you need to do is install and activate SeedProd. For more details, see our step-by-step guide on how to install a WordPress plugin.

Upon activation, you need to enter your license key.

SeedProd license key

You can find this information under your account on the SeedProd website. After adding the license key, simply click on ‘Verify Key.’

Create a Custom Page Design

To get started, go to SeedProd » Landing Pages and click on ‘Add New Landing Page.’

Creating a new landing page with SeedProd

On the next screen, you’ll be asked to choose a template.

SeedProd comes with over 180 beautiful templates that are organized into different categories such as 404-page templates and custom WooCommerce ‘thank you’ pages.

For this guide, we’ll show you how to create a sales page with animated text and entrance animations, but the steps will be similar no matter what kind of page you create.

Simply click on any tab to see the different templates within that category.

The SeedProd template library

When you find a template you want to use, just hover your mouse over it and then click on the checkmark icon.

We’re using the ‘Zen Sales Page’ template in all our images, but you can use any template.

Selecting a sales template in SeedProd

Next, you need to give the page a title.

SeedProd will automatically create a URL based on the page title, but you can change this to anything you want. For example, adding relevant keywords to a URL can often improve your WordPress SEO and help the page appear in relevant search results.

To learn more, please see our guide on how to do keyword research for your WordPress blog.

When you’re happy with the title and URL, click on ‘Save and Start Editing the Page.’

Adding a title to a custom page design

This will load the SeedProd drag-and-drop page editor.

On the right, you’ll see a live preview of the page design, with some settings on the left.

The SeedProd page editor

SeedProd comes with lots of blocks that you can add to your design, including blocks that allow you to add social share buttons, videos, contact forms, and more.

For more information, please see our guide on how to create a custom page in WordPress.

How to Add Animated Text to WordPress

To add some animated text to the page, find the Animated Headline block and drag it onto your page design.

The SeedProd Animated Headline block

There are two ways to animate your headline. First, the ‘Highlighted’ style adds a shape animation to your text, such as a circle or an underlined zigzag.

You can use this animation to draw attention to a particular word or phrase inside the headline. This can make your headline easier to read and understand by highlighting the most important content. It’s also a great way to draw attention to a call to action.

Adding a CSS animation to a headline in WordPress

The Highlighted style also has a few strikethrough shapes.

You can use strikethroughs to create interesting and eye-catching effects, or it can simply add some fun to your design.

A strikethrough animation created with SeedProd

To create a Highlighted animation, just open the ‘Style’ dropdown and select ‘Highlighted.’

Next, open the ‘Shape’ dropdown and choose a shape. When you click on a shape, SeedProd will show a preview of that animation, so you can try different shapes to see which one you like the most.

A curly CSS animation created with SeedProd

SeedProd also has a ‘Rotating’ animation style, which adds a transition effect to the text.

Often, animated text is the first thing visitors look at when a page loads, so it’s a great way to highlight the most important piece of text.

To create a transition animation, simply open the ‘Style’ dropdown and click on ‘Rotating.’

You can then open the ‘Animation’ dropdown and choose the type of transition you want to use, such as fade, zoom, or roll. Again, SeedProd will play the animation inside the page editor so you can try different effects to see which you prefer.

A transition animation in WordPress

No matter whether you’re creating a ‘Highlighted’ or ‘Rotating’ animation, you can add text before and after the animated text.

Simply type into the ‘Before Headline’ and ‘After Headline’ fields. In the ‘Text’ field, add the word or phrase that you want to animate.

If you want to animate the whole headline, then simply leave the ‘Before Headline’ and ‘After Headline’ fields empty.

Animating an entire headline in WordPress

By default, SeedProd will play the animation on a loop, which some visitors may find annoying.

To only play the animation once, click to deactivate the ‘Infinite Loop’ switch.

Disabling the infinite loop animation settings

By default, the animation will play for 1200 milliseconds after an 8000 milliseconds delay.

To use different values, type into the ‘Duration’ and ‘Delay’ fields. For example, you can make the animation faster by using a shorter duration.

Changing the animation duration

You may also want to style the text. For example, you can change the font size and alignment.

When you’re happy with how the animated headline looks, go ahead and click on the ‘Save’ button to store your changes.

Saving a CSS animation in WordPress

Add Entrance Animations in WordPress

Entrance animations play when the page first loads, so they’re a great way to catch the visitor’s attention.

You can also use them to highlight the content visitors should look at first. For example, if you have an online marketplace then you might animate the product’s hero image, or the banner advertising your Black Friday sale.

Inside the SeedProd editor, simply click on the content you want to animate, and then select the ‘Advanced’ tab in the left-hand menu.

Adding entrance animations using SeedProd

You can then go ahead and click to expand the ‘Animation Effects’ section.

After that, simply choose an animation from the ‘Entrance Animation’ dropdown.

Adding entrance animations using SeedProd

You can now add entrance animations to any block, section, or column simply by following the same process described above.

Publish Your CSS Animations in WordPress

When you’re happy with how the page is set up, click the dropdown menu on the ‘Save’ button and select ‘Publish.’

Publishing a WordPress landing page

You can now visit this page to see the CSS animations live.

We hope this article helped you learn how to add CSS animations in WordPress. You may also go through our ultimate guide to boost speed and performance, or see our list of the most common WordPress errors and how to fix them.

If you liked this article, then please subscribe to our YouTube Channel for WordPress video tutorials. You can also find us on Twitter and Facebook.

The post How to Easily Add CSS Animations in WordPress first appeared on WPBeginner.

How to Start a Video Blog (Vlog) And Make Money in 2023

Do you want to start a video blog and make money?

Vlogging is a powerful way to connect with people and build a personal brand. However, if you simply upload vlogs to third-party platforms like YouTube, then you may struggle to grow your audience, make money, and become a successful vlogger.

In this article, we will show you how you can start a vlog and make money.

How to start a video blog (vlog) and make money

Which Is the Best Website Builder for Your Video Blog?

There are many website builders that can help you create a vlog site, but we recommend using WordPress and a separate video hosting platform.

To learn more about why WordPress is such a good choice, please see our complete WordPress review with pros and cons.

There are two types of WordPress software: WordPress.com and WordPress.org. We recommend using WordPress.org, also called ‘self-hosted WordPress.’ This will give you full ownership and control of your site.

Using WordPress.org allows you to install third-party plugins and themes, including plenty that are designed specifically for vloggers.

Also, while you can upload videos to WordPress, it’s far better to use a separate video hosting platform such as YouTube or Vimeo.

Videos take up a lot of your hosting resources, which will slow down your website. Instead, we recommend uploading your vlogs to a separate hosting platform such as YouTube or Vimeo, which has all the server resources you need.

After uploading your vlogs to one of these sites, you can then embed your vlog in a WordPress page or post by simply copying and pasting a link. WordPress has built-in support for most major video hosting platforms.

If you really want to save time and impress your viewers, then you can use a plugin like Smash Balloon to create a video feed that will update automatically every time you post a new vlog.

An embedded YouTube feed, created using Smash Balloon

If you don’t already have a video hosting platform in mind, then don’t worry. Later in this guide, we’ll help you find the perfect platform for your vlogs.

Step 1. Setting Up Your Video Blog Website

To create a video vlog, you’ll need a domain name and web hosting.

Although the WordPress software is free, hosting and domain names are where the costs can really start to add up.

A domain name typically costs $14.99/year and hosting costs start from $7.99/month. This is a lot for hobby vloggers, new creators, or anyone who is working with a tighter budget.

Thankfully, Bluehost has agreed to offer our users over 60% off on web hosting and a free SSL certificate as part of this deal. This is absolutely essential if you plan to sell premium videos and make money from your vlogs. You will also get a free domain name when you sign up!

Simply click the link below to create a vlogging website for as little as $2.75 per month.

Because you get a free domain when you sign up with Bluehost, you’ll need to be sure it’s the right fit for your video blog. For expert tips, check out our guide on how to choose the best domain name.

Once you’ve completed the purchase, you’ll get an email with instructions on how to log in to your web hosting control panel. This is your hosting account dashboard where you can manage your vlog, including setting up email notifications and asking for WordPress support if you need it.

It’s also where you’ll install the WordPress software, so let’s do that now.

Step 2. Install WordPress on Your Video Blog

When you sign up with Bluehost using our link, you’ll get access to a one-click WordPress installer. Simply log into your Bluehost account and click on ‘One Click Install.’

Installing the WordPress software

You can now follow the onscreen instructions to set up WordPress.

If you’re using a different WordPress website host like SiteGround, Hostinger, HostGator, or WP Engine, then you can see our complete guide on how to install WordPress for all the top hosting providers.

Once WordPress is set up, you’re ready to start customizing your vlog site.

Step 3. Select a Video Theme

WordPress themes are professionally designed templates that change how your vlog looks and acts.

There are lots of different premium and free WordPress business themes to choose from. You can generally categorize these as multipurpose WordPress themes, or niche industry themes. However, most WordPress themes are designed to show text.

Since we’re starting a vlog, we need a theme that’s designed specifically for videos.

A WordPress video theme

Even if you’re using a separate video hosting platform, embedded videos still take time to load. With that in mind, it’s important to find a lightweight theme that won’t slow down your website. Wherever possible, we also recommend using a theme that has built-in lazy loading.

On top of that, vlogs often need special features such as parallax scrolling, lightbox popups, and fullscreen video backgrounds.

An example of a WordPress vlog theme

That’s a lot to keep in mind, so you may want to look at our expert pick of the best WordPress video themes.

Another option is to use a landing page builder plugin such as SeedProd. SeedProd is the best drag-and-drop WordPress page builder and comes with more than 180 templates.

This includes an entire section of ‘Webinar’ templates that are designed specifically to show videos on your WordPress website.

SeedProd's professionally-designed vlog templates

SeedProd also has a ready-made ‘Video’ block that you can drag and drop onto any page.

For more information, please see our guide on how to create a landing page with WordPress.

The SeedProd page builder plugin

Once you’ve chosen a video theme, please see our step-by-step guide on how to install a WordPress theme.

After installing a theme, you may want to customize it by going to Appearance » Customize in the WordPress dashboard. This will launch the theme customizer where you can fine-tune the theme settings and see your changes in the live preview.

Customizing a WordPress video blog theme

If you’re using one of the newer full-site editing themes, then you’ll need to go to Appearance » Editor instead.

Here, you can fine-tune the theme using blocks.

Customizing a WordPress vlogging theme using the FSE

Just remember that you can customize your theme at any point. You can even completely change your WordPress theme, if you realize it doesn’t quite meet your needs.

This means you don’t need to finalize your site design now. In fact, it may be easier to fine-tune your vlog once you’ve added some content.

Step 4. Create a Custom Homepage

WordPress comes with two content types called posts and pages.

You’ll typically use posts to create articles and blogs, while pages are static “one-off” types of content. For example, you might publish an about page, a privacy policy, or a custom archive page.

There are a few different ways to show videos in WordPress. However, since we’re creating a video vlog you’ll typically embed one or more videos in a blog post.

By default, the WordPress homepage shows your posts in reverse chronological order, so your latest vlog appears at the top of the homepage.

A custom homepage on a WordPress vlog

However, you may want to move this blog list to another page, and use a custom homepage instead. This custom homepage can introduce your vlog to visitors and let them know what you have to offer.

You might even create a YouTube gallery of all your best videos, which is a great way to catch a visitor’s attention and make them want to watch more of your content.

Smash Balloon allows you to create all kinds of galleries, including showing a specific YouTube playlist or favorites feed, a single video, or even your latest live stream.

Adding a YouTube vlog feed to your WordPress website

For step-by-step instructions on how to create an attention-grabbing homepage for your video blog, please see our guide on how to create a custom homepage in WordPress.

Once you’re happy with the design, it’s time to set it as your homepage. To do this, go to Settings » Reading in the WordPress dashboard.

How to set a custom homepage in WordPress

Here, scroll to ‘Your homepage settings’ and select ‘A static page.’

Next, open the ‘Homepage’ dropdown and choose the page that you want to use.

Changing the homepage on a WordPress video blog

After that, simply scroll to the bottom of the screen and click on ‘Save Changes.’ Now, if you visit your website you’ll see the new homepage in action.

With that done, make sure you create a separate blog page to display your vlogs.

Step 5. Set Up Your Video Hosting Platform

Before you can start adding videos to your WordPress website, you’ll need to upload them to a separate video hosting platform. In this way, you can show countless high-resolution videos on your website without affecting its performance.

For more on this topic, see our post on why you should never upload a video to WordPress.

There are lots of different video hosting platforms that you can use, but we recommend YouTube as it’s the most popular choice.

It’s free to create a YouTube account and you can upload as many videos as you want.

Uploading videos to YouTube

YouTube even has a Partners Program that you can join to make money from your videos. This program also offers more benefits like analytics, longer videos, and editing tools.

Since it’s such a popular platform, there are lots of great WordPress plugins for YouTube. For example, you can use plugins to quickly and easily embed a YouTube playlist in WordPress.

Adding a YouTube playlist to a vlog using Smash Balloon

If you don’t want to use YouTube, then there are many other popular platforms including Vidyard, Wistia, and SproutVideo. For a closer look at all the top video sites, please see our expert pick of the best video hosting sites for bloggers.

After choosing a platform, you’ll need to create an account and upload all the vlogs that you want to show on your WordPress website.

For instructions on how to do this, check out the online documentation for your chosen video hosting platform.

Step 6. Create Your First Vlog

To create your first vlog, simply go to Posts » Add New in your WordPress dashboard.

WordPress has a block-based editor that allows you to create beautiful content layouts for your vlogs. Here, you can add text, images, audio clips, and more.

How to create a new vlog post

For an in-depth look at the editor, please see our WordPress block editor tutorial.

The easiest way to add vlogs to WordPress is by using the built-in auto-embed feature. If you’re using one of the big video hosting platforms, then you can simply paste the video’s URL into the WordPress content editor, and WordPress will handle the rest.

Just head over to your chosen video hosting platform and find the vlog that you want to show on your WordPress blog. You can then simply copy the video’s URL.

After that, switch back to the WordPress dashboard and paste the URL in the content area. If you paste it into a standard Paragraph block, WordPress will automatically try to place it in the correct block, such as the YouTube block.

Embedding a YouTube video in WordPress

Even if you don’t see the platform-specific block, it will use the Embed block and display the video inside the content editor.

For more information, please see our detailed guide on how to easily embed videos in WordPress blog posts.

How to show a YouTube vlog in WordPress

As you’re working on the vlog, you can see how it’ll look to visitors by clicking on ‘Preview.’

This will open the page in a new tab.

How to preview a vlog in WordPress

The WordPress post editor also has sections for Categories and Tags. You can use these to organize your vlogs so it’s easier for visitors to find interesting content. To learn more, please see our guide on how to add categories and tags in WordPress.

When you’re happy with how the vlog looks, go ahead and click on the ‘Publish’ button in the top-right corner of the screen.

To add more vlogs to your website, simply follow the same process described above.

Step 7. Add a Contact Form to Your Vlog

Some viewers might want to contact you directly. This may include affiliate marketers, sponsors, advertisers, and other brands who are looking to build relationships with creators, or other vloggers who want to collaborate.

These people could ring your phone number or send a message to your business email address, but we always recommend adding a contact form to your website.

This makes it easier for potential partners to contact you, so you don’t miss out on any opportunities to grow your brand and make money from your vlogs.

The easiest way to add a contact form to your WordPress website is by using the free WPForms plugin. WPForms comes with a built-in Simple Contact Form template that you can customize using the drag-and-drop editor.

Adding a contact form to a WordPress vlogging site

You can then add the form to any page, post, or widget-ready area using the ready-made WPForms block.

For detailed instructions, see our guide on how to create a contact form in WordPress.

Step 8. Help Visitors Find Interesting Vlogs

Once you’ve added some content to your vlog, it’s a good idea to add a navigation menu so visitors can find their way around the different videos.

Adding a navigation menu to a video blog (vlog)

The exact location of your menu will depend on your WordPress theme. Most themes have several options, so you can create multiple menus and then show them on different areas of your vlog.

Whether you create a single menu or multiple menus, it’s easy to add navigation to your vlog. For a complete guide, please see our post on how to add a navigation menu.

Adding a navigation menu to a WordPress vlog

Menus encourage people to explore your site, but sometimes visitors may want to search for a specific vlog. WordPress comes with a built-in search feature, but it’s quite basic and not very good at finding relevant content.

That’s why we recommend using SearchWP, which is the best search plugin for WordPress.

It is very easy to use and gives much more accurate search results. It allows visitors to search for a keyword in the post or page title, content, URL slug, categories, tags, taxonomies, WordPress excerpts, and even comments.

All of this can help visitors find interesting vlogs, fast.

How to improve WordPress search with SearchWP

For step-by-step instructions on SearchWP, please see our guide on how to improve WordPress search.

Step 9. Optimize Your Vlog for SEO

If you want to get more viewers, then you’ll need to optimize your vlog for SEO. This will help search engines understand your content and show it to people who are looking for videos just like yours.

WordPress SEO is a huge topic that can be confusing for new vloggers. With that in mind, we recommend using All in One SEO for WordPress (AIOSEO).

The AIOSEO SEO plugin

AIOSEO is the best WordPress SEO plugin on the market and has everything you need to get your vlogs onto the first page of Google, without having to learn any complicated SEO jargon.

AIOSEO comes with the easiest setup wizard that helps you choose the best SEO settings for your business. AIOSEO will even scan your vlogs and show an actionable checklist on how you can optimize that specific vlog.

An actionable checklist for improving SEO

Additionally, AIOSEO has a video sitemap feature that you can use to show search engines what’s the most important content to index.

To help you get started, please see our ultimate guide on how to set up All in One SEO for WordPress correctly.

Step 10. Notify Users About New Vlogs

Did you know that 70% of people who leave your site will never come back? Thankfully there are lots of ways to turn abandoning visitors into loyal viewers.

To start, it’s smart to create an email newsletter so people who enjoy your vlogs can subscribe. After that, you can email these subscribers every time you post a new vlog.

You can also keep them engaged with your brand by sending them fun surveys and polls, notifying them about any giveaways and contests you’re running, or even simply asking them for feedback on your latest vlog.

An example of an online giveaway or contest

All of this can help you create a sense of community and build a stronger relationship with your viewers.

If you do build an email list, then you’ll want to make sure your messages arrive safely in the subscriber’s inbox and not in their spam folder. With that in mind, we recommend using an SMTP service provider to improve your email deliverability rates.

Another option is to use push notifications with software like PushEngage to send targeted, personalized messages to viewers after they leave your vlog.

Push notifications are short, clickable notifications that appear as a popup on the user’s desktop or mobile devices. Some of the biggest websites in the world use push notifications to keep users engaged, including Facebook.

These notifications go directly to the user’s web browser or mobile device so they have a high chance of getting the person’s attention, which makes them perfect for notifying viewers when you post a new vlog.

To learn more, see our guide on how to add web push notifications to WordPress.

Step 11. How to Make Money From Your Video Vlogs

Creating lots of quality, engaging vlogs takes a lot of time and effort, so you may want to make money from your videos.

If you’ve created a contact form, then potential sponsors and partners already have a way to contact you, which is a great start. However, there are lots more ways to make money online with WordPress.

Here are some of the best ways to make money from your vlog.

  1. Google AdSense

There are many reasons why it’s smart to embed videos on your own website, rather than simply uploading them to platforms like YouTube.

One major benefit is that you can show Google AdSense ads next to your videos.

Google AdSense

When you sign up for Google AdSense, Google acts as a middleman between you and the advertiser. Instead of you having to find the right partners for your vlog, Google allows advertisers to bid for keywords matching your content. This allows you to get the best possible rates for the ads on your vlogging website.

For more details, please see our article on how to properly add Google AdSense to your WordPress blog.

  1. Affiliate marketing

Many vloggers make money by recommending products and services to their viewers. For example, many lifestyle vloggers film daily routine videos showing off their favorite skincare or fitness products.

By using affiliate links, you can earn money every time a viewer buys a product or service based on your recommendation.

For the best results, it’s a good idea to only recommend quality items that you already use and trust. If you encourage viewers to buy poor-quality or scammy products, then you’ll damage your band and almost certainly lose viewers.

There are plenty of affiliate marketing plugins and tools for WordPress that can help you make money by promoting affiliate products, but we highly recommend PrettyLinks or ThirstyAffiliates to all vloggers.

To get started, please see our step-by-step affiliate marketing guide for beginners.

  1. Ask for Tips and Donations

If you build a strong, positive relationship with your viewers then they may want to support your work as a vlogger. This is particularly true if you’re a hobby vlogger or someone who is just starting out.

Although they’re mostly used by non-profits, some vloggers use donation forms so that viewers can support their work. These forms are often presented as ‘buy me a coffee’ or ‘buy me a beer.’

An example of a donation form

To learn more, please see our guide on how to create a donate form in WordPress.

  1. Create a Membership Site

Most of the time, you’ll want your vlogs to be publicly available so you can get as many views as possible and build your audience.

However, some vloggers may want to create a video membership site in WordPress. This allows people to pay for different perks, such as early access to the latest vlogs, exclusive live streams, or premium members-only videos.

You can also offer perks that don’t involve videos, such as a members-only forum, blog posts, or the ability to chat with you directly on channels like Discord.

The easiest way to create a membership site is by using MemberPress. It is the best WordPress membership plugin on the market and allows you to accept payments, create unlimited subscription levels, restrict access to video pages based on levels, and more.

Creating video memberships with the MemberPress plugin
  1. Sell Your Videos as Digital Downloads

Depending on the kind of vlogs you create, you may decide to sell some of your premium videos as digital downloads. For example, if you’re a health and fitness vlogger then you might create videos teaching your followers different exercise routines.

For some niches, this can be a way to monetize the audience you’ve built from your vlogs.

Easy Digital Downloads is the best platform to easily sell digital products. You can get started in minutes and accept credit card payments with Stripe, PayPal, Google Pay, and Apple Pay.

The Easy Digital Downloads WordPress eCommerce plugin

With Easy Digital Downloads, you have complete control over how you distribute your videos. You can allow customers to download files as many times as they want or restrict file downloads by time or attempt.

To start selling your premium videos, please see our complete guide on how to sell digital downloads on WordPress.

We hope this tutorial helped you learn how to start a video vlog and make money. You may also want to learn how to increase your blog traffic or check out our list of the best email marketing services.

If you liked this article, then please subscribe to our YouTube Channel for WordPress video tutorials. You can also find us on Twitter and Facebook.

The post How to Start a Video Blog (Vlog) And Make Money in 2023 first appeared on WPBeginner.

How to Easily Create a Restaurant Website with WordPress

Do you want to create a restaurant website with WordPress?

A restaurant website can help attract new customers and grow your business. It can also provide a better experience for your existing customers and keep them coming back to your restaurant, cafe, takeaway, or similar business.

In this article, we will show you how to create a restaurant website with WordPress.

How to easily create a restaurant website with WordPress

Why Create a Restaurant Website?

A website is one of the best ways to market your restaurant to new customers and provide a better experience for your existing clients.

By creating an online presence for your restaurant, you can introduce your business to people who are looking for venues and food just like yours.

An example of a restaurant website

After a potential customer discovers your business, a professionally-designed and helpful restaurant website will tell them everything they need to know about your business. They can then decide whether your restaurant is right for them.

Even if you have lots of loyal customers and a positive reputation in the local area, a restaurant website can help you improve the customer experience.

For example, it can allow customers to book a table online, send you questions using a convenient contact form, check out the latest menu, and much more.

An example of a restaurant online booking form

In this way, a restaurant website can keep your customers happy, so they carry on visiting you for months, or even years to come.

That said, let’s see how you can easily create a restaurant website with WordPress.

Which Is the Best Website Builder for Your Restaurant?

There are many website builders that can help you create a restaurant website but we recommend using WordPress.

According to our blogging research statistics, WordPress is the most popular website platform in the world. It powers nearly 43% of all websites on the internet including many top restaurant websites.

WordPress is also open-source and free. For more on this topic, see our article on why WordPress is free.

However, it’s important to realize that there are two types of WordPress software, so you don’t choose the wrong one.

First, there is WordPress.com, which is a blog hosting platform. Then, there is WordPress.org which is also known as self-hosted WordPress.

For a detailed comparison, you can see our guide on the difference between WordPress.com and WordPress.org.

For a restaurant website, we recommend using WordPress.org because it gives you complete ownership of your site and allows you to install third-party plugins, including plenty that are designed specifically for restaurant owners.

To learn more about why we recommend WordPress to all our readers, please see our complete WordPress review with pros and cons.

Step 1. Setting Up Your Restaurant Website

To create a WordPress website you’ll need a domain name and web hosting.

A domain name is your website’s address on the internet. This is what customers will type into their browsers to reach your website, such as justeat.com or tacobell.com.

Web hosting is where your website lives online. To help you out, we’ve hand-picked some of the best WordPress hosting that you can buy for a restaurant website.  

Although the WordPress software is free, hosting and domain names are where the costs can really start to add up.

A domain name typically costs $14.99/year and hosting costs start from $7.99/month. This is a lot for restaurants that already have bills and expenses to pay.

Thankfully, Bluehost has offers a free domain name, and our readers can get 60% off on web hosting. Bluehost is one of the largest hosting companies in the world, and an official WordPress-recommended hosting partner.

They’re also offering our readers a free SSL certificate. If you want to accept payments online, then an SSL certificate will help keep the customer’s credit and debit card information safe.

You can click the button below to get started for as little as $2.75 per month.

Once there, you will need to go to the Bluehost website in a new tab and click on the green ‘Get Started Now’ button.

Bluehost WordPress Hosting offer for WPBeginner Users

This will bring you to a pricing page where you can choose a hosting plan for your website.

We recommend choosing a Basic or Plus plan, as they’re the most popular web hosting plans among our readers.

Bluehost pricing plans

After selecting a plan, click on ‘Continue.’

On the next screen, you’ll need to choose a domain name.

Choosing a domain name for your restaurant website

Ideally, the domain name will be easy to pronounce and spell, easy to remember, and related to your business. The name of your restaurant is a great place to start, but sometimes that domain may already be taken by another business.

In that case, you can try extending the domain name by adding your restaurant’s location, your own name, or the type of food you serve.

Need help choosing a domain name for your restaurant website? See these tips and tools on how to choose the best domain name.

After choosing a name, click on the ‘Next’ button to continue.

Now you’ll need to provide your account information such as your name and email address. After that, you’ll also see optional extras that you can purchase.

We generally don’t recommend purchasing these extras straight away, as you can always add them later on if you need them.

Bluehost hosting package extras

After that, simply type in your payment information to complete the purchase.

Once you’ve done that, you’ll get an email with instructions on how to login to your web hosting control panel. This is your hosting account dashboard where you can manage your restaurant website, including setting up email notifications and asking for WordPress support.

It’s also where you’ll install the WordPress software.

Step 2. Create a New WordPress Website

When you signup with Bluehost using our link, Bluehost installs WordPress on your domain name automatically.

If you want to create a different WordPress website, then you can simply click on the ‘My Sites’ tab in the Bluehost dashboard.

Next, just click on the ‘Add Site’ button and select ‘Create New Site.’

Creating a new restaurant website using Bluehost

The Bluehost wizard will now guide you through the setup process.

First, you’ll need to type in a site title and optional tagline.

Adding a site title and tagline to your new restaurant website

Click on the ‘Next’ button to continue.

After that, Bluehost will ask you to select a domain name and path for your restaurant website. If you’ve already purchased a domain name, then you can simply select it from the dropdown menu.

Choosing a domain for your new WordPress website

If you don’t have a domain name then you can buy one by visiting the ‘Domains’ page inside the Bluehost dashboard.

After choosing a domain name, you can leave the directory path blank and let Bluehost fill it in for you. The installer will also show a few must-have WordPress plugins that you may want to install on your restaurant website including OptinMonster.

After that, click on the ‘Next’ button and the installer will set up your restaurant site.

Once it’s finished, you’ll see a ‘WordPress installed successfully’ message with information about your new website. You can now go ahead and click on the ‘Log into WordPress’ button.

This will take you to your site’s admin area.

Log into your new WordPress website dashboard

You can also log in to the WordPress dashboard by simply going to yoursite.com/wp-admin/ directly from your browser.

If you’re using a different WordPress website host such as SiteGroundHostingerHostGator, or WP Engine, then you can see our complete guide on how to install WordPress for all the top hosting providers.

Once WordPress is setup, you’re ready to start building a five-star restaurant website.

Step 3. Select a Restaurant Theme

WordPress themes are professionally designed templates that change how your restaurant site looks and acts.

By default, each WordPress site comes with a basic theme. If you visit your website, then it will look something like this:

The default WordPress theme

This is not very appealing for most customers, so you’ll usually want to replace the default WordPress theme.

There are lots of different premium and free WordPress business themes to choose from. You can generally categorize these as multipurpose WordPress themes, or niche industry themes.

Your typical restaurant website needs special features, like the ability to show a menu, photos, location information, business hours, and more.

With that in mind, it makes sense to look for a theme that’s designed for the food or hospitality industry. To help you out, we’ve collected the best WordPress restaurant themes.

You can also use a website and landing page builder plugin such as SeedProd.

The SeedProd page builder

SeedProd is the best drag and drop WordPress page builder and comes with built-in templates that you can use to build a professionally-designed restaurant website.

These templates include a menu, food photos, pricing, recipes, and more.

One of SeedProd's ready-made restaurant templates

Once you’ve chosen a restaurant theme, please see our step-by-step guide on how to install a WordPress theme.

After installing your theme, you may want to customize it by going to Appearance » Customize in the WordPress dashboard.

This will launch the theme customizer where you can fine-tune the theme settings and see your changes in the live preview.

The WordPress theme customizer

If you’re using one of the newer full site editing themes, then you’ll see the option for Appearance » Editor, which uses blocks similar to the content editor to customize your site.

Pro Tip: No matter what theme you’re using, neither the default WordPress customizer nor the full site editing offers a user-friendly drag and drop customization experience. For that reason, we recommend using a page builder like SeedProd to customize your theme.

Just remember that you can always return to this screen and continue customizing your theme. You can even completely change your WordPress theme at any point.

Step 4. Create a Custom Home Page

WordPress has two two default content types called posts and pages.

You’ll typically use posts to create articles and blogs. By default, the home page shows these posts in reverse chronological order, so the newest content appears at the top of the list.

A list of WordPress blog posts

You might use a blog to build a stronger relationship with their customers, improve your WordPress SEO, and get more traffic to your restaurant website. For example, you could write about recipes, share cooking tips, or blog about the latest restaurant industry news.

However, even if you plan to publish blog posts, you typically won’t show these on the home page. Instead, we recommend creating a custom home page that introduces your business to new visitors.

For step-by-step instructions on how to create an attention-grabbing restaurant home page, please see our guide on how to create a custom home page in WordPress.

Once you’re happy with the page’s design, it’s time to set it as your home page. To do this, go to Settings » Reading in the WordPress dashboard.

Adding a static home page to your WordPress website

Here, scroll to ‘Your homepage settings’ and select ‘A static page.’

Next, open the ‘Homepage’ dropdown and choose the page that you want to use.

Adding a static home page to your WordPress restaurant website

Then, simply scroll to the bottom of the screen and click on ‘Save Changes.’ Now, if you visit your website you’ll see the new home page in action.

If you are going to write blogs, then make sure you create a separate blog page to display your posts. If you don’t, then customers will struggle to find your latest WordPress blogs.

Step 5. Create an Online Restaurant Menu

Even long-term, loyal customers may want to look at your menu from time to time. By publishing your menu online, customers can look at it any time of day or night.

Publishing a menu can also help convince new customers to visit your restaurant.

It is possible to upload PDF files to your WordPress website. However, downloading a PDF menu can be difficult depending on the customer’s data plan and internet connection, and they’re non-responsive so they can be hard to read on some devices.

Plus, if you add new dishes or change your pricing, then you’ll also need to upload a completely new PDF.

For that reason, we recommend using SeedProd to add an online menu to your WordPress website. SeedProd also allows you to create a mobile responsive menu that looks great on every device.

One of SeedProd's professionally-designed restaurant templates

You can also easily update the menu as you add new dishes, change the prices, remove dishes, and more.

SeedProd even comes with a ‘Menu Sales Page’ template that’s perfect for creating a menu.

A restaurant menu, created using SeedProd

For detailed instructions, please see our guide on how to create an online restaurant menu.

Step 6. Set Up Online Food Ordering

Many restaurants allow customers to order food online. For example, you might give customers the option to pre-order their meal or place an order for delivery.

It may sound technical, but you can easily add online food ordering to your website using the WPForms plugin.

The WPForms form builder plugin for WordPress

WPForms is the best WordPress form builder that allows you to create online order forms for all kinds of products and services.

It even comes with a ready-made ‘Takeout Order Form’ that you can customize to suit your restaurant website.

Adding an online takeaway order form to your WordPress website

Every time someone completes the form, WPForms will notify you automatically so you can start working on that order straight away.

If you don’t want to accept cash on delivery, then WPForms supports all of the best payment gateways including PayPal and Stripe. This allows you to accept payments securely online, which is quick and convenient for your customers.

Accepting online payments for your restaurant website

For step-by-step instructions, please see our guide on how to set up food ordering for restaurants in WordPress.

Step 7. Add a Restaurant Booking Form

Today, most people expect to be able to book appointments through an automated system.

By adding a booking form to your restaurant website, you can accept reservations at any time of the day or night. You’ll never lose another customer just because you weren’t around to answer the phone. 

Booking forms can also automate a lot of the booking process. This includes collecting payments and emailing your customers to remind them about their upcoming booking.

You can easily add a restaurant booking form to your website using WPForms. This plugin has a ready-made dinner reservation form template that you can customize for your restaurant.

How to accept online bookings on a restaurant website

WPForms also integrates with all of the top email marketing providers. This makes it easy to send reservation confirmation emails to your customers.

As their booking approaches, you can even send the customer a reminder email, ask them to share any dietary requirements, send a pre-order form, and more.

Creating email notifications for your booking form

To learn more about adding a reservation form to your WordPress website, please see our guide on how to create a booking form in WordPress.

Step 8. Add a Contact Us Form

Even if you use a WordPress appointment and booking plugin, some customers may still need to talk to you directly.

While visitors could ring your phone number or send a message to your business email address, we always recommend adding a contact form to your website.

An example of a contact form

Most of the best contact form plugins come with built-in spam protection, so you won’t get any contact form spam. A form will also collect consistent information from visitors, so you’ll have all the data you need to write a helpful reply.

The easiest way to add a contact form to your WordPress website is by using the free WPForms plugin.

This free plugin comes with a built-in Simple Contact Form template that you can quickly customize using the drag and drop editor.

WPForms' contact form template

Then, simply add the form to any page, post, or widget-ready area using the ready-made WPForms block.

For detailed instructions, see our guide on how to create a contact form in WordPress.

Step 9. Add a Navigation Menu

Once you’ve added some content to your restaurant website, you’ll want to help visitors find their way around those pages and posts by adding a navigation menu.

An example of a restaurant menu, created using WordPress

No matter what theme you’re using, WordPress makes it really easy to add menus and sub-menus to your restaurant website.  

For a complete guide, please see our post on how to add a navigation menu.

The WordPress menu settings

Step 10. Add Social Proof to Your Restaurant Website

Social proof is one of the best ways to earn customer trust, and convince new people to visit your restaurant. After all, we’re more likely to try things that we see other people buying, using, or recommending.

People love sharing food photos on sites like Instagram and Facebook. With that in mind, we recommend adding social media feeds to your WordPress website.

Smash Balloon Instagram Feed is one of the best Instagram plugins for WordPress, and it allows you to easily show other people’s photos on your site.

Using this plugin, you can create a hashtag feed and show photos that customers have tagged your account in. This includes photos of your food, venue, and shots of customers having fun at your restaurant.

A food hashtag Instagram feed, created using Smash Balloon

For detailed step-by-step instructions, please see our guide on how to create a custom Instagram feed in WordPress.

If your customers regularly tweet about your restaurant, then Smash Balloon Twitter Feed also lets you create hashtag and mention feeds.

A Smash Balloon Twitter feed

For more instructions on adding a Twitter feed to WordPress, see our guide on how to embed tweets in WordPress.

Step 11. Show Customer Reviews

Customer reviews and testimonials can provide visitors with more information, and may even solve any question or worries customers have about visiting your restaurant.

If you already have a Facebook page, then it’s easy to display your Facebook reviews in WordPress using Smash Balloon Facebook Feed.

Facebook reviews, embedded in a WordPress website

If you want to show reviews from other platforms like Yelp or Google My Business, then there’s also plenty of customer review plugins for WordPress that you can use.

These plugins will collect reviews automatically and then organize them into a nice layout on your restaurant website.

Customer reviews embedded on a WordPress website

If you do add a customer review page in WordPress, then don’t forget to add it to your navigation menu too.

Don’t have any reviews to feature on your website? Then it’s time to start asking for them.

WPForms has a a ready-made Restaurant Review Form template that you can add to your website.

A restaurant review form, created using WPForms

Bonus Tips to Grow Your Restaurant Website

Now that you have setup your restaurant website, here are some top tips that you can use to grow your online business:

We hope this tutorial helped you learn how to create a restaurant website with WordPress. You may also want to see our ultimate WordPress security guide and our expert pick of the must have WordPress plugins that you should install on all business sites.

If you liked this article, then please subscribe to our YouTube Channel for WordPress video tutorials. You can also find us on Twitter and Facebook.

The post How to Easily Create a Restaurant Website with WordPress first appeared on WPBeginner.

How to Remove the Powered by WordPress Footer Links

Do you want to remove the ‘powered by WordPress’ footer links on your site?

By default, most WordPress themes have a disclaimer in the footer, but this can make your site look unprofessional. It also leaves less space for your own links, copyright notice, and other content.

In this article, we will show you how to remove the powered by WordPress footer links.

How to remove the powered by WordPress footer links

Why Remove the WordPress Footer Credits?

The default WordPress themes use the footer area to show a ‘Proudly powered by WordPress’ disclaimer, which links to the official WordPress.org website.

The Powered by WordPress disclaimer

Many theme developers take this further and add their own credits to the footer.

In the following image, you can see the disclaimer added by the Astra WordPress Theme.

The Astra footer disclaimer

While great for the software developers, this ‘Powered by….’ footer can make your site seem less professional, especially if you’re running a business website.

It also lets hackers know that you’re using WordPress, which could help them break into your site.

For example, if you’re not using a custom login URL, then hackers can simply add /wp-admin to your site’s address and get to your login page.

This disclaimer also links to an external site, so it encourages people to leave your website. This can have a negative impact on your pageviews and bounce rate.

Is it legal to remove WordPress footer credit links?

It is perfectly legal to remove the footer credits link on your site because WordPress is free, and it is released under the GPL license.

Basically, this license gives you the freedom to use, modify, and even distribute WordPress to other people.

Any WordPress plugin or theme that you download from the official WordPress directory is released under the same GPL license. In fact, even most commercial plugins and themes are released under GPL.

This means you’re free to customize WordPress in any way you want, including removing the footer credits from your business website, online store, or blog.

With that in mind, let’s see how you can remove the powered by WordPress footer links.

Video Tutorial

If you don’t want the video or need more instructions, then simply use the quick links below to jump straight to the method you want to use.

Method 1. Removing the ‘Powered by’ Link Using the Theme Settings

Most good theme authors know that users want to be able to edit the footer and remove the credit links, so many include it in their theme settings.

To see whether your theme has this option, go to Appearance » Customize in your WordPress admin dashboard.

Launching the WordPress Customizer

You can now look for any settings that let you customize your site’s footer, and then click on that option.

For example, the Astra theme has a section called ‘Footer Builder.’

Customizing the Astra theme disclaimer

If you’re using this theme, then simply click on the ‘Footer’ section and select ‘Copyright.’

Doing so will open a small editor where you can change the footer text, or even delete it completely.

How to remove the 'powered by WordPress' disclaimer

No matter how you remove the footer disclaimer, don’t forget to click on ‘Publish’ to make the change live on your site.

If you’re using a block theme, then you can remove the footer disclaimer using Full Site Editing (FSE) and the block editor.

This is a quick and easy way to remove the ‘Powered by’ credit across your entire site, although it won’t work with all themes.

To launch the editor, go to Appearance » Editor.

How to launch the FSE

Then, scroll to your website’s footer and click to select the ‘Powered by’ disclaimer.

You can now replace it with your own content, or you can even delete the disclaimer completely.

Editing the 'Proudly powered by WordPress' credit using the full site editor

When you’re happy with how the footer looks, simply click on ‘Save.’ Now if you visit your site, you’ll see the change live.

Method 3. How To Remove the ‘Powered by’ Disclaimer Using a Page Builder

Many WordPress websites use the footer to communicate important information, such as their email address or phone number. In fact, visitors might scroll to the bottom of your site looking specifically for this content.

With that in mind, you may want to go one step further and replace the ‘Powered by’ text with a custom footer. This footer could contain links to your social media profiles, links to your affiliate partners, a list of your products, or other important information and links.

You can see the WPBeginner footer in the following image:

An example of a WordPress footer

The best way to create a custom footer is by using SeedProd. It is the best page builder plugin and comes with over 180 professionally-designed templates, sections, and blocks that can help you customize every part of your WordPress blog or website.

It also has settings that allow you to create a global footer, sidebar, header, and more.

First, you need to install and activate SeedProd. For more details, see our step-by-step guide on how to install a WordPress plugin.

Note: There’s also a free version of SeedProd that allows you to create all kinds of pages using the drag-and-drop editor. However, we’ll be using the premium version of SeedProd since it comes with the advanced Theme Builder.

After activating the plugin, SeedProd will ask for your license key.

SeedProd license key

You can find this information under your account on the SeedProd website. After entering the key, click on the ‘Verify Key’ button.

Once you’ve done that, go to SeedProd » Theme Builder. Here, click on the ‘Add New Theme Template’ button.

The SeedProd theme builder

In the popup, type in a name for the new theme template.

Once you’ve done that, open the ‘Type’ dropdown and choose ‘Footer.’

Creating a custom footer with SeedProd

SeedProd will show the new footer template across your entire site by default. However, you can limit it to specific pages or posts using the ‘Conditions’ settings.

For example, you may want to exclude the new footer from your landing pages, so it doesn’t distract from your main call to action.

When you’re happy with the information you’ve entered, click on ‘Save.’

This will load the SeedProd page builder interface.

At first, your template will show a blank screen on the right and your settings on the left. To start, click on the ‘Add Columns’ icon.

The SeedProd theme builder editor

You can now choose the layout that you want to use for your footer. This allows you to organize your content into different columns.

You can use any layout you want, but for this guide, we’re using a three-column layout.

Choosing a layout for the WordPress footer

Next, you can edit the footer’s background so that it matches your WordPress theme, company branding, or logo.

To change the background color, simply click on the section next to ‘Background Color’ and then use the controls to choose a new color.

Changing the background color of a WordPress footer

Another option is to upload a background image.

To do this, either click on ‘Use Your Own Image’ and then choose an image from the WordPress media library, or click on ‘Use a stock image.’

Adding an image to a custom WordPress footer

When you’re happy with the background, it’s time to add some content to the footer.

Simply drag any block from the left-hand menu and drop it onto your footer.

Adding blocks to the WordPress footer

After adding a block, click to select that block in the main editor.

The left-hand menu will now show all of the settings for customizing the block.

The SeedProd advanced theme builder

Simply keep repeating these steps to add more blocks to your footer.

You can also change where each block appears by dragging them around your layout.

A custom footer, created using the SeedProd theme builder

When you’re happy with your design, click on the ‘Save’ button.

Then, you can select ‘Publish’ to complete your design.

Publishing the SeedProd template part

For your new footer to show up on your website, you’ll need to finish building your WordPress theme with SeedProd.

After building your theme, go to SeedProd » Theme Builder. Then, click on the ‘Enable SeedProd Theme’ switch.

Now, if you visit your website you’ll see the new footer live.

How to enable a custom WordPress theme

For a step-by-step guide, please see our guide on how to create a custom WordPress theme.

Method 4. Removing the WordPress Disclaimer Using Code

If you can’t see any way to remove or modify the footer credits in the WordPress customizer, then another option is to edit the footer.php code.

This isn’t the most beginner-friendly method, but it will let you remove the credit from any WordPress theme.

Before making changes to your website’s code, we recommend creating a backup so you can restore your site in case anything goes wrong.

Keep in mind that if you edit your WordPress theme files directly, then those changes will disappear when you update the theme. With that being said, we recommend creating a child theme as this allows you to update your WordPress theme without losing customization.

First, you need to connect to your WordPress site using an FTP client such as FileZilla, or you can use a file manager provided by your WordPress hosting company. 

If this is your first time using FTP, then you can see our complete guide on how to connect to your site using FTP

Once you’ve connected to your site, go to /wp-content/themes/ and then open the folder for your current theme or child theme.

The FileZilla FTP client

Inside this folder, find the footer.php file and open it in a text editor such as Notepad.

In the text editor, look for a section of code that includes the ‘powered by’ text. For example, in the Twenty Twenty-One theme for WordPress, the code looks like this:

<div class="powered-by">
				<?php
				printf(
					/* translators: %s: WordPress. */
					esc_html__( 'Proudly powered by %s.', 'twentytwentyone' ),
					'<a href="' . esc_attr__( 'https://wordpress.org/', 'twentytwentyone' ) . '">WordPress</a>'
				);
				?>
			</div><!-- .powered-by -->

You can either delete this code entirely or customize it to suit your needs. For example, you may want to replace the ‘Proudly powered…’ disclaimer with your own copyright notice.

A custom disclaimer, created using FSE

After making your changes, save the file and upload it to your server. If you check your site, then the footer credit will have disappeared.

Warning! Avoid the CSS Method at All Costs!

Some WordPress tutorial sites may show you a CSS method that uses display: none to hide the footer credit links.

While it looks simple, it’s very bad for your WordPress SEO.

Many spammers use this exact technique to hide links from visitors while still showing them to Google, in the hopes of getting higher rankings.

If you do hide the footer credit with CSS, then Google may flag you as a spammer and your site will lose search engine rankings. In the worst-case scenario, Google may even delete you from their index so you never appear in search results.

Instead, we strongly recommend using one of the four methods we showed above. If you can’t use any of these methods, then another option is hiring a WordPress developer to remove the footer credit for you, or you might change your WordPress theme.

We hope this article helped you remove the powered by WordPress footer links. You may also want to check out our expert pick of the best contact form plugins and proven ways to make money online blogging with WordPress.

If you liked this article, then please subscribe to our YouTube Channel for WordPress video tutorials. You can also find us on Twitter and Facebook.

The post How to Remove the Powered by WordPress Footer Links first appeared on WPBeginner.

How to Easily Add Box Shadow in WordPress (4 Ways)

Recently one of our readers asked if there is an easy way to add box shadows in WordPress?

Shadows can make your most important content stand out and grab your visitors’ attention. They can also help flat website designs appear more engaging and interesting.

In this article, we will show you how to easily add box shadows in WordPress, step by step.

How to easily add box shadow in WordPress

Why Add Box Shadows in WordPress?

A box shadow, sometimes also known as a drop shadow, is a visual effect that makes it look like an onscreen object is casting a shadow.

We tend to pay more attention to objects that appear closer to us. That’s why many website owners add box shadows to their most important content to make it look like it’s hovering above the page.

For example, if you add a big shadow to a call to action button, then it will look physically closer to the visitor. This will draw the person’s attention toward this important button.

With that said, let’s see how you can add box shadows to your WordPress blog or website. Simply use the quick links below to jump straight to the method you want to use.

When adding box shadow, the best practice is to only add it on your most important website elements. If you add a unique shadow effect to each WordPress block, then it can make your site look messy and confusing.

It’s also important that you keep your box shadows consistent across the site. The best way to do this is by defining the style in CSS using WPCode.

WPCode is the best code snippets plugin used by over 1 million WordPress websites. It makes it easy to add custom code in WordPress without having to edit the functions.php file.

With WPCode, even beginners can edit their website’s code without risking mistakes and typos that can cause many common WordPress errors.

The first thing you need to do is install and activate the free WPCode plugin. For more details, see our step-by-step guide on how to install a WordPress plugin.

Upon activation, head over to Code Snippets » Add Snippet.

How to add box shadows using WPCode

Here, simply hover your mouse over ‘Add Your Custom Code.’

When it appears, click on ‘Use snippet.’

Adding drop shadows to WordPress using WPCode

To start, type in a title for the custom code snippet. This can be anything that helps you identify the snippet in the WordPress dashboard.

After that, open the ‘Code Type’ dropdown and select ‘CSS Snippet.’

Adding a CSS snippet to WordPress

In the code editor, add the following code snippet:

.shadow-effect {
box-shadow: 5px 5px 0px 2px #a9a1a1;
}

In the above snippet, you may need to replace the px values depending on the kind of shadow you want to create.

To help you out, here’s what the different px values mean, going from left-to-right:

  • Horizontal offset. When you set a positive value, the shadow gets pushed to the left. If you type in a negative value like -5px, then the shadow will be pushed to the right. If you don’t want to add a horizontal offset, then you can use 0px instead.
  • Vertical offset. If you use a positive value, then the shadow will be pushed downwards. If you type in a negative value then the shadow will be pushed upwards. If you don’t want to offset the shadow vertically, then just type in 0px.
  • Blur radius. This blurs the shadow so that it doesn’t have any harsh edges. The higher the value, the greater the blur effect. If you prefer to use sharp edges, then type in 0px.
  • Spread radius. The higher the value, the greater the shadow’s spread. This value is optional, so skip this one if you don’t want to show a spread.
  • Color. Although grey is the most common color for shadows, you can use any color you want by typing in a hex code. If you’re not sure what code to use, then you can explore different colors using a resource like HTML Color Codes.
Adding shadows to WordPress using custom CSS

When you’re happy with the snippet, scroll to the ‘Insertion’ section. WPCode can add your code to different locations, such as after every post, frontend only, or admin only.

We want to use the custom CSS code across our entire WordPress website, so click on ‘Auto Insert’ if it isn’t already selected. Then, open the ‘Location’ dropdown menu and choose ‘Site Wide Header.’

How to auto-insert custom code using WPCode

After that, you’re ready to scroll to the top of the screen and click on the ‘Inactive’ toggle, so it changes to ‘Active.’

Finally, click on ‘Save Snippet’ to make the CSS snippet live.

Publishing a custom CSS code snipppet

Now, you can add the custom CSS class to any block.

In the WordPress content editor, simply select the block where you want to add a box shadow. Then, in the right-hand menu click to expand the ‘Advanced’ section.

Adding a drop shadow to WordPress using a CSS snippet

Here, you’ll see fields where you can add different classes.

In ‘Additional CSS Class(es),’ type in shadow-effect.

WordPress' advanced code settings

When you’re ready to publish the box shadow, just click on the ‘Publish’ or ‘Update’ button.

Now if you visit your website, you’ll see the box shadow live.

Method 2. Add a Box Shadow Using a Free Plugin (Quick and Easy)

If you’re not comfortable writing code, then you might prefer to create shadows using Drop Shadow Box. This free plugin allows you to add box shadows to any block using the built-in WordPress page and post editor.

A box shadow, created using the Drop Shadow WordPress plugin

First, you’ll need to install and activate the plugin. If you need help, then please see our guide on how to install a WordPress plugin.

There are no settings to configure, so you can start using this plugin straight away.

To add a drop shadow, simply click on the ‘+’ icon and start typing in ‘Drop Shadow Box.’ When the right block appears, give it a click to add it to the page or post.

Adding a Drop Shadow Block in the WordPress page or post editor

This adds the drop shadow as an empty box, so the next step is adding some content.

To do this, go ahead and click on the ‘+’ inside the Drop Shadow Box block.

Adding a shadow block in the WordPress page and post editor

Then, simply add the block you want to use and configure it as normal.

For example, in the following image we’ve added an Image block and selected a picture from the WordPress media library.

An image, with a block shadow

With that done, click to select the Drop Shadow Box block. In the right-hand menu, you’ll see all the settings you can use to style this block.

WordPress sets the shadow’s width automatically but you can change this by opening the ‘Width’ dropdown and then choosing either ‘Pixels’ or ‘%.’

You can then resize it using the settings that appear.

Changing the width of a drop shadow using a free WordPress plugin

The Drop Box Shadow plugin comes with a few different effects such as curved edges and an eye-catching ‘Perspective’ effect.

To preview the different effects, simply open the ‘Effect’ dropdown and choose from the list. The preview will update automatically so you can try different styles to see what you prefer.

Adding different box shadow effects to WordPress

You can also change whether the plugin shows the shadow inside the box, outside the box, or both using the ‘Inside Shadow’ and ‘Outside Shadow’ toggles.

After that, you can change the color of the box and border using the settings under the ‘Colors’ header.

Just be aware that ‘Background’ refers to the inside of the Drop Shadow Box, while ‘Border’ appears outside of the block.

How to add a colored shadow effect to WordPress

If you want to create a softer, curved shadow box then you can enable the ‘Rounded corners’ toggle. Finally, you can change the alignment and padding, similar to how you customize other blocks in WordPress.

To create more box shadows, just follow the same process described above.

When you’re happy with how the page looks, simply click on ‘Update’ or ‘Publish’ to make all your new box shadows live.

Method 3. Add a Box Shadow Using a Page Builder (Advanced)

If you want to add box shadows to landing pages, custom homepages, or any part of your WordPress theme, then we recommend using a page builder plugin.

SeedProd is the best drag and drop WordPress page builder. It allows you to design custom landing pages and even create a custom WordPress theme without having to write a single line of code.

It also lets you add box shadows to any block using its advanced drag-and-drop editor.

First, you need to install and activate the SeedProd plugin. For more details, see our step-by-step guide on how to install a WordPress plugin.

Note: There’s also a premium version of SeedProd that comes with more professionally-designed templates, advanced features, and WooCommerce integration. However, we’ll be using the free version as it has everything you need to add box shadows in WordPress.

After activating the plugin, SeedProd will ask for your license key.

Adding the SeedProd license key to WordPress

You can find this license key under your account on the SeedProd website. After entering the information, click on the ‘Verify Key’ button.

After entering your key, go to SeedProd » Landing Pages in your WordPress dashboard.

SeedProd's professionally-designed templates

SeedProd comes with 150 professionally designed templates that are grouped into categories. Along the top you’ll see categories that let you create beautiful coming soon pages, activate maintenance mode, create a custom login page for WordPress, and more.

All of SeedProd’s templates are easy to customize, so you can use any design you want.

When you find a template that you like, simply hover your mouse over it and click on the checkmark icon.

Selecting a professionally-designed SeedProd page layout

You can now type in a name for your landing page into the ‘Page Name’ field. SeedProd will automatically create a ‘Page URL’ using the page name.

It’s smart to include relevant keywords in your URL wherever possible, as this can help search engines understand what the page is about. This will often improve your WordPress SEO.

To change the page’s automatically-generated URL, simply type into the ‘Page URL’ field.

Adding an SEO-friendly page title to a SeedProd design

When you’re happy with the information you’ve typed in, click on ‘Save and Start Editing the Page.’ This will load the SeedProd page builder interface.

This simple drag-and-drop builder shows a live preview of your page design to the right. On the left is a menu showing all the different blocks and sections you can add to the page.

The SeedProd page editor

When you find a block that you want to add, simply drag and drop it onto your template.

To customize a block, go ahead and click to select that block in the SeedProd editor. The left-hand menu will now update to show all the settings you can use to customize the block.

For example, if you click on a Headline block then you can type in your own text, or change the text color and font size.

Customizing a headline block in SeedProd

As you’re building the page, you can move blocks around your layout by dragging and dropping them. For more detailed instructions, please see our guide on how to create a landing page with WordPress.

To create a box shadow, click to select any block in the SeedProd page editor. The settings in the left-hand menu may vary between blocks, but you’ll typically need to click on an ‘Advanced’ tab.

Adding a box shadow in WordPress using SeedProd

Here, look for a ‘Shadow’ dropdown menu under the ‘Styles’ section. Simply open this dropdown and choose a shadow style such as Hairline, Medium, or 2X Large.

The preview will update automatically, so you can try different styles to see what looks the best on your page design.

How to easily add a box shadow in WordPress using a page builder

If you don’t want to use any of the ready-made styles, then click on ‘Custom.’

This adds some new settings where you can change the color, blur, spread, and position of the custom shadow.

Adding drop shadows to WordPress using SeedProd

That done, you can continue working on the page by adding more blocks and box shadows.

When you’re happy with how the page looks, click the ‘Save’ button and then choose ‘Publish’ to make it live.

Publishing a page with block shadows using SeedProd

Method 4. How to Add a Box Shadow Using CSS Hero (Premium Plugin)

If you’re not comfortable working with code but still want to create advanced box shadows, then you can try CSS Hero. This premium plugin allows you to fine-tune every part of your WordPress theme without having to write a single line of code.

CSS Hero allows you to create a unique shadow for each block, so it’s also a great choice if you want to create lots of different shadow effects.

First, you need to install and activate the CSS Hero plugin. For more details, see our step-by-step guide on how to install a WordPress plugin.

Upon activation, you’ll see a ‘Proceed to Product Activation’ button at the top of the screen. Go ahead and click on this button.

Activating the CSS Hero WordPress plugin

This will take you to the CSS Hero website where you can log into your account and get a license key. Simply follow the onscreen instructions, and you’ll be redirected back to your site in a few clicks.

Next, click the ‘Customize with CSS Hero’ text in the WordPress admin toolbar.

Customizing a WordPress theme using CSS Hero

This will open the CSS Hero editor.

By default, clicking on any piece of content will open a panel with all the settings you can use to customize that content.

The CSS Hero user-friendly page editor

This is great if you want to add a box shadow to your website’s homepage. However, if you want to customize any other page then you’ll need to switch from ‘Select’ mode to ‘Navigate’ mode, as this allows you to interact with menus, links, and other content as normal.

To do this, click on the ‘Select / Navigate’ toggle in the toolbar so that it shows ‘Navigate.’

The CSS Hero WordPress plugin

You can now navigate to the page or post where you want to add the shadow.

As soon as you reach that page, go ahead and click on the ‘Select / Navigate’ toggle again so that it shows ‘Select.’

Switching between Select and Navigation mode using CSS Hero

With that done, click on the paragraph, image, button, or any other content where you want to add a box shadow.

In the left-hand panel, click on ‘Extra.’

Creating a drop shadow using CSS Hero

You can now go ahead and click on ‘Make Shadow,’ which shows all the settings you can use to create a box shadow.

To start, you can change whether the shadow appears inside or outside the block using the ‘Shadow Position’ settings.

Changing the position of a shadow box using CSS Hero

After making this decision, you can fine-tune the shadow’s orientation using the small dot in the ‘Orientation’ box.

Simply drag and drop the dot into a new position to see it move in the live preview.

Customizing a drop shadow in WordPress

When you’re happy with the shadow’s position, you can change its color, blur, and spread.

CSS Hero will show these changes immediately, so you can try different settings to see what looks the best.

Creating a custom box shadow using a drag and drop editor

To add a box shadow to other blocks, just follow the same process described above.

When you’re happy with how the page looks, click on ‘Save & Publish’ to make it live.

How to publish a CSS shadow to WordPress

We hope this tutorial helped you learn how to add a box shadow in WordPress. You may also want to learn how to create a table of content in WordPress, or check out our list of the best WordPress popup plugins.

If you liked this article, then please subscribe to our YouTube Channel for WordPress video tutorials. You can also find us on Twitter and Facebook.

The post How to Easily Add Box Shadow in WordPress (4 Ways) first appeared on WPBeginner.