WordPress powers more than 40% of all websites, which makes it both powerful and a frequent target for hackers. Securing your site isn’t optional, it’s essential to protect your data, your visitors, and your reputation. From SSL certificates and firewalls to backups and VPNs, building a multi-layered security strategy can make the difference between a [...]
Security is often an overlooked consideration when choosing a WordPress theme. Though it should be one of the major priorities. Besides functionality and looks, you must check that the theme’s coding is clean, gets regular updates, and can keep your website safe from data breaches, site hacks, or malware attacks that lead to bad SEO [...]
There was a time when adding a cookie banner and linking to a basic privacy policy was enough to tick the compliance box. But as privacy laws get stricter and regulators become more serious about enforcement, those days are long over. Your website now needs to do more than just show a notice. It needs [...]
The last few years have seen quantum computing take a galactic-sized leap from the realm of science-fiction fantasy to a rapidly evolving technology making a revolutionary impact on a host of real-world industries, including custom web development. But what exactly is quantum computing, and, more importantly, what can it do for your WordPress website? You’ll [...]
Have you ever encountered a 414 request URI too long error on your WordPress website?
The error is usually caused when there is a critical error between your web browser and a server. You’ll see this error when clicking on a link or any action performed by a WordPress plugin.
In this article, we will show you what is the ‘414 request URI too long’ error and how to fix it.
What is 414 Request URI Too Long Error?
A 414 request URI too long error occurs when a URL or an action you’re requesting is too long for the server to handle.
Do note that there is a difference between URI and URL. A URI or Uniform Resource Identifier can be a resource’s name, location, or both. On the other hand, a URL or Uniform Resource Locator can only be the location of a resource.
Both terms are usually used interchangeably because URL is part of URI. However, the 414 error can be triggered by both components, so let’s look at the causes.
What Causes 414 Request URI Too Long Error?
You might see the 414 error when you click on the link, and the server is unable to process it because it’s too long.
One situation where a link might to very long is using UTM (Urchin Tracking Module) parameters. If you’re using UTM codes to track conversions on your WordPress website and there are a lot of parameters in the URL, then it can cause this error.
Another situation that can cause a 414 error is a redirect loop. This is when a misconfiguration or a setting in a WordPress plugin causes a lot of redirect requests.
As a result, you get incredibly long URLs and 414 requests URI too long error.
Similarly, some plugins can also generate lengthy URIs as part of their functionality. You’re most likely to encounter this error if you have all-in-one WordPress security plugins installed on your site.
In a rare event, a developer-side issue can also trigger a 414 error when a POST request converts into a GET request with query information being too long. Lastly, cyber attacks on your website server can also result in 414 URI too long issues.
That said, let’s see how you can fix the 414 error on your WordPress website.
Fixing 414 Request URI Too Long Error
A quick way to fix this issue is by increasing the size of the URI your website server can process.
Before we move forward, we recommend creating a WordPress backup. That’s because fixing the 414 error involves editing the website configuration files. In case anything goes wrong, you’ll have a backup copy of your site ready to restore.
Determine if Your Website is Using Apache or Nginx
First, you’ll need to find out the type of server your WordPress website is using. There are 2 main types of servers, which includes Apache and Nginx.
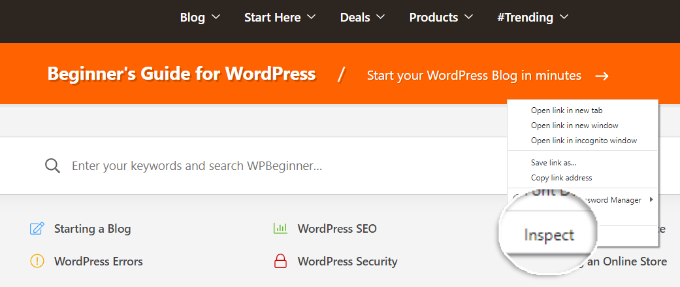
A simple way to do that is by opening your site in a browser. After that, you can right-click on the homepage and select the ‘Inspect’ option.
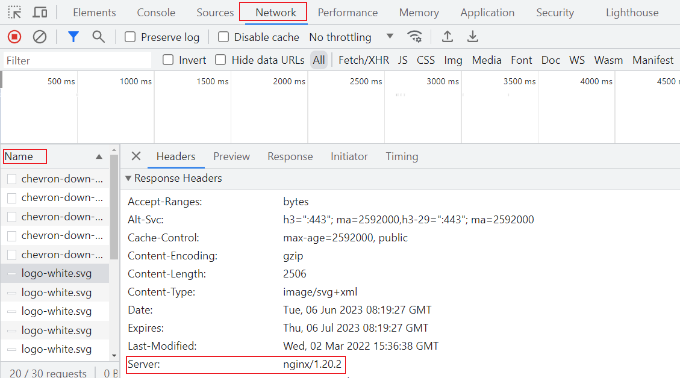
Next, you’ll need to switch to the ‘Network’ tab at the top.
From here, you can select any element under the Name column. After that, you will need to scroll down to the ‘Response Headers’ section and see the ‘Server’ details.
This will show you whether your site is using Nginx or Apache.
If you’re still unsure which server type to use, then you can reach out to your WordPress hosting provider to get more details.
Once you’ve determined the server type, let’s look at how to fix the 414 request URI too long error for Apache and Nginx.
Fixing 414 Request URI Too Long Error in Nginx
First, you’ll need an FTP or file transfer protocol client to access website configuration files.
There are many FTP clients you can use. For this tutorial, we will use Filezilla. If you need help setting up FTP and accessing website files, then please see our guide on how to use FTP to upload files to WordPress.
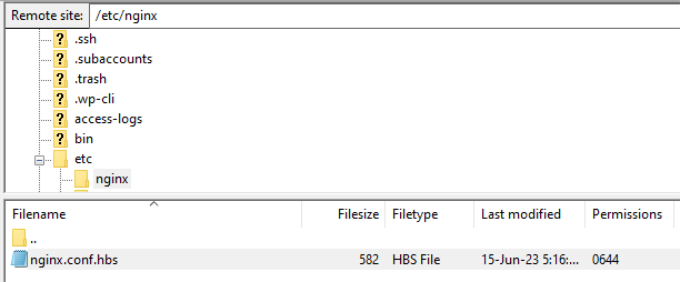
Once you’re logged in, you’ll need to download the ‘nginx.conf’ file. You can access this by following this path: /etc/nginx/nginx.conf
After locating the file, go ahead and download it on your computer and then open it in a notepad software.
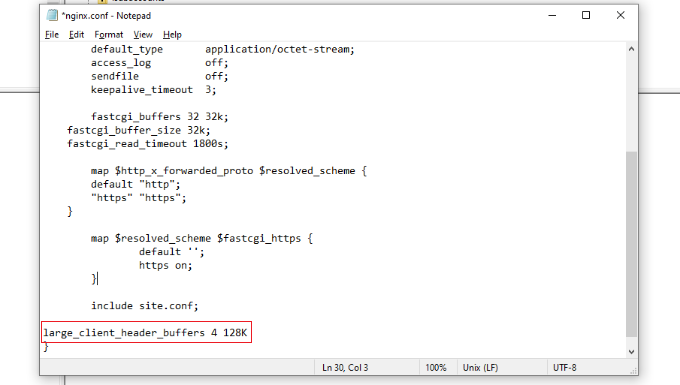
From here, you can search for large_client_header_buffers 4 8K settings. If it’s not there, then simply add it to the end of the file.
You will see 2 sets of values, which relate to a number and size. Simply edit the size from 8K to 128K. This will increase the URI size and allow the site server to process long URLs.
Once you’re done, simply save the text file and reupload it to your website using the FTP client.
If you’re using the Apache server type, then the process is similar to that of Nginx. First, you’ll need an FTP client to access website files.
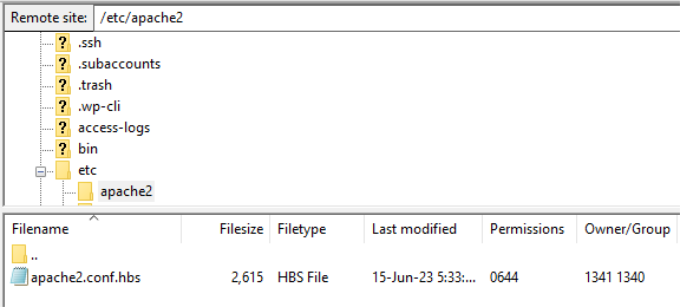
Once you’re logged in, you’ll need to locate the ‘apache2.conf’ file. Simply head to the following path using the FTP client: /etc/apache2/apache2.conf
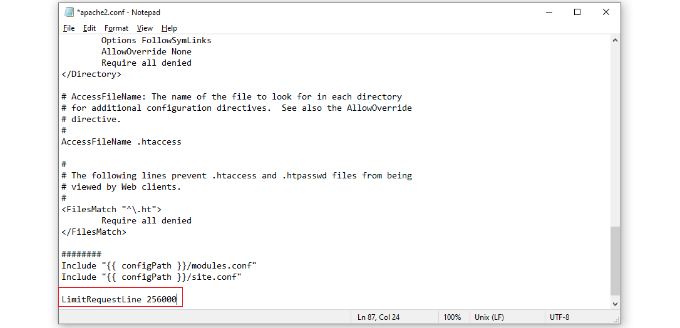
Next, you’ll need to download the file and open it in notepad software.
After that, you can look for LimitRequestLine 128000 settings. If you don’t see one, then simply add it to the end of the file.
Usually, LimitRequestLine is set to 128000. However, you can increase this to 256000 or higher to remove the 414 error. Just make sure that the value you set is a multiple of 2.
Once you’re done, simply upload the file back to the website using the FTP client. This should help resolve the 414 error on your WordPress website.
We hope this article helped you learn about what is 414 request URI too long error and how to fix it. You may also want to see our guide on WordPress security and the most common WordPress errors.
If you liked this article, then please subscribe to our YouTube Channel for WordPress video tutorials. You can also find us on Twitter and Facebook.
Choosing a WooCommerce theme for WordPress can feel like a minefield; many factors exist, from design to user experience to functionality. However, one aspect of choosing a theme is vital: security. Some themes are more secure than others, and there are some key factors to consider regarding safety for you and your site visitors. Even [...]
Do you want to learn how to password-protect your WordPress admin directory?
Adding another layer of password protection to your WordPress admin directory can be a great way to improve your WordPress security.
In this article, you’ll learn how you can password-protect your wp-admin directory easily.
Why Password Protect Your WordPress Admin Directory?
By password-protecting your WordPress admin directory, you improve the security of the most important entry point to your WordPress website.
Your WordPress admin dashboard is the central hub of your site. It’s where you’ll publish posts and pages, customize your theme, install WordPress plugins, and more.
Often, when hackers try to get into your website, they’ll do it through the wp-admin screen. You can help to protect your website against potential attacks by using a secure password and limiting login attempts.
To be even more secure, you can also password-protect the wp-admin directory. Then when someone attempts to access your admin area, they’ll need to enter a username and password before they ever make it to the WordPress login screen.
With that said, let’s take a look at how you can password-protect your WordPress admin directory step by step.
The first method is recommended for most users, and you can use the quick links below to jump straight to the method you want to use.
Method 1: Password-Protect wp-admin Using Directory Privacy (Recommended)
The easiest way to password-protect your WordPress admin directory is by using your WordPress hosting provider’s Directory Privacy app.
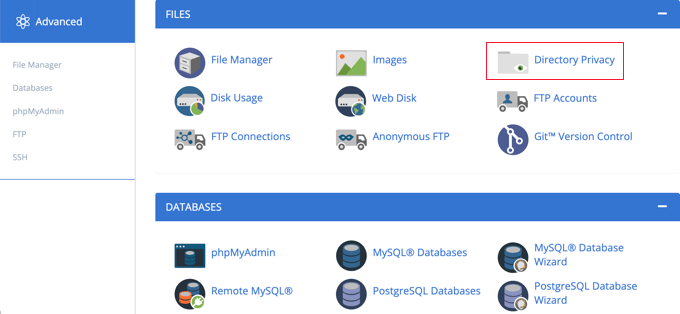
First, you need to log in to your hosting account dashboard and click on the ‘Directory Privacy’ option in the Files section of your website’s advanced settings.
Note: Most web hosts using cPanel, like Bluehost, will have similar steps. However, your dashboard might be slightly different from our screenshots depending on your hosting provider.
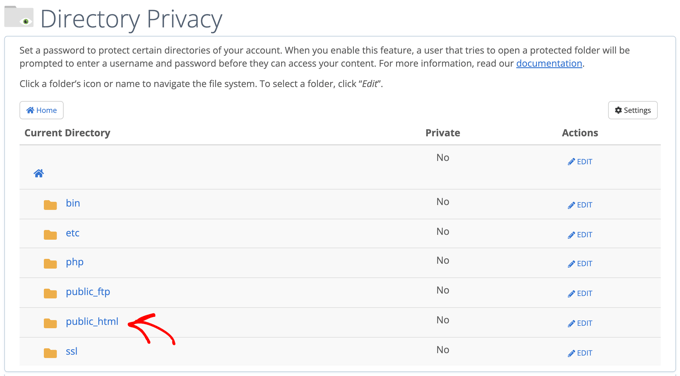
This brings you to a screen that lists all of the different directories on your server. You need to find the folder that contains your website files.
For most website owners, this can be found by clicking on the ‘public_html’ folder.
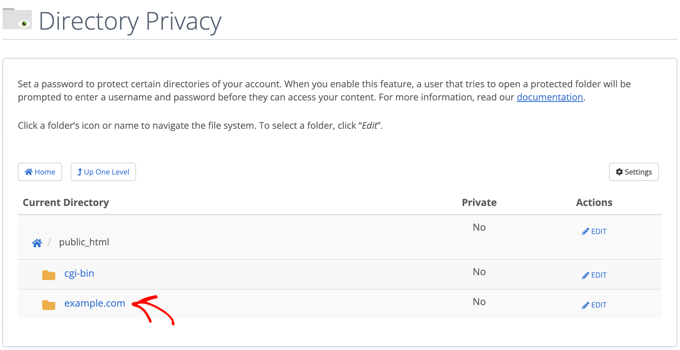
This brings up all of the website files you’ve installed on your server.
Next, you’ll need to click on the folder with your website’s domain name.
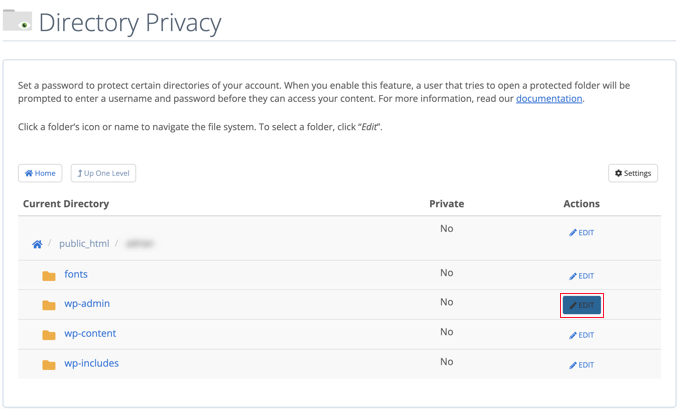
In that folder, you’ll see a ‘wp-admin’ folder.
Instead of clicking the folder name, you’ll need to click the ‘Edit’ button next to that folder.
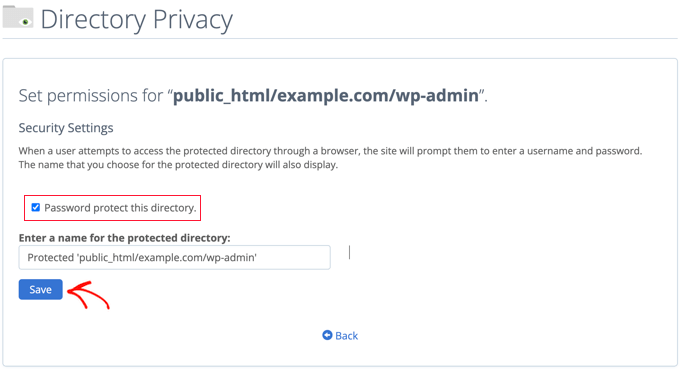
This brings you to a screen where you can turn on password protection.
Simply check the box that says ‘Password protect this directory’. If you like, you can also give your directory a name like ‘Admin Area’ to help you remember.
Once you’ve done that, you’ll need to click the ‘Save’ button.
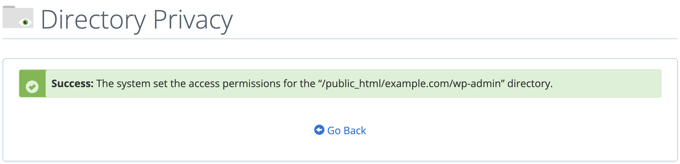
This will take you to a page where the confirmation message will appear.
Now you’ll need to click the ‘Go Back’ button and you’ll be taken to a screen where you can create a user that will be able to access this directory.
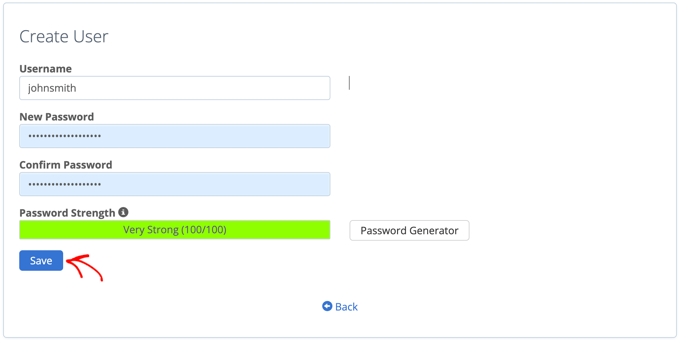
You will be asked to enter a username and password, and then confirm the password. Make sure to note your username and password in a safe place, such as a password manager app.
Make sure you click the ‘Save’ button when you’ve done that.
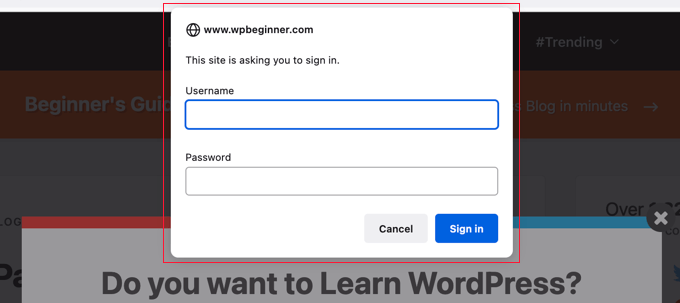
Now, when someone tries to access your wp-admin directory, they will be prompted to enter the username and password you created above.
Method 2: Password-Protect wp-admin Using Code
You can also password-protect your WordPress admin directory manually. To do this you’ll need to create two files called .htpasswd and .htaccess.
Note: Adding any code to your website can be dangerous. Even a small mistake can cause major errors on your site. We only recommend this method for advanced users.
Creating the .htaccess File
First, open up your preferred text editor and name the new file .htaccess.
After that, you need to copy the following code snippet and add it to the file.
Make sure you change the ‘AuthUserFile’ path to the location where you’ll upload the .htpasswd file and change ‘yourusername’ to the username you want to use to log in.
Don’t forget to save the file when you’re finished.
Creating the .htpasswd File
Once you’ve done that, you need to create a .htpasswd file.
To do this, open up a text editor and create a file called .htpasswd. This file will list your username along with your password in an encrypted format.
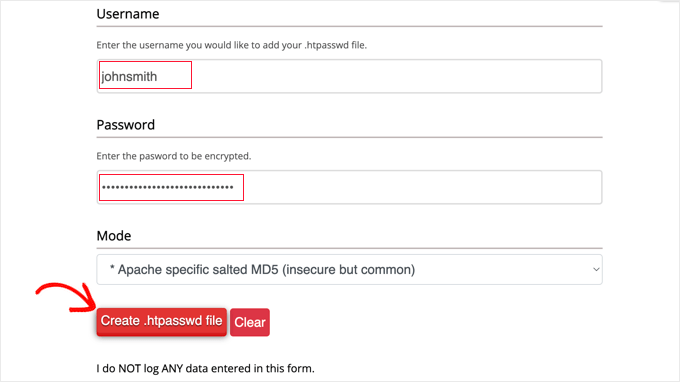
The easiest way to generate the encrypted password is with a htpasswd generator.
Simply enter your username and password, select the encryption format, and click the ‘Create .htpasswd file’ button.
The htpasswd generator will display a line of text that you need to paste into your .htpasswd file. Make sure you save the file once you’ve done that.
Uploading .htaccess and .htpasswd to the wp-admin Directory
The last step is to upload both of the files you created to your website’s wp-admin folder.
You will need to connect to your WordPress hosting account using an FTP client or the online file manager tool provided by your hosting provider. For more details, see our beginner’s guide on how to use FTP to upload files to WordPress.
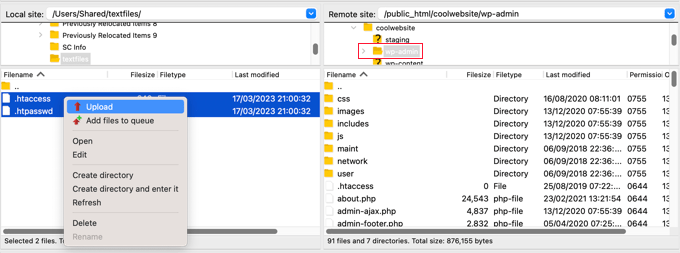
For this tutorial, we’ll use FileZilla because it’s free and works on both Mac and Windows.
Once you have connected to your website, you will see the files on your computer in the left window, and the files on your website in the right. On the left, you need to navigate to the location where you saved the .htaccess and .htpasswd files.
Then on the right, you need to go to the wp-admin directory for the website you wish to protect. Most users will need to double-click the ‘public_html’ folder, then the folder with their domain name, then the ‘wp-admin’ folder.
Now you can select the two files on the left and click ‘Upload’ from the right-click menu or simply drag the files onto the left window.
Now your ‘wp-admin’ directory will be password protected.
Troubleshooting wp-admin Password Protection
Depending on how your server and website are set up, there’s a chance you might run into errors. These errors can be fixed by carefully adding code to your .htaccess file.
Note: This is the .htaccess file located in your main website folder, not the one you uploaded to the ‘wp-admin’ folder. If you’re having trouble finding it, then see our guide on why you can’t find .htaccess and how to locate it.
Fixing the Ajax Not Working Error
One of the most common errors is that Ajax functionality may stop working on the front end of your site. If you have WordPress plugins that require Ajax, such as live Ajax search or Ajax contact forms, then you will notice that these plugins won’t work anymore.
To fix this, simply add the following code to the .htaccess file that’s located in your ‘wp-admin’ folder.
<Files admin-ajax.php>
    Order allow,deny
    Allow from all
    Satisfy any
</Files>
The simplest way to fix them is to open up your main .htaccess file located in your website directory and add the following line of code before the WordPress rules.
ErrorDocument 401 default
We hope this article helped you learn how to password-protect your WordPress admin (wp-admin) directory. You may also want to see our expert picks of the best email marketing services for small businesses and our guide on how to get a free email domain.
If you liked this article, then please subscribe to our YouTube Channel for WordPress video tutorials. You can also find us on Twitter and Facebook.
Are you wondering whether it’s safe to install and use an outdated WordPress plugin?
Sometimes when you are searching for a plugin to add a new feature to your website, you may find one that looks perfect, but it hasn’t been updated for a while or hasn’t been tested with your version of WordPress. Often times this leads to beginner readers asking the question can I use it without breaking my website?
In this article, we’ll discuss how to determine whether or not you can safely install outdated WordPress plugins.
How Do WordPress Plugins Become Outdated?
A WordPress plugin can become outdated if it hasn’t received any updates for a while, or if it hasn’t been tested by the plugin author to ensure it’s compatibility with the latest 3 major releases of WordPress.
We always recommend our readers to keep the plugins in your WordPress website up to date. These updates keep the plugin compatible with changes made to WordPress core, add new features, fix bugs, and address security vulnerabilities.
But what if a plugin that you are using or want to use hasn’t been updated for some time? Or what if it hasn’t been tested with the latest version of WordPress? Is it still safe to use?
The short answer is, it depends on the plugin.
Sometimes outdated plugins simply will not work correctly with newer versions of WordPress. Or the plugin may have even been abandoned by the developer, so that no new features will ever be added.
The biggest concern with outdated plugins is that there may be security issues that can come up. If the plugin isn’t maintained or updated, it might become a target for hackers.
However, just because a plugin is outdated doesn’t mean that it has any of those issues. Some outdated plugins are perfectly safe to use. However, we recommend that you thoroughly test the plugin before installing it on your live site.
With that being said, let’s take a look at how to tell if a WordPress plugin is outdated, and how you can decide whether it is safe to install.
Checking Whether a Plugin Is Outdated
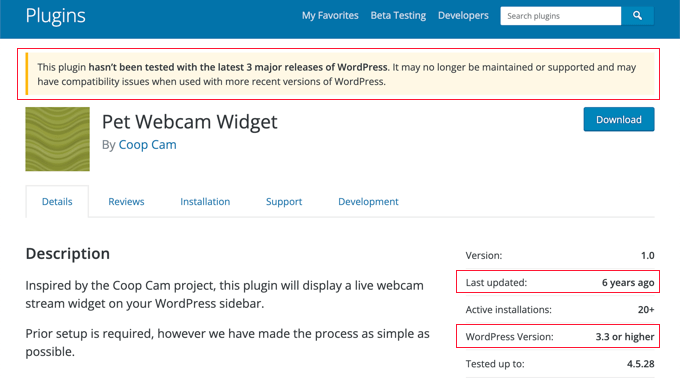
The WordPress Plugin Directory displays a lot of useful information about each plugin. For example, it clearly shows the date each plugin was last updated, and the latest version of WordPress it was tested with.
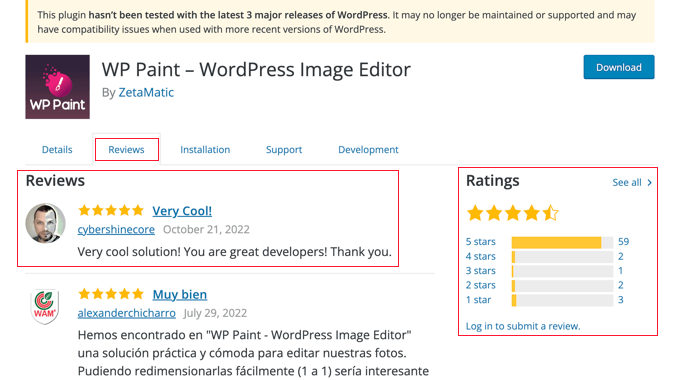
If a plugin has not been tested for several versions of WordPress, then a warning will be displayed at the top of the plugin page, similar to this one:
This plugin hasn’t been tested with the latest 3 major releases of WordPress. It may no longer be maintained or supported and may have compatibility issues when used with more recent versions of WordPress.
Unfortunately, busy developers don’t always update the readme file when a new WordPress update is released. Sometimes a plugin was tested more recently than its plugin page shows.
Now that you know how to check if a WordPress plugin is outdated, let’s take a look at how to tell whether it is safe to install.
Checking Whether an Outdated Plugin Is Safe to Install
Just because a plugin hasn’t been updated or tested recently doesn’t mean that it won’t work. How can you tell if the plugin is safe to install on your WordPress site?
Check User Ratings and Reviews
You can click on the ‘Reviews’ tab on the WordPress Plugin Directory to see user opinions and complaints about the plugin. If there is a compatibility problem with a recent version of WordPress, then other users may have mentioned it on this page.
You can also check the user ratings. If the reviews are recent and five stars, then it’s safe to assume that you can use the plugin on your website.
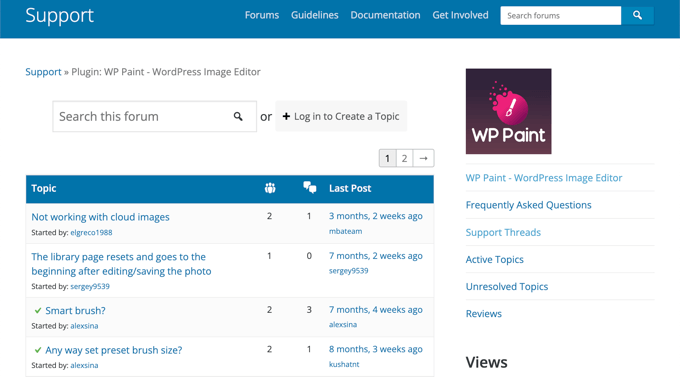
Check the Plugin Support Page
When you click the ‘Support’ tab, you will be taken to the support forum for the plugin. Here you can see any issues that users have been having with the plugin.
You will also see how responsive the plugin’s developer is, and whether they successfully solve issues in a timely manner.
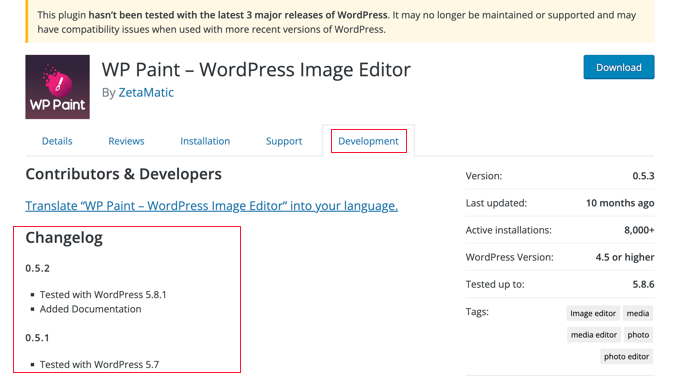
Another way to check whether it’s safe to install the plugin is by going to the plugin development page. This shows you how active the plugin developer is.
Simply go to the WordPress plugin page and click on the ‘Development’ tab.
In particular, take a look at the ‘Changelog’ section to see how often the plugin is being updated and what recent changes and improvements have been made.
If the developer is actively updating the plugin, then it usually means the plugin is high quality and safe to use on your WordPress website.
On the other hand, if a plugin hasn’t been updated in more than two years, then it may mean the plugin has been abandoned. In that case, you shouldn’t install the plugin since the developer is not actively maintaining it.
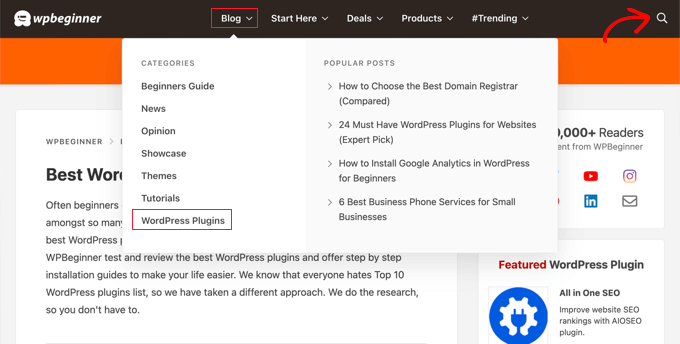
Check for WPBeginner Tutorials on the Plugin
You can also check whether the plugin is safe to install on the WPBeginner blog. You can look for tutorials on the plugin by navigating to the Blog » WordPress Plugins page or by using the search feature.
If we recently published a tutorial on a plugin, then this means the plugin was compatible with the latest version of WordPress when we tested it.
Testing the Plugin on a Staging Site or Local WordPress Installation
Let’s say that you’ve gone through the steps above and decided that an outdated plugin looks safe to install. What should you do next?
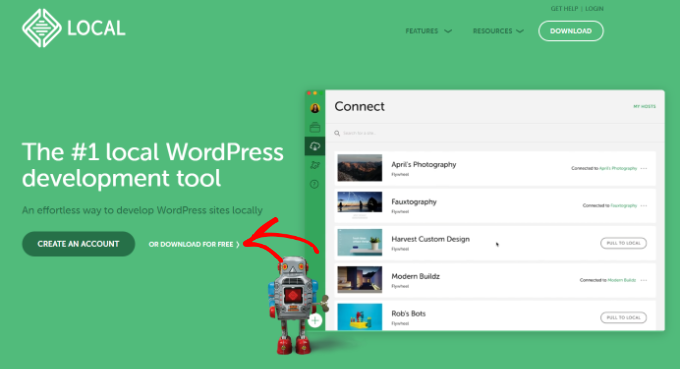
Instead of immediately installing the plugin on your live site, you may wish to first test it on a staging site or local WordPress installation.
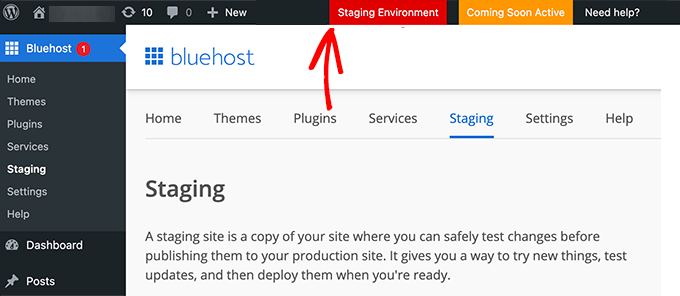
A WordPress staging site is a test site that you can use to safely test a plugin for problems before going live.
The staging site lives on your web hosting server, so you can be confident that if the plugin works there, you won’t encounter problems on your live site.
While it’s not a good idea to use outdated plugins, sometimes the plugin you’re looking for is the only one that does what you need. In that case, you will need to do your due diligence as we mentioned in our guide.
Other things you can look for is author’s reputation. If it’s a popular plugin author, then you can email them and ask whether they have plans to update the plugin.
Some plugins are so simple that they don’t need any updates, and this is why the author may not push out an update because they know it still works. The popular Page Links To plugin is a good example of that.
It’s written by one of WordPress core contributors, Mark Jaquith, and the plugin has been around for a long time. It doesn’t need any active development because it does one thing and does it well. So even though it shows the outdated error on WordPress.org, this plugin would be something that you can safely install.
The downside though is that if you were hoping to have more advanced redirection features, then it’s going to be lacking in the plugin which is why many users switch to the All in One SEO plugin because it includes this feature and many more powerful SEO features in the plugin.
If you want to secure your WordPress site, a firewall is a great way to stop malicious actors before they can damage or spam your site. Firewalls play a key role in most of the popular WordPress security plugins. But some of the existing firewalls out there are tough to set up, are pricey, and/or ... Read more Musubu IP Threat Blocker Review: A Simple WordPress Firewall
If you are on the internet, you are very much vulnerable to security attacks, hackers, and threats no matter what. The Internet is filled with all sorts of people, and to make sure you are safe on the internet and your information remains with you only, you need to take specific steps. A very prominent ... Read more3 Best VPN Services For WordPress Users: ExpressVPN vs NordVPN vs SurfShark
 Security is often an overlooked consideration when choosing a WordPress theme. Though it should be one of the major priorities. Besides functionality and looks, you must check that the theme’s coding is clean, gets regular updates, and can keep your website safe from data breaches, site hacks, or malware attacks that lead to bad SEO
  There was a time when adding a cookie banner and linking to a basic privacy policy was enough to tick the compliance box. But as privacy laws get stricter and regulators become more serious about enforcement, those days are long over. Your website now needs to do more than just show a notice. It needs
  The last few years have seen quantum computing take a galactic-sized leap from the realm of science-fiction fantasy to a rapidly evolving technology making a revolutionary impact on a host of real-world industries, including custom web development. But what exactly is quantum computing, and, more importantly, what can it do for your WordPress website? You’ll
 directory")