We are often asked by our users how to do keyword research for their WordPress blogs. Keyword research helps you find betters content ideas that will help you grow traffic and create highly engaging content that users will love. In this article, we will show you how to properly do keyword research for your WordPress blog.
What is Keyword Research and Why You Need it?
Keyword research is a research technique used by content creators and SEO experts. It helps you discover words users enter into search engines to find content, products, and services in your industry.
You can then use those words and phrases into your website to get more search traffic.
Many beginners assume that they have a clear idea of what their users are looking for. However, you don’t need to make educated guesses when there are powerful tools available that can help you make data-driven decisions.
Properly using keyword research as a part of your content strategy can help you achieve the following:
Find the popular keywords your users are actually looking for
Find content ideas that are easy to rank for and have decent search volume
Find out what your competitors are doing and then beat them to it with a better content strategy
Get more search traffic and grow your audience with each new article
That being said, let’s take a look at how to properly do keyword research for your WordPress blog and boost your search traffic.
We have hand-picked the best keyword research tools that we have personally used for our own projects. We will show you each one of them and how to properly use them to do your own keyword research like a pro.
SEMRush is one of the best SEO Tools on the market. It is the complete SEO suite with tools to perform organic research, paid advertising research, keyword research, and in-depth competition analysis.
To get started, simply go to SEMRush website and enter a keyword or your website URL.
You will see an overview of the keyword you entered showing search volume (number of average searches), CPC for paid advertising, and number of search results.
Scroll down a little and you will see an overview of keywords matches and related keywords. You can click on the view full report button to explore the complete lists or export them to a CSV file.
Scroll down further and you will see the list of top search results for the keyword you entered. You can click on each of these links to view full report which will help you understand why these pages rank for these keywords.
You can also use their new ‘Keyword Magic Tool’ which gives you faster access to broader keyword research on related terms. You can click on the add button next to a keyword to add them into keyword analyzer.
Once you have figured out the best keywords with highest search volume, the next step would be to analyze competition for those keywords. Click on the links already ranking for those keywords to see a detailed analysis.
You will be able to see the backlinks for that particular URL, other keywords that page rank for, and how much search traffic it gets.
Overall, SEMRush is the best keyword research tool on the market. It not only gives you keyword ideas, it also helps you find out how you can rank for those keywords.
Ahrefs is one of the most powerful keyword research tools on the market. It helps you learn why your competitors are ranking so high, and what you need to do to outrank them in search results.
Ahrefs crawls more than 6 billion pages every day, with over 12 trillion links in their index from 200+ million domain names. That’s a lot of data, but the real beauty is how their platform helps you use this data to your advantage.
It has an intuitive user interface which breaks down all the data into different sections. Simply enter a domain name in the search field and Ahrefs will pull a wealth of information in an easy to understand format.
It will show you an overview of the results with the total number of backlinks, referring domains, organic keywords, and content review. You can click on any of these sections to drill down further.
Click on ‘Organic Keywords’ report and Ahrefs will show you a list of keywords for the domain name with search volume, search rank, URL, and more.
You can also generate keyword ideas by entering keywords in the search box. Ahrefs’ keyword explorer tool will generate a list of keyword suggestions with search volume, difficulty score, and clicks.
Ahrefs also comes with powerful tools for content analysis, rank tracking, web monitoring, and more. You can export all reports in CSV or PDF format and then work on them in your favorite spreadsheet software.
AnswerThePublic is a free visual keyword research and content ideas tool. It utilizes Google and Bing’s auto-suggest feature and presents the data in a more understandable visual format.
Simply visit the website and enter a keyword or phrase. The tool will then load keywords and present them into visual maps. Reports are divided into questions, prepositions, comparisons, alphabetical, and related keywords.
You can click on any keyword and it will show Google search results in a new browser tab. This allows you to quickly view the questions people are searching for, and how you can answer them with relevant content.
All keyword research is presented on a single page. You can download the data in visual format as images or export them to a CSV file and use with your preferred spreadsheet software.
More Keyword Research Tips
All the above-mentioned tools will provide you a treasure trove of data. Here are some more tips on how to narrow down your keyword research and find the most profitable ideas.
Start your keyword research with broader keywords and then narrow it down to find keywords with low competition and more search volume.
Enter your own URL in SEMRush or Ahrefs to see your own keyword performance and then compare it with your competitors.
Focus on finding keywords that answer your customer’s questions and help them make a buying decision.
Don’t limit your keyword research to most searched keywords. You can easily rank for longer keywords and build upon that.
How to apply keyword research in your business or blog?
The main goal of keyword research is to find out what your customers are looking for and then rank for those keywords in search results. There are multiple ways to do that depending on your content strategy.
How do I track the performance of my keyword research?
First, you need to sign up for Google Search Console. It provides you insights into how Google views your website. You will also be able to see keywords you rank for, and average position in search results.
We hope this article helped you learn how to do keyword research for your WordPress blog. You may also want to see ultimate step by step WordPress SEO guide for beginners.
If you liked this article, then please subscribe to our YouTube Channel for WordPress video tutorials. You can also find us on Twitter and Facebook.
Recently one of our readers asked us to provide some WordPress stats, facts, and research to help convince their boss on why they should use WordPress. Even though WordPress is the most popular website builder in the world, sometimes popularity alone is not enough for users to make up their mind. In this article, we have compiled an ultimate list of WordPress stats, facts, and other research that will help you convince others to start using WordPress.
It’s important not to confuse WordPress (the software) with WordPress.com which is a hosted solution. To learn more, see the difference between WordPress.com vs WordPress.org in our side-by-side comparison.
It all started when two users of a blogging software called b2/cafelog decided to take the software in a new direction. The idea was coined by Matt Mullenweg who was then joined by Mark Little and together they released the first version of WordPress on May 27, 2003.
Since then, WordPress has evolved from a simple blogging software to a CMS, website builder, eCommerce platform, and more. To learn more, see our article about the history of WordPress.
WordPress is a community software and thousands of users from all over the world have contributed to it by submitting code, fixing bugs, translating, testing, and helping others use it.
Let’s take a look at some WordPress stats and facts to see how WordPress is helping people do great things on the internet.
How Popular is WordPress?
WordPress is immensely popular and is used by millions of people all over the world. Here are some numbers to put things in perspective.
WordPress powers more than 30% of all websites on the internet.
WordPress powers websites for big name brands including Disney, Sony, Facebook, and more.
14.7% of top 100 Websites are powered by WordPress.
More than 22% of all new domain names in the United States are running WordPress.
Each day more than 1014 WordPress sites and 496 WooCommerce stores join the top 10 million websites tracked by W3Techs.
WordPress Plugins
Plugins are like apps for your WordPress website. You can install them to add new features to your site and extend its functionality. To learn more, see our guide on what are WordPress plugins and how do they work?.
Here are some mind-blowing facts about WordPress plugins, which show just how massive the WordPress ecosystem is.
There are more than 50,000 free WordPress plugins on WordPress.org plugin directory alone.
3 of those plugins are installed on 5 million+ websites.
The most popular eCommerce plugin, WooCommerce is installed on more than 3 million websites with 43 million all time downloads.
These stats are from WordPress.org plugin directory alone. Many plugin developers sell premium versions of their plugins from their own websites.
With a healthy plugins ecosystem, it means that you can add custom functionality to your website at a fraction of the cost of custom development.
WordPress Themes
Themes control the appearance of a WordPress website. These are WordPress specific website design templates that you can install on your website to change its look.
There are thousands of free and paid WordPress themes available offering WordPress users an endless combination of design, layout, color schemes, and features.
Themes were first introduced with WordPress 1.5 back in 2005, with the first new default WordPress theme called Kubrick
Just like plugins, there are both free and paid WordPress themes that you can install.
WordPress.org’s free theme directory has more than 5,800 free WordPress themes.
According to Builtwith, Genesis theme framework is the most popular theme used by 17% of websites analyzed by their service.
WordPress is the most commonly used CMS software in the world, which also makes it a common target of hacking attempts, DDOS attacks, malware, and trojans.
According to Sucuri, a leading website security company, 83% of all CMS based websites that were hacked in 2017 were running WordPress. This number isn’t surprising considering that WordPress holds 60% of CMS market share.
Nearly 50% WordPress sites are affected by a security vulnerability caused by an outdated or poorly coded WordPress plugin or theme
Around 8% of WordPress sites were hacked due to a weak password.
You can make your WordPress site as secure as possible by following some basic security best practices. To learn more, see our complete WordPress security guide for step by step instructions.
Often the stats above cause WordPress to get a bad reputation, but the reality is that WordPress itself is not insecure. WordPress core goes through rigorous security audits, and it’s more secure than many other platforms out there.
The only fault WordPress has is that it’s popular which leads to stats like above.
WordPress Community
WordPress has a massive user base spread across all over the world. It is used by not just businesses, but also governments, schools and colleges, non-profits, and more.
As an open source project, WordPress is driven by a global community of users. This means that anyone can contribute to the project in many different ways.
WordPress translation community has it fully translated into 56 languages, partially translated in dozens more.
In 2017, WordPress communities around the world organized 128 WordCamp events, in 48 countries, and sold 39,625 tickets.
In 2017, Local WordPress communities organized 4,379 meetups in 73 countries
WordPress has a thriving billion dollar ecosystem that creates thousands of jobs all over the world. This also includes freelancers, developers, and companies that sell WordPress related products and services.
At the time of writing this article, freelancer.com website alone had 564,010 WordPress jobs posted out of these 13,680 were open.
Thousands of WordPress jobs are currently open on many popular freelancing websites.
Average hourly rate for WordPress developers can be anywhere between $20-$100 per hour depending on their expertise and job at hand.
A custom WordPress theme with its own unique design and plugins can cost $10,000 and it may increase depending on project’s requirements.
We hope this article helped you discover some new WordPress stats, facts, and interesting research. You may also want to see our article + infograph on 25 interesting facts about WordPress.
If you liked this article, then please subscribe to our YouTube Channel for WordPress video tutorials. You can also find us on Twitter and Facebook.
Often when starting a blog, users ask us about how to register a custom domain name, and which are the best places to register a domain. In this article, we will show you how to easily register a domain name, and share a tip on how to register a domain name for free.
But before we get started, let’s cover the basics so we’re on the same page.
What is a Domain Name?
A domain name is the address of your website that people type in the browser to visit your website. For example, wpbeginner.com.
In simple term, if your website was a house, then your domain name will be its address.
The whole internet is a giant network of computers. Each computer is assigned a number which is called an IP address, and it looks like this:
66.249.66.1
Now, this is not an easy to remember address. Imagine if you had to use this kind of addresses to visit your favorite websites.
To fix this problem, domain names were invented. Domain names can have alphabets and numbers, which helps website owners create easy to remember brandable words for their website’s address.
Each day, over 44,000 new .com domain names were registered in the first quarter of 2018. Currently, there are over 134 million .com domain names already registered.
This means that all the good ones are being registered as we speak. Chances are that someone may register a domain name that you’re thinking of, so it’s smart to register a domain name as soon as you think of an idea.
This is why all tech-savvy entrepreneurs pro-actively register domain names even before launching a business. Domain names are cheap, and you can register them for a year. If you decide to not pursue the business, then you can let them expire.
If you are serious about building a business, then you should register a domain name right away. It will help you protect your brand identity, business name, and even future business ideas.
How much does a domain name cost?
Normally, a .com domain name costs $14.99 / year. Other domain name extensions cost varies based on each extension. Some are even more expensive than this. We don’t recommend using anything but .com domains because everybody remembers a .com domain, and your smartphone keyboards have a pre-built key for .com.
Do I Need a Website to Register a Domain Name?
No. You don’t need a website to register a domain name. You can register a domain name and make a website later. You can also register a domain name and set up a temporary website.
A lot of entrepreneurs treat domain names like digital real-estate, so they register a good domain name and hold it for the right buyer to purchase it from them.
How to Choose The Best Domain Name?
Domain names play a very important role in your website’s identity, and its success. You want to spend some time and do your research before registering a domain name. However, it’s also important to not overthink it otherwise you will never get past the research phase.
Here are some general tips to keep in mind.
Make sure that your domain name is easy to pronounce, spell, and as short as possible.
Stick with the .com extension, most users find them easier to remember than other domain extensions.
Use your keywords and brand name in the domain name. For example, stargardeninghouston.com is more search engine friendly, than stargardeningcompany.com
Do not use numbers or hyphens in your domain name. It makes them harder to pronounce and difficult to remember.
There are multiple ways to register a domain name. You can choose from several top domain registrars that are authorized by ICANN to register domain names for you.
We will show you the most popular ways to register a domain name, and you can choose the one that best fits your needs.
1. How to Register a Domain Name for Free
If you want to register a domain name to start a blog or make a website, then this is the best option for you.
Normally, a domain name costs $14.99 / year and website hosting plans start from $7.99 / month. This is a lot of money if you are just starting out.
Luckily, Bluehost has agreed to offer our users a free domain name, SSL Certificate, and 60% discount on web hosting.
Bluehost is one of the biggest hosting companies in the world. They are in business since 2003 and host more than 2 million websites. Not to mention, they’re officially recommended by WordPress.
To get started, you need to visit the Bluehost website and click on the Get Started button.
This will bring you to the pricing page. Their Basic and Plus plans are popular among our users.
Click on the ‘Select’ button below a plan to continue.
On the next page, you will be asked to choose a domain name. Simply type the domain name in the “New Domain” box because that will get you a free domain name.
If the domain name you entered is available, then you will be taken to the signup page. From here you need to enter your account information like name, address, email, etc.
Below the account information, you will notice some hosting extras. We don’t recommend buying them, so you can safely uncheck them for now. If you feel that you need them, then you can always add them later.
After that, you can enter your payment information to finish the purchase.
Bluehost will now register your domain name, setup your hosting account and send you an email with a link to your hosting control panel.
Since you need a web hosting to start a website, it makes no sense to purchase a domain name separately when you can get it for free with the Bluehost combo offer.
If for some reason you don’t want to use Bluehost to get a free domain name, then you can use InMotion Hosting or GreenGeeks, both are top WordPress hosting companies that are offering a free domain name with web hosting to WPBeginner readers.
If you only want to register a domain name at the moment without creating a website, then GoDaddy is your best option.
Godaddy is the largest and most popular domain name registrar in the word. They currently manage over 72 million domain names for 17 million users from around the globe.
GoDaddy offers an easy way to manage your domain name without creating a website. Once you are ready, you can just point the domain name to your preferred WordPress hosting company.
Here is how to register a domain name with GoDaddy (step by step).
First, you need to visit the GoDaddy website and enter the domain name you want to register in the search box.
If your domain name is available, then you will see a success message with your domain name listed on top. You can now go ahead and add it to the cart.
Next, click on the continue to cart button to check out.
GoDaddy, will now show you some additional services that you can purchase with your domain name. You can skip those by selecting ‘No thanks’ and click on the continue button.
On the next page, you will see your domain name and its registration period. You can change the registration period to up to 10 years if you want.
However, we don’t recommend that. You can always renew your domain name before it expires, so if you want to save money, then you can select just 1 year registration period.
You will need to create a Godaddy account to proceed.
After you have created an account, you will be able to enter your billing address and make a payment for your domain name.
GoDaddy will now register your domain name, and they will send you an email with a link to your domain control panel.
Pro Tip: You should make sure that auto-renew on your domain is turned on, so Godaddy can automatically bill your account and renew your domain name. This way you won’t lose your domain if you forgot to renew it.
3. Other Ways to Register a Domain Name
There are plenty of other domain name registrars that you can choose from. Prices for domain name registrations are pretty much the same on all those registration services. However, their user interface and domain management tools can be lacking at times.
If you don’t want to use GoDaddy for some reason, then we recommend trying out either NameCheap as the best alternative.
If you want a free domain name with website hosting but don’t want to use Bluehost, then you can use InMotion Hosting or GreenGeeks, both are listed among the best WordPress hosting providers in our list.
Domain Registration FAQs
Since we have helped over 130,000 people start a website, we have gotten just about every question you can possibly think of. Below are the answers to some of the top domain name questions:
Which is the best domain name registrar?
We believe that Godaddy is the best domain name registrar given their long history. However it’s a smarter money decision to get a free domain with web hosting like Bluehost. You can always transfer your domain name if you decide to switch hosting provider.
How can I buy a domain name permanently?
You cannot buy a domain name permanently. Domain names registration is done on a yearly basis. However you can pre-pay for up to 10 years which guarantees that you will have a domain name for 10 years.
How can I reserve a domain name without buying it?
There is no way to reserve a domain name without purchasing it. You have to buy it if you want to reserve it. Considering the low cost of a domain name, it’s a small investment for a business.
Is there a way to buy an existing domain name?
Yes, you can use brokerage like Sedo.com to potentially acquire an existing domain name. However it’s not guaranteed that you will get the domain name that you want because the seller may not want to sell it or ask for an outrageous price.
Are you confused by GDPR, and how it will impact your WordPress site? GDPR, short for General Data Protection Regulation, is an European Union law that you have likely heard about. We have received dozens of emails from users asking us to explain GDPR in plain English and share tips on how to make your WordPress site GDPR compliant. In this article, we will explain everything you need to know about GDPR and WordPress (without the complex legal stuff).
Disclaimer: We are not lawyers. Nothing on this website should be considered legal advice.
To help you easily navigate through our ultimate guide to WordPress and GDPR Compliance, we have created a table of content below:
The General Data Protection Regulation (GDPR) is a European Union (EU) law taking effect on May 25, 2018. The goal of GDPR is to give EU citizens control over their personal data and change the data privacy approach of organizations across the world.
You’ve likely gotten dozens of emails from companies like Google and others regarding GDPR, their new privacy policy, and bunch of other legal stuff. That’s because the EU has put in hefty penalties for those who are not in compliance.
Fines
Basically after May 25th, 2018, businesses that are not in compliance with GDPR’s requirement can face large fines up to 4% of a company’s annual global revenue OR €20 million (whichever is greater). This is enough reason to cause wide-spread panic among businesses around the world.
This brings us to the big question that you might be thinking about:
Does GDPR apply to my WordPress site?
The answer is YES. It applies to every business, large and small, around the world (not just in the European Union).
If your website has visitors from European Union countries, then this law applies to you.
But don’t panic, this isn’t the end of the world.
While GDPR has the potential to escalate to those high level of fines, it will start with a warning, then a reprimand, then a suspension of data processing, and if you continue to violate the law, then the large fines will hit.
The EU isn’t some evil government that is out to get you. Their goal is to protect consumers, average people like you and me from reckless handling of data / breaches because it’s getting out of control.
The maximum fine part in our opinion is largely to get the attention of large companies like Facebook and Google, so this regulation is NOT ignored. Furthermore, this encourage companies to actually put more emphasis on protecting the rights of people.
Once you understand what is required by GDPR and the spirit of the law, then you will realize that none of this is too crazy. We will also share tools / tips to make your WordPress site GDPR compliant.
What is required under GDPR?
The goal of GDPR is to protect user’s personally identifying information (PII) and hold businesses to a higher standard when it comes to how they collect, store, and use this data.
The personal data includes: name, emails, physical address, IP address, health information, income, etc.
While the GDPR regulation is 200 pages long, here are the most important pillars that you need to know:
Explicit Consent – if you’re collecting personal data from an EU resident, then you must obtain explicit consent that’s specific and unambiguous. In other words, you can’t just send unsolicited emails to people who gave you their business card or filled out your website contact form because they DID NOT opt-in for your marketing newsletter (that’s called SPAM by the way, and you shouldn’t be doing that anyways).
For it to be considered explicit consent, you must require a positive opt-in (i.e no pre-ticked checkbox), contain clear wording (no legalese), and be separate from other terms & conditions.
Rights to Data – you must inform individuals where, why, and how their data is processed / stored. An individual has the right to download their personal data and an individual also has the right to be forgotten meaning they can ask for their data to be deleted.
This will make sure that when you hit Unsubscribe or ask companies to delete your profile, then they actually do that (hmm, go figure). I’m looking at you Zenefits, still waiting for my account to be deleted for 2 years and hoping that you stop sending me spam emails just because I made the mistake of trying out your service.
Breach Notification – organizations must report certain types of data breaches to relevant authorities within 72 hours, unless the breach is considered harmless and poses no risk to individual data. However if a breach is high-risk, then the company MUST also inform individuals who’re impacted right away.
This will hopefully prevent cover-ups like Yahoo that was not revealed until the acquisition.
Data Protection Officers – if you are a public company or process large amounts of personal information, then you must appoint a data protection officer. Again this is not required for small businesses. Consult an attorney if you’re in doubt.
To put it in plain English, GDPR makes sure that businesses can’t go around spamming people by sending emails they didn’t ask for. Businesses can’t sell people’s data without their explicit consent (good luck getting this consent). Businesses have to delete user’s account and unsubscribe them from email lists if the user ask you to do that. Businesses have to report data breaches and overall be better about data protection.
Sounds pretty good, in theory at least.
Ok so now you are probably wondering what do you need to do to make sure that your WordPress site is GDPR compliant.
Well, that really depends on your specific website (more on this later).
Let us start by answering the biggest question that we’ve gotten from users:
Is WordPress GDPR Compliant?
Yes, as of WordPress 4.9.6, the WordPress core software is GDPR compliant. WordPress core team has added several GDPR enhancements to make sure that WordPress is GDPR compliant. It’s important to note that when we talk about WordPress, we’re talking about self-hosted WordPress.org (see the difference: WordPress.com vs WordPress.org).
Having said that, due to the dynamic nature of websites, no single platform, plugin or solution can offer 100% GDPR compliance. The GDPR compliance process will vary based on the type of website you have, what data you store, and how you process data on your site.
Ok so you might be thinking what does this mean in plain english?
Well, by default WordPress 4.9.6 now comes with the following GDPR enhancement tools:
Comments Consent
By default, WordPress used to store the commenters name, email and website as a cookie on the user’s browser. This made it easier for users to leave comments on their favorite blogs because those fields were pre-populated.
Due to GDPR’s consent requirement, WordPress has added the comment consent checkbox. The user can leave a comment without checking this box. All it would mean is that they would have to manually enter their name, email, and website every time they leave a comment.
Data Export and Erase Feature
WordPress offers site owners the ability to comply with GDPR’s data handling requirements and honor user’s request for exporting personal data as well as removal of user’s personal data.
The data handling features can be found under the Tools menu inside WordPress admin.
Privacy Policy Generator
WordPress now comes with a built-in privacy policy generator. It offers a pre-made privacy policy template and offer you guidance in terms of what else to add, so you can be more transparent with users in terms of what data you store and how you handle their data.
These three things are enough to make a default WordPress blog GDPR compliant. However it is very likely that your website has additional features that will also need to be in compliance.
Depending on which which WordPress plugins you are using on your website, you would need to act accordingly to make sure that your website is GDPR compliant.
A lot of the best WordPress plugins have already gone ahead and added GDPR enhancement features. Let’s take a look at some of the common areas that you would need to address:
Google Analytics
Like most website owners, you’re likely using Google Analytics to get website stats. This means that it is possible that you’re collecting or tracking personal data like IP addresses, user IDs, cookies and other data for behavior profiling. To be GDPR compliant, you need to do one of the following:
Anonymize the data before storage and processing begins
Add an overlay to the site that gives notice of cookies and ask users for consent prior to tracking
Both of these are fairly difficult to do if you’re just pasting Google Analytics code manually on your site. However, if you’re using MonsterInsights, the most popular Google Analytics plugin for WordPress, then you’re in luck.
They have released an EU compliance addon that helps automate the above process. MonsterInsights also has a very good blog post about all you need to know about GDPR and Google Analytics (this is a must read, if you’re using Google Analytics on your site).
Contact Forms
If you are using a contact form in WordPress, then you may have to add extra transparency measures specially if you’re storing the form entries or using the data for marketing purposes.
Below are the things you might want to consider for making your WordPress forms GDPR compliant:
Get explicit consent from users to store their information.
Get explicit consent from users if you are planning to use their data for marketing purposes (i.e adding them to your email list).
Disable cookies, user-agent, and IP tracking for forms.
Make sure you have a data-processing agreement with your form providers if you are using a SaaS form solution.
Comply with data-deletion requests.
Disable storing all form entries (a bit extreme and not required by GDPR). You probably shouldn’t do this unless you know exactly what you’re doing.
The good part is that if you’re using WordPress plugins like WPForms, Gravity Forms, Ninja Forms, Contact Form 7, etc, then you don’t need a Data Processing Agreement because these plugins DO NOT store your form entries on their site. Your form entries are stored in your WordPress database.
Simply adding a required consent checkbox with clear explanation should be good enough for you to make your WordPress forms GDPR compliant.
WPForms, the contact form plugin we use on WPBeginner, has added several GDPR enhancements to make it easy for you to add a GDPR consent field, disable user cookies, disable user IP collection, and disable entries with a single click.
Email Marketing Opt-in Forms
Similar to contact forms, if you have any email marketing opt-in forms like popups, floating bars, inline-forms, and others, then you need to make sure that you’re collecting explicit consent from users before adding them to your list.
This can be done with either:
Adding a checkbox that user has to click before opt-in
Simply requiring double-optin to your email list
Top lead-generation solutions like OptinMonster has added GDPR consent checkboxes and other necessary features to help you make your email opt-in forms compliant. You can read more about the GDPR strategies for marketers on the OptinMonster blog.
The WooCommerce team has prepared a comprehensive guide for store owners to help them be GDPR compliant.
Retargeting Ads
If your website is running retargeting pixels or retargeting ads, then you will need to get user’s consent. You can do this by using a plugin like Cooke Notices.
Best WordPress Plugins for GDPR Compliance
There are several WordPress plugins that can help automate some aspects of GDPR compliance for you. However, no plugin can offer 100% compliance due to the dynamic nature of websites.
Beware of any WordPress plugin that claims to offer 100% GDPR compliance. They likely don’t know what they’re talking about, and it’s best for you to avoid them completely.
Below is our list of recommended plugins for facilitating GDPR compliance:
MonsterInsights – if you’re using Google Analytics, then you should use their EU compliance addon.
WPForms – by far the most user-friendly WordPress contact form plugin. They offer GDPR fields and other features.
Cookies Notice – popular free plugin to add an EU cookie notice. Integrates well with top plugins like MonsterInsights and others.
OptinMonster – advanced lead generation software that offers clever targeting features to boost conversions while being GDPR compliant.
Shared Counts – instead of loading the default share buttons which add tracking cookies, this plugin load static share buttons while displaying share counts.
We will continue to monitor the plugin ecosystem to see if any other WordPress plugin stands out and offer substantial GDPR compliance features.
Final Thoughts
Whether you’re ready or not, GDPR will go in effect on May 25, 2018. If your website is not compliant before then, don’t panic. Just continue to work towards compliance and get it done asap.
The likelihood of you getting a fine the day after this rule goes in effect are pretty close to zero because the European Union’s website states that first you’ll get a warning, then a reprimand, and fines are the last step if you fail to comply and knowingly ignore the law.
The EU is not out to get you. They’re doing this to protect user’s data and restore people’s trust in online businesses. As the world goes digital, we need these standards. With the recent data breaches of large companies, it’s important that these standards are adapted globally.
It will be good for all involved. These new rules will help boost consumer confidence and in turn help grow your business.
We hope this article helped you learn about WordPress and GDPR compliance. We will do our best to keep it updated as more information or tools get released.
If you liked this article, then please subscribe to our YouTube Channel for WordPress video tutorials. You can also find us on Twitter and Facebook.
Additional Resources
GDPR Hysteria Part I and Part II by Jacques Mattheij
We are not lawyers. Nothing on this website should be considered legal advice. Due to the dynamic nature of websites, no single plugin or platform can offer 100% legal compliance. When in doubt, it’s best to consult a specialist internet law attorney to determine if you are in compliance with all applicable laws for your jurisdictions and your use cases.
Do you want to add an image to a sidebar widget in WordPress? By default, WordPress makes it easy to upload and add images anywhere on your website. In this article, we will show you how to easily add an image in your WordPress sidebar widget. We will share multiple methods, so you can use one that works best for you.
Adding an Image in WordPress Using The Image Widget
The easiest way to add an image in WordPress sidebar is by using the default ‘Image’ widget.
Simply go to Appearance » Widgets page and add the ‘Image’ widget to your sidebar. If you haven’t used widgets before, then see our guide on how to add and use widgets in WordPress.
The widget will expand, and you will be able to see its settings.
The first option is to add a title to the image widget. After that, click on the ‘Add Image’ button to continue.
This will bring up the WordPress media uploader where you can click on the upload files button to upload your image or select an image you have previously uploaded.
After uploading the image, you will see image settings in the right column. From here, you can provide a title / ALT text for the image, add a description, select size, or even add a link.
Once you are done, you can click on the ‘Add to Widget’ button to save your changes. You will now see a preview of the image inside the widget settings area.
Don’t forget to click on the ‘Save’ button to save your image widget.
You can now visit your website to see the image displayed on your WordPress blog’s sidebar.
Adding an Image in WordPress Sidebar Using Text Widget
Adding an image to the sidebar using the default ‘Image’ widget is quite easy. However, sometimes you may need to add an image with custom HTML or text with formatting. In that case, you will need to use the ‘Text’ widget instead.
Simply go to Appearance » Widgets page and add the ‘Text’ widget to your sidebar. Under the widget settings, you will see the ‘Add Media’ button above text edit area.
Clicking on the button will bring up the media uploader allowing you to upload or select an image from the media library.
After selecting your image, click on the ‘Insert into post’ button. You will now be able to see an image preview in the text widget settings.
You can continue adding text and other elements to the text widget. The toolbar in the text editor gives you some basic formatting buttons.
Once you are done, don’t forget to click on the ‘Save’ button to store your widget settings.
You can now visit your website to see the sidebar image in action.
Manually Adding an Image in WordPress Sidebar Widget
In some cases, you may need to add additional HTML code to your image. The default text widget allows some very basic HTML, but it may not work with advanced HTML or formatting. In that case, you will need to manually add an image to your blog’s sidebar.
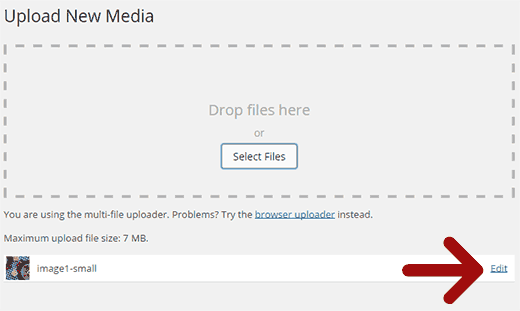
First, you need to upload the image to your WordPress site. Simply go to Media » Add New and upload your image file.
After uploading the image, you need to click on the Edit link next to the image.
WordPress will now take you to the ‘Edit Media’ page where you will see the image file URL on the right side of the screen. You need to copy this URL and paste it into a text editor like Notepad.
Next, you need to go to Appearance » Widgets screen and drag-drop ‘Custom HTML’ widget to your sidebar where you want to display the image.
In the text box area of the widget, you need to add your image using this code:
<img src="Paste The File URL Here" alt="Strawberries" />
The img tag is used in HTML to display images. It needs two attributes, the first one is src which defines the image file location. This is where you will paste the URL you copied earlier.
The second one is alt which is used to provide an alternate text for the image. Your final img tag will look something like this:
You need to click on the Save button to store your widget settings and then preview your website.
Adding an Image in WordPress Sidebar Using a Plugin
Another way to add images to your WordPress sidebar is by using a plugin. This will give you a few more options and a simple interface, which some beginners may find easier than the default ‘Image’ widget.
Upon activation, simply go to Appearance » Widgets page. You will notice a new widget labeled ‘Image Widget’ under available widgets column. Simply drag and drop this image widget to your WordPress sidebar where you want to display an image.
Next, click on the ‘Select Image’ button to upload an image or select one from the media library. After that you need to click on the ‘Insert to Widget’ button, and you will see the image preview under widget settings.
You can add a title, alt text, link, and a caption for the image. You can also choose an image size from the list of available options.
Once you are satisfied, simply click on the Save button to save the image widget. That’s all, you can now go to your website and see the image displayed in your sidebar.
We hope this article helped you add an image in WordPress sidebar widget. If you come across a problem, don’t forget to look at our guide on how to fix common image issues in WordPress.
If you liked this article, then please subscribe to our YouTube Channel for WordPress video tutorials. You can also find us on Twitter and Google+.
We are often asked by users whether they should install a WordPress plugin or add code to their theme’s functions.php file? Some users believe that adding code is always the better method for performance, but that’s actually not true. In this article, we will explain the pros and cons of WordPress plugin vs functions.php file and which method is better.
Installing WordPress Plugins vs Custom Code in Functions.php File
You will often find two solutions to add something to your WordPress site. You can either install a WordPress plugin or add a code snippet to your theme’s functions.php file.
Both methods will do the same thing, and they are both correct. However, many users want to know which one is better for WordPress speed and performance.
Some users feel concerned about installing too many plugins, and how it may affect their website speed and WordPress security. Others worry that adding custom code can break their website, and they may not be able to easily fix it.
Let’s compare both solutions to figure out which one is better for WordPress performance.
Pros and Cons of functions.php File
Functions file in WordPress allows theme developers to define custom functionality for their theme. This file acts like a giant WordPress plugin and can be used to add any other custom code snippets you may want to add to your website.
Here are the advantages of adding custom code to your theme’s functions.php file.
Pros
You can easily use built-in theme editor in admin area to edit functions.php file
You can copy and paste all code snippets in one file
You get a chance to study the code and learn how it works
However, there are also some disadvantages of using functions.php file to save all your custom functionality.
Cons
Your custom code will not work if you switch themes
Unless you are using a child theme, updating your theme will overwrite functions.php file
It becomes harder to understand where theme code ends and where your custom code begins
Some code snippets can be too large and need additional scripts and styles
Understanding Limitations of WordPress Functions File
Adding code snippets to your functions.php file will have the exact same impact on performance, that a WordPress plugin with the same code would have otherwise.
Not all functionality and features you need can be added to the functions.php file. For example, a custom code may need additional scripts and stylesheets to work properly.
We believe that the theme’s functions.php file should be used for what it’s intended purpose was: theme based functionality added by developers.
Pros and Cons of Installing WordPress Plugins
WordPress plugins are like apps for your WordPress website. They contain code that hooks itself to the core WordPress software to provide more features and functionality.
Here are some advantages of using a WordPress plugin instead of adding code to your functions file.
Pros
A WordPress plugin doesn’t depend on your theme
If it is the same code, then it would have the same performance impact as functions file
It is easier to disable, update, or reinstall as needed
Easier to manage as you know what each plugin does from its description
Now, we are not saying that installing all WordPress plugins is good. There are some disadvantages as well.
Cons
You will have to install updates for another plugin
Plugin author could abandon the plugin in the future specially if it’s free
You wouldn’t get to practice with the code
WordPress Plugin vs Functions File – Which One is Better?
If there is a WordPress plugin with the same code, then we believe that using a plugin is a better choice.
In terms of performance, it does not matter where the code runs. Whether it loads from functions.php file or as a separate plugin, if it is the same code, then it will have the same performance impact.
Managing separate plugins is much easier than editing a single large functions file. Adding random code snippets in the same file even when they are not related or dependant on each other makes things complicated.
If you choose a plugin, then you can benefit from future updates which may improve performance, fix bug, or patch security vulnerability.
When Should I Add Code to Functions.php File?
If the functionality you are trying to add is not available as a plugin and the code snippet is really simple, then you can add it to your theme’s functions file.
Another possible scenario is when you are adding functionality that is related to your WordPress theme or child theme. For example, creating new image sizes, showing dates, adding custom code before or after content, and more.
If you often add custom code snippets to your website, then there are even better ways to do that. You can save them in a site-specific WordPress plugin or use Code Snippets plugin to organize all your custom code.
We hope this article helped you understand WordPress plugin vs functions.php file and which one is better. You may also want to see our beginner’s guide on how to choose the best WordPress plugins for your website.
If you liked this article, then please subscribe to our YouTube Channel for WordPress video tutorials. You can also find us on Twitter and Facebook.
Do you want to start a WordPress blog the right way? We know that starting a blog can be a terrifying thought specially when you are not geeky. Guess what – you are not alone. Having helped over 130,000+ users start a blog, we have decided to create the most comprehensive guide on how to start a WordPress blog without any technical knowledge.
There are three things you need to start a WordPress blog:
A domain name idea (this will be the name of your blog i.e wpbeginner.com)
A web hosting account (this is where your website live on the internet)
Your undivided attention for 30 minutes.
Yes, you read it right. You can start a blog from scratch in less than 30 minutes, and we will walk you through the whole process, step by step.
In this tutorial, we will cover:
How to Register a Domain Name for Free
How to Choose the Best Web Hosting
How to Install WordPress
How to Change Your Theme
How to Write Your First Blog Post
How to Customize WordPress with Plugins
How to Add a Contact Form
How to Setup Google Analytics Tracking
How to Optimize Your Website for SEO
How to Make Money From Your Blog
Resources to Learn and Master WordPress
Ready? Let’s get started.
Video Tutorial
If you don’t like the video or need more instructions, then continue reading.
Step 1. Setup
The biggest mistake beginners make when starting a blog is choosing the wrong blogging platform. Thankfully you’re here, so you won’t be making that mistake.
For 95% of users, it makes more sense to use WordPress.org also known as self-hosted WordPress. Why? Because it is free to use, you can install plugins, customize your site design, and most importantly make money from your site without any restrictions (see the difference between WordPress.com vs WordPress.org).
You might be wondering why is it free? What’s the catch?
There’s no catch. It’s free because you have to do the setup and host it yourself.
In other words, you need a domain name and web hosting.
A domain name is what people type to get to your website. It’s your website’s address on the internet. Think google.com or wpbeginner.com
Web hosting is where your website live. It’s your website’s house on the internet. Every website needs web hosting.
A domain name typically costs $14.99 / year, and web hosting normally costs $7.99 / month.
That’s a lot for beginners who are just starting out.
Thankfully, Bluehost, an official WordPress recommended hosting provider, has agreed to offer our users a free domain name and over 60% off on web hosting.
Bluehost is one of the oldest web hosting companies, started in 1996 (that’s before Google). They are also the largest brand name when it comes to WordPress hosting because they host millions of websites including our own.
On top of all this, Bluehost has been working with WordPress since 2005, and they are committed to giving back. That’s why they have promised us that if you cannot get your blog online within 30 minutes by following this tutorial, then our expert team will complete the process for you without any cost. They will compensate us, so you don’t have to. Contact us for free blog setup help.
NOTE: At WPBeginner we believe in transparency. If you sign up with Bluehost using our referral link, we will earn a small commission at no extra cost to you (in fact, you will save money and get a free domain). We would get this commission for recommending just about any WordPress hosting company, but we only recommend products that we use personally use and believe will add value to our readers.
Let’s go ahead and purchase your domain + hosting.
First thing you need to do is click on the green Get Started Now button to get started.
On the next screen, select the plan that you need (basic and plus are the most popular).
After that, you will be asked to enter the domain name for your website.
Lastly, you will need to add your account information and finalize the package info to complete the process. We recommend going with the 36 month plan because that’s best value.
On this screen, you will see optional extras that you can purchase. It’s entirely up to you whether or not you purchase these, but we generally don’t recommend purchasing them right away. You can always add them later on, if you decide that you need them.
Once completed, you will receive an email with details on how to login to your web hosting control panel (cPanel). This is where you manage everything from support, emails, among other things. But most importantly, this is where you install WordPress.
Step 2. Install WordPress
In the cPanel, you will see dozens of small icons for different services and features. This can be a bit overwhelming, so ignore 95% of them because you will never need to use them.
Scroll down to the website section and click on the WordPress icon.
You will be redirected to the Bluehost Marketplace Quick Install screen for WordPress. Click on the Get Started button.
On the next screen, you will be asked to select your domain name. Choose the domain from the dropdown and then click Next.
After that, you need to enter your Site Name, username, and a password for your site. You also need to check all the checkboxes and then click Install.
The QuickInstall will start installing WordPress. The marketplace will prompt you to browse WordPress themes, while WordPress is being installed.
No need to do that right now. We’ll show you how to get free WordPress themes in the next step.
Once WordPress is finished installing, you will see the success notice in the top header bar.
Click on the Installation Complete link, and it will take you to the screen with your WordPress login URL and password.
Congratulations, you have created your WordPress site. That wasn’t too bad right.
Click on the WordPress login link to login to your dashboard.
Now we’re ready to customize your site’s appearance and start blogging.
Step 3. Selecting your WordPress Theme
The visual appearance of your WordPress blog is controlled by themes. When you first visit your blog, it will look something like this:
This is not very appealing to most people.
Customizing the look and feel of your blog is by far one of the most exciting and rewarding part in the journey of creating your WordPress site.
There are thousands of pre-made WordPress themes that you can install on your site. Some of them are free, while others are paid.
You can change your theme by going to your WordPress dashboard and clicking on Appearance » Themes.
Go ahead and click on the Add New button.
On the next screen, you will able to search from 5600+ free WordPress themes that are available in the official WordPress.org themes directory. You can sort by popular, latest, featured, as well as other feature filters (i.e industry, layout, etc).
You can take your mouse over to a theme and you will see a Preview button. Clicking on will open the theme preview where you can see how it would look on your website.
The preview of your theme may not look exactly as shown in the screenshot, which is normal as you will get to customize and set it up later. What you need to look for is design, colors, typography, and other elements.
The best tip to select the perfect WordPress theme is to strive for simplicity in design. It helps you keep things clean and clear while offering a good experience to your users.
When you have found the theme that you like, simply bring your mouse on it, and it will show the Install button. Click on it and wait for the theme to be installed. After that, the install button will be replaced with an Activate button. You need to click on it to Activate the theme.
Once you have installed your theme, you can customize it by clicking on the Customize link under the Appearance menu.
Once you have selected your WordPress theme, you are now ready to create your first blog post.
Step 4. Creating Your First Blog Post
To write your first blog post, click on the Posts » Add New menu in your WordPress dashboard.
You will see an editor area where you can write your first blog post.
Once you’re done writing, go ahead and click on the Publish button on the right to publish your first blog post to the world.
On the posts screen, you will notice several other sections such as Categories and Tags. You can use these to organize your blog posts. We have a great writeup on the difference between categories vs tags, which we highly recommend that you read.
Often beginners are confused between posts and pages menu in the WordPress dashboard. That’s why we have written a complete guide on the difference between posts vs pages in WordPress.
Step 5. Plugins & Customizations
Once you have written your first blog post, you probably want to get started with adding other usual elements on your website such as contact forms, galleries, sliders, etc.
To add all these additional features, you need to use plugins.
WordPress plugins are apps that allow you to add new features to your website.
There are over 55,000 WordPress plugins available in the free WordPress plugin directory alone. This means no matter what you want to accomplish, there is a plugin for it.
That being said, let’s take a look at how to use plugins to add some essential features to your WordPress blog.
How to Create a Contact Form in WordPress
Every website needs a contact form. It allows your users to contact you directly. Since WordPress doesn’t come with a built-in contact form, you will need a WordPress form builder plugin to add a contact form on your site.
We recommend using the WPForms Lite plugin. It is free version of the popular WPForms plugin, which is #1 in our list of best contact form plugins for WordPress.
You can install the plugin by going to Plugins » Add New page and typing WPForms in the search box. Next, you need to click “Install” and then “Activate”. Upon activation, you need to head over to WPForms » Add New page to create your first form.
This will open the WPForms builder interface.
First, you need to enter a name for your contact form and then click on ‘Simple Contact Form’ template.
WPForms will now create a simple contact form for you with all the required fields. You can click on any field to change it, or add a new field from the left column.
Once you are done editing the form, click on the save button at the top right corner and then exit the form builder.
You can now create a new page in WordPress by going to Pages » Add New and call it ‘Contact’. On the edit screen, you will notice a new ‘Add Form’ button.
When you click on it, it will bring up a popup where you need to select the form you created earlier and then click on the add form button.
WPForms will now add the form shortcode into your page. You can now save and publish the page and visit it in your browser to see your contact form in action.
Google Analytics helps you see how many people are visiting your blog, where they are coming from, and what are they doing on your website?
It is best to install Google Analytics when starting your blog, so you can see how much your blog has grown over time.
First, you need to visit Google Analytics website and sign in using your Gmail account.
Once you are logged in, you can go ahead and sign up for a free Google Analytics account.
You will be asked to provide your information and website URL. After that, you will be presented with your Google Analytics tracking code.
You can stop here because we will be using a plugin to automatically fetch and add this code to your blog.
Switch to your WordPress admin area to install and activate the MonsterInsights plugin. It is the free version of the best Google Analytics plugin for WordPress, and it is the easiest way to add Google Analytics on your site.
Upon activation, you need to visit Insights » Settings page to configure the plugin settings.
On the settings page, click on the ‘Authenticate with your Google account’ button to connect Google Analytics to your WordPress site.
Follow the onscreen instructions to complete the setup. Once done, you will be able to see your website analytics report straight from your WordPress dashboard under the MonsterInsights tab.
Most beginners don’t optimize for SEO when creating a blog. SEO or search engine optimization helps users find your blog in search engines. If you want more traffic, then it’s crucial that you optimize your blog for SEO from the beginning.
To get started, first you need to install and activate the Yoast SEO plugin. It is the complete WordPress SEO plugin that will help you optimize your blog.
Upon activation, you will see a new menu item labeled ‘SEO’. Clicking on it will take you to the plugins settings page.
The plugin comes with a quick configuration wizard to help you walk through the set up. You can also follow the instructions in our Yoast SEO guide for manual set up.
We also recommend you to follow our complete step by step WordPress SEO guide to set up your blog’s SEO.
More WordPress Plugins and Customizations
There are a ton of others WordPress plugins that you can install. Often beginners find it a bit overwhelming to search for the plugins they need.
At WPBeginner, we often feature the best WordPress plugins to help you add the functionality that you need.
Here is our expert pick of the best WordPress plugins that you should check out.
Security – Sucuri Security is a free security scanner for WordPress. We have a complete step by step WordPress security guide for beginners that will help you secure your blog.
If you are curious about the plugins and tools we use on our site, then check out WPBeginner’s Blueprint. It has all the plugins and tools that we use on the WPBeginner blog.
Now that you’ve built your blog and customized it to your liking, you are probably wondering how can I actually make money from my blog?
There are actually a lot different ways to successfully monetize your blog. However there is no such thing as a get rich quick scheme.
Don’t be fooled by the pictures of expensive cars and mansions because those are all fake.
Unlike other “make money online” articles, we have created the most comprehensive guide on how to make money from your blog using WordPress.
That’s a 4000+ word guide that everyone who starts a blog and wants to make money from it needs to read. We have shared our 14+ years of online wisdom in that ultimate guide.
As long as you’re willing to put in the hard work and effort, you’ll reap the reward. Remember, there are no shortcuts.
Here are some of the best ways to make money from your WordPress blog.
1. Google AdSense
Many bloggers make money by showing ads on their blog. If you make a blog with monetization in mind, then Google AdSense is the best way to do this.
It is the largest advertising platform for bloggers and publishers. Acting as a middleman between you and the advertiser, Google allow advertisers to bid for keywords matching your content. This allows you to get the best rates possible for the ads.
Affiliate marketing is the second most commonly used monetization strategy among bloggers. Basically, you recommend products and services to your readers and when they make a purchase you get a referral commission.
The key in affiliate marketing is to recommend high-quality products and services that you already use and trust. There are plenty of affiliate marketing plugins and tools for WordPress that can help you make more money when promoting affiliate products.
We have a complete step by step affiliate marketing guide for beginners, that will help you get started.
3. Online Store
Many bloggers make money by selling things directly from their blog. This could be physical products, digital downloads like ebooks, artwork, music, and more. Some bloggers even offer consulting services.
That’s not all you can do with your WordPress blog. You can make WordPress blogs specifically for reviews, fashion blogging, food blogging with recipes, and more. Each of these blog types brings you more unique opportunities to make money.
Step 7. Mastering WordPress
WPBeginner is the largest free WordPress resource site for beginners.
At WPBeginner, our main goal is to provide cutting-edge helpful WordPress tutorials that are easy to understand for small businesses, bloggers, and non-techy WordPress website owners (see more about us).
To expand your WordPress knowledge, you should check out:
WPBeginner Dictionary – The best place for beginners to start and familiarize themselves with the WordPress lingo
WPBeginner Videos – New to WordPress? Watch these 23 videos to master WordPress.
WPBeginner Blog – The central place for all our WordPress tutorials.
You can also subscribe to WPBeginner’s YouTube Channel where we regularly share video tutorials to help you learn WordPress.
Lastly, you can use Google to type your question and add WPBeginner in front of it. Our users find this very helpful because you’ll likely find an answer to any WordPress questions that you have.
In case you don’t find an answer to your question, simply use our contact form to send us a message. We love helping users get started with WordPress.
Frequently Asked Questions (FAQs)
Having helped thousands of people start a blog, we have answered quite a lot of questions. Below are the answers to the most frequently asked questions about creating a blog.
Can I create a blog without WordPress?
Yes, there are several other blogging platforms available. We have compared them all, and WordPress is by far the best solution in the market to make a blog with complete ownership and freedom.
Can I create a blog without hosting?
No, that’s not possible. Web hosting is where your website files are stored. All websites need web hosting.
If you want to have a public-facing blog but want to remain anonymous, then you need to make sure that your domain has WHOIS privacy turned on. Often people use a pseudonym / nickname to write under. You should also create a unique email just for your blog. It goes without saying, don’t post your pictures or anything on the blog. For more detailed instructions, see our article on how to blog anonymously using WordPress.
Social media plays an important role in bringing new visitors to your website and keeping your followers engaged. WordPress has plenty of great social media plugins that you can use. These plugins allow you to easily add social sharing buttons to your website and engage your audiences across platforms like Twitter, Facebook, LinkedIn, and more.
Can I create a blog in my own language?
Yes, you can use WordPress in other languages. You can select your language during installation or from Settings page in WordPress admin area. WordPress is fully translated in more than 56 languages and partially translated into dozens of other languages. Many top WordPress themes and plugins are also available in multiple languages. You can also translate a theme or a plugin that you want to use on your website.
Yes, you can. WordPress comes with a user role management system that you can use to create a multi-author blog.
Can I sell online courses from my WordPress blog?
Yes, you can. WordPress has some of the best LMS plugins to make it happen. You can create a blog and sell courses online from your WordPress blog. For detailed step by step instructions, see our guide on how to create an online course with WordPress.
Can I create a membership based WordPress blog?
Yes, you can. WordPress has some powerful membership plugins, that allow you to easily restrict any content you want and limit it to members only. You can create paid memberships with multiple levels and sell premium content to your paid subscribers. For details, see our ultimate guide to building a WordPress membership website.
Affiliate marketing is one of the most popular ways to make money online from your blog. It allows you to add a steady income stream to your blog’s monetization strategy. In this affiliate marketing guide for beginners, we will explain how affiliate marketing works, and how to get started right away.
What is Affiliate Marketing?
By definition, affiliate marketing is a referral arrangement in which an online retailer (advertiser) pays you a commission when users purchase their product from your referral link.
Unlike other ad types which pays based on clicks or views, affiliate marketing works on a CPA (cost-per-acquisition), or CPL (cost-per-lead) basis. In other words, you only earn a commission when someone takes an action (i.e buys the product or signup for a free trial).
Because there is less risk for the advertiser, affiliate programs pay out much higher commissions to publishers compared to Google AdSense or other types of ads.
Affiliate marketing requires a more hands-on approach. You have to find a product or service that you believe will be helpful to your users. After that you have to strategically add it in your blog posts and other areas of your site, so users can purchase the product using your referral link.
How Does Affiliate Marketing / Tracking Work?
First, you have to find a company or product that you want to promote. You need to select a product or service that you believe will be relevant to your blog’s topic and useful for your audience. The product or company you choose will be called a ‘Merchant’.
Next, you have to partner up with the company by joining their partner program. This makes you their ‘Affiliate’. Some companies also use the terms associates, partners, etc.
Once you have joined their partner program (also called Affiliate Program), you will get a unique affiliate ID. You will need to use this affiliate ID in all affiliate links that you add in your website to promote the product.
You can promote the product by adding an in-depth product reviews, recommend it in your articles, display banner ads, sending an email newsletter, and more. All traffic you send to the merchant website with your unique ID will be tracked.
Once a user makes a purchase, you will earn a commission. Your payment is issued once your earnings reach a particular threshold typically 45 – 60 days.
How to Get Started with Affiliate Marketing
First, you need to make sure that you are using the right blogging platform, and you are allowed to run affiliate marketing campaigns on your website.
For example, if you are using WordPress.com, then there are some restrictions regarding the products and services you can link to. For more details see our comparison of WordPress.com vs WordPress.org.
On the other hand if you are on self-hosted WordPress.org website, then you can add any affiliate link you want and efficiently manage your affiliate campaigns.
If you haven’t created a website already, then you can get started right away. Simply follow the instructions in our step by step guide on how to start a blog, and you’ll be up and running in less than 30 minutes.
Next, you need to let your users know how you make money from your website by adding a disclosure page. See WPBeginner’s disclosure page and feel free to use it as a template.
You will also need to add a privacy policy and terms of service page to your blog.
These are amongst the must have pages for every WordPress blog. They not only save you from legal issues in the future, but they also help you build trust with your audience.
Finding Affiliate Products and Services to Promote
There are many ways to find products and companies that you can partner up with as an affiliate. Here are some of the easiest ways to find the products you can promote.
1. Become an affiliate for products you already use
First, you need to look at the products and services that you already use and find useful. This makes it easy for you to convince your users about the product since you already know the pros and cons.
Next, you need to go to the product’s website and search for terms like ‘Affiliate program’, ‘Partners’, or ‘Affiliates’. Many companies are actively looking for affiliate marketers to promote their products that’s why they add a link to their affiliate page in their website’s footer.
2. Look for products other blogs are recommending
Another way to find products is by looking at other blogs similar to yours. You will be able to find many similar blogs that are using affiliate marketing to make money.
But how do you know that they are promoting affiliate products?
First, look for the obvious and easily noticeable banner ads on their website. Take your mouse to the banner ad, and you will see a link in your browser’s status bar.
This link will usually have an affiliate ID. Affiliate ID helps merchants track which affiliate partner is sending them traffic / sales.
Sometimes these links may look like internal links, but when you click on them they will take you to a product website with affiliate marketer’s ID in the link. You will also find similar affiliate links through-out their content.
3. Join Bigger Affiliate Networks
Another way to find products to promote is by joining affiliate networks. These websites act as a middleman between affiliate marketers and merchants.
You will notice that many products and companies that you want to partner with already use an affiliate network. This helps you quickly find a lot of products that you can start promoting on your website.
4. Reach out to Companies
If you really want to promote a product but can’t find any information about their affiliate program, then you can simply ask them via email.
Some companies may not be actively promoting their affiliate program. If they have an affiliate program, then they can invite you to join.
What are Affiliate Networks? Why You Should Join Them?
Affiliate networks act as a middleman between you (the affiliate marketer) and merchants (companies that want to sell their products).
For merchants, they provide their platform as a service to list their products, track affiliate traffic, manage affiliates, and send payments.
For affiliate marketers, they offer an easy to use platform to search for products, sign up as an affiliate, track your campaign performance and earnings.
Following are some of the most popular affiliate networks that you can join.
ShareaSale – One of the largest affiliate networks with many high-paying affiliate products for almost every category imaginable. Popular WordPress hosting company, WPEngine, uses ShareASale to manage their affiliates. WPEngine’s Affiliate program offers a very generous payout to their affiliate partners.
CJ Affiliate (Formerly, Comission Junction) – Another top affiliate network with a huge number of merchants and products neatly organized in categories and easily searchable. Companies like GoDaddy, Expedia, and many others use CJ.
ClickBank – This is a large online marketplace for selling digital products in various categories from different vendors. It is easy to use and has tons of learning resources for new affiliate marketers.
Amazon Associates – Amazon is world’s largest ecommerce store with millions of products. You can sign up for their affiliate program and start earning by sending people to a website they already use for their online shopping.
Which affiliate networks should you join?
You should join affiliate networks that have the products you want to promote. You can join multiple affiliate networks for different products. We use all the above networks and few others.
Make sure that you always check the network program policies. You also need to review program policies of individual products and merchants. This will give you a clear idea about your earnings, payments, additional incentives, and more.
Affiliate Marketing Tips to Increase Earnings
Now that we have covered the basics, let’s dive into some more tips on how to actually make money from affiliate marketing.
1. Choose good products and companies to promote
As an affiliate marketer, you don’t have control over the future of products that you are recommending. That’s why you need to make sure that you are recommending the best products from reputable companies.
The best way to do this is by recommending the products and services that you have actually used. If you want to recommend a product that looks useful, then feel free to contact them to learn more.
If you ask nicely, most companies will gladly offer you a free account or copy to review / test their product or service.
2. Offer highly useful and valuable content
You can add affiliate links and banners anywhere on your WordPress site. However, simply adding links will not result in convincing your users to actually buy those products.
You need to convince your users by offering useful and valuable information about the product. Many affiliate marketers do that by writing in-depth product reviews, video reviews, product comparisons with pros and cons, and more.
3. Keep your audience in mind
Keep your website’s audience and their interests in mind when choosing the product. For example, if you run a fashion blog, then you would want to promote fashion accessories, clothing, and similar products that your audience would want to buy.
You also need to make sure that you are not just recommending products because they are offering higher commissions. If a user buys a product based on your recommendation, and it doesn’t turn out useful, then they will never trust your recommendations again.
Affiliate Marketing Plugins and Tools for WordPress
As your blog grows, you will be recommending a lot of different products. This will make it difficult for you to manage all the affiliate links, banners, and ads spread all over your website.
Luckily, there are excellent affiliate marketing tools and plugins for WordPress that you can use to help with management.
Manually adding links to your content becomes quite difficult as your site grows. You will have to copy the URL with your affiliate ID every time you mention the product and paste it into WordPress.
It also lets you change lengthy affiliate links into cloaked pretty links which are more user-friendly.
ThirstyAffiliates also has the option to automatically replace keywords with affiliate links which can significantly help you boost your affiliate revenue.
AdSanity is the best WordPress ad management plugin and a must-have for every affiliate marketer’s toolbox. It allows you to create banner ads from your WordPress site and manage them from a single dashboard.
AdSanity also makes it easy to insert ads into your WordPress posts, pages, and sidebar widgets. You can use it to manage your third-party ads like Google AdSense ads and banners as well. For detailed instructions, see our guide on how to manage ads in WordPress with AdSanity.
MonsterInsights is the best Google Analytics plugin for WordPress. It allows you to see where your users are coming from and what they do when they are on your website.
We hope this ultimate affiliate marketing guide for beginners helped you learn how to become an affiliate marketer. You may also want to see our ultimate WordPress SEO guide to bring more visitors to your website.
If you liked this article, then please subscribe to our YouTube Channel for WordPress video tutorials. You can also find us on Twitter and Facebook.
When starting a blog, one of the most common questions you might think of is which are the most popular types of blog? There are many different types of blogs covering a wide range of topics, interests, and audiences. For a successful blog, you need to plan ahead and choose the niche that works for you. In this article, we will share the most popular types of blogs that you can start right away.
What Should You Blog About?
To decide the niche of your blog, you need to know about your passion. Every niche has its own audience who search for content related to their interests. Writing about your passion helps you continuously come up with great content ideas as your blog grows.
You don’t just need to plan for content. You also need to choose a WordPress theme, optimize for SEO, and improve performance of your site. These are the tasks that are not directly related to writing but equally important for the success of your blog.
Let’s take a look at the most popular types of blogs that exist:
1. Fashion Blogs
Fashion blogs are one of the most popular types of blogs on the internet. It’s a big industry with a huge global audience. Fashion bloggers get invited to major events, receive special perks, merchandise, and even business deals by top fashion brands.
These types of blogs are good for creative people with a keen eye for style and fashion. You can start a fashion blog and start making money online by following our guide.
2. Food Blogs
Food blogs are another popular blog type. It attracts a lot of readers who are interested in recipes, ingredients, healthy eating, fine dining, and other food related stories.
Many food bloggers just start with something as simple as their local restaurant reviews. However, as their blog grows so does their interests and target audience. They start covering other food related topics as well. Take a look at our guide on how to start a food blog.
3. Travel Blogs
Travel blogs are becoming more popular each day. Due to cheap air travel, people are traveling more than ever, and they are always looking for travel tips, advice, and destination guides.
These blogs make it easy for other travelers to learn about a destination they have never been to. If you are a traveler, then we recommend you to create your travel blog.
4. Music Blogs
Music blogs has a wide audience who search for critiques on the best and trending music. Music lovers enjoy songs from different languages, cultures and norms.
The music industry has big potential for bloggers to write about different types of music like jazz, pop, heavy metal, famous singers, and more.
5. Lifestyle Blogs
Lifestyle blogs are the most popular type of blogs you can find online. They have a variety of readers, interested in topics ranging from culture, arts, local news, and politics. This gives the blogger a wide range of topics to cover, making it easier to plan their content strategy.
Lifestyle bloggers get opportunities to be an influencer, write for other publications, become a speaker, and partner with businesses who are working to make a difference in the society.
6. Fitness Blogs
Fitness blogs has been a hot trend since they cover important topics like health and general fitness. People all over the world rely on the internet to seek advice on how to stay fit. It’s a great opportunity for fitness instructors to start a fitness blog and get clients online.
These types of bloggers/instructors write about diets, diet plans, workouts, supplements, and more. Fitness bloggers can also create video content to explain different exercises to their audience. They can monetize their website and videos using Google AdSense and affiliate marketing.
7. DIY Blogs
DIY blogs are very interesting and have a huge audience. It has multiple sub-types like arts and crafts, construction, wood-work, metal-work and more.
These interesting DIY activities would encourage visitors to try new stuff and share it with the trainer/blogger. DIY blogs may involve a lot of communication which is great for blogging.
8. Sports Blogs
Sports blogs are another interesting type of blogs online. Every country in the world has different sports and every sport has its own stars. Sports blogging may also include bloggers who are writing paid content for teams, athletes, and other organizations.
The other format in sports blogging is to write about latest events all over the world. Furthermore, bloggers share live status of multiple sports on their Twitter accounts automatically linked to the blogs.
9. Finance Blogs
A lot of us need help and advice to manage our finances efficiently. This gives finance blogs a wide audience ranging from serious investors to families trying to save for a better future.
Personal finance blogs share advice for businesses, investors, startups, individuals and families. It’s a good blog niche for the people interested in the complex world of managing money and generating wealth.
10. Political Blogs
Political blogs have perhaps the most passionate audience of all. They cover news on politics, analysis of political news, and can quickly build a very large engaging audience.
It has become common for the big political affiliates to hire their own blogging team. These bloggers share the agenda of the political party and write about their policies / plans to attract more people towards the representatives.
11. Parenting Blogs
Parenting blogs have a huge, passionate, and highly engaged audience. New parents worry a lot and are always willing to improve their parenting skills.
Mom blogs and dad blogs have different styles of writing. These blogs may involve activities with kids, guidance on food, techniques for early home education and more.
12. Business Blogs
Business blogs are the professional blogs related to the corporate agencies, industries and others. They offer a casual way to communicate with customers and educate them about a businesses product or service.
Personal blogs belong to individual writers who share their experiences, adventures, and daily life with their audience. The purpose of personal blogging can be anything like making a difference through positive stories or influencing readers with own views.
Personal bloggers also include photographers who share photos online to get more work, vloggers who create videos on their daily life routine, chef/cook who share recipes on the blog, and more.
14. Movie Blogs
Movie blogs share news and reviews of new movies and the film industry in general. They have a large audience on the internet. Bloggers are invited to watch premium shows before the public release of movies, so they can write reviews and generate buzz about an upcoming movie.
15. Car Blogs
Car blogs are usually about luxury and sports cars. They cover a wide range of topics including latest car models, their features, engineering, and more. They can even partner up with local car dealerships for business opportunities. These blogs have all the information about modern cars, vintage cars, safety tips for drivers, and more.
Many people get attracted to good cars and spend a lot of time in reading about features of their favorite cars online. It’s a great niche to adopt as a blog type for car lovers.
Some bloggers also write about car financing tips, financing calculators, corporate and banks offers, and finance schedules. It helps the reader find cars in their budget without visiting showrooms.
16. News Blogs
News blogs cover local news and are a great way for journalism students to build up their resume and sharpen their skills. They can cover a wide range of topics or limit to a particular news section. News blogs are not just about sharing news. They also include opinion pieces to share blogger’s own perspective of the news.
The news blogs are updated more frequently to cover latest happenings. News can be about anything like climate change, scientific innovations, technology, politics, religion, and more. Big media outlets have several bloggers to work on each of these sub-types in news blogging.
17. Pet Blogs
Pet blogs have a great readership online that includes pet owners, animal lovers, animal shelters, and people looking for pets. Pet bloggers share tips on keeping pets healthy, pet grooming, pet food, and training.
Animal foster homes also write about their efforts to protect and save animals. Pet bloggers can partner up with businesses selling pet care products to generate revenue.
18. Gaming Blogs
Gaming blogs cater to a large community of gamers looking for articles about latest games, gaming hardware, events, game cheats, and more. This community has grown significantly in the recent years.
Most gaming blogs belong to gamers, reviewers, and official communities of big game developing agencies. They have international events for gamers and reward plans for the winners. It’s a popular blog type and growing everyday.
Once you have chosen your blog’s niche, the next step is to find blog post ideas that you can use on your blog. You can check out this massive list of blog post ideas that you can use right away.
If you recently started a blog, then you might be wondering what are the most important pages that you must have on your blog? Pages allow you to add useful information about your blog without affecting your regular blog post schedule. In this article, we will share the most important pages that every WordPress blog should have.
Why Add Pages to Your WordPress Blog
WordPress comes with two default content types called posts and pages. While posts are used to write blog articles, pages are used to create content that is not part of your regular blog post schedule.
Pages are normally used to add static content that is not supposed to change very often. For example, an about us page.
Keeping this content separate from your blog posts, help users easily discover it. You can also manage your pages easily, rearrange them, add them to your navigation menus, and even use page builders to create custom layouts for each page.
That being said, let’s take a look at some blog page ideas that you can use on your WordPress blog.
1. About Page
This is a must have page for almost all websites on the internet. You can name this page “About Us” or “About Me” depending on whether you have a business blog or a single-author personal blog.
You can use this page to tell users about people behind the website, its purpose, mission, values, and what users should expect to find on your blog. The about page helps build trust among your audience as they get to know the real people behind the scenes. You can also use this opportunity to showcase your most popular content.
2. Contact Page
Your blog readers, advertisers, and potential business partners all need to find your contact information. A contact page allows users to quickly and easily send you a message or learn how to connect with you without leaving a public comment on your blog.
You will need to add a contact form to make it easy for users to contact you. However, you can also add your email address, location map, and social media profiles to offer more ways to connect with you.
3. Disclaimer Page
If you make money online from your WordPress blog, then you must add a disclaimer page. This is where you can let users know about how you make money from your blog. For example, if you display banner ads or promote affiliate products, then you can inform users that this is how your content is monetized.
Privacy policy page basically inform users about the data you collect on your website as well as how you and other third-parties may use this data. Even if you are not collecting any user data, third-party tools on your website like Google Analytics can still set cookies.
You can find many privacy policy templates and generators online. Alternatively, you can also take a look at our privacy policy page and use it to create your own.
5. Terms of Service Page
If you run an online store or offer services on your blog, then you need a terms of service page. It is a legal document so getting professional legal help is highly recommended. There are also online templates that you can use, but do so at your own risk.
It allows you to limit your liability in case of misuse of information and services provided on your website. It can also be used to inform users about their responsibilities regarding the copyright and trademark, and how they can use your website, product, or services.
6. Start Here Page
As your blog gets older, you will have a lot more content to showcase on your front-page. This may leave new users a bit confused about how they can make the most out of your blog. This is where a Start Here page comes in handy.
The purpose of this page is to introduce new users to your most useful content. This give users a clear idea about how they can benefit from your content, and what are the resources that they should check out first.
Take a look at WPBeginner’s Start Here page to see how we use it to engage with new users.
7. Products / Services Page
If you are using an ecommerce platform like WooCommerce to sell products, then it will automatically create a shop page that you can just add to your navigation menus.
On the other hand, if you are selling products or offering services without using an eCommerce plugin, then you will need a product or services page for them. You can also create a parent page to list all your products and child pages for individual products with more details.
Check out WPBeginner’s WordPress plugins page as an example of a typical products page.
8. Custom 404 Page
WordPress automatically displays a 404 error page when it cannot find a specific piece of content. Normally, the 404 page is very plain and is not very useful.
You can replace that plain page with a custom 404 error page and give your users more opportunities to discover content and continue browsing. For detailed instructions, see our article on how to improve 404 page template in WordPress.
9. Archives Page
WordPress automatically create a date, category, and tag based archives. However, the information is still scattered across different pages and may not allow your users to get a bird’s eye view of your most valuable content.
This is where a custom archives page comes in. It is a simple page that you can use to display your popular posts, compact archives, top categories, tags, and more.
Many blogs rely solely on ads to monetize their content. The easiest way to do this is by signing up for Google AdSense. However, you can also sell ad spots directly to the advertisers.
To do this, you will need to create an ‘Advertise’ page with information about available ad spots, your average monthly page views, and your audience demographics. Don’t forget to add a contact form at the end so that advertisers can quickly contact you.
You will need a WordPress ad management plugin to display and manage ads on your website. We recommend using AdSanity because it allows you to easily manage ads whether they are self-hosted or third-party ads like Google AdSense.
11. Write for Us Page
If you run a multi-author WordPress blog and are looking for more writers, then you need a write for us page. This page simply allow users who are looking for blogging gigs to discover the writing opportunity on your website.
You can use this page to tell users what your blog is about and what kind of content you are looking for. Most importantly, let them know how they will benefit from writing on your blog. Don’t forget to add a contact form for users to quickly send you a message.
We hope this article helped you learn about important pages that you should have on your WordPress blog. You may also want to see our ultimate WordPress SEO guide for beginners to bring more visitors to your website.
If you liked this article, then please subscribe to our YouTube Channel for WordPress video tutorials. You can also find us on Twitter and Facebook.