Category Archives: google analytics

The Ultimate Affiliate Marketing Guide for Beginners – Step by Step

Affiliate marketing is one of the most popular ways to make money online from your blog. It allows you to add a steady income stream to your blog’s monetization strategy. In this affiliate marketing guide for beginners, we will explain how affiliate marketing works, and how to get started right away.

Ultimate affiliate marketing guide for beginners

What is Affiliate Marketing?

By definition, affiliate marketing is a referral arrangement in which an online retailer (advertiser) pays you a commission when users purchase their product from your referral link.

Unlike other ad types which pays based on clicks or views, affiliate marketing works on a CPA (cost-per-acquisition), or CPL (cost-per-lead) basis. In other words, you only earn a commission when someone takes an action (i.e buys the product or signup for a free trial).

Because there is less risk for the advertiser, affiliate programs pay out much higher commissions to publishers compared to Google AdSense or other types of ads.

Affiliate marketing requires a more hands-on approach. You have to find a product or service that you believe will be helpful to your users. After that you have to strategically add it in your blog posts and other areas of your site, so users can purchase the product using your referral link.

How Does Affiliate Marketing / Tracking Work?

First, you have to find a company or product that you want to promote. You need to select a product or service that you believe will be relevant to your blog’s topic and useful for your audience. The product or company you choose will be called a ‘Merchant’.

Next, you have to partner up with the company by joining their partner program. This makes you their ‘Affiliate’. Some companies also use the terms associates, partners, etc.

Once you have joined their partner program (also called Affiliate Program), you will get a unique affiliate ID. You will need to use this affiliate ID in all affiliate links that you add in your website to promote the product.

You can promote the product by adding an in-depth product reviews, recommend it in your articles, display banner ads, sending an email newsletter, and more. All traffic you send to the merchant website with your unique ID will be tracked.

Once a user makes a purchase, you will earn a commission. Your payment is issued once your earnings reach a particular threshold typically 45 – 60 days.

How to Get Started with Affiliate Marketing

First, you need to make sure that you are using the right blogging platform, and you are allowed to run affiliate marketing campaigns on your website.

For example, if you are using WordPress.com, then there are some restrictions regarding the products and services you can link to. For more details see our comparison of WordPress.com vs WordPress.org.

On the other hand if you are on self-hosted WordPress.org website, then you can add any affiliate link you want and efficiently manage your affiliate campaigns.

If you haven’t created a website already, then you can get started right away. Simply follow the instructions in our step by step guide on how to start a blog, and you’ll be up and running in less than 30 minutes.

Next, you need to let your users know how you make money from your website by adding a disclosure page. See WPBeginner’s disclosure page and feel free to use it as a template.

You will also need to add a privacy policy and terms of service page to your blog.

These are amongst the must have pages for every WordPress blog. They not only save you from legal issues in the future, but they also help you build trust with your audience.

Finding Affiliate Products and Services to Promote

There are many ways to find products and companies that you can partner up with as an affiliate. Here are some of the easiest ways to find the products you can promote.

1. Become an affiliate for products you already use

First, you need to look at the products and services that you already use and find useful. This makes it easy for you to convince your users about the product since you already know the pros and cons.

Next, you need to go to the product’s website and search for terms like ‘Affiliate program’, ‘Partners’, or ‘Affiliates’. Many companies are actively looking for affiliate marketers to promote their products that’s why they add a link to their affiliate page in their website’s footer.

Finding affiliate programs to join

2. Look for products other blogs are recommending

Another way to find products is by looking at other blogs similar to yours. You will be able to find many similar blogs that are using affiliate marketing to make money.

But how do you know that they are promoting affiliate products?

First, look for the obvious and easily noticeable banner ads on their website. Take your mouse to the banner ad, and you will see a link in your browser’s status bar.

finding affiliate links

This link will usually have an affiliate ID. Affiliate ID helps merchants track which affiliate partner is sending them traffic / sales.

Sometimes these links may look like internal links, but when you click on them they will take you to a product website with affiliate marketer’s ID in the link. You will also find similar affiliate links through-out their content.

3. Join Bigger Affiliate Networks

Another way to find products to promote is by joining affiliate networks. These websites act as a middleman between affiliate marketers and merchants.

You will notice that many products and companies that you want to partner with already use an affiliate network. This helps you quickly find a lot of products that you can start promoting on your website.

4. Reach out to Companies

If you really want to promote a product but can’t find any information about their affiliate program, then you can simply ask them via email.

Some companies may not be actively promoting their affiliate program. If they have an affiliate program, then they can invite you to join.

What are Affiliate Networks? Why You Should Join Them?

Affiliate networks act as a middleman between you (the affiliate marketer) and merchants (companies that want to sell their products).

For merchants, they provide their platform as a service to list their products, track affiliate traffic, manage affiliates, and send payments.

For affiliate marketers, they offer an easy to use platform to search for products, sign up as an affiliate, track your campaign performance and earnings.

Following are some of the most popular affiliate networks that you can join.

  • ShareaSale – One of the largest affiliate networks with many high-paying affiliate products for almost every category imaginable. Popular WordPress hosting company, WPEngine, uses ShareASale to manage their affiliates. WPEngine’s Affiliate program offers a very generous payout to their affiliate partners.
  • CJ Affiliate (Formerly, Comission Junction) – Another top affiliate network with a huge number of merchants and products neatly organized in categories and easily searchable. Companies like GoDaddy, Expedia, and many others use CJ.
  • ClickBank – This is a large online marketplace for selling digital products in various categories from different vendors. It is easy to use and has tons of learning resources for new affiliate marketers.
  • Amazon Associates – Amazon is world’s largest ecommerce store with millions of products. You can sign up for their affiliate program and start earning by sending people to a website they already use for their online shopping.

Which affiliate networks should you join?

You should join affiliate networks that have the products you want to promote. You can join multiple affiliate networks for different products. We use all the above networks and few others.

Make sure that you always check the network program policies. You also need to review program policies of individual products and merchants. This will give you a clear idea about your earnings, payments, additional incentives, and more.

Affiliate Marketing Tips to Increase Earnings

Now that we have covered the basics, let’s dive into some more tips on how to actually make money from affiliate marketing.

1. Choose good products and companies to promote

As an affiliate marketer, you don’t have control over the future of products that you are recommending. That’s why you need to make sure that you are recommending the best products from reputable companies.

The best way to do this is by recommending the products and services that you have actually used. If you want to recommend a product that looks useful, then feel free to contact them to learn more.

If you ask nicely, most companies will gladly offer you a free account or copy to review / test their product or service.

2. Offer highly useful and valuable content

You can add affiliate links and banners anywhere on your WordPress site. However, simply adding links will not result in convincing your users to actually buy those products.

You need to convince your users by offering useful and valuable information about the product. Many affiliate marketers do that by writing in-depth product reviews, video reviews, product comparisons with pros and cons, and more.

3. Keep your audience in mind

Keep your website’s audience and their interests in mind when choosing the product. For example, if you run a fashion blog, then you would want to promote fashion accessories, clothing, and similar products that your audience would want to buy.

You also need to make sure that you are not just recommending products because they are offering higher commissions. If a user buys a product based on your recommendation, and it doesn’t turn out useful, then they will never trust your recommendations again.

Affiliate Marketing Plugins and Tools for WordPress

As your blog grows, you will be recommending a lot of different products. This will make it difficult for you to manage all the affiliate links, banners, and ads spread all over your website.

Luckily, there are excellent affiliate marketing tools and plugins for WordPress that you can use to help with management.

1. ThirstyAffiliates

Manually adding links to your content becomes quite difficult as your site grows. You will have to copy the URL with your affiliate ID every time you mention the product and paste it into WordPress.

This is where ThirstyAffiliates can help. It is an affiliate link management plugin that allows you to easily add affiliate links in WordPress.

It also lets you change lengthy affiliate links into cloaked pretty links which are more user-friendly.

ThirstyAffiliates also has the option to automatically replace keywords with affiliate links which can significantly help you boost your affiliate revenue.

2. AdSanity

AdSanity is the best WordPress ad management plugin and a must-have for every affiliate marketer’s toolbox. It allows you to create banner ads from your WordPress site and manage them from a single dashboard.

AdSanity also makes it easy to insert ads into your WordPress posts, pages, and sidebar widgets. You can use it to manage your third-party ads like Google AdSense ads and banners as well. For detailed instructions, see our guide on how to manage ads in WordPress with AdSanity.

3. MonsterInsights

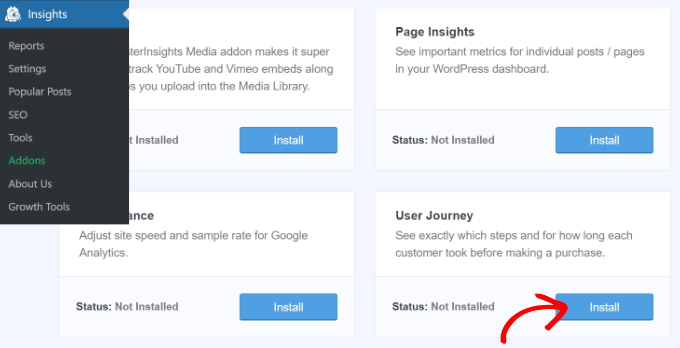
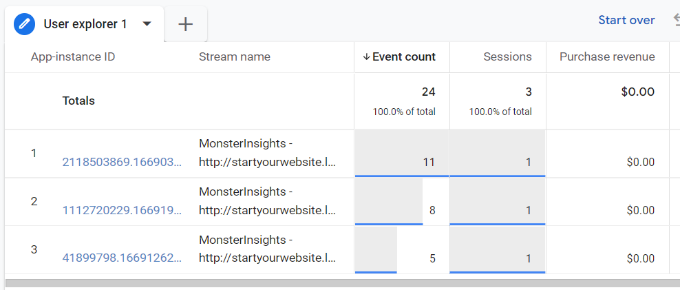
MonsterInsights is the best Google Analytics plugin for WordPress. It allows you to see where your users are coming from and what they do when they are on your website.

It also helps you track your outbound affiliate links using Google Analytics. This enables you to find out which affiliate links are clicked more often and help you discover missed opportunities.

Need more tools? See our full list of top affiliate marketing tools and plugins for WordPress.

We hope this ultimate affiliate marketing guide for beginners helped you learn how to become an affiliate marketer. You may also want to see our ultimate WordPress SEO guide to bring more visitors to your website.

If you liked this article, then please subscribe to our YouTube Channel for WordPress video tutorials. You can also find us on Twitter and Facebook.

The post The Ultimate Affiliate Marketing Guide for Beginners – Step by Step appeared first on WPBeginner.

How to Enable Customer Tracking in WooCommerce with Google Analytics

Do you want to enable customer tracking in WooCommerce?

Customer tracking allows you to offer a personalized shopping experience based on customer behavior in your eCommerce store.

In this article, we will show you how to easily enable customer tracking in WooCommerce with Google Analytics.

How to Enable Customer tracking in WooCommerce with Google Analytics

Why Enable Customer Tracking in WooCommerce with Google Analytics?

Google Analytics allows you to see where your visitors are coming from and what they do on your website. In other words, it helps you track your traffic sources as well as user engagement on your website.

For eCommerce platforms, Google Analytics offers an enhanced eCommerce tracking feature. This allows you to better understand users’ shopping and checkout behavior. Plus, you can see which products perform the best and track your WooCommerce store’s sales performance.

By default, a WooCommerce store allows your customers to create an account or checkout as guest users. Creating an account helps the user save their shipping and billing information for faster checkout next time. It also helps you offer customers a personalized shopping experience based on their browsing and shopping history.

Wouldn’t it be great if you could track logged-in users with their user IDs in Google Analytics and also see the path customers took before making a purchase?

This will give you access to a treasure trove of information and insights on customer behavior. You can use it to offer a better on-site experience and boost your sales.

Let’s take a look at how to easily enable customer tracking in WooCommerce. Here are quick links that you can use to jump ahead to any section:

Set up Ecommerce Tracking in WordPress with Google Analytics

The best way to set up WooCommerce customer tracking in Google Analytics is using Monsterinsights. It is the best Analytics solution for WordPress and helps you set up tracking without editing code.

The plugin offers an eCommerce addon, which automatically detects WooCommerces and starts tracking customer behavior in Google Analytics. It also comes with a Customer Journey addon that allows you to see users’ behavior before they make a purchase.

First, you will need to install and activate the MonsterInsights plugin. For more details, see our step-by-step guide on how to install a WordPress plugin.

You will need to be on the ‘Pro’ plan to access the eCommerce and User Journey addon, which we will use for this tutorial. However, there is also a MonsterInsights Lite version you can use for free.

Upon activation, you will see the welcome screen and the setup wizard. Simply click the ‘Launch the Wizard’ button and follow the on-screen instructions.

Launch setup wizard

For detailed instructions, see our article on how to install Google Analytics in WordPress.

MonsterInsights also helps you set up Google Analytics 4 (GA4) property through its Dual Tracking feature. GA4 is the latest Analytics version, and it will soon replace Universal Analytics.

MonsterInsights Dual Tracking GA v4

If you haven’t created a Google Analytics 4 property, then now is the best time. That’s because, after July 1, 2023, Universal Analytics will sunset and won’t track your website data. Setting up GA4 after the sunset date will mean you’ll have to start from scratch and won’t have any historical data for comparison.

For more details, please see our guide on how to switch to Google Analytics 4 in WordPress.

Install the MonsterInsights eCommerce Addon

Once you’ve configured Google Analytics on your website, the next step is to install the eCommerce addon.

You need to visit the Insights » Addons page from your WordPress dashboard and navigate to the ‘eCommerce’ addon. Simply click the ‘Install’ button, and the addon will automatically activate.

Install the eCommerce addon

Enable Enhanced Ecommerce Tracking in Google Analytics

The next step is to enable eCommerce tracking in Google Analytics. E-commerce tracking is not enabled by default in your Google Analytics account, and you will have to manually enable it.

First, you’ll need to head over to your Google Analytics account dashboard and click the Admin option.

Click the admin settings button

Next, you need to click on the ‘Ecommerce Settings’ option.

It is located under the View column.

Ecommerce settings

On the settings page, click the slider under Enable Ecommerce and Enable Enhanced Ecommerce Reporting to turn it on.

Don’t forget to click the ‘Save’ button when you’re done.

Enable ecommerce and enhanced ecommerce reporting

Now, your Google Analytics account will start showing enhanced eCommerce reports for your WooCommerce store.

For more details, please see our guide on how to set up WooCommerce conversion tracking.

Enabling User Journey Addon in MonsterInsights

Now that you’ve set up WooCommerce tracking in Google Analytics, the next step is to enable the MonsterInsights Customer Journey addon.

The addon will allow you to see the steps a customer takes before making a purchase in WooCommerce. Plus, it also shows the time it took at each step, the pages a user visited, and more.

First, you’ll need to go to Insights » Addons from your WordPress admin panel. Next, navigate to the User Journey addon and click the ‘Install’ button.

Install the user journey addon

The addon will automatically activate and start tracking your WooCommerce customer’s journey.

Next, you can go to WooCommerce » Orders from your WordPress dashboard to view the path your customers took when purchasing a product.

WooCommerce order select

After that, click on the order for which you’d like to see the user journey.

On the next screen, you’ll see the path a customer took before buying the product. You get to view the pages they visited, where they clicked, and how much time they spent on a page.

User journey in MonsterInsights

This is really useful information to better understand your customers. You can see which product categories are performing the best and where customers are exiting your store during the purchase process. Using the data, you can then fix these issues and optimize your site for more conversions.

Enabling User ID Tracking in Google Analytics

While MonsterInsights makes it very easy to track customers on your WooCommerce store, it also tracks WordPress ID tracking in Google Analytics.

WordPress ID is a unique ID to identify every user on your website. The user ID is called the ‘Client ID’ in Universal Analytics and the ‘App Instance ID’ in Google Analytics.

Do remember that enhanced eCommerce tracking will enable eCommerce reporting features for your WooCommerce store. However, it does not enable user tracking by default.

Let’s take a look at how you can enable user ID tracking in Universal Analytics and Google Analytics 4.

Enabling Customer Tracking in Universal Analytics

To enable individual customer tracking, you need to visit your Google Analytics account dashboard and open the Admin page.

Click the admin settings button

Now, click on the ‘Tracking info’ link under the Property column to expand the submenu.

After that, you can click the User-ID link that appears below.

Go to user ID settings

On the next page, you’ll have to review and agree to the User-ID policy.

Simply click the ‘I agree to the User-ID Policy’ toggle to turn it on.

Enable the user ID feature

From here, click on the ‘Next step’ button to continue.

Google Analytics will now ask how you would like to configure the user-ID tracking.

Copy the user id code

Since you’ll be using MonsterInsights, there’s no need to set up the user-ID tracking code. The plugin will take care of this for you.

Simply scroll down and click the ‘Next step’ button to continue.

Head to the next step

Next, you will see information about creating a user ID view in Google Analytics.

Go ahead and click the ‘Create’ button.

Create user-id view

After that, you will be asked to enter a ‘Reporting View Name’, which will be used to display User ID reports.

We recommend including UserID in the name, so it is easy to remember which view has UserID tracking enabled.

Enter a reporting view name

There is also an option to select the Reporting Time Zone.

Next, you just need to scroll down to the bottom and click on the ‘Create view’ button to save it.

Select timezone and create view

Enabling Customer Tracking in Google Analytics 4

To start, you’ll need to go to the Admin settings from your GA4 dashboard and click the ‘Reporting Identity’ option.

Open reporting identity settings

On the next screen, you will need to select a way to identify users on your online store.

GA4 uses multiple ways to identify customers. These include user ID, Google signals, device ID, and modeled data. For the sake of this tutorial, we’ll select the ‘Observed’ option and click the ‘Save’ button.

Select observed option in reporting identity

Viewing Customer Tracking Reports in Google Analytics

Now that everything is set up, Google Analytics will now track all your website customers. It will also be able to track logged-in users with their unique WordPress user ID.

View User ID Data in Universal Analytics

To view all your individual customer activity, you can go to your Universal Analytics account and click on the Audience » User Explorer menu.

View user explorer client ID in UA

You will see individual customer reports with a unique ID assigned to all non-logged-in users.

To view customer tracking reports for logged-in users in WooCommerce, you need to click on the Google Analytics logo on the top left corner of the screen.

This will show all your Google Analytics profiles. You will see your website profile and under ‘All website data’ you will see the UserID reporting view you created earlier.

Select UA User ID view

Go ahead and click on the UserID reporting view to load it.

Once it’s loaded, you need to click on the Audience » User Explorer menu. This way, you will see a logged-in customer tracking report where each user is represented by their WordPress user ID on your website.

UA user explorer user ID report

You can click on the user ID to view a customer’s individual tracking data.

For instance, the device category they use, acquisition date, the channel they used to arrive on the online store, and more.

UA user explorer user id details

View User ID Data in Google Analytics 4

In Google Analytics 4, you’ll need to head to the ‘Explore’ tab from the menu on your left.

Under Explorations, you’ll see different report templates. Simply click the existing ‘User explorer’ report.

Select user explorer report

Next, you’ll see the User explorer report in Google Analytics 4.

One thing you can notice is the Client ID will be replaced with the App instance ID.

See user explorer report in ga4

You can click on any of the app instance IDs to view more details.

For example, the report shows the total events that were triggered, the location of the user, the time stamp for each event, and more.

View details of app instance ID

Matching Customer Tracking with Their WordPress Accounts

Now that you’ve identified users in Google Analytics, you can match them with WordPress accounts. This will help you know who this customer is, and how you can create personalized offers, emails, or shopping experiences for them.

First, you need to note down the customer ID you see in your Google Analytics User-ID reporting view.

After that, go to your WordPress website’s admin area and click on the ‘Users’ menu. It will show you a list of all users on your WordPress site.

Next, you can click the ‘Edit’ link below any username in the list.

Edit any user profile

WordPress will now open the user profile for you.

If you look in your browser’s address bar you will ‘user_id’ parameter in the URL.

User ID in URL

Next, you need to replace the value next to user_id with the one you copied from your Google Analytics report and press enter key on your keyboard.

WordPress will now load the user profile associated with that particular User ID. You now have the customer’s name, username, email address, and social media information. You can also track their orders, product views, cart activity, and more.

We hope this article helped you learn how to enable customer tracking in WooCommerce with Google Analytics. You may also want to see our expert pick of the best free WooCommerce plugins for your online store and how to get a free email domain.

If you liked this article, then please subscribe to our YouTube Channel for WordPress video tutorials. You can also find us on Twitter and Facebook.

The post How to Enable Customer Tracking in WooCommerce with Google Analytics first appeared on WPBeginner.

How to Track User Engagement in WordPress with Google Analytics

Are you properly tracking user engagement on your WordPress site? User engagement is one of the most important metric to track because it helps you strategically plan for growth. In this article, we will show you how to track user engagement in WordPress with Google Analytics.

Tracking User Engagement

Why Track User Engagement with Google Analytics

Generally, website owners consider traffic and pageviews as the most important indicators of their website’s performance. They assume that higher traffic will result into more conversions and sales.

While that is true, you can get even better results by tracking and optimizing user engagement.

User engagement shows you what users do when they arrive on your website. It helps you identify patterns of highly engaged user behavior which leads to more conversions and sales.

For example, you may realize that users visiting a specific page are 10X more likely to make a purchase vs any other visitor on your website. You can use this insight to redirect more user’s attention to that page.

To track user engagement on our websites, we use Google Analytics in combination with the popular MonsterInsights plugin.

If you haven’t already signed up for Google Analytics, then you can follow the instructions in our guide on how to install Google Analytics in WordPress.

Next, you need to install and activate the MonsterInsights plugin. We recommend getting the Pro plan of this plugin.

Now most people ask us why install a plugin, when you can just paste the Google Analytics script in the footer of the website.

The reason is that by simply pasting a link in the footer, you miss out on key user engagement data. You won’t know which outbound links are users clicking, which forms have the highest conversions, which products in your online store has the best conversions, which affiliate links or ads are getting the most clicks, etc.

MonsterInsights plugin automatically handles all of that and more for you. It automates the process of pasting different analytics code and event tracking scripts in the footer, so you don’t have to deal with the hassle of code and configuration.

Once you have setup Google Analytics with MonsterInsights, let’s take a look at how to track different user engagement metrics for your site.

1. Tracking Your Most Popular Content

The first thing you want to figure out is which blog posts and pages are the most popular amongst your users? These are the pages and posts on your website getting the most traffic.

Figuring out what your users like on your site can help you plan a content strategy that expands on what’s already working.

MonsterInsights makes it really simple. You just need to visit Insights » Reports page in your WordPress admin area.

You will find your most popular content under the ‘Top posts and pages’ section.

Most popular content

Next to it, you’ll also see your top traffic sources. This gives you a general idea of where your traffic is coming from.

On most websites, 90% of their traffic goes to 10% of the top pages. Once you find these top pages, you can optimize them for maximum conversions by adding content upgrades or targeted lead magnets on these posts.

We find that by adding content upgrades can help you boost your conversions by as high as 845%. Our founder Syed Balkhi has a blog post sharing the case study results.

2. Tracking How Users Engage with Forms on Your Website

Most websites rely on contact forms to collect user leads and feedback. Sadly most contact form plugins don’t give you accurate tracking and conversions data.

MonsterInsights lets you leverage Google Analytics’ events tracking feature to see how many times your forms are viewed and submitted.

To enable forms tracking, you need to visit Insights » Addons page. On this page, you will need to install and activate the Forms addon.

Install Forms Addon for MonsterInsights

Once you have activated the Forms addon, MonsterInsights will automatically start tracking all forms on your website.

It automatically works with popular contact form plugins like WPForms, Ninja Forms, Formidable, and others. MonsterInsights also track your website comment form, user registration forms, and more.

To see how your forms are doing, you will need to visit your Google Analytics account. In the Google Analytics dashboard, click on Behavior » Events » Overview page and then under ‘Event Category’ click on ‘form’.

Form tracking in Google Analytics

Next, you need to click on the ‘Event Label’ to see stats for different forms on your website.

Sort by form label

From there, you can click on any form to see your impressions and conversions.

Form impressions and conversions

3. Tracking Ecommerce Stores in Google Analytics

Google Analytics offer many features specifically for eCommerce websites. However these features are not turned on by default, and most users don’t even know that they exist.

Enhanced Ecommerce tracking lets you see shopping behavior, checkout behavior, product lists performance, sales performance, and so much more. The best part is that you can combine this data with your overall website traffic to gather better insights.

MonsterInsights eCommerce tracking for WordPress works with both WooCommerce and Easy Digital Downloads.

First, you will need to enable eCommerce tracking in Google Analytics. Head over to your Google Analytics account and switch to the admin page.

Google Analytics admin

Next, you need to click on the ‘Ecommerce Settings’.

Ecommerce settings

Now click the slider under the first step, Enable Ecommerce, to turn it on. You need to click on the Next Step button to continue.

Enable eCommerce tracking

We also recommend that you turn on the Enhanced Ecommerce settings.

Enhanced ecommerce

Once you are done, click on the submit button to store your settings.

Next, you need to switch to your WordPress admin area. Go to Insights » Addons page and install and activate the ‘Ecommerce Addon’.

MonsterInsights ecommerce addon

After that you can head over to Insights » Settings page and click on the tracking tab. Next, click on the Ecommerce section to continue.

Enhanced eCommerce tracking

On this tab, you need to check the box next to ‘Use Enhanced eCommerce’ and then click on ‘Save changes’ button to store your settings.

To view your ecommerce tracking reports, you need to visit your Google Analytics account and go to Conversions » Ecommerce page.

Ecommerce tracking

Here are a few powerful reports you get by enabling Enhanced eCommerce tracking on your store:

  • Shopping Behavior
  • Checkout Behavior
  • Product Lists Performance
  • Sales Performance

For more details on each of these reports, see this article on adding Google Analytics enhanced ecommerce to your website.

4. Tracking Who’s Clicking on Your Ads with Google Analytics

Many websites rely on ads to make money online while creating useful content. Advertising platforms like Google AdSense provide you some reports on ad impressions and clicks.

However, with MonsterInsights and Google Analytics you can actually see how users interact with ads on your site. You’ll be able to:

  • Track how many clicks each ad is receiving
  • Discover which ads your audience are ignoring
  • Identify the most effective ad placements
  • And more…

First you will need to visit Insights » Addons page on your WordPress site. Now install and activate the ‘Ads Tracking’ addon.

Ads tracking addon

Next, you need to integrate Google Analytics to your Google Adsense account.

Head over to your Google Analytics dashboard and click on the ‘Admin’ button located at the bottom left corner of the screen.

Switch to the Google Analytics Admin section

On the admin page, click on ‘AdSense linking’ under the property column.

Linking AdSense

Next, you need to click the +New AdSense Link button and then select AdSense property that you want to link with your Analytics property.

Select and link AdSense property

After that, click on the continue button to move forward.

Next, you need to select the Analytics view in which you want your AdSense data to be available. Once you select that click Enable Link and then click Done.

Adsense link setup

After you have configured everything in Google Analytics, you need to head over to your WordPress site and go to Insights » Settings page. Switch to the ‘Tracking’ tab and then click on the Ads section.

You need to Enable Google Adsense tracking in MonsterInsights.

Enable Adsense tracking in Google Analytics with MonsterInsights

To view your AdSense performance reports, go to your Google Analytics account and visit Behavior » Publisher page.

Adsense reports

The overview report gives you a high-level summary of key AdSense metrics. You can also find the Publisher Pages and Publisher Referrers report in Google Analytics.

5. Tracking Your Affiliate Links in Google Analytics

Most affiliate marketers use plugins to manage and cloak affiliate links. This makes your affiliate links look more user-friendly. Here is an example of a cloaked affiliate link:

http://example.com/recommends/product-name/

MonsterInsights allows you to track those affiliate links in Google Analytics. This helps you figure out which affiliate products are doing well, which pages are generating more affiliate revenue, and more.

To enable Affiliate link tracking, you need to visit Insights » Settings page. Switch to the tracking tab and then click on ‘Affiliate links’ section.

Affiliate link tracking in MonsterInsights

First you need to enter the slug you use for your affiliate links. After that, you need to provide a label you would like to use for those links in your Google Analytics reports.

Next, click on the save changes button to store your settings.

MonsterInsights lets you track affiliate clicks as events in Google Analytics.

To find an overview of your affiliate link clicks report, you can go to Behavior » Events » Overview page. Your affiliate link clicks will be shown with the label you chose earlier.

Affiliate link reports

For more detailed instructions, see our guide on how to track outbound links in WordPress.

Note: most WordPress affiliate plugins may promise to give you link stats. We have found most of those stats to be highly inaccurate because most WordPress based analytics tracking breaks due to caching. Google Analytics is the only way to properly track analytics.

6. Tracking Bounce Rate in Google Analytics

Bounce rate is the percentage of users who land on your website and decide to leave without going to a second page.

To check your website’s bounce rate, you need to login to your Google Analytics dashboard and then go to Audience » Overview page.

Checking bounce rate in Google Analytics

Want to see an individual page’s bounce rate? Head over to Behavior » Site Content » All Pages to see all pages from your website.

Checking bounce rate for individual pages

You can sort the pages by higher or lower bounce rate to see which pages are not performing.

Higher bounce rate indicates that you were unable to convince the user to visit other pages. Users can leave your website by clicking on the back button in their browser, clicking on an outgoing link, or by closing the window.

Bounce rates are completely normal. However higher bounce rates indicate problems with your website affecting user experience and causing low conversions / engagement.

What should be the acceptable bounce rate for your website?

Here is a general breakdown of bounce rate from good to bad.

An excellent bounce rate is between 30% and 50%. However, most websites fall between 50% and 70% bounce rate which is an acceptable average. Bounce rates higher than 70% are considered poor for most websites.

Not all websites are the same which means average bounce rate vary depending on different kind of websites.

Take a look at the chart below to see an average bounce rate by industry:

Bounce rate average by industry

For more on this topic, see this article with tips to reduce bounce rate on your website.

7. Tracking Time Spent on Your Website

Another indicator that shows user engagement is session duration or time users spend on your site.

If users are abandoning your site without spending enough time to look at it, then something is wrong that needs to be fixed.

Google Analytics can show you the average time users spend on your site per session. Simply go to Audience » Overview page, and you will see it among other stats.

Average time spend per session

It can also show you how much time users spend when viewing individual pages. You can check it by visiting Behavior » Site Content » All Pages page in Google Analytics.

Time spent on individual pages

To learn how to improve session durations, take a look at this article with practical tips to increase time users spend on your website.

8. Tracking Page Views Per Visit with Google Analytics

Page views per visit is another great indicator of how engaged your users are. More page views per session also increases time users spend on your site and decreases bounce rates.

Google Analytics will show you the total page views for a given period on Audience » Overview page. However, to track user engagement you also want to see page views per session.

Tracking page views in Google Analytics

You can also break down page views per session by source and channel by visiting Acquisation » All Traffic » Channels page.

Pages per session by channel

This helps you see which traffic channels are converting the best for your website, so you can focus your efforts on areas that are actually driving results.

We hope this article helped you track user engagement in WordPress with Google Analytics. You may also want to see our ultimate step by step WordPress SEO guide and email marketing 101 guide for beginners.

If you liked this article, then please subscribe to our YouTube Channel for WordPress video tutorials. You can also find us on Twitter and Facebook.

The post How to Track User Engagement in WordPress with Google Analytics appeared first on WPBeginner.