Category Archives: WordPress Plugins

MailOptin Review: Flexible Opt-in Forms To Build Your Email List On WordPress

If you want to build a long-term asset for your blog or website, you should build an email list. And if you want to do that, you need a way to display opt-in forms on your WordPress site to actually convince visitors to subscribe. MailOptin helps you do that without leaving your WordPress dashboard. And ... Read moreMailOptin Review: Flexible Opt-in Forms To Build Your Email List On WordPress

The post MailOptin Review: Flexible Opt-in Forms To Build Your Email List On WordPress appeared first on Learn WordPress with WPLift.

Metorik Review: Awesome WooCommerce Analytics And Reports

If you run an eCommerce store, you need data. It tells you who your most valuable customers are, what products perform the best, how your vital signs are doing, and lots more. More than needing data, you need that data to be in a format that you can quickly access and actually apply to making ... Read moreMetorik Review: Awesome WooCommerce Analytics And Reports

The post Metorik Review: Awesome WooCommerce Analytics And Reports appeared first on Learn WordPress with WPLift.

(Really) Marvellous Metrics Review: Analytics Made Easy

In this (Really) Marvellous Metrics review we’ll be taking a look at this new WordPress plugin that has been created to help you easily track and understand your page web analytics. Whether you run a humble blog, an expanding eCommerce store, or a multinational business site, (Really) Marvellous Metrics could be just what you need ... Read more(Really) Marvellous Metrics Review: Analytics Made Easy

The post (Really) Marvellous Metrics Review: Analytics Made Easy appeared first on Learn WordPress with WPLift.

How to Easily Import and Export WordPress Users

Do you want to import and export WordPress users from one website to another? This could be really helpful when you are merging multiple sites and want to automatically shift all users from existing websites. In this article, we will share how you can easily import and export users in WordPress.

Import and Export Users in WordPress

Why or When You May Need to Import and Export Users in WordPress?

While there are several use-cases for importing and exporting WordPress users, the most common scenarios when you need to import and export users are:

  • When you purchase a website and want to merge the content and user base.
  • When you want to consolidate two sites and merge their content and user base.
  • When you want to import all users into an email list or your CRM.

On large multi-author sites or a membership site in WordPress, each user profile has tons of useful data (like profile photo, bio information, social links, and more).

While you can surely ask them to recreate their profile, it’s inconvenient and not an ideal user experience.

Let’s take a look at how you can easily import and export users from one WordPress site to another.

Exporting Users in WordPress

First thing you need to do is install and activate the Import Export WordPress Users plugin. For more details, see our step by step guide on how to install a WordPress plugin.

Upon activation, you need to visit Users » User Import Export page and scroll down to the export section.

User Export

On this page, you need to select a user role to export from your website, select fields that you want to export with the user, and more.

By default, all user fields will be exported. If you don’t want to export a specific item, then you can simply uncheck it from the columns section.

After selecting the settings, you need to click on the Export button. It will save a CSV export file in your computer.

You can use this file to import users into another WordPress site.

Importing Users in WordPress

This step will also require the same Import Export WordPress Users plugin that we used above to export users. Make sure that you have this plugin installed and activated on the site where you want to import users.

Next, you need to visit Users » User Import Export page and click on the Import Users button.

Import Users

On this page, first you need to click on the Browse button and then select the CSV file you want to import. After selecting the CSV file, you need to click the Upload file and import button.

Upload File

Once done, you will see a success message with details on how many users imported, status message, and more details on the process.

User Import

The plugin will not only import users, it will also automatically assign them correct user role and fill in other profile settings.

We hope this article helped you learn how to easily import and export WordPress users. You may also want to see our guide on how to track user engagement in WordPress.

If you liked this article, then please subscribe to our YouTube Channel for WordPress video tutorials. You can also find us on Twitter and Facebook.

The post How to Easily Import and Export WordPress Users appeared first on WPBeginner.

9 Best WordPress Facebook Plugins to Grow Your Blog

Ae you looking for the best Facebook plugins for WordPress? Facebook is the world’s largest social media platform with more than 1 billion active users. In this article, we have hand-picked the best WordPress Facebook plugins to help you grow your blog and get more traffic.

Best Facebook plugins for WordPress

1. Shared Counts

Shared Counts

Shared Counts is one of the best social media plugins for WordPress. It allows you to easily add social sharing buttons to your WordPress posts including the Facebook share button.

It is highly optimized for speed and performance and can accurately show shares count for Facebook, Twitter, LinkedIn, and more. It comes with multiple button styles which allows you to choose the one that looks best on your site.

2. Custom Facebook Feed

Custom Facebook Feed

Custom Facebook Feed allows you to display your posts from a Facebook page on your WordPress website. This custom Facebook feed is responsive, SEO friendly, and customizable. You can even fetch multiple feeds from different Facebook pages and display them anywhere on your website using a shortcode.

You can create a new page for your Facebook feed or display it in your blog’s sidebar. The plugin is optimized for speed and makes it super easy to change colors / style of your feeds from the WordPress admin area. For detailed instructions, see our article on how to create a custom Facebook feed in WordPress.

3. Pixel Cat – Facebook Pixel

Pixel Cat - Facebook Pixel

Pixel Cat Facebook Pixel plugin allows you to add your Facebook retargeting pixel to your WordPress site. This pixel allows you to show customized ads to Facebook users who have visited your website. To learn more, see our article on how to install Facebook retargeting pixel in WordPress.

Aside from making it easy to install the Facebook pixel in WordPress, this plugin also helps you track WooCommerce customers and show them better ads in their Facebook feeds.

4. Facebook Reviews

Facebook Reviews

Facebook Reviews plugin allows you to display Facebook page reviews on your WordPress website. It comes with an easy to use widget that allows you to connect your website to your Facebook page and display Facebook users reviews.

This helps you add social proof to your website and build trust in your brand. The free version works fine, but you will need the pro version to display reviews in Schema.org rich snippets format.

5. Facebook Widget

Facebook Widget

Facebook Widget plugin allows you to easily add a Facebook page plugin to your blog’s sidebar. It is extremely easy to use and comes with a shortcode that you can use to display the Facebook Like box anywhere on your website.

It comes with the same customization options as the default Facebook page plugin. You can show or hide profile pics, page cover, customize width / height, and select language.

6. Nextend Social Connect

Nextend Social Login

Nextend Social Connect plugin allows users to register and login on your website using their social profiles. It supports login with Facebook, Google, and Twitter.

It works seamlessly with the default WordPress login and registration forms, so users have the option to use Facebook or use the default signup method. Once registered, users can disconnect their social account at any time by visiting their user profile page inside the admin area.

7. AccessPress Facebook Auto Post

As the name suggests, AccessPress Facebook Auto post allows you to automatically share new articles on your Facebook page or profile. Upon activation, you will need to connect to your profile and authorize your website.

It allows you to choose which content you want to share: posts, pages, and custom post types. You can even disable sharing for a single item before publishing it. For detailed setup instructions, see our article on how to automatically post to Facebook from WordPress.

8. WP Embed Facebook

WP Embed Facebook

WP Embed Facebook plugin makes it easier to embed Facebook events, pages, profiles, and Facebook videos on your WordPress website.

You can also use it to add a Facebook like or share button. The plugin comes with a handy shortcode that you can use to embed different items anywhere on your site. It also comes with really good documentation to help you make the most out of it.

9. Yoast SEO

Yoast SEO

Yoast SEO is the complete WordPress SEO plugin on the market. Apart from adding SEO meta tags, it does so many other things to improve your website including social features.

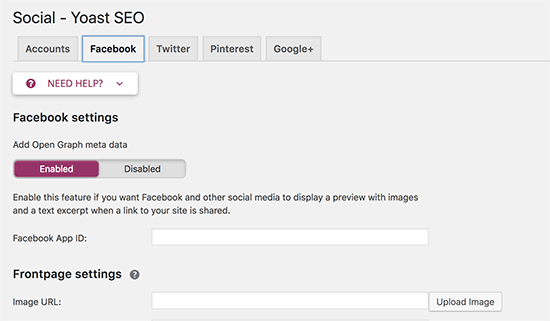
You can use it to fix incorrect Facebook thumbnail issue and automatically add Facebook Open Graph meta tags to every page on your website. You can also let search engines discover social media profiles associated with your website.

That’s all, we hope this article helped you discover the best WordPress Facebook plugins to grow your blog. You may also want to see these actionable tips to drive traffic to your WordPress site.

If you liked this article, then please subscribe to our YouTube Channel for WordPress video tutorials. You can also find us on Twitter and Facebook.

The post 9 Best WordPress Facebook Plugins to Grow Your Blog appeared first on WPBeginner.
WooCommerce Order Form: Increase Your Conversion Rates

When your default layout doesn’t fit with how your customers browse and buy products, a WooCommerce order form could be exactly what you need. For many online stores, adding a WooCommerce bulk order form is one of the most efficient ways to improve the customer experience, increase conversion rates and boost sales. Shops with large product ... Read moreWooCommerce Order Form: Increase Your Conversion Rates

The post WooCommerce Order Form: Increase Your Conversion Rates appeared first on Learn WordPress with WPLift.

6 Best Product Review Plugins for WordPress

Are you looking for the best product review plugins for WordPress? If you regularly add detailed product reviews on your website, then you can use a product review plugin to make them more SEO friendly. In this article, we have hand-picked the best product review plugins for WordPress.

Best product review plugins for WordPress

Why Use Product Review Plugin in WordPress?

What do you do when you want to buy something? If you are like most people, then you probably check out product reviews to compare different options.

That’s why there are so many popular reviews websites like Yelp, TripAdvisor, Rotten Tomatoes, and more. Even Amazon, world’s largest online store features product reviews so prominently.

Many WordPress site owners write product reviews to make money online. Some get paid directly by the company for the review while others use affiliate marketing to earn revenue.

You can write a product review as a blog post. However, a plain blog post does not use product review format supported by search engines. This means your article will not be highlighted in search results as a review.

SEO Reviews Snippet

For better SEO, you need to write your reviews with schema.org rich snippets format. A product review plugin helps you easily write search engine friendly reviews that also look great on your website.

Let’s take a look at some of the best product review plugins for WordPress.

1. WP Product Review Pro

WP Product Review

WP Product Review is the best WordPress product review plugin. It comes with a detailed settings section allowing you to choose how you want to manage and display reviews on your website.

Adding a product review is quite easy. Simply select the product review option when writing a blog post and the plugin will show you all settings to write your review. You can break down your review into features, add images, pros and cons, and more.

It comes with sidebar widgets allowing you to showcase your reviews. You can also use it to collect user submitted reviews or allow your users to add their own rating and reviews in the comments. All reviews are displayed in schema.org rich snippet format for maximum SEO benefit.

For detailed instructions, see our guide on how to create a niche review website in WordPress.

2. All in One Schema Rich Snippets

All in One Schema Rich Snippets

As we mentioned earlier, your reviews need to be in a proper SEO friendly format. All in one Schema Rich Snippets plugin allows you to write different types of posts using the rich snippets format including product reviews.

Simply select ‘Item Review’ from a drop-down menu when writing a blog post, and the plugin will show review options like reviewer name, product name, and star rating. It will display this information below your blog post with the correct SEO friendly markup.

The plugin can also be used to add articles, products, recipes, software and more. For detailed instructions see our article on how to add rich snippets in WordPress.

3. WP Review Pro

WP Review

WP Review is another excellent option to add product reviews in WordPress. It is beginner friendly and quite easy to use. Upon activation, simply write a new post and select the review type.

It supports three types of review ratings stars, points, and percentage. You can also add different ratings for individual features if you want. It also supports user ratings which simply allows users to submit their own ratings for a product.

It also comes with styling options located under Settings » WP Review page. From here you can choose your own colors for the review box to match your theme colors.

4. Rich Reviews

Rich Reviews

Rich Reviews is a simple free plugin that allows you to add reviews of your own products, services, or website. You can also allow your users to submit reviews.

It uses shortcodes to display reviews, and you can display a review anywhere on your website including posts, pages, and sidebar widgets.

If you are collecting user-submitted reviews, then this plugin allows you to manually approve each review before publishing it. The plugin’s settings panel comes with detailed instructions on how to use it.

5. WP Customer Reviews

WP Customer Reviews

WP Customer Reviews plugin allows you to collect customers reviews as well as create your own product reviews. Upon activation, simply edit a blog post where you want to add a product review and check the reviews option.

Next, you need to go to the Reviews » All Reviews page and click on the add new button. After that, you can select the post and write your review. The plugin also allows you to enable user submitted reviews which you can then approve and publish to display on your website.

This plugin also allows you to customize the review form shown to users and comes with a how to use page with detailed instructions.

6. Site Reviews

Site Reviews

Site Reviews allows you to collect customer reviews for your products, services, or local business. It comes with a simple settings page allowing you to control how you want to gather reviews, and how you want to display them. You can customize the review form and display it anywhere on your website using a shortcode.

You can also display reviews using the shortcode. The plugin adds an easy to use shortcode inserter on the post edit screen to manually display reviews, review form, and review summary.

We hope this article helped you find the best product review plugins for WordPress. You may also want to see our list of the best testimonial plugins for WordPress.

If you liked this article, then please subscribe to our YouTube Channel for WordPress video tutorials. You can also find us on Twitter and Facebook.

The post 6 Best Product Review Plugins for WordPress appeared first on WPBeginner.

7 Best WordPress Donation Plugins in 2018: One-Off Donations To Fundraising

Need to accept donations on your WordPress site? Then you need one of these WordPress donation plugins! No matter if you’re a non-profit looking to run full-on fundraising campaigns or a blogger looking for a simple solution to accept donations, you can probably find a plugin that works for you on this list. You’ll even ... Read more7 Best WordPress Donation Plugins in 2018: One-Off Donations To Fundraising

The post 7 Best WordPress Donation Plugins in 2018: One-Off Donations To Fundraising appeared first on Learn WordPress with WPLift.

How to Create a Referral Program in WordPress

Do you want to create a referral program in WordPress? Referral programs are a great way to get more people to promote your products to a larger audience. In this article, we will show you how to easily create a referral program in WordPress and get more customers.

Creating referral program in WordPress

Why Create a Referral Program in WordPress?

Referral program or affiliate program allows you to get more people to help you sell your products and services. In return, you pay them a small commission on each sale they make. For more details, see our ultimate affiliate marketing guide to see how it works.

In simple terms, it is like building your own sales army without paying them a salary.

These affiliate marketers use tools and plugins to create marketing content. They make money online by referring their users to right products and services.

To manage a referral or affiliate program, you will need a tool that can manage your affiliate program. It will allow affiliate marketers to join your referral program. It will also help you track sales and traffic sent by each affiliate partner.

Why Use AffiliateWP to a Create Referral Program in WordPress?

For this tutorial, we will be using AffiliateWP plugin to create a referral program in WordPress. It is one of the best affiliate management plugins for WordPress.

Like everything else in life, AffiliateWP has it’s own pros and cons that you should consider.

Pros of Using AffiliateWP

Following are some of the benefits of using AffiliateWP to manage your referral program in WordPress.

  • Very easy to use and blends in your WordPress site like a native app.
  • Very cost effective with plans starting from $99/year to $499 for a lifetime license.
  • Integrates with WooCommerce stores, Easy Digital Downloads, PayPal, Stripe, and more
  • Large number of addons including free, paid, and third-party add-ons to extend AffiliateWP
  • Real-time affiliate tracking with detailed reports for you and your affiliate partners

Cons of Using AffiliateWP

Here are some of the disadvantages of using AffiliateWP to manage your referral program.

  • It has limited reach compared to affiliate networks which already have thousands of affiliate marketers actively looking for products to promote
  • It does not come with advanced fraud detection features that are offered by popular affiliate networks.
  • There is no automatic payout system, and you will have to manually send payments each month
  • Does not calculate taxes and 1099 forms for payouts. As a business owner, you will have to manage it on your own.
  • It is less convenient for affiliate partners. They will have to create an account and login to view their reports, compared to affiliate networks where they can see all their earnings at one place.

A good alternative to AffiliateWP would be ShareASale, which is a large affiliate network with thousands of skilled affiliate marketers actively looking for new products to recommend.

For a more detailed comparison, you may want to see this article on setting up your own affiliate program by Syed Balkhi (Founder and CEO of WPBeginner).

With that being said, let’s take a look at how to create a referral program in WordPress using AffiliateWP.

Creating a Referral Program in WordPress

First thing you need to do is install and activate the AffiliateWP plugin. For more details, see our step by step guide on how to install a WordPress plugin.

Upon activation, you need to visit Affiliates » Settings page to enter your license key. You can find this information under your account on AffiliateWP website.

Enter your license key

After activating your license key, you need to select a page to be used for Affiliate Area. AffiliateWP automatically creates one for you, but if you want to use a different page, then you can select it here.

Next, you need to choose the terms of service page. You can check out affiliate program terms pages on other websites to create one for your own site. After creating the page you can select it here.

After that, you need to review other settings on the page and set them up based on your own referral program policies.

Don’t forget to click on the ‘Save Changes’ button to store your settings.

Next, you need to switch to the integrations tab on the Settings page. From here you need to select the integrations you want to enable. AffiliateWP supports most popular eCommerce, membership, contact form, and LMS plugins.

AffiliateWP integrations

Click on the save changes button and then switch to ‘Emails’ tab on the Settings page.

AffiliateWP allows you to edit emails sent out to your affiliates. You can also upload your business logo, create your own email templates, and choose the email address you want to use to send out affiliate emails.

Email notifications

Note: If you are unable to receive email notifications, then follow our guide on how to fix WordPess not sending email issue.

Lastly, switch to the Misc tab on the settings page to set up advanced settings for your affiliate program. The first option on the page is to allow affiliates to register themselves. You can check this if you want affiliates to be able to sign up for your referral program.

Misc settings

Next, you would also want to enable reCAPTCHA to prevent bots from registering as affiliates.

You will need to carefully review each setting and change them as needed. Don’t forget to click on the save changes button to store your settings.

Adding Links to Your Referral Program

Now that you have set up your referral program, the next step is to add links to it. For example, if you have enabled affiliate registration, then you may want to add a link to affiliate area so that interested marketers can register themselves.

Simply go to Appearance » Menus page and add your affiliate area page to a navigation menu. For detailed instructions, see our beginner’s guide to adding navigation menus in WordPress.

Add link to affiliate area

Clicking on the link will take users to the affiliate area where they can register to join as a new affiliate, or login to their account to see their reports.

Affiliate area

Managing Your Referral Program in AffiliateWP

AffiliateWP comes with powerful tools to manage your affiliates, view reports, and effectively run your affiliate program without leaving WordPress.

To view affiliates that have joined your referral program, simply go to Affiliates » Affiliates page.

Affiliates

On this page, you can see a list of all your affiliate partners, their earnings, unpaid earnings, referral visits, and more. You can edit any affiliate account individually.

To view each sale made through a referral partner, you need to visit Affiliates » Referrals page. Here you will see all referral sales, affiliate partner, amount, and more. You can also click on ‘Reject’ link if you suspect a referral to be fraudulent.

Referrals

Viewing Your Referral Program Reports in AffiliateWP

Reporting is crucial to run a successful referral program, and AffiliateWP comes with powerful reporting features. Head over to Affiliates » Affiliates page for a full overview.

Reports overview

You can filter the reporting period by time and specific affiliate partner name. You can also view reports for affiliates, referral visits, and campaigns.

Sending Payments to Your Affiliates

Unfortunately, AffiliateWP doesn’t come with automatic payouts, which means you will have to manually send payments. AffiliateWP makes it easy to manage your payouts.

Depending on when and how often you want to pay your referral partners, you can head over to the Affiliates » Referrals page and click on the ‘Generate Payout File’ button.

Generate payout file

This will generate a payout file which is compatible with PayPal’s mass payment system. The file also works with Skrill and other payment services that support mass payment feature. It contains the amount and payment email addresses for all your unpaid referrals.

We hope this article helped you learn how to create a referral program in WordPress. You may also want to see our ultimate step by step WordPress SEO guide for beginners.

If you liked this article, then please subscribe to our YouTube Channel for WordPress video tutorials. You can also find us on Twitter and Facebook.

The post How to Create a Referral Program in WordPress appeared first on WPBeginner.

How to Create Interactive Images in WordPress

Do you want to create an interactive image for your WordPress blog? An interactive image allows you to highlight, link, and animate certain areas of your image. In this article, we will show you how to create interactive images in WordPress.

Create Interactive Images in WordPress

What is an Interactive Image?

An interactive image has hotspot areas, highlights, links, colors, and more. It’s different from a simple image that you upload in WordPress. Interactive images are eye-catching and attract users to see details of the image. You can add description on different parts of an image, add links to pages, highlight sections, and more.

Description Demo for Interactive Images

In this image, you can see the description of fruits on mouse over to different bars. You can use these interactive images to boost user engagement and time spent on site.

Let’s take a look on how you can draw attention of your visitors with interactive images.

Creating Interactive Images in WordPress

First thing you need to do is install and activate the Draw Attention plugin. For more details, see our step by step guide on how to install a WordPress plugin.

Upon activation, you’ll see a new custom post type in your WordPress admin area. You need to go to the Draw Attention » Add New page to create an interactive image.

Add New Image

Start by adding a title for this new interactive image, so you can easily remember it. On this page, you can create interactive design on new or previously uploaded images. You can add a new image by clicking on the upload image icon, or you can select an image from your WordPress media library.

Upload or Select Image

Next, you need to click on Publish button.

After publishing, the plugin allows you to edit the image and highlight specific areas, add colors, links, draw hotspot areas, and more. You can scroll down to the Hotspot Areas section and expand the clickable area to preview image.

Simply move your mouse and draw clickable areas on the image. You can easily select the hotspot areas and expand them to create a selection.

Draw Hotspot Areas

After drawing the hotspot area, you need to scroll down to the Action dropdown and select an action for the selected area on image. If you choose Show More Info, then you can simply add a description to explain the hotspot area on the image. You can also add a link on the selected area by using the ‘Go to URL’ option.

Add Action

You can also manage general settings and highlight styling for action link, action text, info background and more. These settings can help in making your image more interactive.

General Settings

Next you need to click on the Update button and copy the shortcode to add it in your WordPress post or page.

Copy Shortcodes

The plugin allows you to create as many interactive images as you need using your previously uploaded or new images.

Clickable Interactive Image

Import and Export Interactive Images

If you are working on multiple sites and want to import / export interactive images, then it requires the same Draw Attention plugin on both sites.

On the first site, you need to visit Draw Attention » Import / Export page and check mark the images that you want to export. Next, click on the Generate Export Code button and copy the code.

Export Code Interactive Images

After that you need to go to the next website and make sure that you have Draw Attention plugin activated. Next, you need to go to Draw Attention » Import / Export page from WordPress admin and paste the code in import field.

Paste Code Interactive Images

Go ahead and click on the Import button and your images will be imported will all the interactive details that you added previously.

These interactive images are good for WordPress SEO and attract more visitors on your site. However, it’s recommended to compress images before you upload them to improve site performance.

We hope this article helped you learn how to create interactive images in WordPress. You may also want to check our guide on how to lazy load images in WordPress.

If you liked this article, then please subscribe to our YouTube Channel for WordPress video tutorials. You can also find us on Twitter and Facebook.

The post How to Create Interactive Images in WordPress appeared first on WPBeginner.