Do you want to create compact archives on your WordPress website?
If you have been blogging for a few years, then the list of your posts might have become too long to fit in your WordPress sidebar. This will make your sidebar look cluttered which won’t be good for your site presentation
In this article, we’ll show you how to easily create compact archives in WordPress.
Why Do You Need Compact Archives in WordPress?
Adding an archive in WordPress allows you to easily display your previously published content on your website for users to go through.
By default, WordPress offers an ‘Archives’ block and widget that can be added to the sidebar of your WordPress blog.
However, the ‘Archives’ block only allows you to display your archives as a long list or a dropdown menu.
A list will make your site look cluttered while a dropdown can be easily overlooked by users as it isn’t as noticeable.
By creating compact archives, you can easily display your archives in the WordPress sidebar without taking up much space. You can also display them on your about page or even create a dedicated Archives section.
That being said, let’s take a look at how to easily add compact archives in WordPress.
Now, the plugin offers three styles to display compact archives on your website.
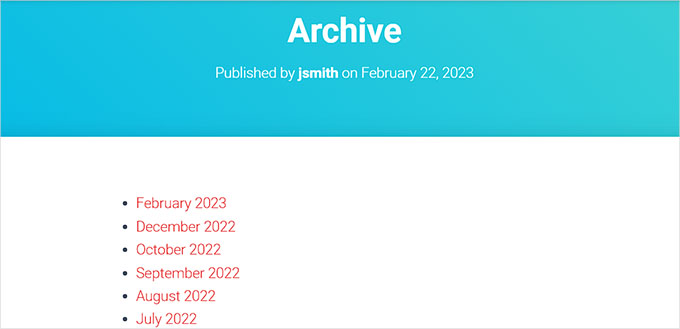
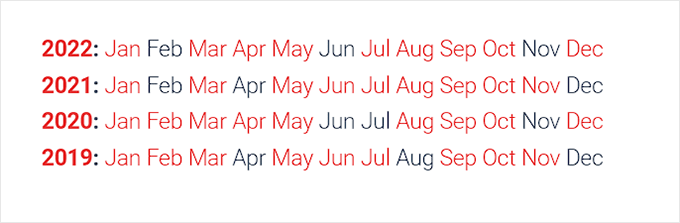
Style 1. Relaxed three-letter month initials
Style 2. Compact Monthly Initials
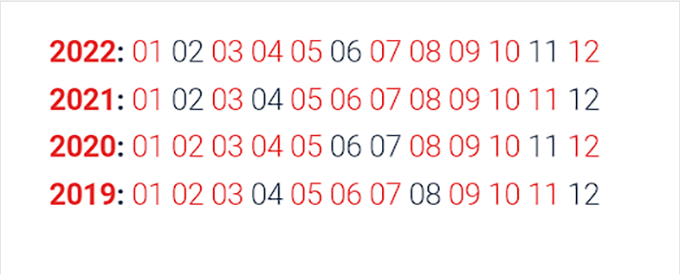
Style 3. Numeric Block
There are multiple ways to easily display compact archives on your website.
In this tutorial, we will be showing you all four methods and you can choose the one that you like the most.
Method 1. Add Compact Archives in WordPress Posts or Pages
It is super easy to add compact archives to your WordPress page or post because the plugin comes with an easy-to-use block that you can add to your post or page.
For this tutorial, we will be creating a new page for compact archives.
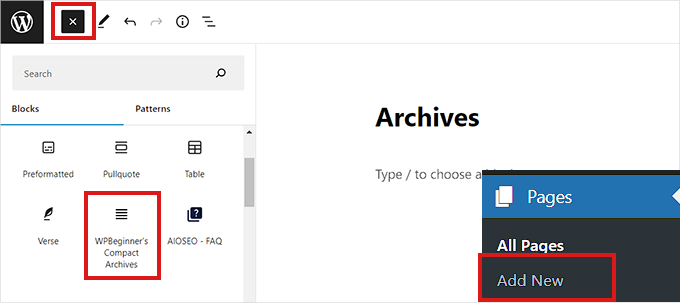
Simply head over to the Pages » Add New page from the admin sidebar. Once a new page opens up in the block editor, you can start by typing a name for your page.
Next, you need to click the ‘Add Block’ (+) button at the top and search for the ‘WPBeginner’s Compact Archvies’ block.
Upon locating it, simply click on the block to add it to your page.
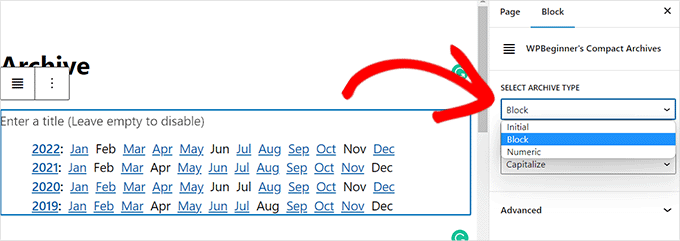
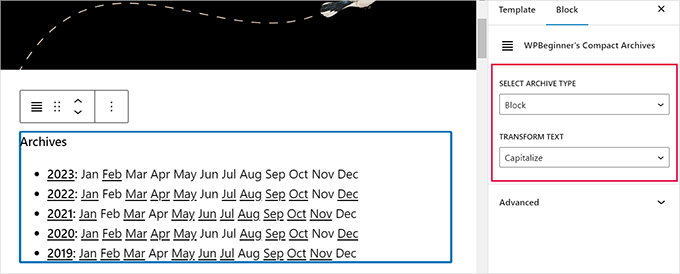
Next, you need to choose a style for your archives from the Block Settings panel on the right corner of the screen.
Simply choose a style of your liking from the dropdown menu below the ‘Select Archive Type’ option.
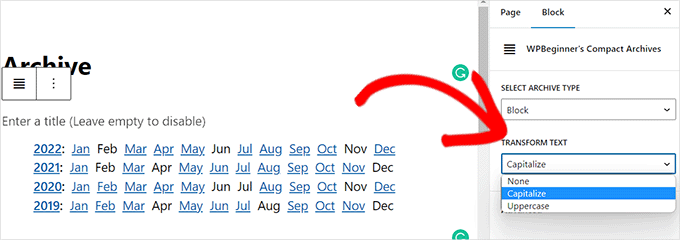
You can also choose if you want your archive text to be capitalized or Uppercase.
For that, you need to open the dropdown menu below the ‘Transform Text’ option.
Once you’re satisfied with your choice, simply click the ‘Publish’ or ‘Update’ button at the top.
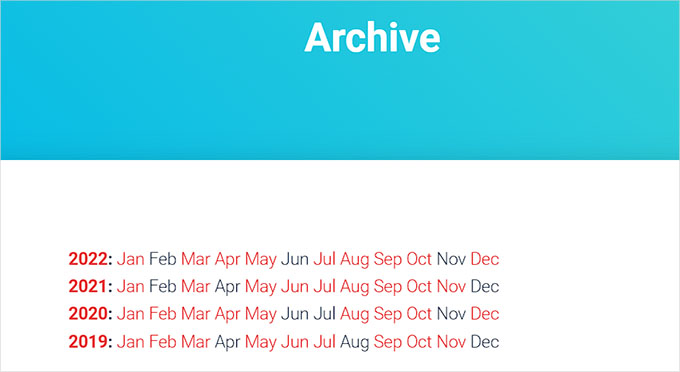
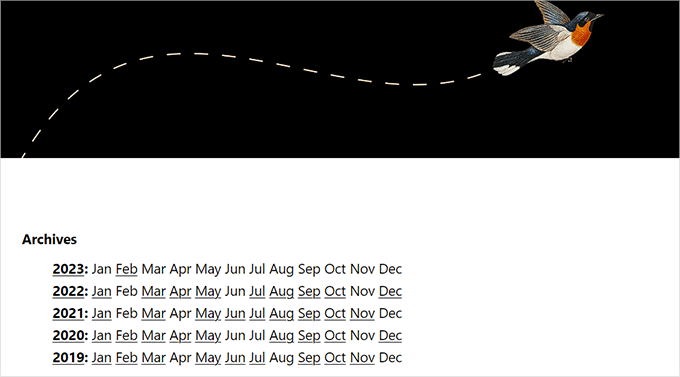
This is how your archives page will look.
Method 2. Add Compact Archives as a Widget
You can also display your archive as a widget on your website.
Adding the Compact Archives Block in Full Site Editor
If you’re using a block-based theme on your website, then you’ll have to add the ‘ WPBeginners’ Compact Archives’ block using the full site editor.
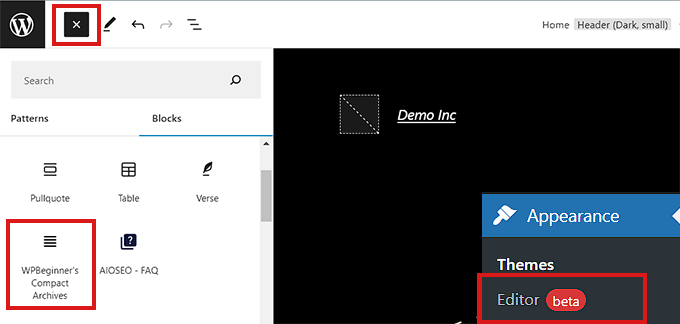
First, you need to visit the Appearance » Editor page from the admin sidebar to launch the FSE.
From here, you need to click the ‘Add Block’ (+) button on the top-left corner of the screen to open up the block menu.
Next, you need to simply locate and add the ‘WPBeginner’s Compact Archvies’ block to your preferred place on the website.
Once you add the block, you can configure its’ style and text settings from the Block Settings panel on the right.
Finally, don’t forget to click on the ‘Save’ button at the top to store your settings.’
Your compact archives will look like this.
Adding the Compact Archives Block Using Widgets
If you’re not using a block-based theme, then this method is for you.
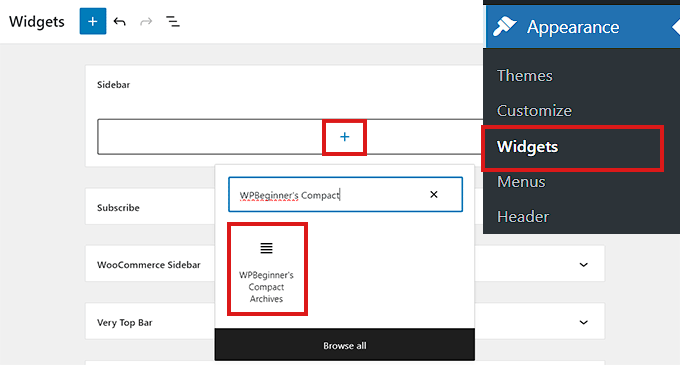
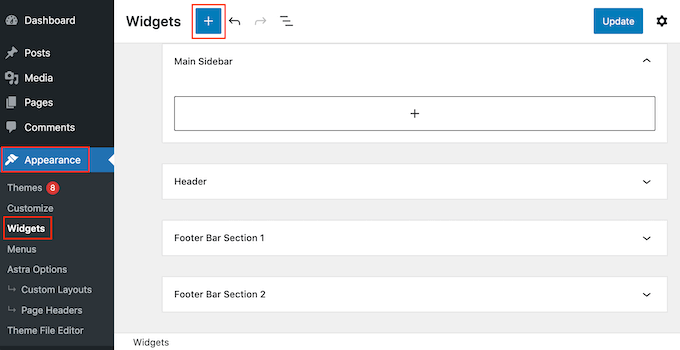
First, you need to visit the Appearance » Widgets page from the admin sidebar.
Once there, simply click the ‘Sidebar’ tab to expand it.
Now, you need to click the ‘Add Block’ (+) button in the sidebar tab.
This will open up the ‘Widget Block Menu’ where you need to search for the ‘WPBeginner’s Compact Archive’ block.
Upon locating it, simply click the block to add it in the sidebar section.
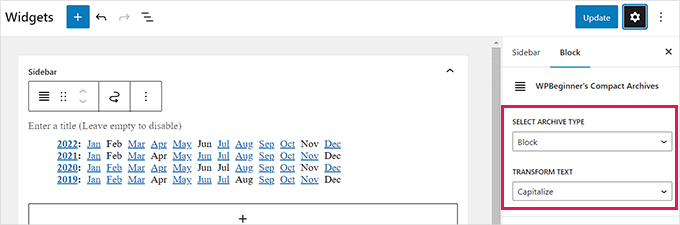
Once the ‘Compact Archives’ block is added you can change the style and text of your archive by configuring the settings from the Block Settings panel on the right.
Don’t forget to click the ‘Update’ button at the top to save your changes.
This is how your website sidebar will look upon adding the ‘Compact Archvies’ block.
Method 3. Displaying Compact Archives in Template Files
For example, $style == 'initial' will display only month name initials and should fit right inside a sidebar. Using$style == 'block', will fit the main column of a page. Using $style == 'numeric', will display numeric months.
Method 4. Add Compact Archives to Your HTML Sitemap
First, you will need to install and activate the All in One SEO for WordPress plugin. For more details see our article on how to install a WordPress plugin.
All in One SEO is the best WordPress SEO plugin on the market. It allows you to easily optimize your website for search engines.
It also comes with an HTML sitemap feature that allows you to easily add an HTML sitemap to your WordPress site.
It is a premium plugin but you can also use the free version called All in One SEO Lite. The free version has fewer features but it includes HTML sitemaps.
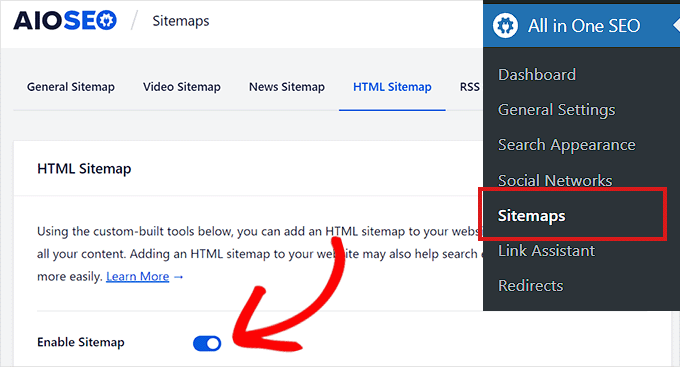
Once finished, you now need to visit the All in One SEO » Sitemaps page from the admin sidebar.
From here, you need to click on the ‘HTML Sitemap’ tab and make sure that the ‘Enable Sitemap’ toggle is turned on.
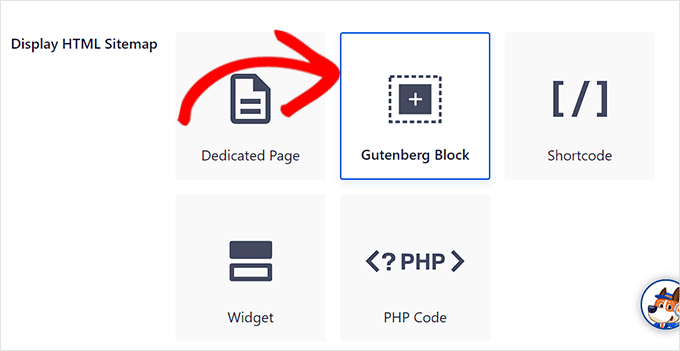
Next, you need to choose how you want to display your HTML sitemap.
For this tutorial, we will be choosing the ‘Gutenberg Block’ option.
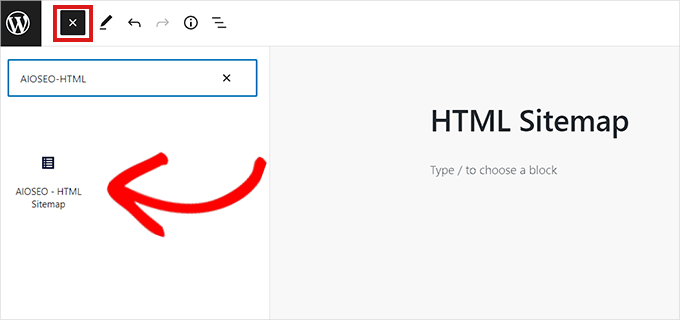
If you choose this method, then you’ll have to add the “AIOSEO – HTML Sitemap” block to any page where you wish to display your HTML sitemap.
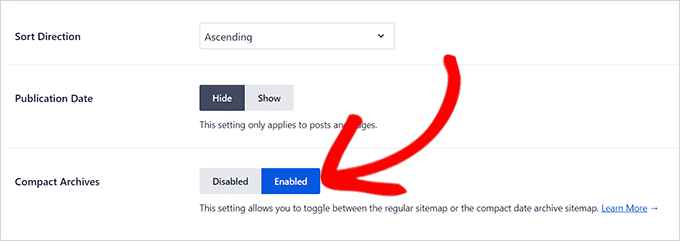
Next, you need to scroll down to the ‘Compact Archives’ option in the ‘HTML Sitemap Settings’ section.
Here, you need to simply toggle the ‘Compact Archives’ switch to ‘Enabled’.
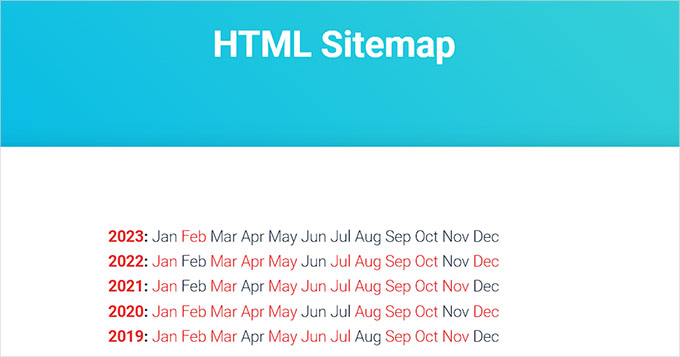
Now your HTML sitemap will be displayed in a compact date archive format.
Finally, don’t forget to click on the ‘Save Changes’ button to store your settings.
Next, open up a page where you want to display the HTML sitemap from the admin sidebar.
From here, simply click on the ‘Add Block’ (+) button at the top and then add the ‘AIOSEO-HTML Sitemap’ block to your page.
Finally, don’t forget to click the ‘Publish’ or ‘Update’ button to save your changes.
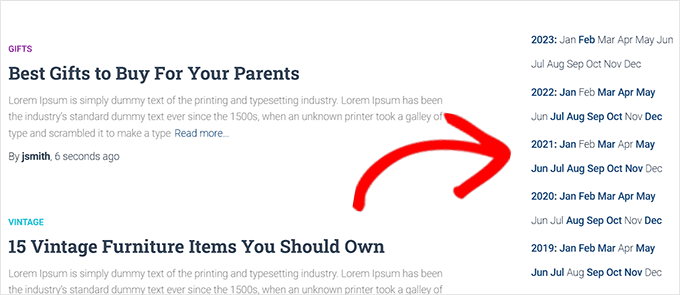
Your compact archives HTML Sitemap will look like this.
We hope this article helped you learn how to easily create compact archives in WordPress. You may also want to see our guide on how to easily create an email newsletter in WordPress and our top picks of the best social media plugins to help promote your website.
If you liked this article, then please subscribe to our YouTube Channel for WordPress video tutorials. You can also find us on Twitter and Facebook.
Are you looking to enable or activate plugins from the WordPress database?
If you are unable to access your WordPress admin area and need to activate a plugin to restore your access, then you can do that from the WordPress database.
In this article, we will show you how to easily activate your WordPress plugins using the database.
When Should You Activate WordPress Plugins Using Database
However in some situations, a website owner may need to activate certain plugins to restore access to their WordPress website.
For example, let’s assume an error is stopping you from accessing your WordPress dashboard, and you have found a plugin that can fix that error.
Luckily, WordPress stores the active plugins information in your WordPress database. This means you can manually enter this information directly in the database and tell WordPress to activate a plugin.
The only condition is that the plugin must be installed on your WordPress site. Which means that it should be present in the plugins folder on your WordPress website.
With that being said, let’s see how you can easily enable/activate a plugin using the database.
Step 1. Find Your Database Name Using the Hosting Control Panel
To activate your WordPress plugins using phpMyAdmin, first, you need to find out your WordPress database’s name.
Now, to find the name of your database, you need to log in to your web hosting dashboard. For this tutorial, we will be using Bluehost.
If you are using a different hosting company, then your WordPress hosting dashboard may look slightly different.
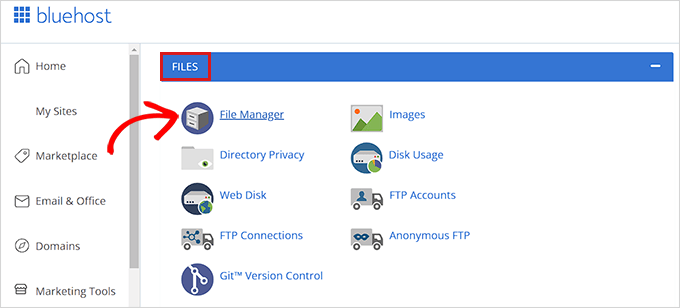
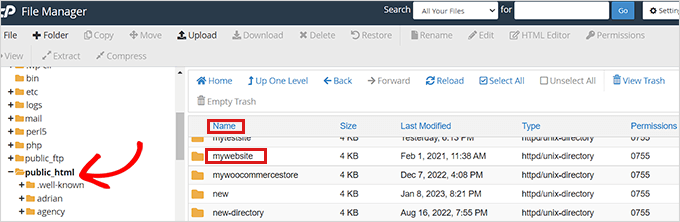
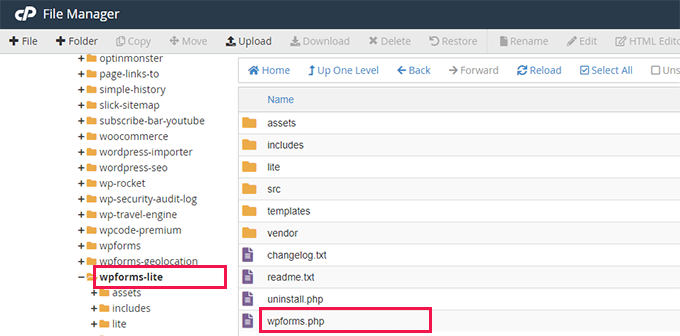
Once you are on the cPanel, scroll down to the ‘Files’ section and click the ‘File Manager’ option.
This will open up the File Manager in a new window. Here you simply need to locate and click the public_html folder from the left column.
This will open up all the files that are stored in the public_html folder. Now, you simply need to locate and click the folder with your site’s name on it present under the ‘Name’ column.
Some users may instead see their WordPress files and folders installed inside public_html folder.
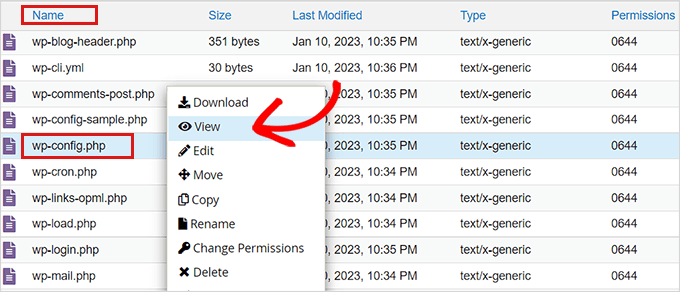
After you have opened up your WordPress site’s file, locate the wp-config.php file under the ‘Name’ section and right-click on it.
This will open up a menu where you need to select the ‘View’ option.
This will open up the wp-config.php file in a new window where you can locate your database details.
We recommend that you copy and paste your database details including username and password into a notepad on your computer.
Now you’ve successfully found your database’s name, let’s move to our next step.
Step 2. Locate Active Plugins Option via PhpMyAdmin
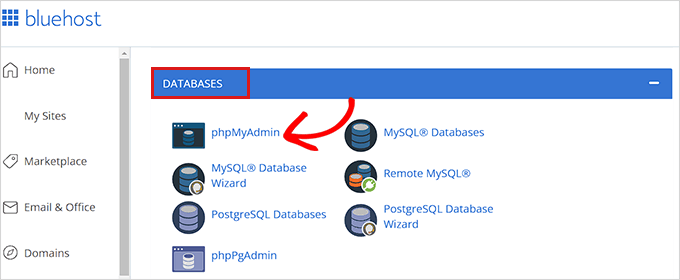
After you have found out the name of your database, you need to go back to your WordPress hosting control panel.
Once there, scroll down to the ‘Databases’ section and click the ‘phpMyAdmin’ option.
This will launch the phpMyAdmin app in a new browser tab.
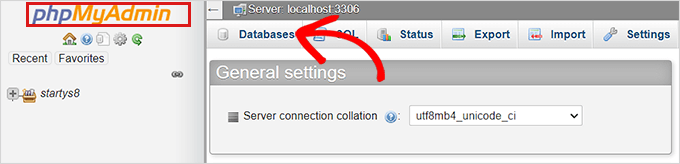
Note: Before you make any kind of changes, please make sure to create a complete backup of your database. It will come in handy if anything goes wrong with the process.
Next, you simply need to click the ‘Database’ tab from the navigation menu present at the top of the page.
Now, simply locate your WordPress database and click on the browse button to expand it.
This will show your WordPress database tables.
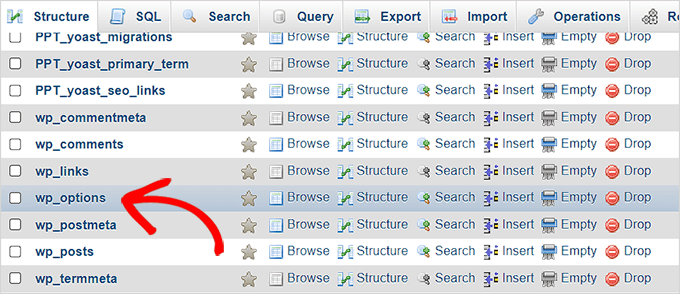
Here, you will simply need to locate wp_options table and click browse next to it.
Note: By default, WordPress uses wp_ as the prefix for table names. Your WordPress database table may have a different table prefix.
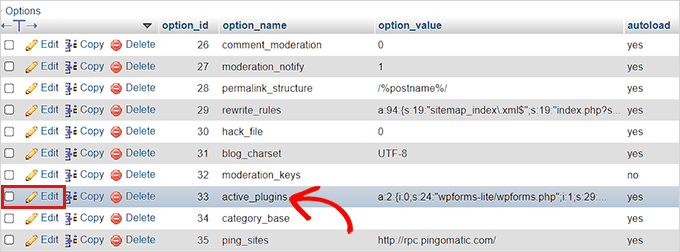
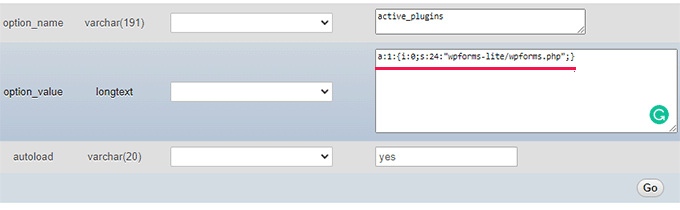
Inside the wp_options table, you’ll need to find the row where option_name is set toactive_plugins.
After that, click on the Edit link next to it.
This will open up a box where you can manually enter details to activate a plugin.
Step 3. Activate a Plugin Using phpMyAdmin
WordPress stores the active plugins information in a special format so that it can be programatically accessed by the software.
In order to tell WordPress which plugins to activate, we’ll need to use that same format.
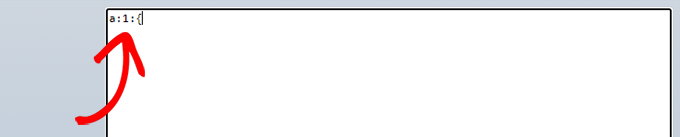
First, we’ll start by entering the option_value as a:1: and then open up the curly bracket ({).
We are entering this value as 1 because we only want to activate one plugin. You have to change the value to the number of plugins you plan on activating.
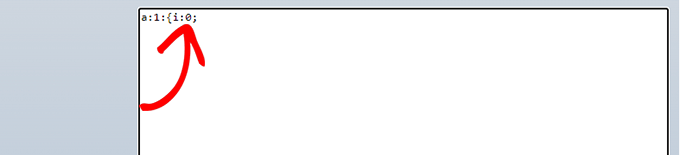
Next, we will be entering i:0; after the curly bracket. Here we are essentially assigning a serial number to our plugin.
Remember to always assign numbers starting from 0 instead of 1.
Next, we will be entering the number of characters present in the plugin’s name and the php file name of the plugin that we’re about to activate.
For that, we will type s:24: in the box. Keep in mind that the number of characters will differ for each plugin based on the characters in the plugin directory and file name.
For instance, we are activating WPForms in this tutorial which has 24 characters in its name including the file name of the plugin as stored in our file manager.
Next, you just need to type the plugin’s directory name. You can find it by visiting the /wp-content/plugins/ folder using the File Manager app.
Don’t forget to add quotation marks before typing the plugin’s directory name.
After the /, you need to enter the plugin’s file name. This is usually the file with similar name inside the plugin folder.
Now, go back to phpMyAdmin and type the name of the plugin and then close the quotation marks.
After that, simply add a semi-colon (;) and close the curly brackets (}). The final value in this example would look like this:
a:1:{i:0;s:24:"wpforms-lite/wpforms.php";}
This is how it will look once you’re done.
Next, simply click the ‘Go’ button to execute the command.
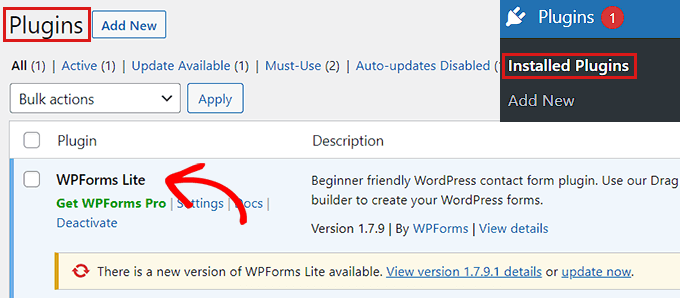
Now go visit your WordPress dashboard and head over to Plugins » Installed Plugins.
Your plugin has been successfully activated.
Now let’s say you want to activate two more plugins.
First you will need to change the number of plugins. After you will adjust each entry for the plugin that you want to activate.
Note: We have added line breaks here to make the code look more readable. You need to make sure that there are no line breaks or spaces in your code. Otherwise, it wouldn’t work.
Many of our readers ask us how to write better content for SEO. Some ask whether or not they should focus on Yoast SEO’s green light.
Well, when it comes to SEO content optimization, we use a different SEO writing assistant. It helps us optimize our content for SEO, so we can rank higher in search engines.
In this article, we will show you how to use the SEO Writing Assistant in WordPress to improve SEO and create better content for your website.
What is SEO Writing Assistant?
The SEO Writing Assistant is a content optimization tool created by Semrush, one of the best SEO tools on the market. It allows you to check your content in real-time for SEO suggestions and improve the overall SEO score of the content on your WordPress website.
Here is how it works:
You enter your focus keywords to generate content templates based on the top 10 results for that phrase.
You instantly get semantically-related keywords to include in your article.
You improve your content with a readability score based on rival results.
You optimize your article headline for SEO.
You adjust the article length based on the average length of top results.
You check for plagiarism without leaving your website.
You check the content’s tone to make it sure sounds natural and casual.
It is an extremely useful tool and can help you improve the SEO as well as writing style across your website. If you manage a multi-author site, then it allows authors to follow the same SEO best practices across all content.
Having said that, let’s take a look at how to use the SEO Writing Assistant to improve your SEO and get more search traffic to your website.
Setting Up Semrush’s SEO Writing Assistant in WordPress
The first thing you need to do is visit the Semrush SEO Writing Assistant website and click on ‘Create new template’ button.
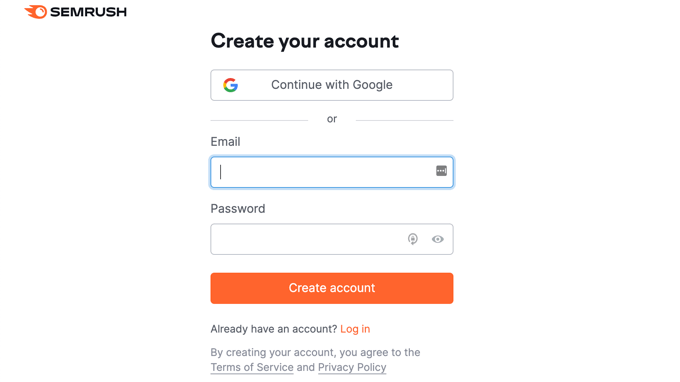
You will be now asked to log in or create a free account.
Semrush offers a basic free account with just 1 free content recommendation.
You will need to sign up for or upgrade to a paid Semrush subscription to get all features. This is totally worth it, and a free 7-day trial is available for paid plans.
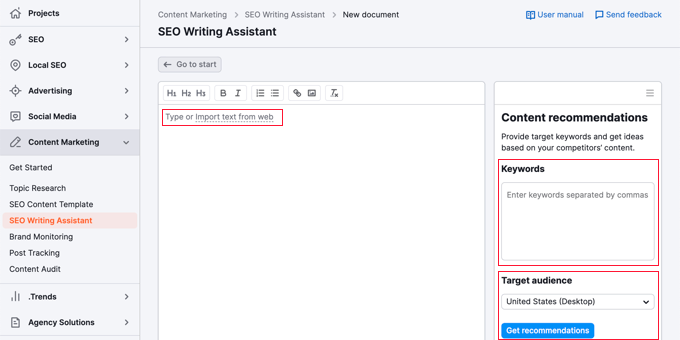
Once you log in, you will be able to use the SEO Writing Assistant from Semrush’s website.
You can type your content or import it from the web, provide target keywords, and select the language and location of your target audience.
When you press the ‘Get recommendations’ button, Semrush will analyze the content and make suggestions.
However, you can also use the SEO Writing Assistant inside your WordPress dashboard. You simply need to connect the SEO Writing Assistant tool to your WordPress site.
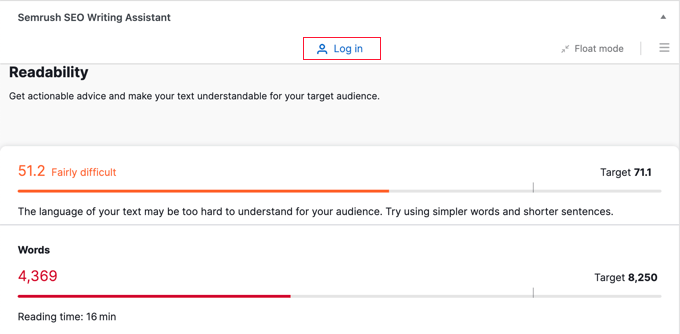
Upon activation, you need to edit an article that you want to optimize for SEO. On the post edit screen, scroll down until you see the new ‘Semrush SEO Writing Assistant’ section below the content editor.
It will show you basic readability and SEO score. To get the full picture, you need to click the ‘Log in’ link and sign in to your Semrush account.
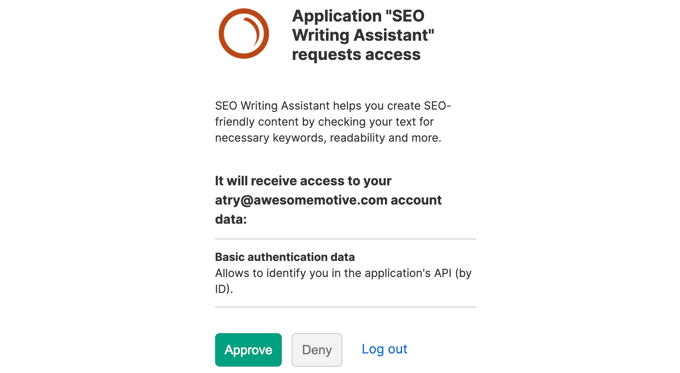
Once signed in, you’ll be asked to give permission. Click the ‘Approve’ button to continue.
Now that you have connected the plugin to your Semrush account, you can generate SEO recommendations for our article.
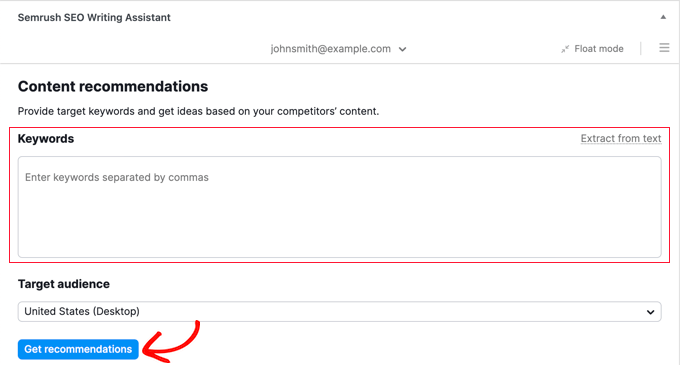
You can enter your target keywords by typing them into the ‘Keywords’ field or by clicking the ‘Extract from text’ button. If you need help finding the right keywords, then see our beginner’s guide on how to do keyword research for your WordPress site.
After that, you should click the ‘Get recommendations’ button and Semrush will analyze your content.
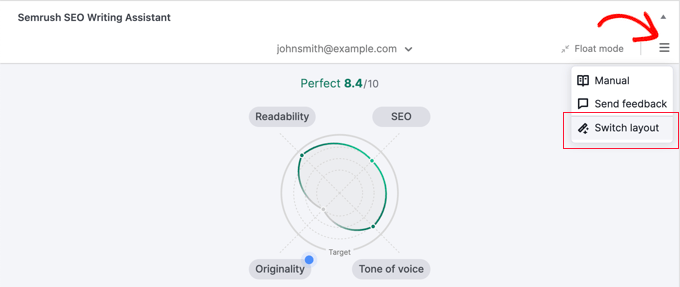
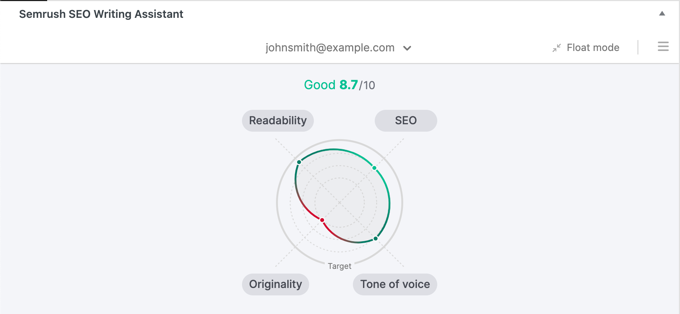
It will start by giving the post an overall score.
By default, the following sections offer simple summaries. You can switch to a more detailed report by clicking the hamburger icon at the top right of the Semrush SEO Writing Assistant, and then selecting ‘Switch layout’ from the menu.
Checking Target Keywords Using Semrush SEO Writing Assistant
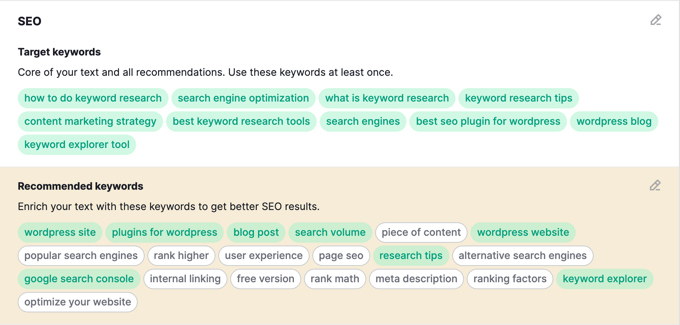
You can now scroll down to the SEO report. Semrush will check the top 10 results for the given keywords to generate a list of semantically related keywords that you can include in your content.
Keywords already included in your article will appear with a green background. You can go ahead and start adding missing keywords to your existing content where applicable or expanding your content to add new sections when necessary.
As you write, the tool will also adjust the readability and article length scores to match the average scores of top results.
Checking Tone of Voice Using Semrush SEO Writing Assistant
All SEO experts and marketers advise using a casual tone for all your articles. Search engines consider this conversational tone to be more engaging and useful for most audiences.
Now the problem is that sometimes it becomes harder to maintain a casual tone throughout the article.
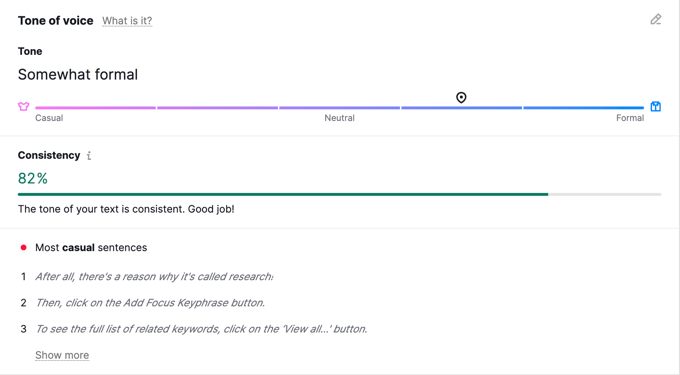
SEO Writing Assistant comes with a ‘Tone of Voice’ checker. This AI-powered tool checks your content’s tone and gives it a score ranging from formal to casual.
Most articles fall somewhere in between, so don’t worry if it says your article has a neutral tone.
You will also see a list of your most casual sentences. You can consider rewriting these so they are less casual.
Checking Internal LinksUsing Semrush SEO Writing Assistant
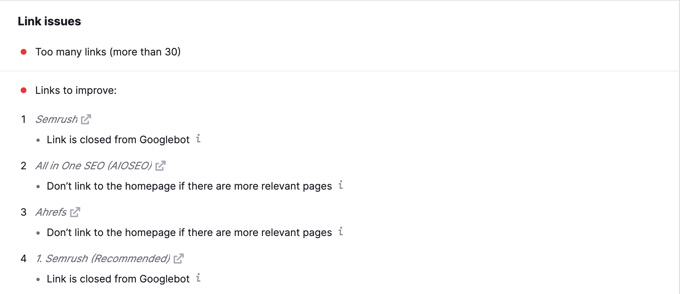
Links play a crucial role in SEO and the SEO Writing Assistant helps you keep track of links inside your article.
It will let you know if your article does not have an optimal number of internal links. It will also check for external links and links to your homepage.
This tool comes in handy if you have other authors working on articles. Editors can quickly see if the article includes internal links to other posts on your website.
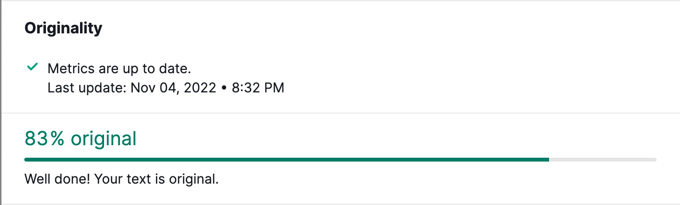
Checking Plagiarism in WordPress with SEO Writing Assistant
If you are hiring writers to contribute articles to your blog, then you’ll need to make sure that the articles they are submitting are original content.
Normally, editors and website owners use plagiarism checkers like Grammarly, CopyScape, or Google to see if an article is original.
The SEO Writing Assistant makes this easier with a built-in Plagiarism Checker tool.
The downside is that even with the paid plans, you can only perform a limited number of checks.
If you need more, then you can buy additional checks from your subscription page on the Semrush dashboard.
Getting a Perfect SEO Score for Your Article
As you implement suggestions provided by the SEO Writing Assistant tool, your overall score will improve as well.
The overall score bar takes into account all the parameters and suggestions shown by the plugin. You need to make sure that each line on the chart turns green for better SEO rankings.
However, sometimes the plugin may suggest LSI keywords that may not fit in your content. You can safely ignore them instead of stuffing them into your article.
Remember that while these SEO tools provide recommendations, you know your audience better than these tools ever can. Keep your users in mind and make sure that they find your content useful and engaging.
Tracking Your SEO Performance in WordPress
Once you have started using SEO Writing Assistant for a while, you may want to track how it is affecting your website’s positions in search.
You may also want to keep an eye on your top content using Google Analytics. The best way to do this is by using MonsterInsights. It brings your Google Analytics reports into WordPress and displays them in a human-readable format.
Are you tired of your WordPress site’s automated emails ending up in users’ spam folders or not being delivered at all? Have you experienced issues with sending and receiving emails from your site? If so, you’re not alone. Many website owners struggle with these problems, which can be frustrating and time-consuming to resolve. But what [...]
By default, WordPress comes with a lazy load feature, which delays downloads for images and other media to improve page load speed.
However, for some websites, it may affect user experience by not displaying images and media right away.
In this article, we’ll show you how to easily disable lazy load in WordPress both using a code method as well as a plugin method.
What is Lazy Loading?
WordPress first introduced lazy loading images in WordPress 5.5. Later it extended the lazy load feature to iframes embeds (e.g. YouTube videos, Spotify, and other embeds).
A faster website is not just good for users, but it is also good for SEO. Search engines like Google consider speed as an important ranking factor.
Apart from images and embeds, you can also easily lazy load comments and Gravatars to further improve page load speed.
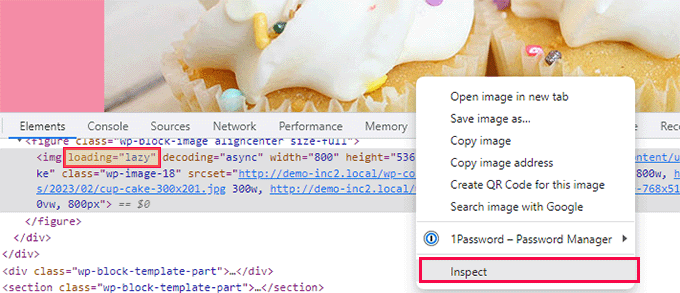
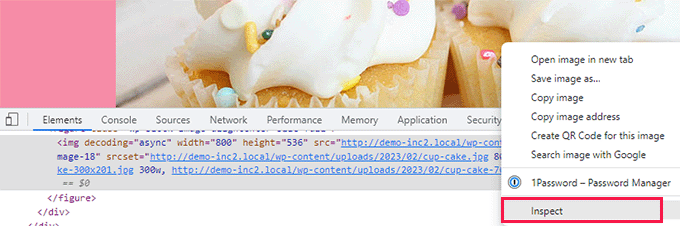
Lazy loading can be seen in action by right-clicking on an image and selecting the Inspect tool in your browser.
This will split your browser screen and show you the HTML source code. From here, you’ll be able to see the “loading=lazy” attribute added to the image.
Now normally, we don’t recommend disabling lazy load due to its overall benefits for your WordPress website. Turning it off can result in slower website speed, lower conversion rates, and lower SEO rankings.
However, sometimes lazy loading can affect the user experience for some websites.
For instance, if you run a photography website where images are the most significant aspect of your content, then lazy loading them may ruin the user experience for your customers.
In other cases, you might be using a different lazy loading solution and just want to turn off the default WordPress lazy load.
That being said, let’s see how you can easily disable lazy load in WordPress.
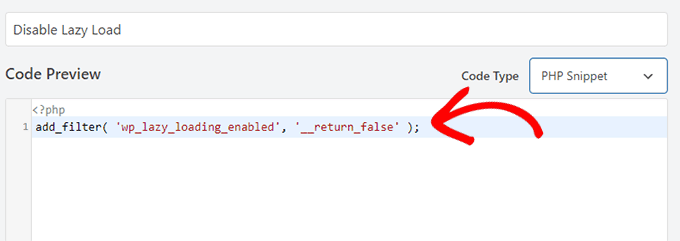
This is how the code will look after it is pasted in the ‘Code Preview’ box.
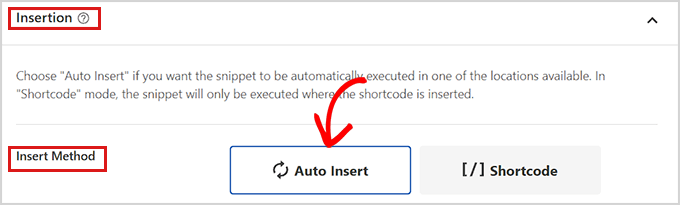
After adding the code, scroll down to the ‘Insertion’ section.
Here, simply choose ‘Auto Insert’ as the insertion mode. This will ensure that your custom code is automatically executed everywhere on your website once you activate the snippet.
Next, you need to scroll to the top of the page and simply toggle the ‘Inactive’ switch to ‘Active’.
After that, don’t forget to click the ‘Save Snippet’ button to save and execute your custom snippet.
Once activated, this custom code snippet will disable the lazy loading feature on your WordPress website.
You can test by right-clicking on an image and selecting Inspect from the browser menu.
In the HTML code for the image, the loading=lazy attribute will now disappear.
Method 2. Disable Lazy Load in WordPress Using a Plugin
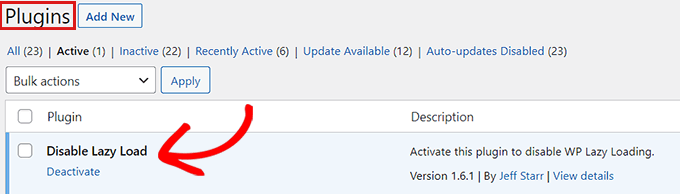
If you don’t want to add code to your site, then you can use the Disable Lazy Load plugin.
The plugin works out of the box and does not require any configuration. Once activated, it will automatically disable the lazy load feature on your site.
Do you want to add a YouTube video gallery on your WordPress website?
You can add YouTube videos to WordPress blog posts using the built-in Embed block. However, you can’t easily arrange these videos in a nice gallery layout.
In this article, we will share the best YouTube video gallery plugins for WordPress so you can show your videos in an organized and eye-catching way.
This plugin allows you to hand-pick specific videos from your account, or automatically show all the latest videos from your YouTube channel. You can even combine multiple YouTube channels into a single feed.
Smash Balloon has a ready-made gallery layout so you can organize your videos with the click of a button. After creating a gallery, you can control exactly how the videos look by choosing whether to show the YouTube description, title, comments, the total number of likes, and much more.
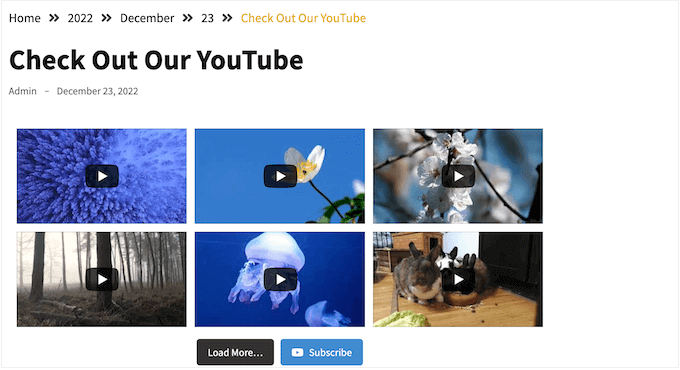
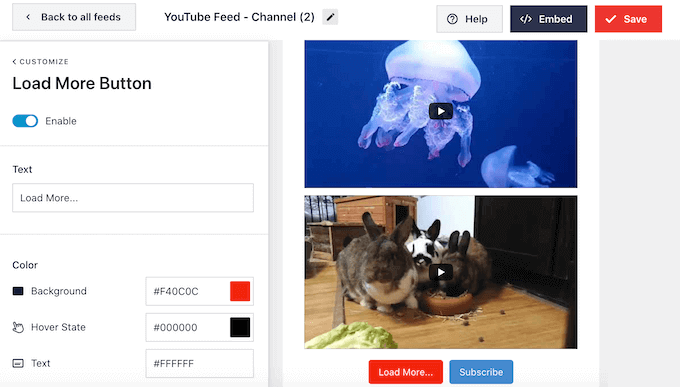
You can even encourage visitors to join your YouTube channel, by adding a ‘Subscribe’ button to the gallery.
By default, the gallery layout also has a ‘Load More’ button so visitors can scroll through your entire YouTube channel without leaving your website.
When a visitor clicks on a video, Smash Balloon will start playing it in an embedded video player. In this way, you can get more YouTube views and engagement without driving visitors away from your website.
By default, the player shows related videos when the playback finishes, or the visitor pauses the video. Smash Balloon lets you replace these suggested videos with a custom call to action, so you can promote a specific post, page, or even the most popular WooCommerce products from your online store.
You can also use Smash Balloon to embed YouTube playlists, favorites, and livestreams on your WordPress website.
The best part about Smash Balloon is that it doesn’t slow down your site. The plugin’s built-in YouTube caching feature will make sure your site always loads fast, which is great for SEO.
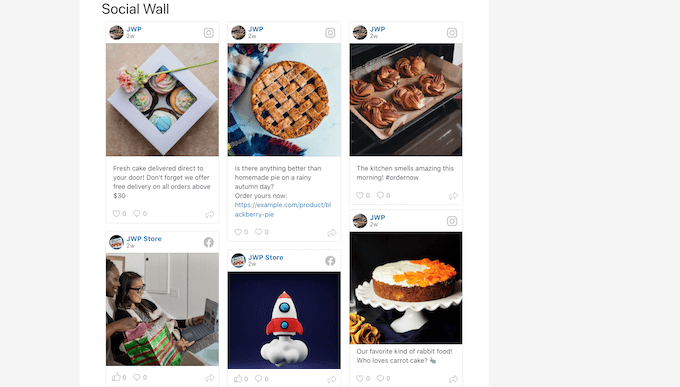
The other nice thing about Smash Balloon is that you can combine social content from Instagram, Facebook, Twitter, and YouTube into a single social wall. If you’re serious about growing your online presence, then we highly recommend the Smash Balloon All Access Bundle, which gives you access to the social wall feature.
Note: If you’re just getting started or have a limited budget, then there’s also a free version of the YouTube feed plugin. Although this plugin is missing the more advanced features, it still has everything you need to embed YouTube videos on your WordPress website.
Pricing: Smash Balloon YouTube Feed Pro licenses start at $49 per year. If you want to embed Facebook, Twitter, Instagram, and YouTube content on your WordPress website, then you can grab the All Access Bundle for $299 per year.
However, there’s also an Envira Gallery Videos Addon that allows you to create a YouTube gallery. Simply enter the URL for each YouTube video and then specify the thumbnail that you want to show in the gallery. The Videos Addon will then fetch the video automatically.
After adding all your videos, Envira Gallery lets you fine-tune the playback experience. You can make the video autoplay, open it fullscreen by default, hide the playback controls, and much more.
Envira Gallery can also embed entire YouTube playlists, although you’ll need to get a YouTube API from the Google Cloud Console and then add it to the plugin’s settings first.
As well as YouTube, Envira Gallery supports other popular video hosting services such as Vimeo, Wistia, Twitch, VideoPress, and Dailymotion.
One major drawback is that Envira Gallery won’t automatically fetch new YouTube videos from your channel. If you want to update the gallery, then you’ll need to add each new video manually using its URL.
Pricing: To get Envira with the Video Gallery addon, you’ll need to either buy a Pro license ($89 per year) or a Lifetime license ($209).
With the YouTube Showcase plugin, you can add a YouTube video gallery or grid to your WordPress website.
After activating the plugin, you can add any YouTube video to your site using the 11-digit alphanumeric video key shown at the end of the video’s URL.
To help visitors find what they’re looking for, YouTube Showcase lets you add categories and tags to your videos. These work in exactly the same way as the built-in WordPress categories and tags, so they’re very easy to use.
Once you’ve done that, you just need to add the plugin’s shortcode to any page, post, or widget-ready area. YouTube Showcase will then show all your videos in a nice gallery layout.
YouTube Showcase automatically adds a row of video thumbnails below the gallery, so visitors can easily move between the different videos. For visitors who are using a smartphone or tablet, YouTube Showcase replaces these thumbnails with more mobile-friendly ‘Prev’ and ‘Next’ icons.
The plugin uses pagination by default, so your gallery should load quickly no matter how many videos you add.
The default gallery layout should be a good fit for most websites. However, if you want to make changes then the plugin has a straightforward settings page.
While it isn’t as customizable as some of the other gallery plugins, YouTube Showcase does have a section where more advanced users can add custom CSS and custom JavaScript.
If you don’t like the gallery layout, then YouTube Showcase also has a video grid shortcode. This shows all your YouTube videos in a 4-column grid layout.
Pricing: You can download YouTube Showcase for free from the official WordPress repository.
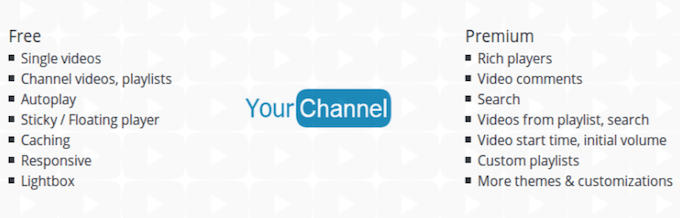
YourChannel is one of the easiest ways to create a YouTube gallery. It allows visitors to look through your entire YouTube channel feed and watch any video without leaving your website.
YourChannel also comes with a built-in WordPress caching system, to help keep your website running smoothly.
To set up YourChannel, simply enter your YouTube username or channel ID. After that, the plugin will automatically fetch banner images, video thumbnails, your subscriber count, and your total number of views.
The plugin’s settings are straightforward and user-friendly, so you can create a beautiful-looking gallery simply by checking a few boxes and typing some numbers.
You can change how many videos YourChannel shows when the gallery page first loads, and set a maximum number of videos that visitors can scroll through. This is particularly useful for creating a mobile-friendly video gallery.
YourChannel also helps you stay GDPR compliant by showing an ‘Allow Cookies’ message when a visitor first clicks the ‘Play’ button. This message includes a link to your privacy policy.
When you’re happy with how the gallery looks, you can add it to any page, post, or widget-ready area using a shortcode provided by the plugin.
Pricing: Simply visit the WordPress repository and download the YourChannel plugin for free.
According to our marketing statistics research, 70% of people visit YouTube on a smartphone or tablet. If you run an online store using a plugin such as WooCommerce, then you’ll be interested to learn that 90% of consumers watch videos on a mobile device.
With that in mind, you’ll want to make sure your YouTube gallery looks just as good on mobile, as it does on desktop. With Photo Gallery by 10Web, you can create a mobile responsive image and video gallery within minutes.
Despite the name, Photo Gallery supports all the best video hosting sites including Vimeo, Dailymotion, and YouTube. Simply copy the video’s URL, and Photo Gallery will add that video to your website.
After that, you can fine-tune how the gallery looks by choosing different layouts, switching between dark and light themes, adding pagination, and more. You’ll also have complete control over the content that appears in your gallery, including adding or removing the video title, description, tag box, and more.
Visitors can watch each video directly on your website, using the Photo Gallery lightbox popup. The lightbox comes with built-in social share buttons, which make it easy for visitors to share your videos on Facebook and Twitter. This can help you create a buzz on social media, get more engagement, and grow your social media following.
Pricing: You can download Photo Gallery for free from the official WordPress repository. If you need more advanced features, then there’s also a premium version of Photo Gallery.
Embed Plus for YouTube allows you to create a YouTube gallery using videos, playlists, shorts, and livestreams.
This plugin has a few unusual features, such as ‘Modest Branding’ which reduces the amount of YouTube branding in your video gallery.
Another unique feature is ‘facade mode,’ which aims to make your WordPress website faster by loading a lighter version of the video player initially, and then downloading the rest of the player when the visitor clicks a video.
To make your pages load even faster, Embed Plus can defer JavaScript while serving minified CSS and JavaScript.
Embed Plus can even convert non-HTTPs videos to HTTPS. Since Google uses HTTPS/SSL as a ranking factor in its search results, this can improve your search engine rankings.
To keep people on your website for longer, Embed Plus can automatically play the next video in the gallery, which is particularly useful if you’re adding playlists to your WordPress blog.
This plugin has in-depth and detailed settings that cover several tabs. This gives you complete control over how the YouTube gallery looks and acts, but it can be confusing when you first activate the plugin.
Thankfully, Embed Plus has a built-in setup wizard that asks questions about the kind of gallery you want to create and then changes the default settings based on your answers.
Pricing: You can download Embed Plus YouTube for free from the official WordPress repository. If you need more advanced features then there’s also a Pro YouTube plugin.
Automatic YouTube Gallery lets you create unlimited video galleries on your site. As the name suggests, this plugin automates most of the setup process so you can create a YouTube video gallery in minutes.
With this plugin, you can create a YouTube gallery using a channel ID, username, playlist, search terms, or even by entering specific video URLs. You can also embed live streams on your WordPress website.
After choosing your videos, Automatic YouTube Gallery lets you fine-tune how the gallery looks. This includes changing the number of columns in the gallery layout, changing the ratio, adding or removing the video titles, and more.
Automatic YouTube Gallery also has some settings to help keep visitors on your website for longer, such as autoplaying the next video and looping a single video. To make your YouTube gallery more accessible, you can also activate closed captions by default or change the language used by the video player’s interface.
With Automatic YouTube Gallery, you don’t have to worry about videos slowing down your site. The plugin has a caching feature that can reduce page loading times and boost your WordPress speed and performance.
You can use All-in-One Video Gallery to show videos from YouTube, Vimeo, Dailymotion, Rumble, and more in an HTML5 video player.
Unlike other plugins that have their own editors, All-in-One Video Gallery integrates with the familiar WordPress page and post editor. It also has video categories and tags that work exactly the same as the built-in WordPress categories and tags.
With this in mind, it’s very easy to get started with the All-in-One Video Gallery.
After adding your videos, All-in-One Video Gallery lets you customize the player controls, playback options, and video quality levels. This plugin also aims to make your videos more accessible by supporting WebVTT subtitles and showing the subtitles automatically.
The plugin is GDPR compliant and will get the visitor’s consent before loading YouTube, Vimeo, or embedded videos from third-party websites. If you prefer, then you can also disable the plugin’s cookies for added privacy.
When you’re ready, you can either show all your videos in a single gallery or create different galleries using the plugin’s categories feature. This allows you to create lots of different galleries, with different content.
Another option is embedding the built-in All-in-One Video Gallery search form. This allows visitors to search through all your videos, to find exactly the content they’re looking for.
Pricing: You can download All-in-One Video Gallery for free from the WordPress repository.
Video Gallery by Total Soft can add an unlimited number of professionally-designed video galleries to your website. This plugin supports YouTube plus other major video platforms such as Vimeo and Wistia.
When building a gallery, you can choose between 16 different themes and 9 layouts. If your YouTube channel has lots of videos, then you can use pagination to spread the content across multiple pages.
This plugin puts a strong focus on gallery thumbnails. Every time you add a video to a gallery, you can replace the default YouTube thumbnail with an image of your choice.
After that, Video Gallery will play different hover effects when the visitor moves their mouse over the thumbnail. This includes some advanced hover effects that animate the video’s title, description, and other elements. In this way, your gallery can catch the visitor’s attention before it starts playing videos.
Video Gallery allows you to show videos from different online platforms, and even self-hosted videos, in the same gallery.
After building a gallery, you can add it to any page, post, or widget-ready area using a shortcode. Video Gallery also provides a code snippet that adds the gallery to your WordPress theme. For more information, please see our guide on how to easily add custom code in WordPress.
Pricing: You can download Video Gallery for free from the official WordPress repository.
What is the Best YouTube Video Gallery Plugin for WordPress?
If you’re looking for the easiest way to add a gallery to WordPress, then Smash Balloon Youtube Feed Pro is our top pick.
This plugin guides you through the process of connecting YouTube and WordPress and then makes it easy to build a professionally-designed gallery. It also lets you fine-tune every part of the gallery so it perfectly suits your WordPress theme.
When you’re happy with how the gallery looks, you can add it to any page, post, or widget-ready area using either a shortcode or the plugin’s Feeds for YouTube block.
Unlike some other plugins on the list, your Smash Balloon gallery will update automatically as you publish new videos to YouTube. This means visitors will always see the latest videos, and you don’t have to worry about updating your gallery manually.
While Smash Balloon YouTube Feed Pro is our top choice, it is a premium plugin. If you’re looking for a free YouTube gallery plugin, then you may want to take a look at Feeds for YouTube instead.
While this plugin is missing some of Smash Balloon’s advanced features, it still has everything you need to create a YouTube video gallery for your WordPress website.
This makes Feeds for YouTube our top pick for anyone who is just getting started, has a limited budget, or just wants to embed a small number of videos in their WordPress website.
We hope this article helped you choose the best YouTube gallery plugins for WordPress. You may also want to see our list of best drag-and-drop WordPress page builders to create custom designs and our tutorial on how to create an email newsletter to keep your visitors updated with your new videos.
If you liked this article, then please subscribe to our YouTube Channel for WordPress video tutorials. You can also find us on Twitter and Facebook.
By embedding PDF files in your website, you can make sure those files always have the same layout, no matter what device the visitor is using. These files can also keep people on your website for longer and add value for your uses.
In this article, we will show you how to add a PDF viewer in WordPress.
Why Do You Need a PDF Viewer in WordPress?
Many websites use PDF files to share information about their services and products. For example, restaurant owners often publish their menu as an online PDF.
However, this isn’t the best user experience for people who want to quickly look at a PDF document. For example, someone who is planning to visit your restaurant may prefer to read the PDF menu on your website rather than downloading a copy to their computer.
Instead, you can add a PDF viewer in WordPress and then show the PDFs directly on your website. This allows visitors to see the document without downloading it to their computer, which is often quicker and easier. This is particularly true for visitors who are using smartphones or tablets.
With that being said, let’s see how you can easily add a PDF viewer to WordPress. Simply use the quick links to jump straight to the method you want to use.
Method 1. Add a PDF Viewer Using the Block Editor (Easy)
The easiest way to show PDFs on your WordPress website is by using the built-in File block.
This method doesn’t require a special plugin, but you can only customize the viewer in a few ways. If you want more advanced customizations and features, then we recommend using a plugin instead.
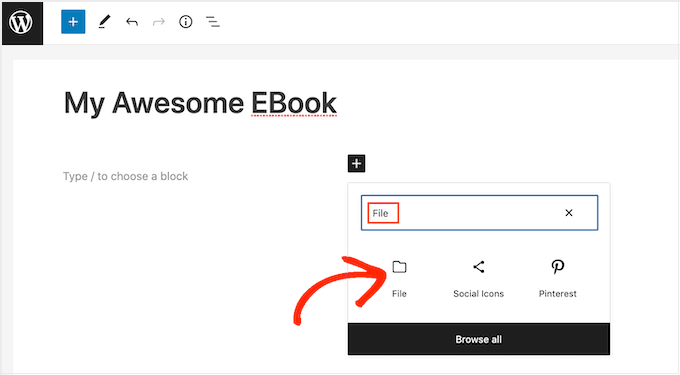
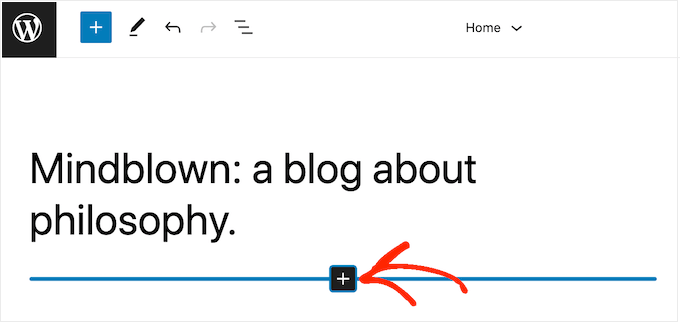
To get started, simply open the page or post where you want to add the PDF viewer in the content editor and then click on the ‘+’ button to add a new block.
After that, start typing in ‘File’ and select the right block when it appears.
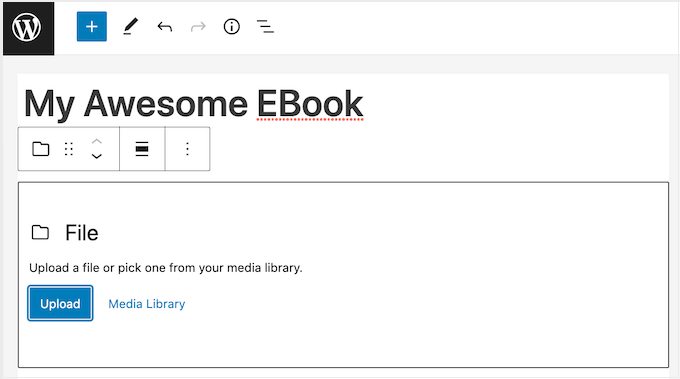
If you’ve already uploaded your PDF to the WordPress media library, then click on the ‘Media Library’ button. You can then select the PDF that you want to embed.
If you haven’t already uploaded the PDF, then click on ‘Upload’ and then choose a file from your computer.
WordPress will automatically choose a size for the embedded PDF.
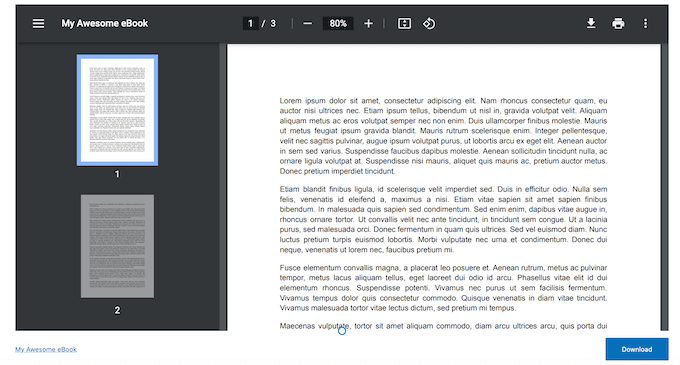
Note that the default view may not show the full document, but the ‘File’ block includes a toolbar that allows visitors to zoom in and out of the document. They can also scroll through the PDF to see more content.
If you prefer, then you can change the PDF viewer’s height to show more or less of the embedded document.
To do this, simply use the ‘Height in pixels’ slider in the right-hand menu.
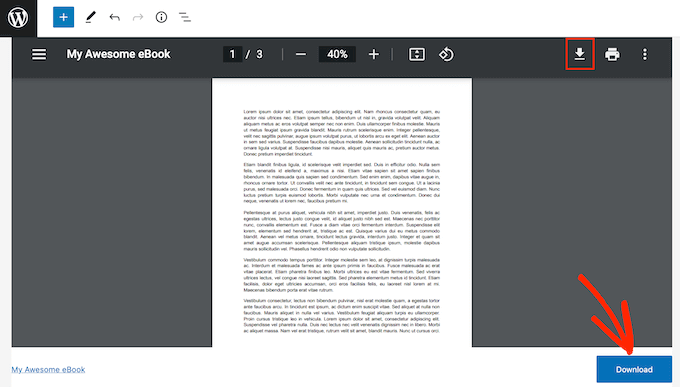
Sometimes, visitors may want to download a PDF so they always have it close by. For example, customers may want to download the user manual for your most popular product or the programming schedule for an upcoming event or conference.
By default, WordPress shows a ‘Download’ icon in the toolbar and a button below the PDF.
The ‘Download’ button beneath the PDF is useful for visitors who are unfamiliar with the different PDF toolbar icons. By showing a ‘Download’ button, visitors will immediately understand that this file is not tied to your site alone.
With that in mind, you may want to leave the ‘Download’ button enabled. However, if you don’t want to include this duplicate content then you can click to disable the ‘Show Download Button’ toggle.
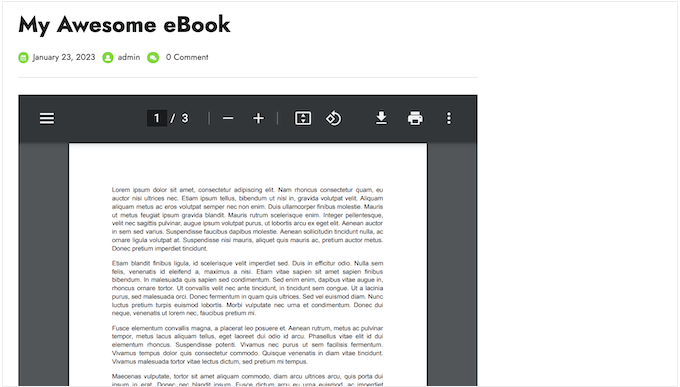
When you’re happy with how the PDF is set up, either click on ‘Update’ or ‘Publish’ to make your changes live.
Now if you visit your WordPress website you’ll see the PDF viewer in action.
Method 2. Add a PDF Viewer in WordPress Using a Plugin (More Customizable)
The built-in WordPress File block should be a good fit for websites that simply want to embed a few PDFs. However, if you want more control over the viewer then it often makes sense to use a plugin instead.
It also comes with a fullscreen mode, which is perfect for showing longer documents such as ebooks and user manuals.
First, you’ll need to install and activate PDF.js Viewer. If you need help, then please see our guide on how to install a WordPress plugin.
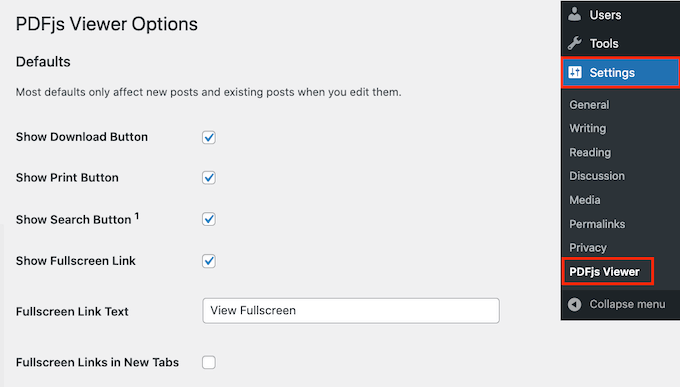
Upon activation, go to Settings » PDFjs Viewer to configure the plugin’s settings.
Most of the time, you can override these default settings when embedding each PDF. For example, you can change an individual PDF’s settings for size or scale.
However, we still recommend changing the default settings to better match your own requirements, as this can save you a lot of time and effort.
By default, the plugin includes Download, Print, and Search buttons in the PDF toolbar. If you want to remove any of these buttons, then simply uncheck the box next to it.
You can also change the default embed height and width, and the ‘Viewer Scale.’
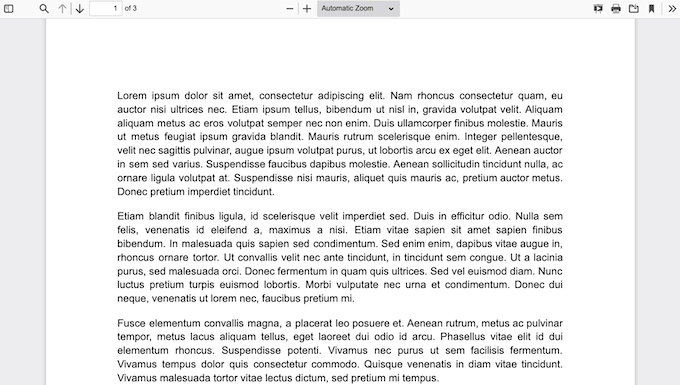
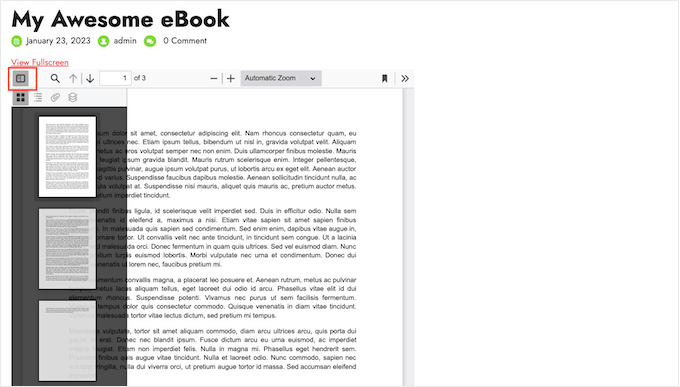
Out-of-the-box, PDF.js Viewer shows the PDF without any sidebar so visitors can see the full document when they arrive on the page. They can open the sidebar at any point by clicking on the ‘Toggle Sidebar’ button, as you can see in the following image.
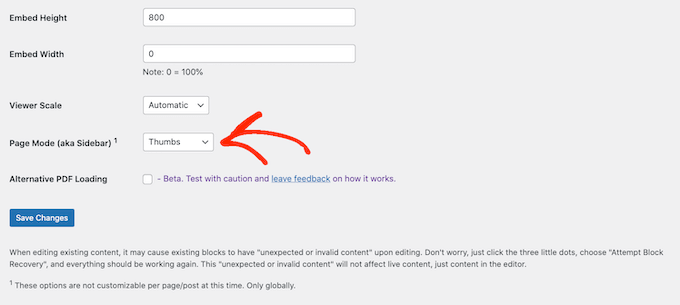
If you plan to include longer documents or multi-page PDFs then it may be helpful to show the sidebar by default.
To do this, simply open the ‘Page Mode’ dropdown menu and select either Thumbs, Bookmarks, or Attachments.
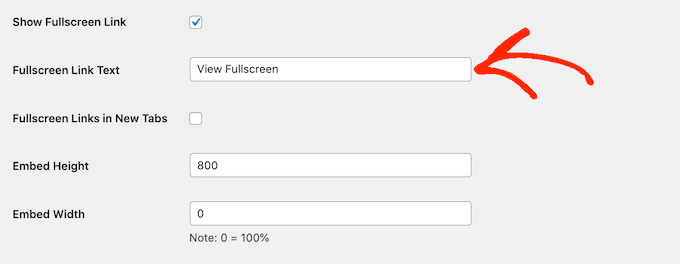
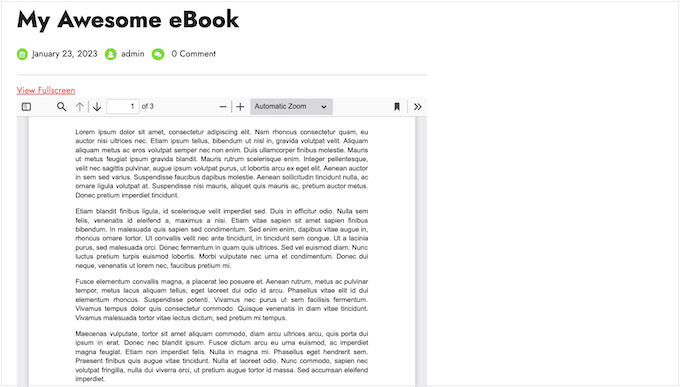
PDF.js Viewer allows visitors to open the PDF in fullscreen mode. By default, visitors can open this mode by clicking on a ‘View Fullscreen’ link above the embedded PDF.
To replace the text with your own custom messaging simply type into the ‘Fullscreen Link Text’ field.
You can also choose whether the link opens in a new tab using the ‘Fullscreen Links in New Tabs’ box.
Launching a new tab will help to keep visitors on your website, but it can be annoying for mobile and tablet users.
Fullscreen mode makes it easier to read long documents so we recommend leaving this feature enabled. However, if you don’t want to use it then you can uncheck the box next to ‘Show Fullscreen Link.’
When you’re happy with how the plugin is set up, click on ‘Save Changes.’
You’re now ready to add a PDF viewer in WordPress. Simply open the page or post where you want to show the PDF and then click on the ‘+’ button.
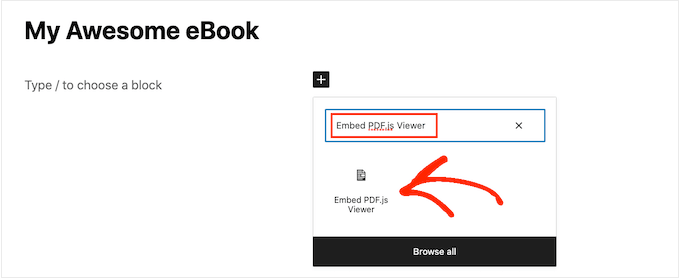
You can now start typing in ‘Embed PDF.js Viewer’ and select the right block when it appears.
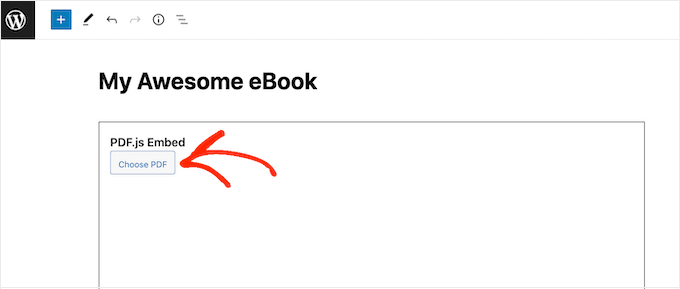
After that, click on ‘Choose PDF’ to open the WordPress media library.
You can now either choose a PDF from the library or upload a file from your computer.
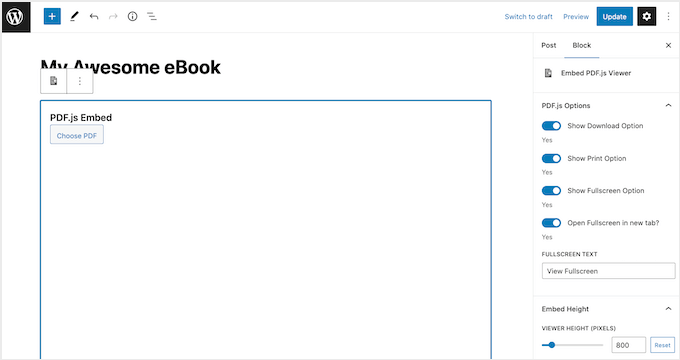
The plugin will use your default settings, but you can fine-tune how this PDF looks and acts using the settings in the right-hand menu.
Here, you can change the PDF’s height, width, and scale. You can also remove or customize the ‘View Fullscreen’ link.
Finally, you can choose to remove or show the ‘Download’ and ‘Print’ buttons.
When you’re happy with how the PDF is set up, simply click on ‘Update’ or ‘Publish.’ You can now visit your WordPress blog or website to see the embedded PDF viewer.
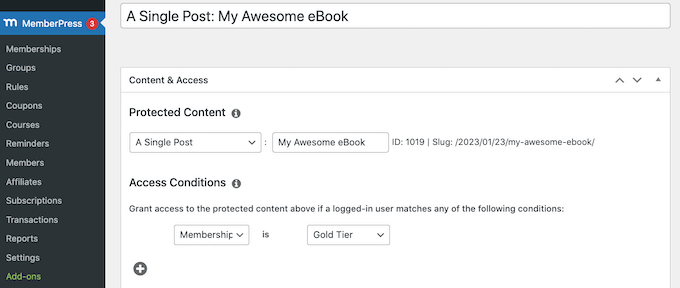
After embedding a PDF document in your website, you can turn that page or post into exclusive members-only content. Visitors will then need to buy a membership to access that page or post, and see the embedded PDF.
The easiest way to turn WordPress into a membership site is by using MemberPress. It is the best WordPress membership plugin and allows you to turn any page or post into exclusive subscriber-only content, including embedded PDFs.
We also suggest using Easy Digital Downloads to manage and sell PDFs on your website. You can sell all kinds of digital goods easily and embed PDFs in the product pages as previews, too.
Do you want to add a multilingual search in WordPress?
If you have a multilingual WordPress site, then adding a multilingual search feature can help users find information more quickly by searching in their own language.
In this article, we’ll show you how to easily add multilingual search in WordPress and delight your users with a better user experience.
Why Should You Add Multilingual Search in WordPress?
Often users have trouble finding information on multilingual websites because either there is no search feature that they can use, or the search feature shows them content in the wrong language.
Adding a multilingual search feature helps users easily find the content they are looking for. This improves user experience which means users will stay longer on your website.
Research shows that engaged users are more likely to convert, subscribe, or make a buying decision.
That being said, let’s take a look at how to easily add a multilingual search in WordPress without breaking your website or writing any code.
Note: Keep in mind that the free version of TranslatePress only allows you to translate your website into one other language. So if you want to add multilingual search in WordPress for more than two languages, then you’d need to buy the TranslatePress Premium version.
Once you have translated some content on your WordPress website. It is time to add the search form.
Add a Search Block to your WordPress Site
WordPress comes with a built-in search block that you can add anywhere on your website.
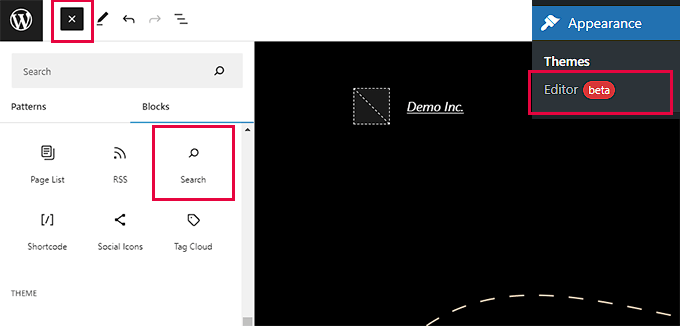
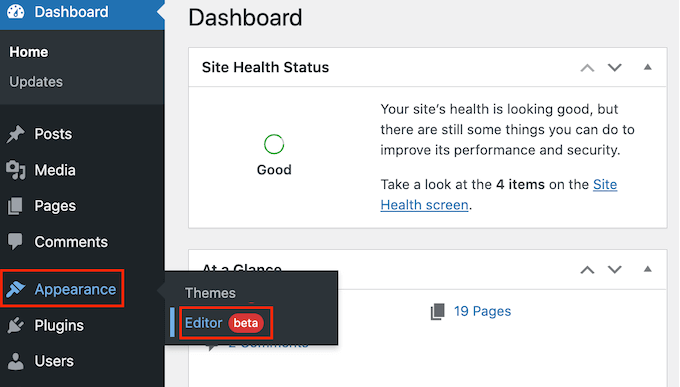
If you’re using a block-based theme like Ultra, then you’ll be using the full site editor to add the search block.
Simply visit the Appearance » Editor page from the WordPress dashboard.
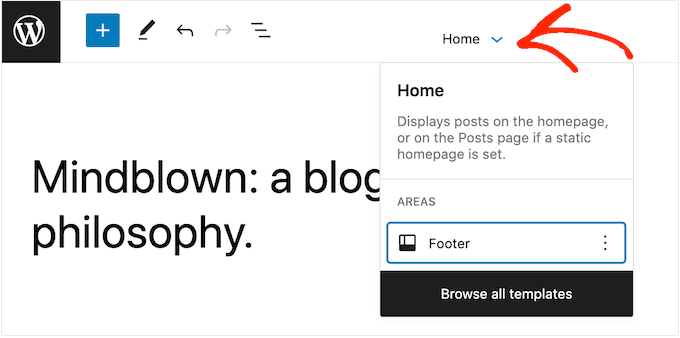
This will launch the full site editor which looks a lot like the block editor you use for writing posts and pages.
Now, click on the add block button (+) to add the Search block.
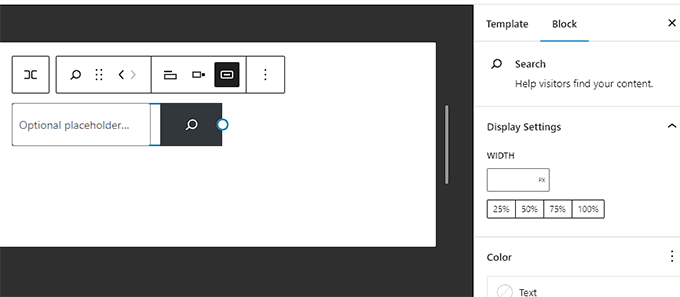
You can move the search block up and down to display it anywhere on the page.
Search block also comes with a few style options that you can choose from the block toolbar or settings.
Once you are finished, don’t forget to click on the Save button to save your changes.
You can now visit your website to see the search form in action.
On the other hand, if you’re using a theme that does not support the full-site editor, then you can add a search form as a widget.
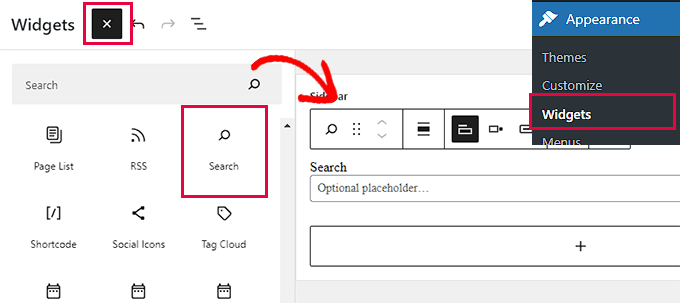
Simply go to the Appearance » Widgets page from the WordPress admin dashboard.
Here, click the Add widget block button (+) and add the Search block to your widget area.
Once the ‘Widget Block Menu’ opens up, locate the ‘Search’ block and add it to your WordPress sidebar.
Don’t forget to click the ‘Update’ button at the top to save your changes.
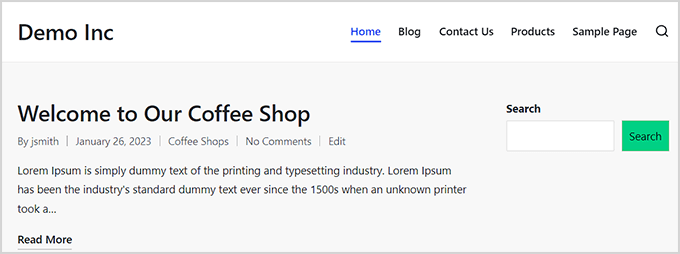
Once you’ve saved the changes, visit your site and see the search box in action.
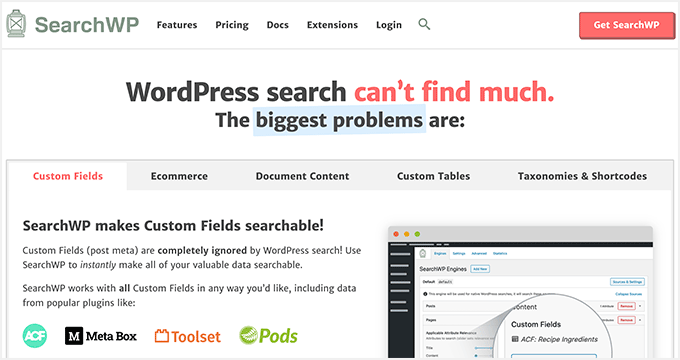
Method 2: Adding Multilingual Search Using SearchWP (Recommended)
The default WordPress search feature used by TranslatePress is not very good. It is quite basic and only looks for search terms in certain places.
It is the best WordPress search plugin on the market and allows you to easily replace the default WordPress search with a more powerful search feature.
SearchWP automatically builds a search index and matches search keywords in content, title, categories, tags, shortcodes, documents, products, and more.
Plus, it automatically replaces the default search form upon activation so you don’t need to replace it if you were already using it on your site.
That being said, let’s take a look at how to easily add a better multilingual search to your WordPress site.
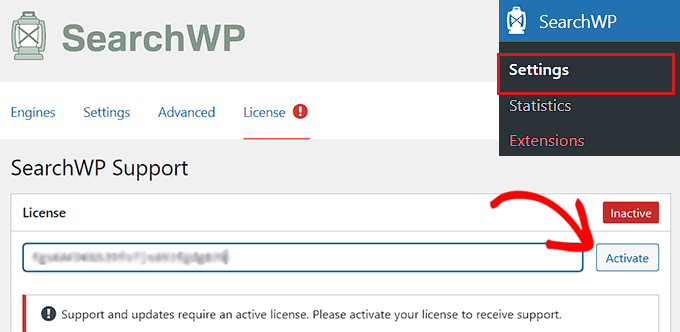
After that, go to the SearchWP » Settings page and then click on the ‘License’ menu option to enter your license key.
You can get the license key from your ‘SearchWP Accounts’ page. Simply copy the license key from there.
After that, paste it into the ‘License Key’ field and then click on the Activate button.
Now, you are ready to create your first custom search engine.
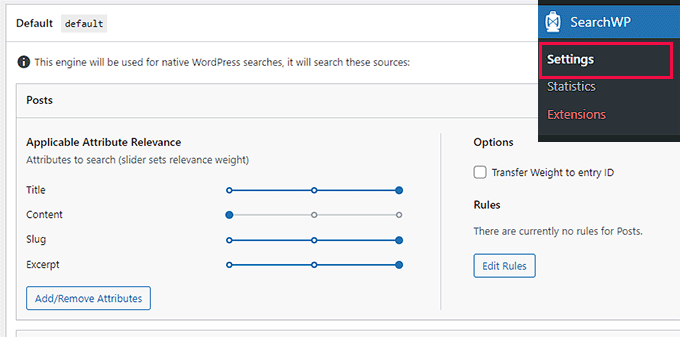
Simply go to the SearchWP » Settings page from the dashboard.
From here, you will see SearchWP’s first default search engine for you. It is pre-configured to work for most websites including multilingual websites.
You’ll see all your post types with different attributes. Next to each attribute there will be a slide that you can move to assign weight for that attribute.
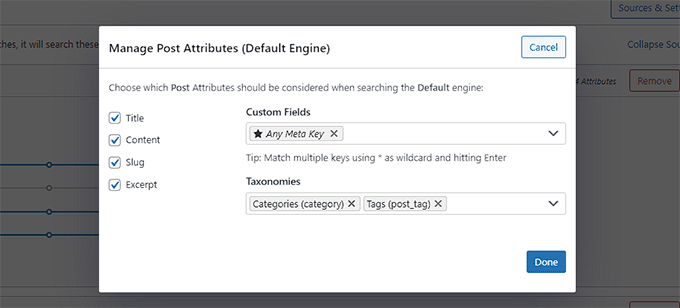
You can also click on the Add/Remove Attributes button to include more areas in the search.
For instance, you can add custom fields and taxonomies to the attributes as well.
If you are unsure about a setting, you can leave it as it is. The default options would work for more use cases.
Finally, click on the Save Engines button to store your settings.
SearchWP will now start building your search index in the background.
Now, all you need to do is add the search form to your site.
Add a Search Block to your WordPress Site
SearchWP replaces the built-in search feature, which means you can use the default WordPress search form and it would still use SearchWP to show the results.
If you haven’t already added a search form to your website, then here is how you would add it.
If you’re using a block-based theme, then you’ll be adding a search block using a full-site editor.
Simply go to the Appearance » Editor page from the admin dashboard.
On the edit screen, click on the add block button (+) at the top and add the search block.
You can move the search block to the area where you want to display the search form by moving it up or down.
Finally, don’t forget to click on the Save button to save your changes.
If you’re using a theme that doesn’t support the full-site editor, then you’ll need to add a search widget to your website’s sidebar or widget-ready area.
For that, head over to the Appearance » Widgets page from the dashboard.
Now click on the add block button (+) at the top to open up the ‘Widget Block Menu’.
From here, locate and add the Search widget to your preferred widget area.
Don’t forget to click the ‘Update’ button at the top to save your changes.
Next, simply visit your website and use your improved search box.
Have you ever wanted to white label the WordPress admin dashboard for your clients or users?
WordPress comes with a nice user interface, but sometimes you may need to customize it for your own needs or simplify it for clients.
In this article, we will show you how to white label your WordPress admin dashboard.
What is White Labeled WordPress and When Do You Need it?
WordPress is the most popular content management system (CMS) in the world as it powers more than 43% of the website on the internet. However, many people still don’t know about it.
When working on a client project, it is possible that they may not be familiar with WordPress. Clients are interested in an easy way to update their website. They don’t want to struggle with themes, plugins, updates, security, and learning how to use WordPress.
White labeling a WordPress admin dashboard allows you to customize the WordPress admin area. You can replace the default WordPress branding with your own and hide unnecessary items to create a more streamlined interface for your clients or users.
Having said that, let’s take a look at how you can white label the WordPress admin dashboard without much effort.
White Labeling WordPress Admin Dashboard
The best way to white label your site’s admin area is by using the White Label CMS plugin. It’s a free WordPress plugin that lets you customize the login page, add your branding, edit the dashboard, control which menus your clients can see, and more.
The first thing you need to do is install and activate the White Label CMS plugin. For more details, see our step-by-step guide on how to install a WordPress plugin.
Upon activation, you need to visit Settings » White Label CMS from your WordPress dashboard to configure the plugin settings.
The plugin offers a simple setup wizard that you can use to get started. In the wizard, you can add a developer name that will appear in the footer and alt text.
Other than that, there are options for adding a developer URL, footer text, and RSS feed. After adding these details, you can click the ‘Next’ button.
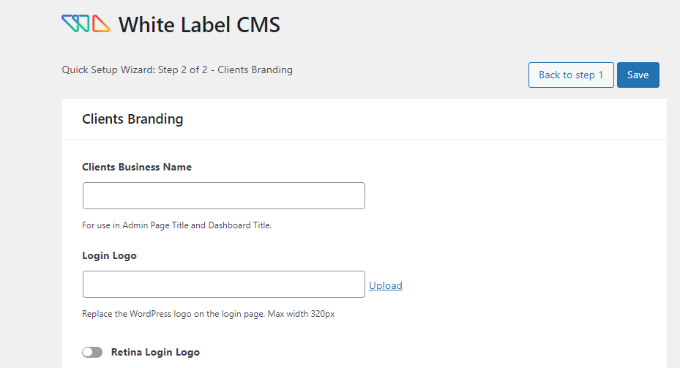
The White Label CMS setup wizard also lets you add your client’s business name and upload a login logo for customization.
There’s also an option to enable a Retina login logo and upload your image.
Once you’re done, simply click the ‘Save’ button to exit the setup wizard.
Besides that, the settings page for the plugin allows you to control and customize every aspect of WordPress administration screens.
It is divided into these 5 sections:
Branding
Login
Dashboard
Menus
Settings
Let’s dive deeper into the different options available under each section and how to properly configure them.
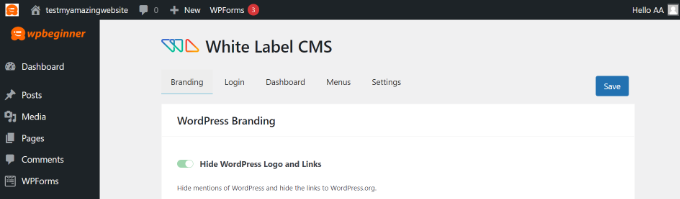
Replace WordPress Branding With Your Own Brand
This is where you will replace the default WordPress site’s branding with your own custom branding.
The first option under the branding is to show or hide the WordPress logo and links in the admin bar. You can also hide the WordPress version from the footer.
Next, you can scroll down and upload your own custom logo to replace the WordPress logo that will appear in the admin bar.
The plugin also lets you replace the Howdy text from the admin bar and the WordPress.org URL with your own custom link.
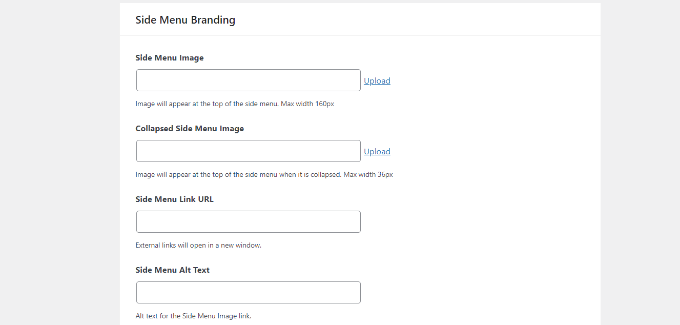
After that, you can scroll down and change the side menu branding in your WordPress admin panel.
The plugin offers options to add a side menu image, an image that appears when the menu is collapsed, side menu link URLs, and alt text.
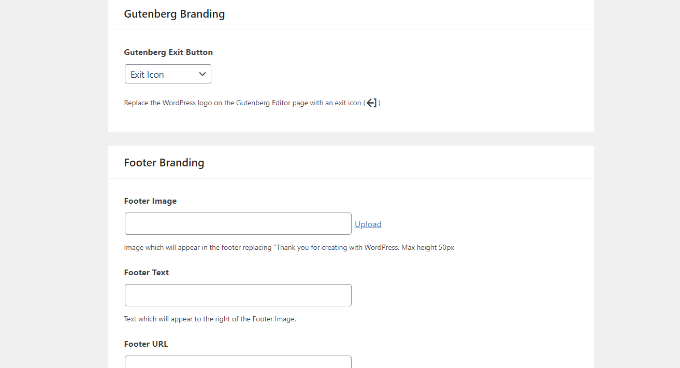
Lastly, you can also change the Gutenberg exit button and replace it with an exit icon, admin bar logo, and use a custom logo.
Besides that, there are options to brand the footer of your WordPress admin panel. The plugin lets you add a footer image, text, URL, and your own HTML code.
When you’re done, simply save your changes.
Here’s a preview of what these changes would look like in the WordPress dashboard.
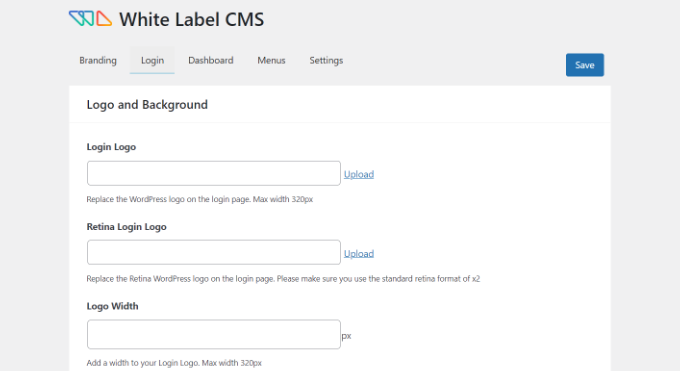
White Label the WordPress Login Page
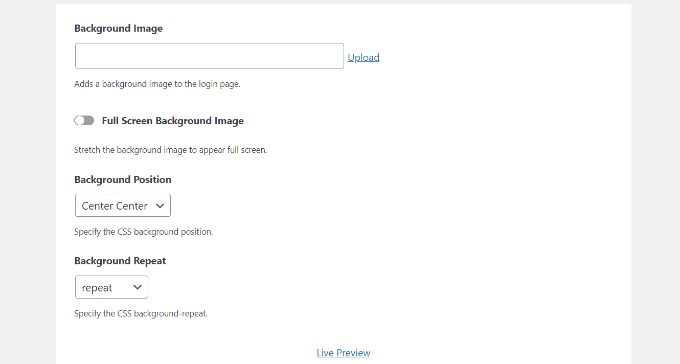
Next, you can go to the ‘Login’ tab in White Label CMS and change what the login screen will look like.
To start, you can upload a login logo and a retina login logo. There are also options to define the logo’s width, height, bottom margins, and add background color.
If you scroll down, there are more settings to change the background image and its position.
You can also enable the option to make the background image appear as a full screen on the login page for your WordPress website.
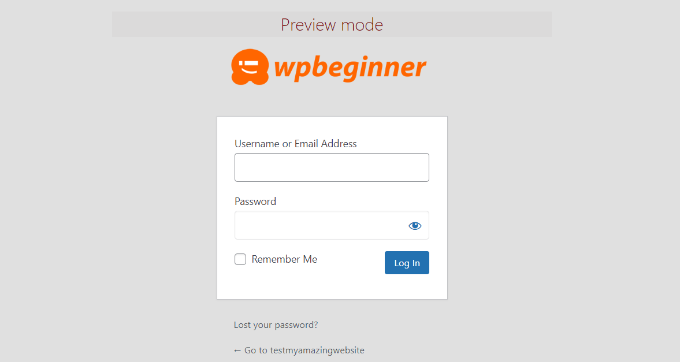
After making these changes, you can click the ‘Live Preview’ button at the bottom.
This will show you what your changes will look like in real-time. Once you’re satisfied with the edits, simply save your changes.
The White Label CMS plugin gives you some simple options to customize the login page. However, if you’d like more control over its design, then we recommend using a drag and drop page builder like SeedProd.
The main WordPress admin screen is called the dashboard. This is what users usually see when they login to WordPress.
It contains default panels showing different information about the website.
There is usually quite a lot of information, and many users don’t know what they are supposed to do with it.
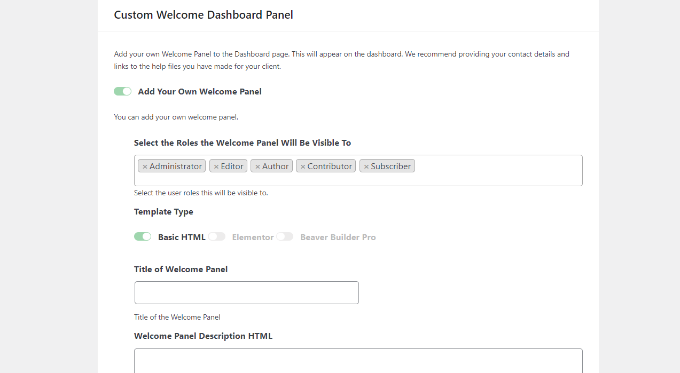
White Label CMS allows you to customize this section and make it look cleaner. To start, simply click on the ‘Dashboard’ tab, and you will see options to show and hide each panel.
You can add dashboard icons, change the heading for the dashboard, and select WordPress user roles that can view the dashboard panel.
If you scroll down, there are more options.
For instance, you can enable the ‘Add Your Own Welcome Panel’ option.
When you’re done, don’t forget to save your changes.
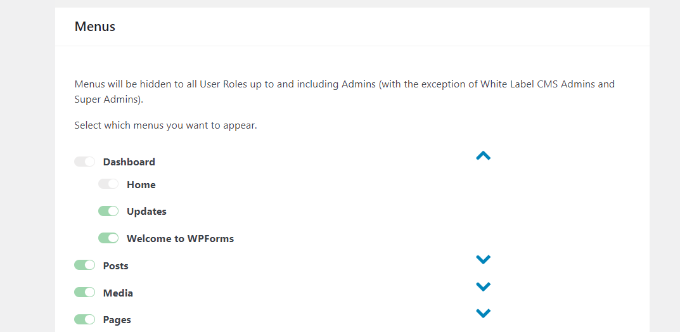
Hide Specific Menu Items in the WordPress Admin
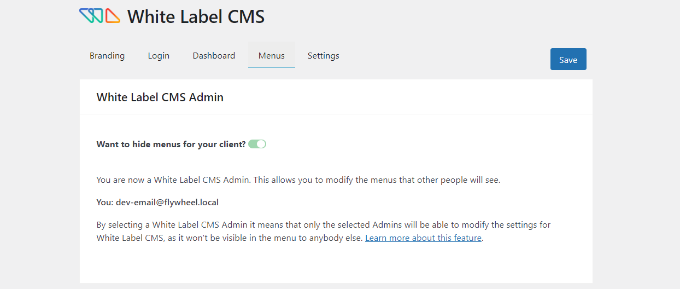
Next, you can head over to the ‘Menus’ tab in White Label CMS.
If you are using a bunch of plugins on the site, then those plugins will probably add their own menus as well. This could make your admin menu quite long. Many of your clients or users will probably not need these menus.
Using the plugin, you can hide these menus by enabling the ‘Want to hide menus for your clients’ option.
After that, you can scroll down and see different menus to hide.
For each menu, there are sub-menu items that you can see by clicking the blue downwards arrow icon.
To hide a menu, simply click the toggle, and it will be hidden for different user roles in WordPress.
There are also admin bar menus that you can hide using the plugin.
When you’re done, go ahead and save your changes.
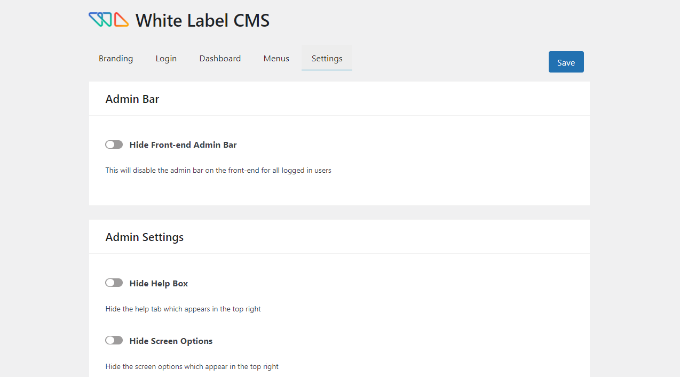
Customize WordPress Admin Settings
Lastly, you can go to the ‘Settings’ tab in the White Label CSS plugin.
In this section, you’ll get options to hide the front-end admin bar, help box, and other screen options.
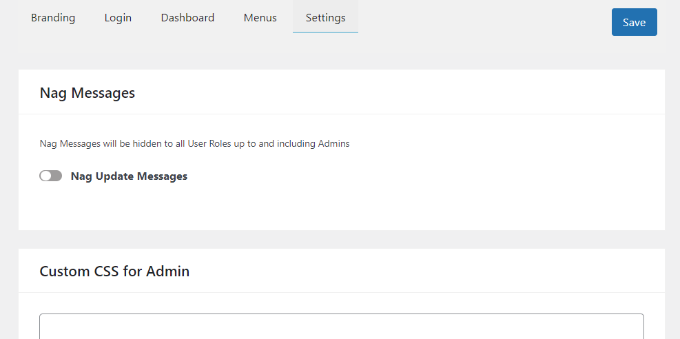
You can also turn off nag messages that appear at the top of the page in your WordPress dashboard. These are messages like rating the plugin or upgrading to a pro plan.
By removing them, you can keep your admin panel clean and clutter-free for your clients.
Other than that, the plugin lets you add custom CSS for admin and custom editor stylesheet.
Once you’ve made the changes, simply click the ‘Save’ button.
Note: If you’re doing work-for-hire and will not be managing your client’s sites on a regular basis, then we DO NOT recommend hiding admin menus or disabling the admin nags.
Only do that if you’re going to be regularly updating and managing the website.
Do you want to show Google, Facebook, or Yelp reviews in WordPress?
Customer reviews encourage people to trust your website and buy from your business. There are lots of third-party sites where potential customers can see your reviews, but it’s also a good idea to show this content on your own website.
In this article, we will show you how to display business reviews from Google, Facebook, and Yelp in your WordPress site.
Why You Should Display Business Reviews in WordPress
There are lots of different websites where customers can review your company such as Google, Yelp, and Facebook. However, potential customers will need to visit these third-party websites in order to see the reviews.
With that being said, it’s a good idea to add Google, Yelp, and Facebook reviews to your WordPress website so that everyone can see them. For example, you might show positive reviews on your WooCommerce product pages, or your About Us page.
These reviews can convince customers to trust your company, even if they haven’t bought from you before.
With that said, let’s see how you can easily add Yelp, Google, and Facebook reviews to WordPress. Simply use the quick links below to jump straight to the platform you want to use.
How to Show Google, Facebook, and Yelp Reviews in WordPress
You could simply copy and paste the best reviews into your site, and then show them using a customer review plugin. However, depending on the plugin you use, you may need to add new reviews manually, which can take a lot of time and effort.
There will also be a delay between customers posting on sites like Yelp and Facebook, and those reviews appearing on your WordPress website.
With that in mind, it’s a good idea to create a review feed that updates automatically using the Reviews Feed Pro plugin.
This single plugin allows you to show reviews from all the biggest review platforms.
It also comes with pre-designed templates, so you can display your reviews in different layouts including showcases, carousels, grids, and more.
The Reviews Feed automatically copies your website’s design so the reviews look like a natural part of your website, rather than content embedded from another platform.
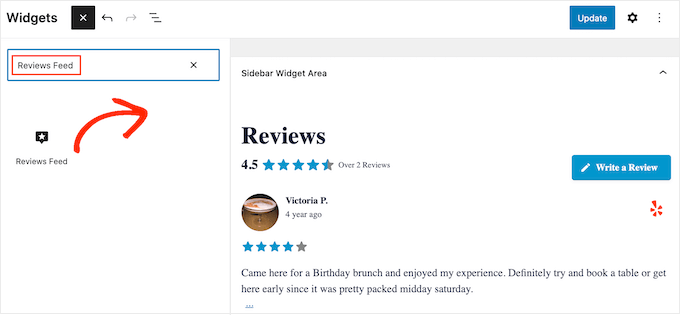
First, you’ll need to install and activate the plugin. If you need help, then please see our guide on how to install a WordPress plugin.
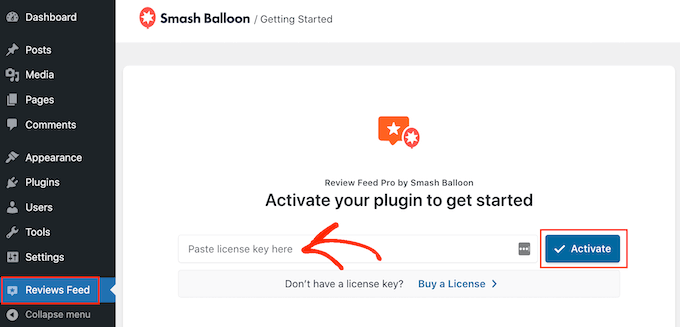
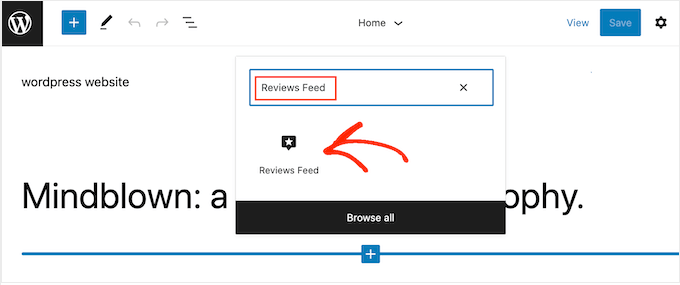
Upon activation, click on Reviews Feed in the left-hand menu. You can then add your Reviews Feed Pro license key and click on the ‘Activate’ button.
You’ll find the license key under your account on the Smash Balloon website.
After activating the plugin, you’re ready to show reviews from Google, Facebook, or Yelp.
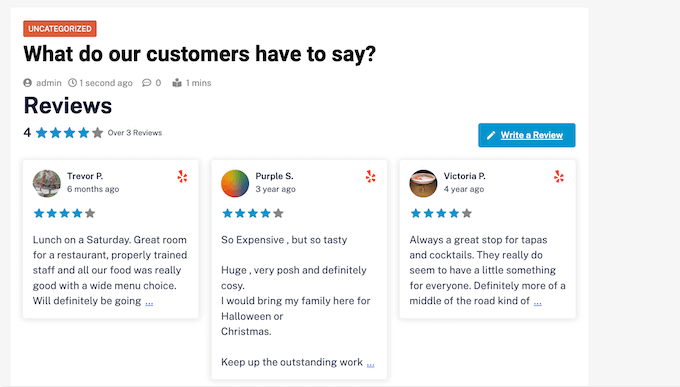
Method 1. How to Show Yelp Reviews in WordPress
Yelp is a popular website where visitors can review restaurants, brands, services, products, and more.
If your business already has some positive Yelp reviews, then adding them to your website can get you more sales, members, appointments, and more.
Since Yelp is a public site, you can show reviews from any business that has a Yelp listing. For example, if you own a business listing blog or membership site, then you could show Yelp reviews for different local businesses on your website.
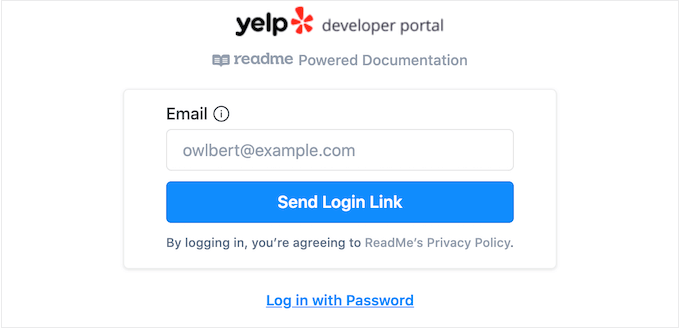
To add reviews to your website, you’ll need to create a Yelp API key. Simply go to the Yelp Developers page and type in your email address.
Then, click on the ‘Send Login Link’ button.
Note: If you don’t already have an account, then go to the Yelp signup page and follow the onscreen instructions to register.
After a few moments, Yelp will send a one-time login link to your email address. Simply open the email and use the ‘Click to Log in’ button.
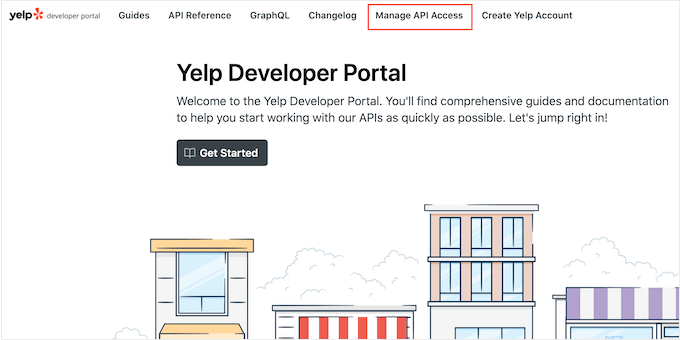
This takes you to the Yelp Developer Portal.
In the toolbar, click on Manage API Access.
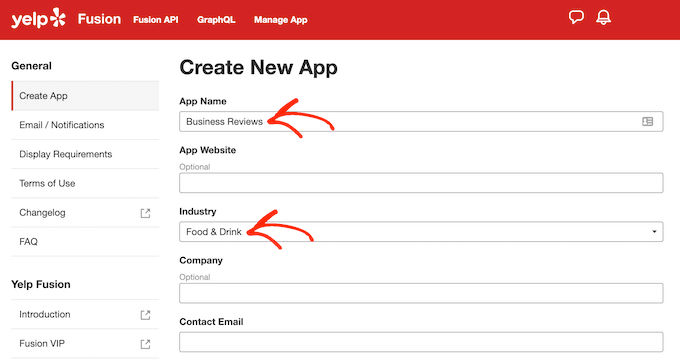
On this screen, type a name for your Yelp app into the ‘App Name’ field. This is just for your reference so you can use anything you want.
After that, open the ‘Industry’ dropdown and choose the industry that best reflects your website or business.
After that, type in your email address and add a description.
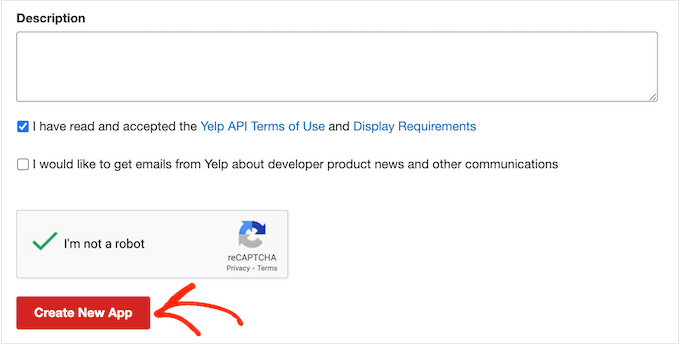
With that done, read the terms and conditions. If you’re happy to go ahead, then check the terms and conditions box, decide whether you want to get email updates from Yelp, and pass the captcha.
Finally, click on the ‘Create New App’ button.
After a few moments, you’ll see the following message ‘Great, your app has been created! Check your App ID and API Key below.’
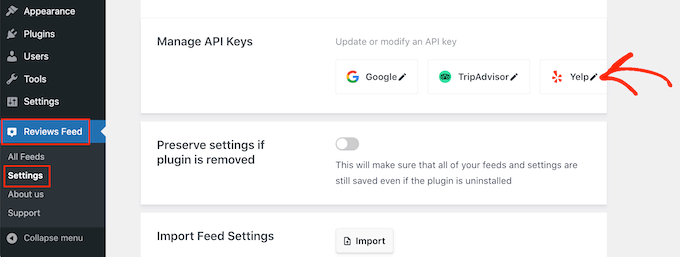
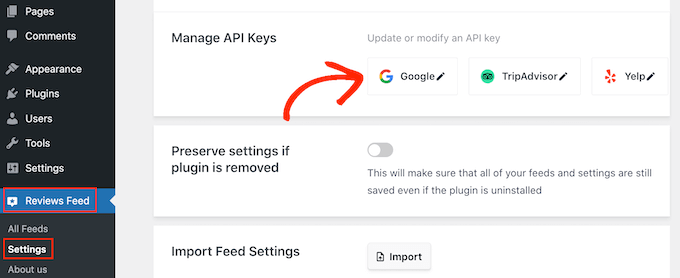
Simply go to Reviews Feed » Settings in the WordPress dashboard.
Then, scroll to Manage API Keys and click on the small pencil icon next to ‘Yelp.’
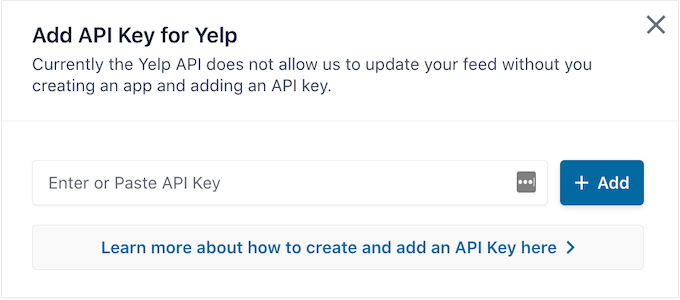
In the popup, add your Yelp API key.
Then, click on the ‘Add’ button.
With that setup out of the way, you’re ready to add Yelp reviews to your website.
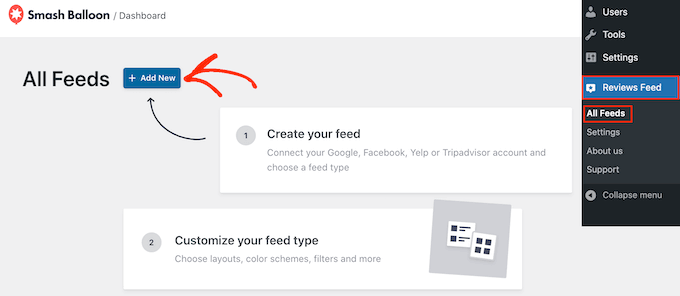
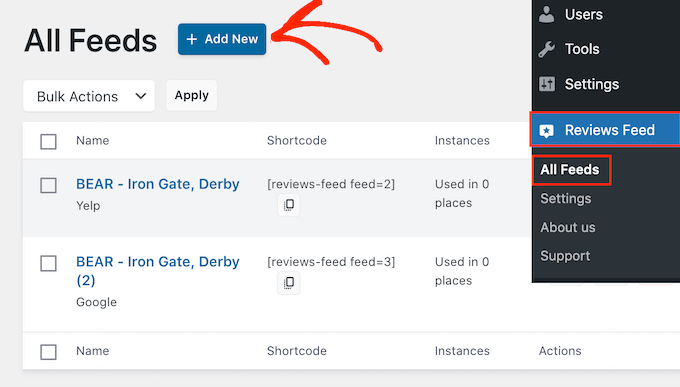
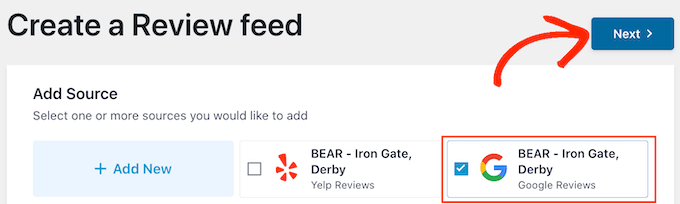
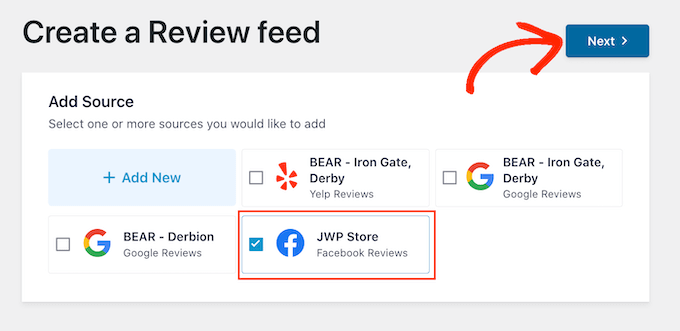
Simply go to Reviews Feed » All Feeds. Then, click on the ‘Add New’ button.
On the next screen, click on ‘Add New’ again.
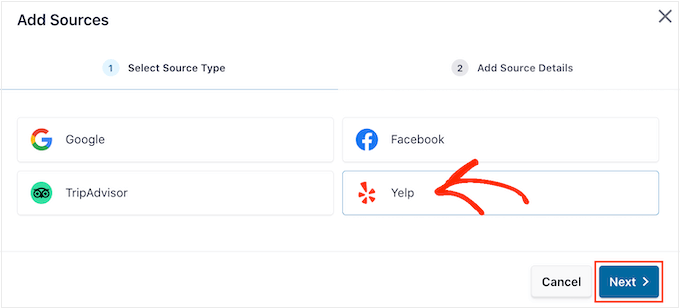
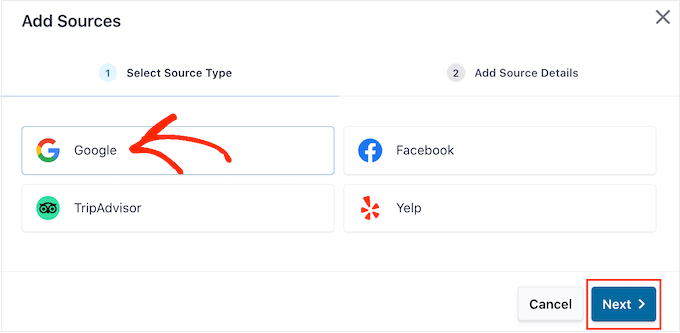
In the popup that appears, select ‘Yelp’ and then click on the ‘Next’ button.
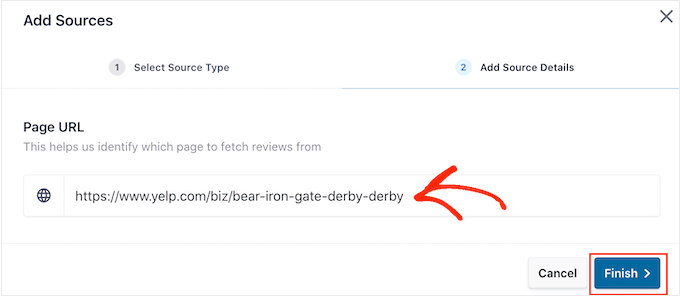
You can now add the URL of the Yelp page that you want to use. This can be a page that you own or any public third-party page.
After that, click on ‘Finish’.
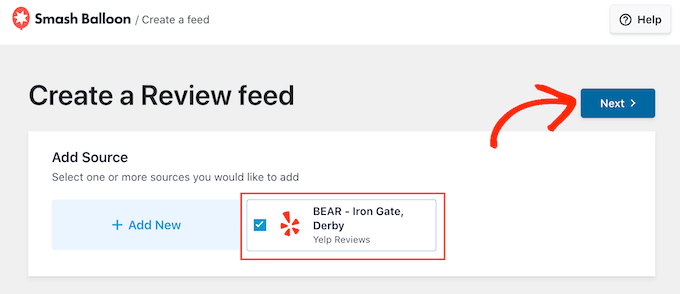
Smash Balloon will now show this Yelp page as a possible source.
To go ahead and create the feed, simply check the box next to the Yelp page and then click on ‘Next.’
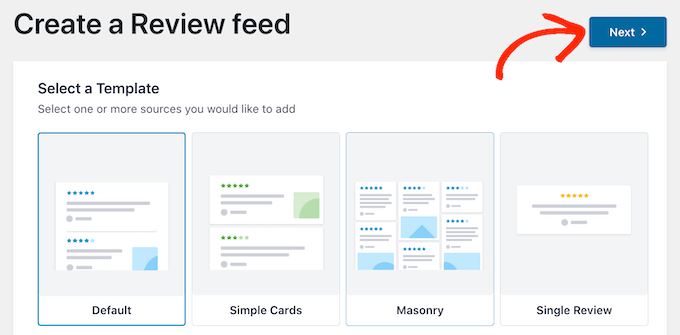
You can now choose a template to use for the review feed, such as a showcase carousel, grid carousel, or even a single review template.
After choosing a design, click on the ‘Next’ button.
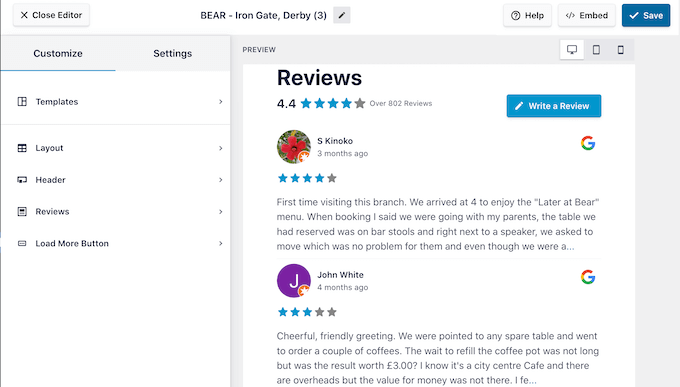
Smash Balloon will now show the Yelp review feed in its editor, ready for you to fine-tune.
For instructions on how to customize the feed and then add it to your site, skip to the end of this guide.
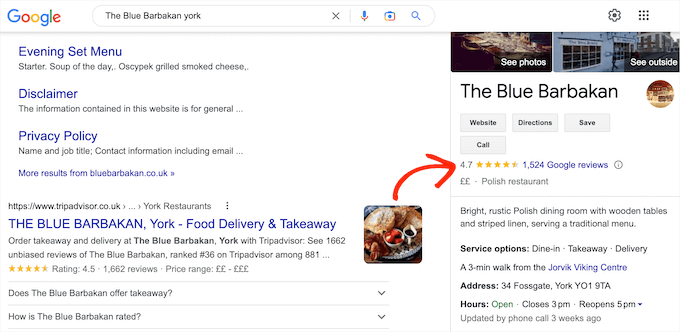
Method 2. How to Show Google Reviews in WordPress
Google Reviews is another place where customers can review your business online. Once again, positive reviews are important for building trust and getting conversions, but these reviews can also affect where your site appears in the search results.
Lots of positive Google reviews and high rankings may improve your business’s search ranking, especially in local search results.
Google also shows your reviews on relevant search engine result pages.
By adding these reviews to your website, you can encourage people to visit your Google listing and leave you a positive review.
This may improve your WordPress SEO and the overall star rating that appears in relevant search engine results.
With that being said, let’s see how you can add Google reviews to your WordPress website.
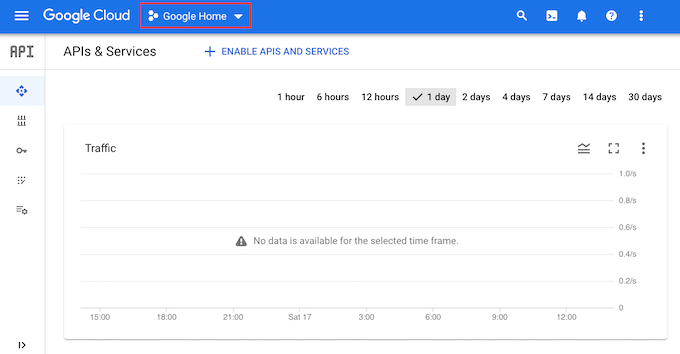
To start, you’ll need to create a Google API key, so head over to the Google Console and sign in using your Google account.
Once you’re logged into the console, click on ‘Google Home.’
If you’re logging into the Google Console for the first time then you’ll need to accept the terms and conditions.
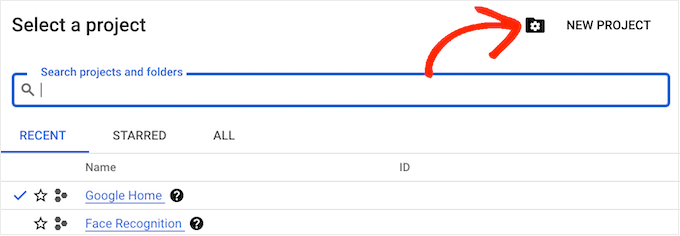
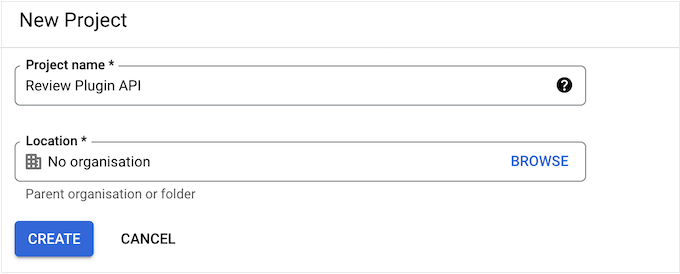
With that done, click on ‘New Project.’
You can now type in a name for the project. This is just for your reference so you can use anything you want.
Once you’ve done that, click on the ‘Create’ button.
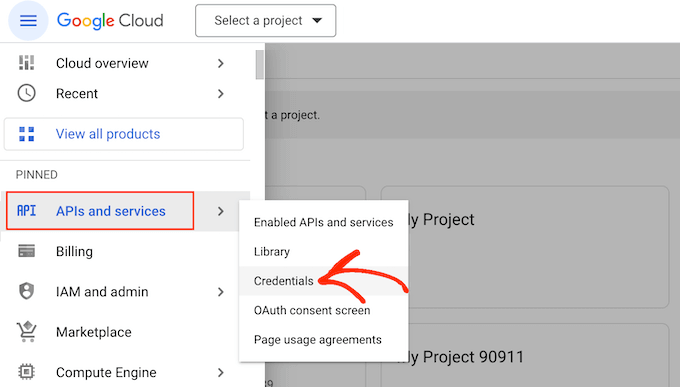
After that, click on the lined icon in the upper-left corner to open the menu.
In the menu, select ‘APIs and services’ and ‘Credentials.’
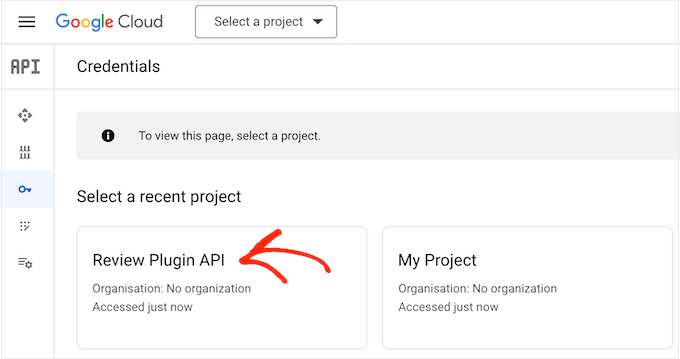
You will now see all your Google projects.
Simply find the project we just created and give it a click.
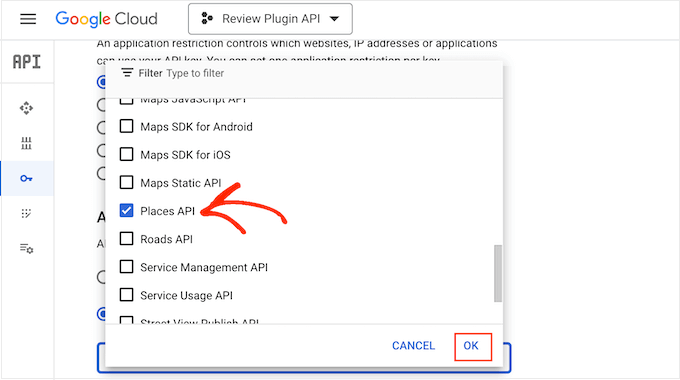
In the search field, start typing ‘Places API.’
When the right API appears, give it a click.
This takes you to a screen where you can activate the key for making Places API requests.
To do this, simply click on the ‘Enable’ button.
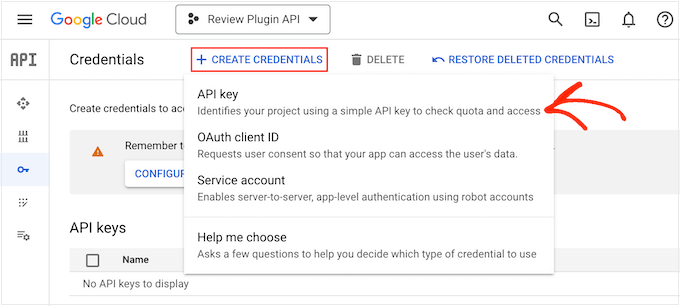
With that done, press the backwards arrow to return to the main Google Cloud Console dashboard. Here, click on ‘Create Credentials.’
Go ahead and select ‘API key’ from the dropdown menu.
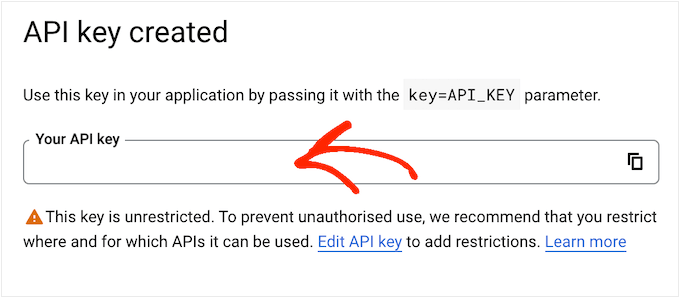
After a few moments, you’ll see an ‘API key created’ popup.
You’ll need to add this information to your WordPress blog or website, so make a note of it.
By default, all of Google’s API keys are unrestricted. To stop other people from using the API key, you’ll need to restrict it by clicking the ‘Edit API Key’ link inside the popup.
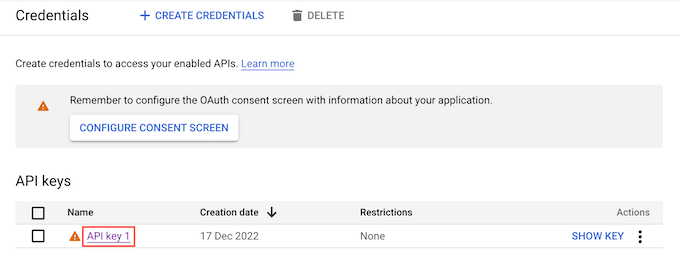
This opens a screen showing all your Google API keys. Simply find the key you just created, and give it a click.
Note: If you closed the popup by accident, then don’t worry. You can reach the same screen by selecting ‘Credentials’ in the left-hand menu.
Under ‘Application restrictions,’ click on ‘HTTP referrers (websites).’
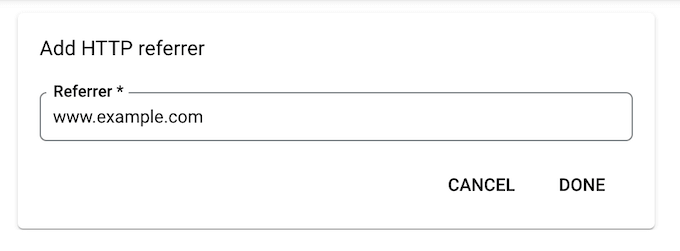
Under ‘Website Restrictions,’ click on ‘Add.’
You can now type in the address of your WooCommerce store or WordPress website, and then click on ‘Done.’
To make sure Smash Balloon can access the Places API, you’ll also need to type in www.googleapis.com and click on ‘Done.’
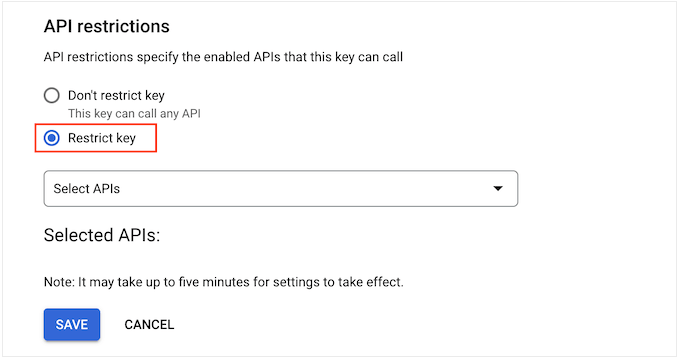
Under ‘API restrictions,’ select the button next to ‘Restrict key.’
With that done, click on the ‘Select APIs’ dropdown menu and check the box next to ‘Google Places API.’
Now we’re ready to click on ‘OK.’
The next step is adding the API key to your site. In the WordPress dashboard, go to Reviews Feed » Settings.
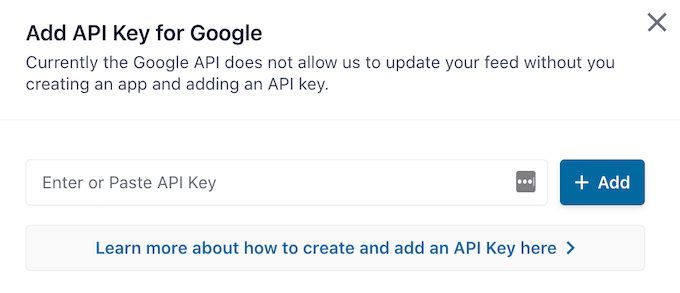
Under ‘Manage API Keys,’ click on the pencil icon next to ‘Google.’
In the popup, add your Google API key.
After that, click on the ‘Add’ button.
Now you’ve added an API key, you’re ready to create a feed showing all your Google Reviews.
To do this, go to Reviews Feed » All Feeds, and click on the ‘Add New’ button.
On the next screen, click on ‘Add New.’
In the popup that appears, click on ‘Google’ and then select ‘Next.’
Now you’ll need to enter the Place ID of the cafe, restaurant, or other venue that you want to use in your feed.
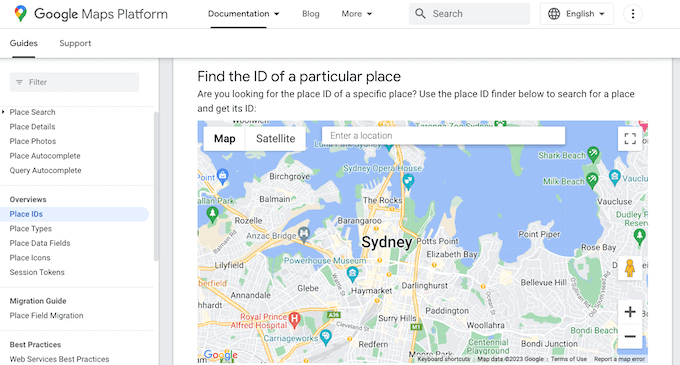
To get the ID, go to Google’s Place ID page and scroll to ‘Find the ID of a particular place.’
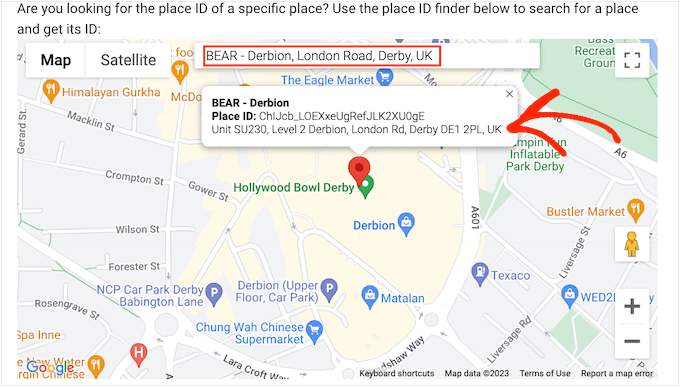
In the Google Maps search bar, start typing the address or name of the place that you want to feature. When the right place appears, give it a click.
Google will now show the place ID in a small popup.
Go ahead and copy the place ID.
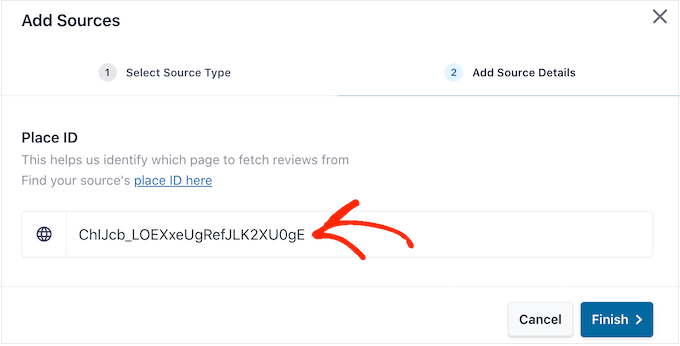
Now, switch back to the WordPress dashboard and paste the ID into the ‘Enter Place ID’ field.
With that done, click on ‘Finish.’
To go ahead and create the feed, you need to check the box next to the Google place you just added, and then click on ‘Next.’
You can now choose the template you want to use for the review feed, and click on ‘Next.’
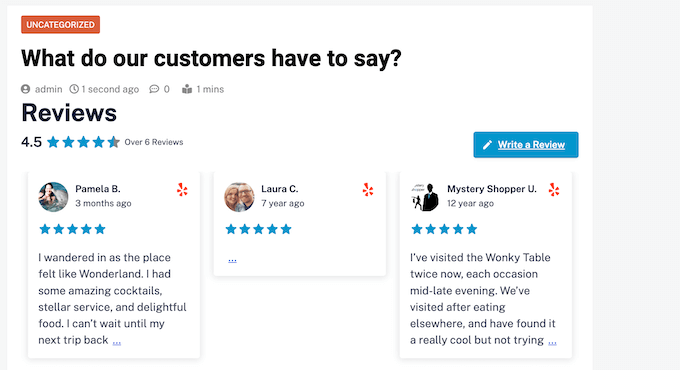
Smash Balloon will now create a feed showing all your Google reviews.
Do you want to change how the feed looks? Skip to the end of this post for a detailed step-step guide on how to fine-tune the Google Reviews feed, and then add it to your website.
Method 3. How to Show Facebook Reviews in WordPress
Many businesses, websites, and online stores use Facebook to connect with their audience. Facebook also has its own built-in review system, so you may want to add these reviews to your website.
Unlike Yelp and Google, your Facebook page belongs to you, so this is also a way to promote your profile and get more social media followers.
To create a Facebook review feed, go to Reviews Feed » All Feeds.
Then, click on the ‘Add New’ button.
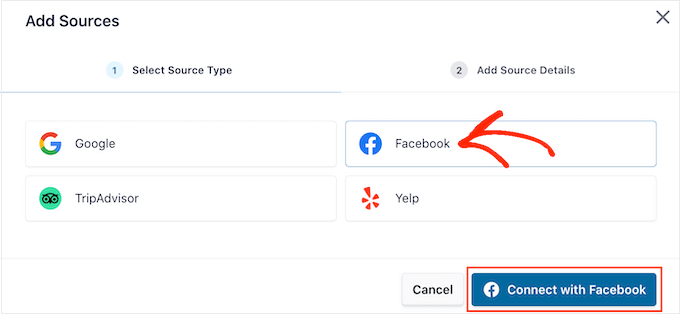
On the next screen, click on ‘Add New’ again.
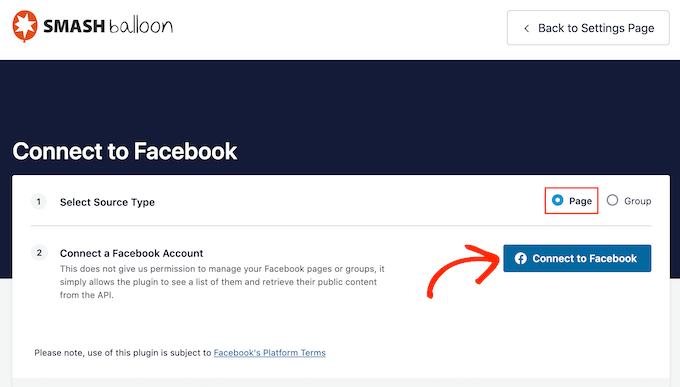
In the popup that appears, click on ‘Facebook’ and then select ‘Connect with Facebook.’
On the next screen, select the radio button next to ‘Page.’
Once you’re done with that, click on ‘Connect to Facebook.’
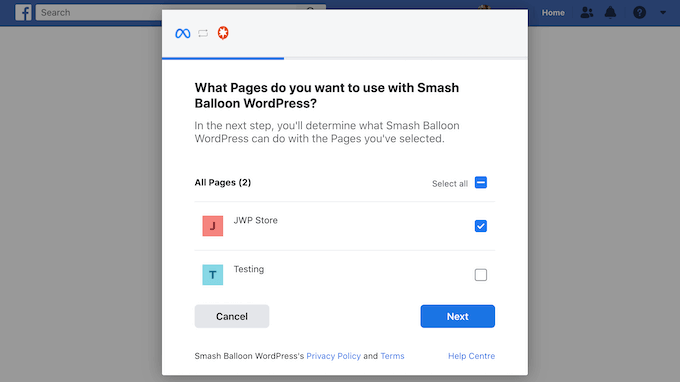
This opens a popup where you can log into your Facebook account and choose the pages where you’ll get the reviews from.
After that, we’re ready to click on ‘Next.’
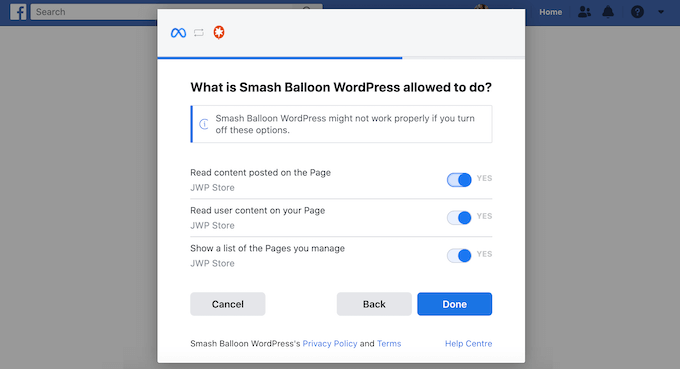
Facebook will now show all the information that Smash Balloon will have access to and the actions it can perform.
To restrict Smash Balloon’s access to your Facebook page, just click any of the switches to turn it from ‘Yes’ to ‘No.’ However, be aware that this can affect the content that appears on your website.
With that in mind, it’s a good idea to leave all the switches enabled.
When you’re happy with how the Facebook permissions are set up, click on ‘Done.’
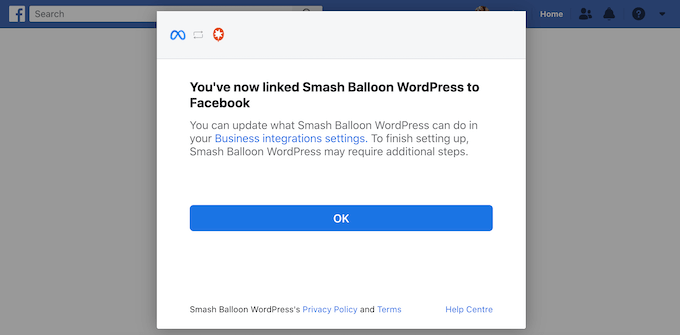
After a few moments, you should see a message confirming that you’ve connected your WordPress website and your Facebook page.
That done, click on the ‘OK’ button.
Smash Balloon will automatically take you back to the WordPress dashboard, where you’ll see the Facebook page you just connected to your website.
Simply select the checkbox next to the Facebook page and then click on the ‘Next’ button.
You can now choose the template you want to use for the Facebook reviews feed.
After making the decision, click on ‘Next.’
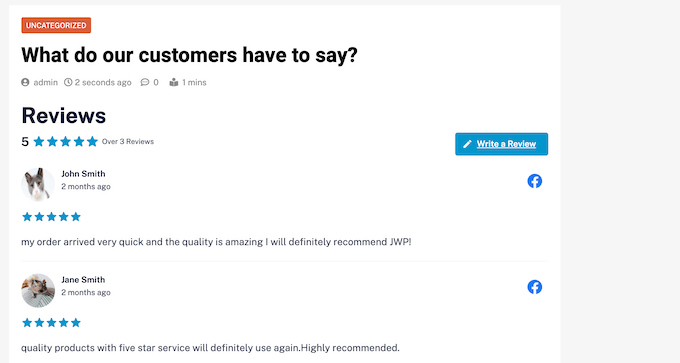
Smash Balloon will now create a feed showing all your Facebook reviews.
Customizing Your Google, Facebook, or Yelp Review Feed
Smash Balloon automatically copies your WordPress theme so any reviews feed you create will fit perfectly with your site’s design. However, Smash Balloon also has an advanced feed editor so you can fine-tune every part of the feed.
No matter whether you create a feed using Google, Facebook, or Yelp, Smash Balloon will open its feed editor automatically.
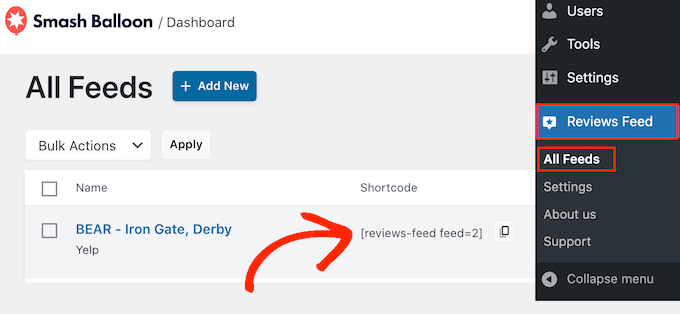
Note: If you accidentally closed the editor then don’t panic. Simply go to Reviews Feed » All Feeds in the WordPress dashboard, and then click on the ‘Edit’ icon next to the feed.
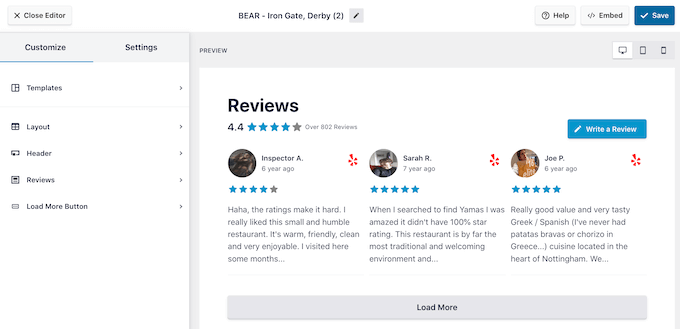
Smash Balloon shows a live preview of your review feed to the right. On the left is a menu that shows the different settings that you can use to change how the feed looks.
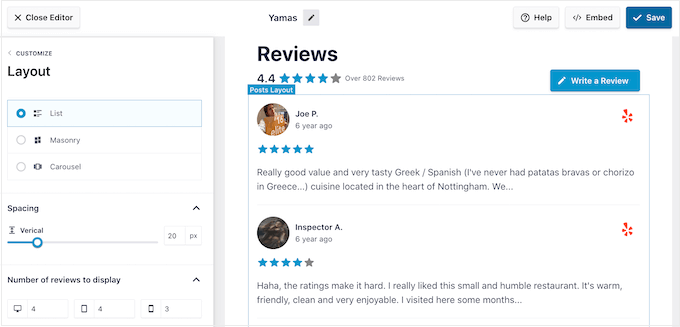
To see what changes you can make, start by clicking on ‘Layout’ in the left-hand menu. Here, you can choose from a Grid, Masonry, or Carousel layout.
As you click on the different layouts, the live preview will automatically update to show the new layout. This makes it easy to try different layouts and find the one you prefer.
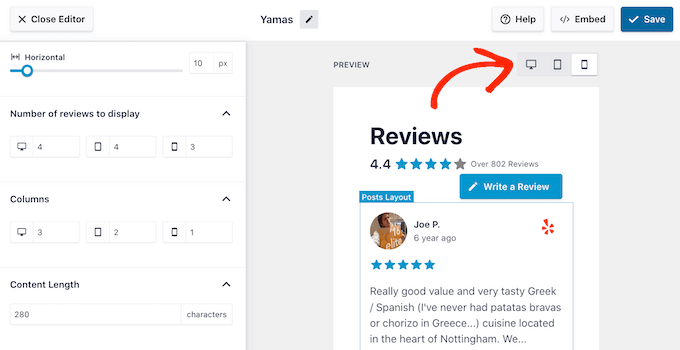
You can also change the spacing, how many reviews you include in the feed, and the number of characters WordPress shows from each review.
As you make changes, remember that the feed may look different on smartphones and tablets, compared to desktop computers.
With that being said, it’s a good idea to test the mobile version of your feed using the row of buttons in the right-hand corner. In this way, you can create a review feed that looks just as good on smartphones and tablets, as it does on desktop computers.
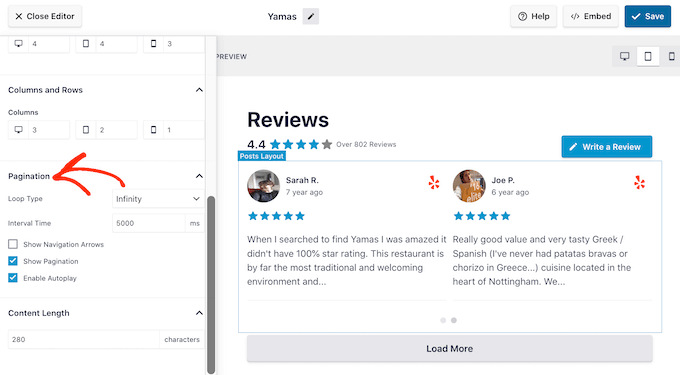
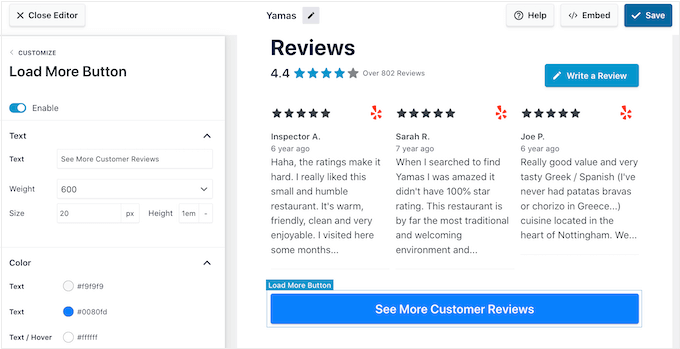
Finally, if you select the Carousel layout then you can change how the reviews scroll using the ‘Pagination’ settings.
For example, you can enable autoplay so the reviews scroll automatically or increase the interval so visitors have more time to read each review.
When you’re happy with these changes, click on the small arrow next to ‘Customize.’
This takes you back to the main Smash Balloon review feed editor.
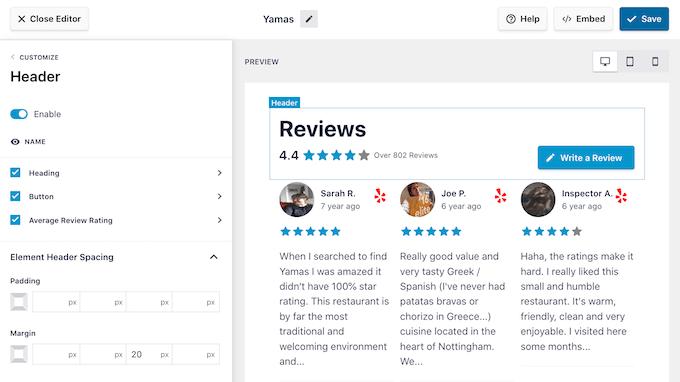
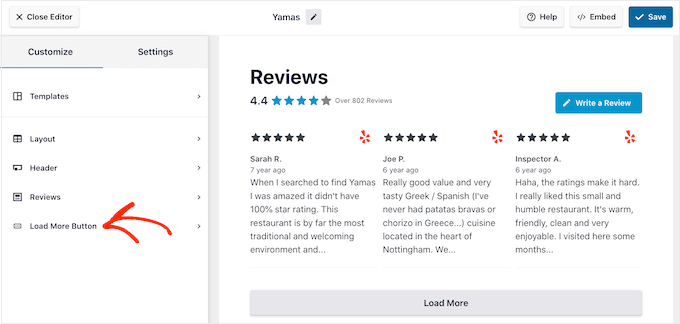
The next setting you can explore is ‘Header,’ which controls the text that appears at the top of your feed.
By default, Smash Balloon shows a ‘Review’ headline, your average star rating, and a ‘Write a review’ button.
This header helps visitors understand the content, while also encouraging them to leave their own review. However, if you prefer then you can remove the header using the ‘Enable’ toggle.
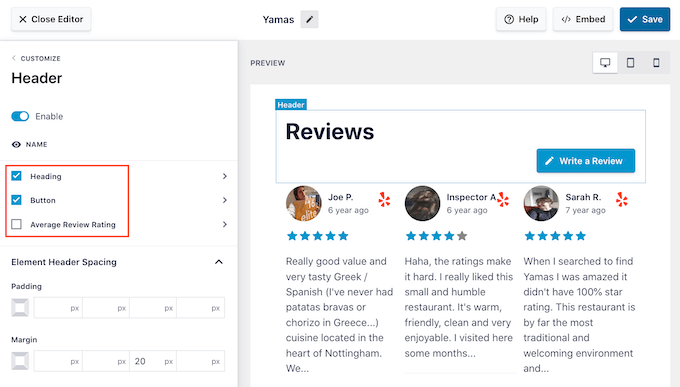
If you do show the header, then you can add or remove content using the Heading, Button, and Average Review Rating checkboxes.
To change the padding and margins, simply use the settings under ‘Element Header Spacing.’
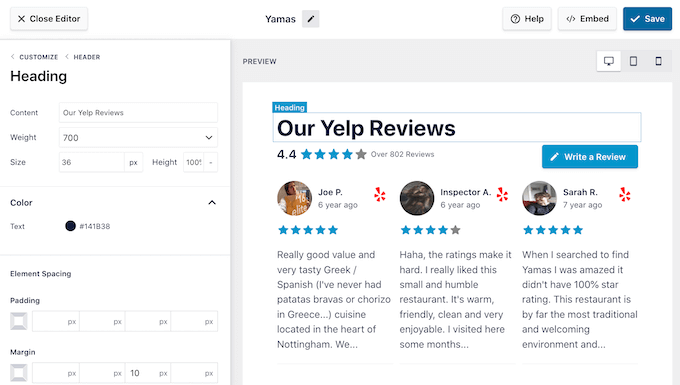
If you want to change any of the text that appears in the header, then simply click on either Heading, Button, or Average Review Rating. This takes you to an area where you can change the text color, size, and more.
You can also replace the standard text with your own custom messaging by typing into the ‘Content’ field.
When you’re ready to return to the main editor screen, just click on the ‘Customize’ link at the top of the left-hand menu.
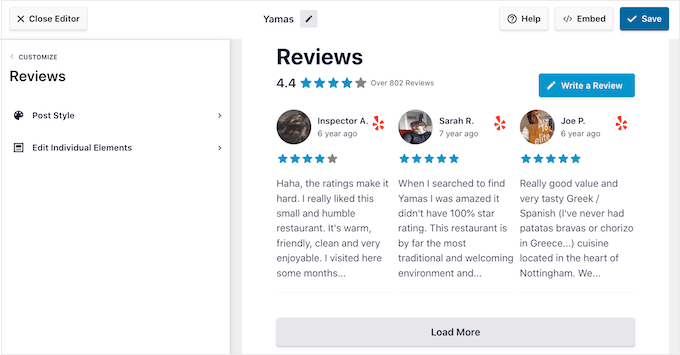
The next setting you can look at is ‘Reviews,’ so give this option a click. Here, you can choose between ‘Post Style’ and ‘Edit Individual Elements.’
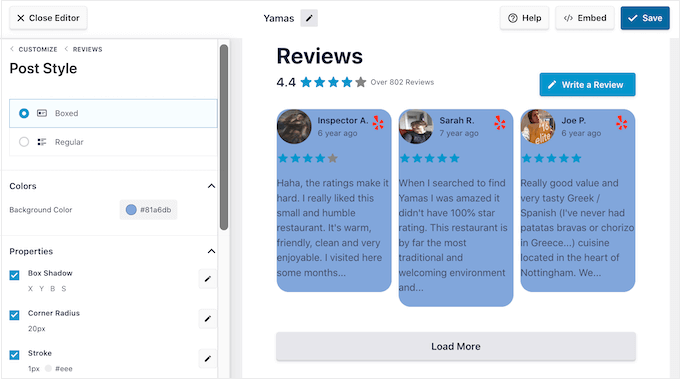
If you select ‘Post Style,’ then you can change how the individual reviews look inside the feed. For example, you can switch to a boxed layout, add a shadow, and change the corner radius to create curved edges.
As you make changes, the preview updates automatically so you can try different settings to see what looks the best on your website.
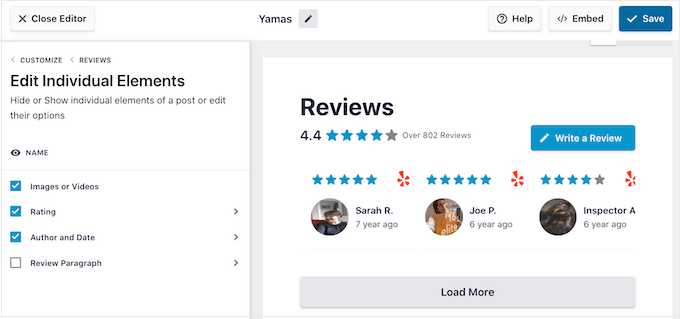
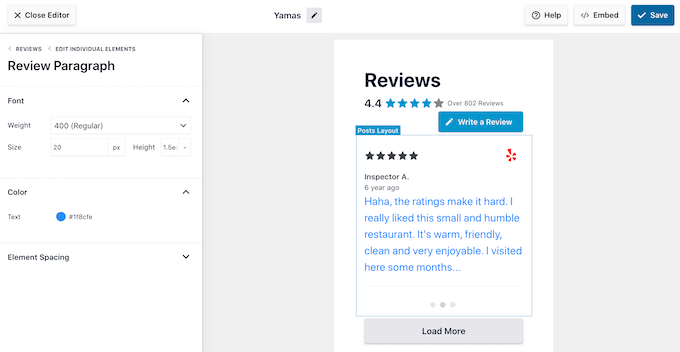
If you choose ‘Edit Individual Elements,’ then you’ll see all the different content that Reviews Feed Pro includes in each review such as rating, author and date, and the review text.
To remove a piece of content, just click to uncheck its box.
You can also customize how each type of content looks by clicking on it.
For example, in the following image, we’ve changed the color and size of the review content, known as the ‘Review Paragraph.’
When you’re happy with how the review feed looks, click on ‘Customize’ to return to the main Smash Balloon editor.
You can now move to the next settings screen by selecting ‘Load More Button.’
The ‘Load More’ button allows visitors to scroll through more reviews, so the plugin adds it by default. Since it’s such an important button, you may want to help it stand out by changing the background color, hover state, label, margins, and more.
You can also replace the default ‘Load More’ text with your own messaging by typing into the ‘Text’ field.
If you prefer, then you can remove the button completely by clicking the ‘Enable’ toggle.
When you’re happy with how the review feed looks, don’t forget to click on ‘Save.’ With that out of the way, you’re ready to add Google, Facebook, or Yelp reviews to your site.
How to Add Reviews on Your WordPress Website
Now you can add the review feed to your site using a block, widget, or shortcode.
If you’ve created more than one feed using Reviews Feed Pro, then you’ll need to know the feed’s shortcode if you’re going to use a widget or block.
To get this information, go to Reviews Feed » All Feeds and then look at the value under ‘Shortcode.’ You’ll need to add this code to the block or widget, so make a note of it.
In the following image, we’ll need to use [reviews-feed feed=2]
If you want to embed the feed in a page or post, then you can use the Reviews Feed block.
Just open the page or post where you want to show your Yelp, Google, or Facebook reviews. Then, click on the ‘+’ icon to add a new block and start typing ‘Reviews Feed.’
When the right block appears, click to add it to the page or post.
The block will show one of your review feeds by default. If you want to show a different feed, then find ‘Shortcode Settings’ in the right-hand menu.
Here, simply add the shortcode you got earlier, and then click on ‘Apply Changes.’
If you’re happy with how the review feed looks, then you can go ahead and publish or update the page.
Another option is to add the Reviews Feed widget to your website. This is a great way to show positive customer reviews on every page of your site. For example, you might add the widget to the sidebar or WordPress footer.
To add the Reviews Feed widget to your site, head over to Appearance » Widgets. You can then click on the blue ‘+’ icon towards the top of the screen.
In the panel that appears, type in ‘Reviews Feed’ to find the right widget.
Then, simply drag the widget onto the area where you want to show the reviews, such as the sidebar or similar section.
The widget will automatically show one of the feeds you created using the Reviews Feed plugin. If this isn’t the feed you want to display, then type the feed’s shortcode into the ‘Shortcode Settings’ box.
After that, click on ‘Apply Changes.’
You can now make the widget live by clicking on the ‘Update’ button. For more information, please see our step-by-step guide on how to add and use widgets in WordPress.
Another option is embedding the Google, Facebook, or Yelp reviews on any page, post, or widget-ready area using the shortcode.
Simply go to Reviews Feed » All Feeds and copy the code in the ‘Shortcode’ column. You can now add this code to any Shortcode block.
Are you using a block-enabled theme? Then you can use the full-site editor to add the Reviews Feed block anywhere on your website.
In the WordPress dashboard, go to Appearance » Editor.
By default, the full-site editor will show the theme’s home template. If you want to add the Google, Facebook, or Yelp feed to a different template, then click on the arrow next to ‘Home.’
You can then choose any design from the dropdown, such as the footer template.
After choosing a template, simply hover your mouse over the area where you want to show the reviews.
Then, click on the ‘+’ button.
Once you’ve done that, type in ‘Reviews Feed.’
When the right block appears, click to add it to the template.
As always, Reviews Feed will show a feed by default. You can change this feed by adding a shortcode following the same process described above.