Do you want to build an online question and answer community like Stack Overflow or Quora?
You can create a whole site dedicated to Q&A, or add a question and answer section to an existing WordPress site. No matter what approach you take, helpful questions and answers can improve the visitor experience and keep people on your website for longer.
In this article, we will show you how to easily create a question and answers site in WordPress.
Getting Started with a Question and Answer Website
To start your own question and answers website, you will need the following:
- A domain name. This is the name of your website such as stackoverflow.com.
- A web hosting account. This is where your website’s files are stored. All websites need web hosting.
- A Content Management System. This is software that helps you create, publish, and manage all your questions and answers. For this guide, we’ll be using WordPress as it powers nearly 43% of all websites and gives you complete control over your content. To learn more about why we recommend WordPress to all our readers, please see our complete WordPress review with pros and cons.
- Extra software, plugins, or tools. These add special question-and-answer features to your WordPress website.
How Much Does It Cost to Build a Question and Answer Website?
The answer to this question depends on the features you need, how many visitors you get, how much content you create, and lots of other factors.
To help you budget, we’ve created a complete guide on how much it really costs to build a website. However, typically the cost of building a website can range from anywhere between $100 per year to as high as $30,000 per year.
We recommend you start small and then add more features to your question-and-answer site as it grows and gets more popular. This helps you avoid spending too much on your site, before it starts making a profit.
That said, let’s see how you can build a successful Q&A website for under $100.
Step 1: Setting up Your Question and Answers Site
To create a WordPress website you’ll need a domain name and web hosting. To help you out, we’ve hand-picked some of the best WordPress hosting that you can buy for a question and answer website.
Although the WordPress software is free, hosting and domain names are where the costs can really start to add up.
A domain name typically costs $14.99/year and hosting costs start from $7.99/month. This is A LOT for new websites or anyone who is working with a limited budget.
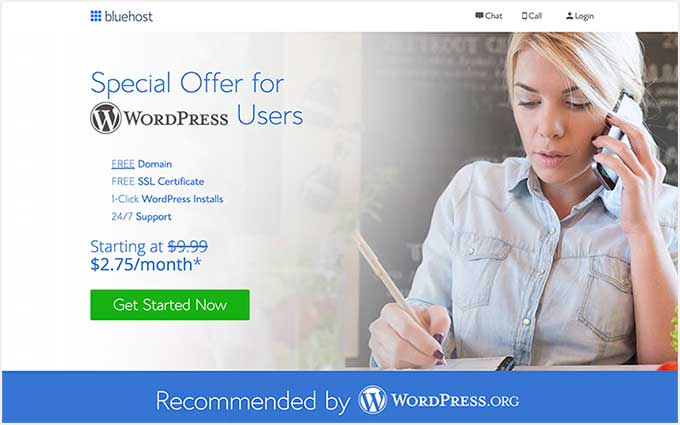
Luckily, Bluehost has agreed to offer our users a free domain name and over 60% off on web hosting. Basically, you can get started for $2.75 per month.
→ Click Here to Claim This Exclusive Bluehost Offer ←
Bluehost is one of the largest hosting companies in the world and an officially recommended WordPress hosting provider.
They’re also offering our readers a free SSL certificate so you have the option to accept payments online. This is perfect if you want to make money from your question and answer website in the future.
To buy a domain name and hosting, simply go to the Bluehost website in a new browser window and click on the green ‘Get Started Now’ button.
This will bring you to a pricing page where you can choose a hosting plan for your question-and-answer website.
We recommend choosing a Basic or Plus plan, as they’re the most popular web hosting plans among our readers.
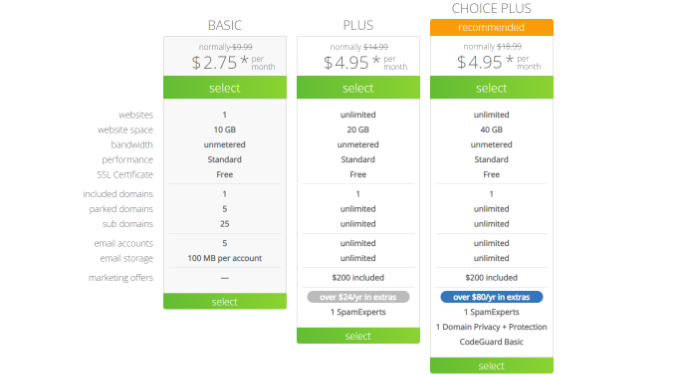
After selecting a plan, click on ‘Continue.’
On the next screen, you’ll need to choose a domain name.
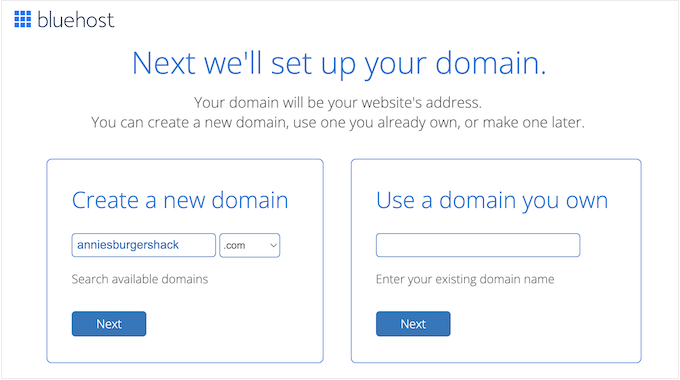
Ideally, the domain name will be easy to pronounce and spell, and easy to remember.
Need help choosing a domain name for your question and answer website? See these tips and tools on how to choose the best domain name.
After choosing a name, click on the ‘Next’ button to continue.
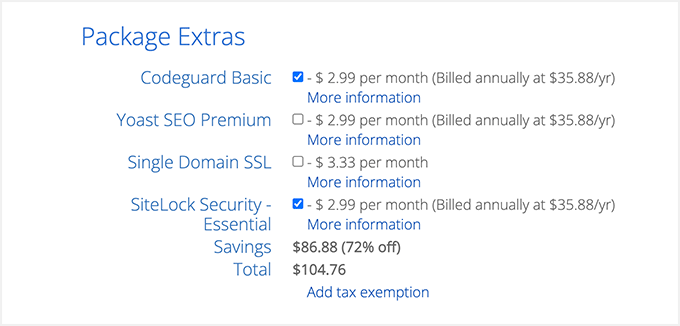
Now you’ll need to provide your account information such as your name and business email address. After that, you’ll also see optional extras that you can purchase.
We generally don’t recommend purchasing these extras straight away, as you can always add them later on if you need them.
After that, simply type in your payment information to complete the purchase.
Once you’ve done that, you’ll get an email with instructions on how to log in to your web hosting control panel. This is your hosting account dashboard where you can manage your Q&A website, including setting up email notifications and asking for WordPress support, if you need it.
It’s also where you’ll install the WordPress software.
Step 2. Install WordPress on Your Question and Answer Website
When you signup with Bluehost using our link, you’ll get access to a one-click WordPress installer.
Simply log into your Bluehost account and click on ‘One Click Install.’
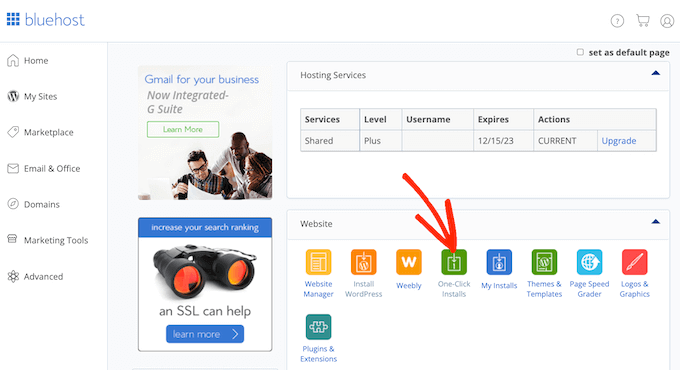
Here, you’ll see all the different software you can add to your account.
Simply find ‘WordPress’ and give it a click.
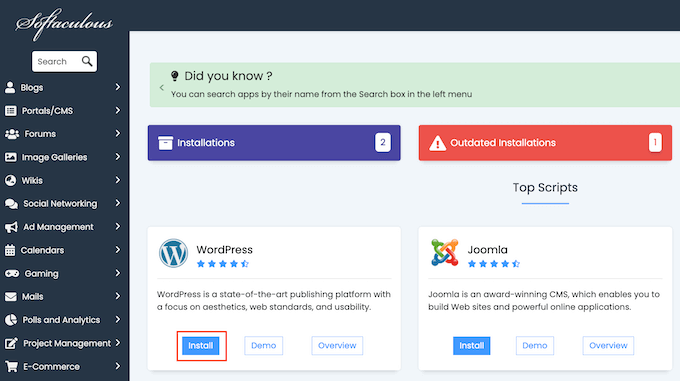
Here, just click on the ‘Install’ button.
You can now follow the onscreen instructions to install the WordPress software.

Once that process is finished, you can log in to the WordPress dashboard by simply going to yoursite.com/wp-admin/ directly from your browser.
If you’re using a different WordPress website host like SiteGround, Hostinger, HostGator, or WP Engine, then you can see our complete guide on how to install WordPress for all the top hosting providers.
Step 3. Select a WordPress Theme
After installing WordPress, you’ll typically want to change the default theme. WordPress themes are professionally designed templates that change how your site looks and acts.
There are lots of different premium and free WordPress business themes to choose from. You can generally categorize these as multipurpose WordPress themes, or niche industry themes.
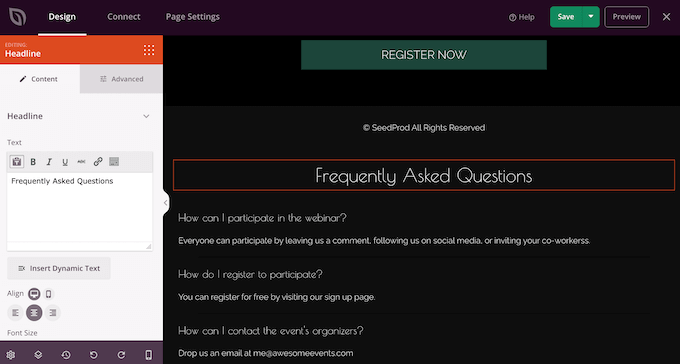
Another option is to use a landing page builder plugin such as SeedProd.

SeedProd is the best drag-and-drop WordPress page builder and comes with built-in templates that you can use to build a professionally-designed question-and-answer website.
It even has a ready-made FAQ section that you can add to any page using drag and drop.
Once you’ve chosen a theme, please see our step-by-step guide on how to install a WordPress theme.
Step 4. Setting up Your Question and Answers Site
The easiest way to add question and answer features to your WordPress website is by using the AnsPress plugin. This plugin allows you to create a Stack Overflow-style question and answer site.
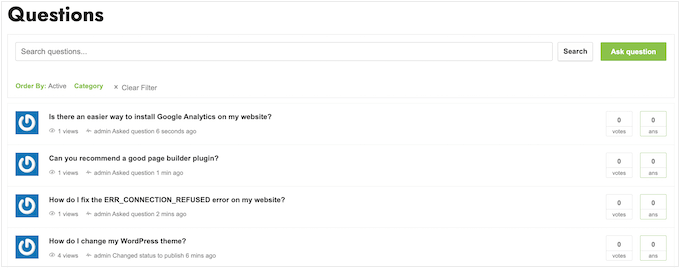
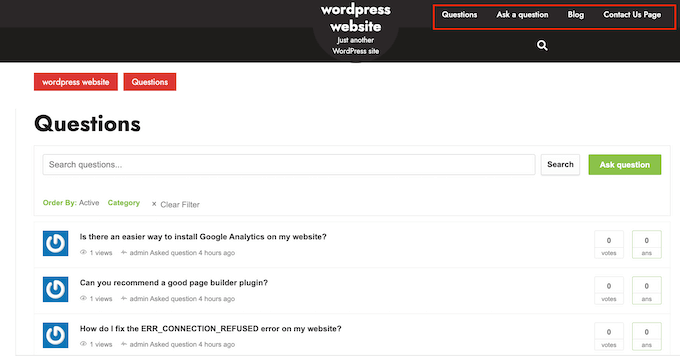
Even better, AnsPress automatically creates all the pages you need to launch a successful Q and A site.
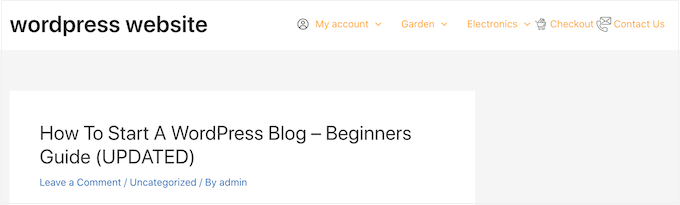
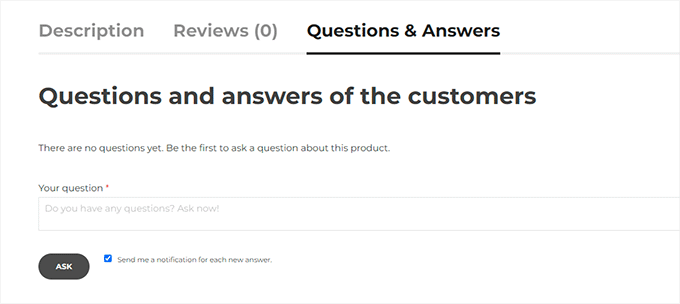
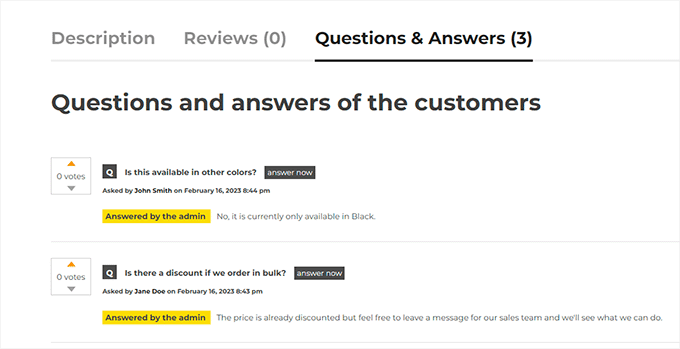
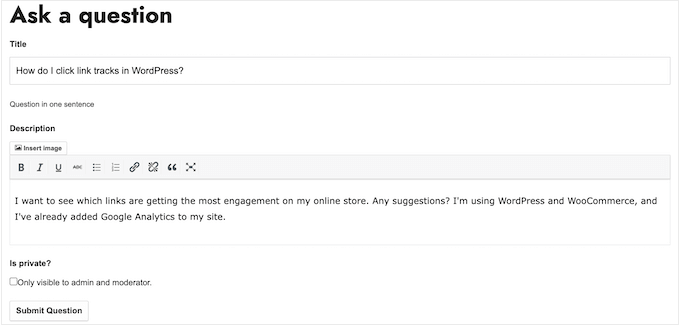
This includes a page where visitors can type in their questions, in exactly the same way people use websites like Quora.
The first thing you need to do is install and activate AnsPress. For more details, see our step-by-step guide on how to install a WordPress plugin.
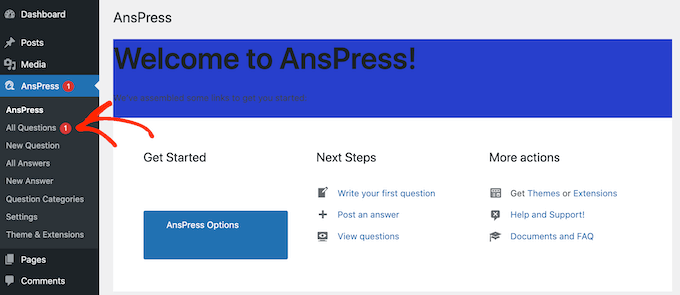
Upon activation, AnsPress automatically adds question-and-answer pages to your WordPress website. To see these pages, head over to AnsPress » Settings in the WordPress dashboard.
Once there, you can select ‘General’ in the menu on the left-hand side.
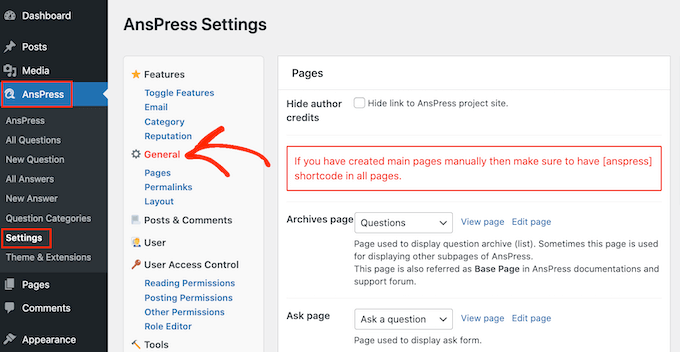
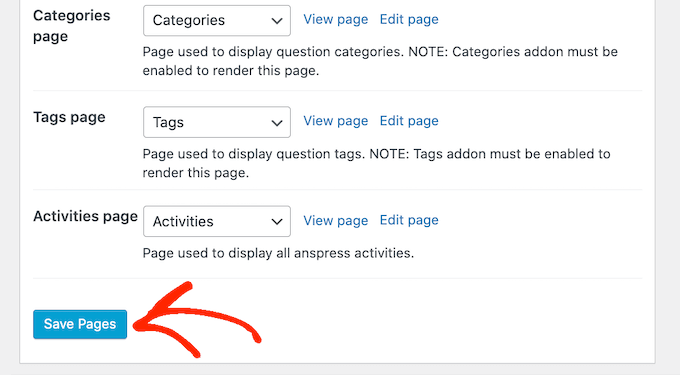
This page lists all the different pages that AnsPress has created.
To take a closer look at any page, simply click on its ‘View page’ link.

The default AnsPress pages should be a good fit for most WordPress blogs and websites. However, you can always add your own content to these pages.
For example, you might add some text that encourages visitors to post their questions, and tells them when to expect an answer.

To add your own content to any AnsPress page, simply click on the ‘Edit page’ link next to it.
This opens the standard WordPress post editor where you can add text, images, and more.
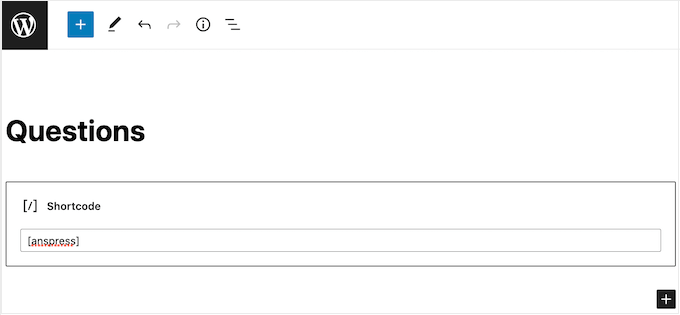
As you can see, AnsPress adds all its content using shortcode, so don’t change this code in any way.
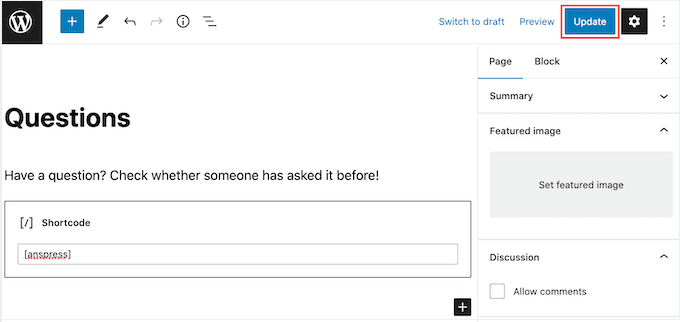
When you’re happy with the changes you’ve made, just click on ‘Update.’
You can edit any default AnsPress page by following the same process described above.
When you’ve finished, don’t forget to click on ‘Save Pages’ to store your settings.
By default, AnsPress adds the following message to all its pages: ‘Question and answer is powered by anspress.net.’ This can make your site look less professional.
It also links to the AnsPress site, which can hurt your pageviews and bounce rate by encouraging people to leave your site.
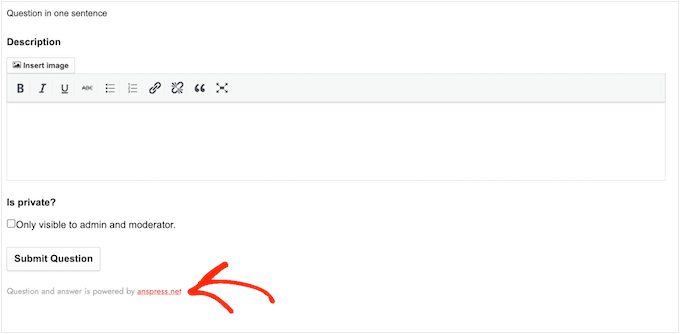
Because of that, it’s a good idea to remove this text by checking the box next to ‘Hide author credits’ and then clicking on ‘Save Changes.’
Now if you look at any AnsPress page, you’ll see the text has vanished.

With that done, scroll to the ‘Permalinks’ section in the AnsPress settings.
Here, you’ll see the permalink structure and settings that the plugin uses by default. These settings should work well for most websites, but you may be able to improve your WordPress SEO by making some small changes.
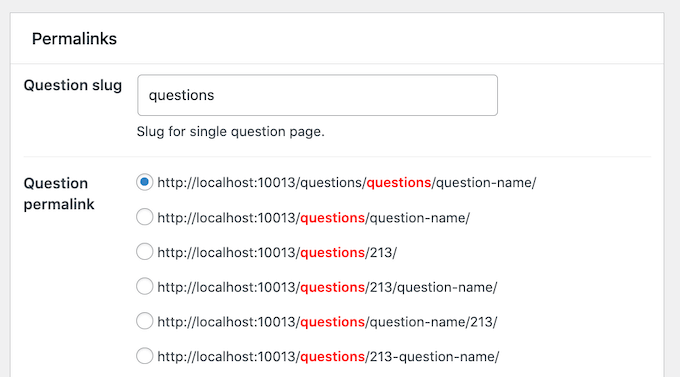
For example, you may want to add some relevant keywords to the default ‘Question slug.’ This can help you create more SEO-friendly URLs in WordPress.
In the image below, each question will now use the slug /questions/wordpress-questions/question-name/ which will help us rank for the term ‘WordPress.’

If you do make any changes in this section, then don’t forget to click on ‘Save Changes.’
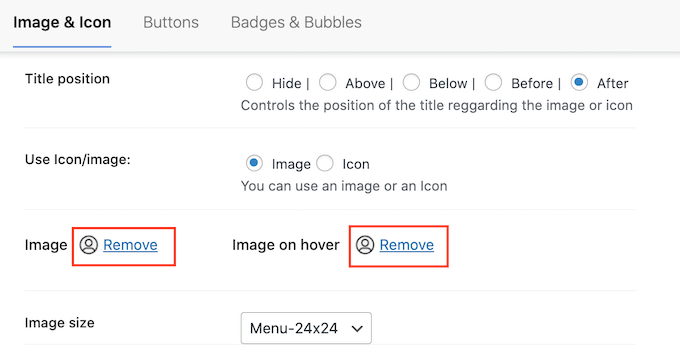
Next, it’s time to fine-tune the layout by scrolling to the ‘Layout’ section. Here, you’ll see that AnsPress shows the user’s Gravatar in a few different places including next to questions, answers, and comments.
You can change the size of these avatars by typing into the different boxes.
For more information on user avatars, please see our beginner’s guide on Gravatars and why you should start using them right away.
By default, AnsPress will show 20 questions per page and 5 answers per page. You can show more or less content by typing new numbers into the ‘Questions per page’ or ‘Answers per page’ box.
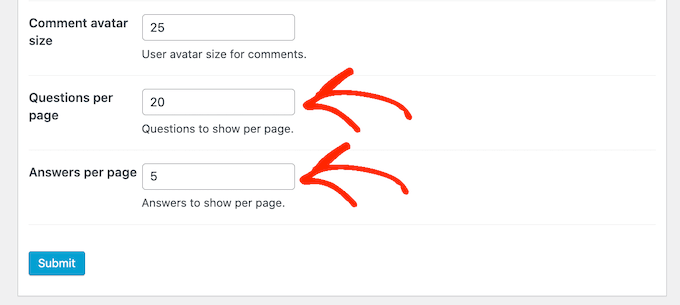
If you show fewer questions and answers per page, then users will need to scroll less. This is particularly helpful for visitors who are using smaller devices like smartphones and tablets. It can also speed up your WordPress performance since you’re loading less content.
Just be aware that most visitors expect to get the right answer on the first page, so you’ll want to show a reasonable number of answers per page.
When you’re happy with how your Q&A site is set up, click on the ‘Submit’ button.
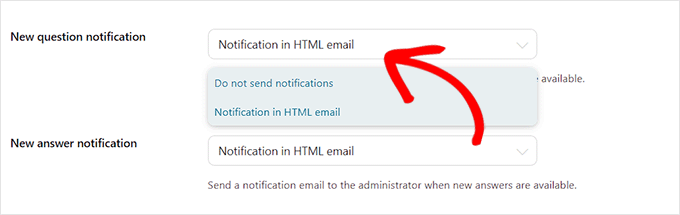
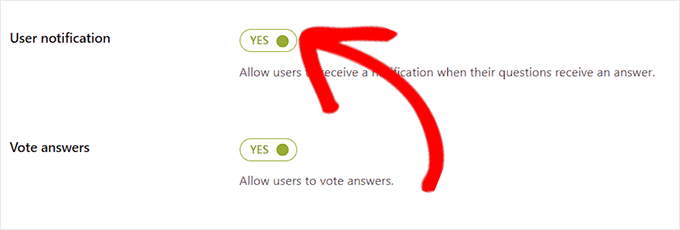
Email notifications are an important part of running a successful question-and-answer website. They let admins know when customers or potential leads post a new question, and they also let users know when their question gets an answer.
In this way, emails can keep users engaged and help your Q&A site run more smoothly.
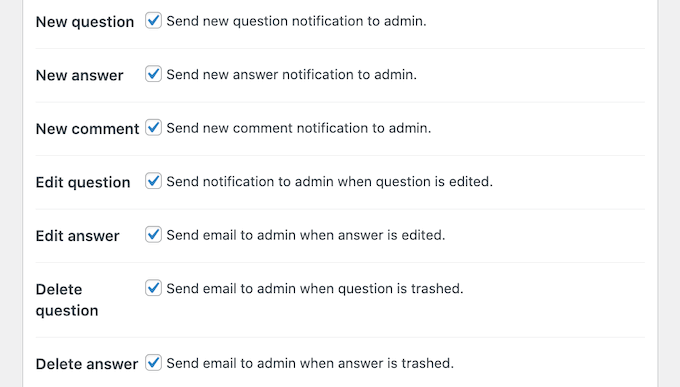
AnsPress comes with built-in email notifications that work out-of-the-box. However, it’s still smart to see whether there are any changes you want to make by clicking on the ‘Email’ link.
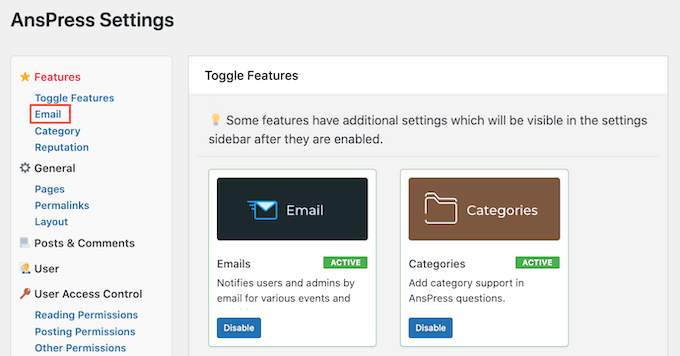
Here, you can see all the different emails that AnsPress will send automatically.
To enable or disable an email, simply click on the box next to it.
Pro Tip: You need to make sure all your Q&A emails go to the user’s email inbox and not to the spam folder. The best way to do this is by using an SMTP service provider to improve email deliverability. For more details, see our guide on how to fix WordPress not sending email issue.
As always, don’t forget to click on ‘Submit’ to save your changes.
Some question-and-answer sites are completely open to the public. This means that non-logged-in users can see the content, and may even be able to post questions and answers without creating an account.
Other Q&A sites are completely private or require user registration.
There are drawbacks and positives to the different approaches. A public question-and-answer site will typically get more traffic and engagement, but it may also get more spam and attract low-quality answers.
If you’re using questions and answers to make money online blogging with WordPress, then you may want to make some parts of your site members-only. This allows you to charge a subscription fee using a plugin like MemberPress.
Another option is allowing people to register with your website for free, so you can collect their email addresses. In this way, your question-and-answer site can help you do lead generation like a pro.
However you plan to use your question-and-answer site, it’s a good idea to review the posting permissions by selecting ‘User Access Control.’
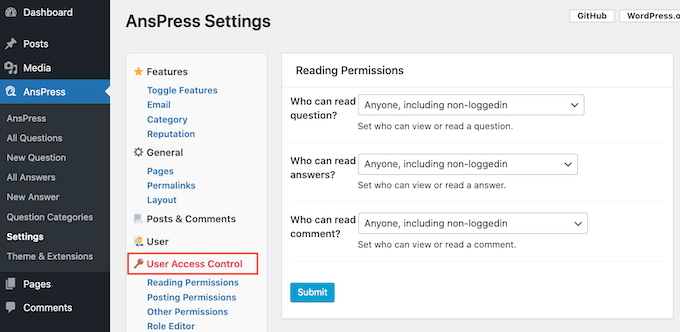
Here, you can see all the different content that logged-in and non-logged-in users can access, and the actions they take. You can change these settings using the different dropdown menus.
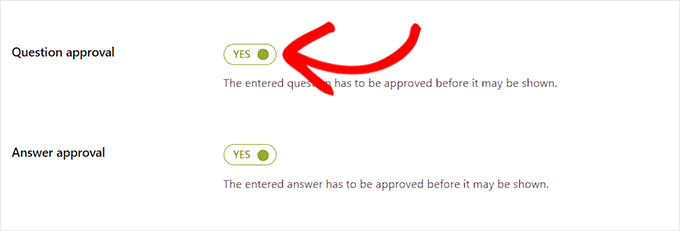
You can also change whether questions and answers get posted automatically, or if they’re held for admin approval. By default, non-logged-in users can post questions and answers, but you’ll need to approve them manually in the admin area.
This is similar to how you moderate comments in WordPress.
These settings are self-explanatory but they have a big impact on how your question-and-answer site runs. With that being said, it’s worth going through the different settings carefully and then making any changes.
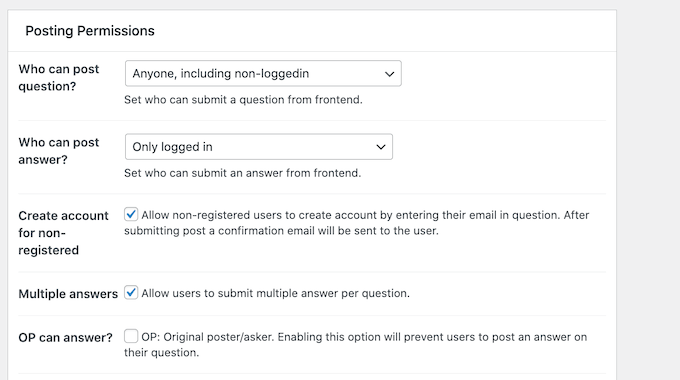
If you do edit these settings, then don’t forget to click on the ‘Submit’ button.
AnsPress encourages users to engage with your site through gamification, by awarding reputation points for different actions. This reputation system works by default, but you can change how many points AnsPress awards for each action by selecting ‘Reputations.’
Here, you’ll see all the different actions and their reputation points.
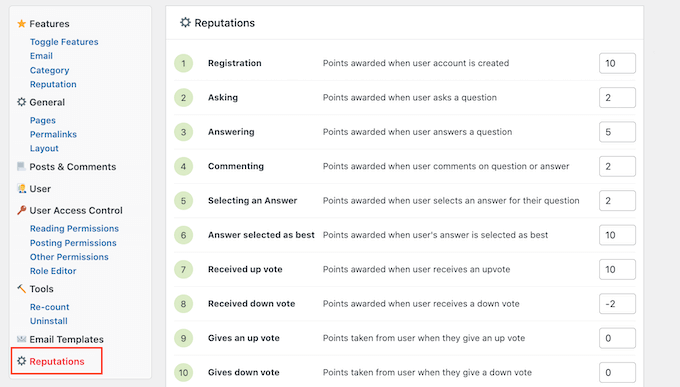
To award more or less points for an action, simply type a new number into its box. When you’re happy with how the reputation system is set up, click on Save Events Points.
There are some more settings you may want to look through, but this should be enough to help you set up a successful question-and-answer website.
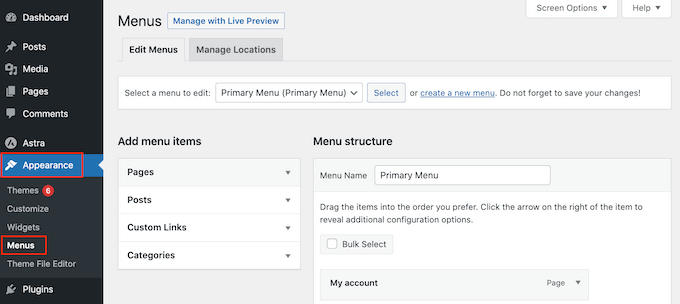
When you’re happy with how the plugin and pages are set up, it’s a good idea to add them to your website’s navigation menu so visitors can find them.
For step-by-step instructions, please see our beginner’s guide on how to add a navigation menu in WordPress.
If you need reminding about all the different pages that AnsPress added to your site, then simply go to AnsPress » Settings and then click on the ‘Pages’ link.
Managing Your Question Answer Site
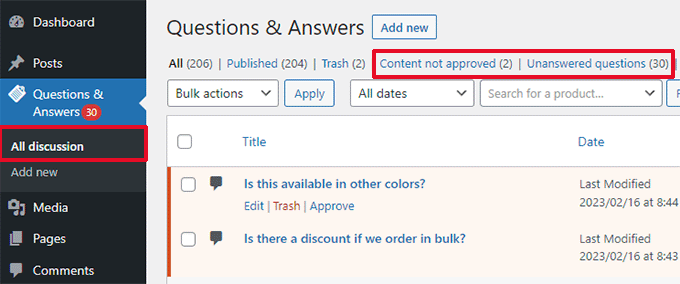
At this point, your site is ready to start accepting questions and answers from users. However, depending on how your Q&A site is set up, you may need to manually approve some, or all, of these posts.
By default, AnsPress will email the WordPress admin about any questions or answers that need manual approval. You’ll also see notifications in the admin dashboard.
To manually approve an answer or question, simply click on either ‘All Questions’ or ‘All Answers’ in the left-hand menu.
You can then hover your mouse over the post that you want to review and click on ‘View.’
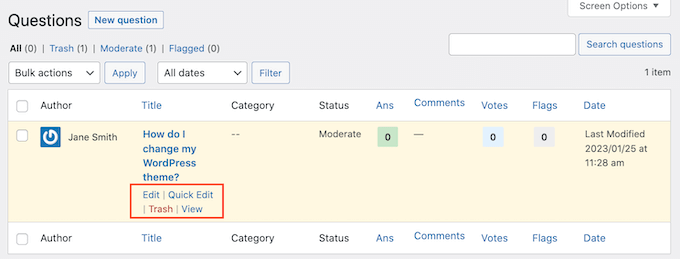
This will show a preview of how the question or answer will look on your website.
If you’re happy to make it live, then click on the small cog icon and then select ‘Published.’
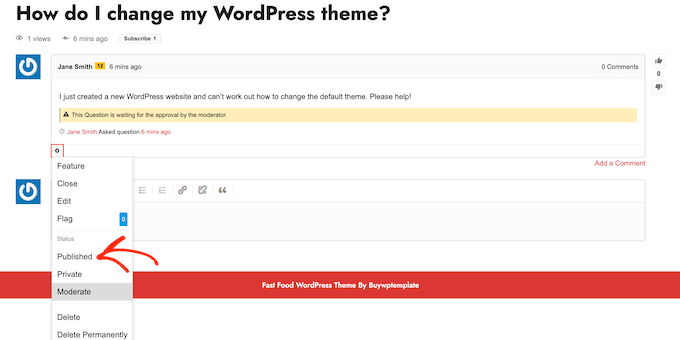
If you don’t want to publish the post, then select ‘Delete’ or ‘Delete Permanently’ instead.
We hope this article helped you create a question-and-answer site in WordPress. You may also want to see our guide on how to create a contact form in WordPress or see our expert pick of the best live chat software for small businesses.
If you liked this article, then please subscribe to our YouTube Channel for WordPress video tutorials. You can also find us on Twitter and Facebook.
The post How to Create A Question and Answers Site in WordPress first appeared on WPBeginner.