If you run an online store, this article is for you as it explains why a WooCommerce recover abandoned cart plugin is an essential addition to your site. As an online store owner, you’ll know how frustrating it is when you have put tons of effort into creating an outstanding online shopping experience, only for [...]
Do you want to enable customer tracking in WooCommerce?
Customer tracking allows you to offer a personalized shopping experience based on customer behavior in your eCommerce store.
In this article, we will show you how to easily enable customer tracking in WooCommerce with Google Analytics.
Why Enable Customer Tracking in WooCommerce with Google Analytics?
Google Analytics allows you to see where your visitors are coming from and what they do on your website. In other words, it helps you track your traffic sources as well as user engagement on your website.
For eCommerce platforms, Google Analytics offers an enhanced eCommerce tracking feature. This allows you to better understand users’ shopping and checkout behavior. Plus, you can see which products perform the best and track your WooCommerce store’s sales performance.
By default, a WooCommerce store allows your customers to create an account or checkout as guest users. Creating an account helps the user save their shipping and billing information for faster checkout next time. It also helps you offer customers a personalized shopping experience based on their browsing and shopping history.
Wouldn’t it be great if you could track logged-in users with their user IDs in Google Analytics and also see the path customers took before making a purchase?
This will give you access to a treasure trove of information and insights on customer behavior. You can use it to offer a better on-site experience and boost your sales.
Let’s take a look at how to easily enable customer tracking in WooCommerce. Here are quick links that you can use to jump ahead to any section:
Set up Ecommerce Tracking in WordPress with Google Analytics
The best way to set up WooCommerce customer tracking in Google Analytics is using Monsterinsights. It is the best Analytics solution for WordPress and helps you set up tracking without editing code.
The plugin offers an eCommerce addon, which automatically detects WooCommerces and starts tracking customer behavior in Google Analytics. It also comes with a Customer Journey addon that allows you to see users’ behavior before they make a purchase.
First, you will need to install and activate the MonsterInsights plugin. For more details, see our step-by-step guide on how to install a WordPress plugin.
You will need to be on the ‘Pro’ plan to access the eCommerce and User Journey addon, which we will use for this tutorial. However, there is also a MonsterInsights Lite version you can use for free.
Upon activation, you will see the welcome screen and the setup wizard. Simply click the ‘Launch the Wizard’ button and follow the on-screen instructions.
MonsterInsights also helps you set up Google Analytics 4 (GA4) property through its Dual Tracking feature. GA4 is the latest Analytics version, and it will soon replace Universal Analytics.
If you haven’t created a Google Analytics 4 property, then now is the best time. That’s because, after July 1, 2023, Universal Analytics will sunset and won’t track your website data. Setting up GA4 after the sunset date will mean you’ll have to start from scratch and won’t have any historical data for comparison.
Once you’ve configured Google Analytics on your website, the next step is to install the eCommerce addon.
You need to visit the Insights » Addons page from your WordPress dashboard and navigate to the ‘eCommerce’ addon. Simply click the ‘Install’ button, and the addon will automatically activate.
Enable Enhanced Ecommerce Tracking in Google Analytics
The next step is to enable eCommerce tracking in Google Analytics. E-commerce tracking is not enabled by default in your Google Analytics account, and you will have to manually enable it.
First, you’ll need to head over to your Google Analytics account dashboard and click the Admin option.
Next, you need to click on the ‘Ecommerce Settings’ option.
It is located under the View column.
On the settings page, click the slider under Enable Ecommerce and Enable Enhanced Ecommerce Reporting to turn it on.
Don’t forget to click the ‘Save’ button when you’re done.
Now, your Google Analytics account will start showing enhanced eCommerce reports for your WooCommerce store.
Now that you’ve set up WooCommerce tracking in Google Analytics, the next step is to enable the MonsterInsights Customer Journey addon.
The addon will allow you to see the steps a customer takes before making a purchase in WooCommerce. Plus, it also shows the time it took at each step, the pages a user visited, and more.
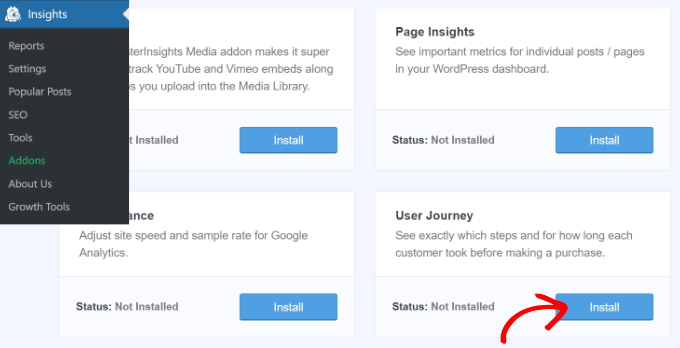
First, you’ll need to go to Insights » Addons from your WordPress admin panel. Next, navigate to the User Journey addon and click the ‘Install’ button.
The addon will automatically activate and start tracking your WooCommerce customer’s journey.
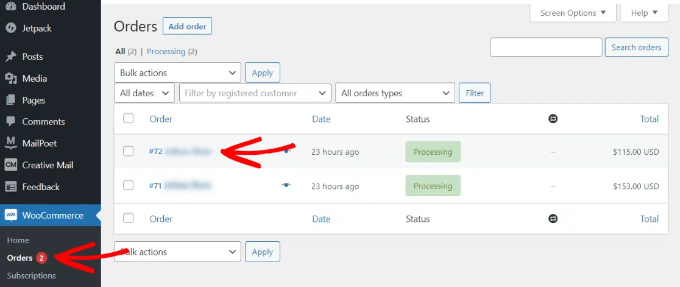
Next, you can go to WooCommerce » Orders from your WordPress dashboard to view the path your customers took when purchasing a product.
After that, click on the order for which you’d like to see the user journey.
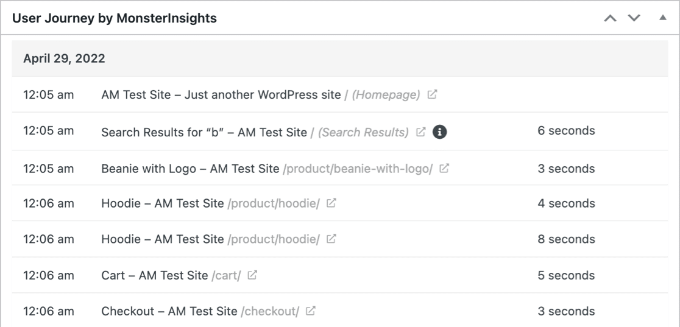
On the next screen, you’ll see the path a customer took before buying the product. You get to view the pages they visited, where they clicked, and how much time they spent on a page.
This is really useful information to better understand your customers. You can see which product categories are performing the best and where customers are exiting your store during the purchase process. Using the data, you can then fix these issues and optimize your site for more conversions.
Enabling User ID Tracking in Google Analytics
While MonsterInsights makes it very easy to track customers on your WooCommerce store, it also tracks WordPress ID tracking in Google Analytics.
WordPress ID is a unique ID to identify every user on your website. The user ID is called the ‘Client ID’ in Universal Analytics and the ‘App Instance ID’ in Google Analytics.
Do remember that enhanced eCommerce tracking will enable eCommerce reporting features for your WooCommerce store. However, it does not enable user tracking by default.
Let’s take a look at how you can enable user ID tracking in Universal Analytics and Google Analytics 4.
Enabling Customer Tracking in Universal Analytics
To enable individual customer tracking, you need to visit your Google Analytics account dashboard and open the Admin page.
Now, click on the ‘Tracking info’ link under the Property column to expand the submenu.
After that, you can click the User-ID link that appears below.
On the next page, you’ll have to review and agree to the User-ID policy.
Simply click the ‘I agree to the User-ID Policy’ toggle to turn it on.
From here, click on the ‘Next step’ button to continue.
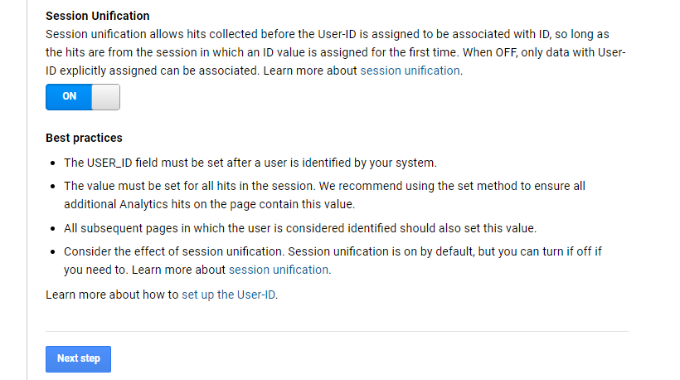
Google Analytics will now ask how you would like to configure the user-ID tracking.
Since you’ll be using MonsterInsights, there’s no need to set up the user-ID tracking code. The plugin will take care of this for you.
Simply scroll down and click the ‘Next step’ button to continue.
Next, you will see information about creating a user ID view in Google Analytics.
Go ahead and click the ‘Create’ button.
After that, you will be asked to enter a ‘Reporting View Name’, which will be used to display User ID reports.
We recommend including UserID in the name, so it is easy to remember which view has UserID tracking enabled.
There is also an option to select the Reporting Time Zone.
Next, you just need to scroll down to the bottom and click on the ‘Create view’ button to save it.
Enabling Customer Tracking in Google Analytics 4
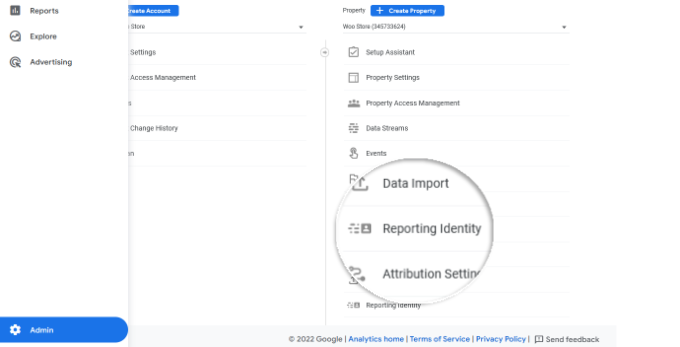
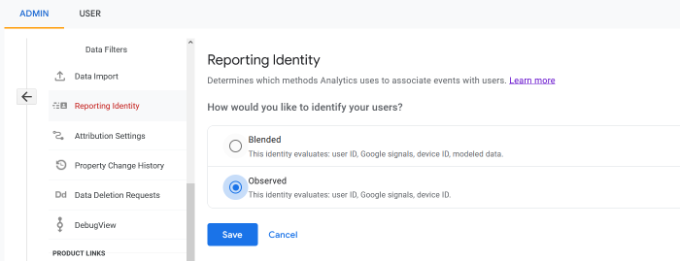
To start, you’ll need to go to the Admin settings from your GA4 dashboard and click the ‘Reporting Identity’ option.
On the next screen, you will need to select a way to identify users on your online store.
GA4 uses multiple ways to identify customers. These include user ID, Google signals, device ID, and modeled data. For the sake of this tutorial, we’ll select the ‘Observed’ option and click the ‘Save’ button.
Viewing Customer Tracking Reports in Google Analytics
Now that everything is set up, Google Analytics will now track all your website customers. It will also be able to track logged-in users with their unique WordPress user ID.
View User ID Data in Universal Analytics
To view all your individual customer activity, you can go to your Universal Analytics account and click on the Audience » User Explorer menu.
You will see individual customer reports with a unique ID assigned to all non-logged-in users.
To view customer tracking reports for logged-in users in WooCommerce, you need to click on the Google Analytics logo on the top left corner of the screen.
This will show all your Google Analytics profiles. You will see your website profile and under ‘All website data’ you will see the UserID reporting view you created earlier.
Go ahead and click on the UserID reporting view to load it.
Once it’s loaded, you need to click on the Audience » User Explorer menu. This way, you will see a logged-in customer tracking report where each user is represented by their WordPress user ID on your website.
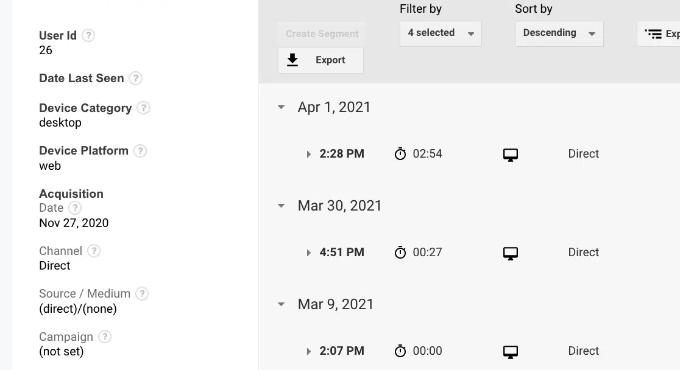
You can click on the user ID to view a customer’s individual tracking data.
For instance, the device category they use, acquisition date, the channel they used to arrive on the online store, and more.
View User ID Data in Google Analytics 4
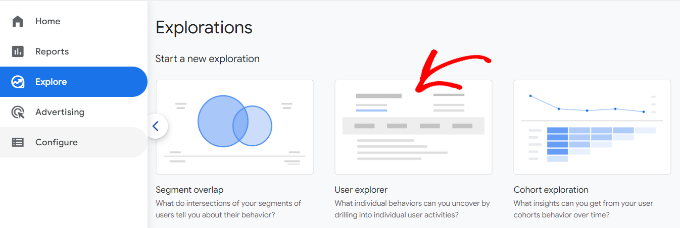
In Google Analytics 4, you’ll need to head to the ‘Explore’ tab from the menu on your left.
Under Explorations, you’ll see different report templates. Simply click the existing ‘User explorer’ report.
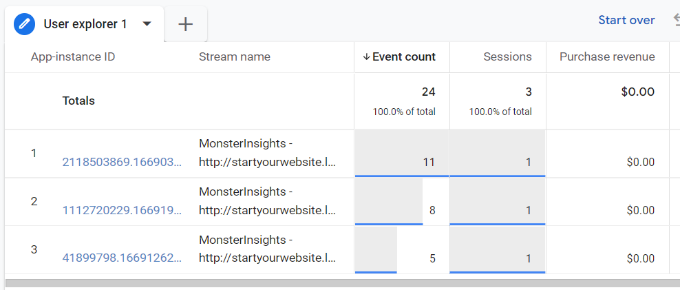
Next, you’ll see the User explorer report in Google Analytics 4.
One thing you can notice is the Client ID will be replaced with the App instance ID.
You can click on any of the app instance IDs to view more details.
For example, the report shows the total events that were triggered, the location of the user, the time stamp for each event, and more.
Matching Customer Tracking with Their WordPress Accounts
Now that you’ve identified users in Google Analytics, you can match them with WordPress accounts. This will help you know who this customer is, and how you can create personalized offers, emails, or shopping experiences for them.
First, you need to note down the customer ID you see in your Google Analytics User-ID reporting view.
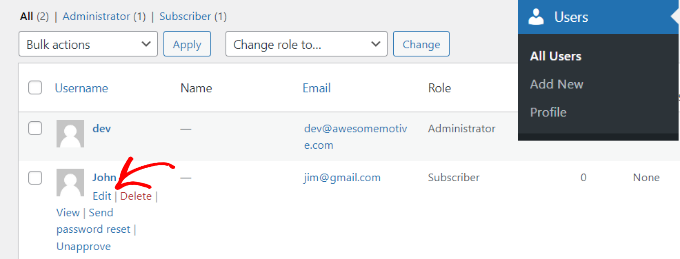
After that, go to your WordPress website’s admin area and click on the ‘Users’ menu. It will show you a list of all users on your WordPress site.
Next, you can click the ‘Edit’ link below any username in the list.
WordPress will now open the user profile for you.
If you look in your browser’s address bar you will ‘user_id’ parameter in the URL.
Next, you need to replace the value next to user_id with the one you copied from your Google Analytics report and press enter key on your keyboard.
WordPress will now load the user profile associated with that particular User ID. You now have the customer’s name, username, email address, and social media information. You can also track their orders, product views, cart activity, and more.
We hope this article helped you learn how to enable customer tracking in WooCommerce with Google Analytics. You may also want to see our expert pick of the best free WooCommerce plugins for your online store and how to get a free email domain.
If you liked this article, then please subscribe to our YouTube Channel for WordPress video tutorials. You can also find us on Twitter and Facebook.
Do you know how well your WooCommerce store is actually doing? If you’re using the default WooCommerce reports, that’s not always the easiest thing to know. Don’t get me wrong – they’re functional enough for basic uses. But there are much more detailed (not to mention more usable) options out there. We’ve collected some of [...]
Are you looking to use FOMO and social proof notifications on your WordPress site?
FOMO, short for fear of missing out, is basically a marketing technique used to create anticipation and excitement for a product. It uses a basic psychology principle to help customers make a buying decision faster.
In this article, we will show you how to properly use FOMO on your WordPress website to increase conversions and sales.
What is FOMO and How Does it help with Conversions?
FOMO or ‘fear of missing out’ is a psychological term that describes anxiety about missing out on something exciting and trendy.
As a WordPress website owner, you can take advantage of this human behavior in your marketing strategy and improve your conversions.
The concept of FOMO is not new. It’s actually been used by marketers even before the arrival of the internet. However, with online marketing, FOMO has become far easier to implement and much more effective.
For example, if you run an online store, then you can create anticipation about an upcoming sale and limited-time offers by adding social proof to your landing pages.
With that said, let’s take a look at how to easily add FOMO to your WordPress site. We will show you two techniques that we have successfully used on our own websites with incredible results.
Method 1: Adding FOMO with Social Proof by Using TrustPulse
People feel more comfortable with their buying decision when they know others have also bought the same product or service and had a good experience with it.
This is why smart business owners use social proof in their marketing.
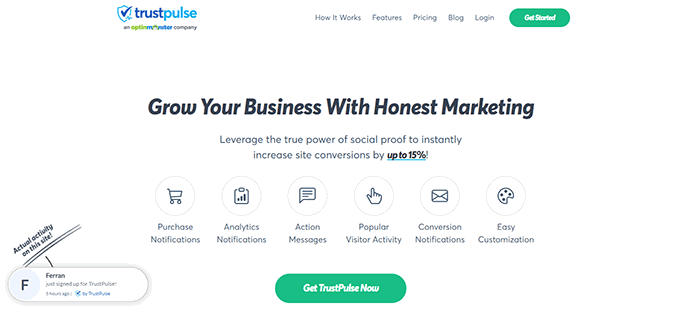
TrustPulse allows you to display real-time user activity notifications on your website, such as products purchased, forms submitted, etc.
To get started, you’ll need to install and activate the TrustPulse plugin on your website. For more details, see our step-by-step guide on how to install a WordPress plugin.
The plugin helps you connect your WordPress site to the TrustPulse app.
Upon activation, click on the TrustPulse menu from the WordPress admin sidebar and click the ‘Get started for free’ button to continue.
This will take you to the TrustPulse website, where you can sign up for a free account. The free plan is good for up to 500 sessions per month.
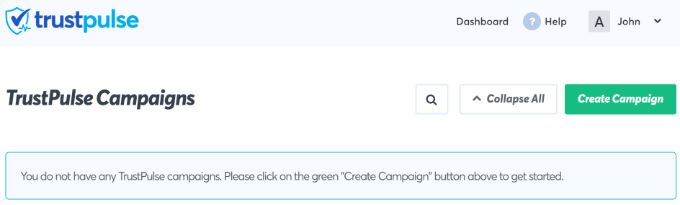
Once you sign up, you are ready to create your first campaign. Simply click on the ‘Create Campaign’ button to start your first FOMO campaign.
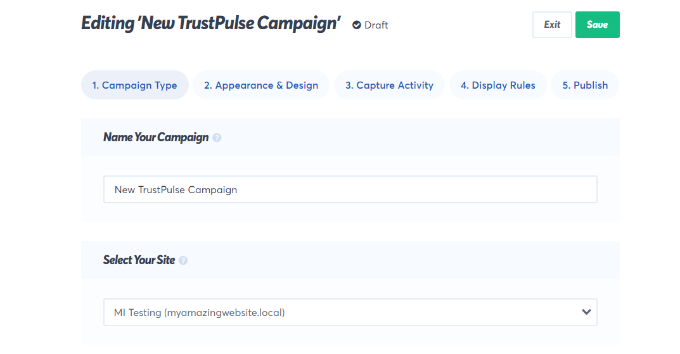
Next, you will need to provide a title for your campaign and select your website.
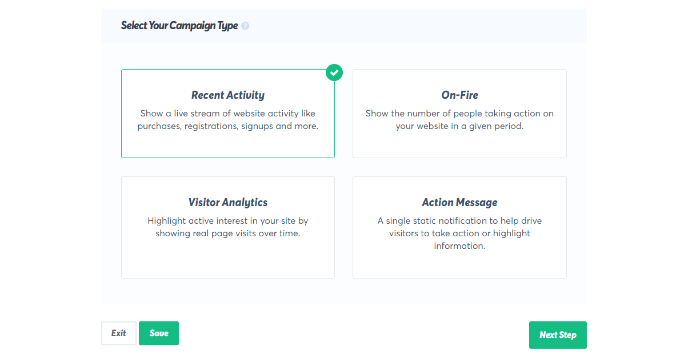
If you scroll down, then you can choose a campaign type.
TrustPulse offers 4 different campaign types to choose from.
These include showing recent activities, the number of people taking action, visitor analytics, or a static notification with helpful information.
After selecting a campaign type, don’t forget to click the ‘Next Step’ button.
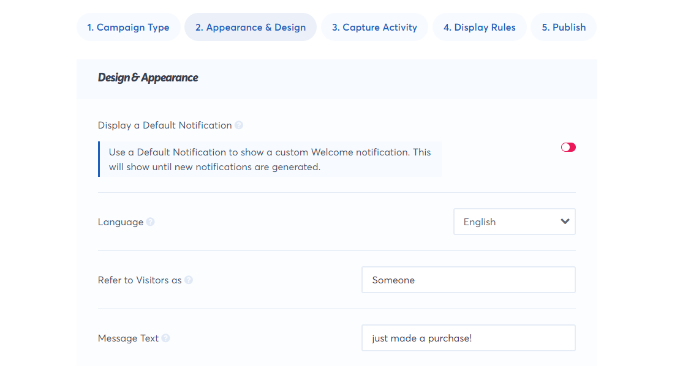
You can now head to the ‘Appearance & Design’ tab and choose language and appearance options for your campaign. You can change the position, badge image, style, and more.
Once done, click on the next step to continue.
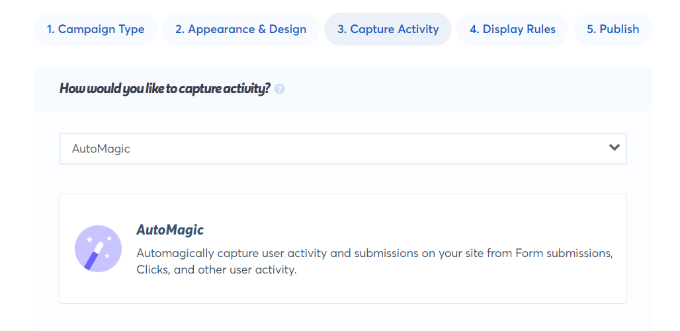
Next, you need to choose how you want to capture the activity.
We recommend using ‘AutoMagic,’ which allows you to select the activity that matches different conditions. For example, you can select your checkout page to automatically capture eCommerce activity.
You can also use Zapier to capture activities from 1000+ integrations.
Once done, click on the next step button to continue.
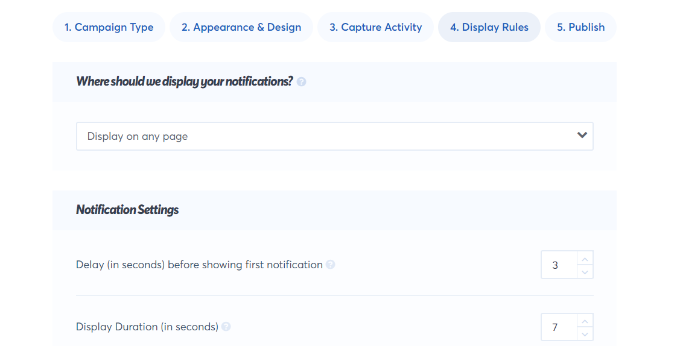
Next, you need to set up the display rules. You can display the badge on all pages or specific pages on your site. You can also choose the delay between notifications, run them as a loop, and enable mobile notifications.
After that, click on the ‘Publish’ tab at the top.
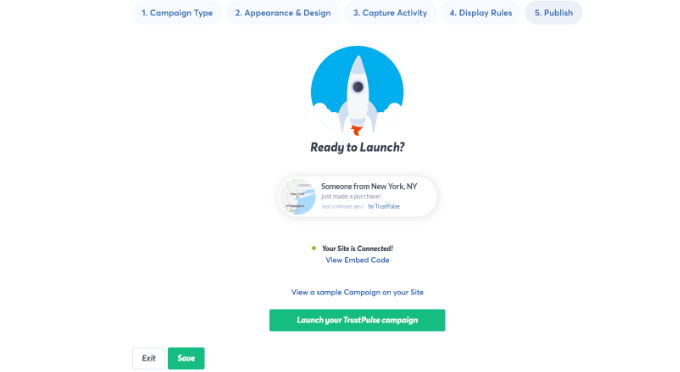
In the next step, simply click the ‘Launch your TrustPulse campaigns’ button.
Don’t forget to click the ‘Save’ button to store your changes and then exit the campaign builder.
You can now visit your website to see your FOMO campaign in action.
Method 2: Adding FOMO Countdown Timers with OptinMonster
We have all seen marketers using ‘Urgency’ to get customers’ attention. Whether it is your local grocery store or a big name-brand website, it is one of the oldest marketing techniques, which works just as effectively online.
Basically, you show users an offer with a sense of urgency, which triggers the fear of missing out on a valuable deal and helps users make a purchasing decision.
Urgency hacks can be used with limited-time offers, seasonal sale campaigns, one-time discounts, and more. To learn more, see this article on using urgency to hack conversion rates with proven methods.
The best way to add urgency timers in WordPress or WooCommerce is by using OptinMonster. It is the most popular conversion optimization and lead generation software that helps businesses turn potentially abandoning website visitors into subscribers and customers.
First, you will need to sign up for an OptinMonster account. It is a paid tool, and you will need at least the ‘Basic’ plan to use their Floating bar campaigns.
This plugin is a connector between your WordPress site and the OptinMonster application.
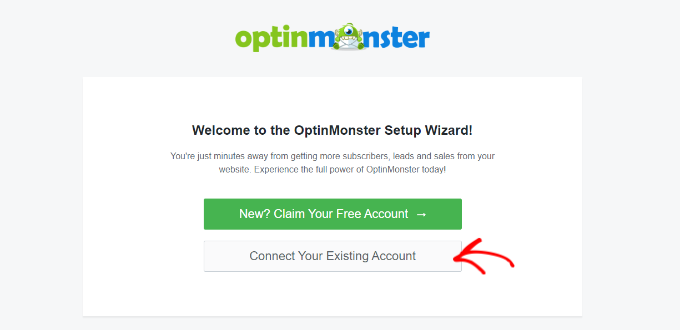
Upon activation, click on the ‘Connect Your Existing Account’ button on the OptinMonster welcome screen.
Next, you should see a new window open where you’ll be asked to connect your website.
Go ahead and click the ‘Connect to WordPress’ button.
After connecting your website, you will need to go to OptinMonster » Campaigns from your WordPress dashboard.
From here, click on the ‘Create Your First Campaign’ button to continue.
This will launch the OptinMonster campaign builder.
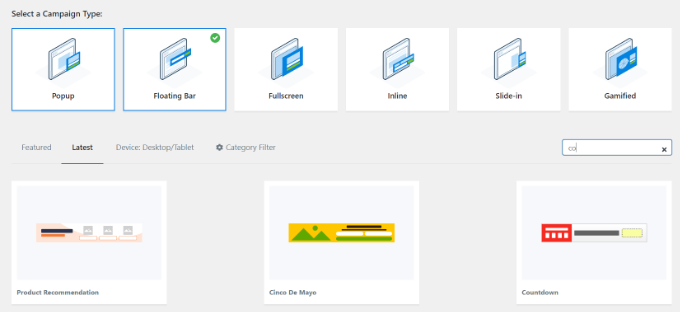
First, you will need to select an optin type and then select a theme. We will use a ‘Floating bar’ campaign with the ‘Countdown’ theme.
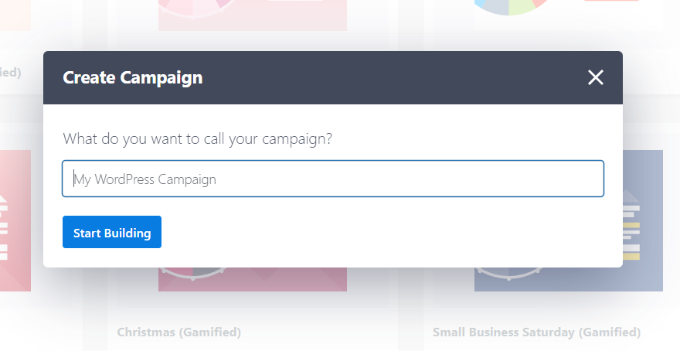
Next, you will be asked to choose a name for your campaign.
Once that’s done, simply click the ‘Start Building’ button.
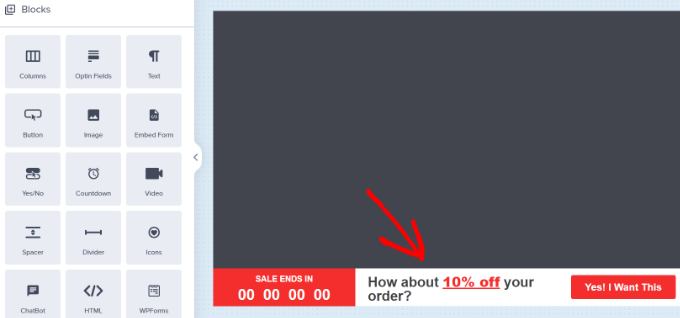
On the next screen, you’ll see the drag-and-drop tool, where you can simply point and click to design your campaign.
You’ll see a live preview of your campaign in the right panel and a bunch of customization blocks and options in the left panel.
With the floating bar countdown campaign, the preview will appear near the bottom of the screen for you, just as it does for the users.
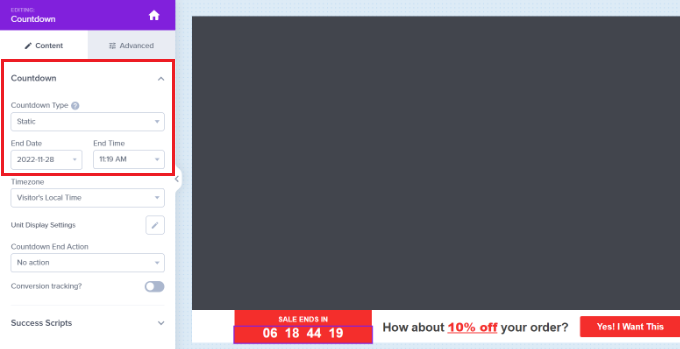
Go ahead and click on the countdown timer in the live preview to set the countdown style and end date. You can use two types of countdown timers: Static and Dynamic.
The static timer remains the same for all your users, while the Dynamic timer changes based on user behavior on your website.
For this tutorial, we will be using the static timer. Since we are using a floating bar with a countdown theme, we can move the floating bar to the bottom or the top.
You can just point and click to edit the text in your floating bar. You can add a coupon code, add links to special offers, and style it any way you want.
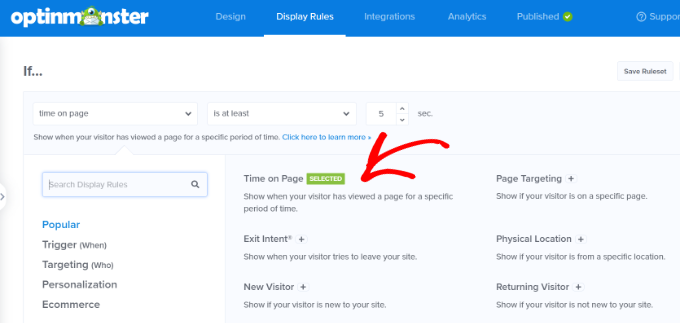
Next, you can go to the ‘Display Rule’ tab at the top. Here, you’ll see different options for showing your campaign.
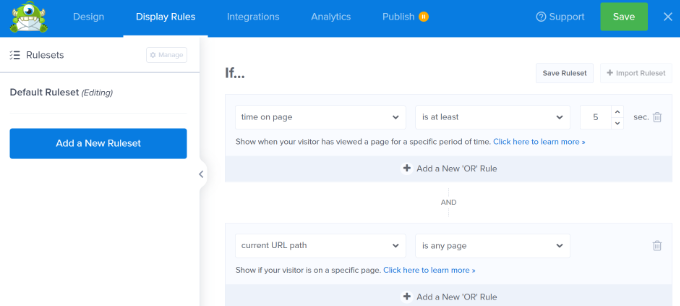
For instance, you can select the ‘Time on Page’ option and show the floating bar after a user spends at least 5 seconds on your website.
Below that, you also get to select the location for your campaign. We’ll use the default setting where the countdown timer floating bar will appear on all the pages on your website.
Once you are satisfied, don’t forget to click on the ‘Save’ button at the top.
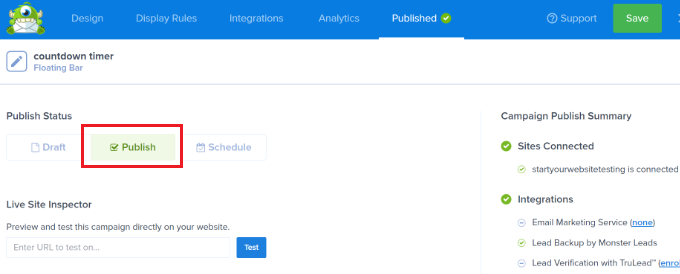
After that, head to the ‘Publish’ tab. Now, change the Publish Status from Draft to Publish.
Don’t forget to click the ‘Save’ button and close the campaign builder.
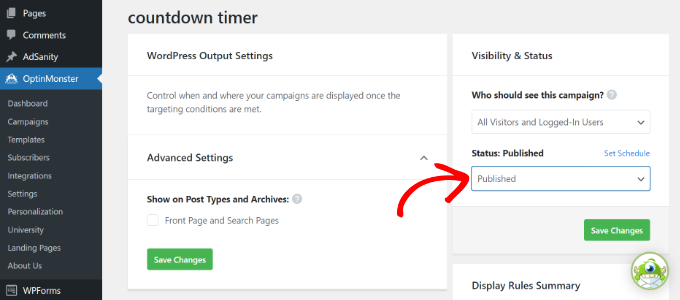
You will now see the WordPress Output settings for your recently created campaign.
By default, your campaign will be disabled, and you just have to click on the Status dropdown menu to change it from Pending to Published.
Once that’s done, click the ‘Save Changes’ button.
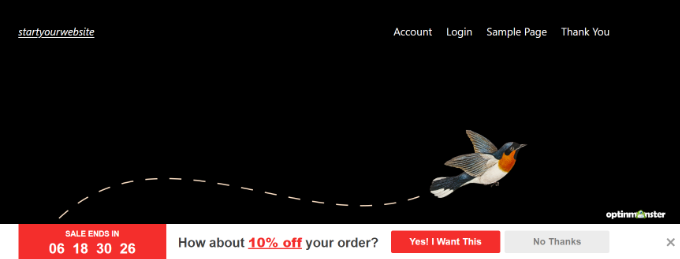
You can now visit your website to see your countdown timer FOMO campaign in action.
Tracking Your Conversions in WordPress
FOMO techniques work really well for conversions, but how do you keep track of their performance? Without tracking, you wouldn’t know how many sales or leads were generated because of these campaigns.
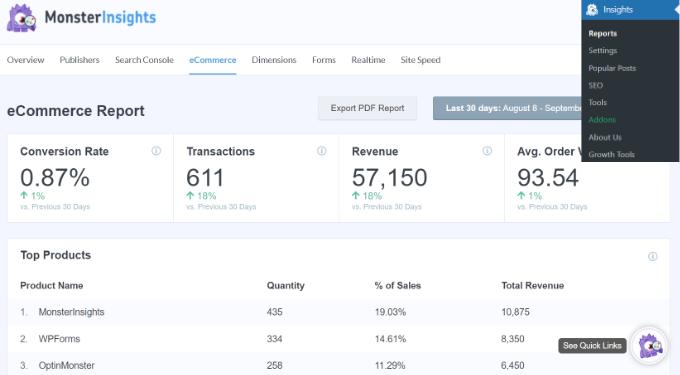
The easiest way to use Google Analytics in WordPress is through MonsterInsights. It is the best Google Analytics plugin for WordPress and makes it super easy to track conversions on your website.
For instance, it has an eCommerce addon, which helps you track your eCommerce performance without leaving the WordPress dashboard. Plus, you can also track form conversions, link clicks, and more with MonsterInsights.
We hope this article helped you learn how to add FOMO to your WordPress website and boost conversions. You may also want to see our list of must-have WordPress plugins for business websites and how to start a WordPress blog.
If you liked this article, then please subscribe to our YouTube Channel for WordPress video tutorials. You can also find us on Twitter and Facebook.
Are you looking for the best WooCommerce theme for your existing Store? If yes, you’ve landed on the right page! Finding an excellent WooCommerce theme is not an easy job. With thousands of WooCommerce theme out there and so many options, it becomes a difficult task to choose the perfect theme. There are so many ... Read more The Best WooCommerce Themes of 2020
Do you want to create an online markeplace using WordPress? Online marketplace websites allow your users to buy and sell items by setting up their own mini stores within your eCommerce website. In this article, we will show you how to easily create an online marketplace using WordPress.
What Do You Need to Start an Online Marketplace using WordPress?
First you need to make sure that you are using the right website platform, and since you’re reading this article, you’re in the right place.
There are two types of WordPress available: WordPress.com vs WordPress.org. One is a limited blog hosting service while the other is known as the self-hosted WordPress which you’ve likely heard tons about. See the full comparison between WordPress.com vs WordPress.org.
We recommend using WordPress.org because it gives you the freedom and access to all WordPress features out of the box.
To start an online marketplace using self-hosted WordPress you will need the following:
A domain name (For example, wpbeginner.com)
Web hosting account (This is where your website’s files are stored)
The entire setup can take up to 40 minutes, and we will walk you through every step one by one.
Ready? Let’s get started.
Step 1. Setting up Your Ecommerce Platform
First step is to buy a domain name and a web hosting account. You don’t just need a web hosting, but you will need a service that specializes in WooCommerce hosting because this is the software that we will be using as our eCommerce platform.
Typically a domain name costs $14.99/year, web hosting 7.99/month, and SSL certificate 69.99/year.
Now this seems like a lot of money if you are just starting out.
Fortunately, Bluehost an officially recommended WordPress and WooCommerce hosting provider has agreed to offer our users free domain + SSL and discount on their cloud WordPress hosting.
Once you have purchased hosting, then follow our step by step tutorial on how to start an online store for complete setup instructions.
You would now have a WordPress website with WooCommerce installed on it. However, by default WooCommerce assumes that your website is a single vendor website, so it is not possible for other users to add their own products to your website.
Let’s change this.
Step 2. Turn Your WooCommerce Site into an Online Marketplace
Upon activation, head over to WooCommerce » WC Vendors page to configure marketplace settings.
On this screen, you need to set a commission rate that you will pay to each vendor. This rate could also be overridden for individual products or vendors.
The default settings on the page will work for most sites, but you can review and change them as needed.
Don’t forget to click on the ‘Save General changes’ button to store your settings.
Next, you need to switch to the products page. On this screen, you can choose which items to hide from vendors when they are adding a product.
WC Vendors allows you to setup vendor capabilities and permissions. Head over to the Capabilities tab on the WC Vendors settings page.
Next item on the WC Vendors settings page is to setup pages.
The plugin will automatically create pages to use for vendor dashboard, shop settings, and orders page. You can use a different page if you would like by using the shortcodes shown below each page.
One page that is not automatically created by the plugin is the terms page. These are the terms that a vendor has to agree to when submitting their application.
To create a terms page, you can simply create a new page in WordPress and add the terms and conditions in plain text describing what vendors can sell, how they will get paid, how to settle disputes, etc.
Once you have created a terms page, you can return back to this section and select your newly created page here.
The final item on WC Vendors settings page is the most important one, the Payments. By default, WC Vendors uses PayPal Adaptive Payments to pay vendors.
You will see a link to setup PayPal adaptive payments. After you have set it up, you can choose when you want to pay the vendors.
Now that WC Vendors is all set up, let’s setup WooCommerce for a multi-vendor environment.
Step 3. Enable Account Management in WooCommerce
First you need to visit WooCommerce » Settings page and click on the ‘Accounts’ tab. From here you need to check the boxes next to customer registration option.
Don’t forget to save your changes.
Step 4. Setting Up Navigation Menus
Now that your multi-vendor marketplace setup is finished. It is time to make it easy for your users to find their way around your website.
To do that, you need to visit Appearance » Menus page. You will need to add your user account and checkout pages to the navigation menu.
Don’t forget to click on the ‘Save Menu’ button to store your changes. For more detailed instructions, see our guide on how to add navigation menus in WordPress.
If you don’t have a My Account page, then simply create a new page in WordPress and add the following shortcode in the post editor.
[woocommerce_my_account]
Step 5. Testing Your Marketplace Website
Your online marketplace website is now ready for testing. You can visit your website in a new browser window and create a new account by clicking on the My Account link at the top.
From here, both customers and vendors can login to their accounts as well as create a new account.
Once users create a new account, you will recieve an email notification. If you are unable to recieve email notifications, then take a look at our guide on how to fix WordPress not sending email issue.
You can also view new vendor applications by visiting Users » All Users page. You will see all new vendor requests as ‘pending vendor’, and you can approve or deny applications by clicking the link under their username.
Once approved, these vendors can log in to their accounts and add their products by visiting their vendor dashboard. They can also view their orders and sales reports.
The first thing your vendors need to do is to setup their shop settings by clicking on ‘Store Settings’ link.
They will need to provide their PayPal email address to recieve payments. After that they can enter their shop name and description.
Once a vendor adds a new product, you will get a notification email and see an icon next to the products menu. You can then edit a product, approve it, or delete it.
Your shop page will clearly show the products sold by vendor’s shop name.
This week, we saw the release of WordPress 4.9.3…followed quickly by the release of WordPress 4.9.4 just hours later. WordPress 4.9.3 fixed 34 different bugs covering a range of different issues. Then, hours after it was pushed out, WordPress 4.9.4 came out to fix a critical bug with the auto update process in WordPress 4.9.3. ... Read moreWeekly WordPress News: WordPress 4.9.3 (And Then 4.9.4)
Are you looking for the best free WooCommerce plugins for WordPress? WooCommerce, just like WordPress, comes with thousands of extensions and plugins. These plugins add new features to your eCommerce store and help you grow your business. In this article, we have hand-picked the best free WooCommerce plugins for WordPress that you can try right away.
YITH WooCommerce wishlist plugin allows your customers to save products to their wishlist. They can use the wishlist to make the purchase later or share their wishlist with friends and family.
This is a perfect addon for your online store during busy holiday seasons when people are making their shopping lists and purchasing gifts.
Non-English WordPress websites surpassed the English WordPress websites in 2014. Since then more WooCommerce stores are created in languages other than English. WooCommerce Multilingual adds compatibility layer with the popular WPML WordPress multilingual plugin.
This allows you to translate your product and other WooCommerce pages in multiple languages. Your customers can choose to browse your website in their preferred language.
WooCommerce Customizer provides an easy user-interface to use built-in WooCommerce filters. These filters allow you to customize things like button text, labels, fields, and much more.
Normally, you would have to write PHP code to use these filters. With WooCommerce customizer, you can easily use those filters from a simple settings page (no coding necessary).
As the name suggests, this simple plugin makes your WooCommerce shop compliant with the new EU VAT. It will automatically detect your customer’s location and will display prices with correct VAT from the first page.
This plugin allows users to choose a delivery date for products during the checkout. WooCommerce store owners can see the desired delivery date on their orders page in the admin area.
WooCommerce Quick View allows your customers to peek into product details by simply taking their mouse over a button. This enables customers to quickly get the product information without leaving the product listings or shop page.
Users will be able to see a larger product image, product description, and an add to cart button in a lightbox popup.
This nifty plugin allows you to send PDF invoices and packing slips to customers via email. Users can also download their invoices and slips from their account area. As a site admin, you can also bulk generate invoices, download them, and email them to users from an admin area.
As the name suggests, this plugin allows your customers to compare two or more WooCommerce products side by side. You can choose which fields users will see in the comparison table and reorder them as needed.
Normally, your WooCommerce theme would prominently display a cart button at the top. However, if your theme doesn’t show a cart button, or you don’t like its placement, then WooCommerce Menu Cart will fix this for you.
It allows you to add the cart button into your WordPress navigation menu. It works with any WordPress theme and will display cart icon, items and price in your navigation menu.
Speed is crucial for the success of any website, particularly for online stores. A single second delay in page load can significantly increase cart abandonment and lower user engagement.
YITH WooCommerce Ajax Search offers a powerful search feature to instantly display products as users start typing. It uses Ajax to fetch the results which means your users can search without leaving the page they are currently viewing.
MailChimp is one of the top email marketing services in the world. MailChimp for WooCommerce is their official WooCommerce extensions that integrates email marketing into your ecommerce website.
Do you want to add custom fields to WooCommerce checkout page? The WooCommerce Checkout Field Editor plugin allows you to easily add, customize, and rearrange fields on the checkout page of your online store.
This allows you to customize the whole checkout experience for your customers and use the data to grow your business.
Minimum Purchase for WooCommerce allows you to setup minimum purchase rules to your products. You can add rules for a single product or create rules for a product group.
The plugin also allows you to apply rules on minimum purchase amount or quantity, set different rules based on user role, and set up custom messages to display when rules are not matched.
Gift cards for WooCommerce allows you to add gift cards to your online store. Your customers will be able to purchase gift cards of different amounts and give them to their friends and family who then apply the gift card when shopping on your store.
You can setup gift cards of different pricing and sell them as virtual products. When a customer applies the gift card on purchase, the equivalent amount is deducted from their bill.
As the name suggests, this plugin allows your customers to easily switch currencies and get real time conversion rates in their local currency. You can add the currency switcher by using the shortcode or a sidebar widget.
WooCommerce Colors adds a WooCommerce section to the theme customizer where you can change the color of buttons and other WooCommerce elements. It is simple and highly useful if you want to customize WooCommerce elements without adding any custom CSS.
WooCommerce Products Filter allows your site customers to filter products by categories, attributes, product tags, product custom taxonomies, and price. You can add the filter anywhere using the shortcode or the sidebar widget.
WooCommerce comes with a bunch of shortcodes that you can use throughout your website to add products, buttons, and more. The WooCommerce Shortcodes plugin adds a drop down in your WordPress visual editor, allowing you to easily select and insert shortcodes in content areas like post, page, or products.
Booster for WooCommerce allows you to add several useful features to your WooCommerce website that allow you to run your online store more efficiently. It uses a modular approach similar to Jetpack and acts like a plugin suite with tons of features.
Normally, product pages require users to scroll down to view more information. Custom Product Tabs for WooCommerce allows you to divide product description and details into tabs. This helps users switch to the section they want to view while making sure that your website looks neat and organized.
Bonus Plugins
These plugins are not free, but we believe they are highly useful for any WooCommerce store.
The Woo Marketing bundle is a pack of WooCommerce marketing extensions developed and maintained by the folks behind WooCommerce. It includes email marketing, dynamic pricing, smarter discounts, transaction emails, Facebook retargeting, and more.
If you pack and ship products to customers, then you’ll need this bundle. It is maintained by the WooCommerce team and includes extensions like invoices, packing slips, customize shipping options, product kits, multi-address shipping, track shipping, and more.
Purchasing this bundle also gives you access to the WooCommerce 360° images extension, WooCommerce Storefront and all its child themes.
OptinMonster is the most powerful conversion optimization software in the market. It helps you convert abandoning website visitors into subscribers and customers.
You can use it on your eCommerce website to reduce cart abandonment, increase sales conversion, grow your email list, show targeted website messages, onsite retargeting, and more.
If you’re serious about growing your email list and boosting sales, then you need this conversion optimization optimization toolkit.
We hope this article helped you find some of the best free WooCommerce plugins for your online store. You may also want to see our expert pick of the best WooCommerce themes for your ecommerce website.
If you liked this article, then please subscribe to our YouTube Channel for WordPress video tutorials. You can also find us on Twitter and Facebook.
If you’re thinking of starting an eCommerce store on WordPress, you’re probably considering using WooCommerce, right? Not only is WooCommerce the most popular WordPress eCommerce plugin, it’s also the most popular eCommerce solution for all sites. Period. According to BuiltWith, WooCommerce powers a whopping 42% of eCommerce stores on the entire Internet, which is pretty ... Read moreWooCommerce Tutorial: How To Start An eCommerce Store On WordPress
Do you want to export WordPress users data to a CSV file? Sometimes you may need the user data to add into a new website or to use in other marketing campaigns. The default WordPress export tools do not let you export user accounts. In this article, we will show you how to easily export WordPress users data to a CSV file.
When and Why Export WordPress Users Data to a CSV File
The default WordPress export tool does not include user accounts. It allows you to create user accounts during the import, only if those users have content. This excludes user roles with no writing privileges like subscribers or customers in an ecommerce store.
Many businesses and site owners may want to use the user data in their CRM platforms, email lists, or other marketing campaigns.
This is when you’ll need a tool to easily export user data in a CSV file. These are plain text files where each user data field is separated by a comma. CSV files can be opened in any spreadsheet software like Google Sheets, Microsoft Excel, etc.
That being said, let’s take a look at how to easily export WordPress users data to a CSV file.
Upon activation, you need to visit Users » Export Users to CSV page to configure plugin settings.
Select the user role you want to export or select ‘Every role’. The plugin also allows you to select a date range to download only users who joined between that period.
Once you are finished, click on the export button to continue.
The plugin will prepare a CSV file containing user data and send it to you as a download. Once downloaded, you can open that file in a spreadsheet program or import it into other programs.
That’s all, we hope this article helped you export WordPress users data to a CSV file. You may also want to see our mega list of handy WordPress tips, tricks, and hacks for beginners.
If you liked this article, then please subscribe to our YouTube Channel for WordPress video tutorials. You can also find us on Twitter and Facebook.