In a significant move for the WordPress community, WordCamps are set to receive advertising funds under newly proposed changes. This initiative aims to boost the visibility and reach of these community-driven events, ensuring they continue to thrive and support WordPress enthusiasts worldwide. Read more! Stay tuned for more updates as this proposal progresses. Happy WordPressing 🚀 [...]
Have you ever visited a website that felt like it understood you? Maybe it suggested articles you actually wanted to read or offered products that caught your eye. This kind of smart experience is possible with AI and machine learning, and you can bring it to your WordPress site using the WordPress API. It’s no [...]
Gutenberg. The block editor probably needs no introduction. Since its launch in 2018, it has become a staple for anyone building a site on WordPress—even those who aren’t particularly tech-savvy can get the hang of it. But as good as Gutenberg is, its users could benefit from even more flexibility and options. That’s where block [...]
July 18, 2024 – WP Engine, a global leader in web enablement, has acquired NitroPack, a renowned SaaS solution for site speed and performance optimization. This acquisition enhances WP Engine’s capabilities, offering customers advanced tools to improve site performance, including significant boosts in Google’s Core Web Vitals. NitroPack’s technology, known for its ease of use and powerful optimizations, [...]
Struggling with a malfunctioning of your WordPress site? You’re not alone. A corrupted WordPress database can damage your site’s performance and user experience. Whether you’re an expert or a newbie, knowing how to repair WordPress database (WP DB) is crucial. In this guide, you can uncover the proven tips to repair the WP (WordPress) database. [...]
Do you want to know what is an email blast and how to do it “the right way”?
An email blast or broadcast sends a single email message to many subscribers in your mailing list. This can be highly effective strategy to get more sales, and bloggers use these blasts to get more website traffic.
In this article, we will explain how to do an email blast the proper way and share some examples.
What Is an Email Blast?
An email blast is a single email message that is sent to an entire email list, a large segment of that list, or many email lists at the same time.
These emails target most or all contacts in your mailing list, making an email blast a broad reach-out campaign.
Email blasts are also known as broadcast emails, mass emails, bulk emails, e-blasts, and email campaigns. Most people use the term ’email campaigns’ to avoid the aggressive feeling associated with the term ’email blast’.
Email blasts are mainly used for sending promotional content and newsletters. At WPBeginner, we use email blasts to promote our premium WordPress plugins and share our helpful tutorials.
If you want to let all your subscribers know about special offers, then email blasts are the most reliable and efficient form of communication.
Are Email Blasts Outdated?
Although email blasts are great for delivering any message to a large number of people, some consider them an outdated communication method.
That’s because email blasts are bulk emails sent to everyone regardless of their choice, priorities, and needs. At times, blast emails can feel irrelevant and useless to the recipients.
Due to this, the email recipients may ignore the message, mark the email as spam, or even unsubscribe from your email list.
Here are the top reasons why users don’t like email blasts:
1. Unsegmented: Email blasts often use the entire mailing list without segmentation. Your email subscribers are usually very different, and they may be interested in different products or services.
2. Untargeted: The email blasts send the same message to everyone without considering their interests, past interactions, or needs. Users often unsubscribe from your mailing list after receiving these unwanted emails.
3. Not personalized: We all love reading a message that addresses us personally. Email blasts that don’t personalize the emails are often marked as spam.
4. Unexpected: Broadcast emails are usually unexpected, so there can be a natural feeling of resistance from the recipients.
Unlike 10 or 15 years ago, many new marketing methods are available, like social media, pay-per-click advertising, and more. However, none are as effective as email.
So, you might be wondering: is email blast dead? The answer is NO.
Email is still the most reliable form of communication in the world. With new technology, there are better ways to do an email blast to get higher results.
We will explain how to do an email blast the RIGHT way in the following section.
How to Do an Email Blast “the Right Way” – Step by Step
Marketers from big and small companies alike are still using email blasts to promote their product launches, discount offers, and more.
And the results are brilliant. That’s because they are using email blasts the right way.
If you are not a professional marketer, you can follow the steps below to run an email blast successfully:
First, you need a robust email marketing service to create an email blast. An email marketing service lets you create a mailing list, segment that list, and send bulk emails.
There are dozens of email marketing services in the market. Among them, Constant Contact, Brevo, Drip, and ConvertKit are the most popular companies.
We have tried and tested all of the above email marketing services, and we believe they are great at what they offer. However, we recommend Constant Contact because they provide the best deal.
Constant Contact is the most beginner-friendly email blast software. It has dozens of pre-made email templates to help you quickly get started. You can choose a template and easily customize that using their drag and drop editor.
It has simple options for collecting emails, automation features to send/trigger emails based on user actions, and more. Plus, it lets you segment your subscribers and send targeted email campaigns.
You can quickly create a Constant Contact account as they offer a free trial account (no credit card required).
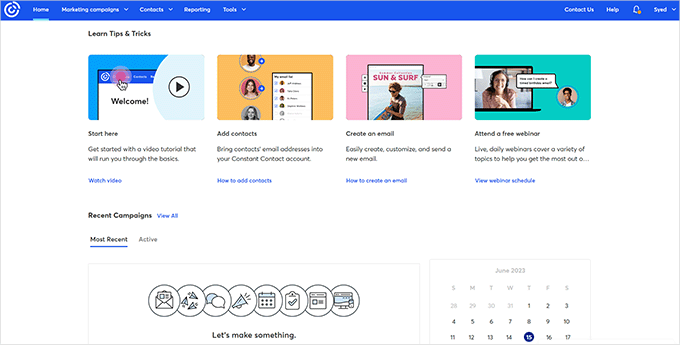
Once done, you will see your Constant Contact dashboard, where you can manage your email lists, see subscribers, and send email blasts.
Alternatively, you can also use Brevo, which offers a free email marketing plan.
Step 2. Create Your Email List
An email list is simply a list of email addresses you can send messages to. It is like your contact book containing the email addresses of your subscribers and prospective customers.
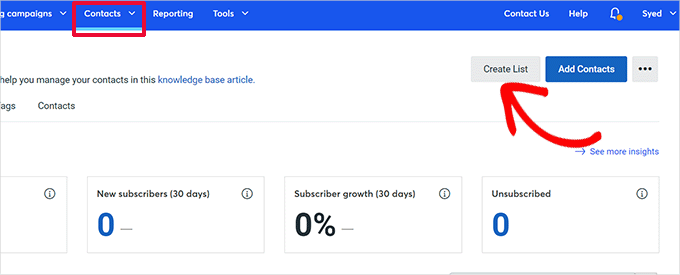
To create an email list in Constant Contact, just go to the ‘Contacts’ menu at the top and click on the ‘Create List’ button.
An email list is where you store all your email contacts.
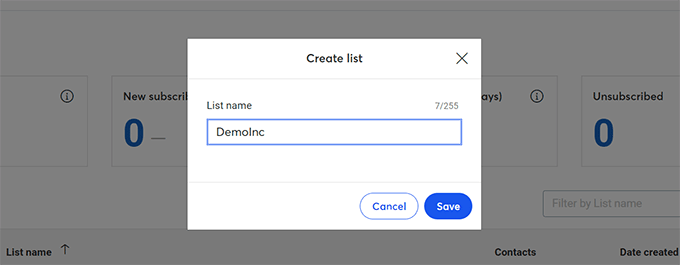
Clicking on the button will bring up a popup where you need to enter a name for your email list and click the ‘Save’ button.
Constant Contact will now create your email list.
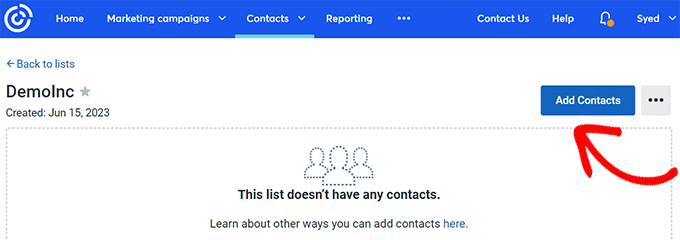
The next step is to add contacts to your list. Just open your new email list, and click the ‘Add Contacts’ button.
Constant Contact lets you add contacts in multiple ways. You can type in a contact, upload from a file, or import from Gmail, Outlook, and other apps.
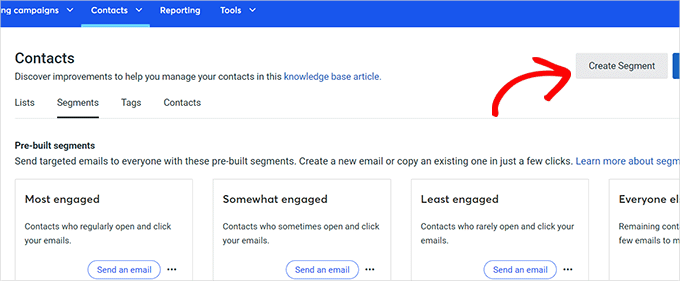
To create segments in Constant Contact, you need to go to the ‘Contacts’ menu and click on the ‘Segments’ tab. After that, click on the ‘Create Segment’ button.
Constant Contact offers a bunch of criteria you can choose from.
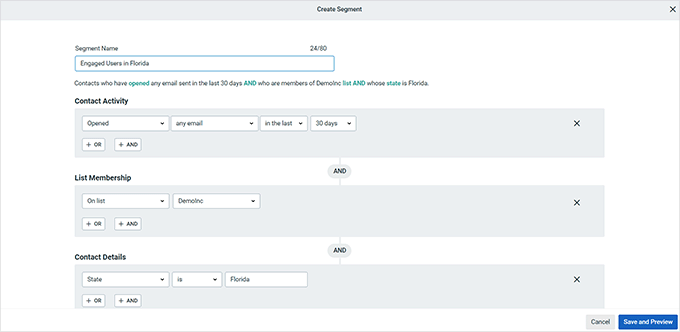
In the next screen, you can create a segment by choosing the criteria you want.
You can create a segment by contact activity like emails sent, opened, clicked, or did not open. You can also include email subscribers by contact details, including job title, city, country, etc.
Once you are finished, simply click on the ‘Save and Preview’ button.
Then, you can repeat the process if you need to create more segments.
Step 4: Create a Targeted Email Campaign
After creating segments, the next task is to create a targeted email campaign or an email blast.
You can create an email campaign in different ways depending on the email marketing software you use.
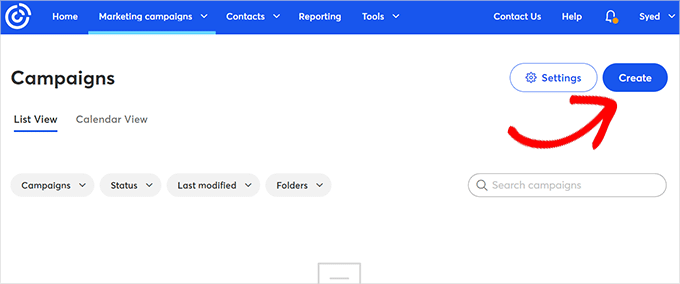
To design an email campaign in Constant Contact, you must go to the ‘Campaigns’ menu and then click the ‘Create’ button.
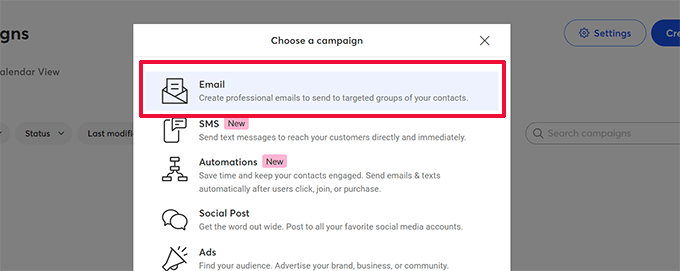
This will bring up a popup showing a bunch of campaigns you can make with Constant Contact.
You need to choose the Email option to continue.
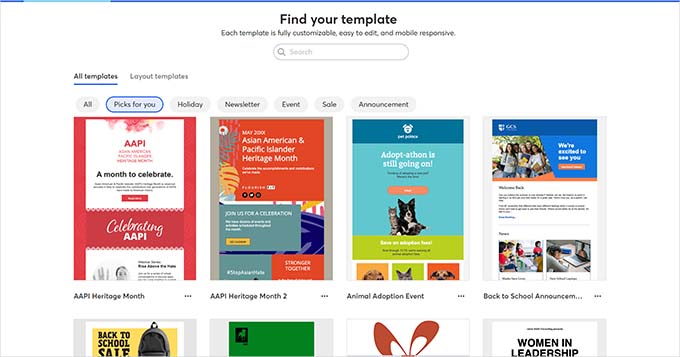
After that, you will see dozens of pre-made email templates ready for use.
You can preview the templates individually or simply type keywords to search for a template.
Simply click to choose a template as a starting point.
After that, the email campaign builder page will open. First, you need to name your campaign.
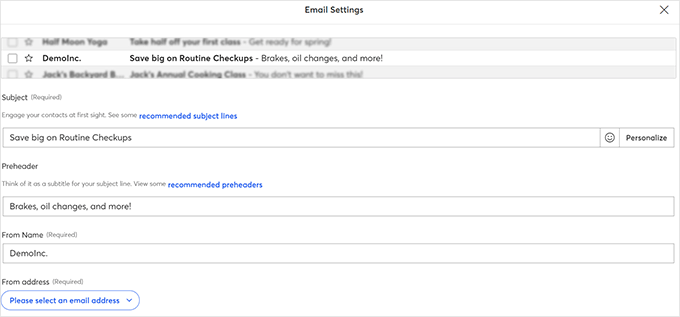
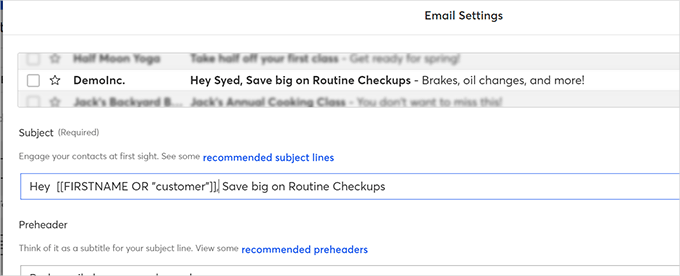
Next, click the ‘Email Settings’ link to edit the email subject line, sender name, and more.
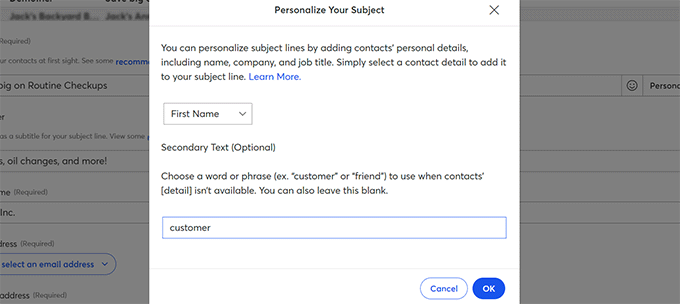
Then, you need to click on the ‘Personalize’ option.
Here, you can choose the first name or any other contact details to insert in your subject line.
You can also enter a generic name like Customer, User, or Friend to address users whose names are unavailable. Once done, simply click on the ‘Insert’ button.
You will see some text with large brackets added in your subject line.
For example, you can see [[FIRSTNAME OR “customer”]] in the screenshot below.
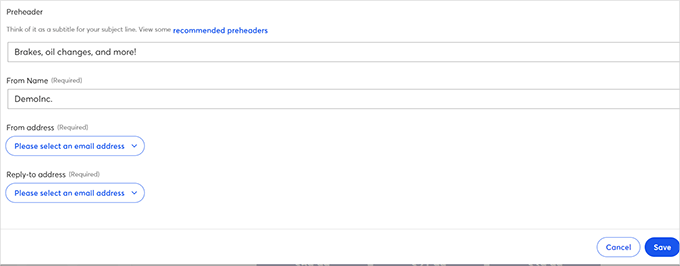
After that, you can edit your email preheader From Name (company or organization name) and From Address.
Don’t forget to click on the ‘Save’ button to store your changes.
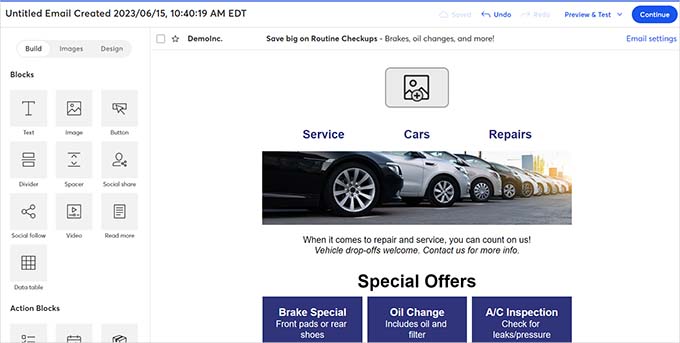
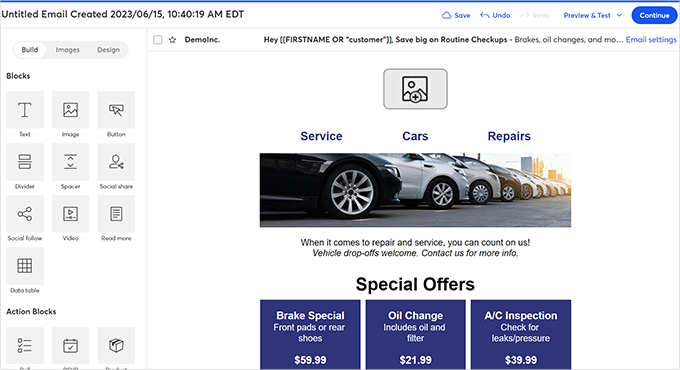
The next step is to customize the email body.
You can simply point and click on any element in the email to edit or delete it.
You can also drag and drop elements and layouts from the left sidebar.
Once your email design is complete, you can preview your email. If it looks good, just click on the ‘Continue’ button in the top right corner.
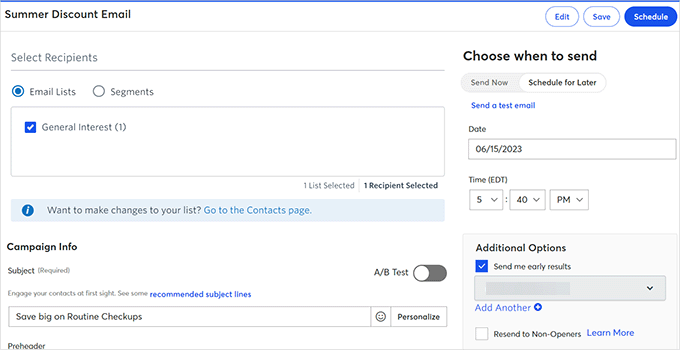
Next, you will see email send (blasting) options on the screen.
From here, you can select recipients from email lists or segments. For example, we will choose the segment that we created earlier.
In the right sidebar, you will see options to send your email campaign now or schedule it for later.
Step 5: Measure Results and Improve Email Deliverability
Sending an email campaign doesn’t mean that your work is done. After posting your email blast, you will need to measure your results and see how the recipients interact with your messages.
Top email marketing services like Constant Contact have built-in email stats features.
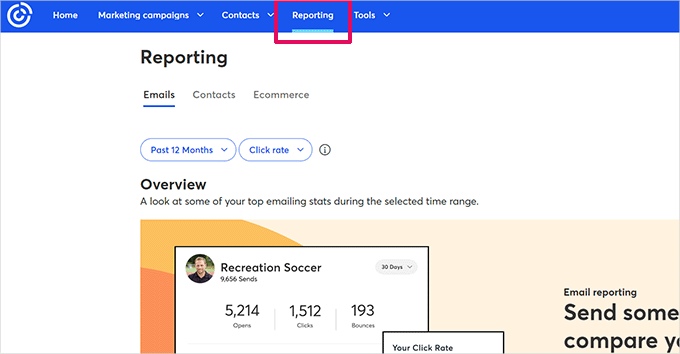
To view your email campaign stats, just click on the ‘Reporting’ menu item at the top.
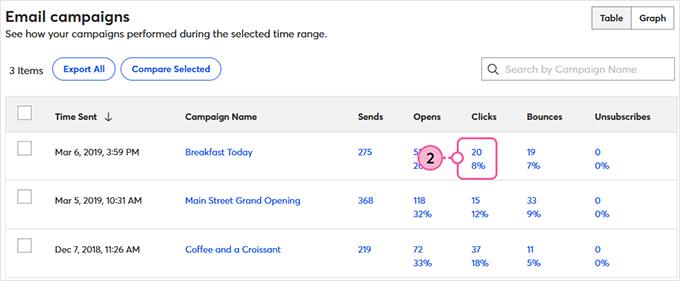
You can also see the performance of your email campaigns individually by clicking on them.
You will see the email open rate, the total sent emails, bounces, and successful deliveries. The reports will also reveal click rate, did not open, unsubscribes, and marked spam stats.
The biggest challenge of email blasting is email deliverability. A lot of the time, your emails don’t get delivered at all or are sent to the spam box directly.
Here are some proven techniques to improve email deliverability:
Update your email list occasionally to remove fake email addresses, deleted emails, and more.
Maintain the frequency of your emails (no spikes).
Avoid misleading subject lines.
Make your emails useful with valuable and engaging content.
Best Email Blast Examples
There are two main types of emails used for marketing: Broadcast Emails (Email blasts) and Triggered Emails.
Triggered emails are automated emails that are sent to your users following their actions. For example, you can send a welcome email after a user subscribes to your list.
Email blasts are different because you will manually create campaigns and send them to a large segment at once. Email blasting is done with the belief that the single message will be helpful to every subscriber in a list or segment.
You can’t broadcast a welcome email to your entire email list, which may also include old customers. So, email blasts can be used only for specific purposes.
Here are the best email blast examples:
1. Flash Sale
If you are offering a flash sale, you can send mass emails in bulk to inform all of your subscribers.
Here are a couple of subject line examples for a flash sale email blast:
[FLASH SALE] Fashion Shoes 40%-60% off!
[LAST CHANCE] 40%-60% off sale ends today!
2. Event Information like Webinars
You can send mass emails if you run online courses and webinars for your users.
Here are a couple of email subject lines for an event information email blast:
LIVE Training: 10 steps to create a winning email campaign
Join us LIVE tomorrow at 5 PM for a FREE marketing class
3. New Products
You can send an email blast when you launch a new product. It’s best to segment your list into already purchased customers and new subscribers so that you can send different campaigns to them.
4. Newsletters
Newsletters are the most common type of broadcast email. News, magazine websites, blogs, as well as business or non-profit organizations send newsletters to inform their subscribers about the latest news.
You can see our tutorial on starting an email newsletter to learn more about best practices to make it more successful.
Is the ‘ERR_SSL_VERSION_OR_CIPHER_MISMATCH’ error stopping you from accessing a WordPress website?
This error is only seen when visiting a website that uses an SSL certificate. It is caused by out-of-date or misconfigured software on either the website or the user’s computer.
In this article, we will show you how to fix the ‘ERR_SSL_VERSION_OR_CIPHER_MISMATCH’ error in WordPress.
What Is the ERR_SSL_VERSION_OR_CIPHER_MISMATCH Error?
We recommend that everyone with a WordPress website install an SSL certificate. This can help keep your website data secure.
An SSL certificate is required if you want to accept payments in your online store, and it also protects your users in other ways.
SSL stands for ‘Secure Sockets Layer’, and TLS stands for ‘Transport Layer Security’ protocol. These protocols rely on certificates that tell the user the identity of the website they are communicating with.
When visiting a secure website, your browser will automatically check for an SSL certificate to see if it is valid and up to date. It also checks the version of the protocols being used.
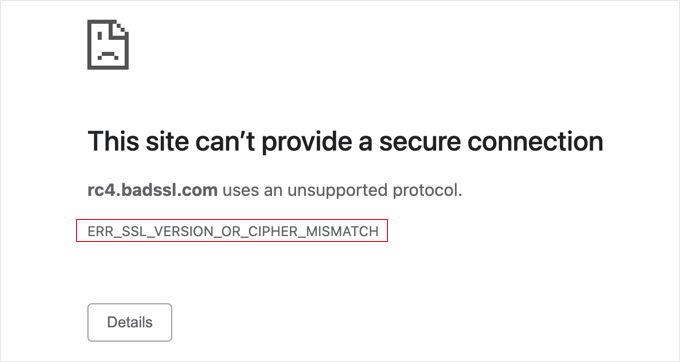
If there’s an issue, then you’ll see an SSL error like ERR_SSL_VERSION_OR_CIPHER_MISMATCH.
This error message appears when your browser doesn’t recognize the version of the SSL protocol being used or when the SSL certificate is not configured correctly.
This can happen when the user is using an out-of-date web browser that doesn’t recognize the latest TLS protocols. It can also be caused if the website’s SSL certificate or software is out of date or mismatched.
With that being said, let’s take a look at some steps you can take to fix the ERR_SSL_VERSION_OR_CIPHER_MISMATCH error in WordPress:
The first thing you need to do is scan your WordPress website for SSL errors. This will help you identify problems that can cause the ‘ERR_SSL_VERSION_OR_CIPHER_MISMATCH’ error.
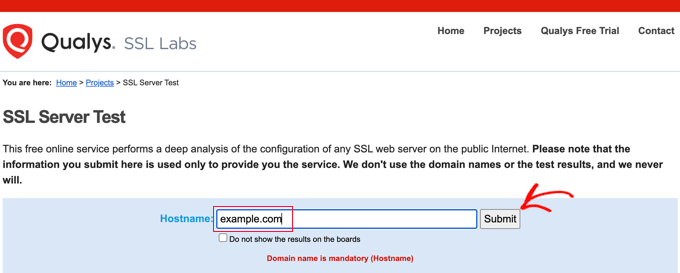
The easiest way to check is by using an online tool like the Qualys SSL Labs SSL Server Test. Simply type in the website’s domain name and then click the ‘Submit’ button.
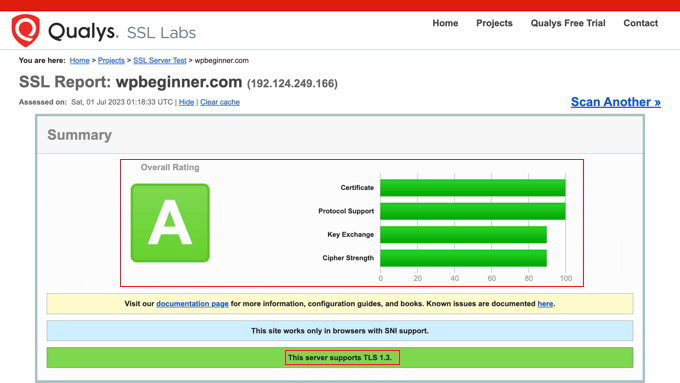
This will perform a thorough test on the website that takes a few minutes to finish. After that, you will see a very detailed report about the site’s SSL certificate.
In the screenshot below, you will find the results of a scan on wpbeginner.com. You can see that the WPBeginner SSL certificate is valid and trusted and supports the latest TLS protocol, which is TLS 1.3. This is an example of a great SSL test result.
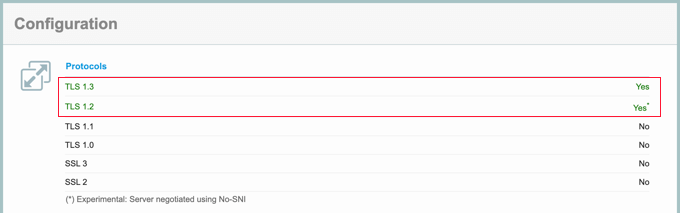
You can scroll down to the Configuration section of the report.
This will show you which versions of the TLS protocol are supported. In this case, both currently used versions are supported, which are TLS 1.2 and TLS 1.3.
It’s also important that the other protocols are not being used because they have known security issues.
If your test result looks similar to this, then the ‘ERR_SSL_VERSION_OR_CIPHER_MISMATCH’ error is not being caused by the website. You can scroll down to the last section of this tutorial to learn how to troubleshoot the software on your computer.
On the other hand, here is a screenshot from a scan that found SSL errors. The errors are summarized at the top of the report, and more details are given below.
You can go to a page with detailed notes about an error by clicking the ‘MORE INFO »’ link.
If the SSL test report for your website lists some SSL errors, then you can follow these guidelines to fix them.
Your Site Uses Outdated TLS 1.0, TLS 1.1, or RC4 Cipher Suite
Old TLS protocols like TLS 1.0 and TLS 1.1 should never be run because they have security issues, and modern web browsers have stopped supporting them.
The same goes for the RC4 cipher suite. A cipher suite is a set of algorithms used to secure your website with TLS. However, the RC4 version has been found to be insecure and should never be used.
Reputable WordPress hosting companies never use insecure versions of the TLS protocol or cipher suite.
However, if your website is using any of these outdated versions, then you should contact your hosting provider and get them to enable TLS 1.2 or TLS 1.3. You will also need to switch to AEAD cipher suites (AES-GCM).
Because an SSL certificate proves that your website is what it claims to be, the domain name on your certificate must match your site’s domain name. When they are not the same, this is called an ‘SSL certificate name mismatch’.
When you see this error in your SSL report, it will list the potential reasons:
The website does not use SSL but shares an IP address with some other site that does.
The website no longer exists, yet the domain name still points to the old IP address, where some other site is now hosted.
The website uses a content delivery network (CDN) that does not support SSL.
The domain name is an alias for a website whose main name is different, but the alias was not included in the certificate by mistake.
This error is likely caused by a problem with your SSL setup.
In particular, make sure you have set up your SSL certificate to work with all of the variations (or aliases) of your domain name that will be used, including www and non-www URLs.
Another solution is to redirect your website visitors to the correct variation of your domain name.
For example, if your SSL certificate has the URL ‘https://www.example.com’, then you can redirect ‘https://example.com’ to that address. See our article on how to set up redirects in WordPress for more details.
This error could also appear if you have recently moved your website to a new domain name or server. You will need to update your SSL certificate with the new details.
If you are using a CDN service, then you should also make sure that it supports SSL. If you need to upgrade, then you can see our expert picks of the best WordPress CDN services for recommendations.
If you need help with any of these issues, then don’t hesitate to reach out to your hosting provider’s technical support team.
When the Website Is Not the Problem
If the website is not the problem, then the error is caused by software on your computer. Most likely, you have an out-of-date web browser, or your antivirus software is causing the error.
You can follow these steps to troubleshoot the problem.
Update Your Web Browser to the Latest Version
If you are using an outdated web browser such as Internet Explorer or an old version of a modern web browser, then you may see this error. This happens because the old software was written before the latest versions of the TLS protocols and doesn’t recognize them.
In that case, all you need to do is switch to the latest version of a modern web browser like Google Chrome.
If, for some reason, you can’t update to a later version of your browser, like if you are stuck using Microsoft Windows XP, then you may be able to enable a later version of TLS in your browser.
For example, on Google Chrome, you can type chrome://flags in the address bar, search for ‘TLS 1.3’ and enable the option.
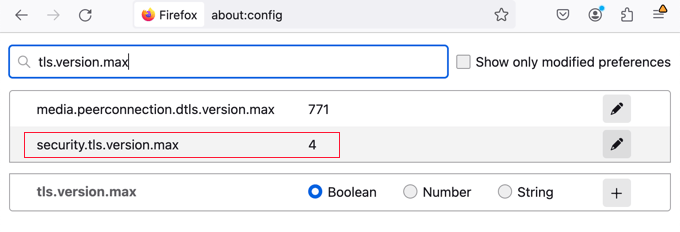
Or if you are using Firefox, then you should type about:config in the address bar, search for TLS, and then set the security.tls.version.max value to 4.
Clear Your Browser Cache and SSL Cache
If you still see the error message after doing this, then there are a few more troubleshooting steps you can take. The first thing is to delete your browser cache and cookies.
On Windows, you can also clear the SSL cache. This may be storing out-of-date SSL information about the website you are trying to access.
You can open ‘Internet Options’ by searching for it in the Start menu. Now switch to the Content tab and click on the ‘Clear SSL state’ button.
Temporarily Disable Your Antivirus Software
Finally, it’s possible that your antivirus software or firewall software may be configured incorrectly. This can sometimes cause the ‘ERR_SSL_VERSION_OR_CIPHER_MISMATCH’ error to appear when it shouldn’t.
If your software has an automatic SSL scanning feature, then you can try turning it off. Otherwise, you will need to temporarily disable your antivirus software. Once you have done that, you can try accessing the website again.
If you can access the software with your antivirus software disabled, then you can contact the antivirus company’s technical support team about the error or switch to a more reputable application.
Google Domains helps you register a domain name for your website. However, the service is shutting down and migrating to Squarespace. That has sent many customers looking for a new place to register or transfer their old and new domain names.
In this article, we will show you the best Google Domains alternatives.
Why Do You Need a Google Domains Alternative?
Google launched a domain registration service in 2015 to help users find, buy, and manage a domain for their business.
However, the Google Domains service will close down, and Squarespace will take over the business and assets. Squarespace is a popular website builder that also provides hosting services.
With Google Domains ending, all the existing customers and their domains will be migrated to the Squarespace platform.
One of the drawbacks of transitioning to Squarespace will be domain renewal costs. Squarespace has said it will honor all existing Google Domains customers’ renewal prices for at least 12 months. However, you can expect higher renewal costs after that.
Besides that, many other domain registration services in the market offer free domain names with hosting plans. Plus, the hosting plans are often much cheaper than Squarespace.
That said, let’s look at some of the best Google Domains alternatives you can get your hands on today.
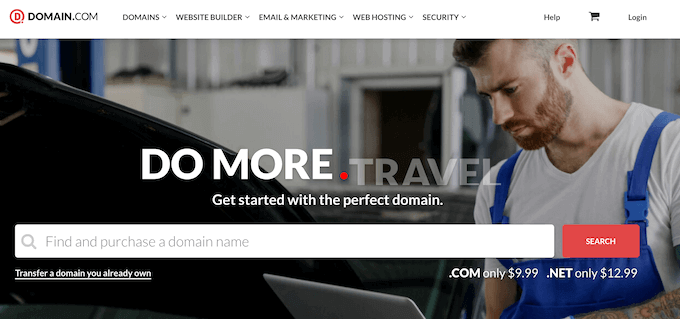
Domain.com is the best Google Domains alternative in the market and one of the most popular domain registrars. You get top-level domain name extensions (TLDs) and lots of country code top-level domains (ccTLDs).
It makes it very easy to search for and manage a domain name. For instance, you can access tools like WHOIS privacy protection, bulk registration, private registration, DNS management, renewals, and more.
Domain.com also easily integrates with Google Workspace (formerly known as G Suite). You can use your Gmail for business emails and access other tools like Google Drive for storage. You also get file-sharing tools and can communicate with others using Google Meet.
Besides that, Domain.com offers web hosting services, website builder and web design services, email marketing services, and more. There are different security features, including SSL certificates, daily malware scans, DDoS protection, blacklist monitoring, and more.
While these additional services are beneficial, Domain.com is the perfect solution for registering a domain without hosting and using it as an alternative to Google Domains.
For WPBeginner readers, Domain.com is offering a 25% off discount on domain products. Simply use our Domain.com coupon code to get your hands on the offer.
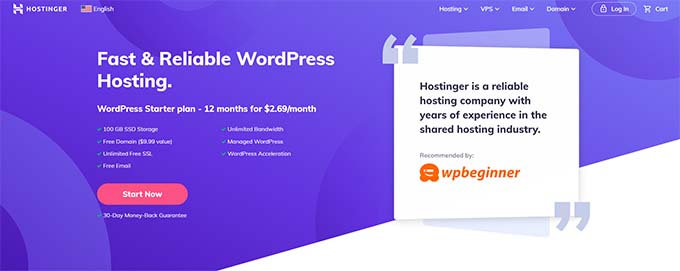
Hostinger is another popular WordPress hosting service that also offers free domain registration. You can choose from top-level domain name extensions (TLDs) and get free WHOIS privacy protection.
What makes Hostinger a great Google Domains alternative is that you get a variety of web hosting types to choose from. For instance, you can share hosting, cloud hosting, managed WordPress hosting, and VPS hosting.
Plus, it offers affordable hosting prices compared to Squarespace, which will be the domain hosting platform once Google Domains shuts down.
Besides that, Hostinger offers free CDN, a 1-click WordPress install, automatic updates, enhanced security features, 24/7 live chat support, free email, free SSL, unlimited bandwidth, WordPress acceleration, and more.
You can check out our Hostinger coupon to get exclusive discounts and also read our expert Hostinger review for complete details.
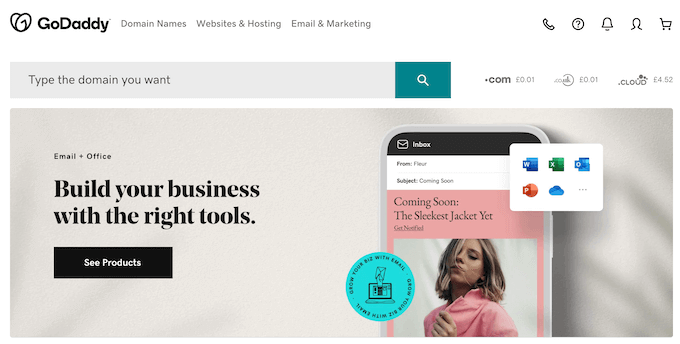
GoDaddy is the next Google Domains alternative on our list. It is one of the oldest and most popular domain registrars.
GoDaddy offers over 84 million domains to choose from, with over 500 domain extensions. It is a great place to search and register a domain.
It is an excellent alternative to Google Domains because it is a one-stop solution. You can buy a domain of your choice, choose a web hosting plan, and start to build a WordPress website. It also offers one of the cheapest domain registration services, with prices starting from $0.99 per year.
If you can’t find the domain you’re looking for, then GoDaddy also offers a WHOIS search feature and domain broker service. You can hire GoDaddy to find, negotiate, and purchase a domain in the broker service.
There is also an auction section on GoDaddy where you can see domains up for sale. Simply bid for a name you’re looking for before the auction ends.
Besides that, you get other features like beginner-friendly domain management facilities. This includes domain name changes, bulk domain renewals, and more. GoDaddy also offers WordPress hosting, website builder, email marketing service, and other tools.
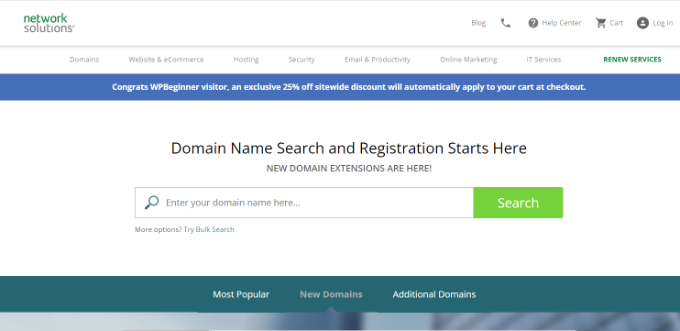
Network Solutions is another Google Domains alternative and one of the largest domain registrars in the market, with over 7 million domains registered.
It offers domain features such as domain transfer, forwarding, private registration, expiration protection, WHOIS search, trademark protection, and more.
With Network Solutions, you can register a wide variety of domain extensions, like .com, .org, .net, .biz, .info, and other niche TLDs. This makes it a create Google Domains alternative as you can choose from different domain extensions.
Aside from that, it also offers web hosting, website builder, SSL certificate, cybersecurity solution, email marketing tools, SEO tools, and more.
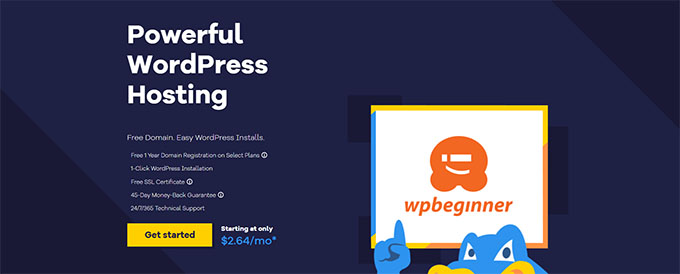
Bluehost is the best web hosting service and the official WordPress hosting partner. They offer fast and affordable hosting services along with domain name registration services.
If you’re looking for a Google Domains alternative that also offers web hosting and free SSL, then Bluehost is one of the best solutions.
With Bluehost, you get a free domain name and a free SSL certificate with each hosting plan. This means you don’t have to pay extra to purchase a domain or get an SSL certificate.
Another benefit of choosing Bluehost is that WordPress comes pre-installed. It also has a beginner-friendly interface, and you can easily manage everything from a single dashboard. Plus, you can use Google Workspace to set up your business emails.
WPBeginner readers can enjoy a 60% off discount on Bluehost. This means you can start with a domain name and web hosting for only $2.75 per month.
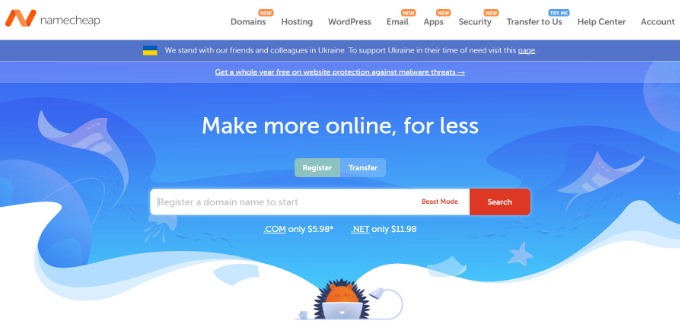
Namecheap is another attractive Google Domains alternative. It is a popular domain registrar that offers a powerful domain search tool. Plus, Namecheap provides suggestions for different domains if the preferred name or extension isn’t available.
Domain Name System Security Extensions (DNSSEC) is free with every purchase of a domain name. This provides an extra layer of security by checking the DNS address and keeps your domain secure from cyber threats.
Namecheap also provides different types of hosting services. You can choose from shared, WordPress, VPS, dedicated servers, and reseller hosting.
Besides that, you get 24/7 customer support, a free 2-month email address trial, privacy protection, domain transfer, SSL certificates, and more.
Hover is a beginner-friendly domain name registrar service and a great alternative to Google Domains.
It makes it very easy to find a domain name of your choice and purchase it. You can also choose from popular domain extensions and other niche TLDs. You can also transfer domains, and renew them.
The best part of using Hover is getting WHOIS and 2-factor authentication for free with every purchase. This is something that makes it different from Google Domains and worth checking out as a replacement for the service.
Hover also offers tools like custom emails and Realnames emails to create a personal touch for your readers. The Realnames email lets you turn your name into an email address in the format of firstname@lastname.
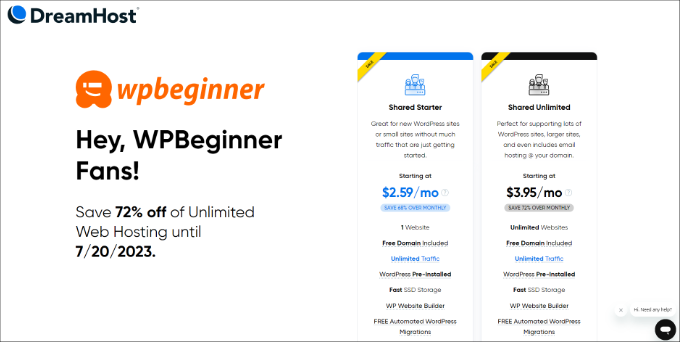
DreamHost is another great Google Domains alternative. Like many other options on the list, it also helps you register a domain and get web hosting for your website.
You get a free domain name, SSL certificate, and domain privacy with any hosting plan. However, you can purchase a domain name for your business using DreamHost.
There are over 400 domain extensions to choose from. Besides that, DreamHost provides a variety of hosting options.
For instance, you can select shared hosting, managed WordPress hosting called DreamPress, dedicated server hosting, cloud hosting, VPS hosting, and more. You can see our details DreamHost review to learn more.
It also easily integrates with Google Workspace. Plus, DreamHost offers email hosting, a website builder option, custom web design, SEO marketing, social media marketing, and other website management services.
HostGator is the last Google Domains alternative on our list. It is another popular hosting provider for WordPress that offers a free domain name.
What makes it an attractive option compared to Google Domains is the pricing plans. You get affordable plans that include free one-year domain registration, SSL certificate, easy WordPress install, and more.
HostGator also offers a domain transfer feature. You can migrate a domain from another platform, such as Google Domains, to HostGator.
Aside from that, the hosting service provides other features like website builder, shared and dedicated hosting, Google Workspace integration, web design facility, SEO and pay-per-click (PPC) consultation, and more.
Which Google Domains Alternative is the Best?
After reviewing multiple services, our top picks are Domain.com, Hostinger, GoDaddy, and Network Solutions.
Domain.com makes it super easy to find a domain name with multiple domain extensions. It also offers some of the best domain management and security features.
On the other hand, if you want a domain name with web hosting, we highly recommend Hostinger. With each hosting plan, you get a free domain name and SSL certificate for one year.
If you’re in the market to just register a domain name, then GoDaddy and Network Solutions are excellent alternatives to Google Domains. Both offer powerful domain search tools.
FAQs about Google Domains Alternatives
Here are some frequently asked questions about choosing a Google Domains alternative.
1. Is Google good for buying domains?
Google launched Google Domains in 2015 to help users buy a domain name for their websites and offer competitive prices compared to other domain registration services. However, Squarespace acquired Google Domains in 2023. Once the migration is complete, you can purchase domains on Squarespace, and Google Domains will no longer be available.
2. Why is Google Domains better than GoDaddy?
One of the reasons why people liked Google Domains is because it offered cheaper domains compared to GoDaddy. However, with Google Domains transitioning to Squarespace, GoDaddy is a more attractive option than Squarespace. You get more features, web hosting, a website builder, and more in GoDaddy.
3. What is the lowest cost of a domain?
The cost usually depends on the domain name and extension you’re looking for. Domain.com offers domain names starting from $11.99. On the other hand, Hostinger offers a domain for free with its WordPress starter and higher plans. GoDaddy lets you register a domain for as low as $0.99.
4. Can I sell my Google domain?
Yes, you can sell your Google domain. There are many domain registrars and marketplaces where you can sell your domain. For example, GoDaddy lets you select domains from your portfolio and list them for sale. Besides that, you can also use marketplaces like Flippa and Efty to sell your domain or website.
Are you looking to make the most of custom fields on your WordPress website?
Custom fields are a handy WordPress feature that allows you to add extra data and information to your WordPress posts and pages. A lot of popular WordPress plugins and themes use custom fields to store important data.
In this article, we will show you how to use WordPress custom fields with some tips, tricks, and hacks.
Since this is a long article, we have added a table of contents for easier navigation. Just use the quick links below to jump to the section you want to read:
The second part is the information about that content. For example, the title, author, date, time, and more. This information is called metadata.
A WordPress website automatically adds all the required metadata to each post or page you create. You can also create and store your own metadata by using custom fields.
By default, the custom fields option is hidden on the post edit screen. To view it, you need to click on the three-dot menu in the top-right corner of the screen and select ‘Preferences’ from the menu.
This will open a popup where you need to switch to the ‘Panels’ tab and then enable the ‘Custom fields’ option.
After that, simply click on the ‘Enable & Reload’ button to reload the post editor.
The post editor will reload, and you will be able to see the Custom Fields panel below the content editor.
Custom fields can be used to add any information related to the post, page, or other content type. This meta information can then be displayed in your theme.
However, to do that, you will need to edit your WordPress theme files.
Note: This tutorial is recommended for users who are already familiar with editing theme files. It is also helpful for aspiring WordPress developers who want to learn how to properly use custom fields in their own themes or plugins.
Having said that, let’s take a look at how to add and use custom fields in WordPress.
Adding Custom Fields in WordPress
First, you need to open a post or page in the block editor so that you can add custom fields. Then, you must go to the Custom Fields meta box.
Next, you need to provide a Name for your custom field and then enter its Value. Click on the ‘Add Custom Field’ button to save it.
The field will be stored and displayed in the Custom Fields meta box like this:
You can edit this custom field any time you want and then just click on the ‘Update’ button to save your changes. You can also delete it if you don’t want to use it anymore.
Now, you need to save your post to store your custom field settings.
Displaying Custom Fields in WordPress Themes
To display your custom field on your website, you will need to edit your WordPress theme files and code snippets.
We don’t recommend directly editing the theme files because the slightest mistake can break your website. An easier way to do this is by using WPCode.
It is the best code snippet plugin for WordPress that lets you add custom code and manage snippets from your WordPress dashboard.
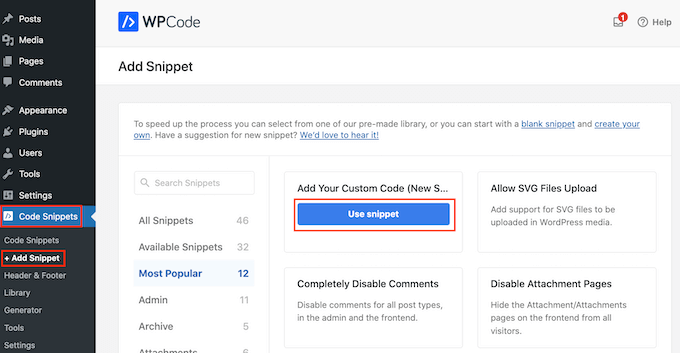
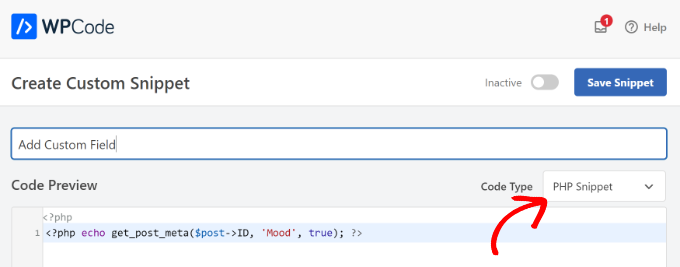
Upon activation, you will need to go to Code Snippets » + Add Snippet from the WordPress dashboard and select the ‘Add Your Custom Code (New Snippet)’ option.
Now you need to copy this code to add to your theme files:
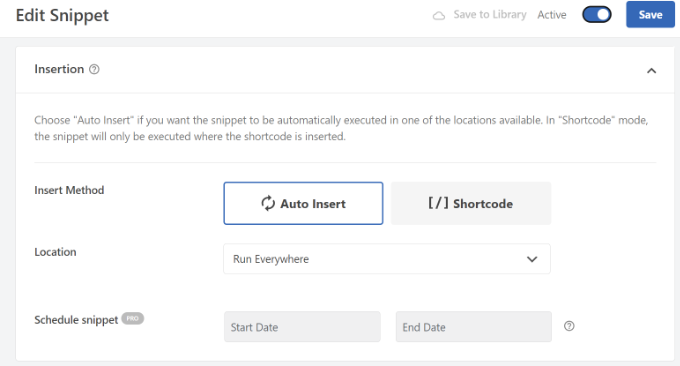
From here, you can scroll down to the Insertion section.
Here, you can select where the code will run. By default, WPCode will Auto Insert the code and run it everywhere on your website.
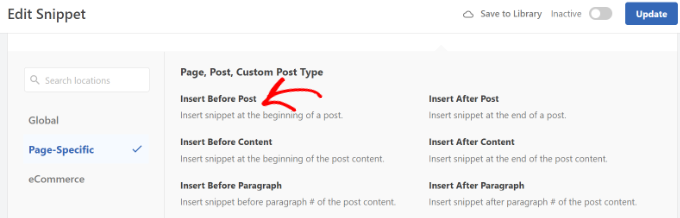
However, you can change this and select where you would like the custom field to appear.
For example, we will choose the ‘Page Specific’ tab and select the ‘Insert Before Post’ option. This way, the custom field will appear at the beginning of the blog post.
You can now save your changes and visit the post where you added the custom field to see it in action.
You can use this custom field in all your other WordPress blog posts as well.
You can also easily adjust the custom field for different blog posts. Simply create a new post or edit an existing one.
Then, go to the Custom Fields meta box and select your custom field from the dropdown menu and enter its Value.
Once you are done, simply click the ‘Add Custom Field’ button to save your changes and then publish or update your post.
Troubleshooting: Can’t Find Custom Field in Dropdown on Post Edit Screen
By default, WordPress only loads 30 custom fields in the dropdown menu on the post edit screen.
If you are using WordPress themes and plugins that already use custom fields, then those might appear first in the dropdown menu, and you won’t be able to see your newly-created custom field.
To fix this issue, you will need to add the following code to your theme’s functions.php file or by using WPCode (recommended):
Upon activation, you need to visit the ACF » Field Groups page and click on the ‘Add New’ button.
A field group is like a container with a set of custom fields. It allows you to add multiple panels of custom fields.
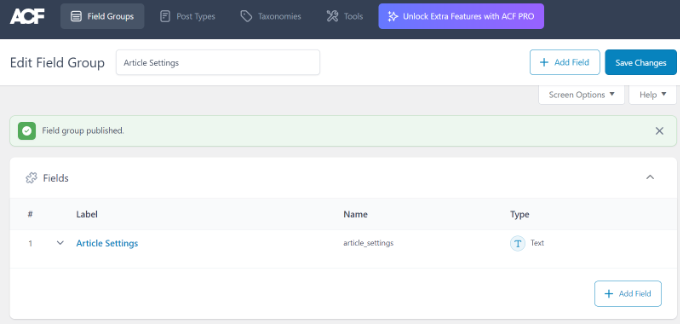
Now, you need to provide a title for your field group and click the ‘+ Add Field’ button in the top-right corner.
You can now select a field type.
Advanced Custom Fields allows you to create all sorts of fields, including text, image upload, number, dropdown, checkboxes, and more.
Next, you can scroll down to see other options for that particular field, like field name, field label, and default value. You can change them to your own requirements.
You can also add multiple fields to your field group if you want. Once you are finished, just click on the ‘Save Changes’ button.
Next, edit a post or create a new one, and you will see a new panel with your WordPress custom fields below the content editor.
How to Hide Empty Custom Fields With Conditional Statements
So far, we have covered how to create a custom field and display it in your theme.
Now let’s see how to check that the custom field is not empty before displaying it. To do that, we will modify our code to first check if the field has data in it:
Don’t forget to replace Mood with your own custom field name.
Adding Multiple Values to a Custom Field
Custom fields can be reused in the same post to add multiple values. You just need to select the field again and add another value to the ‘Value’ box.
However, the code we have used in the above examples will only be able to show a single value.
To display all values of a custom field, we need to modify the code and make it return the data in an array. You will need to add the following code to your theme file:
Again, don’t forget to replace Mood with your own custom field name.
In this example, you will notice that we have changed the last parameter of get_post_meta function to false. This parameter defines whether the function should return a single value or not. Setting it to false allows it to return the data as an array, which we then displayed in a foreach loop.
How to Search Posts by Custom Field in WordPress
WordPress’s default search doesn’t work with any custom fields on your website. It only uses the content to find the post you or your visitors are looking for on your site.
However, SearchWP changes that by improving your WordPress search. It’s the best WordPress search plugin that goes beyond using the post content and indexes everything, including WordPress custom fields, PDF documents, custom tables, text, files, and more.
You can adjust the search algorithm without editing code using SearchWP. Simply install the plugin and then head over to SearchWP » Algorithm from your WordPress admin area.
After that, you need to go to the ‘Engines’ tab and then adjust the Attribute Relevance slider. This will change the importance given to each attribute during a search.
For instance, you can set the Custom Fields slider to maximum and adjust sliders for other attributes accordingly. This way, SearchWP will give preference to data in custom fields when searching for content in WordPress.
Another advantage of using SearchWP is that works with some of the most popular custom field plugins, including Advanced Custom Fields (ACF), Meta Box, and Pods.
WordPress allows you to display posts with custom keys and their values. For example, if you are trying to create a custom archive page to display all posts with specific custom keys, then you can use the WP_Query class to query posts matching those fields.
You can use the following code as a starting point:
$args = array(
    'meta_key'   => 'Mood',
    'meta_value' => 'Happy'
);
$the_query = new WP_Query( $args );

<?php
// the query
$the_query = new WP_Query( $args ); ?>

<?php if ( $the_query->have_posts() ) : ?>

    <!-- the loop -->
    <?php while ( $the_query->have_posts() ) : $the_query->the_post(); ?>
        <h2><?php the_title(); ?></h2>
        <?php the_content(); ?>

    <?php endwhile; ?>
    <!-- end of the loop -->

    <!-- pagination here -->

    <?php wp_reset_postdata(); ?>

<?php else : ?>
    <p><?php _e( 'Sorry, no posts matched your criteria.' ); ?></p>
<?php endif; ?>
Don’t forget to replace meta_key and meta_value parameters with your own values.
How to Add Guest Author Name Using Custom Fields
Do you want to add a guest post but don’t want to add a new user profile just for that post? An easier method is adding a guest author name as a custom field.
To do this, you will need to add the following code to your theme’s functions.php file or use WPCode (recommended):
This code hooks a function to the_author and get_the_author_display_namefilters in WordPress.
The function first checks for the guest author’s name. If it exists, then it replaces the author’s name with the guest author’s name.
Now you will need to edit the post where you want to display the guest author’s name. Go to the Custom Fields meta box, add your guest author name, and finally click on the ‘Add Custom Field’ button.
How to Display Contributors to an Article Using Custom Fields
On many popular blogs and news sites, many authors contribute to writing a single article. However, WordPress only allows a single author to be associated with a post.
Another method is adding contributors as a custom field.
First, you need to edit the post where you want to display co-authors or contributors. Then, scroll down to the Custom Fields meta box and add author names as co-author custom fields.
Now, you need to add this code to your theme files where you want to show co-authors:
One way to do this is by using custom fields. Just edit the post or page where you want to show a different sidebar and then add the sidebar as a custom field.
Now you need to edit your WordPress theme file, such as single.php, where you want to display a custom sidebar. You will be looking for the following code:
This code simply looks for the sidebar custom field and then displays it in your theme. For example, if you add webpage as your sidebar custom field, then the code will look for a sidebar-webpage.php file to display.
You will need to create the sidebar-webpage.php file in your theme folder. You can copy the code from your theme’s sidebar.php file as a starting point.
Manipulating RSS feed Content With Custom Fields
Want to display additional metadata or content to your RSS feed users? Using custom fields you can manipulate your WordPress RSS feed and add custom content into your feeds.
First, you need to add the following code to your theme’s functions.php file or use WPCode (recommended):
Now, just create a custom field called ‘coolcustom’ and add any value you like. You can use it to display advertisements, images, text, or anything you want.
How to Manipulate RSS Feed Title With Custom Fields
Sometimes you may want to add extra text to a post title for RSS feed users. For example, this can be handy if you are publishing a sponsored post or a guest post.
First, you need to add the following code to your theme’s functions.php file or use WPCode to add the custom code snippet without breaking your website:
Next, you need to edit the post where you want to display the extra text in the title field.
Then, add guest_post and sponsored_post as custom fields.
If either of these two custom fields is found with a value “true”, then the code will add the appropriate text before the title. This technique can be used in many ways to fit whatever you like.
How to Set Expiration Date for Posts in WordPress Using Custom Fields
Want to set an expiration date for some posts on your WordPress site? This comes in handy when you want to publish content only for a specific period like running surveys or limited-time offers.
One way to do this is by manually removing the post content or by using a plugin like Post Expirator.
Another option is using custom fields to automatically expire posts after a specific time. You will need to edit your theme files and modify the WordPress loop like this:
<?php
if (have_posts()) :
while (have_posts()) : the_post();
$expirationtime = get_post_meta($post->ID, "expiration", false);
if( count( $expirationtime ) != '' ) {
if (is_array($expirationtime)) {
$expirestring = implode($expirationtime);
}

$secondsbetween = strtotime($expirestring)-time();
if ( $secondsbetween >= 0 ) {
echo 'This post will expire on ' .$expirestring.'';
the_content();
} else {
echo "Sorry this post expired!"
}
} else {
the_content();
}
endwhile;
endif;
?>
Note: You will need to edit this code to match your theme.
After adding this code, you can add the expiration custom field to the post you want to expire. Make sure you add the time in this format mm/dd/yyyy 00:00:00.
How to Style Individual Posts Using Custom Fields
Want to change the look of an individual post using CSS? WordPress automatically assigns each post its own class, which you can use to add custom CSS.
However, by using custom fields, you can add your own custom classes and then use them to style posts differently.
First, you need to edit a post that you would like to style differently. Go to the Custom Fields box and add the post-class custom field.
Next, you need to edit your WordPress theme files and add this code at the beginning of the WordPress loop:
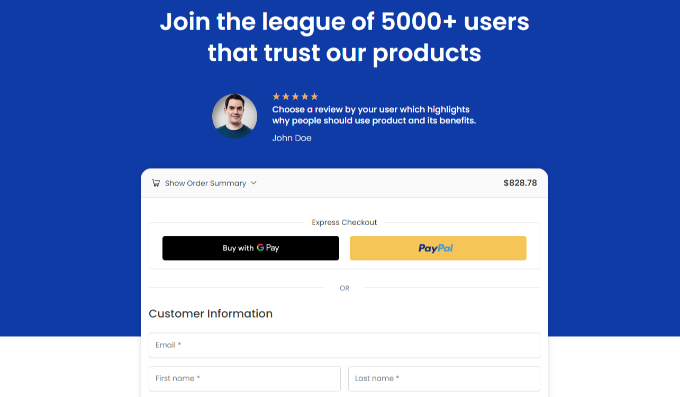
Are you looking to add an express checkout button to your online store?
Express checkout helps streamline the checkout process and improves the overall shopping experience for your customers. It can also boost conversions and reduce cart abandonment.
In this article, we will show you how to add express checkout buttons in WooCommerce.
Why Add Express Checkout in WooCommerce?
Adding express checkout to your WooCommerce store provides a better shopping experience for your customers.
It allows customers to go directly to the payment page and skip the shopping cart or checkout pages. They also won’t have to go to a payment provider page or fill out a checkout form to complete their purchases.
Express checkout buttons make the entire buying process quicker. Customers can simply click the buttons and log in to pay for the products they wish to buy in an instant. As a result, you may see a boost in conversions and fewer abandoned carts.
Adding express checkout also helps mobile users where their screen sizes are small. Customers will just tap the buttons to quickly purchase the products.
However, WooCommerce doesn’t offer an express checkout option by default. You will need to use a WooCommerce plugin to add the feature to your online store.
That said, let’s see how you can add express checkout buttons in WooCommerce.
Setting Up FunnelKit on Your WooCommerce Store
FunnelKit is the best WooCommerce sales funnel plugin on the market. It lets you add express checkout buttons and create different funnel pages for your online store.
The best thing about using the plugin is that it works with Stripe, Apple Pay, Google Pay, PayPal Express, Amazon Pay, and other payment gateways for express checkout. This way, you don’t have to add each payment provider to your online store using third-party plugins or extensions.
FunnelKit also provides user-friendly templates and lets you do A/B testing. You can easily customize your funnels using different drag-and-drop page builders. Plus, there are multiple pre-built templates and automation features for your marketing campaigns.
Note: For this tutorial, we will be using the FunnelKit Pro plugin because it includes premium templates and more customization options. You can also use the free Funnel Builder for WordPress by FunnelKit plugin to add express checkout buttons in WooCommerce.
First, you will need to install and activate the FunnelKit plugin. If you need help, then you can follow our guide on how to install a WordPress plugin.
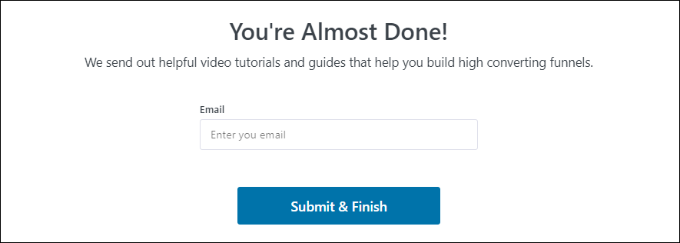
Upon activation, you will see the FunnelKit setup wizard. Go ahead and click the ‘Get Started’ button.
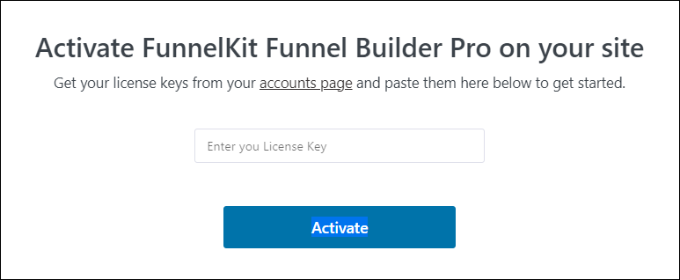
After that, you will need to enter your license key. You can find the key in the FunnelKit account area.
Simply click the ‘Activate’ button after entering the license key.
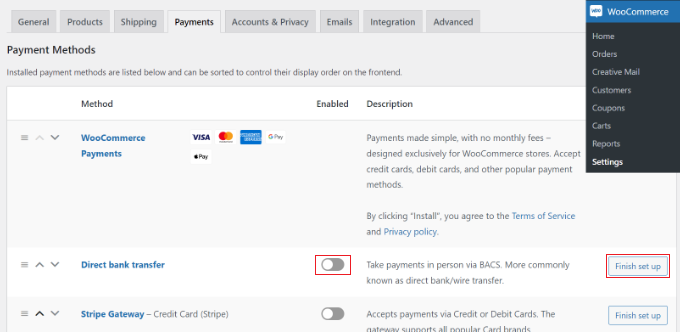
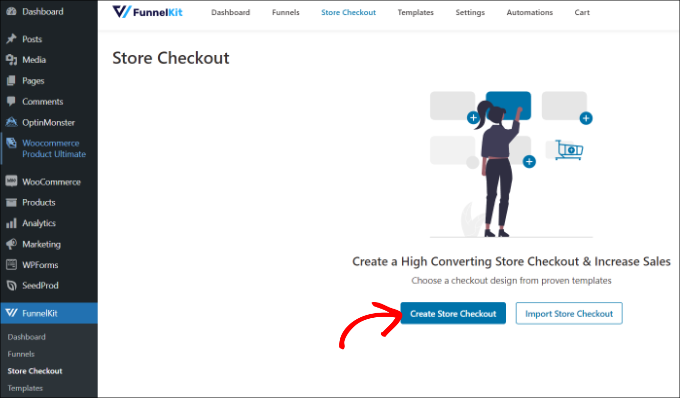
Once you have enabled your preferred payment gateways, you can head to the FunnelKit » Store Checkout page from your WordPress admin panel.
From here, simply click the ‘Create Store Checkout’ button.
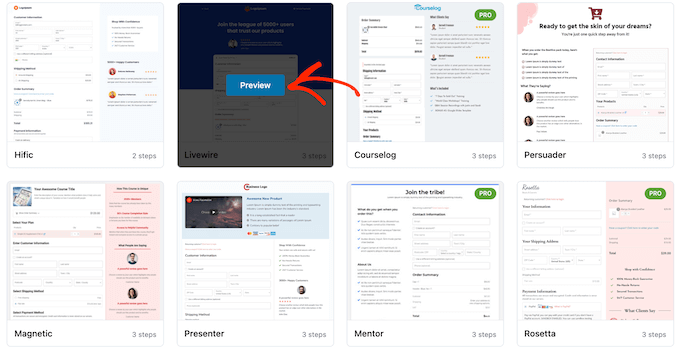
On the next screen, FunnelKit will show you professionally-designed templates for your checkout page. It will also let you create a checkout page from scratch.
However, we recommend using a template and quickly customizing it according to your requirements.
Simply hover over a template you’d like to use and click the ‘Preview’ button.
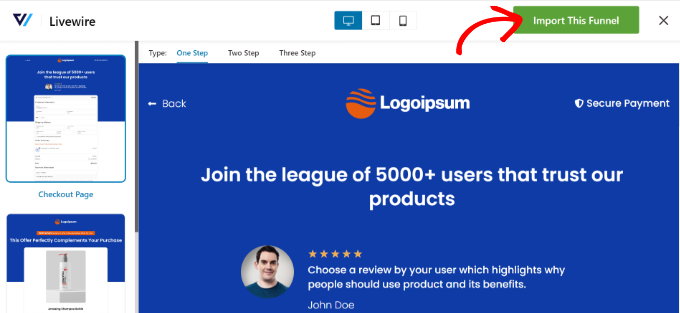
For this tutorial, we will use the Livewire template.
Next, go ahead and click the ‘Import This Funnel’ button at the top.
Depending on the template you use, FunnelKit may ask you to install additional plugins like Elementor to edit the checkout page.
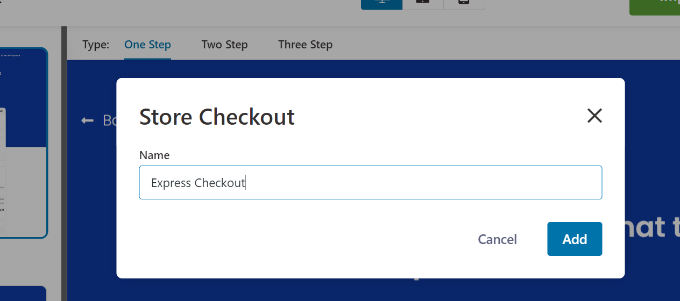
Next, you will need to enter a name for your store checkout and click the ‘Add’ button.
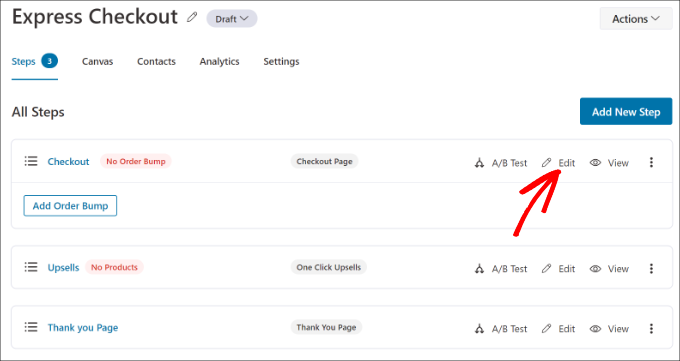
After that, you will see all the steps that are included in the template.
You can simply click the ‘Edit’ button for the Checkout page to continue.
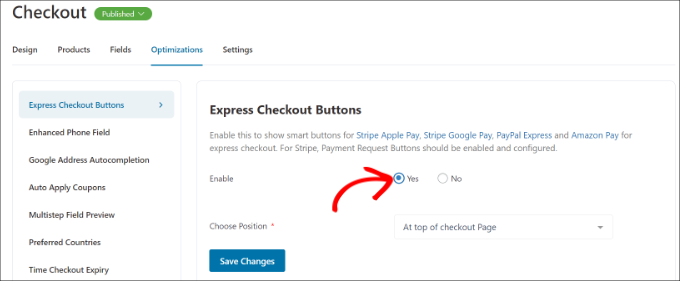
Next, you can switch to the ‘Optimizations’ tab. From here, simply enable the ‘Express Checkout Buttons’ option.
FunnelKit will also let you choose the position of the buttons from the following options:
Top of the checkout page
Before/after the product switcher
Before/after the order summary
Above the payment gateways
When you are done, simply click the ‘Save Changes’ button.
That’s it, you have successfully added express checkout buttons to your online store.
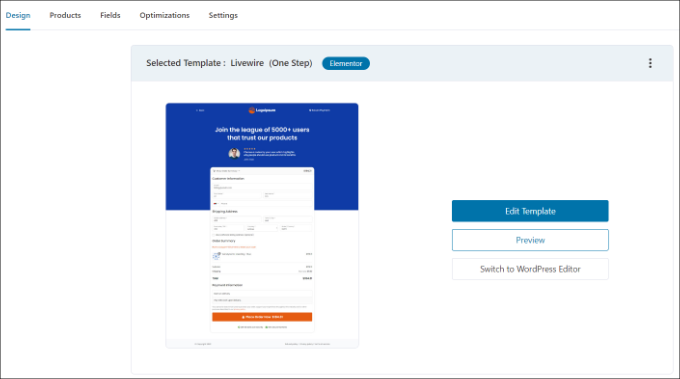
If you want to edit the appearance of the checkout page, then you can switch to the ‘Design’ tab and click the ‘Edit Template’ button.
Once you have made your changes, simply visit your online store to view the express checkout buttons in action.
Additionally, FunnelKit helps you upsell products in WooCommerce. This way, you can boost sales by encouraging users to buy more products.
You can also set up automated emails in WooCommerce using FunnelKit Automations, a sister product of FunnelKit. This plugin lets you create automated workflows and send email campaigns to customers.
 In a significant move for the WordPress community, WordCamps are set to receive advertising funds under newly proposed changes. This initiative aims to boost the visibility and reach of these community-driven events, ensuring they continue to thrive and support WordPress enthusiasts worldwide. Read more! Stay tuned for more updates as this proposal progresses. Happy WordPressing 🚀 [...]
 Have you ever visited a website that felt like it understood you? Maybe it suggested articles you actually wanted to read or offered products that caught your eye. This kind of smart experience is possible with AI and machine learning, and you can bring it to your WordPress site using the WordPress API. It’s no
  Gutenberg. The block editor probably needs no introduction. Since its launch in 2018, it has become a staple for anyone building a site on WordPress—even those who aren’t particularly tech-savvy can get the hang of it. But as good as Gutenberg is, its users could benefit from even more flexibility and options. That’s where block
  July 18, 2024 – WP Engine, a global leader in web enablement, has acquired NitroPack, a renowned SaaS solution for site speed and performance optimization. This acquisition enhances WP Engine’s capabilities, offering customers advanced tools to improve site performance, including significant boosts in Google’s Core Web Vitals. NitroPack’s technology, known for its ease of use and powerful optimizations,
  Struggling with a malfunctioning of your WordPress site? You’re not alone. A corrupted WordPress database can damage your site’s performance and user experience. Whether you’re an expert or a newbie, knowing how to repair WordPress database (WP DB) is crucial. In this guide, you can uncover the proven tips to repair the WP (WordPress) database.