Are you looking for the best practices to maximize the SEO benefits of internal links?
Internal links play an important role in search engine optimization (SEO). They help search engines discover your content and rank them higher in search results.
In this article, we’ll list the best practices to use for internal linking for SEO.
How Does Internal Linking Improve SEO in WordPress?
Internal links are links between posts on your own website. Having internal links is important for your WordPress SEO. They help search engines like Google crawl your website and discover new content to index and rank.
Generally, the more links a page has pointing to it, the more likely it is to rank higher in search results. That means that you can use internal links to point to important pages on your site as a way to increase their traffic.
Internal links also help your visitors easily find related articles and provide a better user experience overall. This can also help increase pageviews and reduce your bounce rate.
That being said, let’s take a look at the best practices for improving SEO by adding internal links in WordPress. Since this is a comprehensive guide, we have included a table of contents for easier navigation.
- Make Internal Linking a Habit
- Monitor Your Internal Link Performance in WordPress
- Improve Your WordPress Site’s Internal Linking With a Plugin
- Display a List of Your Most Popular Posts in WordPress
- Create List Posts That Roundup Other Articles in WordPress
- Get Google Sitelinks for Your WordPress Site
- Preload Links in WordPress for Faster Loading Speeds
- Find and Fix Broken Links in WordPress
- Update Internal Link URLs When Moving a Site to a New Domain
- Use MediaWiki Syntax to Quickly Add Internal Links in WordPress
- Track Which Internal Links Are Clicked in WordPress
- Enable Breadcrumbs in WordPress or WooCommerce
1. Make Internal Linking a Habit
We recommend that you make a habit of linking to your older articles from your new articles.
It’s a great way to develop a contextual relationship between your new and old posts. It also allows you to pass relevant link juice to your older articles.
Because internal links play such an important role in SEO, we have even made it part of our pre-publish blog post checklist for WPBeginner writers.
You can also edit your older articles to add links to your newer content whenever you publish. Many successful bloggers dedicate time to adding internal links that point to new articles on a weekly or monthly basis.
This will help you boost your pageviews, increase the time users spend on your site, and ultimately will improve the SEO score of your individual blog posts and pages.
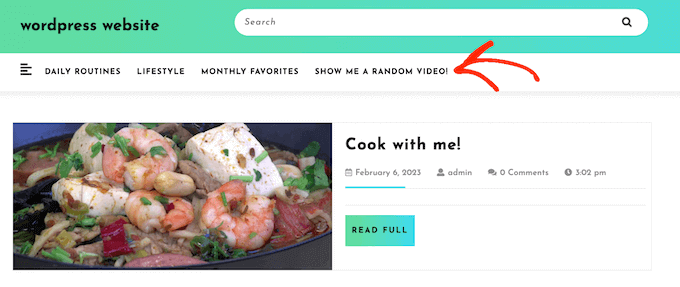
WordPress makes it easy to search for your old posts right inside the post editor. Simply select the text you want to link and click on the link button in the toolbar that appears.
A text pop-up will appear below your highlighted words. Then, you can start typing to search for the older articles you want to link to.

To learn more, see our beginner’s guide on how to add a link in WordPress.
2. Monitor Your Internal Link Performance in WordPress
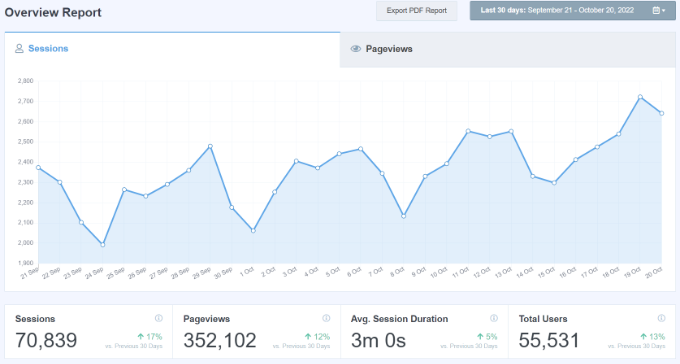
It’s helpful to see your website’s SEO performance in terms of links by using a tool such as the Links Report in Google Search Console. This is a helpful starting point for working out how to improve internal linking on your site.

The Links Report will show you how many pages are linking to this page. You can compare it with other pages and see whether pages with more internal links are ranking higher than posts with many internal links.
If you find that posts with more links do rank higher, then you can go ahead and start adding internal links to pages that you want to rank higher. For the details, see our guide on using Google Search Console to effectively grow your website traffic.
Just make sure you are only linking to the article when it makes sense. Adding links where they don’t make sense creates a bad user experience.
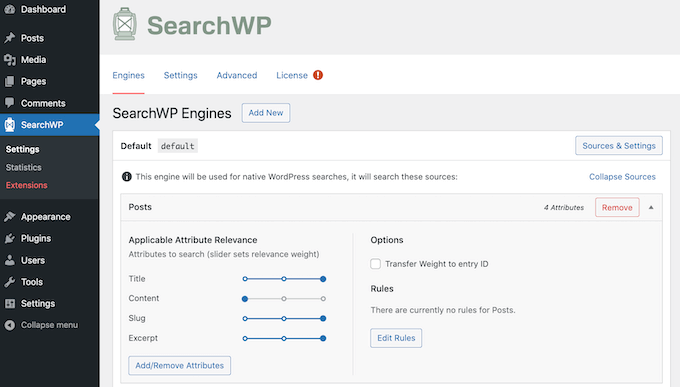
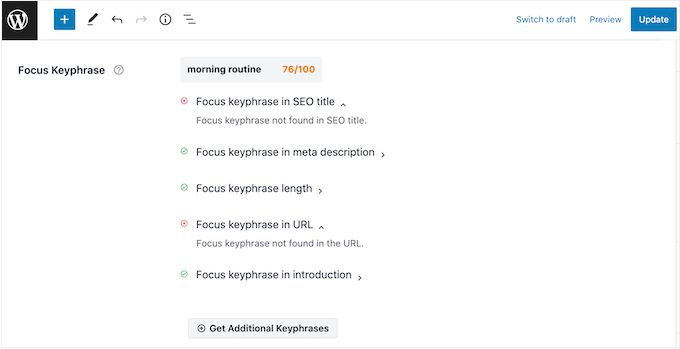
Another way to monitor the impact of internal linking is to see which keywords are gaining or losing position. All in One SEO makes this extremely easy with the Search Statistics feature.
Once you connect the plugin with Google Search Console, All in One SEO will fetch your Google Search Console data and present it under All in One SEO » Search Statistics.

The keyword positions chart shows a graph of your site’s keyword positions.
Below this, you’ll see the Keyword Rankings overview box. This shows your top 10 keywords, and if you use them for internal links they are very likely to be clicked.

3. Improve Your WordPress Site’s Internal Linking With a Plugin
If you’re not sure which posts you want to link to, then you will often find it faster to add internal links in WordPress using an internal linking plugin.
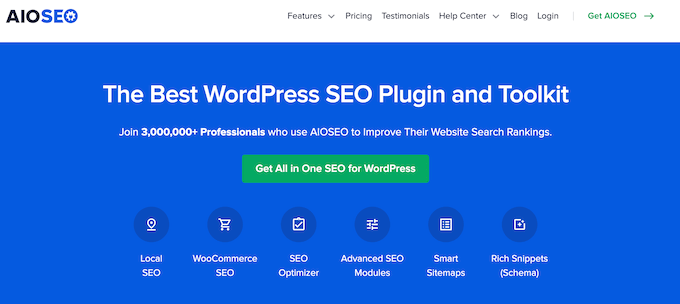
We recommend using All in One SEO. It includes a unique Link Assistant feature that lets you add links to your old and new content without having to open up the post. Plus, it provides link recommendations, detailed link reports, and much more.
To set up the plugin, see our guide on how to set up All in One SEO for WordPress correctly. After that, simply navigate to All in One SEO » Link Assistant in your WordPress dashboard.
Link Assistant will crawl every link on your website and then show a comprehensive list report.

The report will show you an overview of the links with total counts for internal, external, and affiliate links. It will also show you the number of orphaned posts that have not yet been linked to from another post or page.
You can switch to the Links Report tab for detailed information on all your links. Here you’ll see a list of all your posts and pages with columns for internal, external, and affiliate links.

It will also show a number of suggestions where you can add links.
For more details, you can click on the right arrow button next to a post or page. This will show all links organized in different tabs. From the suggestions tab, you can quickly view link suggestions and add links without directly editing a post or page.

Link Assistant also helps you discover more internal linking opportunities.
You can switch to the ‘Linking Opportunities’ tab to see suggestions about how to improve the internal linking on your website, and also see the list of orphaned posts so you can add links to them.

Another plugin useful for internal linking is Semrush SEO Writing Assistant because it can help you keep track of links inside your article.
For example, it lets you know when your article has too many or too few internal links and also suggests ways you can improve your links.

This tool also comes in handy if you have other authors working on articles. Editors can quickly see if the article includes internal links to other posts on your website.
We show you how to use this plugin step-by-step to improve your SEO in our guide on how to use the SEO Writing Assistant in WordPress.
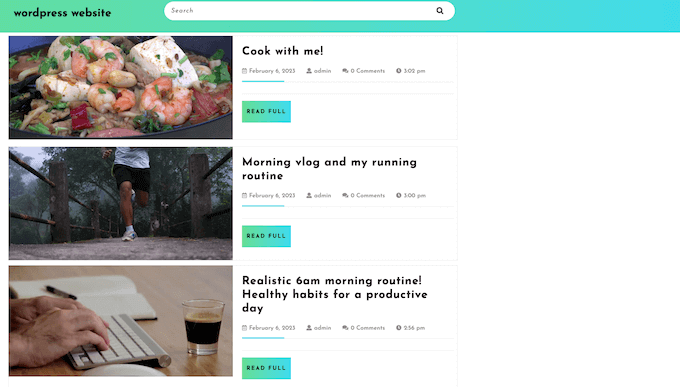
4. Display a List of Your Most Popular Posts in WordPress
You can use a WordPress popular posts plugin to point users toward the articles that other users have already found helpful. These plugins automatically create a list of internal links to your most popular content.
Popular posts are usually your most successful content, which means they are more likely to increase user engagement, conversions, and sales. They are also a good opportunity for internal linking to your other less popular articles.
For example, MonsterInsights has a feature that allows you to show your popular articles anywhere on your WordPress site. You can use also use inline popular posts to show articles inside your content.

If you want to show articles in the sidebar or at the end of your content, then you can select the Popular Post Widget. MonsterInsights even lets you display your top-performing products anywhere on your eCommerce store.
You can learn more in our guide on how to display popular posts in WordPress.
5. Create List Posts That Roundup Other Articles in WordPress
Another way to increase the number of internal links on your WordPress blog is to create roundups of your existing content. You do this by creating a new post that mentions your best articles on a certain subject to give a detailed overview of the topic.
In fact, you’re reading a post like that now.
Luckily, there are some plugins that make this job easy. For example, WP Tasty Roundups allows you to quickly repurpose your existing content into beautiful roundup posts that rank in search results.
All you need to do is type one or two keywords into the built-in search functionality, and the plugin will automatically pull images, titles, descriptions, and links from relevant posts into your roundup list.

6. Get Google Sitelinks for Your WordPress Site
Sitelinks are a feature on Google search engine results pages (SERPs) where additional sub-pages appear under a website in the search results.
These are often internal links to the most popular pages of that website.
The top 3 spots on Google get the most clicks. When sitelinks are shown for a website, it takes up the same amount of space as three regular search listings.
Having this much screen space dedicated to your site significantly increases your overall click-through rate. Simply put, more visitors will visit your website from the keyword.
While there is no guaranteed way to get Google to show sitelinks for your website, it certainly helps to create lots of internal links to your most important posts and pages.
You can learn more in our guide on how to get Google sitelinks for your WordPress site.
7. Preload Links in WordPress for Faster Loading Speeds
Link preloading is a browser technology that will load links in the background before a site visitor clicks them. This makes your website seem faster, which can improve SEO.
Because loading speed is one of the top indicators for search engine rankings and user engagement, when your internal pages are preloaded, your visitors are more likely to stay on your website longer.
They are more likely to view more pages because they’re loading instantly.
The easiest way to preload links is by using the Flying Pages plugin. It simply adds intelligent preloading to make sure preloading won’t crash your site or even slow it down.

We show you how to set up the plugin step-by-step in our guide on how to preload links in WordPress for faster loading speeds.
8. Find and Fix Broken Links in WordPress
Broken links are bad for your website’s SEO. Search engine crawlers find new content on your website by following internal links, so a broken link can stop them from indexing a new post.
They also negatively impact user experience because broken links will return a 404 error. If a visitor clicks on a link and is unable to find a page they’re looking for, then they may leave.

You can easily find and fix broken links on your WordPress website using All in One SEO.
AIOSEO offers a powerful redirection manager that helps track 404 errors on your website and lets you set up permanent 301 redirects to fix broken links.

To learn more, see our detailed guide on how to find and fix broken links in WordPress.
9. Update Internal Link URLs When Moving a Site to a New Domain
If you ever move your WordPress site to a new domain name, then it is important to update all internal link URLs. Otherwise, you will have lots of broken links.
You should start by changing the WordPress address and site URL by visiting the Settings » General page from your WordPress dashboard.
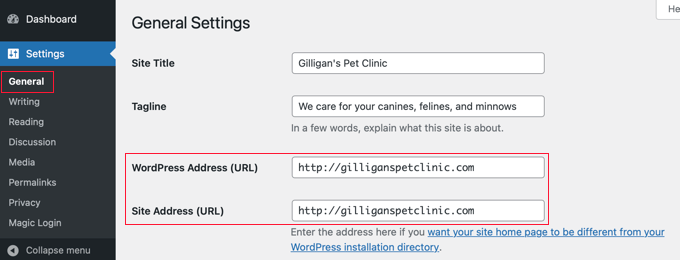
But you will also need to change the URLs of every internal link added to your posts and pages.
You’ll find the simplest way to do this in our step-by-step guide on how to easily update URLs when moving your WordPress site.
10. Use MediaWiki Syntax to Quickly Add Internal Links to WordPress
If you want to make internal linking a habit, then it helps to use the most efficient method. Since WordPress 6.0, WordPress has supported standard MediaWiki syntax to quickly add internal links when creating or editing a post.
You can now quickly add links by adding two square brackets followed by the post title. The animated gif below shows you how easy this feature is to use inside WordPress.

The link will automatically add the correct URL to the post, and use the post title as an anchor link.
If you know the title of a post (or even just part of it), then using the double square bracket method is the fastest way of creating an internal link.
11. Track Which Internal Links Are Clicked in WordPress
One of the best ways to uncover how users interact with your website is to track which internal links your visitors are clicking. Tools such as MonsterInsights can help you see which internal links your visitors are the most interested in.
You can then use these insights to improve the way you add internal links to your posts and pages.
We offer detailed instructions on tracking different types of links in our guide on how to track link clicks and button clicks in WordPress.
You might also like to see our guide on how to track user engagement in WordPress.
12. Enable Breadcrumbs in WordPress or WooCommerce
Breadcrumb navigation is a term used to describe a hierarchical navigation menu presented as a trail of links.
It’s often used as a secondary navigation that allows users to go up in the website’s hierarchy of pages.

Breadcrumbs are great for internal linking because they define a clean path or trail to the page you are on.
These breadcrumbs also appear in search results giving your site an extra advantage in rankings.

We cover two ways to add breadcrumbs in our guide on how to display breadcrumb navigation links in WordPress. Most users will find Method 1 easier, using All in One SEO.
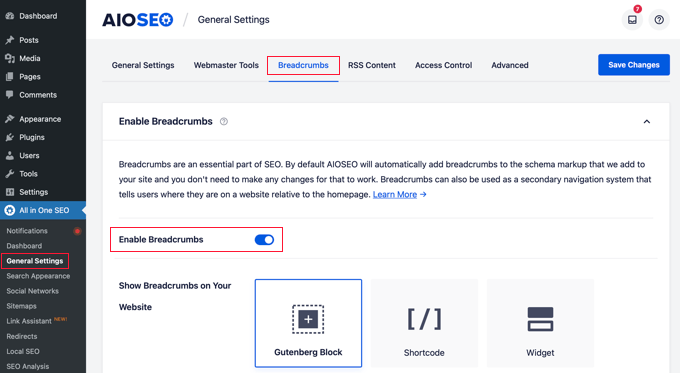
You can also use All in One SEO to enable breadcrumbs for your WooCommerce products. For details, see the fifth tip in our guide on WooCommerce SEO made easy.
We hope this tutorial helped you learn how the best internal linking practices for SEO. You may also want to see our ultimate WordPress security guide, or check out our list of tips on how to increase your blog traffic.
If you liked this article, then please subscribe to our YouTube Channel for WordPress video tutorials. You can also find us on Twitter and Facebook.
The post Internal Linking for SEO: The Ultimate Guide of Best Practices first appeared on WPBeginner.


 - welcome mat example")