Are you looking to download WordPress to create your website?
WordPress is an open-source project, and you can download it for free. Although many web hosting providers now install WordPress for you automatically, you can always download and install it manually on your own server or computer.
In this article, we’ll show you how to download WordPress for free, as well as what you need to do next to get it installed.
Why Is WordPress Freely Downloadable?
WordPress is free for anyone to download and use to build any kind of website without any restrictions. That’s because WordPress is an open-source community project that tens of thousands of talented people contribute to.
There is a core team of developers that lead the project development, but anyone can contribute patches, fix bugs, make features, suggest features, and more.
Note: When we speak of the WordPress open-source project, we’re talking about self-hosted WordPress.org. This is different from the WordPress.com hosting service. For more details, see our comparison between WordPress.com vs WordPress.org.
While the core software is free, there are still costs involved in making a WordPress website. The cost of a website depends on your budget and goals, but it can be quite affordable.
The main costs will be a domain name, which will be your website’s address on the internet, and website hosting, which is where you will store your website files and database.
The good news is that most website hosting providers will automatically install WordPress for you, and you will probably never need to manually download or install it yourself.
However, if you are an intermediate or advanced user, then you always have the option of installing WordPress manually. That’s handy if you wish to do a custom WordPress install, or have WordPress running on your own server or computer.
With that being said, let’s take a look at how to download WordPress for free, along with what you need to do next. Here are the topics we’ll cover in this tutorial:
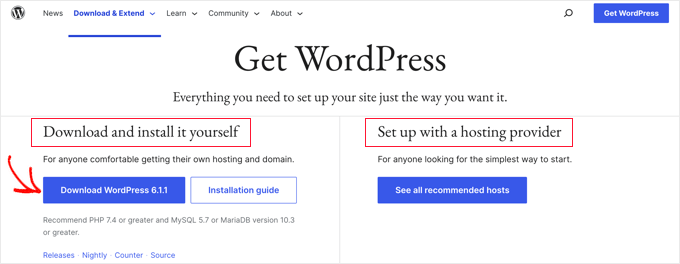
You can download WordPress and install it yourself as we’ll cover in this article, or
You can set up WordPress automatically with a hosting provider.
We recommend most users take the second option. Reputable hosting providers such as Hostinger, Bluehost, Dreamhost, or SiteGround will install WordPress for you automatically in just 5 minutes. To learn how that works, see our complete guide on how to install WordPress.
But if you’re an advanced or intermediate user and want to install WordPress manually, then go ahead and click the ‘Download WordPress’ button.
This button will also indicate which version of WordPress you are downloading. In this case, it is WordPress 6.1.1.
After downloading the file from WordPress.org, you just need to unzip it. This will create a ‘wordpress’ folder on your computer that contains all the files you need to create a WordPress website.
Now that you have downloaded WordPress for free, you can use it to install or reinstall WordPress on your server or create a local WordPress installation on your computer.
How to Install or Reinstall WordPress Manually on a Web Server
Installing WordPress manually requires a few added steps, but may be easier than you expect. You will need the files you downloaded and an FTP client or a web-based file manager.
Your first job will be to use FTP to upload the WordPress files you have downloaded to your web server. You can think of FTP as file management for the internet.
Most web hosting providers offer an FTP server and send your FTP username, password, and other details via email when you sign up for your WordPress hosting account. You can also find your ‘FTP Accounts’ information in your hosting account’s cPanel or Site Tools dashboard.
As an alternative to FTP, most hosting providers also provide a browser-based file manager application. This can be accessed from your web hosting control panel as pictured above.
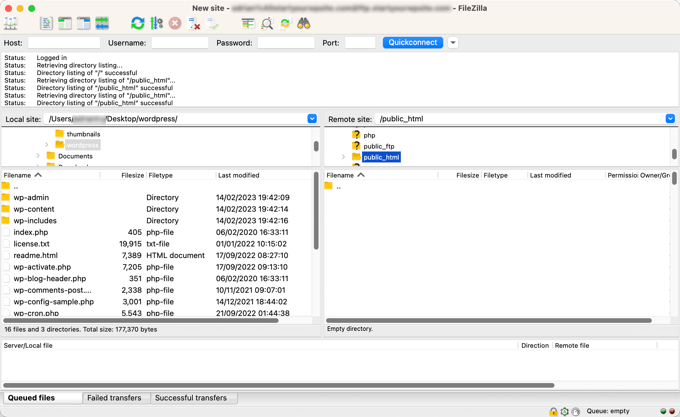
We’ll use the FileZilla FTP client because it’s free and works on Windows and Mac.
First, you need to open FileZilla and select File » Site Manager from the menu. Next, you should click the ‘New site’ button and provide a title for your website. Once you’ve done that, you should enter the login details in the ‘User’ and ‘Password’ fields.
From the Protocol dropdown, you should select ‘SFTP’ if your hosting provider supports it, otherwise leave it as ‘FTP.’
Next, you just type your domain name such as ‘example.com’ in the Host field and select ‘Normal’ for the Logon Type.
Once you’ve entered those details, you can click on the Connect button to continue. FileZilla will now attempt to log in to your website using the credentials you entered.
Once connected, you will see two columns of files and folders. The left column lists the Local files on your computer. The right column lists the Remote files on your website. This layout lets you easily transfer files to and from your website.
In the left column, you need to locate the ‘wordpress’ folder that you downloaded and unzipped earlier. In the right column, you need to locate the folder on your website where you need to upload these files:
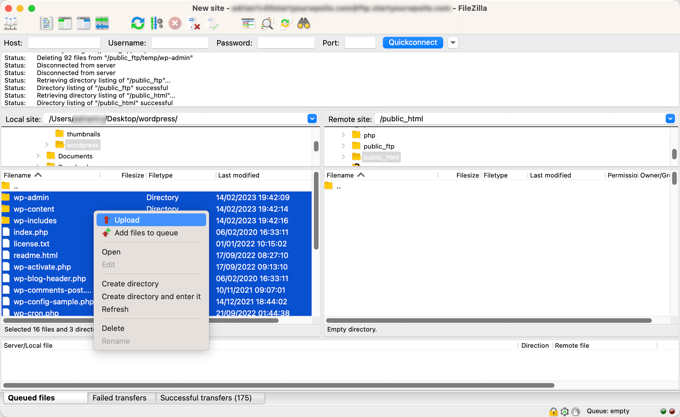
If you want to install WordPress on your root domain name (like example.com), then you need to upload WordPress files to your website’s root directory. Usually, this directory is called /public_html/.
On the other hand, If you want to install WordPress in a subdirectory (like example.com/blog), then upload it to a folder /public_html/blog/.
Now you simply select all the files on the left. After that, you need to right-click the files and select Upload from the menu, or simply drag the files to the right column.
Your FTP client will now upload the WordPress files to your website.
Creating Your WordPress Database
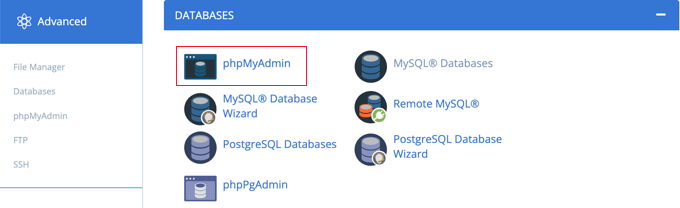
Once the WordPress files are uploaded, you need to go to your hosting control panel to create a database. We’ll show you how to do that using cPanel, but if your hosting provider has a different control panel, then just look for the ‘phpMyAdmin’ option.
Clicking the ‘phpMyAdmin’ icon will open the phpMyAdmin application in a new tab. In the phpMyAdmin dashboard, click on the Databases tab.
You can now type a name for your database into the ‘Database name’ field. You can name your database anything you want. Make a note of the name because you’ll need it later.
For this tutorial, we will call our database test_db.
After typing your database name, you should click the ‘Create’ button.
PhpMyAdmin will now go ahead and create your database.
Now that you’ve uploaded the WordPress files to your website and created a database, everything is ready to install WordPress.
Installing WordPress
To start installing WordPress, simply go to your website’s URL, such as example.com or www.example.com. This will open the WordPress installation wizard.
You will see the language selection page. You can choose a language here so that the rest of the installation is displayed in your own language. You can also use English for now and then later change the language or add multiple languages.
Next, you can click the ‘Continue’ button to proceed.
You will now see some instructions about the installation process. You will see a list of information you need, including the database name, username, password, and host.
After reading the screen, you should click the ‘Let’s go!’ button to continue. The setup wizard will now show you a form where you can enter the database information you created earlier.
Once you’ve done that, make sure you leave the Database Host field as the default ‘localhost.’ This just means that the database and website are hosted on the same server. Unless you changed the database prefix, the Table Prefix field should say wp_.
After filling in this information, you need to click the ‘Submit’ button. WordPress will connect to your database and show you a success message.
To move on to the next step, simply click on the ‘Run the installation’ button. WordPress will now create tables in your database and then send you to the next step of the installation.
The next screen will ask for some additional information.
You’ll also need to create a username and password. This is the login information you’ll use to access your WordPress dashboard.
You can also type your email address into the Your Email field. This is the address where WordPress will send all of its admin emails.
If you don’t want your website to be visible to search engines at this point, then you can check the box next to search engine visibility.
Later when you are ready you can change this from WordPress settings. If you are unsure about what to do, then simply leave it unchecked.
After completing this form, click the ‘Install WordPress’ button. WordPress will now run the installation and after a few moments, you should see a ‘Success!’ message.
Now you can sign in to your WordPress dashboard by clicking on the ‘Log In’ button.
Congratulations, you have successfully installed WordPress by downloading the core software for free and then installing it manually.
How to Install WordPress Locally on Your Computer
You can also use the WordPress core files you downloaded to install WordPress on your own computer. This gives you the chance to try out WordPress before starting your blog or website. It’s also a great way to experiment with themes and plugins risk-free.
Note: If you install WordPress locally on your computer, then you will be the only person who can see it.
For WordPress to successfully run on your computer, you first need to install the software that WordPress relies on. This includes the PHP server-side programming language, the Apache web server, and the MySQL database management system.
Now, installing all these software independently and making them work with each other sounds like a daunting task.
Luckily, there are free development tools that make it super easy to install them as one package even for non-techy users. Once you install one of these applications, then you will be able to install WordPress using a method similar to the above.
Note: When you’re using Local WP, you don’t need to manually download and install WordPress on your computer. It can help you do that with just a few clicks.
Do you want to show a before and after photo in WordPress?
A before and after photo allows you to show a side by side comparison of two images with minor differences. This is perfect for showing the impact of your products and services, or simply encouraging people to interact with your content.
In this article, we’ll show you how to add a before/after photo to your WordPress website with a slide effect.
Why Show Before and After Photos in WordPress (with Slide Effect)?
A before-and-after image is an interactive picture that typically shows some kind of change.
Visitors can use a slider to switch between the different ‘versions’ of the image in an engaging and interactive way.
If you run an online store using a plugin such as WooCommerce, then a before and after photo can show the effect of your products or services.
You simply need to show a ‘before’ photo that the customer can relate to, and a desirable ‘after’ photo. This will make shoppers want to buy the thing that takes them from the ‘before’ state to the ‘after’ state.
If you’re an affiliate marketer, then showing persuasive before and after photos on your website is a great way to promote your affiliate links, and get more sales.
Before and after photos can also encourage visitors to interact with your content. Dragging a slider to reveal the ‘after’ photo is an easy way to get more engagement, which can keep visitors on your site for longer. This can also help increase your pageviews and reduce bounce rate in WordPress.
With that being said, let’s see how you can create a before and after photo in WordPress using a slide effect. Simply use the quick links below to jump straight to the method you want to use.
The BEA plugin allows you to create horizontal and vertical sliders, and customize the image with different labels and colors.
The first thing you need to do is to install and activate the Ultimate Before After Image Slider & Gallery (BEA) plugin. For more details, see our step-by-step guide on how to install a WordPress plugin.
Upon activation, go to Before and After Slider » Add New in your dashboard.
To start, type in a name for the image slider. This is just for your reference so you can use anything that will help you identify it.
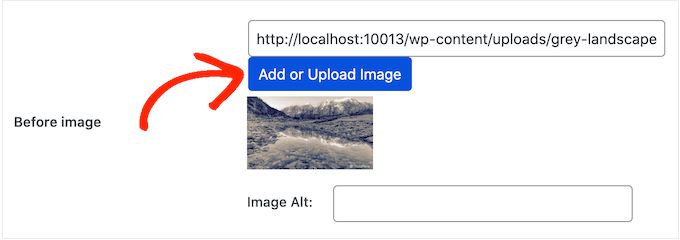
With that done, you can add the ‘before’ image by scrolling to the ‘Before Image’ section.
Here, click on ‘Add or Upload Image’ and then either choose a picture from the WordPress media library or upload a new file from your computer.
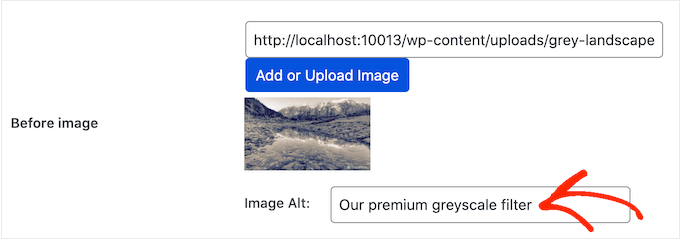
To help search engines understand this image and show it to the right people, it’s a good idea to add some image alt text. To do this, simply type into the ‘Image Alt’ field.
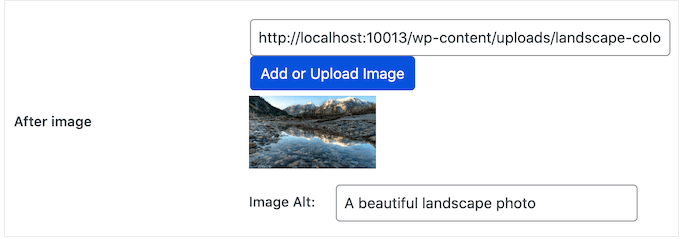
With that done, scroll to the ‘After Image’ section.
You can now add the ‘after’ image by following the same process described above. Don’t forget to add some alt text to this image, too, since it’s important for WordPress SEO.
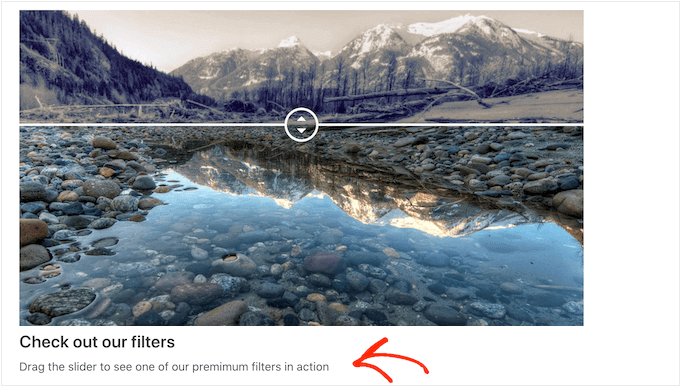
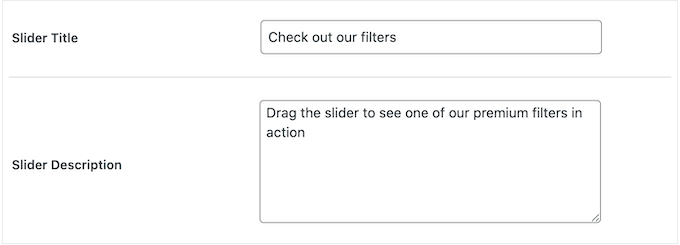
You can also show some text below the image, by adding a title and a description.
For example, you might encourage visitors to interact with the slider. This is especially important for visitors who might have never run across a before-and-after photo before.
This is also an easy way to add some context to the image.
To add some text, simply type into the ‘Slider Title’ or ‘Slider Description’ fields.
You can also add a ‘Read More’ URL, which can link to any post or page on your WordPress website, or even an external website. For example, you might send visitors to a page where they can buy the product featured in the slider image.
This link will appear below the before/after image, and also beneath any slider title or description you’re using.
To add a link, type the destination into the ‘Read More Link’ field.
You can then decide whether to open the link in the same tab, or in a new tab using the ‘Read More Link Target’ dropdown.
If you’re linking to another website, then we recommend choosing ‘New tab’ so you’re not sending visitors away from your WordPress blog.
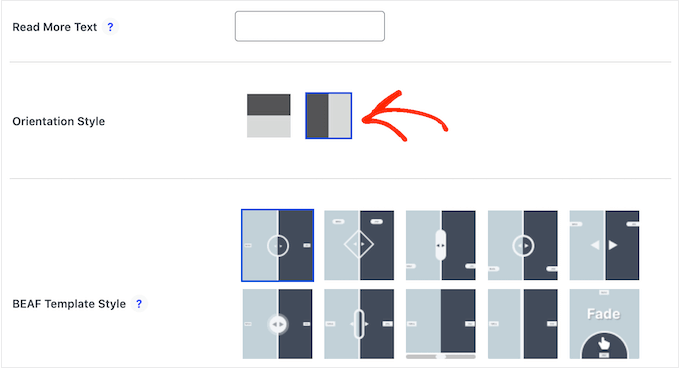
With that done, you can choose whether you want to create a vertical or horizontal slider by clicking on one of the thumbnails in the ‘Orientation Style’ section.
After that, scroll to the top of the screen and click on ‘Options.’
Here, you’ll see the ‘Default offset’ is set 0.5. This means the visitor sees half of the ‘before’ image when the page first loads.
If you want to show more of the before image, then type in a bigger number such as 0.6, 0.7, or higher.
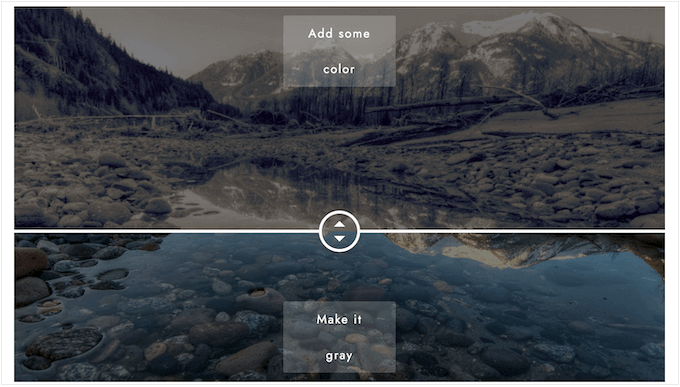
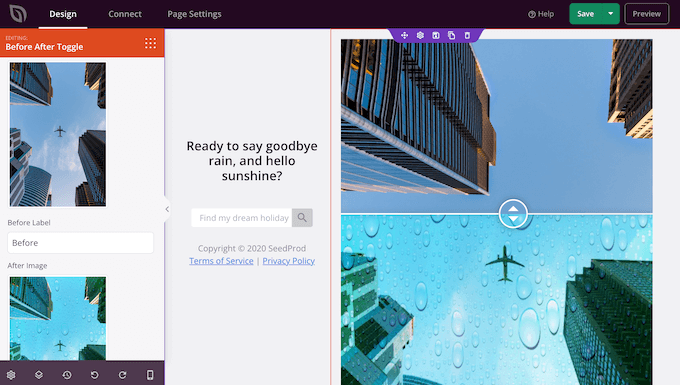
If you want to show the entire before image, then type in 1. This will place the slider at the top or right of the before image, as you can see in the following image.
By default, the plugin shows ‘Before’ and ‘After’ labels when the visitor hovers their mouse over the image.
You may want to replace these labels with something more descriptive.
To do this, simply go ahead and type into the ‘Before Label’ and ‘After Label’ fields.
By default, visitors will move the slider using drag and drop. Some people may find this difficult, especially if they have mobility issues or they’re using smaller devices like smartphones or tablets.
With that being said, you may want to change how visitors move the slider.
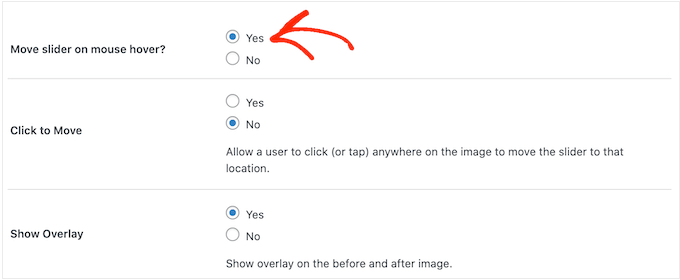
If you select the ‘Yes’ button next to ‘Move slider on mouse hover,’ then visitors can move the slider simply by hovering their mouse over the image.
If you select the ‘Yes’ button next to ‘Click to move,’ then visitors can click anywhere on the image to move the slider to that point.
These settings can make it easier to interact with the before/after image, but it’s typically not the way that sliders behave. With that in mind, we recommend using these settings carefully.
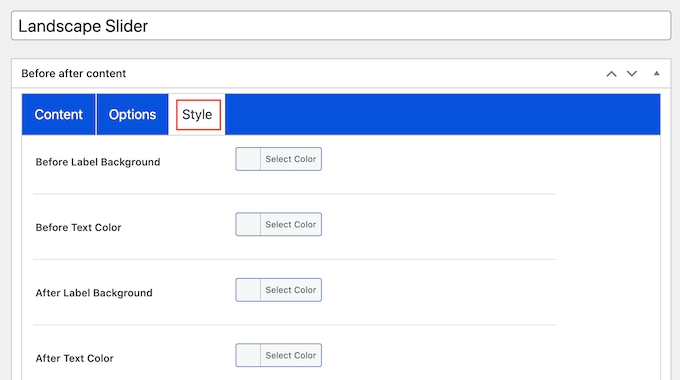
Next, click on the ‘Style’ tab.
Here, you can change the colors used for the different labels, backgrounds, headings, descriptions, and the read more button. This can help the before/after image blend in with your WordPress theme, or even stand out from the rest of your website’s design.
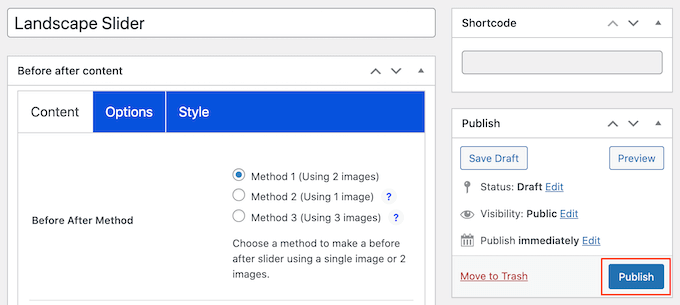
After adding the shortcode to your site, simply click on the ‘Publish’ or ‘Update’ button to make the before/after image and slider effect live.
Method 2. How to Show A Before and After Photo Using SeedProd (Advanced)
If you simply want to add a before and after image to a page or post, then the BEA plugin may be a good choice. However, if you’re using the image to promote a product, service, or business then we recommend using SeedProd.
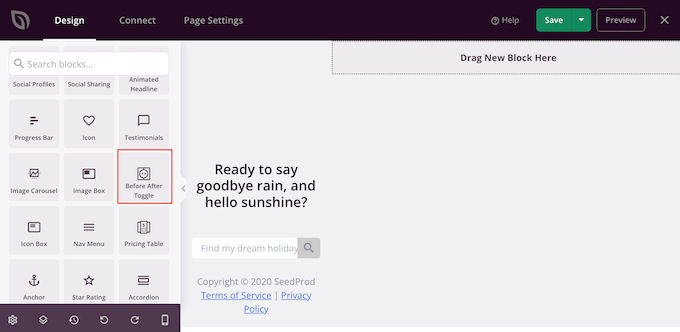
It also has a ready-made ‘Before After Toggle’ block that you can use to create beautiful before-and-after images your users can interact with.
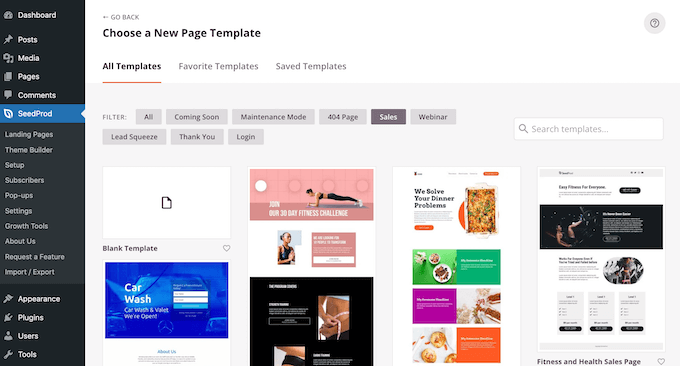
Simply drag the block from the left-hand menu, and then drop it onto any page design that you may happen to be working on, including sales pages.
If you’re using WooCommerce to sell your products, then SeedProd integrates with WooCommerce and even comes with special eCommerce blocks. This is perfect if you plan to use before and after images to promote your WooCommerce products.
Note: There is a free version of SeedProd that allows you to create custom pages no matter your budget. However, we’ll be using the premium version as it comes with the Before After Toggle block. It also integrates with many of the best email marketing services you may already be using on your website.
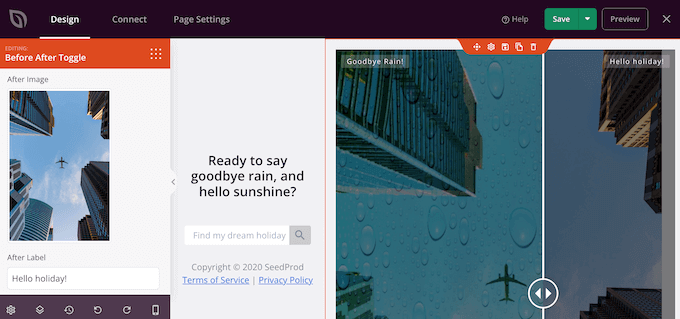
After creating a page, it’s easy to add a before and after image to your design. In the SeedProd page editor, simply find the ‘Before After Toggle’ block.
You can then drag and drop this block anywhere on your design, to add it to the page layout.
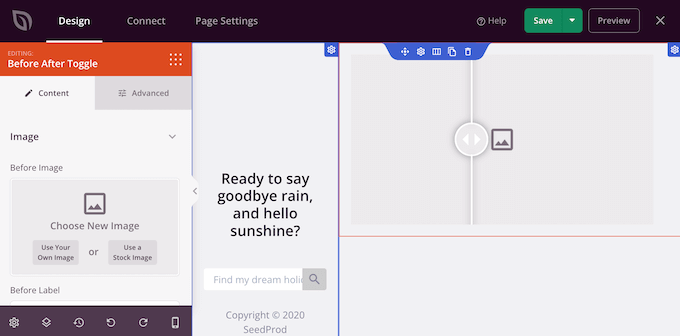
With that done, simply click to select the ‘Before After Toggle’ block. The left-hand menu will now update to show all the settings you can use to create your before-and-after image.
To start, you’ll need to add the picture you want to use as the before image. Under ‘Before Image’ either click on ‘Use Your Own Image’ or ‘Use a Stock Image’ and choose the picture you want to use.
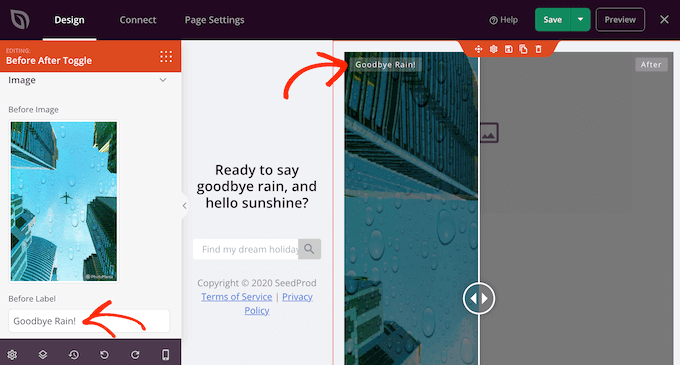
By default, SeedProd shows a ‘Before’ label above this image. However, you can change this to something more descriptive by typing it into the ‘Before Label’ field.
With that done, scroll to the ‘After Image’ section.
You can now add an image and customize the default ‘After’ label by following the same process described above.
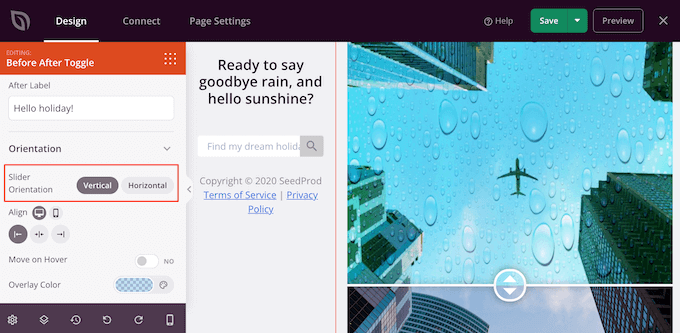
SeedProd can add a vertical or horizontal slide effect.
To switch between these two styles, scroll to the ‘Slider Orientation’ section and then click on either ‘Vertical’ or ‘Horizontal.’
By default, visitors will move between the before and after images by dragging the slider. However, some users may find it easier to move the slider by hovering their mouse over the image.
This is particularly true for larger images where the visitor would need to drag the slider a greater distance.
To try this setting, enable ‘Move on Hover’ in the left-hand menu.
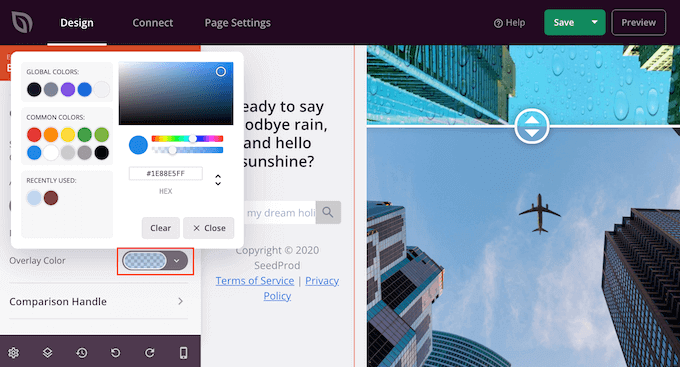
Next, you may want to add a colored overlay to both the before and after images. This can help the image blend in with the rest of the color scheme, or stand out from the background.
You can even make the colored overlay semi-transparent, to create a more subtle effect.
To try different colors, click on the ‘Overlay Color’ section and then make your changes in the popup that appears.
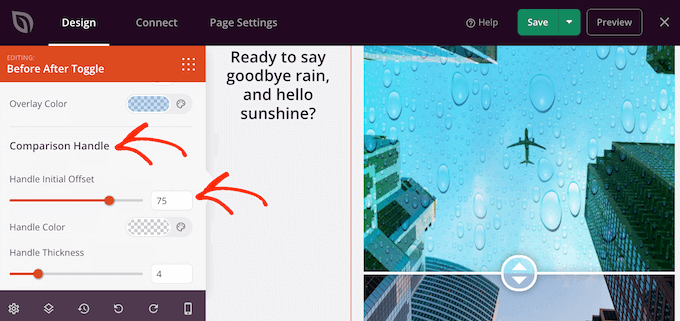
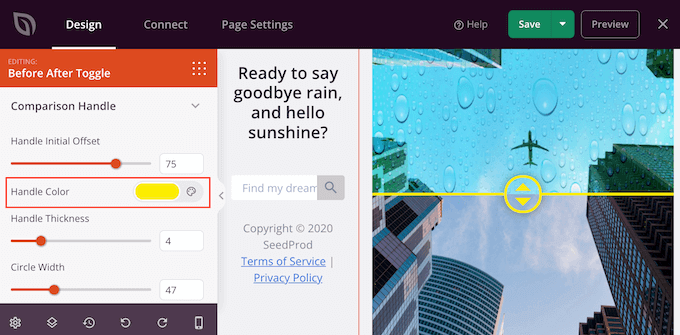
With that done, you can customize the slider handle by clicking to expand the ‘Comparison Handle’ section.
By default, SeedProd shows half of the ‘before’ image and half of the ‘after’ image. To change this, simply drag the ‘Handle Initial Offset’ slider.
To display less of the before image, drag the slider to the left so that it shows a lower number. To show more of the before image, drag the slider to the right, which increases the number.
Next, you can change the slider’s color using the ‘Handle Color’ settings.
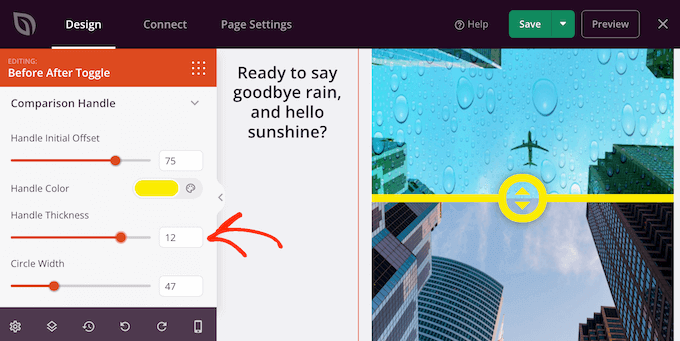
You can also make the handle thicker or thinner using the ‘Handle Thickness’ slider.
In this way, you can make the handle stand out, or create a more subtle effect.
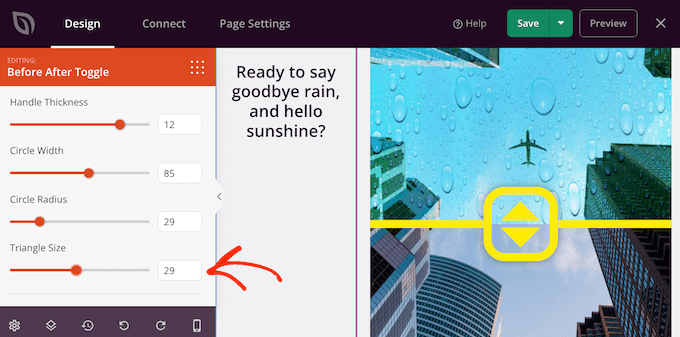
When you’re happy with the handle, you may want to change the circle. You can make the circle bigger or smaller using the ‘Circle Width’ settings, and change the ‘Circle Radius’ to create sharp or curved corners.
As you make changes, the live preview will update automatically so you can try different settings to see what looks the best.
When you’re happy with the circle, you may want to change the size of the triangles inside that circle. For example, if you’ve made the circle bigger then you might want to increase the size of the triangles too.
To make this change, drag the ‘Triangle Size’ slider until you’re happy with how it looks.
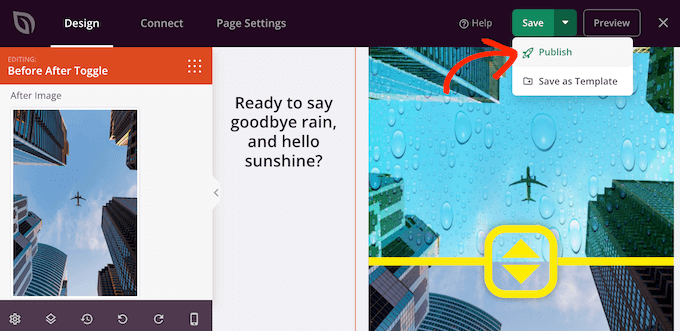
With that done, you can continue adding new blocks and customizing the content on your SeedProd page.
When you’re happy with how the page looks, just click on the arrow next to the ‘Save’ button and then select ‘Publish.’
Now if you visit your website you’ll see your page design with the before-and after-image live.
To say that user experience is an important factor in responsive theme design is like saying human safety is important to the production of car seatbelts. In other words, it’s the very reason it exists and the top concern that should influence every design decision. Of course, that begins with the fundamentals of responsive design, [...]
Do you want to add your WordPress products to Google Shopping?
Adding your online store products to Google Shopping can help you increase traffic, reach more customers, and generate greater revenue.
In this article, we’ll show you how to easily add WordPress products to Google Shopping.
Why Should You Add WordPress Products to Google Shopping
Google Shopping is a virtual marketplace like Amazon and Etsy, where users can search, view, and compare products from different online stores that have paid to advertise their products.
If you have a WooCommerce store, then adding your products to Google Shopping can prove to be extremely beneficial for your business.
Your products will be shown to all users browsing through Google shopping which will increase traffic on your WordPress website, generate more revenue and bring in more customers.
That being said, let’s see how you can add WordPress products to Google Shopping.
How to Add WordPress Products in Google Shopping
Step 1: Creating a Google Merchant Account
To add your products to Google Shopping, you have to start by creating an account in the Google Merchant Center. This is the place where your product information will be stored for viewing by Google Shopping.
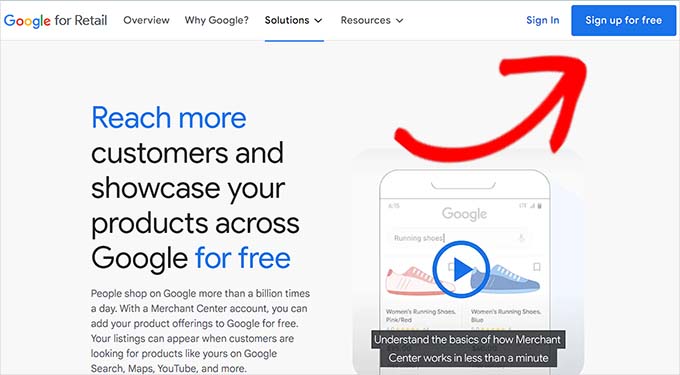
First, go to the Google Merchant Center page and click the ‘Sign up for free’ button.
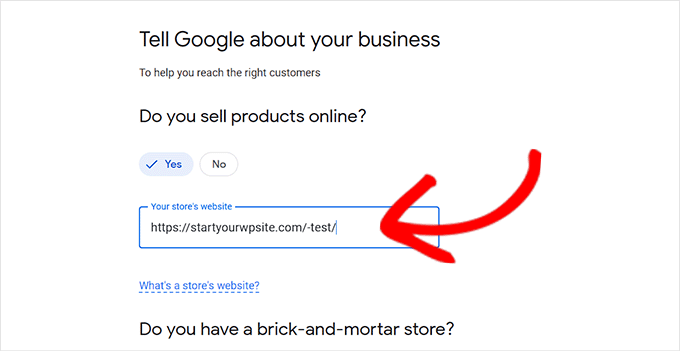
After that, Google will ask you about your online business.
Just check the answers that apply to you, and then provide your website’s URL.
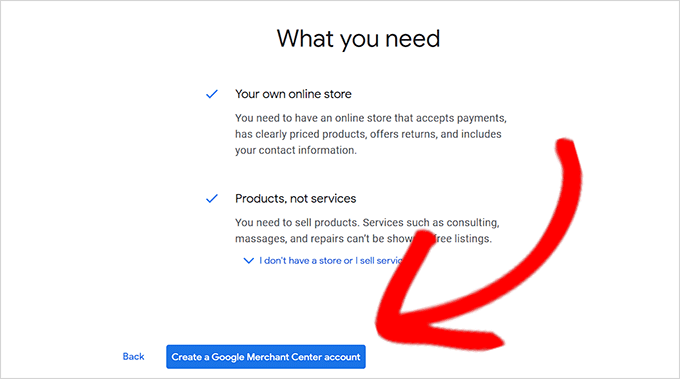
After you’ve provided the details, you’ll be redirected to another page.
Here, you simply have to click the ‘Create a Google Merchant Account’ button at the bottom of the page.
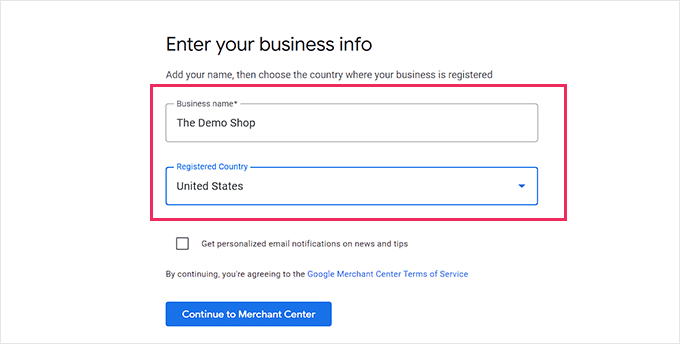
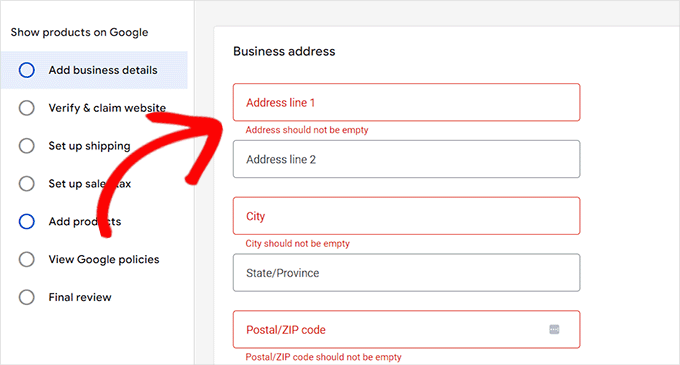
Now, you will be asked to provide your business details. You can start by writing your business name.
Next, select the country where your business is based from the dropdown menu below the ‘Registered Country’ option.
After that, click the ‘Continue to Merchant Center’ button.
You’ve successfully created your Google Merchant Account. Now all you have to do is provide your business info and shipping details.
Once you’ve filled in those details, simply click the ‘Save’ button at the bottom to store your settings.
Step 2: Linking Your Google AdWords Account
Now you’ll have to link your Google AdWords account to your Google Merchant Center account so that you can show your products via Google Shopping.
To link your account, simply go to the Google Merchant Center dashboard and click the gear icon at the top of the page.
Clicking it will open up a ‘Tools and Settings’ prompt. Here you simply have to choose the ‘Linked Account’ option present.
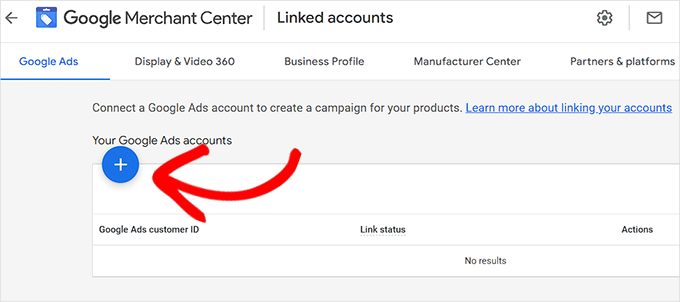
This will take you to the ‘Linked Accounts’ page.
Now you simply have to click the ‘+’ button to create your Google Ads account.
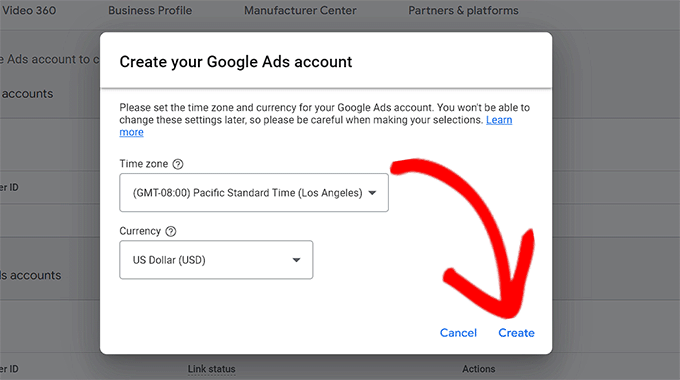
This will open up a ‘Create Your Google Ads Account’ prompt.
Simply choose your preferred time zone and currency and then click the ‘Create’ button.
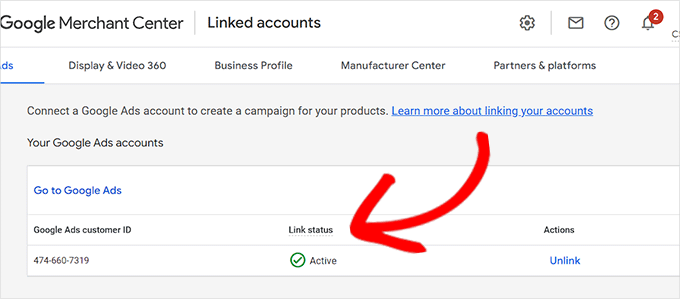
You have now successfully created your Google Ads account.
This is how it will look once your account has been created.
Step 3: Adding WordPress Products to Google Shopping
To add your WordPress products to Google Shopping, we will be using the ELEX Google Shopping plugin to display your WooCommerce products in Google Shopping.
Upon activation, head over to the Google Shopping Feed » Create Feeds page from the WordPress admin sidebar.
From here, simply fill in your business details and click the ‘Continue’ button at the bottom.
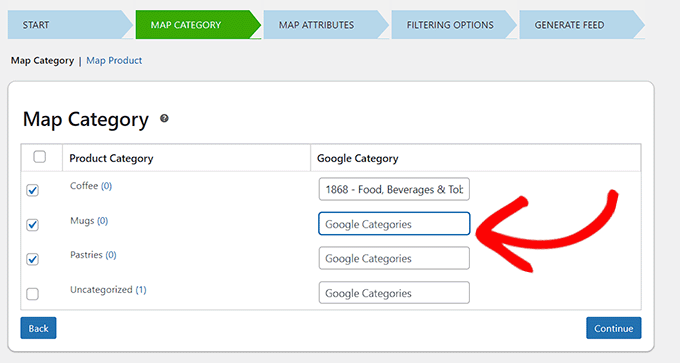
Next, you’ll be taken to the ‘Map Category’ page. Here you simply have to select your product categories.
Simply type your product categories in the ‘Google Categories’ tab and click ‘Continue’
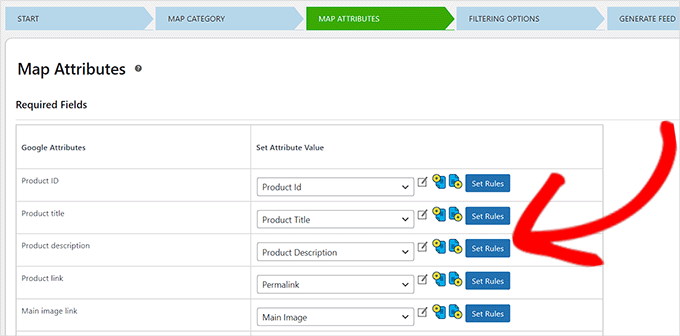
After that, you’ll be directed to the ‘Map Attributes’ page.
This is where you’ll have to fill in your product details including product id, product description, product link, pricing, image, and more.
Here select and fill in as many attributes as possible for more visibility in Google Shopping and click the ‘Continue’ button.
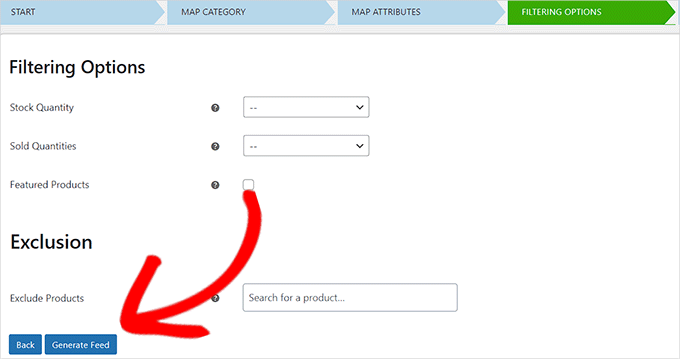
Now that you’re on the ‘Filtering Options’ page, simply fill in the details as required for your online store.
For example, you can include how many items you have in stock or note how many have sold already.
Next, simply click the ‘Generate Feed’ button at the bottom.
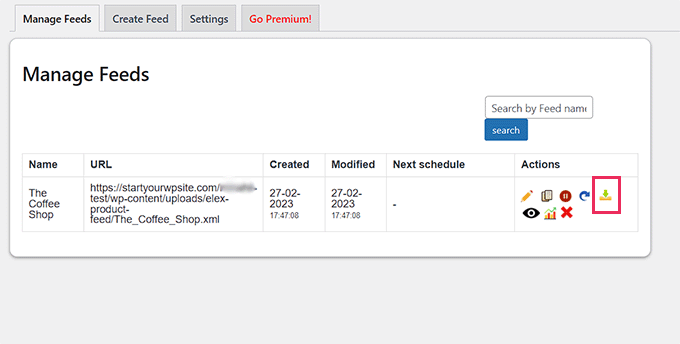
After you’ve created your Google Shopping feed, go to the Google Shopping Feed » Manage Feeds page from the admin sidebar.
Here you will be able to view your Google Shopping Feed. Now you have to simply click the ‘Download’ button beside it.
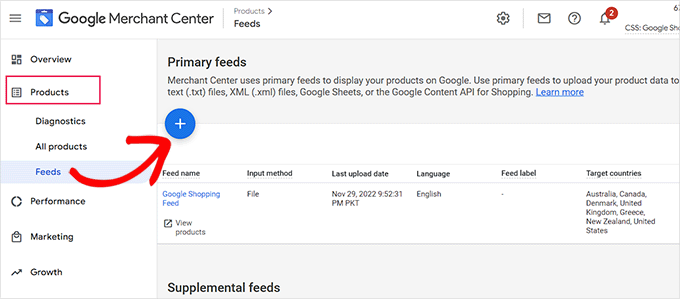
Once you’ve downloaded your feed as an XML file, go back to the ‘Google Merchant Center’ dashboard and click the Products » Feeds option from the sidebar.
This will open up the ‘Primary Feeds’ page where you have to click the ‘+’ button to add a new feed.
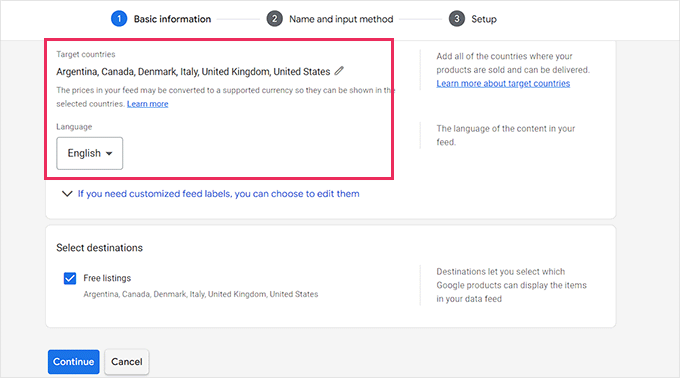
This will take you to the ‘New Primary Feed’ page where you can start by filling in basic details. First, start by adding all your target countries.
Next, select your preferred language and then click the ‘Continue’ button.
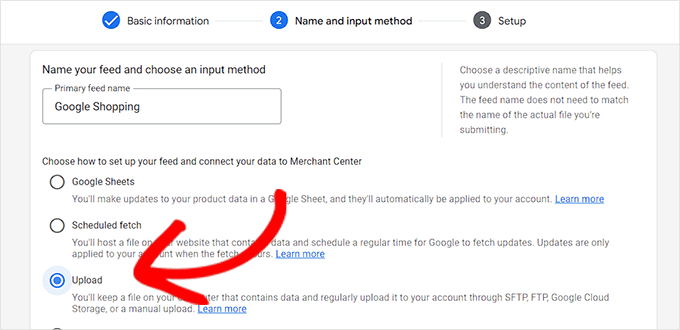
Then, you have to choose a name for your feed and select a method to connect your data to the Merchant center.
For this tutorial, we will be uploading the feed XML from WordPress.
After that, just click on the ‘Continue’ button.
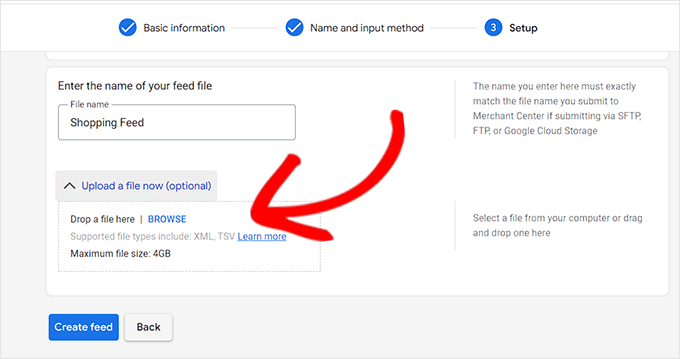
Now that you’re on the ‘Setup’ page, simply type the name for your Google Shopping Feed.
Next, just upload the Feed file you got from WordPress and click the ‘Create Feed’ button.
You have now successfully added your WordPress products to Google Shopping.
Bonus: How to Add Google Merchant Center Schema in WordPress
To improve your product search visibility in Google Shopping and increase conversion rates, you should add a Google Merchant schema in WordPress.
Schema markup is an HTML code that provides more details about your products to search engines.
A GMC listing schema will make your search snippets more prominent and will allow your products to be featured as popular products for the relevant search terms.
The easiest way to add a Google Merchant Center listing schema to WordPress is by using the All in One SEO for WordPress.
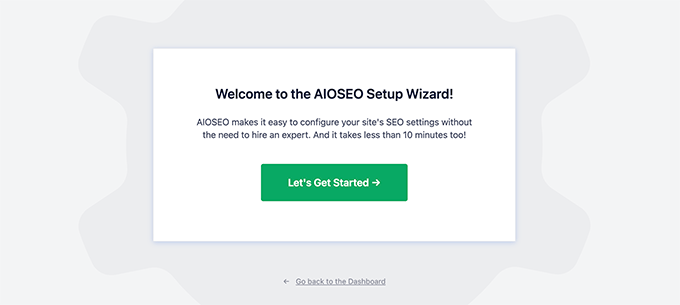
Upon activation, a setup wizard will open up. Simply go ahead and click the ‘Get Started’ button.
After that, you need to follow the onscreen instructions in the setup wizard to configure the plugin. If you need help, please see our guide on how to properly set up AIOSEO in WordPress.
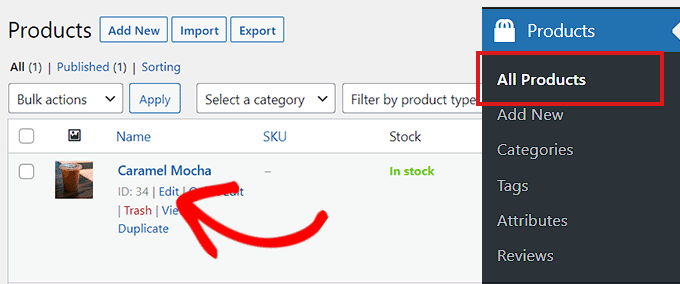
After the AIOSEO plugin has been set up, you need to visit the Products » All Products page from the admin sidebar.
From here, simply click on the ‘Edit’ link below a product to open up the ‘Edit Product’ page.
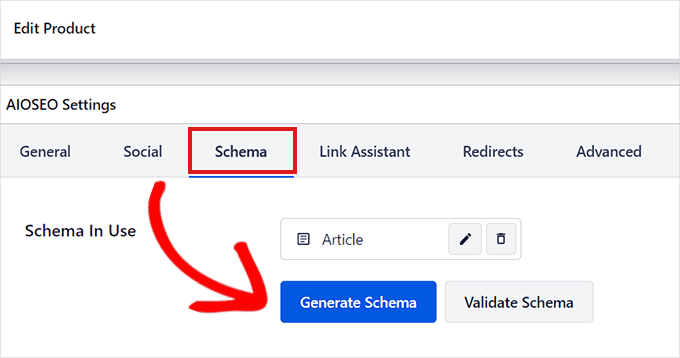
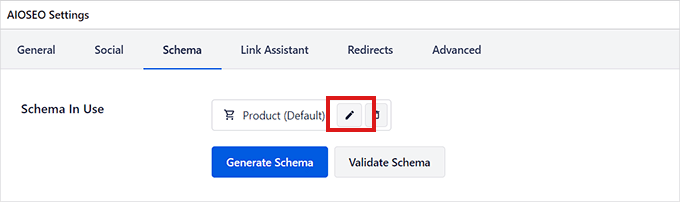
Once there, you need to scroll down to the ‘AIOSEO Settings’ section and click on the ‘Schema’ tab.
Now, you need to make sure that the schema type is set to ‘Product’ by default.
If that is not the case, then simply click on the ‘Generate Schema’ button.
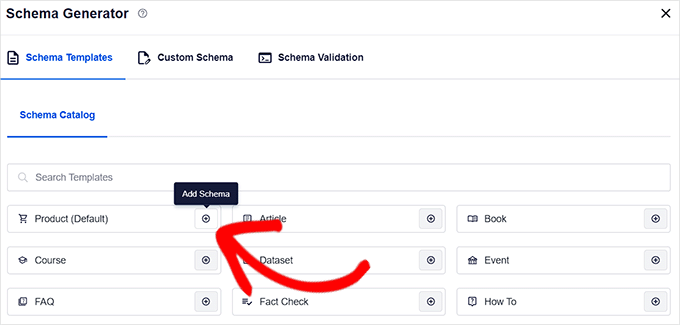
It will open up the Schema Catalog which will list all the available schema templates.
From here, you need to click the ‘Add Schema’ (+) button beside the Product option to set it as your primary schema.
Note: You may see the ‘Article’ schema already applied. If so, you can remove it as you add the new one because this particular page isn’t an article or blog post in Google’s eyes.
Next, you will need to fill in the product information to add the GMC listing schema.
For that, you need to click the ‘Edit Schema’ button next to the ‘Schema in Use’ option.
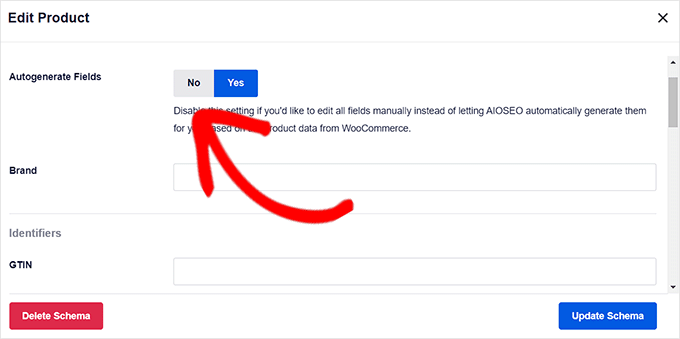
This will open up the ‘Edit Product’ modal where you will need to fill in the product details.
If you’re using WooCommerce, then AIOSEO will automatically pull most of the product data from your product information.
However, if you want to fill in the information manually, you need to simply toggle the ‘Autogenerate Fields’ switch to ‘No.’
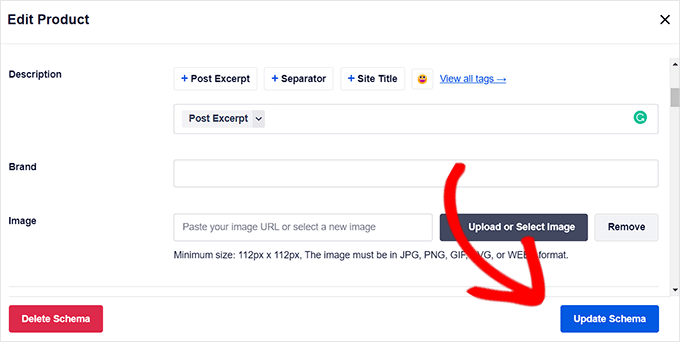
The product attributes that you will need to add include the product name, description, image, ISBN, price, material, color, shipping details, and more.
We recommend that you provide all the details so that the schema markup can make your product snippets more engaging.
Once you’re done, simply click the ‘Update Schema’ or ‘Add Schema’ button to store your settings.
You have now successfully added the Google Merchant Center listing schema to WordPress, and your products can now be featured on the platform and hopefully earn you more sales.
Conversion tracking is the ability to track and measure the success of your various marketing efforts.
Depending on your business, the conversion is the desired action you want users to perform on your website.
For an online store or eCommerce website, a conversion could be a successful purchase.
For a news/blog site, the conversion could be a successful subscription to the email newsletter.
For a professional services website, a conversion could be a user filling up a contact form.
Simply put, conversion tracking shows you how many of your website visitors successfully perform the desired action.
Why is Conversion Tracking Important?
Conversion tracking is important because it helps you make data-driven decisions to grow your business.
For instance, it shows that users from a specific traffic source are more likely to convert. You can then focus your attention on getting more traffic from that particular source.
Conversion tracking also helps you uncover the users who are not converting so well.
For instance, you may learn that users open the contact page, but many abandon it before submitting the form. You can then make your form easier by removing unnecessary fields, making it conversational, changing colors, setting up partial form submission, etc.
Basically, you need conversion tracking to measure your success and failures and then improve upon them to grow your online business.
That being said, let’s take a look at what tools we’ll need to set up conversion tracking in WordPress.
Tools You Need to Setup Conversion Tracking in WordPress
Most conversion optimization experts rely heavily on Google Analytics. It is a free tool provided by Google that helps you track your website traffic.
It shows where your users are coming from, and what they do while on your website.
If you are running Google AdWords, Facebook Ads, and Twitter Ads to promote your business, then you’ll need to set up those for conversion tracking.
This may sound complicated, but you’ll only have to set it up once, and we’ll walk you through every step of the way.
Ready? Let’s get started.
Setting Up Conversion Tracking in Google Analytics
First, you need to install Google Analytics on your website.
The easiest way to do this is by using MonsterInsights. It is the best Google Analytics plugin on the market that comes with enhanced eCommerce tracking, form tracking, and other conversion tracking tools built-in.
You’ll need the PRO version of the plugin to access eCommerce and other conversion tracking features. For basic tracking, the free version works as well.
Upon activation, you’ll see the setup wizard. Go ahead and click the ‘Launch the Wizard’ button.
Next, you can follow the on-screen instructions to connect your WordPress site to Google Analytics using MonsterInsights. For more details, see our guide on how to install Google Analytics in WordPress.
With MonsterInsights, you can also easily create a Google Analytics 4 (GA4) property. GA4 is the latest version of the famous analytics platform, and it will replace the old version on July 1, 2023.
Now that you have installed Google Analytics, let’s set up conversion tracking on your website.
Turning on Enhanced Ecommerce Conversion Tracking
Ecommerce tracking helps you see which products are doing well on your site, which products are being looked at but not purchased, and what’s bringing you the most revenue.
Google Analytics comes with enhanced eCommerce tracking, which works for most eCommerce websites, including WooCommerce, Easy Digital Downloads, MemberPress, and more. However, you’ll need to enable it for your website manually.
Step 1. Turn on eCommerce Tracking in MonsterInsights
MonsterInsights comes with an eCommerce addon that lets you properly set up eCommerce conversion tracking in Google Analytics.
It works with all top eCommerce platforms for WordPress, including WooCommerce, MemberPress, LifterLMS, Easy Digital Downloads, and more.
First, you need to visit the Insights » Addons page to install and activate the eCommerce addon.
Step 2. Turn on Enhanced Ecommerce in Google Analytics
Next, you need to enable enhanced eCommerce tracking in your Google Analytics account. Go to your Google Analytics dashboard and select your website.
From here, you need to click on the Admin button located at the bottom left corner of the screen.
On the next screen, you’ll see different Google Analytics settings.
Under the ‘View’ column, click the ‘Ecommerce Settings’ link.
After that, you need to turn on the ‘Enable Ecommerce’ and ‘Enable Enhanced Ecommerce Reporting’ options.
Don’t forget to click the ‘Save’ button when you’re done.
Google Analytics will now turn on the eCommerce reporting feature for your account.
Afterward, you can return to your WordPress dashboard and visit the Insights » Settings page. From here, switch to the eCommerce tab.
MonsterInsights will automatically detect your eCommerce software and enable advanced eCommerce tracking for your store.
Note: the manual process for adding eCommerce conversion tracking has a lot of room for errors, so we strongly recommend using a plugin like MonsterInsights.
Viewing eCommerce Conversion Tracking Reports
Now that you have enabled eCommerce conversion tracking on your website. Let’s see how to view these reports and use them to make informed decisions about your business.
Ecommerce Conversion Reports in MonsterInsights
Simply go to the Insights » Reports page inside the WordPress admin area and then switch to the eCommerce tab.
At the top, you’ll see your most important metrics, like the conversion rate, transactions, revenue, and average order value.
Below that, you will see a list of your top products with quantity, sale percentage, and total revenue. This shows you which products are doing well in your store.
Next, you’ll see your top conversion sources with the number of visits, conversion share, and revenue. You can see which sources are bringing you more revenue and which traffic sources are not very effective.
MonsterInsights will also show you shopper behavior reports with the number of times products were added to and removed from the cart.
That’s not all the data. You can drill down these reports even further inside Google Analytics.
Ecommerce Conversion Reports in Google Analytics
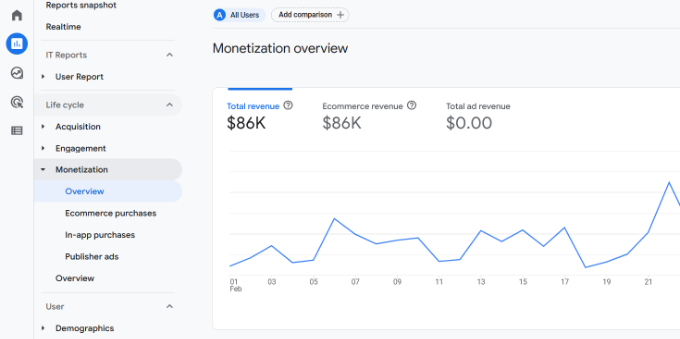
In Google Analytics 4, you can head to Reports » Monetization » Overview to view the report.
Here, you can see the total revenue your online store is making. Besides that, there are more metrics you can track, like items purchased, first-time purchasers, and total purchases.
On the other hand, you can visit your Universal Analytics dashboard and click on the Conversions » Ecommerce from the left column.
The overview section offers the most important stats, such as revenue, conversion rate, transactions, and average order value.
You can further drill down to view different reports. For example, you can switch to shopping and checkout behavior reports to see how users reach the conversion page. You can also figure out what stopped them at the last minute from completing the transaction.
Turning on Form Conversion Tracking in Google Analytics
Not all websites use an eCommerce platform to conduct business. For instance, a restaurant website may use an order delivery form, or a salon may use a booking form.
Many businesses use contact forms to capture leads from their website. A lot of news and blogs use an email newsletter to convert website visitors into subscribers.
To track them, you need to enable form conversion tracking in Google Analytics.
MonsterInsights comes with a Forms addon that lets you easily track form conversions on your WordPress site. It works with all popular WordPress form plugins, including WPForms, Formidable Forms, Gravity Forms, Contact Form 7, and more.
Simply go to the Insights » Addons page. Scroll down to the ‘Forms’ addon, and then click on the Install button.
Upon activation, you need to visit the Insights » Settings page and switch to the ‘Conversions’ tab.
MonsterInsights will automatically detect your WordPress form plugin and will also start tracking miscellaneous WordPress forms on your site.
Viewing Your Form Conversion Reports
You can now view your form conversion reports inside your WordPress admin area.
Head over to the Insights » Reports page and switch to the ‘Forms’ tab.
You’ll see a list of forms on your website with their impressions, conversion, and conversion rates.
This helps in tracking how each WordPress form is performing. You can optimize low-converting forms while increasing the visibility of high-converting forms.
Setting Up Goals for Conversion Tracking in Universal Analytics
So far, we have covered how to track eCommerce and form conversions.
What if you wanted to manually set up conversion goals and track them in Google Analytics?
For instance, you may want to consider users visiting a specific page as a conversion. Since it is not a form submission or an eCommerce transaction, it will not appear as a conversion in your reports.
Universal Analytics allows you to create your own goals and track their conversion.
However, an important thing to note is that Google Analytics 4 doesn’t have goals anymore. It is one of the major differences you’ll see between the new and old versions.
That said, let’s see how to set them up in Universal Analytics and track them on your website.
Go to the Google Analytics dashboard and click the ‘Admin’ tab on the bottom left. Then, in the View column, click on Goals.
Now, you will need to create a new goal.
Simply click the ‘+ New Goal’ button to set up a new goal.
Next, you will need to select the goal type. Universal Analytics offers 4 types:
Destination: This tracks whether a visitor went to a specific page. This could be a thank you page or any conversion page on your site.
Duration: This tracks how long a visitor spends on your website. More time spent on a website means more engagement.
Pages/Screens per session: This tracks how many pages an average visitor looks at on your site.
Event: This can track all sorts of things, like button clicks, video plays, and downloads. It requires a bit more setup than the other options.
Destination and Event types are the most commonly used goal types for most businesses.
For this tutorial, we will create a ‘Destination’ goal to track visitors who view our thank you page after completing a form.
First, provide a name for your Goal. It needs to be something meaningful so that you can easily identify it in your Google Analytics reports.
After that, choose ‘Destination’ as your goal type and click the Continue button.
Now you can simply provide the last part of the URL you want to track as the destination.
For instance, if your page is: https://www.example.com/thank-you-for-booking/
Then you should enter the following: /thank-you-for-booking/
Below that, you can optionally add value for the conversion. This makes sense if people are completing a payment form or if you know how much each lead is worth to you on average.
If you want to track a funnel, such as a customer moving through a checkout process, then you can also do this as part of the destination goal. This can help you pinpoint areas you might want to improve.
Once you’re happy with your goal, click the Save button. You should then see your goal listed in a table. You can edit it, switch it off and on, or create more goals here.
Viewing Your Goal Conversions in Universal Analytics
Now that you have created your goal, allow Google Analytics to collect some data. After that, you can view your Goal Conversion report under the Google Analytics dashboard.
Simply, go to the Conversions » Goals and then click on Overview.
Like all Google Analytics reports, you can drill down to view visitor journeys and get deeper insights.
Google Analytics 4 replaces goals with events. You can manually configure events to track different user interactions in GA4.
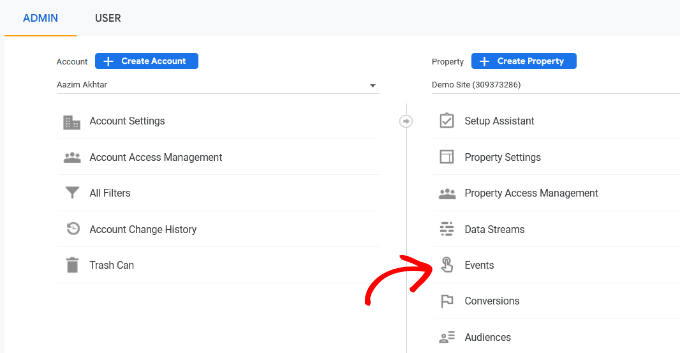
First, you’ll need to go to the ‘Admin’ settings from your GA4 property.
Next, you will need to navigate to the Property column.
After that, simply click the ‘Event’s option.
You are now ready to create a new event in GA4.
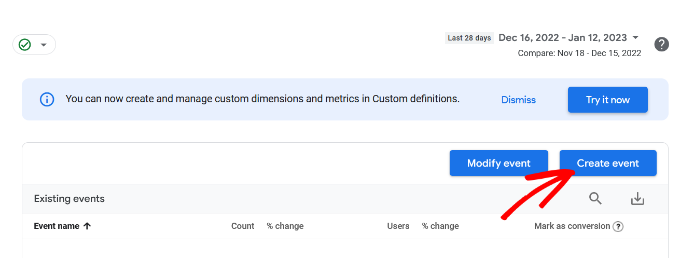
Simply click the ‘Create event’ button to get started.
You should now see a new window slide in from the right. This is where all your custom events will be listed.
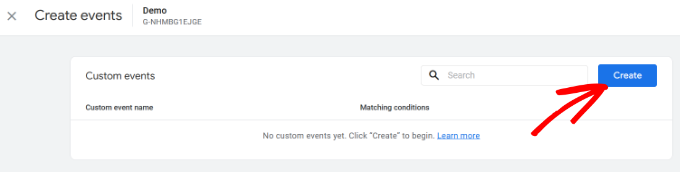
Go ahead and click the ‘Create’ button.
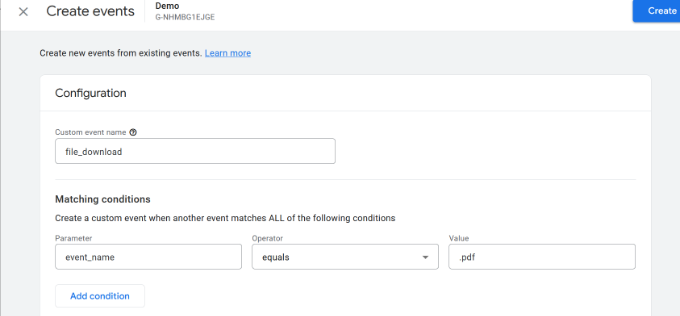
On the next screen, you can enter details of your new event.
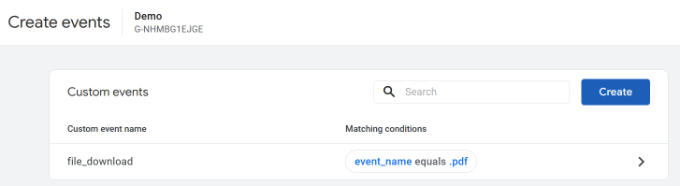
Google Analytics 4 already has pre-built events. Simply click the Custom event name dropdown menu and choose an event. For example, we’ll select the ‘file_download’ event for this tutorial.
GA4 will automatically enter the specific Parameter and Operator for your custom event.
Next, you can enter a value for your event. For instance, we will enter ‘.pdf’ since we want to track PDF file downloads. However, you can enter any specific word you use to organize filenames on your site.
After entering these details, click the ‘Create’ button at the top.
You will now see your new custom event listed under the Custom events area in GA4.
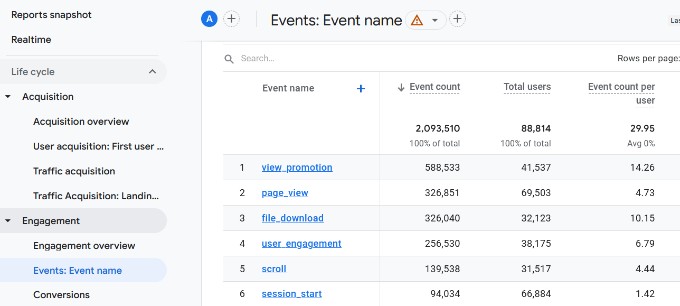
Viewing Your Event Conversions in Google Analytics 4
Now that you’ve created a custom event in GA4, the next step is to view the conversions.
To do that, simply head to Reports » Engagement » Event: Event name from the menu on your left and view the report.
You can now repeat this step to track other custom events.
That said, an easier way of tracking user behavior is by using MonsterInsights. The plugin automatically sets up different events in Google Analytics.
This way, you don’t have to manually configure events or worry about messing up your tracking.
Google Ads Conversion Tracking in WordPress
If you run Google Ads (formerly Google AdWords) to bring targeted traffic to your website, then you may want to track those conversions.
Setting up is a bit complicated because it requires adding code to your website. However, with MonsterInsights, you can easily set up Google Ads conversion tracking without editing code or hiring a developer.
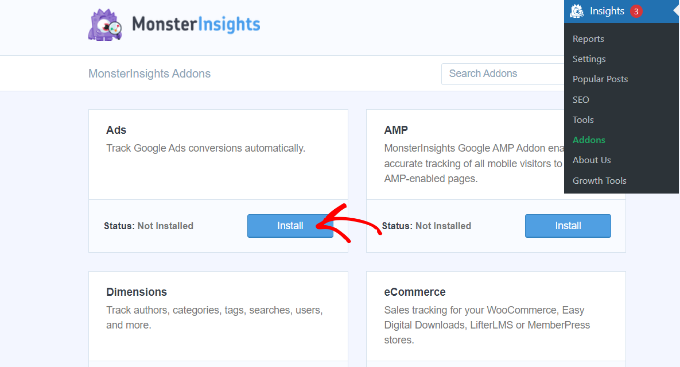
First, you can go to Insights » Addons from your WordPress dashboard and install the Ads addon.
Once you install the addon, it should automatically activate.
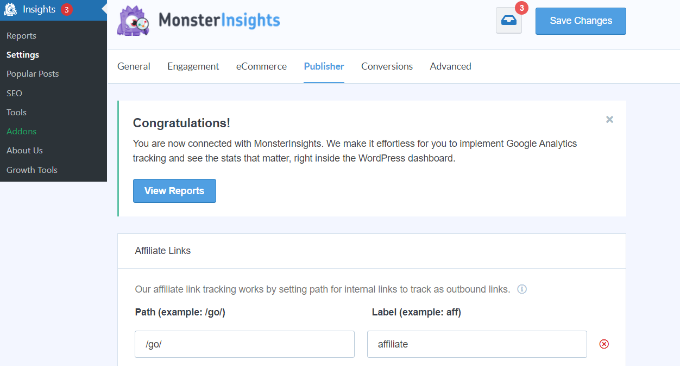
From here, you can go to Insights » Settings and head to the Publisher tab.
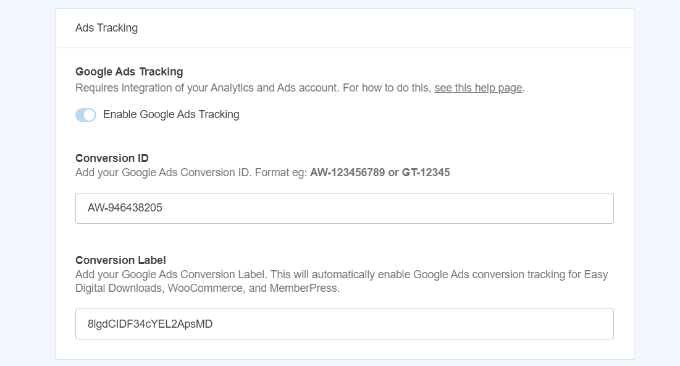
Next, you can scroll down to the ‘Ads Tracking’ section.
Here, you will need to enter the Conversion ID, which will be in this format: AW-123456789.
If you’re tracking Google Ads on an eCommerce store, then you can also enter the Conversion Label.
To find the Conversion ID and Conversion Label, you’ll need to go to your Google Ads dashboard and create a conversion action.
Viewing Google Ads Conversion Reports in Google Analytics 4
Your Google Ads conversion tracking will now appear in your Google Analytics reports.
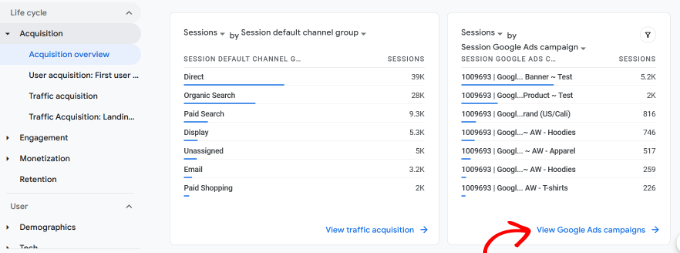
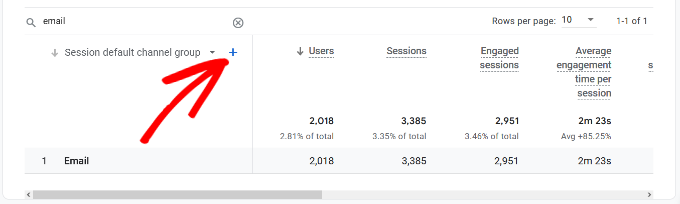
In Google Analytics 4, you can head to Acquisition » Acquisition overview and then navigate to the ‘Session Google Ads’ report.
After that, click the ‘View Google Ads campaigns’ option at the bottom of the report.
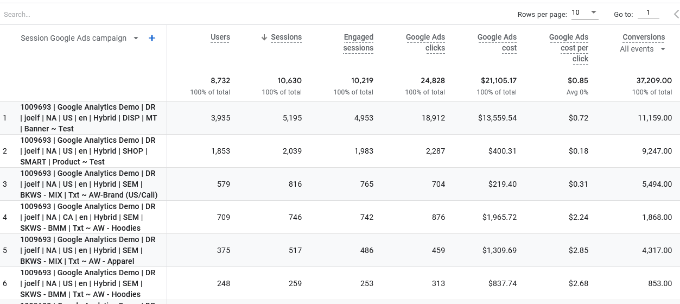
This will expand the report and show more details about your ad campaigns.
You can see the total number of users, sessions, Google Ads clicks, and more.
Viewing Google Ads Conversion Reports in Universal Analytics
For Universal Analytics, you can open your website property.
After that, view the Google Ads report by going to the Acquisition » Google Ads » Campaigns section. Here, you can see conversions for all your paid campaigns.
Use UTM Parameters for Conversion Tracking in Google Analytics
UTM parameters are special tags you can add to URLs to pass important information to Google Analytics.
For instance, if you want to track users coming from a particular ad, then you can add UTM parameters to your ad URL like this:
MonsterInsights makes it super easy to build URLs with UTM parameters. Simply head over to the Insights » Tools page and select the ‘URL Builder’ tab.
Simply enter the UTM parameters you want to use, and it will automatically generate the URL, which you can then use in your campaigns.
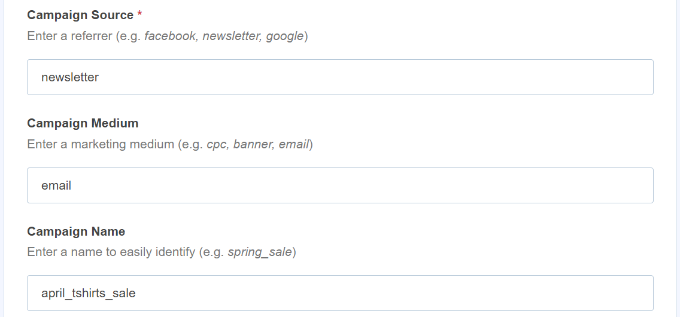
For instance, you can enter a campaign source, like a newsletter or Google, which tells you where the users are coming from. After that, you can define a campaign medium, such as emails or banner ads, and enter a campaign name.
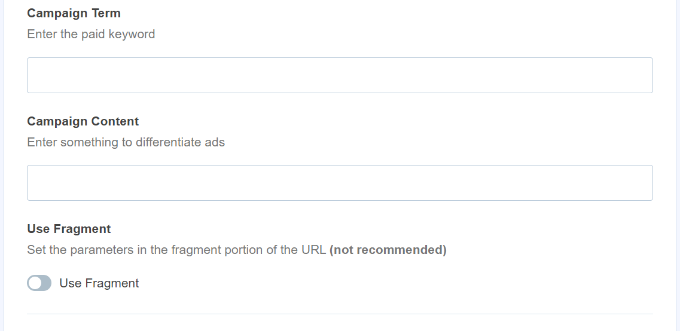
MonsterInsights will also give you additional options to add campaign terms and content.
This is useful if you’re split-testing different emails or paid campaigns.
For creating a custom URL, you can leave these options blank.
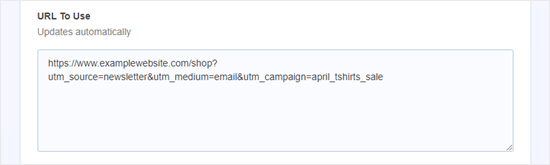
Next, you can scroll down to the bottom to see your custom URL.
Go ahead and use the link for campaigns and track conversions on your website.
Viewing UTM Parameter Reports in Google Analytics 4
Now that you’ve added UTM parameters to a URL, you can track its performance in Google Analytics.
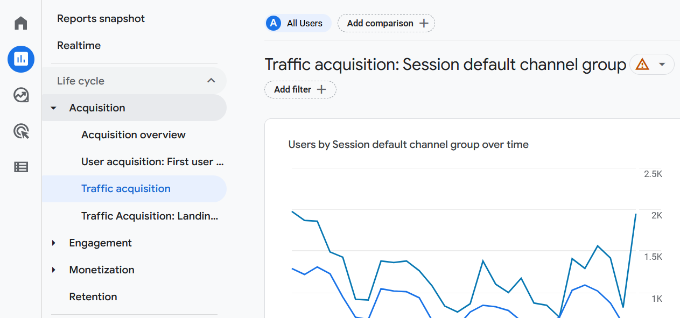
First, log in to your GA4 account. After that, head to Reports » Acquisition » Traffic Acquisitionfrom the menu on your left.
You should now see traffic from different sources on your website, such as organic search, email, display, and more.
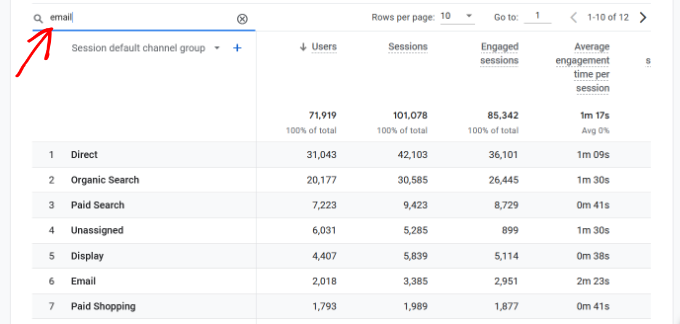
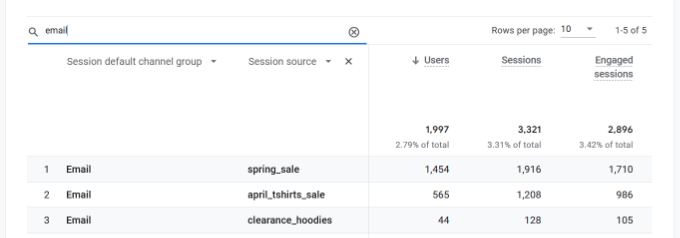
You can use the search bar to filter the traffic source for your custom campaign. For example, if you’re tracking conversions from a newsletter, then you can look up ‘Email’ in the report.
After that, you further drill down and filter your traffic.
Simply click the ‘+’ button under the search bar.
GA4 will then show different options to filter your traffic.
You can select Traffic source » Session source from the dropdown list.
Next, Google Analytics will list your email campaigns.
You can now see which campaign performs best and gets the most conversions.
Viewing UTM Parameter Reports in Universal Analytics
In Universal Analytics, you can track the conversions of your campaigns under your Google Analytics dashboard.
Simply switch to the Acquisition » Campaigns » All Campaigns report.
Your campaigns will appear here.
You can click on any of them to drill down further.
Setting Up Facebook Conversion Tracking in WordPress
Facebook is the largest social media website on the planet, with billions of active users. This is why Facebook ads are sometimes the easiest way to reach a niche audience.
Now, if you are running Facebook ads, then you may want to see how well your ads are doing by implementing conversion tracking for your Facebook ads.
Usually, you’d need to add a code snippet to your WordPress website to track Facebook conversions. However, WPCode makes it very simple, and you can simply enter the Facebook Pixel ID to set up tracking.
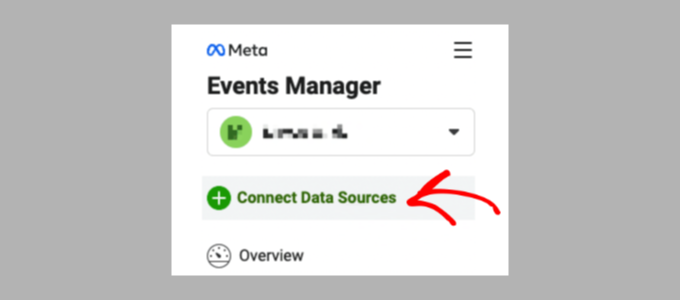
First, you’ll need to log in to Facebook and visit the Meta Business Suite. Then, click on All Tools » Events Manager.
Next, you need to add a data source to the Event Manager.
Simply click the ‘+ Connect to Data Sources’ button in the left-hand menu.
You should now see different options to connect your new data source.
Go ahead and select the ‘Web’ option and click the ‘Connect’ button to continue.
After that, enter a name for your pixel.
Once that’s done, you can click the ‘Create Pixel’ button.
Next, you need to choose how to connect your website and send activity to Facebook.
At the bottom, you will see the Facebook Pixel. Go ahead and copy the pixel ID.
Note that you’ll need at least the WPCode Plus plan because it includes the Conversion Pixel Addon. However, there is also a free version of WPCode you can use to get started.
Upon activation, you need to visit the Code Snippets » Conversion Pixel page and go to the Facebook tab. From here, you need to paste the Facebook Pixel ID in the respective field.
WPCode will now automatically add the code to your site that’s needed to track Facebook ad conversions.
Setting Up Twitter Conversion Tracking in WordPress
If you run Twitter Ads to promote your business, then you’ll need to set up Twitter conversion tracking to measure the success of your ads.
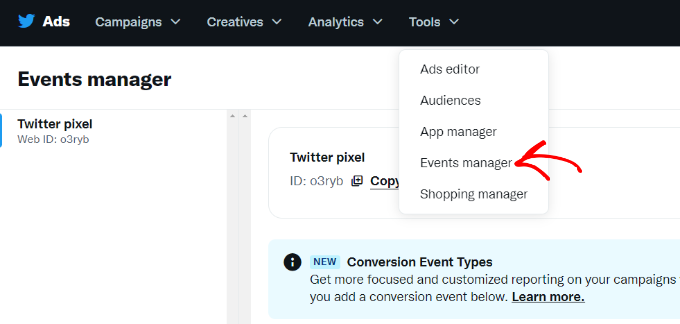
Simply log in to your Twitter Ads account and click on the Tools » Event manager from the menu at the top.
You should now see a pixel created by Twitter.
Go ahead and click the ‘View Twitter Pixel’ option.
On the next screen, you will see different options to add the Twitter pixel to your site.
You can use the ‘Pixel Code’ method and simply copy the code.
You will need to add this code to the header of your WordPress site.
First, you need to switch back to your WordPress website’s admin area.
If you haven’t already done so, then go ahead and install and activate the WPCode plugin. For more details, please see our guide on how to install a WordPress plugin.
Upon activation, you need to visit the Code Snippets » Header & Footer page. Now you can paste the Twitter pixel code into the Header section.
Don’t forget to click the ‘Save Changes’ button to store your settings.
After you have successfully installed the pixel code, you can track conversions on your Twitter Ads account.
Optimizing Conversion Rates to Boost Sales
Once you start tracking conversions on your website, the next step is to improve those conversion rates.
You’d be surprised how little things can make a huge impact on your business.
The best way to improve your conversions is by using OptinMonster. It is the best conversion optimization software on the market and helps you convert more visitors into customers.
It integrates with any email marketing service and works with all popular eCommerce platforms.
OptinMonster’s display rules allow you to show targeted messages to your customers at the precise time and nudge them into making a buying decision.
For instance, if you notice that customers are leaving a product page without taking any action, then you can offer them a discount when they are about to exit.
Similarly, you can run time-sensitive campaigns to trigger the FOMO effect and give customers a nudge in the right direction.
Wondering how to choose the best WooCommerce WordPress theme for your business? With thousands of FREE & PREMIUM WordPress theme options, picking the best theme for your eCommerce website is daunting. Worry not! We’ve got you covered. In this article, we’ll share a detailed guide on choosing WooCommerce WordPress themes for your business, so you [...]
Does your WordPress website contain many long and cluttered URLs? Are you looking for a way to make these links look more presentable? With ClickWhale, you can easily shorten, manage, and analyze links on your site using your own domain. ClickWhale offers many advantages, from tidying up ugly affiliate links to branding site URLs with [...]
Are you looking to add a passwordless login system to your website, such as magic links?
This will allow your users to log in to your WordPress website without needing to remember a password. They will simply click on a link that is sent to their email inbox to gain access to the site and their account.
In this article, we’ll show you how to add a passwordless login in WordPress with magic links.
What Is Passwordless Login?
You use passwords to keep our WordPress websites secure. By requiring each user to enter a username and password when logging in, you keep unauthorized users from visiting sensitive areas of your websites.
But passwords are hard to create and remember, and they can cause security issues. For example, users may make weak passwords that can be easily guessed or use the same password on multiple sites.
They may also be costing you money. 75% of users quit when they forget and need to reset their password, and 30% of customers abandon their shopping cart when prompted to create a password. Password problems also place a burden on your support team.
However, you may wish to avoid passwords altogether. A passwordless login system allows your users to log in to your website without entering a password.
What Are Magic Links?
Magic links are the most common method of passwordless login.
When logging in to your WordPress website, a user is asked for their username or email address. Next, a special link is sent to that email address, and the user just has to click on the link to be taken to your website and automatically logged in.
This form of passwordless login is secure because the link can only be used once and will expire after a certain number of minutes. Also, the link can only be found in the user’s email account, which confirms that the user is who they say they are.
This is different from a temporary login link that you would give to a plugin developer or security expert who needs to run tests on your website. In that case, the login solution is only temporary, and an email address does not need to be entered each time.
With that being said, let’s take a look at how to add a passwordless login in WordPress with Magic links.
How to Add Passwordless Login in WordPress with Magic Links
Note: In this tutorial, we’ll use the free plugin. There is also a Magic Login Pro plan that adds support and additional features such as brute force protection, login redirection, and the ability to customize the emails sent.
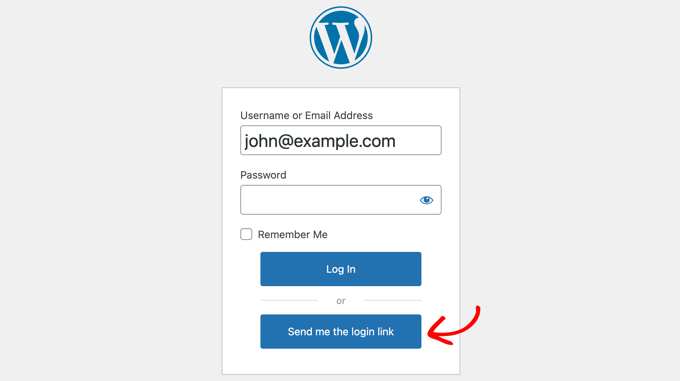
Upon activation, the plugin will automatically add a ‘Send me the login link’ button to your standard login screen. This will let your users sign in using their username (or email) and password if they remember it, or request a magic link if they don’t.
If there is a valid account on your website for the username or email address entered, then the user will receive an email with a link to log in.
The link will work for 5 minutes and then expire. If you need, you can change the link’s lifespan in the plugin’s settings, as we show below.
Note: If you or your users did not receive the email and it isn’t in your spam folder, then there may be a problem with your website’s email. You should take a look at our guide on how to fix WordPress not sending email issue.
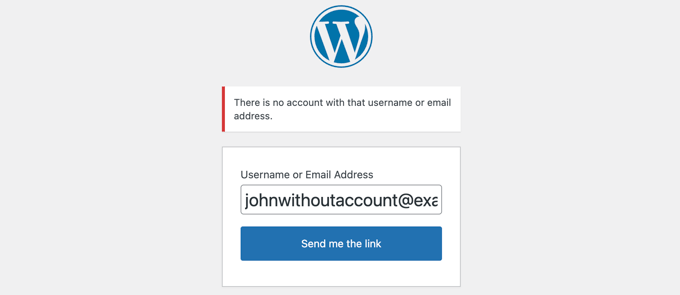
If there is no account on your website with the username or email address that was entered, then an error message will be displayed instead.
Configuring the Magic Link Plugin
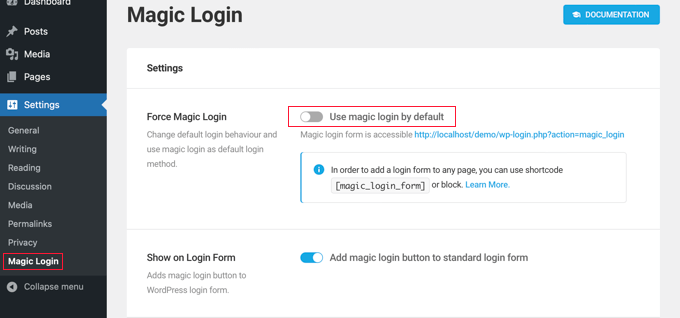
You can configure the Magic Link plugin by visiting Settings » Magic Login in your admin sidebar.
This page contains all of the options for the plugin, including premium options that can be used by Pro users.
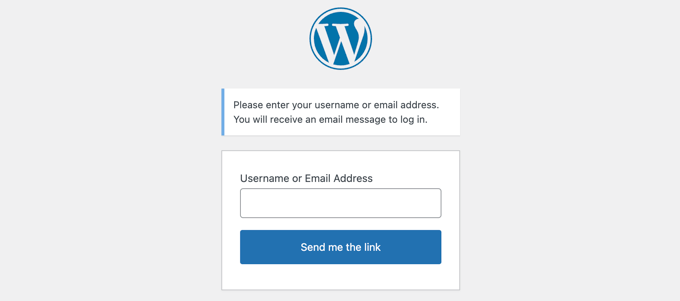
The first option is called ‘Force Magic Login.’ When enabled, your users will not be given the option of signing in with a password.
They simply enter their username or email address and then click the ‘Send me the link’ button. A magic link will be emailed to their inbox.
Alternatively, you can use the shortcode [magic_login_form] to add a magic link login form to any page or widget. See our guide on how to add a shortcode in WordPress for details.
The second option is enabled by default and adds a magic login button to the standard login form. When this switch is toggled off, the magic link button is removed from that login form.
The next two options are related to security. By default, the Token Lifespan setting makes magic links expire after 5 minutes. We recommend keeping this setting short, but you could increase it to 10 or 20 minutes if your users have issues.
The Token Validity setting is set to 1 by default. This means that each magic link will work for a single login. We recommend you keep this setting.
Next comes a feature called ‘Auto Login Links.’ When enabled, a magic link will be added to all emails sent out by WordPress, such as WooCommerce order confirmations, automated coupons, and comment notifications. The user will be logged in automatically when responding to the email.
After that comes a number of premium features for Pro users. These include:
Brute Force Protection
Login Request Throttling
IP Check
Domain Restriction
Email Subject
Email Content
Login Redirection
There is also a button for all users that will reset the tokens.
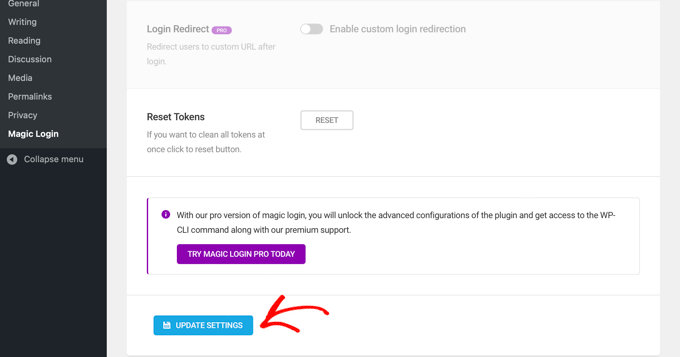
Once you have finished configuring the plugin, make sure you click the ‘Update Settings’ button at the bottom of the page to store the settings.
Do you want to redact text on your WordPress website?
Redaction can be a way to share information with your visitors without hurting anyone’s privacy. You can even use it as an unusual paywall or a game where you challenge visitors to fill in the missing words.
In this article, we will show you how you can redact text in WordPress.
Why Redact Text in WordPress?
Redaction is where you edit text by blacking out sensitive parts of it. It is a way to share information and documents with the general public while keeping confidential and sensitive information private.
Redaction can help you share real world examples without breaking your privacy policy. For example, if you’re showing visitors how to write a great CV then you might want to include a few examples of real CVs you’ve received. You can use redaction to block out each applicant’s name, address, and other personal information.
When you redact text, that content still exists in your WordPress dashboard. This means you can easily remove the redaction at any point.
Redaction can also be an eye-catching way to preview the kind of content visitors can expect when they sign up to your WordPress membership site. Visitors can then buy a membership to remove the redaction and enjoy the full, uncensored version.
That being said, let’s see how you can easily redact text on your WordPress website.
How to Redact Text in WordPress
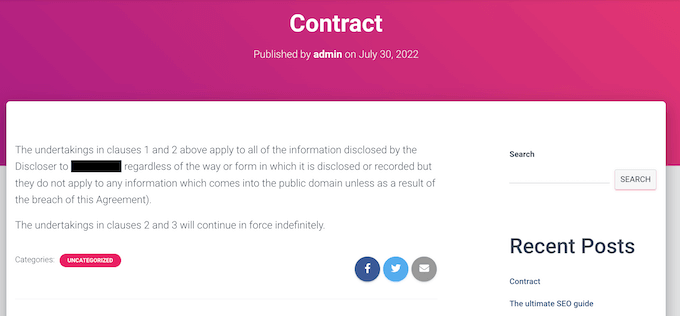
The easiest way to redact text in WordPress is by using Eyes Only. This plugin will replace any redacted text with a black block.
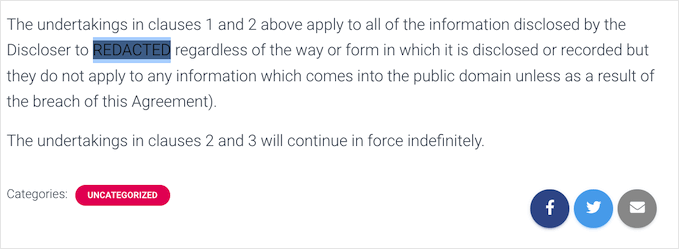
If the visitor highlights the block, then they’ll simply see the word REDACTED in white letters.
You can see an example of how this might look in the following image.
Another option is to automatically replace any word or phrase with an alternative chosen by you. For example, if you can’t use a client’s name on your small business website then you might replace the information with a more vague word such as ‘client.’
First, you’ll need to install and activate the plugin. If you need help, then please see our guide on how to install a WordPress plugin.
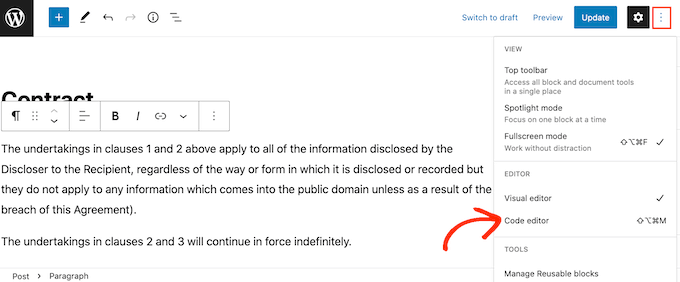
Then, click on the dotted icon in the top right corner and click on ‘Code editor.’
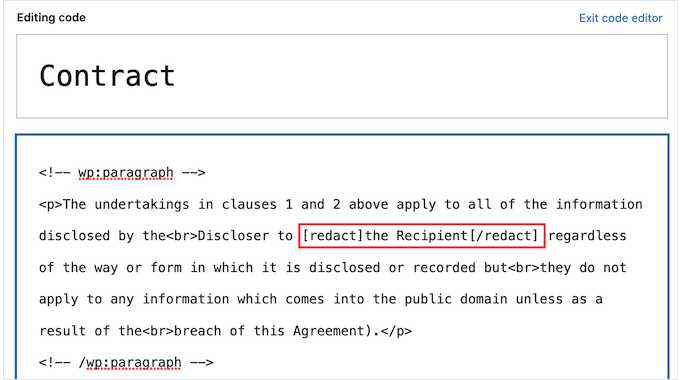
Next, find the piece of text that you want to redact. At the start of the text, type in the following tag:
[redact]
At the end of the redacted text, type in:
[/redact]
In the following image, we’re redacting ‘the Recipient.’
To redact more text just follow the same process described above.
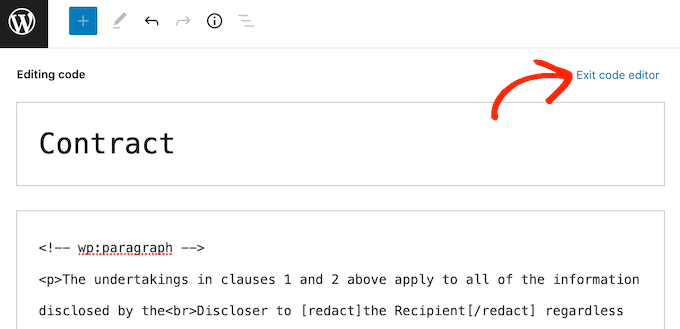
If you want to switch back to the default plain text block editor at any point, then simply click on ‘Exit code editor.’
After adding tags to all the text that you want to redact, you can go ahead and publish or update the page.
Just be aware that the text won’t appear redacted while you’re logged into your WordPress account. To check that the text is redacted, you’ll either need to log out of your account or visit the page in an incognito tab in your web browser.
Another option is to automatically replace specific words with alternative words. This is useful if there’s a word that you never want to show on your site, such as the name of a confidential supplier or customer.
By configuring the plugin to automatically redact a word, you can make sure that information never shows up on your website. This automated workflow can also save you a lot of time and hard work.
Since it replaces each redacted word with an alternative word, this method can also make your pages easier to read and nicer to look at, particularly when compared to a page that has lots of blacked-out content.
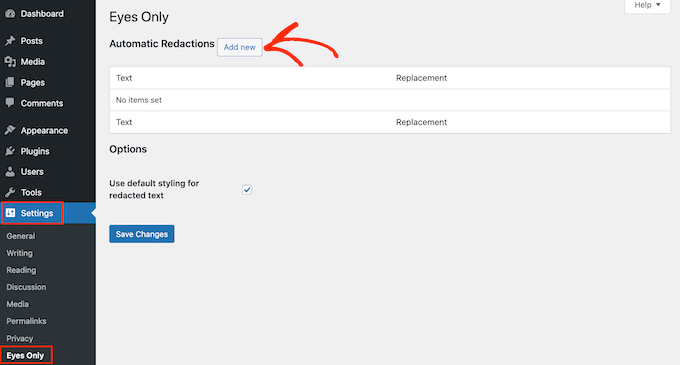
To redact a word or phrase automatically, head over to Settings » Eyes Only. Then, go ahead and click on the ‘Add new’ button.
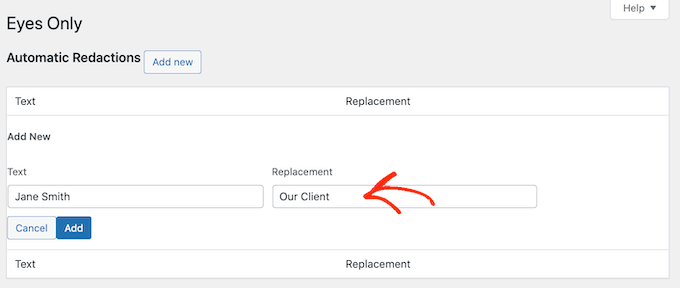
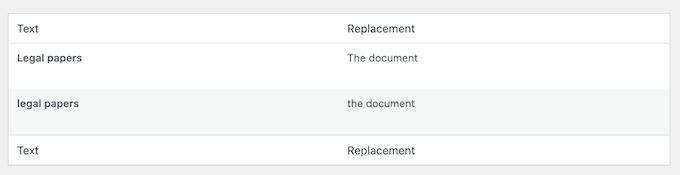
In the new ‘Text’ field, simply type in the text that you want to redact automatically. Just be aware that the text replacement is case sensitive.
In the ‘Replacement’ field, type in the text that you want to show instead of the redacted text.
In the following image, we’re replacing ‘Jane Smith’ with ‘Our Client.’
You can then go ahead and click on the ‘Add’ button.
If you want to automatically replace more words or phrases, then simply repeat the process described above.
As we already mentioned, the text replacement is case sensitive. If you want to redact a word no matter whether it’s capitalizated, you’ll need to create two separate text replacement rules.
One of these rules should replace the capitalized version, and another should replace the uncapitalized version, as you can see in the following image.
When you’re happy with the redaction rules you’ve created, click on the Save Changes button at the bottom of the screen.
The plugin will now scan your site and automatically replace any matches that it finds.
At some point you may no longer want to hide a particular word or phrase. In this case, you can simply delete the redaction rule. This will automatically remove the masking and show the original words across your WordPress blog.
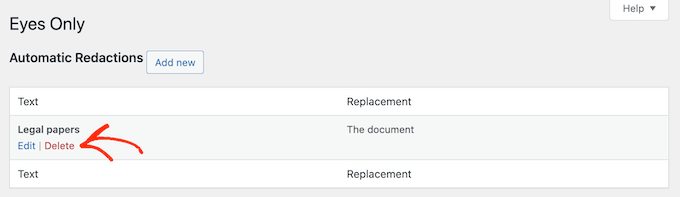
To delete a redaction rule, simply go to Settings » Eyes Only.
Then, just hover the mouse over the rule that you want to delete and click on the ‘Delete’ link when it appears.
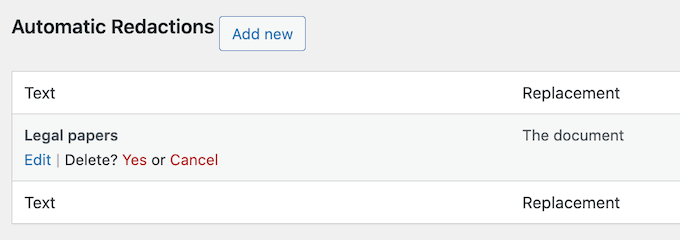
You will need to confirm that you want to delete the rule.
If you still want to go ahead, then click on ‘Yes.’
Finally, it’s time to click the ‘Save Changes’ button at the bottom. Now if you visit any page or post that has the original word, you’ll see that the plugin is no longer redacting the text.
Do you want to build an online question and answer community like Stack Overflow or Quora?
You can create a whole site dedicated to Q&A, or add a question and answer section to an existing WordPress site. No matter what approach you take, helpful questions and answers can improve the visitor experience and keep people on your website for longer.
In this article, we will show you how to easily create a question and answers site in WordPress.
Getting Started with a Question and Answer Website
To start your own question and answers website, you will need the following:
A domain name. This is the name of your website such as stackoverflow.com.
A web hosting account. This is where your website’s files are stored. All websites need web hosting.
A Content Management System. This is software that helps you create, publish, and manage all your questions and answers. For this guide, we’ll be using WordPress as it powers nearly 43% of all websites and gives you complete control over your content. To learn more about why we recommend WordPress to all our readers, please see our complete WordPress review with pros and cons.
Extra software, plugins, or tools. These add special question-and-answer features to your WordPress website.
How Much Does It Cost to Build a Question and Answer Website?
The answer to this question depends on the features you need, how many visitors you get, how much content you create, and lots of other factors.
To help you budget, we’ve created a complete guide on how much it really costs to build a website. However, typically the cost of building a website can range from anywhere between $100 per year to as high as $30,000 per year.
We recommend you start small and then add more features to your question-and-answer site as it grows and gets more popular. This helps you avoid spending too much on your site, before it starts making a profit.
That said, let’s see how you can build a successful Q&A website for under $100.
Although the WordPress software is free, hosting and domain names are where the costs can really start to add up.
A domain name typically costs $14.99/year and hosting costs start from $7.99/month. This is A LOT for new websites or anyone who is working with a limited budget.
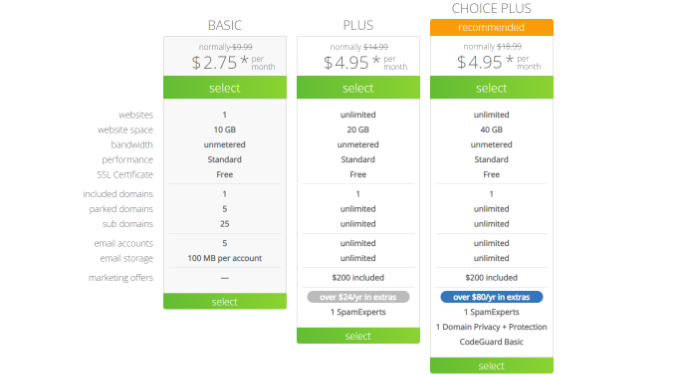
Luckily, Bluehost has agreed to offer our users a free domain name and over 60% off on web hosting. Basically, you can get started for $2.75 per month.
Bluehost is one of the largest hosting companies in the world and an officially recommended WordPress hosting provider.
They’re also offering our readers a free SSL certificate so you have the option to accept payments online. This is perfect if you want to make money from your question and answer website in the future.
To buy a domain name and hosting, simply go to the Bluehost website in a new browser window and click on the green ‘Get Started Now’ button.
This will bring you to a pricing page where you can choose a hosting plan for your question-and-answer website.
We recommend choosing a Basic or Plus plan, as they’re the most popular web hosting plans among our readers.
After selecting a plan, click on ‘Continue.’
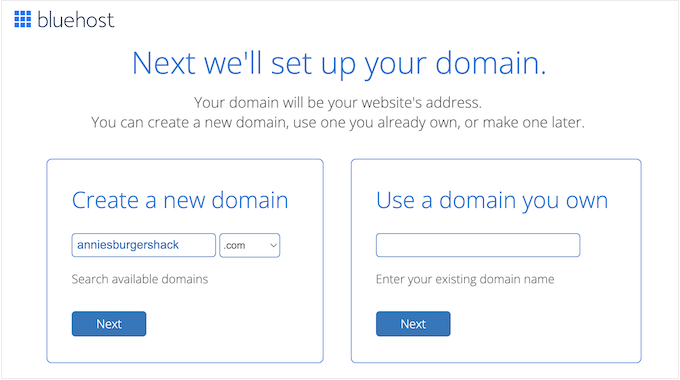
On the next screen, you’ll need to choose a domain name.
Ideally, the domain name will be easy to pronounce and spell, and easy to remember.
After choosing a name, click on the ‘Next’ button to continue.
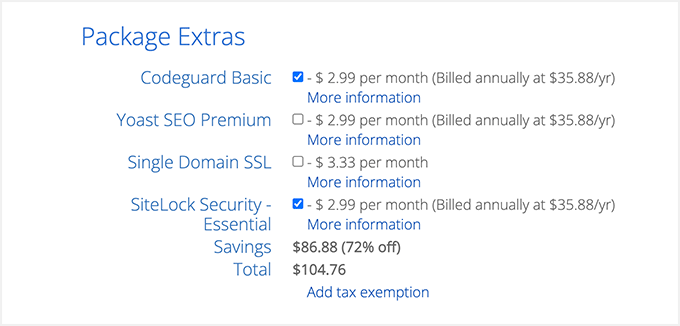
Now you’ll need to provide your account information such as your name and business email address. After that, you’ll also see optional extras that you can purchase.
We generally don’t recommend purchasing these extras straight away, as you can always add them later on if you need them.
After that, simply type in your payment information to complete the purchase.
Once you’ve done that, you’ll get an email with instructions on how to log in to your web hosting control panel. This is your hosting account dashboard where you can manage your Q&A website, including setting up email notifications and asking for WordPress support, if you need it.
It’s also where you’ll install the WordPress software.
Step 2. Install WordPress on Your Question and Answer Website
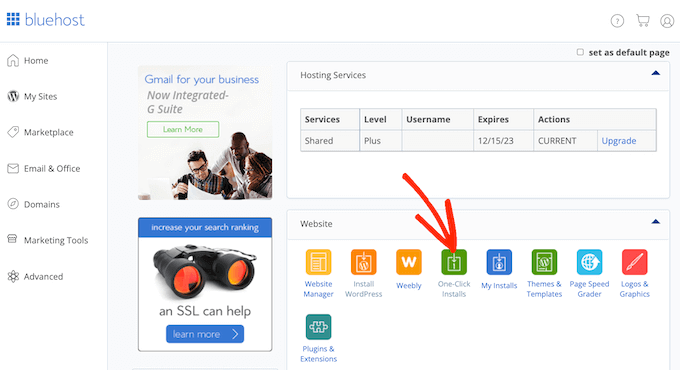
When you signup with Bluehost using our link, you’ll get access to a one-click WordPress installer.
Simply log into your Bluehost account and click on ‘One Click Install.’
Here, you’ll see all the different software you can add to your account.
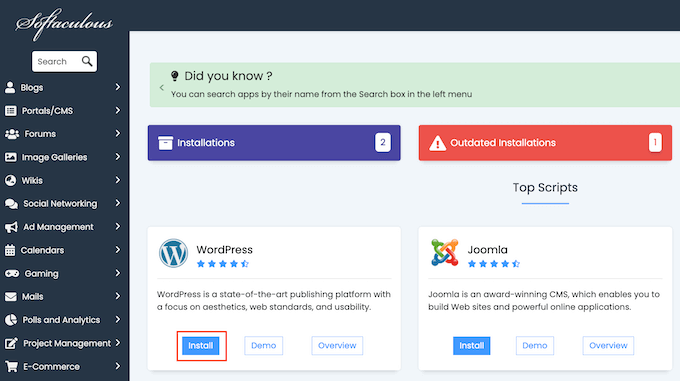
Simply find ‘WordPress’ and give it a click.
Here, just click on the ‘Install’ button.
You can now follow the onscreen instructions to install the WordPress software.
Once that process is finished, you can log in to the WordPress dashboard by simply going to yoursite.com/wp-admin/ directly from your browser.
After installing WordPress, you’ll typically want to change the default theme. WordPress themes are professionally designed templates that change how your site looks and acts.
Another option is to use a landing page builder plugin such as SeedProd.
SeedProd is the best drag-and-drop WordPress page builder and comes with built-in templates that you can use to build a professionally-designed question-and-answer website.
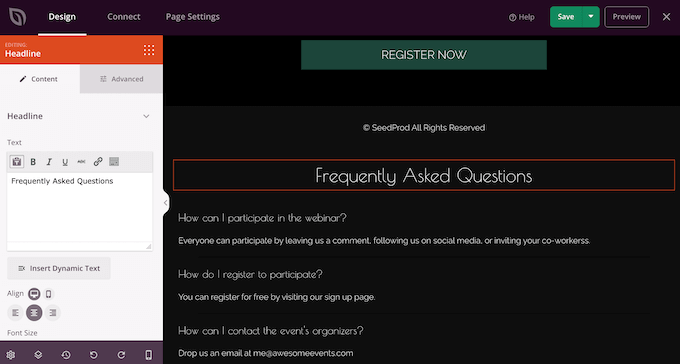
It even has a ready-made FAQ section that you can add to any page using drag and drop.
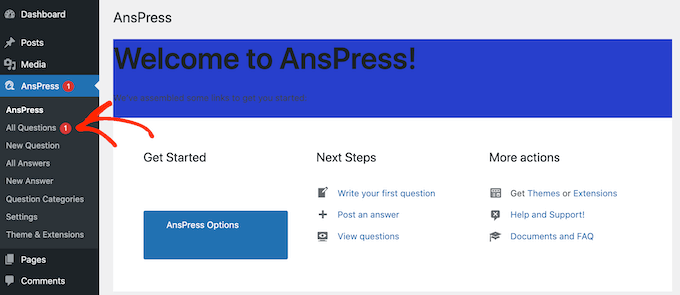
The easiest way to add question and answer features to your WordPress website is by using the AnsPress plugin. This plugin allows you to create a Stack Overflow-style question and answer site.
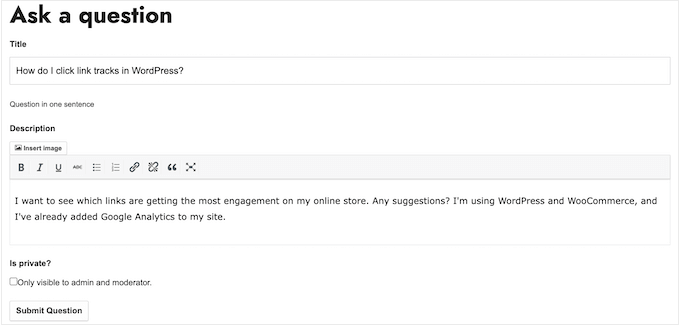
Even better, AnsPress automatically creates all the pages you need to launch a successful Q and A site.
This includes a page where visitors can type in their questions, in exactly the same way people use websites like Quora.
The first thing you need to do is install and activate AnsPress. For more details, see our step-by-step guide on how to install a WordPress plugin.
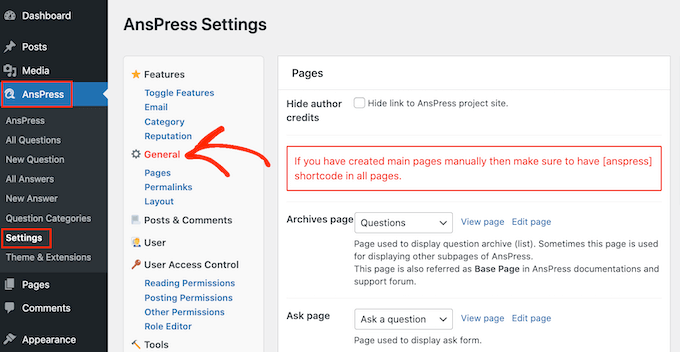
Upon activation, AnsPress automatically adds question-and-answer pages to your WordPress website. To see these pages, head over to AnsPress »Settings in the WordPress dashboard.
Once there, you can select ‘General’ in the menu on the left-hand side.
This page lists all the different pages that AnsPress has created.
To take a closer look at any page, simply click on its ‘View page’ link.
The default AnsPress pages should be a good fit for most WordPress blogs and websites. However, you can always add your own content to these pages.
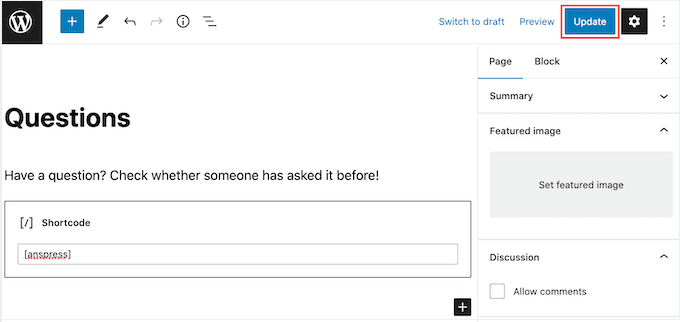
For example, you might add some text that encourages visitors to post their questions, and tells them when to expect an answer.
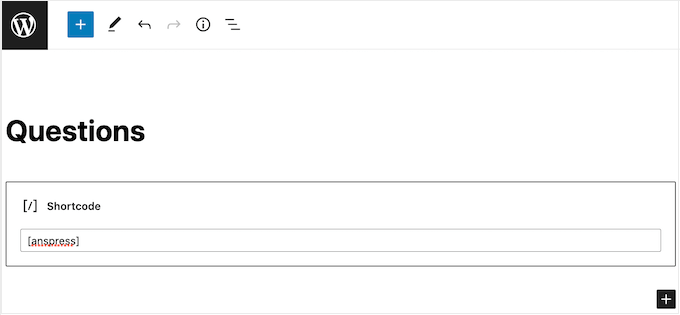
To add your own content to any AnsPress page, simply click on the ‘Edit page’ link next to it.
This opens the standard WordPress post editor where you can add text, images, and more.
As you can see, AnsPress adds all its content using shortcode, so don’t change this code in any way.
When you’re happy with the changes you’ve made, just click on ‘Update.’
You can edit any default AnsPress page by following the same process described above.
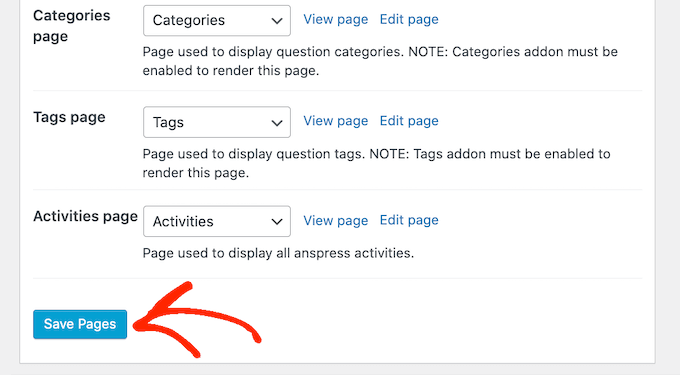
When you’ve finished, don’t forget to click on ‘Save Pages’ to store your settings.
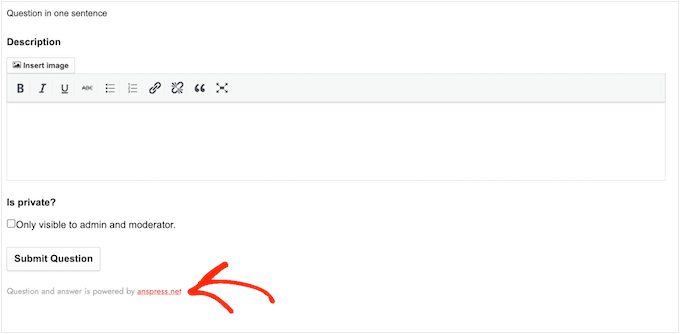
By default, AnsPress adds the following message to all its pages: ‘Question and answer is powered by anspress.net.’ This can make your site look less professional.
It also links to the AnsPress site, which can hurt your pageviews and bounce rate by encouraging people to leave your site.
Because of that, it’s a good idea to remove this text by checking the box next to ‘Hide author credits’ and then clicking on ‘Save Changes.’
Now if you look at any AnsPress page, you’ll see the text has vanished.
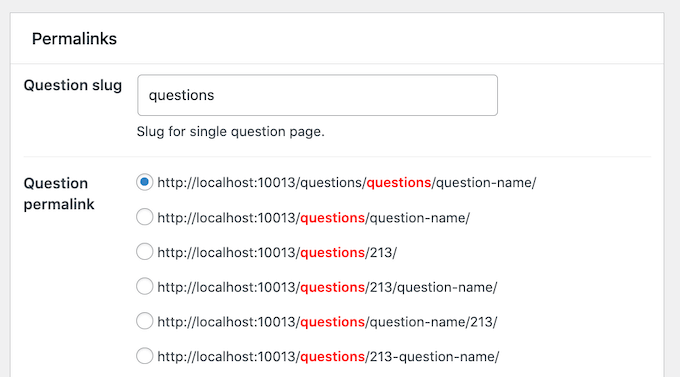
With that done, scroll to the ‘Permalinks’ section in the AnsPress settings.
Here, you’ll see the permalink structure and settings that the plugin uses by default. These settings should work well for most websites, but you may be able to improve your WordPress SEO by making some small changes.
In the image below, each question will now use the slug /questions/wordpress-questions/question-name/ which will help us rank for the term ‘WordPress.’
If you do make any changes in this section, then don’t forget to click on ‘Save Changes.’
Next, it’s time to fine-tune the layout by scrolling to the ‘Layout’ section. Here, you’ll see that AnsPress shows the user’s Gravatar in a few different places including next to questions, answers, and comments.
You can change the size of these avatars by typing into the different boxes.
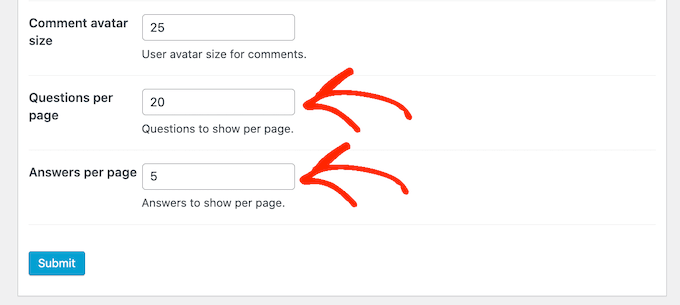
By default, AnsPress will show 20 questions per page and 5 answers per page. You can show more or less content by typing new numbers into the ‘Questions per page’ or ‘Answers per page’ box.
If you show fewer questions and answers per page, then users will need to scroll less. This is particularly helpful for visitors who are using smaller devices like smartphones and tablets. It can also speed up your WordPress performance since you’re loading less content.
Just be aware that most visitors expect to get the right answer on the first page, so you’ll want to show a reasonable number of answers per page.
When you’re happy with how your Q&A site is set up, click on the ‘Submit’ button.
Email notifications are an important part of running a successful question-and-answer website. They let admins know when customers or potential leads post a new question, and they also let users know when their question gets an answer.
In this way, emails can keep users engaged and help your Q&A site run more smoothly.
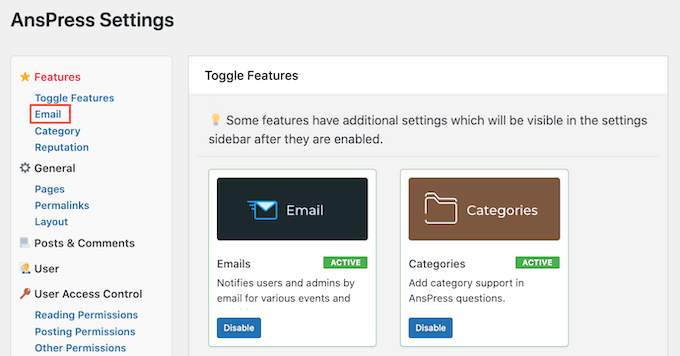
AnsPress comes with built-in email notifications that work out-of-the-box. However, it’s still smart to see whether there are any changes you want to make by clicking on the ‘Email’ link.
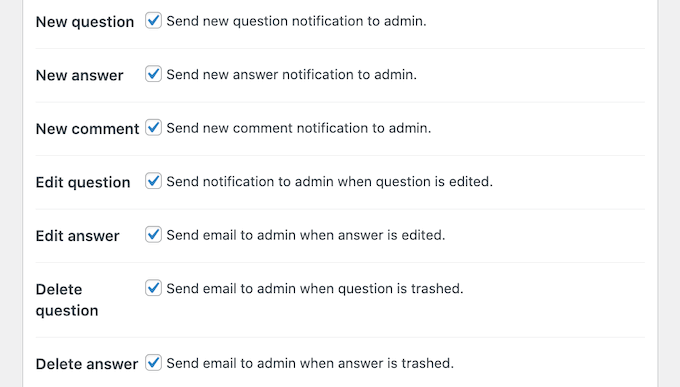
Here, you can see all the different emails that AnsPress will send automatically.
To enable or disable an email, simply click on the box next to it.
Pro Tip: You need to make sure all your Q&A emails go to the user’s email inbox and not to the spam folder. The best way to do this is by using an SMTP service provider to improve email deliverability. For more details, see our guide on how to fix WordPress not sending email issue.
As always, don’t forget to click on ‘Submit’ to save your changes.
Some question-and-answer sites are completely open to the public. This means that non-logged-in users can see the content, and may even be able to post questions and answers without creating an account.
Other Q&A sites are completely private or require user registration.
There are drawbacks and positives to the different approaches. A public question-and-answer site will typically get more traffic and engagement, but it may also get more spam and attract low-quality answers.
If you’re using questions and answers to make money online blogging with WordPress, then you may want to make some parts of your site members-only. This allows you to charge a subscription fee using a plugin like MemberPress.
Another option is allowing people to register with your website for free, so you can collect their email addresses. In this way, your question-and-answer site can help you do lead generation like a pro.
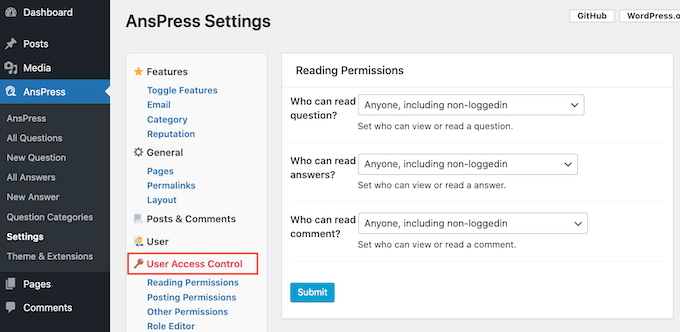
However you plan to use your question-and-answer site, it’s a good idea to review the posting permissions by selecting ‘User Access Control.’
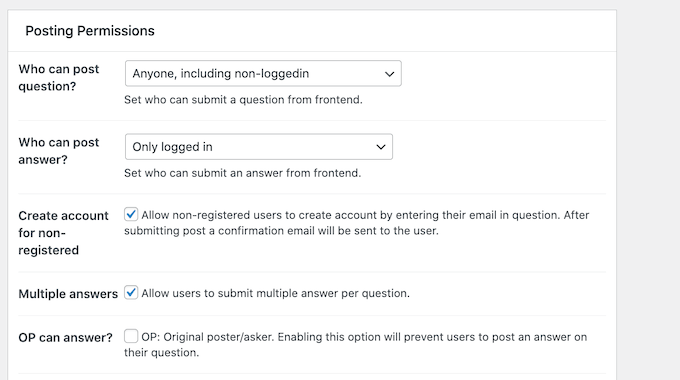
Here, you can see all the different content that logged-in and non-logged-in users can access, and the actions they take. You can change these settings using the different dropdown menus.
You can also change whether questions and answers get posted automatically, or if they’re held for admin approval. By default, non-logged-in users can post questions and answers, but you’ll need to approve them manually in the admin area.
These settings are self-explanatory but they have a big impact on how your question-and-answer site runs. With that being said, it’s worth going through the different settings carefully and then making any changes.
If you do edit these settings, then don’t forget to click on the ‘Submit’ button.
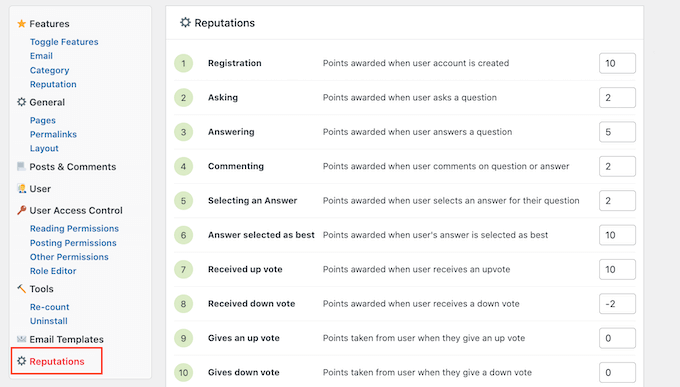
AnsPress encourages users to engage with your site through gamification, by awarding reputation points for different actions. This reputation system works by default, but you can change how many points AnsPress awards for each action by selecting ‘Reputations.’
Here, you’ll see all the different actions and their reputation points.
To award more or less points for an action, simply type a new number into its box. When you’re happy with how the reputation system is set up, click on Save Events Points.
There are some more settings you may want to look through, but this should be enough to help you set up a successful question-and-answer website.
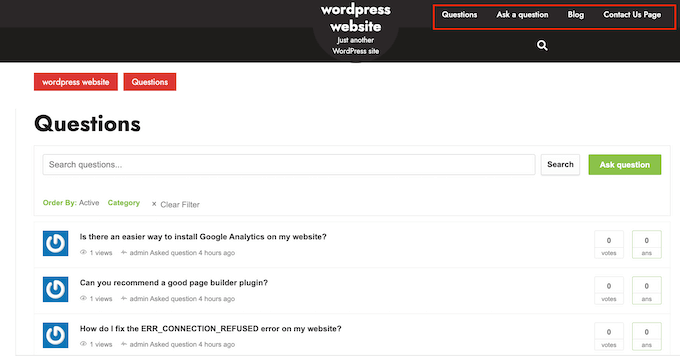
When you’re happy with how the plugin and pages are set up, it’s a good idea to add them to your website’s navigation menu so visitors can find them.
If you need reminding about all the different pages that AnsPress added to your site, then simply go to AnsPress »Settings and then click on the ‘Pages’ link.
Managing Your Question Answer Site
At this point, your site is ready to start accepting questions and answers from users. However, depending on how your Q&A site is set up, you may need to manually approve some, or all, of these posts.
By default, AnsPress will email the WordPress admin about any questions or answers that need manual approval. You’ll also see notifications in the admin dashboard.
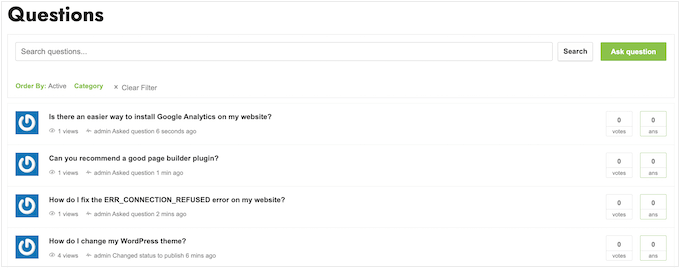
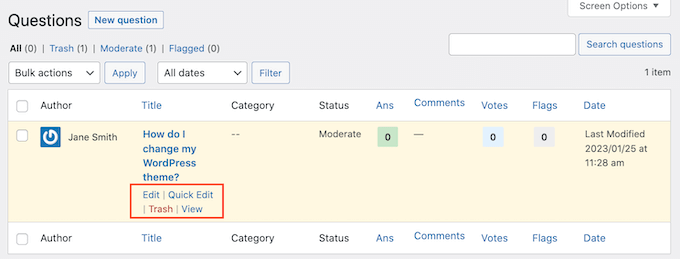
To manually approve an answer or question, simply click on either ‘All Questions’ or ‘All Answers’ in the left-hand menu.
You can then hover your mouse over the post that you want to review and click on ‘View.’
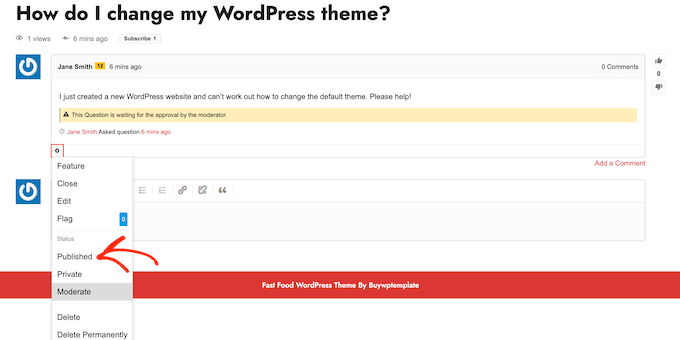
This will show a preview of how the question or answer will look on your website.
If you’re happy to make it live, then click on the small cog icon and then select ‘Published.’
If you don’t want to publish the post, then select ‘Delete’ or ‘Delete Permanently’ instead.