Are you looking for a way to easily import Google Docs to WordPress?
You may prefer to write your posts in Google Drive, but importing that content into WordPress isn’t straightforward. If you try to copy and paste a Google Doc into WordPress, then you might get lots of unwanted HTML tags, and sometimes you may even lose all the original formatting.
In this article, we will show you how you can easily add Google Drive documents to your WordPress website.
Why Import Google Docs to WordPress?
You may prefer to write blogs in Google Docs, rather than in the WordPress post editor.
If you accept guest posts in WordPress, then you might even ask authors to send their work as a Google Doc, rather than giving them access to the dashboard by allowing user registration in WordPress.
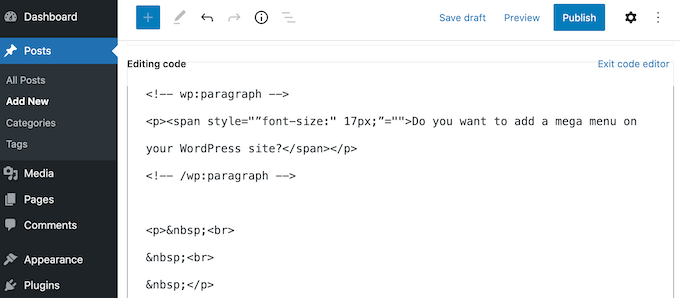
However, when it’s time to import the document from Google Drive to WordPress, you may run into some problems. If you copy/paste the Google Doc’s text directly into the WordPress editor, then it can add extra tags, particularly <span> and <font tags> tags.
You may also get unwanted line breaks and lose some of the original Google Doc formatting. This means you’ll need to manually go through each post and fix these problems, which can take a lot of time and effort.
With that being said, let’s see how you can easily import Google Docs to WordPress without any formatting problems or extra code.
Simply follow the quick links below to jump straight to the method you want to use.
Method 1. Using the Copy/Paste Method (Quick and Easy)
If you regularly import Google Docs to WordPress, then we recommend taking the time to set up a WordPress plugin mentioned in our other methods.
However, if you simply want to import a single document, then you can always use another web tool to help make sure the document is clean and ready to go.
This typically involves copying the text from your Google Doc into a third-party app or online service. Often, this removes the unwanted tags and formatting errors.
You can then go ahead and copy the text from the middleman app or online service, and paste it into the WordPress block editor.
This is a workaround rather than a fix, and the results can sometimes be unpredictable. There’s always a chance your chosen middleman might remove some errors, and not others. It may also add its own code, which can cause common WordPress errors.
However, you won’t need to set up a new plugin or service. With that in mind, this is a good option if you simply want to import a small number of Google Docs into WordPress.
There are lots of different services you can use, but we recommend using Grammarly.
Grammarly does a great job of preserving the formatting from Google Docs, while removing unwanted HTML tags. It’s also an online service, so you can access it from any place that has an internet connection.
As an added bonus, Grammarly will highlight any spelling mistakes, typos, and punctuation errors. It can also suggest ways to improve your writing by changing the tone, clarifying confusing text, and much more.
In this way, you can improve the quality of your writing before importing it into your WordPress website. Just be aware that Grammarly doesn’t support images, so you’ll need to upload any image files separately using the WordPress media library.
If you don’t already have a Grammarly account, then you can head over to the website and click on the ‘Get Grammarly It’s Free’ button.
You can then sign up for Grammarly using an existing Google, Facebook, or Apple account. Another option is to type in your email address, and then create a password and username.
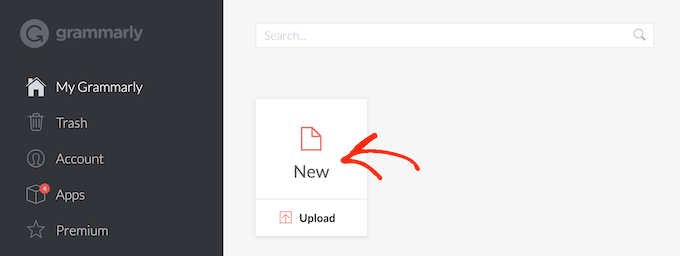
After creating an account, you’ll be taken to the the Grammarly dashboard. To import a Google Doc, go ahead and click on ‘New.’
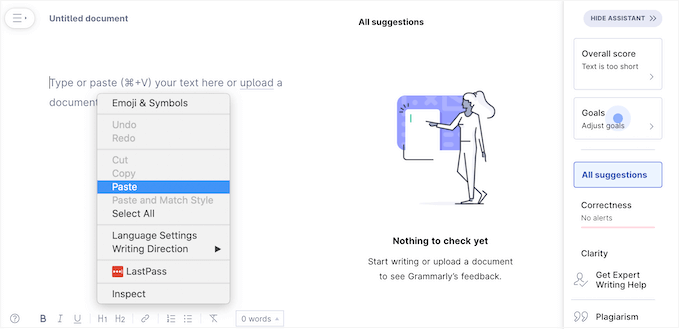
This opens the Grammarly editor.
In a new tab, open the Google Doc that you want to import into WordPress and copy all of its text. You can then paste this content into the Grammarly editor.
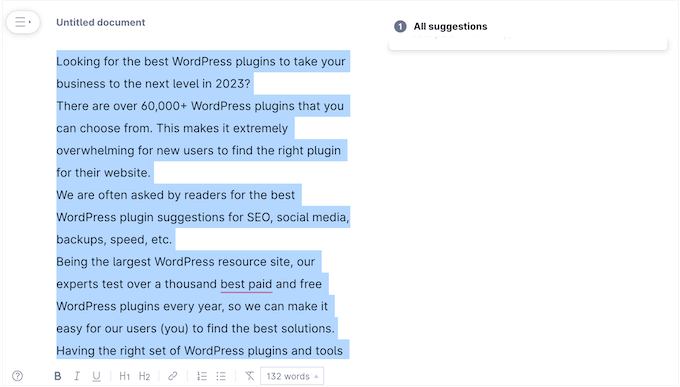
Grammarly will highlight any problems with your text and show its recommendations in the right-hand menu. It’s a good idea to read through this feedback and optimize your post before moving onto the next step.
When you’re ready to import the Google Doc into WordPress, go ahead and copy the text in the Grammarly editor.
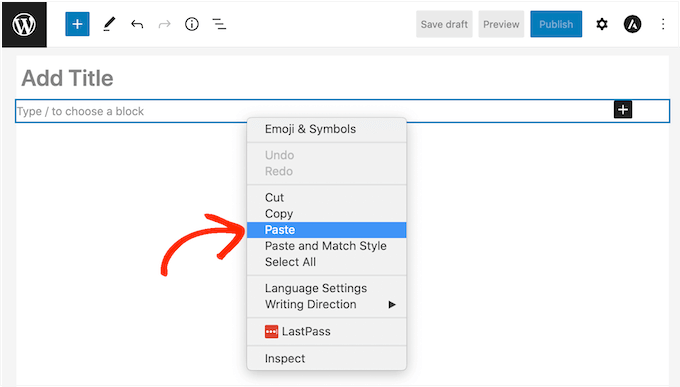
Now, switch over to the WordPress dashboard and open the post or page in where you want to import the Google Doc.
After that, simply go ahead and paste the content into the content editor.
Grammarly does a good job of removing unwanted HTML tags while preserving the Google Drive formatting. However, we still recommend looking through the page’s code, to make sure there aren’t any problems.
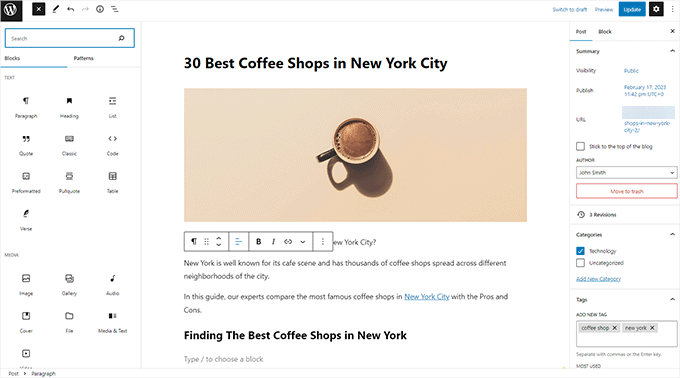
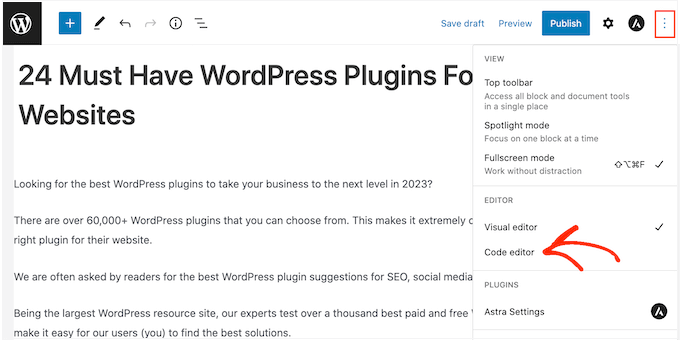
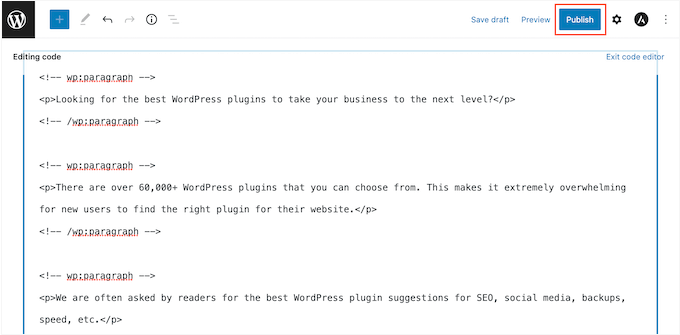
This is very easy to do using the WordPress code editor, that’s built right into Gutenberg.
To access it, just click on the three-dotted icon in the upper-right corner of the screen, and then select ‘Code editor.’
You can now delete any unwanted HTML tags or errors from the post.
When you’re happy with how the page looks, go ahead and click on the ‘Update’ or ‘Publish’ button to make the content live.
There are other tools that you can use for this such as StripHTML, but this tool and many others you can find on line will remove all code and return plain text.
That’s why we recommend using Grammarly for the best results at preserving rich formatting.
Method 2. Download the Google Doc as a Web Page (Imports Text and Images)
Copying and pasting Google Drive documents into a middleman service like Grammarly is quick, but it can give unpredictable results. Another option is to download the Google Doc as a web page, and then import the file into WordPress.
This tends to be more predictable, and once again you don’t have to configure a separate plugin or service.
This method also pastes any images from the original Google Doc into the page or post, along with the text.
However, we recommend ignoring this feature and instead adding any image files separately using the WordPress media library. This allows you to set the image caption and image alt text for each file, which makes it easier to re-use the images across your website.
To download a Google Doc as a web page, open the document in your Google Drive account. Then, click on ‘File’ in the toolbar, followed by ‘Download’ and ‘Web Page.’
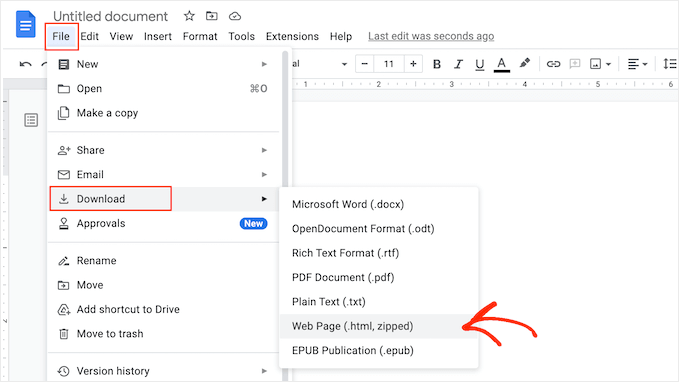
This will save the Google Doc as a zip archive. The document itself will be an HTML file, and each image will be included as its own file.
If you’re a Mac user, then simply find the file on your computer, and then either right-click or Control-click it. In the menu that appears, select ‘Open With’ and then ‘Google Chrome.’
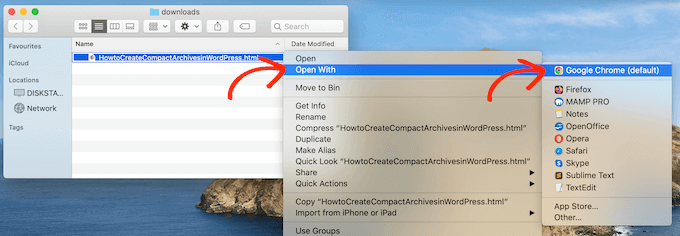
If you don’t see ‘Google Chrome’ as an option, then click on ‘Other…’ and then choose Google Chrome in the popup that appears.
If you’re on a Windows computer, then right-click on the folder and select ‘Extract All.’ You can then right-click on the .html file and select ‘Open,’ followed by ‘Google Chrome.’
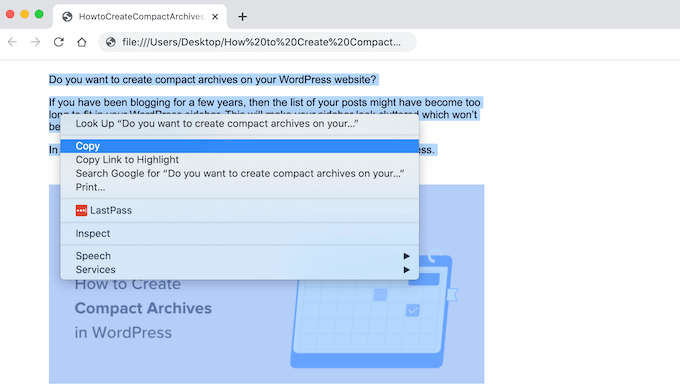
This will open a HTML version of your Google Doc in a new tab, with all the correct formatting and images. You can now go ahead and copy this content.
With that done, go to the WordPress dashboard and open the page or post where you want to add the content.
You’re now ready to paste the Google Doc into WordPress.

Most of the time, this should keep all the formatting in place, but it’s still a good idea to look through the post’s code for any errors. You can open the WordPress code editor by following the same process described above.
If you want to use any images in the page or post, then you can now add them manually using the WordPress media library. For step-by-step instructions, please see our guide on how to add images in the WordPress block editor.
When you’re ready to make the document live on your WordPress blog, simply click on the ‘Update’ or ‘Publish’ button.
Method 3. Using the Mammoth .docx Converter Plugin (Recommended)
If you need to import lots of Google Docs into WordPress, then it’s well worth installing a separate plugin.
We recommend Mammoth .docx converter as it takes all the formatting and images from a Google Doc and converts it into error-free HTML code.
If the Google Doc has any images, then Mammoth will import them into WordPress automatically, so this is also a great choice if you want to transfer images.
Just be aware that Mammoth uses the image’s original filename, so you may want to rename the images before adding them to the Google Doc and starting the import.
With that done, you’ll need to install and activate the Mammoth plugin. If you need help, then please see our guide on how to install a WordPress plugin.
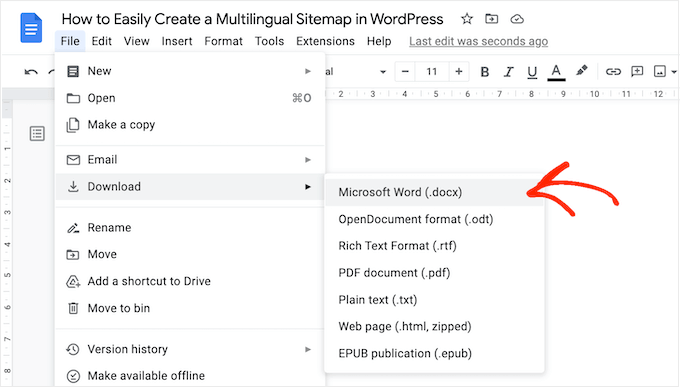
To import a document using Mammoth, start by opening it in your Google Drive. In the toolbar, select ‘File.’
In the dropdown menu that appears, click on ‘Download’ and then ‘Microsoft Word (.docx).’ You won’t need to open this document, so you don’t need Microsoft Word.
Google will now download the file to your computer as a .docx file.
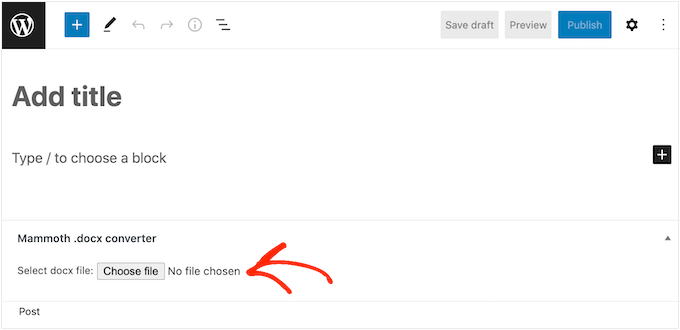
In the WordPress dashboard, open the page or post where you want to import the Google Doc. Directly beneath the editor, you’ll see a new Mammoth .docx converter section.
You can now go ahead and click on the ‘Choose file’ button.
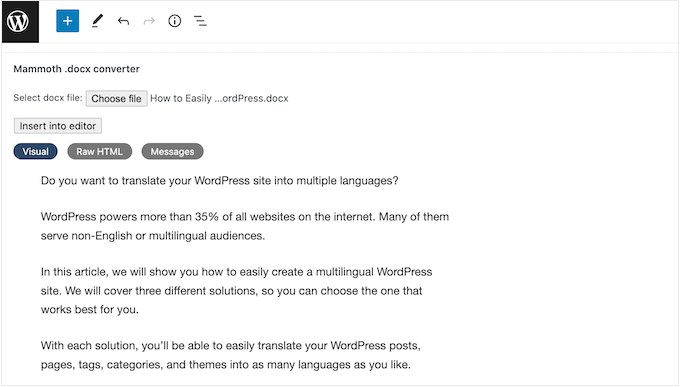
In the popup, select your .docx file and then click on ‘Open.’
Mammoth will now import all the content from the Google Doc. By default, Mammoth will display this content in its ‘Visual’ view, which is similar to how it will look on your website.
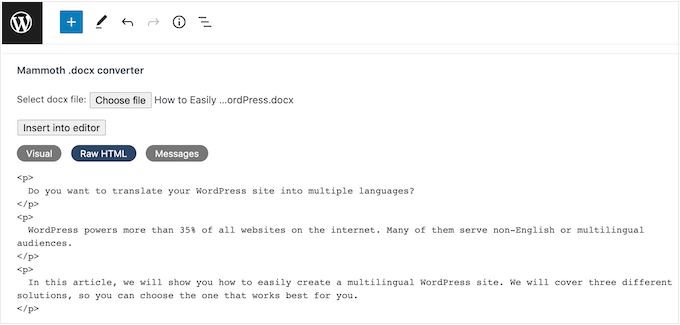
If you want to check the code for errors, then simply click on the ‘Raw HTML’ button.
You can now make any changes to the post’s HTML.
When you’re happy with how the content looks, you can add it to the page or post by clicking on the ‘Insert into editor’ button.
Mammoth will now go ahead and add the content to the main post editor. If you’re happy with how it looks, then click on ‘Publish’ or ‘Update’ to make the content live on your website.
Method 4. Using Wordable (Import Google Docs With a Single Click)
Do you want to import lots of Google Docs into WordPress?
You might have a team of writers who all use Google Drive, or accept posts from guest bloggers. You might even have an entire catalog of Google Docs that you want to import into a new WordPress website.
If you need to transfer dozens or even hundreds of documents, then you can use Wordable. This service lets you fine-tune how Wordable imports the Google Doc’s text, images, videos, and more.
After creating the first import, you can save your settings as a template. This allows you to transfer any future Google Docs with a single click, which will save you a ton of time.
You can import 5 documents per month using the free Wordable plan, so you can try the service before you buy. If you need to move more documents, then you can upgrade to any of the premimum Wordable plans.
Connect Wordable to Your WordPress Website
The easiest way to connect Wordable to your WordPress website is by installing and activating the Wordable plugin. If you need help, then please see our guide on how to install a WordPress plugin.
Upon activation, go to Settings » Wordable in the WordPress dashboard.
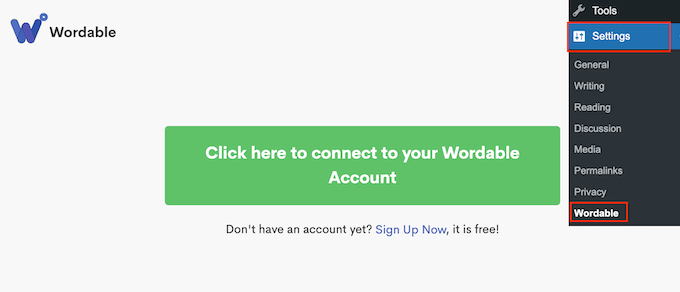
If you already have a Wordable account, then you can go ahead and select ‘Click here to connect to your Wordable account.’ This opens a popup where you can type in your Wordable email address and password.
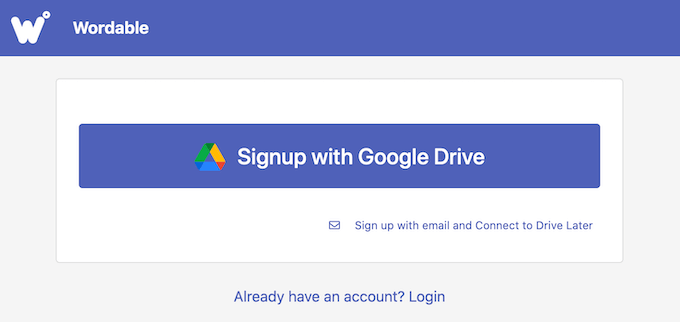
If you don’t have a Wordable account, then click on the ‘Sign up now’ link instead. This opens a new browser tab where you can select ‘Signup with Google Drive.’
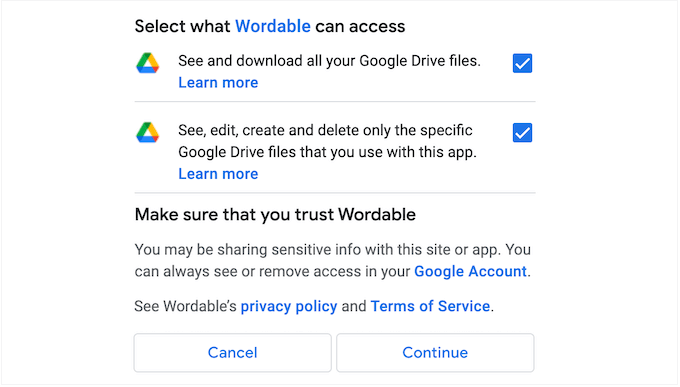
Wordable needs permission to see, edit, create, delete, and download your Google Drive files. To grant these permissions, simply check all the boxes on the ‘Wordable wants access to your Google Account’ page.
After that, click on the ‘Continue’ button.
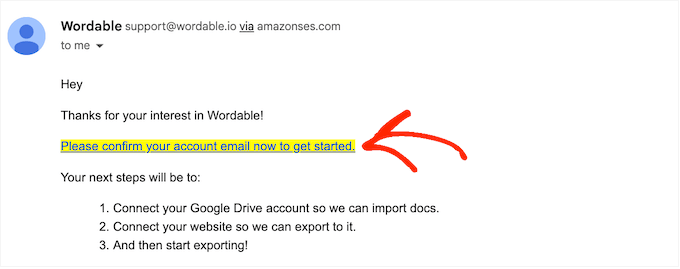
After creating an account, Wordable will send an email to your Google address.
Open the email, and then click on the following link: ‘Please confirm your account email now to get started.’
After that, go to Settings » Wordable in the WordPress dashboard and select ‘Click here to connect to your Wordable account.’
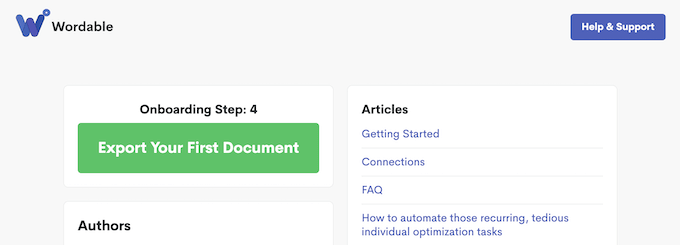
Then, simply refresh your WordPress dashboard. You should now see an ‘Export Your First Document’ button, which means WordPress is connected to your Wordable account.
Select a Google Drive Document or Folder
To import a document, go ahead and click on the ‘Export Your First Document’ button. This opens your Wordable account in a new browser tab.
Your next task is finding the document or folder that you want to import.
If you select a folder, then you can still choose exactly which Google Docs to transfer, and which to ignore, so you won’t be forced to import the entire folder.
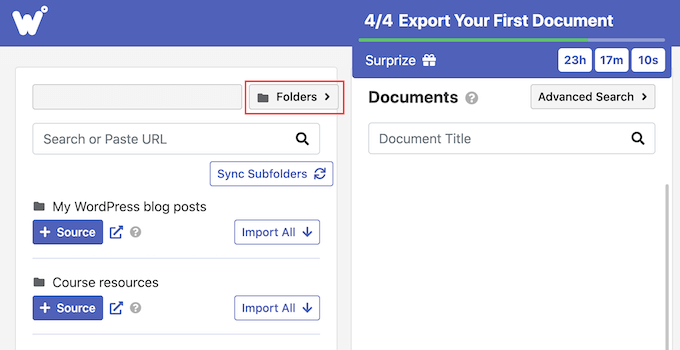
If you want to search for a folder, then simply open the dropdown menu next to your email address and select ‘Folders.’
After that, type the name of the file or folder into the ‘Search’ field. Another option is to paste the item’s link directly into the ‘Search’ field.
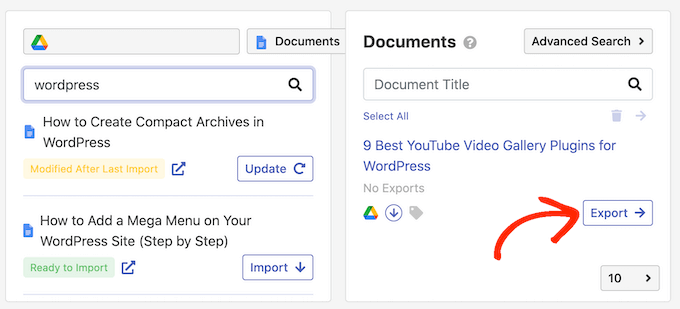
To add a document to the import queue, go ahead and click on its ‘Import’ button.
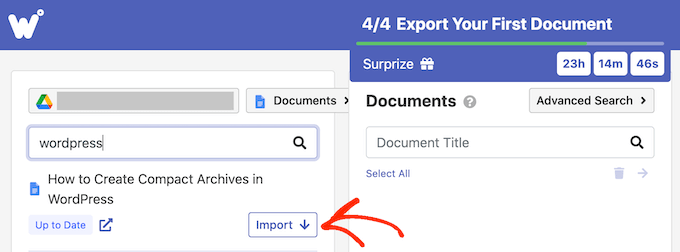
After a few moments, the file will appear in the ‘Documents’ section. To add more documents to the queue, just repeat the same process described above.
If you want to add a folder to the import queue, then click on its ‘+ Source’ button.
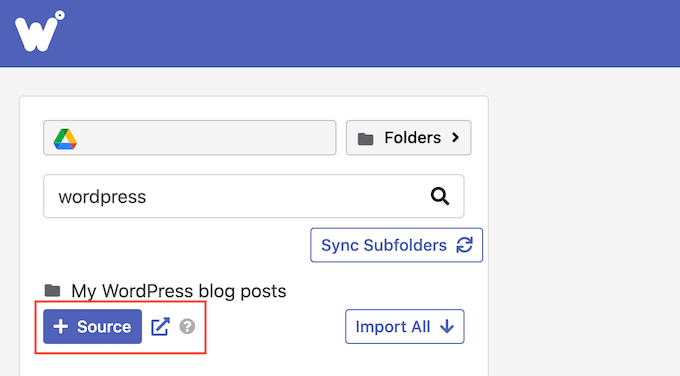
You’ll now see all the Google Docs that are inside that folder.
After that, it’s time to choose exactly which files you want to export from your Google Drive account. For each file, simply click on its ‘Export’ button, which adds the document to the export queue.
Configure the Google Doc Export
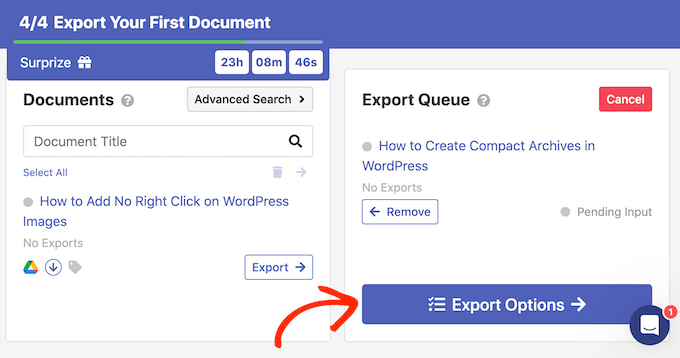
When you’re happy with the export queue, it’s time to configure your export. For example, Wordable can turn YouTube links into embedded videos, optimize images, add nofollow attributes to the Google Doc’s links, and more.
To get started, click on the ‘Export Options’ button.
Wordable does a good job of importing Google Docs into WordPress, but it’s still smart to manually check the imported content before publishing it.
With that being said, we recommend setting the ‘Publish Status’ to ‘Save as Draft.’
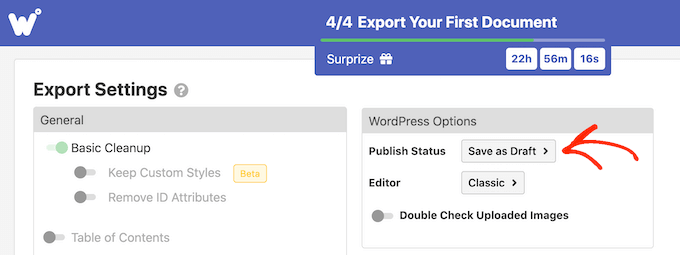
The plugin uses the Classic WordPress editor by default.
However, we recommend using the modern block-based editor instead, so open the ‘Editor’ dropdown and choose ‘Gutenberg.’
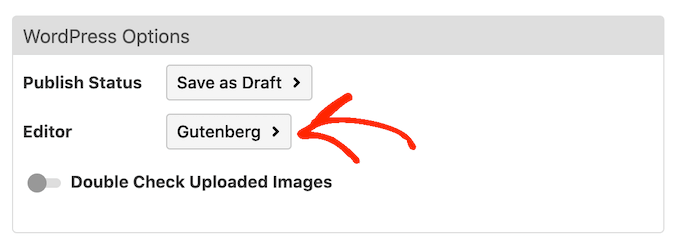
Note: If you leave this set to ‘Classic’ then Wordable will import the document into a new Classic block within the block editor, unless you completely disable it. For more information on this topic, please see our guide on how to keep the classic editor.
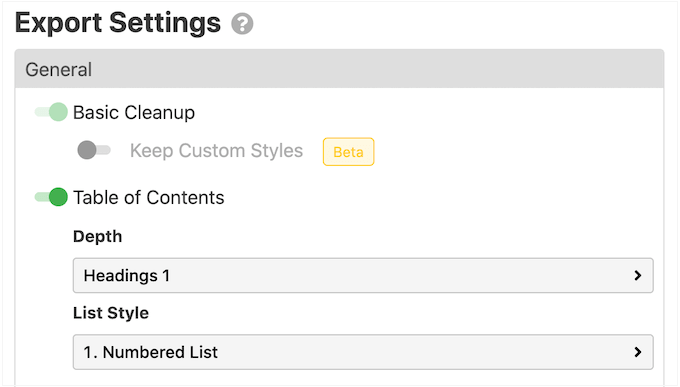
By default, Wordable does some basic cleanup, which typically removes most of the HTML tags and errors. However, there are lots more options you can customize.
In this guide, we’ll cover some of the major settings, but you can learn more about any setting by hovering your mouse over it, and then reading the tooltip that appears.
If you write longer documents with lots of headings, then you may want to start by enabling the ‘Table of Contents’ slider. This creates a table of contents using the headings in the Google Doc.
After enabling this slider, you can choose which headings Wordable will add to its table of contents, using the ‘Depth’ dropdown menu. You can also choose between the numbered and bullet list styles using the ‘List Style’ dropdown.
If you’re running an affiliate marketing website or regularly link to external websites, then it’s usually a good idea to mark these links as no-follow. A nofollow link tells search engines not to pass any link authority to the website you’re linking to.
To mark all the Google Doc links as nofollow, enable the following slider: ‘Apply nofollow Attribute to All Links.’ You may also want to enable the ‘Open Links in New Tab’ slider, as this will help keep visitors on your website.
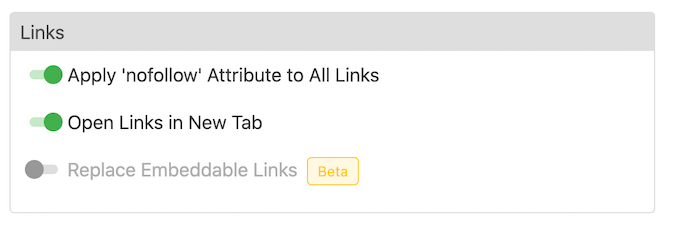
If your document has links to Instagram or YouTube content, then Wordable can try to convert this content into embedded media.
To use this feature, enable the ‘Replace Embeddable Links’ slider.
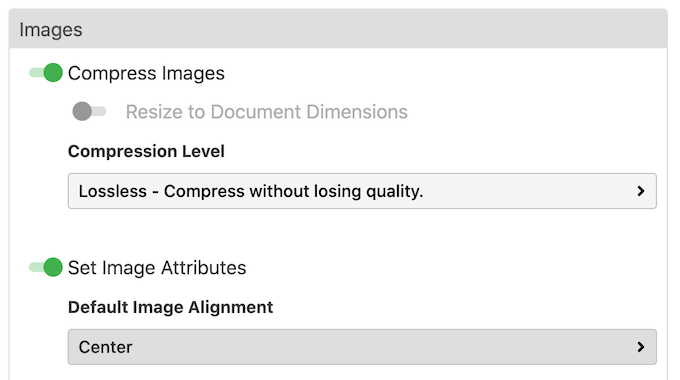
If your Google Doc contains any images, then we recommend scrolling to the ‘Images’ section. Here, you can change how Wordable shows those images.
For example, you can open the ‘Default Image Alignment’ dropdown and change how Wordable aligns images in the WordPress block editor.
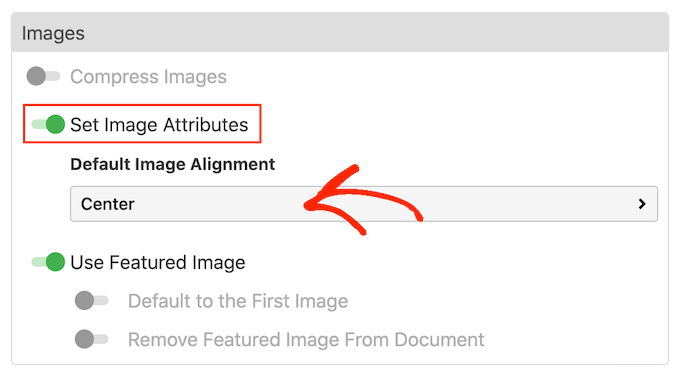
Wordable can also use the post’s first image as the featured image, which is the post’s primary graphic. Featured images often appear next to the heading on your home page, and may also appear on social media.
Most popular WordPress themes come with built-in support for featured images, so it’s a good idea to enable the ‘Use Featured Image’ and ‘Default to the First Image’ slider.
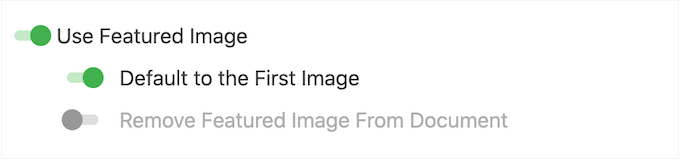
If you prefer to set the featured image manually, then you can disable the ‘Use Featured Image’ slider instead.
Large images can slow your website, which will have a negative effect on the visitor experience and can even damage your search engine rankings. With that in mind, it’s a bad idea to import images from Google Drive without optimizing them.
For the best results, we recommend optimizing your images before adding them to your Google Docs. This gives you complete control over the process, so you can reduce the size of your images without losing quality.
For more information, please see our guide on how to optimize images for web performance.
If you prefer, then Wordable can optimize your images during the import process. If you want to try this automatic optimization, then click to enable the ‘Compress Images’ slider.
You can then choose whether Wordable should perform lossless or lossy compression. Lossless is a better choice if you want to preserve image quality, while lossy will save you more space but may lose some quality.
There are more settings you can look at, but this should be enough to configure the import.
When you’re happy with the changes you’ve made, go ahead and click on ‘Export Now.’

At this point, you can save the settings as a template that you can apply to future imports.
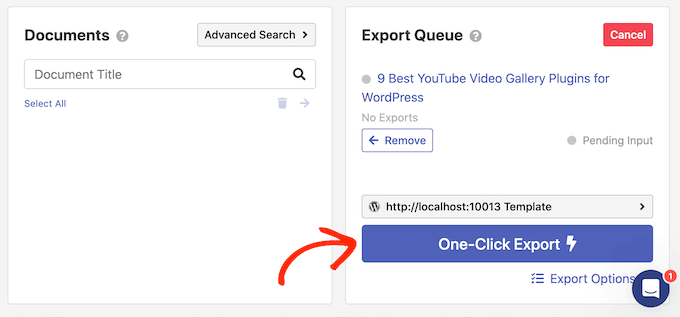
In the following image, we simply need to click ‘One Click Export’ to apply the template and import the document.
This can save you a ton of time, especially if you use the same settings over and over.
To create a template, type a title into the ‘Template name’ field and then click on the ‘Enable One-Click Exports’ button.
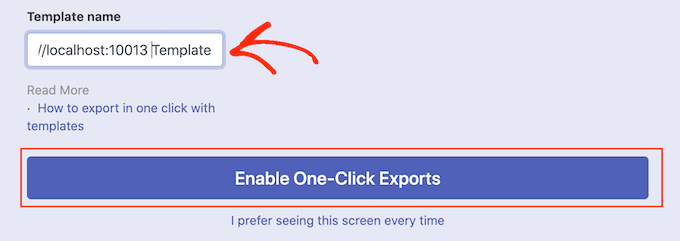
If you don’t want to use templates, then click on the following link instead: ‘I prefer seeing this screen every time.’
No matter what you click, Wordable will start exporting the Google Document.
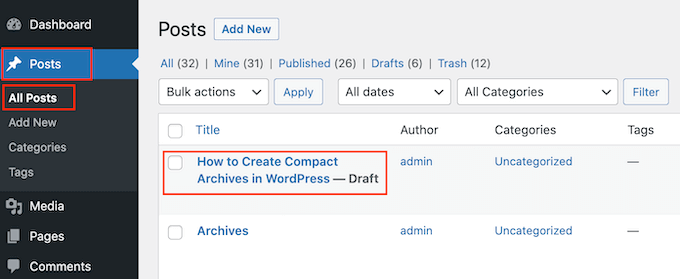
After a few moments, go to Posts » All Posts in the WordPress dashboard and you’ll see the Google Doc as a new draft.
To import more Google Drive documents into WordPress, simply follow the same process described above.
We hope this article helped you learn how to easily import Google Docs to WordPress. You may also want to check out how to create a file upload form in WordPress and our list of 24 expert tips to speed up WordPress performance.
If you liked this article, then please subscribe to our YouTube Channel for WordPress video tutorials. You can also find us on Twitter and Facebook.
The post How to Easily Import Google Docs to WordPress (4 Ways) first appeared on WPBeginner.