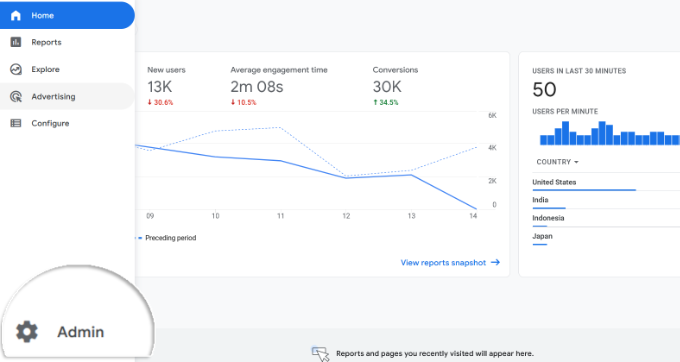
Do you want to remove the ‘powered by WordPress’ footer links on your site?
By default, most WordPress themes have a disclaimer in the footer, but this can make your site look unprofessional. It also leaves less space for your own links, copyright notice, and other content.
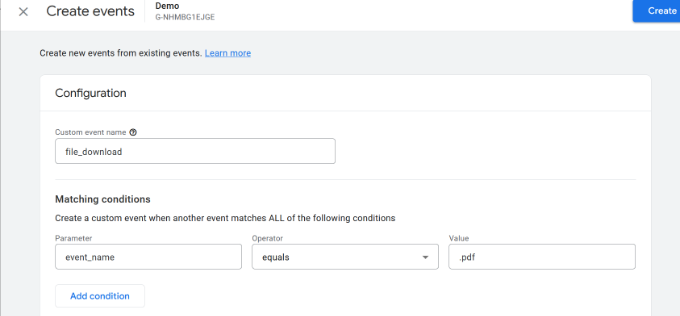
In this article, we will show you how to remove the powered by WordPress footer links.
Why Remove the WordPress Footer Credits?
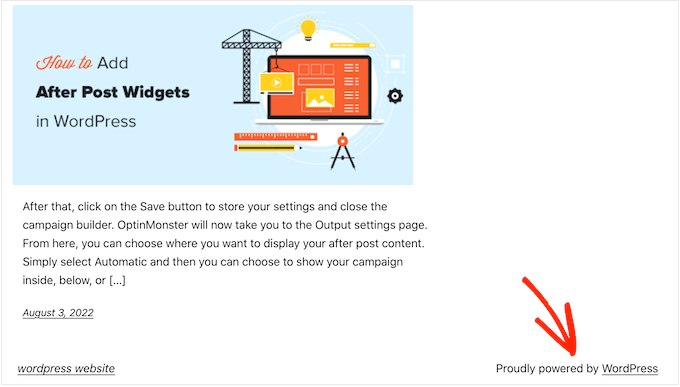
The default WordPress themes use the footer area to show a ‘Proudly powered by WordPress’ disclaimer, which links to the official WordPress.org website.
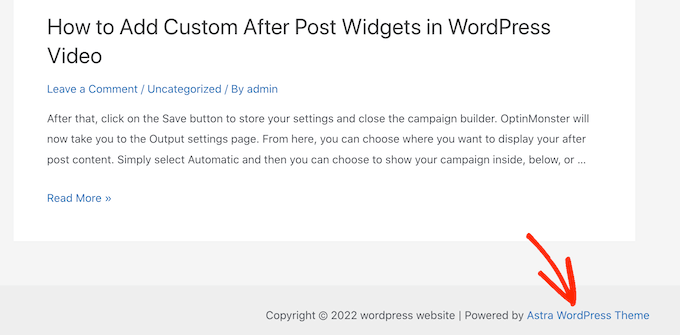
Many theme developers take this further and add their own credits to the footer.
In the following image, you can see the disclaimer added by the Astra WordPress Theme.
While great for the software developers, this ‘Powered by….’ footer can make your site seem less professional, especially if you’re running a business website.
It also lets hackers know that you’re using WordPress, which could help them break into your site.
For example, if you’re not using a custom login URL, then hackers can simply add /wp-admin to your site’s address and get to your login page.
This disclaimer also links to an external site, so it encourages people to leave your website. This can have a negative impact on your pageviews and bounce rate.
Is it legal to remove WordPress footer credit links?
It is perfectly legal to remove the footer credits link on your site because WordPress is free, and it is released under the GPL license.
Basically, this license gives you the freedom to use, modify, and even distribute WordPress to other people.
Any WordPress plugin or theme that you download from the official WordPress directory is released under the same GPL license. In fact, even most commercial plugins and themes are released under GPL.
This means you’re free to customize WordPress in any way you want, including removing the footer credits from your business website, online store, or blog.
With that in mind, let’s see how you can remove the powered by WordPress footer links.
Video Tutorial
If you don’t want the video or need more instructions, then simply use the quick links below to jump straight to the method you want to use.
Method 1. Removing the ‘Powered by’ Link Using the Theme Settings
Most good theme authors know that users want to be able to edit the footer and remove the credit links, so many include it in their theme settings.
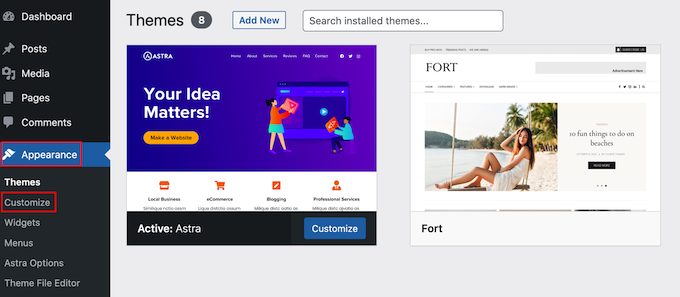
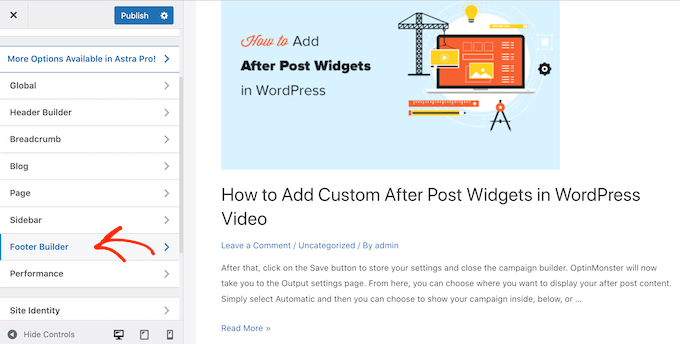
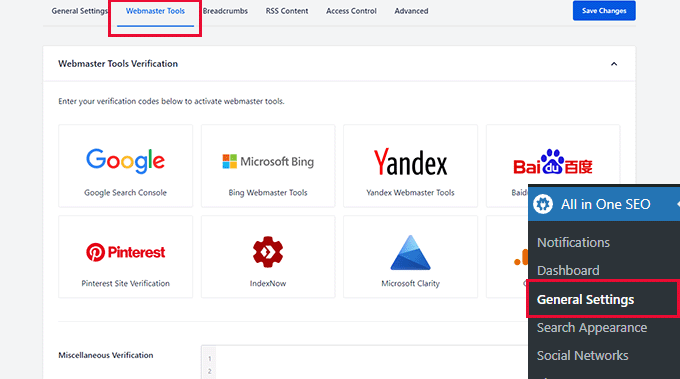
To see whether your theme has this option, go to Appearance » Customize in your WordPress admin dashboard.
You can now look for any settings that let you customize your site’s footer, and then click on that option.
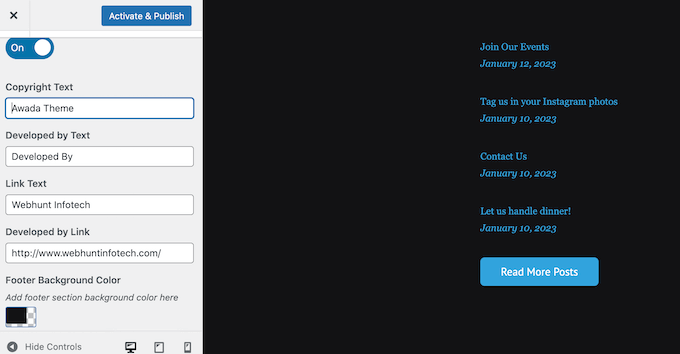
For example, the Astra theme has a section called ‘Footer Builder.’
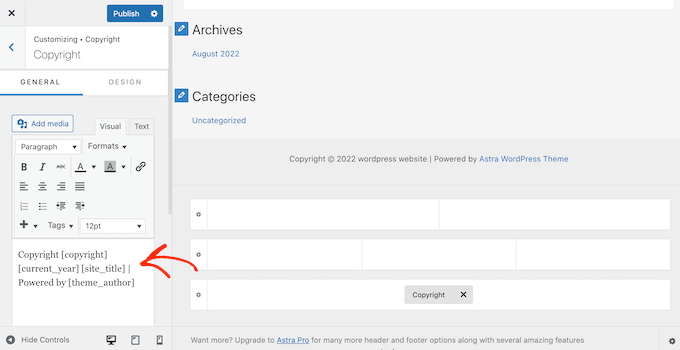
If you’re using this theme, then simply click on the ‘Footer’ section and select ‘Copyright.’
Doing so will open a small editor where you can change the footer text, or even delete it completely.
No matter how you remove the footer disclaimer, don’t forget to click on ‘Publish’ to make the change live on your site.
Method 2. Removing the ‘Powered by’ Credit Using Full Site Editing
If you’re using a block theme, then you can remove the footer disclaimer using Full Site Editing (FSE) and the block editor.
This is a quick and easy way to remove the ‘Powered by’ credit across your entire site, although it won’t work with all themes.
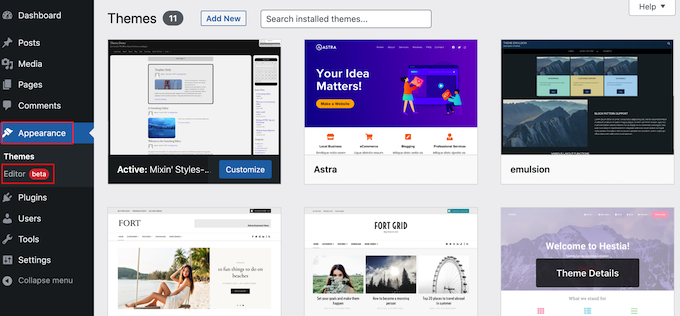
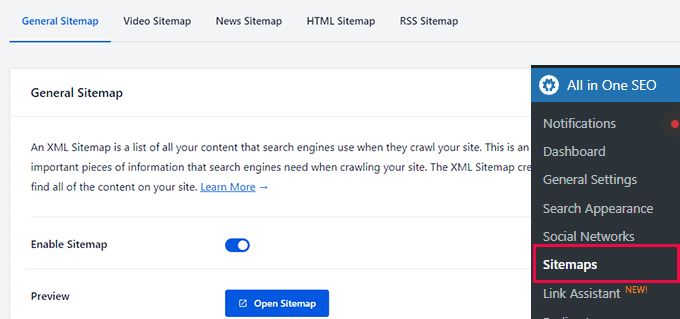
To launch the editor, go to Appearance » Editor.
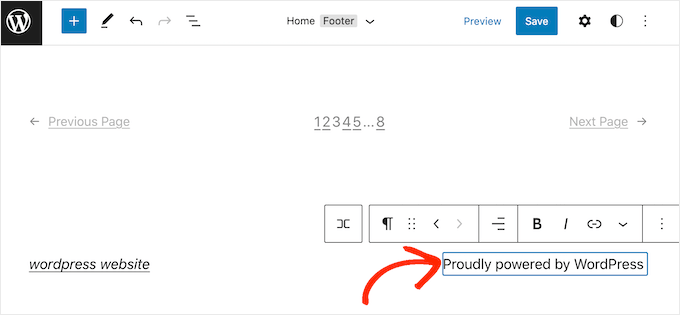
Then, scroll to your website’s footer and click to select the ‘Powered by’ disclaimer.
You can now replace it with your own content, or you can even delete the disclaimer completely.
When you’re happy with how the footer looks, simply click on ‘Save.’ Now if you visit your site, you’ll see the change live.
Method 3. How To Remove the ‘Powered by’ Disclaimer Using a Page Builder
Many WordPress websites use the footer to communicate important information, such as their email address or phone number. In fact, visitors might scroll to the bottom of your site looking specifically for this content.
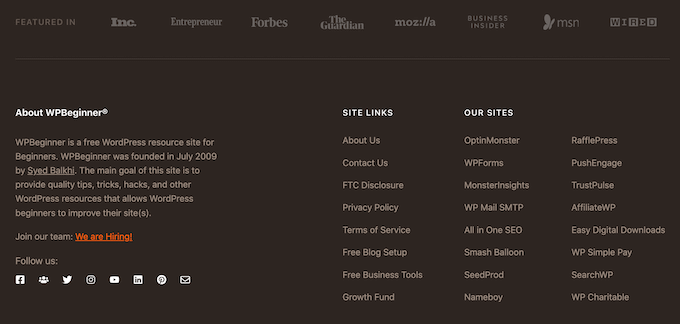
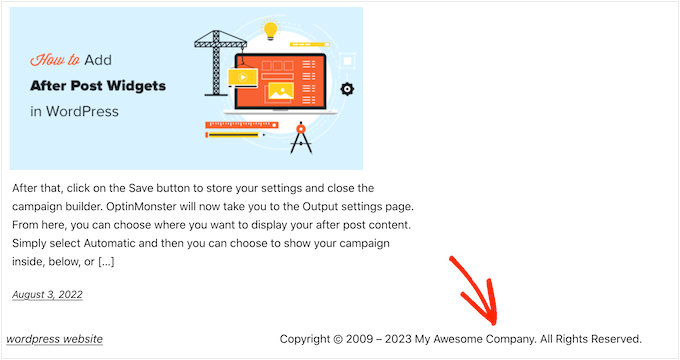
With that in mind, you may want to go one step further and replace the ‘Powered by’ text with a custom footer. This footer could contain links to your social media profiles, links to your affiliate partners, a list of your products, or other important information and links.
You can see the WPBeginner footer in the following image:
The best way to create a custom footer is by using SeedProd. It is the best page builder plugin and comes with over 180 professionally-designed templates, sections, and blocks that can help you customize every part of your WordPress blog or website.
It also has settings that allow you to create a global footer, sidebar, header, and more.
First, you need to install and activate SeedProd. For more details, see our step-by-step guide on how to install a WordPress plugin.
Note: There’s also a free version of SeedProd that allows you to create all kinds of pages using the drag-and-drop editor. However, we’ll be using the premium version of SeedProd since it comes with the advanced Theme Builder.
After activating the plugin, SeedProd will ask for your license key.
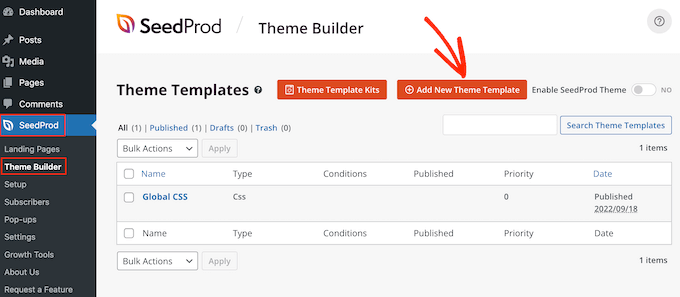
Once you’ve done that, go to SeedProd » Theme Builder. Here, click on the ‘Add New Theme Template’ button.
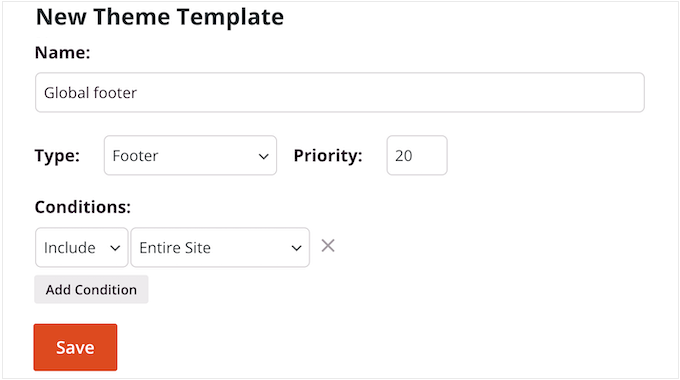
In the popup, type in a name for the new theme template.
Once you’ve done that, open the ‘Type’ dropdown and choose ‘Footer.’
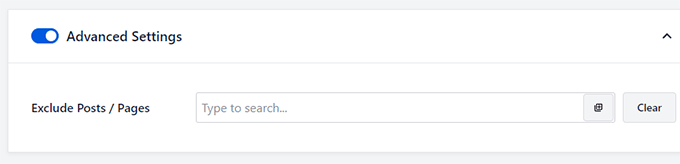
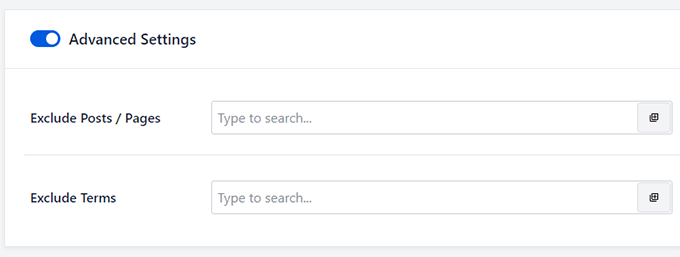
SeedProd will show the new footer template across your entire site by default. However, you can limit it to specific pages or posts using the ‘Conditions’ settings.
For example, you may want to exclude the new footer from your landing pages, so it doesn’t distract from your main call to action.
When you’re happy with the information you’ve entered, click on ‘Save.’
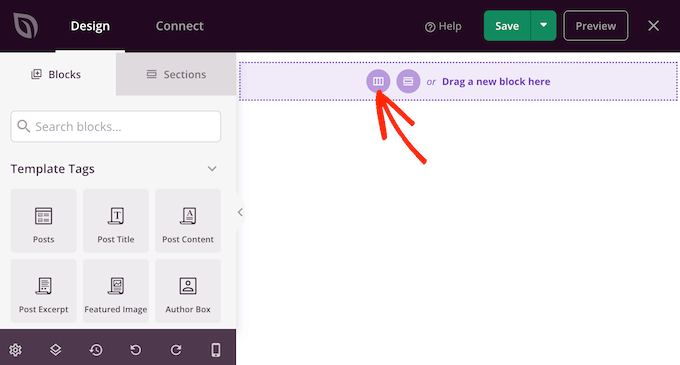
This will load the SeedProd page builder interface.
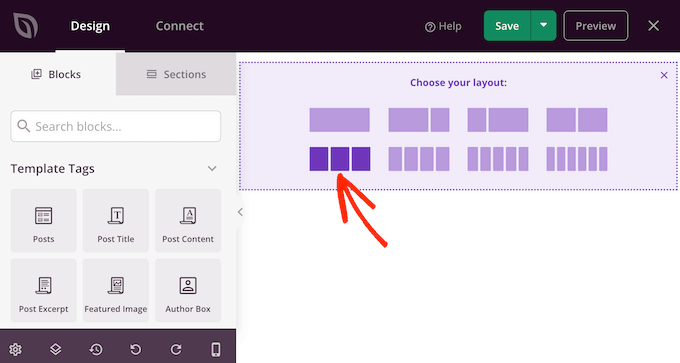
At first, your template will show a blank screen on the right and your settings on the left. To start, click on the ‘Add Columns’ icon.
You can now choose the layout that you want to use for your footer. This allows you to organize your content into different columns.
You can use any layout you want, but for this guide, we’re using a three-column layout.
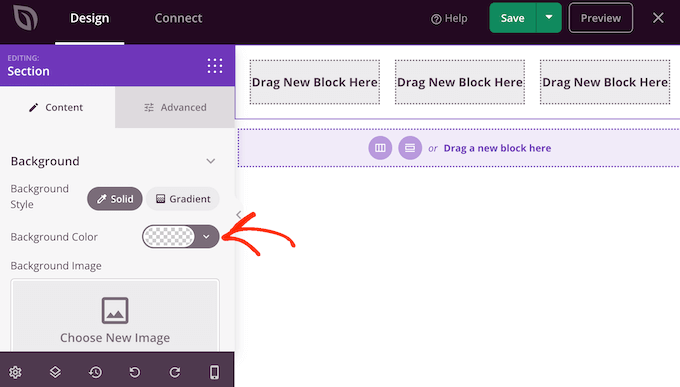
Next, you can edit the footer’s background so that it matches your WordPress theme, company branding, or logo.
To change the background color, simply click on the section next to ‘Background Color’ and then use the controls to choose a new color.
Another option is to upload a background image.
To do this, either click on ‘Use Your Own Image’ and then choose an image from the WordPress media library, or click on ‘Use a stock image.’
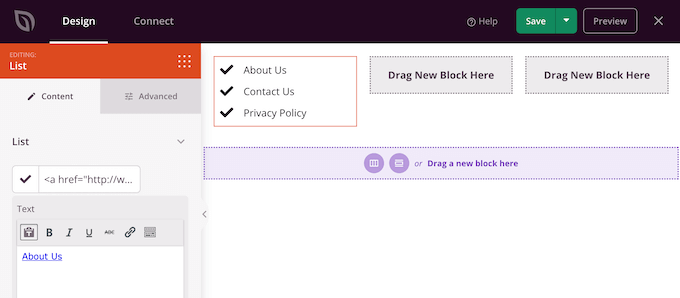
When you’re happy with the background, it’s time to add some content to the footer.
Simply drag any block from the left-hand menu and drop it onto your footer.
After adding a block, click to select that block in the main editor.
The left-hand menu will now show all of the settings for customizing the block.
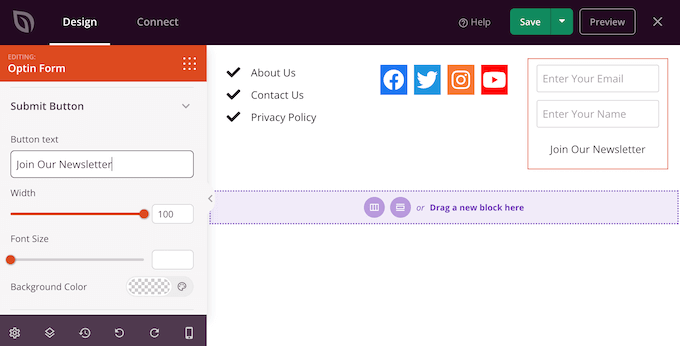
Simply keep repeating these steps to add more blocks to your footer.
You can also change where each block appears by dragging them around your layout.
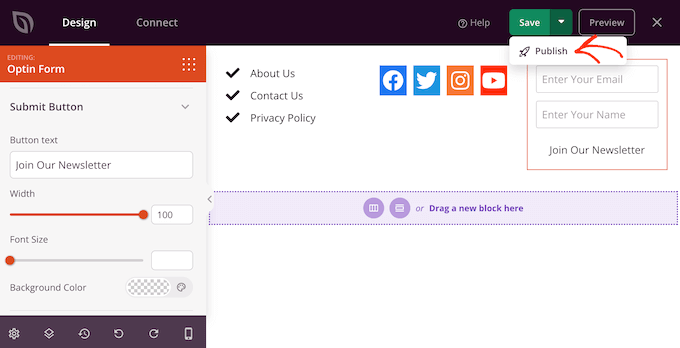
When you’re happy with your design, click on the ‘Save’ button.
Then, you can select ‘Publish’ to complete your design.
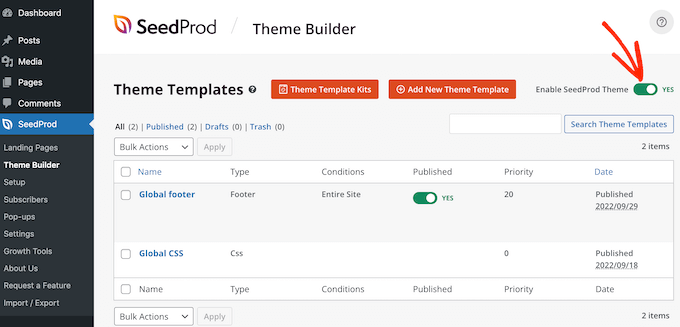
For your new footer to show up on your website, you’ll need to finish building your WordPress theme with SeedProd.
After building your theme, go to SeedProd » Theme Builder. Then, click on the ‘Enable SeedProd Theme’ switch.
Now, if you visit your website you’ll see the new footer live.
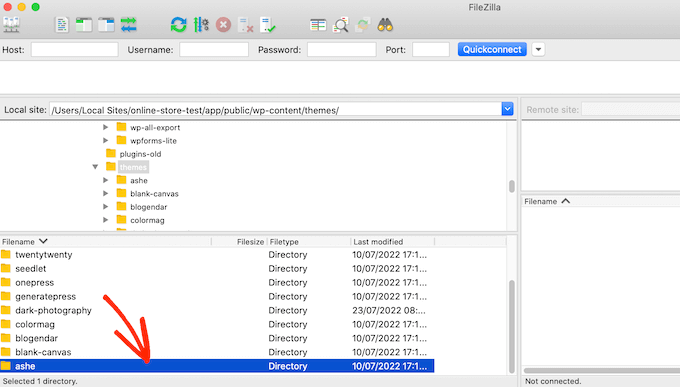
Once you’ve connected to your site, go to /wp-content/themes/ and then open the folder for your current theme or child theme.
Inside this folder, find the footer.php file and open it in a text editor such as Notepad.
In the text editor, look for a section of code that includes the ‘powered by’ text. For example, in the Twenty Twenty-One theme for WordPress, the code looks like this:
You can either delete this code entirely or customize it to suit your needs. For example, you may want to replace the ‘Proudly powered…’ disclaimer with your own copyright notice.
After making your changes, save the file and upload it to your server. If you check your site, then the footer credit will have disappeared.
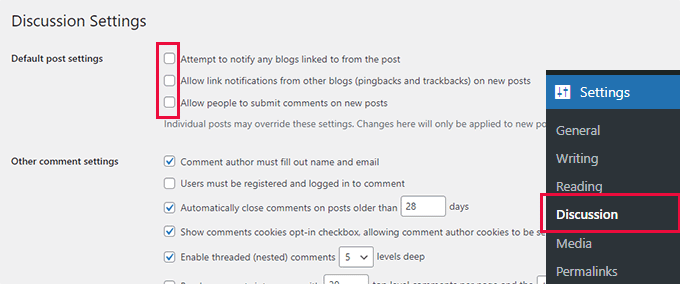
Warning! Avoid the CSS Method at All Costs!
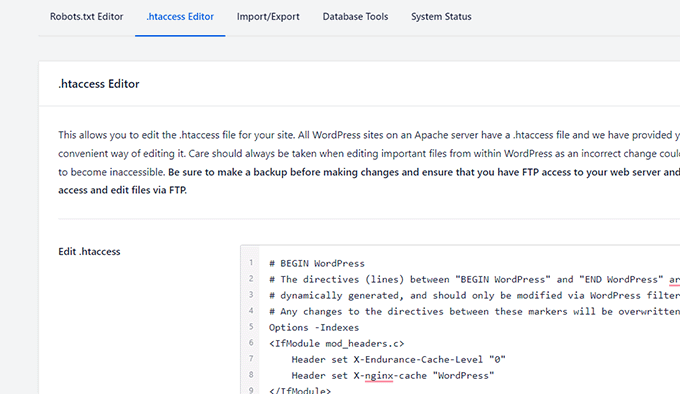
Some WordPress tutorial sites may show you a CSS method that uses display: none to hide the footer credit links.
While it looks simple, it’s very bad for your WordPress SEO.
Many spammers use this exact technique to hide links from visitors while still showing them to Google, in the hopes of getting higher rankings.
If you do hide the footer credit with CSS, then Google may flag you as a spammer and your site will lose search engine rankings. In the worst-case scenario, Google may even delete you from their index so you never appear in search results.
Instead, we strongly recommend using one of the four methods we showed above. If you can’t use any of these methods, then another option is hiring a WordPress developer to remove the footer credit for you, or you might change your WordPress theme.
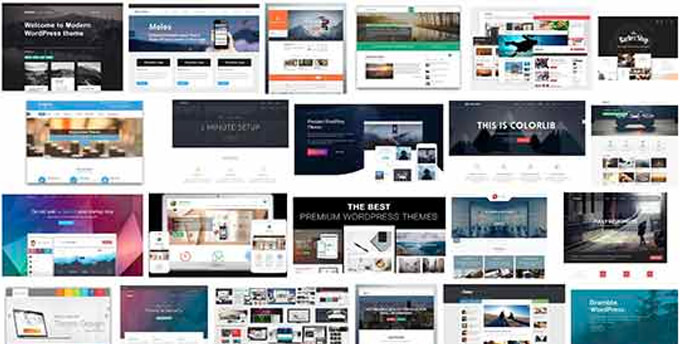
Are you looking for the best WordPress Crossfit themes?
Considering the number of themes out there, choosing the right one can be quite overwhelming. You’ll have to find a balanced theme that has the right features and the perfect look for a health and fitness-related website.
In this article, we will share some of the best WordPress themes for Crossfit, health, and fitness websites.
Making a Crossfit Website Using WordPress
If you look around the health and fitness industry, you will notice many top brands using WordPress. That’s because WordPress is extremely flexible and easy to use.
WordPress is the most popular website builder in the world. It powers over 43% of all websites.
However, you need to make sure that you are using the right type of WordPress. Often people get confused between WordPress.com vs WordPress.org. You need to use WordPress.org to get all the features and functionality of WordPress.
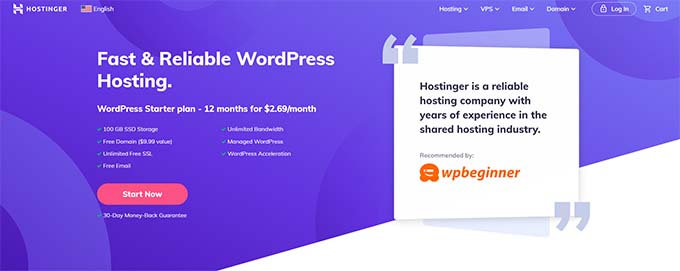
To get started, you will need a domain name and WordPress hosting. A domain name is your site’s address on the web, like wpbeginner.com or google.com. Web hosting is the storage for all your website files.
We recommend using Bluehost for web hosting. They are one of the largest hosting companies in the world, and an official WordPress recommended hosting partner.
The best part is that WPBeginner users get a free domain name and free SSL certificate.
Next, you need to install a WordPress theme. Select a theme from our expert pick below and follow the instructions on how to install a WordPress theme guide.
Now that we’re ready, let’s check out some of the best WordPress themes for CrossFit and fitness websites.
This list contains both free and paid themes, and all of them are mobile responsive.
Astra is a popular WordPress theme with multiple templates. It has a built-in website demo for gym, CrossFit, and fitness websites. This includes sections for about me, awards, training, schedule, rates, image gallery, and more.
Astra has multiple layout choices allowing you to create a unique homepage layout and custom landing pages. To make it even easier, it works great with drag-and-drop page builders like Beaver Builder and Elementor.
Plus, Astra is designed for good WordPress search engine optimization (SEO). This helps your crossfit site to be found in search engines like Google.
SeedProd is the best WordPress website and theme builder on the market. It lets you make your own CrossFit and gym theme, and then you can use this custom theme for your website.
SeedProd is easy to use for anyone and requires no coding knowledge. It comes with a powerful drag-and-drop builder that you can use to design your theme, make your website, and create landing pages.
To make it more simple, SeedProd provides built-in theme templates for different business niches. These templates are ready-to-use, and you just need to replace the content to launch your site.
Divi is a powerful and stylish WordPress theme designed to create all types of WordPress websites. It has multiple ready-made layouts and Divi Builder support to create your own pages using powerful drag-and-drop tools.
It includes photo galleries, events, schedules, and an about section. This theme has custom widgets for social media integrations, featured posts, and more. Divi fully supports eCommerce and can be used to create an online store for your fitness products.
OceanWP is an all-purpose WordPress theme, including a ready-made website template for gyms, health, and fitness websites. It includes easy-to-manage sections to add instructors, classes, locations, and more. It also allows you to show different classes, training sessions, and pricing tables.
The theme setup is easy, and it also has a 1-click demo content installer. It has many flexible customization options to upload your own logo, choose custom colors, or change fonts. OceanWP is eCommerce-ready and optimized for SEO.
Ultra is a modern WordPress theme designed specifically for gyms, CrossFit, health, and fitness training businesses.
Its Fitness template comes with a built-in section for memberships, training, amenities, and apparel. It allows you to easily manage schedules, classes, and training sessions. It also includes an activity section where you can add different activities.
Ultra is a highly flexible WordPress theme with tons of options, multiple layouts, custom widgets, sidebars, and unlimited colors. Plus, it’s translation ready and can be used to create multilingual websites using a translation plugin such as WPML.
Landing is a modern multi-purpose WordPress theme designed to create one-page websites. It’s super flexible and comes with multiple ready-to-use pages that you can install with 1-click. It has multiple header styles, an events section, a portfolio, and eCommerce support.
Other features include a theme options panel, parallax background, video background, and Themify Builder.
7. Neve
Neve lets you tell your fitness story through your diet plan and photography. It’s a beautifully crafted WordPress theme with a minimalist design and gorgeous image galleries. It includes sections for portfolio, featured content, and eCommerce products.
Wellness also has a pain-free setup process and even includes a theme setup guide, so you can get online within minutes.
Aspire is a modern and stylish WordPress theme for gyms, fitness centers, CrossFit, and sports websites. It features a beautifully crafted homepage with a fullscreen header background and popup-style subscription box. It offers flexible options for different layouts, headers, templates, and more.
Other notable features include WooCommerce support, widget areas, custom page templates, photo galleries, etc.
Hestia Pro is an excellent WordPress multi-purpose theme that can be used for gyms, fitness, and health websites. It ships with a fullscreen image slider, an eCommerce-ready layout, a separate blog page, and call-to-action buttons. This theme has homepage sections for your featured content.
Hestia Pro comes with its own set of companion plugins that you can activate to add new features to your website. It’s fully compatible with drag-and-drop page builders such as Visual Composer. All the theme options can be easily set up using the live theme customizer.
With Hestia Pro, your site will always look great on mobile devices. The theme is fully responsive and retina ready.
VW Fitness is a free WordPress theme designed for gyms, fitness, and weight training websites. It includes a banner section, testimonials section, appointment form section, call to action button, and social media buttons.
All the theme options can be easily set up using the live theme customizer. It has a limited slider for the homepage. More features can be added using third-party WordPress plugins. For instance, you could easily add a contact form to your site.
Stack is a multi-purpose and metro designed theme. It makes a great CrossFit WordPress theme and can be easily used for gym fitness, CrossFit, or sports website.
It features a sidebar-based navigation menu, a custom logo, and social icons. Two key features of this theme are the masonry layout and infinite scrolling. It supports drag-and-drop page builders to design your own layout. Stack is easy to get started with and comes with a theme setup dashboard included.
Extra is a modern WordPress theme for personal trainers, gyms, and sports websites. It features a polished professional look with a beautiful slider and parallax effects. It includes custom page templates, unlimited color choices, multiple header layouts, and menu styles.
Inside, you will also find the Divi drag-and-drop page builder, sidebars, multiple layout choices, Google Fonts, several custom widgets, a custom admin panel, and more.
Consulting is a free WordPress theme perfect for fitness bloggers, CrossFit, and gym consultants. It includes multiple-page templates that allow you to show your classes, training, and schedule. It has a beautiful full-width homepage slider.
Consulting uses blurbs to display recent posts and featured content. All theme options can be set up using the live theme customizer.
Spencer is a stylish WordPress theme that can be used to create websites for CrossFit, gyms, and fitness businesses. It ships with a sticky navigation menu, newsletter sign-up form, fullscreen header background, and call to action button.
The theme setup is quite simple. The homepage uses a widgetized layout, so you just drag and drop content widgets to set it up. Spencer supports all popular page builder plugins out of the box.
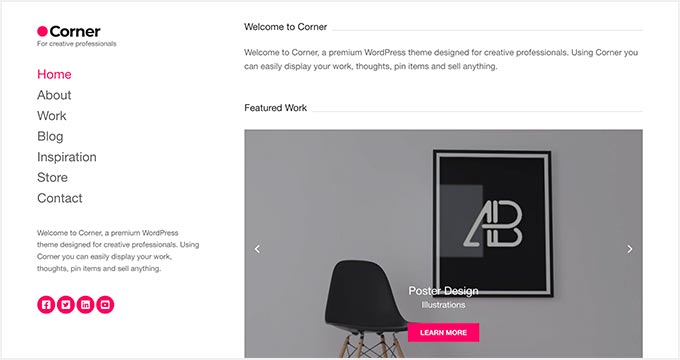
Corner is an excellent WordPress multipurpose theme. It comes with a 2-column layout and a sidebar navigation menu where you can easily add your pages, welcome text, and social icons.
There’s a featured slider on the homepage to display photos. You can also add call-to-action buttons on slider images to redirect users to CrossFit and gym landing pages.
Moreover, it supports WooCommerce to sell gym equipment and collect payments online. The theme is easy to set up using page builder plugins and WordPress live customizer.
Listable is a WordPress theme that allows you to build a local directory of businesses and places. For instance, you could create a directory of local gyms, fitness training, and adventure events.
It lets users submit their listings, add listings to favorites, and manage their places from your WordPress site. And you can charge for a listing submission and service request to make money online.
This theme also includes beautiful colors and fonts, social media integration, and tons of customization options.
Pranayama Yoga is a free WordPress theme for yoga and health-related websites. It features a simple, spacious layout with bright colors. It includes a custom menu, a welcome banner, about information, courses, trainers, and testimonial sections.
It has footer widget areas and a right sidebar with custom widgets. All the theme options can be set up using the live theme customizer, and you can see a live preview of your website while making changes.
Inspiro is a multipurpose WordPress theme with a beautiful fullscreen video background, video gallery, and a lightbox popup to view videos. This makes it a great option to use videos to inspire your customers or promote your business.
Inspiro has a powerful portfolio section that you can use to showcase your gym inspiration, fitness videos, or photo galleries. It also includes uniquely designed templates and a drag-and-drop page builder to create your own layouts. It’s easy to customize and comes with a powerful theme options panel.
Flevr is a highly customizable WordPress multipurpose theme for all kinds of business websites. It features a clean white navigation menu on top of a fullscreen background image with a welcome message and a call to action button. The homepage uses a widgetized layout, which allows you to just drag and drop content widgets to create your homepage.
It also uses parallax effects on the homepage to create a visually stunning user experience. It includes multiple color choices, page templates, social media widgets, content discovery widgets, and a beautiful slider.
Poseidon is a free WordPress theme designed for health and fitness websites, sports blogs, and gyms. It has a minimal layout with a custom logo and navigation menu on top. It features a fullscreen image slideshow to grab the user’s attention.
It uses a magazine-style layout to display your blog posts on the homepage with post format support. The theme setup is straightforward, and the theme can be easily customized with the live customizer.
Breakthrough is an iconic and simple WordPress theme for weight training, CrossFit, and bodybuilding websites. It features a neat layout with a welcome message alongside the call to action button. It’s built on the robust Genesis Framework, so it’s a great theme for fast WordPress performance.
Inside you will also find beautiful page templates, custom widgets for social media, and eCommerce support. Breakthrough can be easily edited using the page builder or the live theme customizer.
Eclecticon is a portfolio WordPress theme to share your adventure, sports, and CrossFit portfolio. It has a clean, minimalist layout with a sidebar navigation menu and a fullscreen image slider. The theme homepage also utilizes beautiful parallax effects and CSS animations.
It has a theme options panel to manage the theme settings easily. Eclecticon fully supports eCommerce and uses responsive design to look great on all devices.
Float is another great choice for gyms, CrossFit, and fitness training websites. It’s a highly flexible WordPress theme featuring a modern layout with bold colors. It includes an easy theme setup with drag-and-drop options.
Inside you will find a 1-click demo installer, social media integration, custom logo upload, multilingual support, and more. It also includes beautiful templates for your homepage, blog, and photo galleries.
Indigo is a super flexible WordPress theme to start a blog or any other kind of website. It ships with several ready-made websites which you can install with one click. After that, you can just replace the content with your own, and you are good to go.
If you want to create your own layouts, then Indigo makes that easy too. It has ready-to-use modules that you can drag and drop on any page to create your own layouts. It includes beautiful typography, templates, sliders, and many customization options.
Meridian Fitness is a WordPress theme for health, fitness, and gym websites. It includes built-in sections for classes with schedules and trainers. This allows you to easily add a gym schedule, workout routines, and trainer profiles to your website.
It also includes custom widgets, multiple color schemes, a class schedule template, a parallax effect, and more. It’s easy to set up, and all the theme options can be configured using the live customizer.
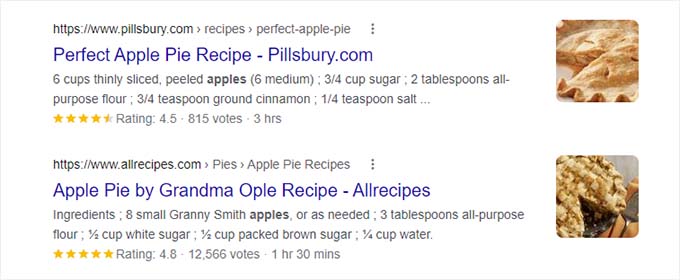
Do you want to show Google, Facebook, or Yelp reviews in WordPress?
Customer reviews encourage people to trust your website and buy from your business. There are lots of third-party sites where potential customers can see your reviews, but it’s also a good idea to show this content on your own website.
In this article, we will show you how to display business reviews from Google, Facebook, and Yelp in your WordPress site.
Why You Should Display Business Reviews in WordPress
There are lots of different websites where customers can review your company such as Google, Yelp, and Facebook. However, potential customers will need to visit these third-party websites in order to see the reviews.
With that being said, it’s a good idea to add Google, Yelp, and Facebook reviews to your WordPress website so that everyone can see them. For example, you might show positive reviews on your WooCommerce product pages, or your About Us page.
These reviews can convince customers to trust your company, even if they haven’t bought from you before.
With that said, let’s see how you can easily add Yelp, Google, and Facebook reviews to WordPress. Simply use the quick links below to jump straight to the platform you want to use.
How to Show Google, Facebook, and Yelp Reviews in WordPress
You could simply copy and paste the best reviews into your site, and then show them using a customer review plugin. However, depending on the plugin you use, you may need to add new reviews manually, which can take a lot of time and effort.
There will also be a delay between customers posting on sites like Yelp and Facebook, and those reviews appearing on your WordPress website.
With that in mind, it’s a good idea to create a review feed that updates automatically using the Reviews Feed Pro plugin.
This single plugin allows you to show reviews from all the biggest review platforms.
It also comes with pre-designed templates, so you can display your reviews in different layouts including showcases, carousels, grids, and more.
The Reviews Feed automatically copies your website’s design so the reviews look like a natural part of your website, rather than content embedded from another platform.
First, you’ll need to install and activate the plugin. If you need help, then please see our guide on how to install a WordPress plugin.
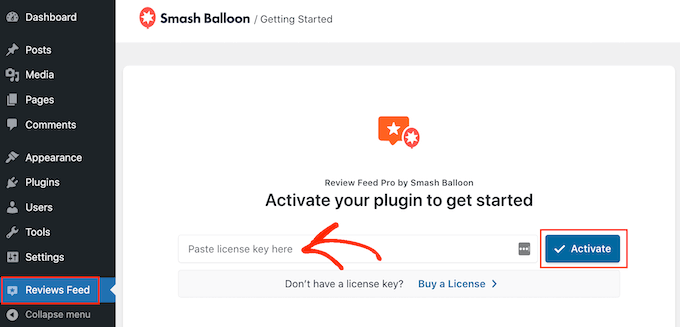
Upon activation, click on Reviews Feed in the left-hand menu. You can then add your Reviews Feed Pro license key and click on the ‘Activate’ button.
You’ll find the license key under your account on the Smash Balloon website.
After activating the plugin, you’re ready to show reviews from Google, Facebook, or Yelp.
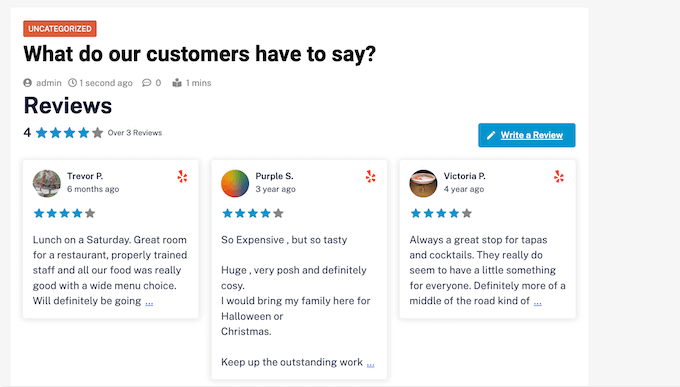
Method 1. How to Show Yelp Reviews in WordPress
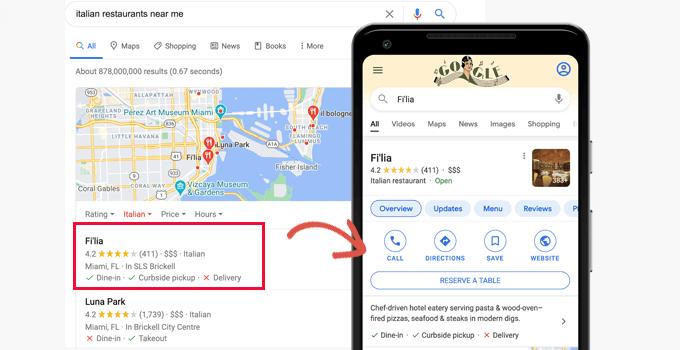
Yelp is a popular website where visitors can review restaurants, brands, services, products, and more.
If your business already has some positive Yelp reviews, then adding them to your website can get you more sales, members, appointments, and more.
Since Yelp is a public site, you can show reviews from any business that has a Yelp listing. For example, if you own a business listing blog or membership site, then you could show Yelp reviews for different local businesses on your website.
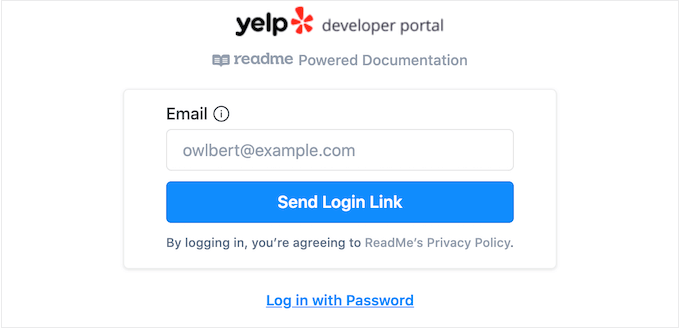
To add reviews to your website, you’ll need to create a Yelp API key. Simply go to the Yelp Developers page and type in your email address.
Then, click on the ‘Send Login Link’ button.
Note: If you don’t already have an account, then go to the Yelp signup page and follow the onscreen instructions to register.
After a few moments, Yelp will send a one-time login link to your email address. Simply open the email and use the ‘Click to Log in’ button.
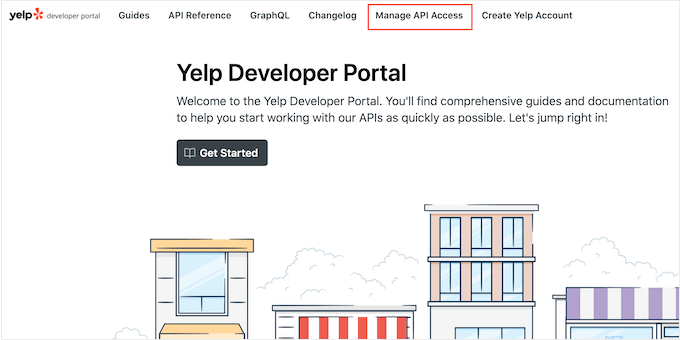
This takes you to the Yelp Developer Portal.
In the toolbar, click on Manage API Access.
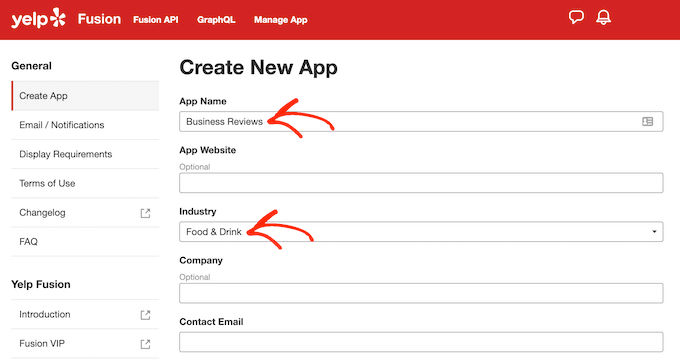
On this screen, type a name for your Yelp app into the ‘App Name’ field. This is just for your reference so you can use anything you want.
After that, open the ‘Industry’ dropdown and choose the industry that best reflects your website or business.
After that, type in your email address and add a description.
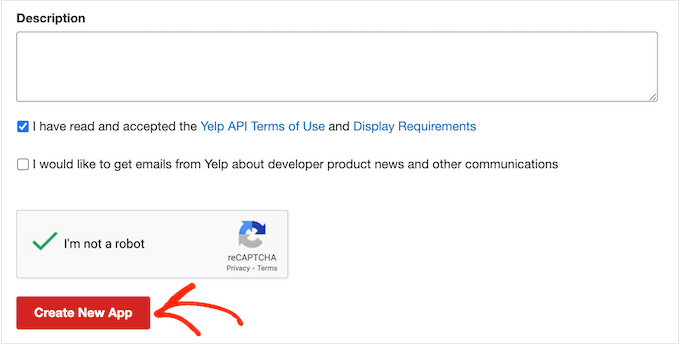
With that done, read the terms and conditions. If you’re happy to go ahead, then check the terms and conditions box, decide whether you want to get email updates from Yelp, and pass the captcha.
Finally, click on the ‘Create New App’ button.
After a few moments, you’ll see the following message ‘Great, your app has been created! Check your App ID and API Key below.’
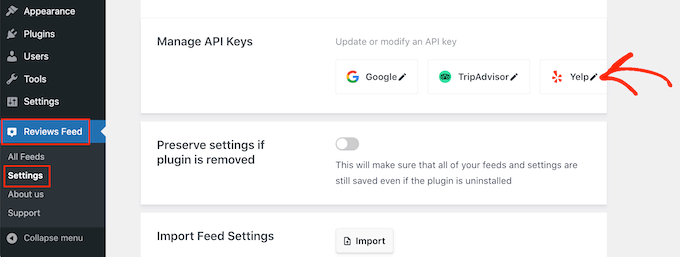
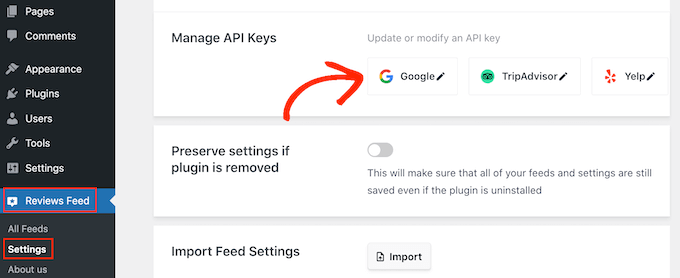
Simply go to Reviews Feed » Settings in the WordPress dashboard.
Then, scroll to Manage API Keys and click on the small pencil icon next to ‘Yelp.’
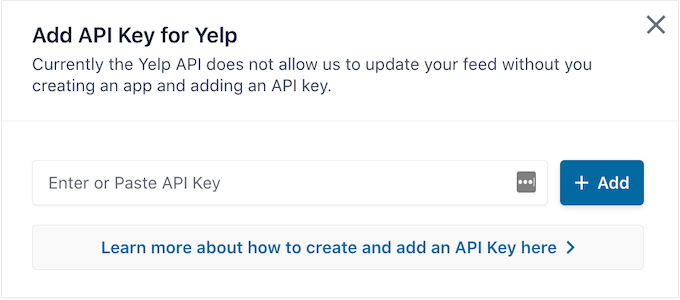
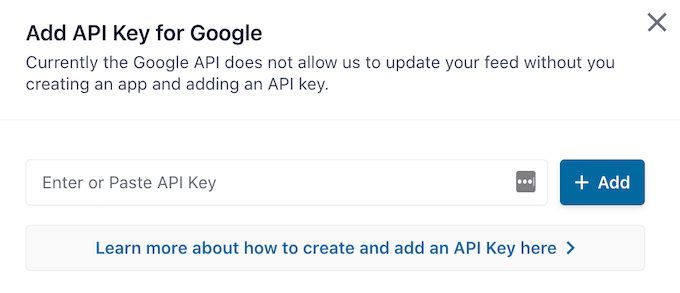
In the popup, add your Yelp API key.
Then, click on the ‘Add’ button.
With that setup out of the way, you’re ready to add Yelp reviews to your website.
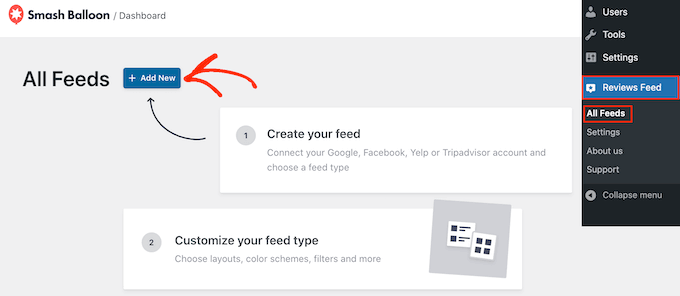
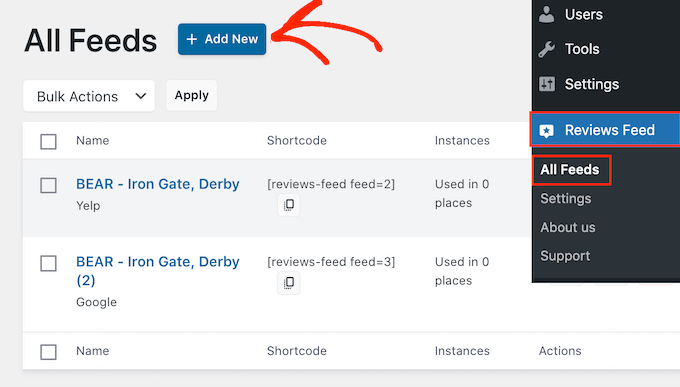
Simply go to Reviews Feed » All Feeds. Then, click on the ‘Add New’ button.
On the next screen, click on ‘Add New’ again.
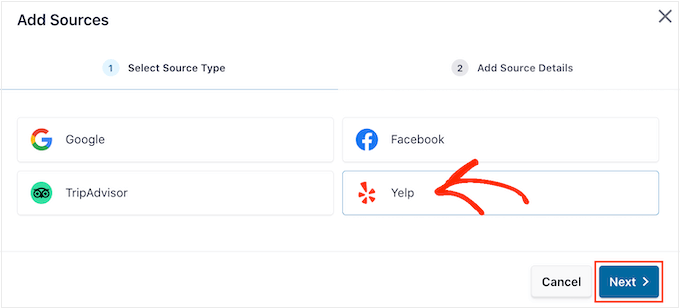
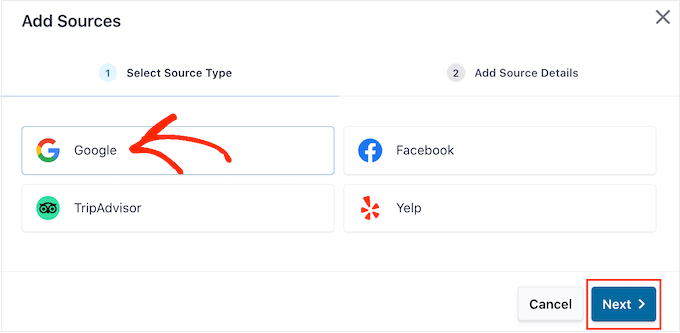
In the popup that appears, select ‘Yelp’ and then click on the ‘Next’ button.
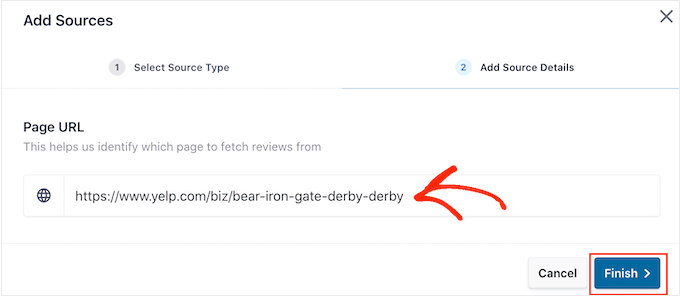
You can now add the URL of the Yelp page that you want to use. This can be a page that you own or any public third-party page.
After that, click on ‘Finish’.
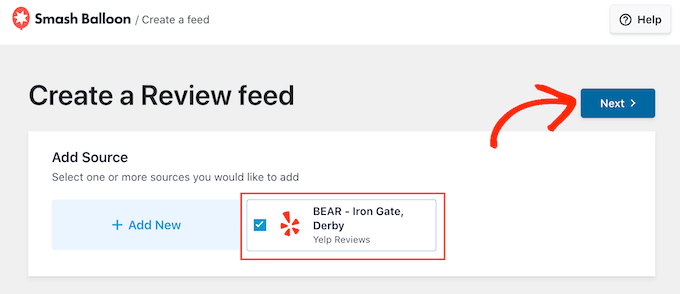
Smash Balloon will now show this Yelp page as a possible source.
To go ahead and create the feed, simply check the box next to the Yelp page and then click on ‘Next.’
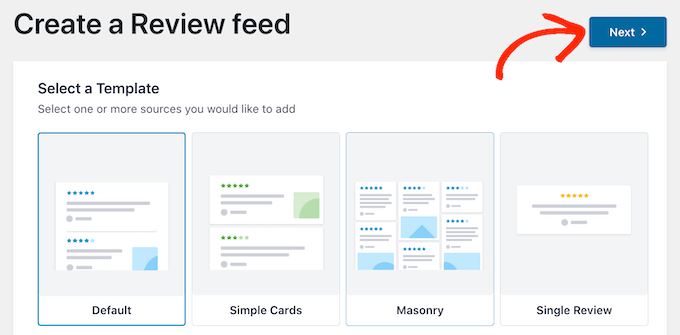
You can now choose a template to use for the review feed, such as a showcase carousel, grid carousel, or even a single review template.
After choosing a design, click on the ‘Next’ button.
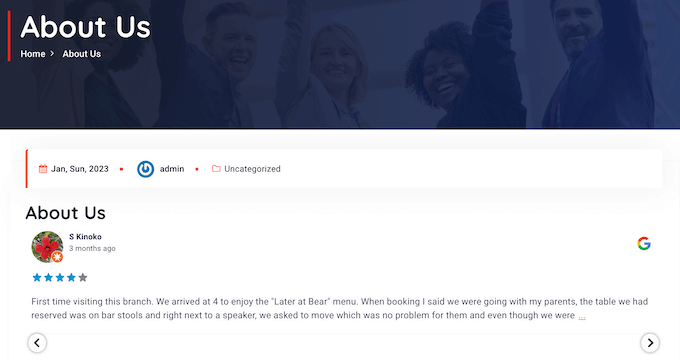
Smash Balloon will now show the Yelp review feed in its editor, ready for you to fine-tune.
For instructions on how to customize the feed and then add it to your site, skip to the end of this guide.
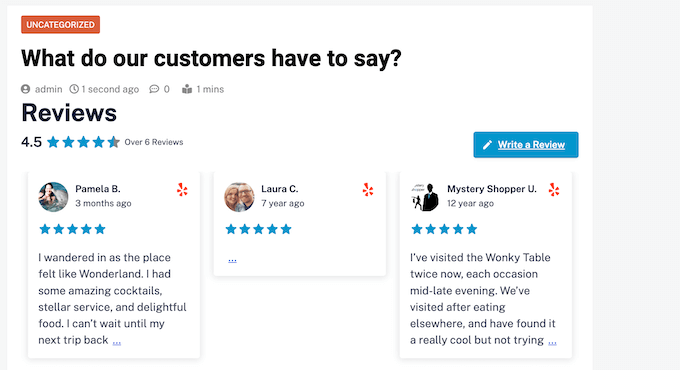
Method 2. How to Show Google Reviews in WordPress
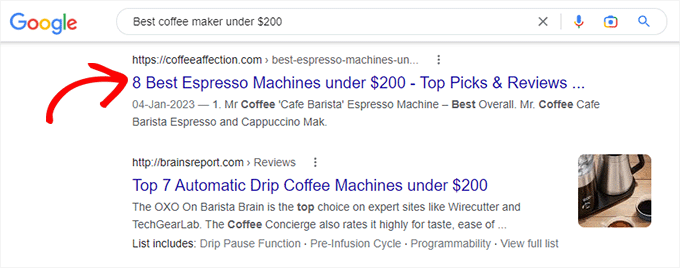
Google Reviews is another place where customers can review your business online. Once again, positive reviews are important for building trust and getting conversions, but these reviews can also affect where your site appears in the search results.
Lots of positive Google reviews and high rankings may improve your business’s search ranking, especially in local search results.
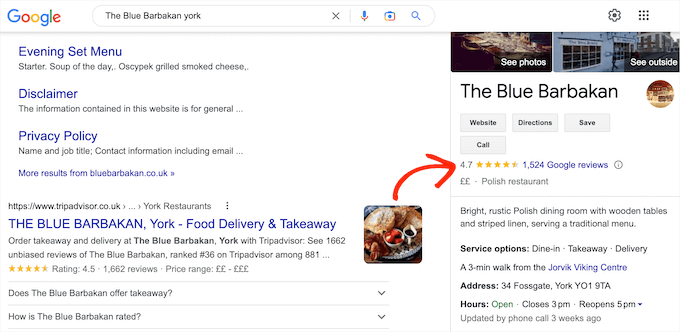
Google also shows your reviews on relevant search engine result pages.
By adding these reviews to your website, you can encourage people to visit your Google listing and leave you a positive review.
This may improve your WordPress SEO and the overall star rating that appears in relevant search engine results.
With that being said, let’s see how you can add Google reviews to your WordPress website.
To start, you’ll need to create a Google API key, so head over to the Google Console and sign in using your Google account.
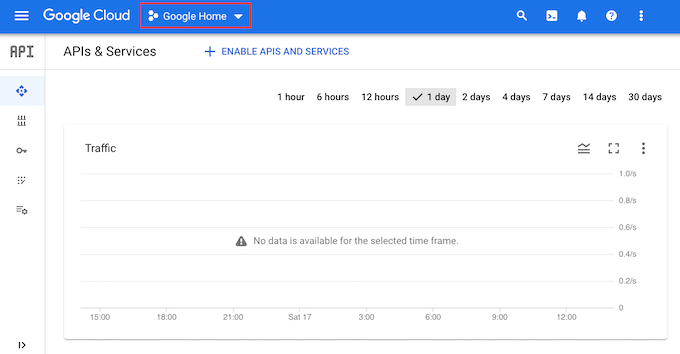
Once you’re logged into the console, click on ‘Google Home.’
If you’re logging into the Google Console for the first time then you’ll need to accept the terms and conditions.
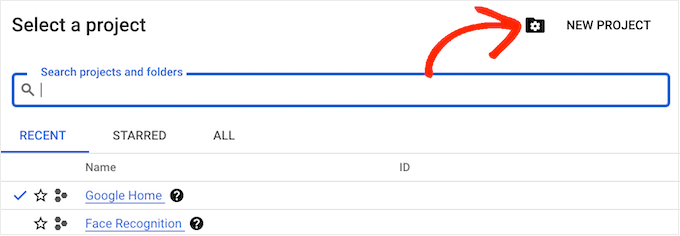
With that done, click on ‘New Project.’
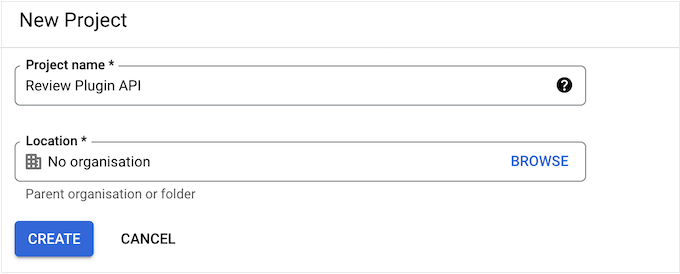
You can now type in a name for the project. This is just for your reference so you can use anything you want.
Once you’ve done that, click on the ‘Create’ button.
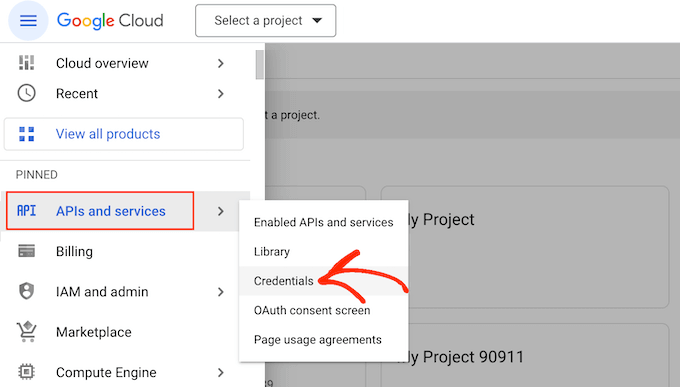
After that, click on the lined icon in the upper-left corner to open the menu.
In the menu, select ‘APIs and services’ and ‘Credentials.’
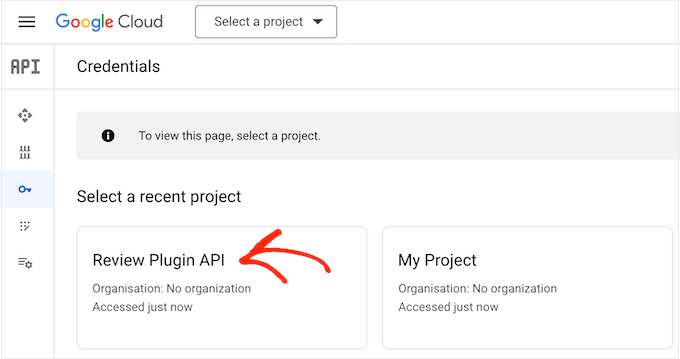
You will now see all your Google projects.
Simply find the project we just created and give it a click.
In the search field, start typing ‘Places API.’
When the right API appears, give it a click.
This takes you to a screen where you can activate the key for making Places API requests.
To do this, simply click on the ‘Enable’ button.
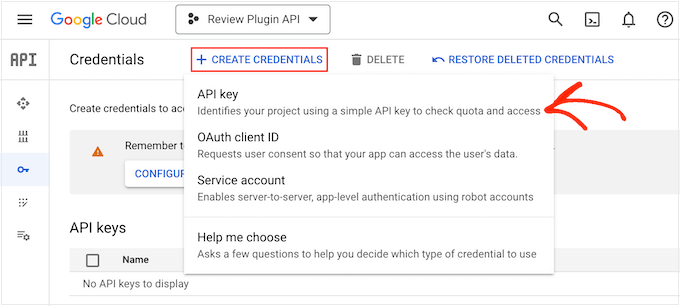
With that done, press the backwards arrow to return to the main Google Cloud Console dashboard. Here, click on ‘Create Credentials.’
Go ahead and select ‘API key’ from the dropdown menu.
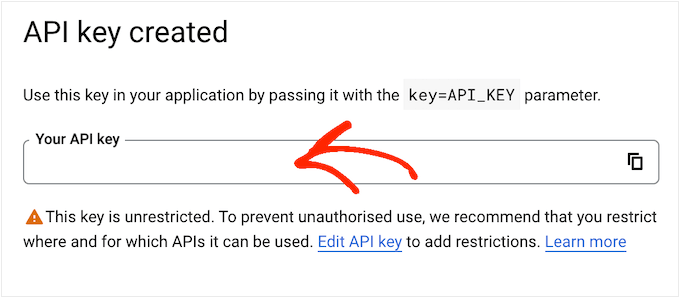
After a few moments, you’ll see an ‘API key created’ popup.
You’ll need to add this information to your WordPress blog or website, so make a note of it.
By default, all of Google’s API keys are unrestricted. To stop other people from using the API key, you’ll need to restrict it by clicking the ‘Edit API Key’ link inside the popup.
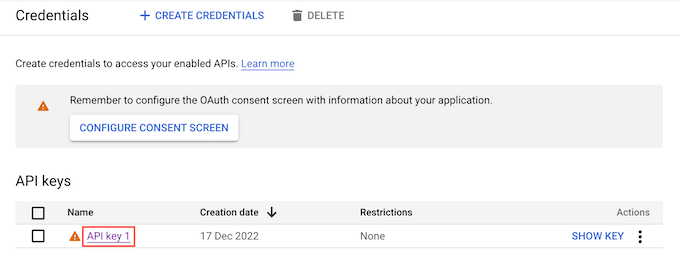
This opens a screen showing all your Google API keys. Simply find the key you just created, and give it a click.
Note: If you closed the popup by accident, then don’t worry. You can reach the same screen by selecting ‘Credentials’ in the left-hand menu.
Under ‘Application restrictions,’ click on ‘HTTP referrers (websites).’
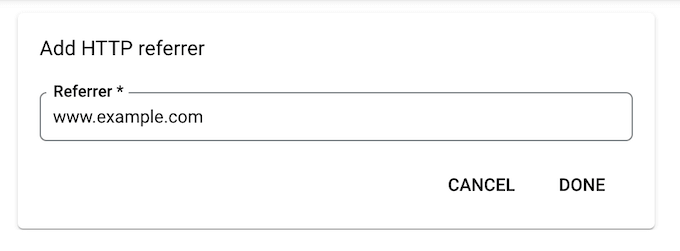
Under ‘Website Restrictions,’ click on ‘Add.’
You can now type in the address of your WooCommerce store or WordPress website, and then click on ‘Done.’
To make sure Smash Balloon can access the Places API, you’ll also need to type in www.googleapis.com and click on ‘Done.’
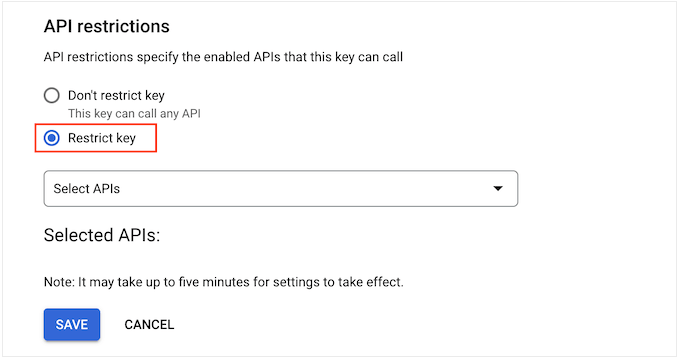
Under ‘API restrictions,’ select the button next to ‘Restrict key.’
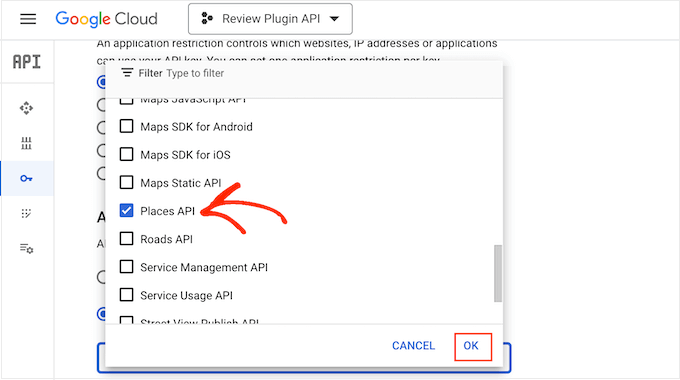
With that done, click on the ‘Select APIs’ dropdown menu and check the box next to ‘Google Places API.’
Now we’re ready to click on ‘OK.’
The next step is adding the API key to your site. In the WordPress dashboard, go to Reviews Feed » Settings.
Under ‘Manage API Keys,’ click on the pencil icon next to ‘Google.’
In the popup, add your Google API key.
After that, click on the ‘Add’ button.
Now you’ve added an API key, you’re ready to create a feed showing all your Google Reviews.
To do this, go to Reviews Feed » All Feeds, and click on the ‘Add New’ button.
On the next screen, click on ‘Add New.’
In the popup that appears, click on ‘Google’ and then select ‘Next.’
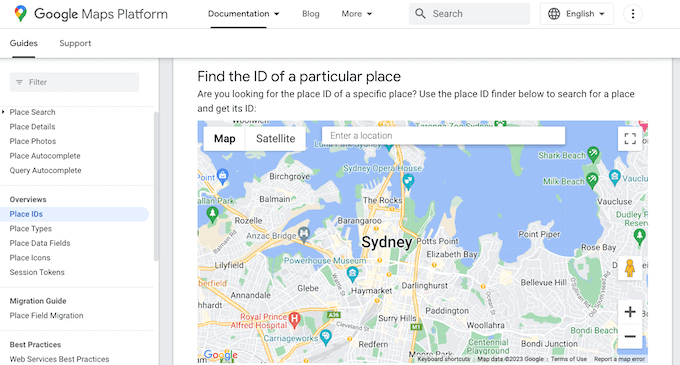
Now you’ll need to enter the Place ID of the cafe, restaurant, or other venue that you want to use in your feed.
To get the ID, go to Google’s Place ID page and scroll to ‘Find the ID of a particular place.’
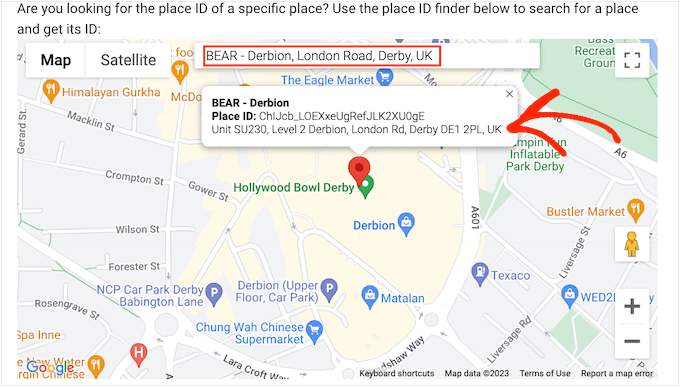
In the Google Maps search bar, start typing the address or name of the place that you want to feature. When the right place appears, give it a click.
Google will now show the place ID in a small popup.
Go ahead and copy the place ID.
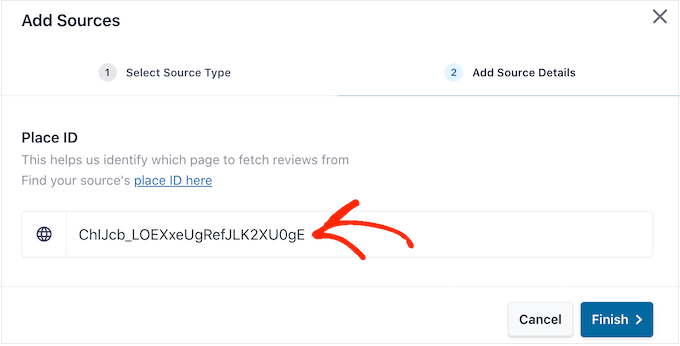
Now, switch back to the WordPress dashboard and paste the ID into the ‘Enter Place ID’ field.
With that done, click on ‘Finish.’
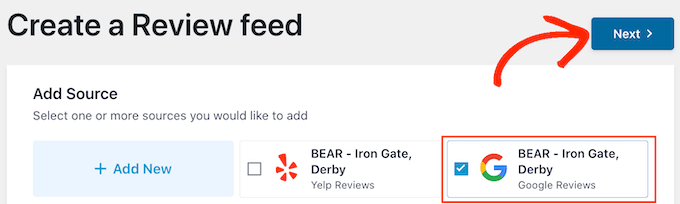
To go ahead and create the feed, you need to check the box next to the Google place you just added, and then click on ‘Next.’
You can now choose the template you want to use for the review feed, and click on ‘Next.’
Smash Balloon will now create a feed showing all your Google reviews.
Do you want to change how the feed looks? Skip to the end of this post for a detailed step-step guide on how to fine-tune the Google Reviews feed, and then add it to your website.
Method 3. How to Show Facebook Reviews in WordPress
Many businesses, websites, and online stores use Facebook to connect with their audience. Facebook also has its own built-in review system, so you may want to add these reviews to your website.
Unlike Yelp and Google, your Facebook page belongs to you, so this is also a way to promote your profile and get more social media followers.
To create a Facebook review feed, go to Reviews Feed » All Feeds.
Then, click on the ‘Add New’ button.
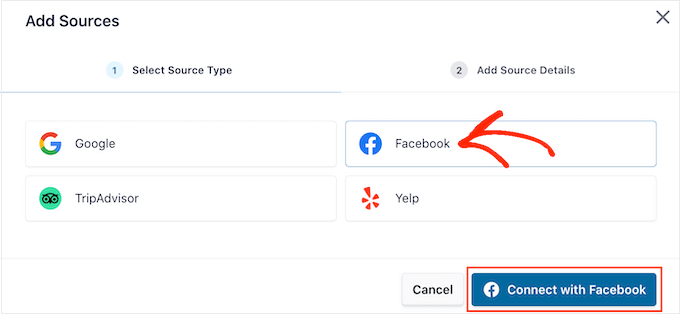
On the next screen, click on ‘Add New’ again.
In the popup that appears, click on ‘Facebook’ and then select ‘Connect with Facebook.’
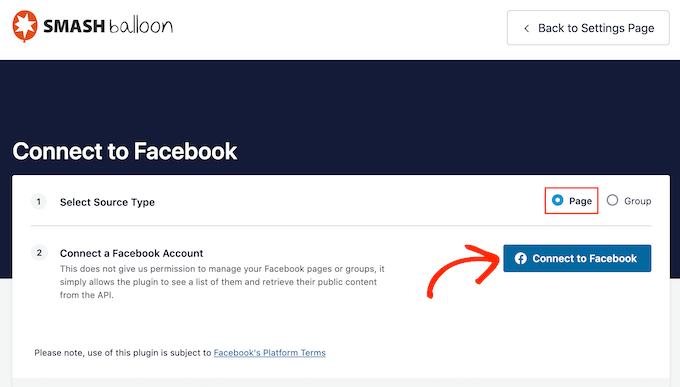
On the next screen, select the radio button next to ‘Page.’
Once you’re done with that, click on ‘Connect to Facebook.’
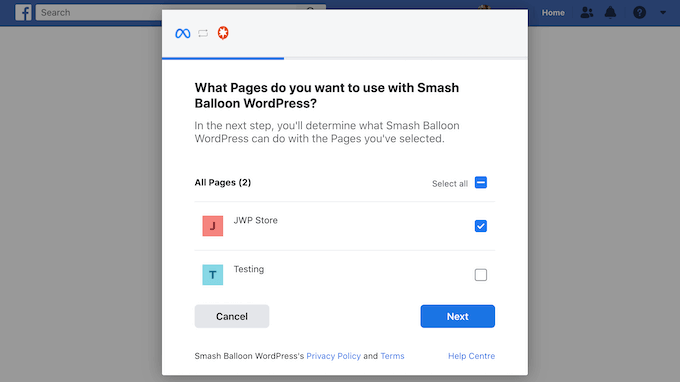
This opens a popup where you can log into your Facebook account and choose the pages where you’ll get the reviews from.
After that, we’re ready to click on ‘Next.’
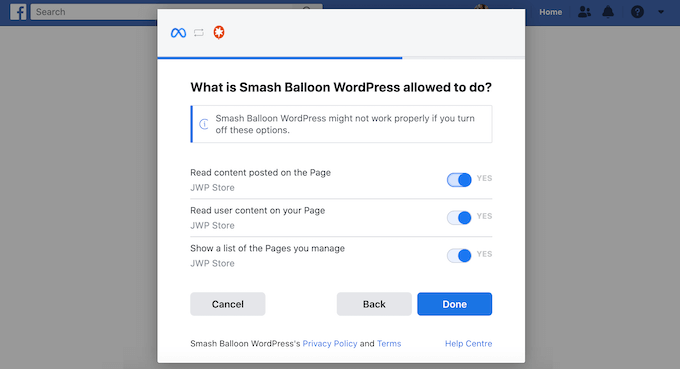
Facebook will now show all the information that Smash Balloon will have access to and the actions it can perform.
To restrict Smash Balloon’s access to your Facebook page, just click any of the switches to turn it from ‘Yes’ to ‘No.’ However, be aware that this can affect the content that appears on your website.
With that in mind, it’s a good idea to leave all the switches enabled.
When you’re happy with how the Facebook permissions are set up, click on ‘Done.’
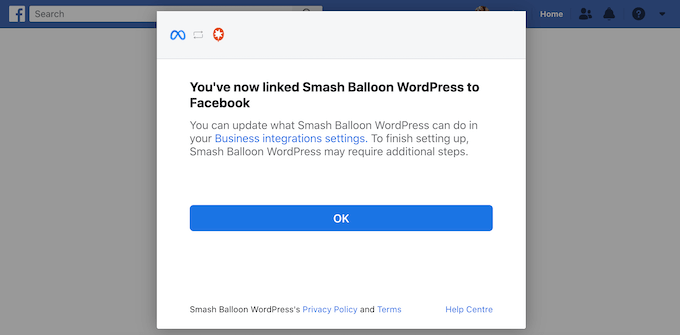
After a few moments, you should see a message confirming that you’ve connected your WordPress website and your Facebook page.
That done, click on the ‘OK’ button.
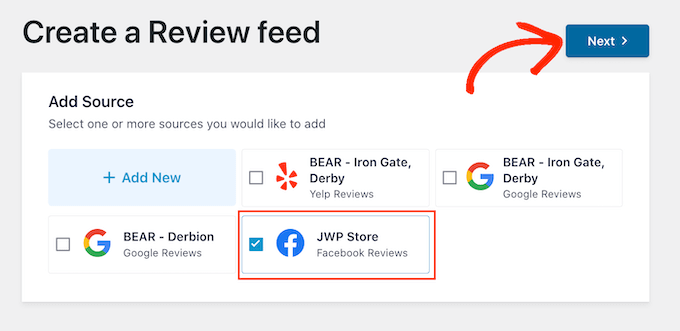
Smash Balloon will automatically take you back to the WordPress dashboard, where you’ll see the Facebook page you just connected to your website.
Simply select the checkbox next to the Facebook page and then click on the ‘Next’ button.
You can now choose the template you want to use for the Facebook reviews feed.
After making the decision, click on ‘Next.’
Smash Balloon will now create a feed showing all your Facebook reviews.
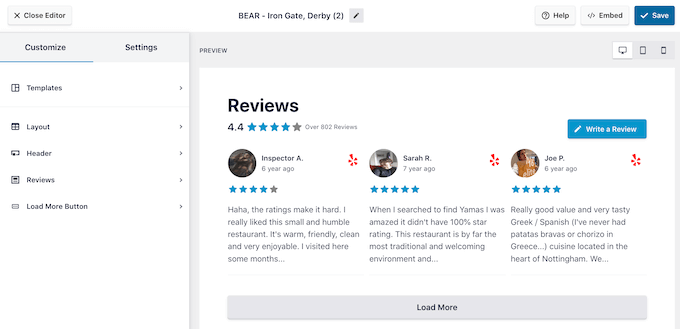
Customizing Your Google, Facebook, or Yelp Review Feed
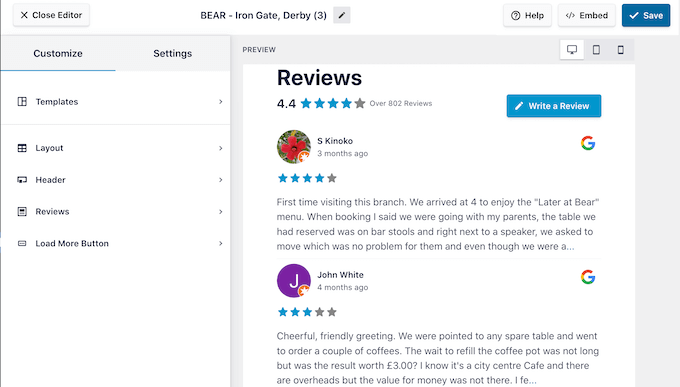
Smash Balloon automatically copies your WordPress theme so any reviews feed you create will fit perfectly with your site’s design. However, Smash Balloon also has an advanced feed editor so you can fine-tune every part of the feed.
No matter whether you create a feed using Google, Facebook, or Yelp, Smash Balloon will open its feed editor automatically.
Note: If you accidentally closed the editor then don’t panic. Simply go to Reviews Feed » All Feeds in the WordPress dashboard, and then click on the ‘Edit’ icon next to the feed.
Smash Balloon shows a live preview of your review feed to the right. On the left is a menu that shows the different settings that you can use to change how the feed looks.
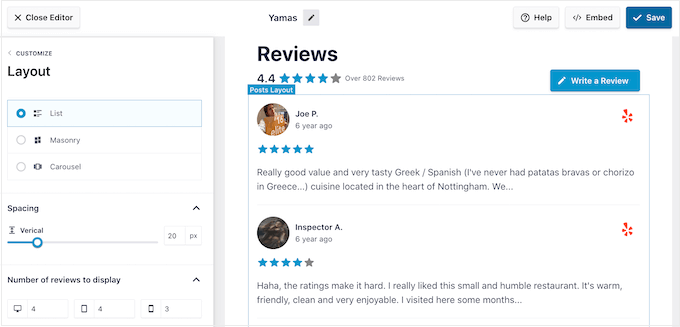
To see what changes you can make, start by clicking on ‘Layout’ in the left-hand menu. Here, you can choose from a Grid, Masonry, or Carousel layout.
As you click on the different layouts, the live preview will automatically update to show the new layout. This makes it easy to try different layouts and find the one you prefer.
You can also change the spacing, how many reviews you include in the feed, and the number of characters WordPress shows from each review.
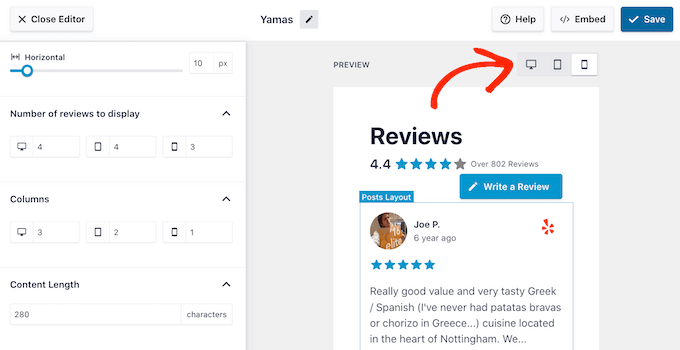
As you make changes, remember that the feed may look different on smartphones and tablets, compared to desktop computers.
With that being said, it’s a good idea to test the mobile version of your feed using the row of buttons in the right-hand corner. In this way, you can create a review feed that looks just as good on smartphones and tablets, as it does on desktop computers.
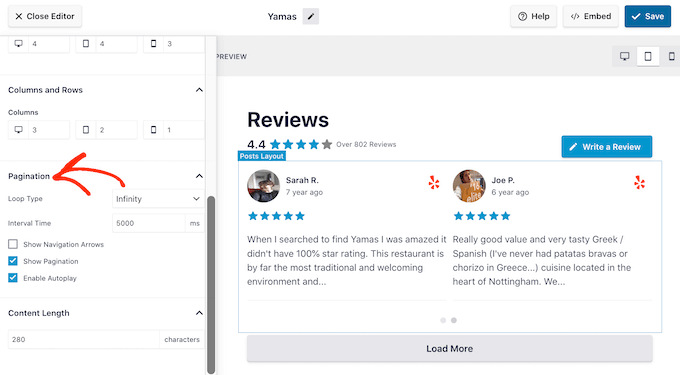
Finally, if you select the Carousel layout then you can change how the reviews scroll using the ‘Pagination’ settings.
For example, you can enable autoplay so the reviews scroll automatically or increase the interval so visitors have more time to read each review.
When you’re happy with these changes, click on the small arrow next to ‘Customize.’
This takes you back to the main Smash Balloon review feed editor.
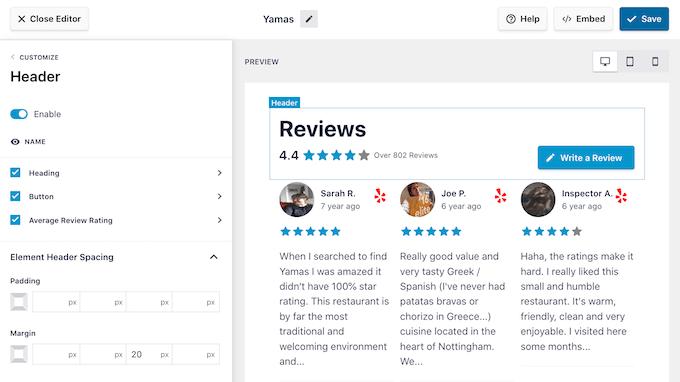
The next setting you can explore is ‘Header,’ which controls the text that appears at the top of your feed.
By default, Smash Balloon shows a ‘Review’ headline, your average star rating, and a ‘Write a review’ button.
This header helps visitors understand the content, while also encouraging them to leave their own review. However, if you prefer then you can remove the header using the ‘Enable’ toggle.
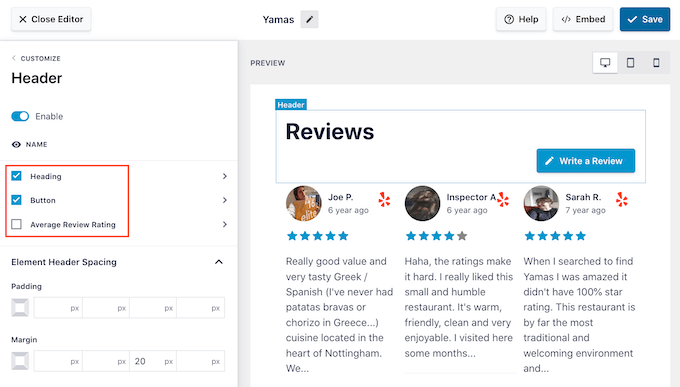
If you do show the header, then you can add or remove content using the Heading, Button, and Average Review Rating checkboxes.
To change the padding and margins, simply use the settings under ‘Element Header Spacing.’
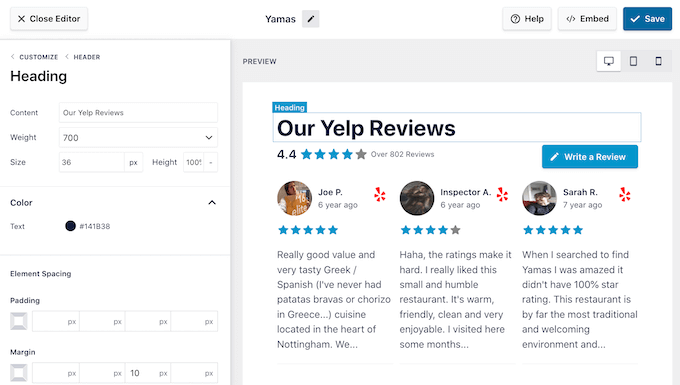
If you want to change any of the text that appears in the header, then simply click on either Heading, Button, or Average Review Rating. This takes you to an area where you can change the text color, size, and more.
You can also replace the standard text with your own custom messaging by typing into the ‘Content’ field.
When you’re ready to return to the main editor screen, just click on the ‘Customize’ link at the top of the left-hand menu.
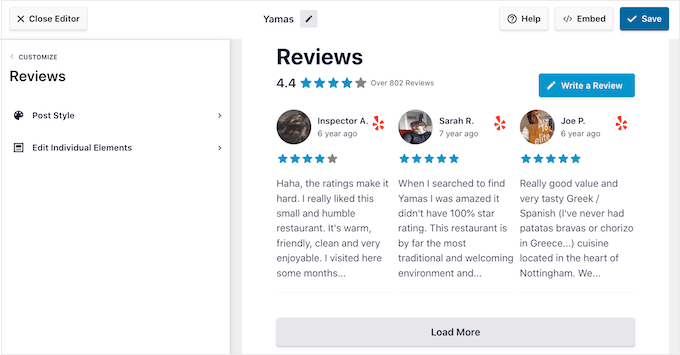
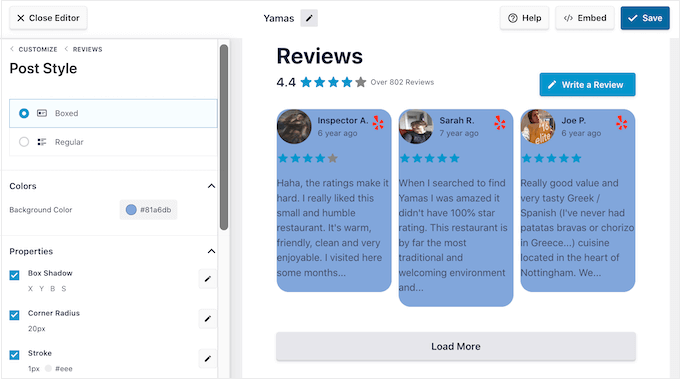
The next setting you can look at is ‘Reviews,’ so give this option a click. Here, you can choose between ‘Post Style’ and ‘Edit Individual Elements.’
If you select ‘Post Style,’ then you can change how the individual reviews look inside the feed. For example, you can switch to a boxed layout, add a shadow, and change the corner radius to create curved edges.
As you make changes, the preview updates automatically so you can try different settings to see what looks the best on your website.
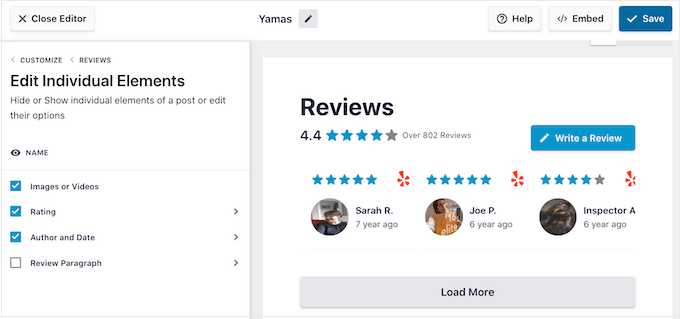
If you choose ‘Edit Individual Elements,’ then you’ll see all the different content that Reviews Feed Pro includes in each review such as rating, author and date, and the review text.
To remove a piece of content, just click to uncheck its box.
You can also customize how each type of content looks by clicking on it.
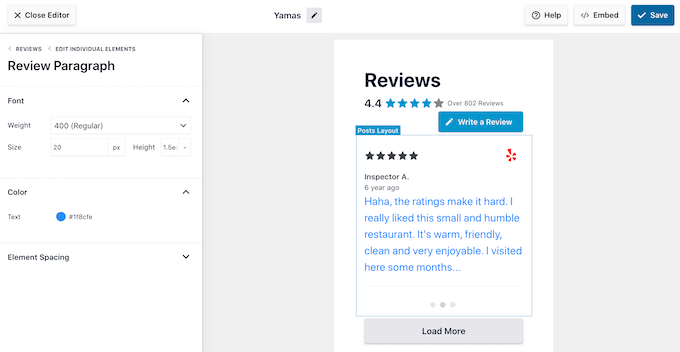
For example, in the following image, we’ve changed the color and size of the review content, known as the ‘Review Paragraph.’
When you’re happy with how the review feed looks, click on ‘Customize’ to return to the main Smash Balloon editor.
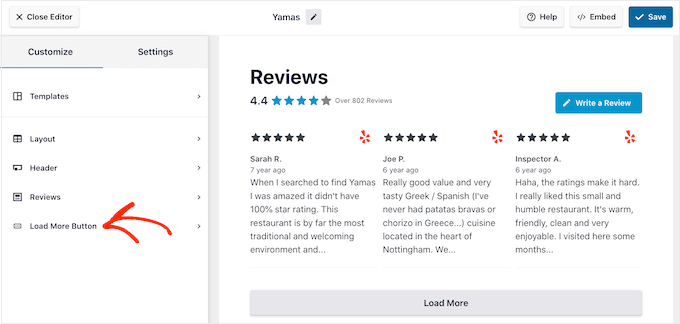
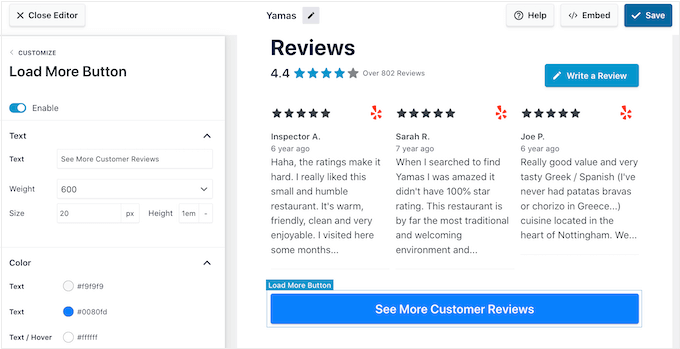
You can now move to the next settings screen by selecting ‘Load More Button.’
The ‘Load More’ button allows visitors to scroll through more reviews, so the plugin adds it by default. Since it’s such an important button, you may want to help it stand out by changing the background color, hover state, label, margins, and more.
You can also replace the default ‘Load More’ text with your own messaging by typing into the ‘Text’ field.
If you prefer, then you can remove the button completely by clicking the ‘Enable’ toggle.
When you’re happy with how the review feed looks, don’t forget to click on ‘Save.’ With that out of the way, you’re ready to add Google, Facebook, or Yelp reviews to your site.
How to Add Reviews on Your WordPress Website
Now you can add the review feed to your site using a block, widget, or shortcode.
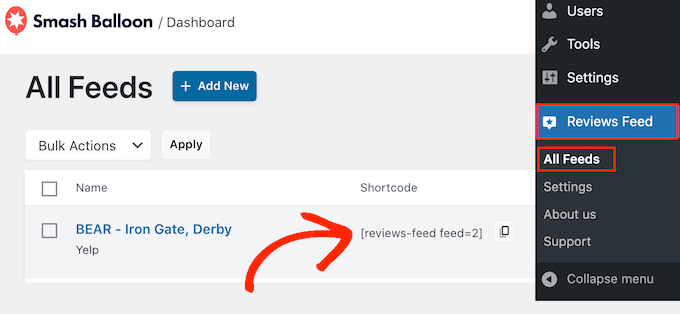
If you’ve created more than one feed using Reviews Feed Pro, then you’ll need to know the feed’s shortcode if you’re going to use a widget or block.
To get this information, go to Reviews Feed » All Feeds and then look at the value under ‘Shortcode.’ You’ll need to add this code to the block or widget, so make a note of it.
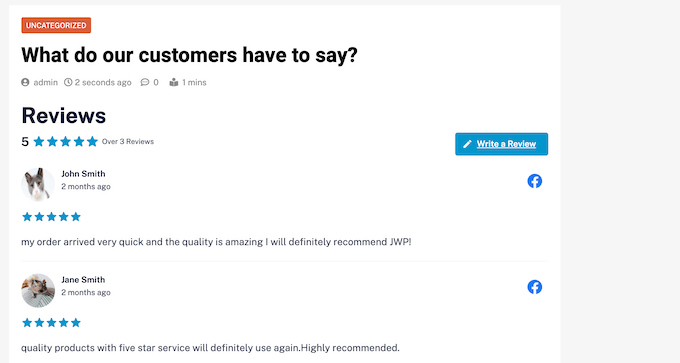
In the following image, we’ll need to use [reviews-feed feed=2]
If you want to embed the feed in a page or post, then you can use the Reviews Feed block.
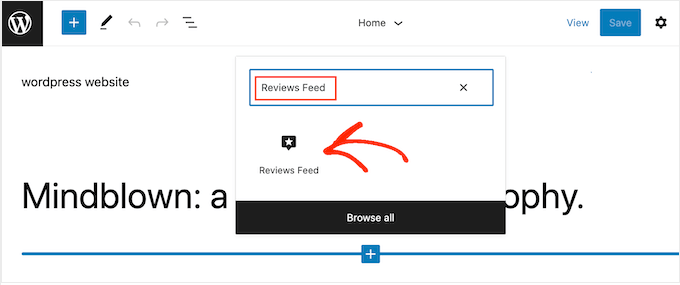
Just open the page or post where you want to show your Yelp, Google, or Facebook reviews. Then, click on the ‘+’ icon to add a new block and start typing ‘Reviews Feed.’
When the right block appears, click to add it to the page or post.
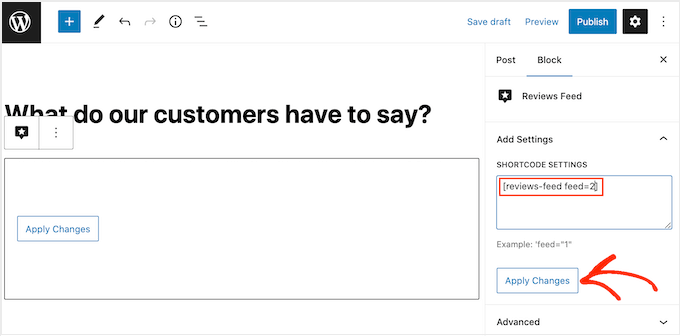
The block will show one of your review feeds by default. If you want to show a different feed, then find ‘Shortcode Settings’ in the right-hand menu.
Here, simply add the shortcode you got earlier, and then click on ‘Apply Changes.’
If you’re happy with how the review feed looks, then you can go ahead and publish or update the page.
Another option is to add the Reviews Feed widget to your website. This is a great way to show positive customer reviews on every page of your site. For example, you might add the widget to the sidebar or WordPress footer.
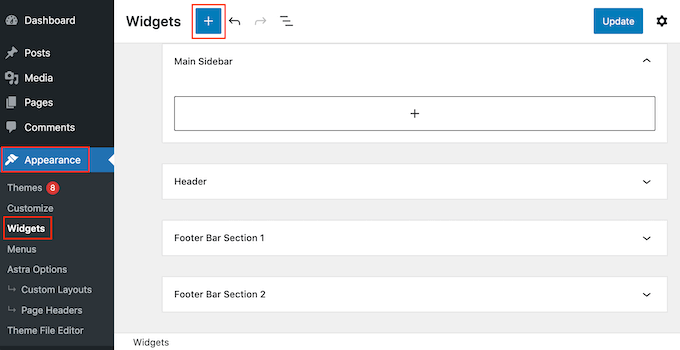
To add the Reviews Feed widget to your site, head over to Appearance » Widgets. You can then click on the blue ‘+’ icon towards the top of the screen.
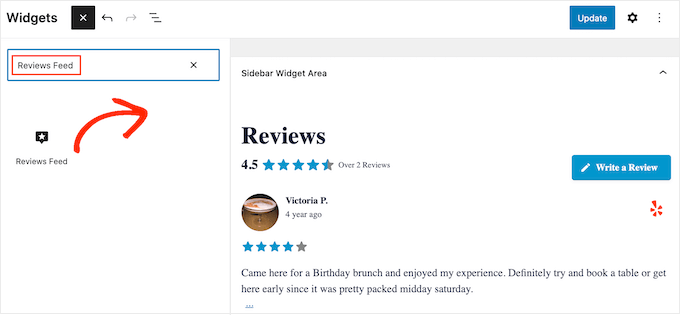
In the panel that appears, type in ‘Reviews Feed’ to find the right widget.
Then, simply drag the widget onto the area where you want to show the reviews, such as the sidebar or similar section.
The widget will automatically show one of the feeds you created using the Reviews Feed plugin. If this isn’t the feed you want to display, then type the feed’s shortcode into the ‘Shortcode Settings’ box.
After that, click on ‘Apply Changes.’
You can now make the widget live by clicking on the ‘Update’ button. For more information, please see our step-by-step guide on how to add and use widgets in WordPress.
Another option is embedding the Google, Facebook, or Yelp reviews on any page, post, or widget-ready area using the shortcode.
Simply go to Reviews Feed » All Feeds and copy the code in the ‘Shortcode’ column. You can now add this code to any Shortcode block.
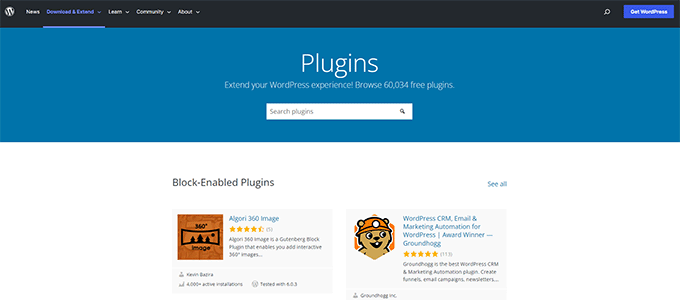
Are you using a block-enabled theme? Then you can use the full-site editor to add the Reviews Feed block anywhere on your website.
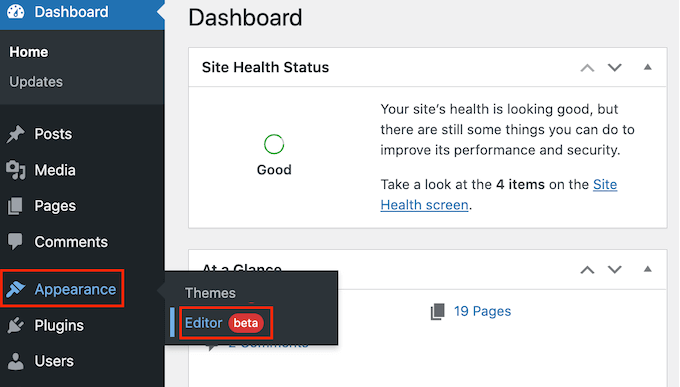
In the WordPress dashboard, go to Appearance » Editor.
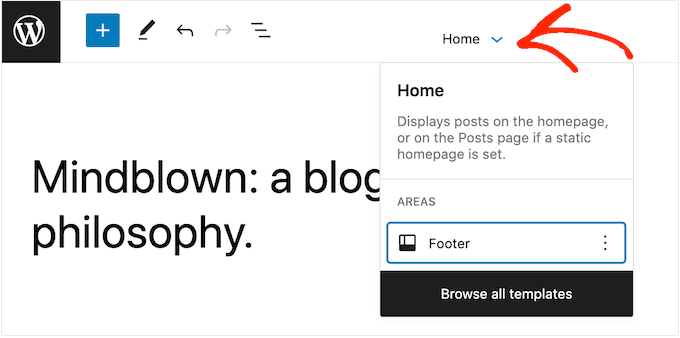
By default, the full-site editor will show the theme’s home template. If you want to add the Google, Facebook, or Yelp feed to a different template, then click on the arrow next to ‘Home.’
You can then choose any design from the dropdown, such as the footer template.
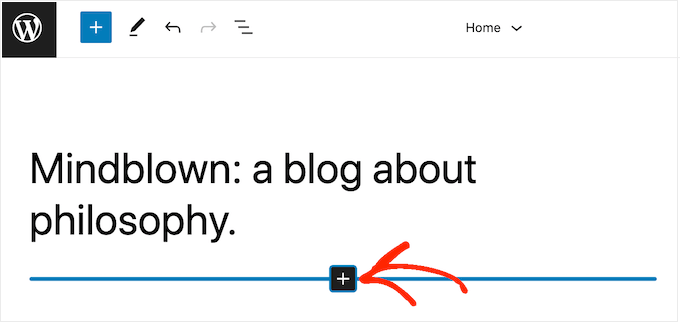
After choosing a template, simply hover your mouse over the area where you want to show the reviews.
Then, click on the ‘+’ button.
Once you’ve done that, type in ‘Reviews Feed.’
When the right block appears, click to add it to the template.
As always, Reviews Feed will show a feed by default. You can change this feed by adding a shortcode following the same process described above.
Recently one of our readers asked if there is an easy way to add box shadows in WordPress?
Shadows can make your most important content stand out and grab your visitors’ attention. They can also help flat website designs appear more engaging and interesting.
In this article, we will show you how to easily add box shadows in WordPress, step by step.
Why Add Box Shadows in WordPress?
A box shadow, sometimes also known as a drop shadow, is a visual effect that makes it look like an onscreen object is casting a shadow.
We tend to pay more attention to objects that appear closer to us. That’s why many website owners add box shadows to their most important content to make it look like it’s hovering above the page.
For example, if you add a big shadow to a call to action button, then it will look physically closer to the visitor. This will draw the person’s attention toward this important button.
With that said, let’s see how you can add box shadows to your WordPress blog or website. Simply use the quick links below to jump straight to the method you want to use.
Method 1. How to Add Box Shadows Using Code (Recommended)
When adding box shadow, the best practice is to only add it on your most important website elements. If you add a unique shadow effect to each WordPress block, then it can make your site look messy and confusing.
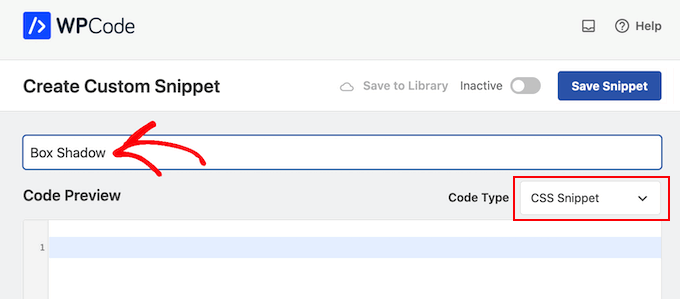
It’s also important that you keep your box shadows consistent across the site. The best way to do this is by defining the style in CSS using WPCode.
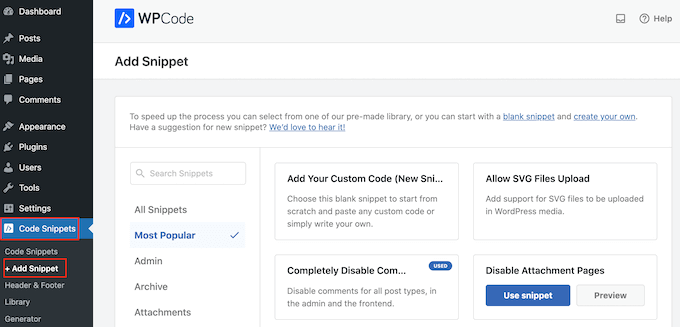
WPCode is the best code snippets plugin used by over 1 million WordPress websites. It makes it easy to add custom code in WordPress without having to edit the functions.php file.
With WPCode, even beginners can edit their website’s code without risking mistakes and typos that can cause many common WordPress errors.
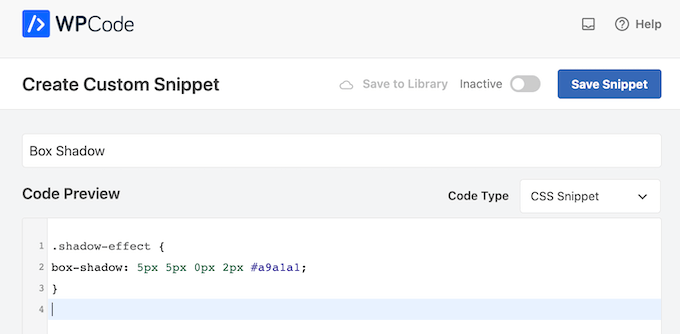
In the above snippet, you may need to replace the px values depending on the kind of shadow you want to create.
To help you out, here’s what the different px values mean, going from left-to-right:
Horizontal offset. When you set a positive value, the shadow gets pushed to the left. If you type in a negative value like -5px, then the shadow will be pushed to the right. If you don’t want to add a horizontal offset, then you can use 0px instead.
Vertical offset. If you use a positive value, then the shadow will be pushed downwards. If you type in a negative value then the shadow will be pushed upwards. If you don’t want to offset the shadow vertically, then just type in 0px.
Blur radius. This blurs the shadow so that it doesn’t have any harsh edges. The higher the value, the greater the blur effect. If you prefer to use sharp edges, then type in 0px.
Spread radius. The higher the value, the greater the shadow’s spread. This value is optional, so skip this one if you don’t want to show a spread.
Color. Although grey is the most common color for shadows, you can use any color you want by typing in a hex code. If you’re not sure what code to use, then you can explore different colors using a resource like HTML Color Codes.
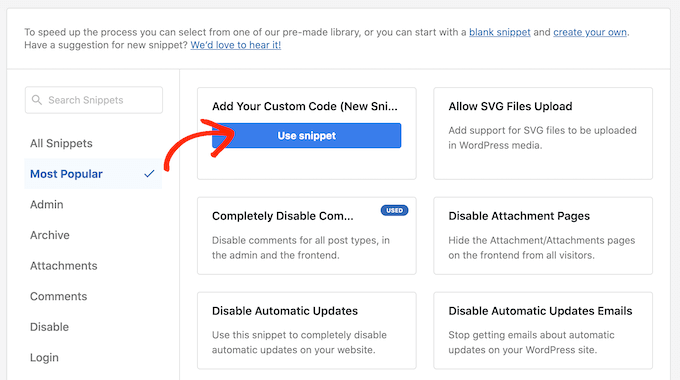
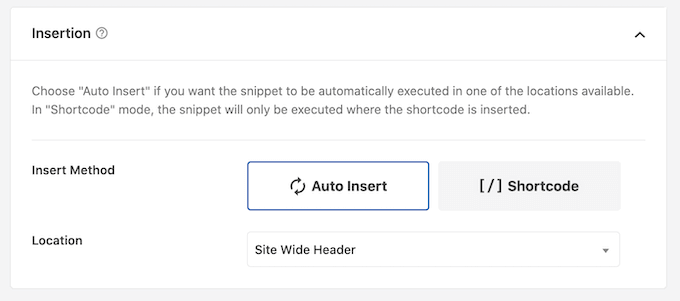
When you’re happy with the snippet, scroll to the ‘Insertion’ section. WPCode can add your code to different locations, such as after every post, frontend only, or admin only.
We want to use the custom CSS code across our entire WordPress website, so click on ‘Auto Insert’ if it isn’t already selected. Then, open the ‘Location’ dropdown menu and choose ‘Site Wide Header.’
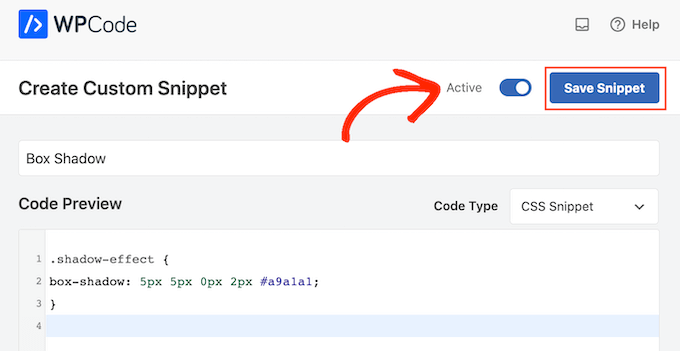
After that, you’re ready to scroll to the top of the screen and click on the ‘Inactive’ toggle, so it changes to ‘Active.’
Finally, click on ‘Save Snippet’ to make the CSS snippet live.
Now, you can add the custom CSS class to any block.
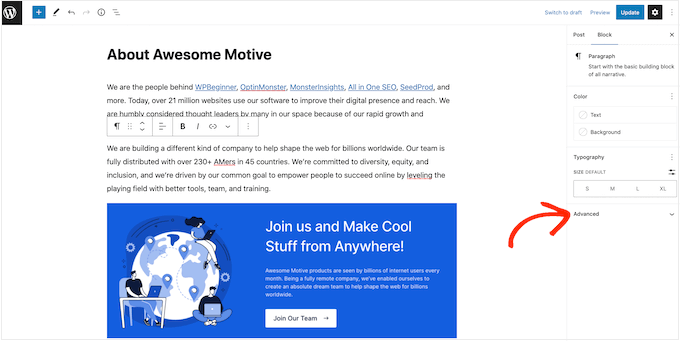
In the WordPress content editor, simply select the block where you want to add a box shadow. Then, in the right-hand menu click to expand the ‘Advanced’ section.
Here, you’ll see fields where you can add different classes.
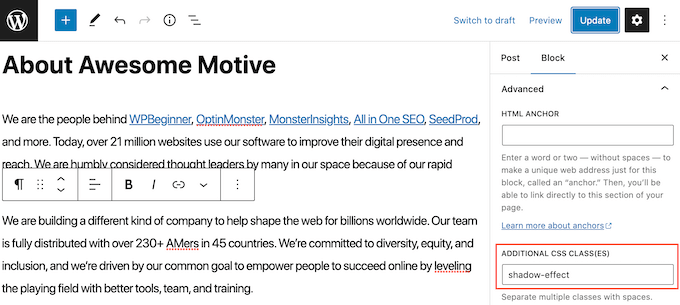
In ‘Additional CSS Class(es),’ type in shadow-effect.
When you’re ready to publish the box shadow, just click on the ‘Publish’ or ‘Update’ button.
Now if you visit your website, you’ll see the box shadow live.
Method 2. Add a Box Shadow Using a Free Plugin (Quick and Easy)
If you’re not comfortable writing code, then you might prefer to create shadows using Drop Shadow Box. This free plugin allows you to add box shadows to any block using the built-in WordPress page and post editor.
First, you’ll need to install and activate the plugin. If you need help, then please see our guide on how to install a WordPress plugin.
There are no settings to configure, so you can start using this plugin straight away.
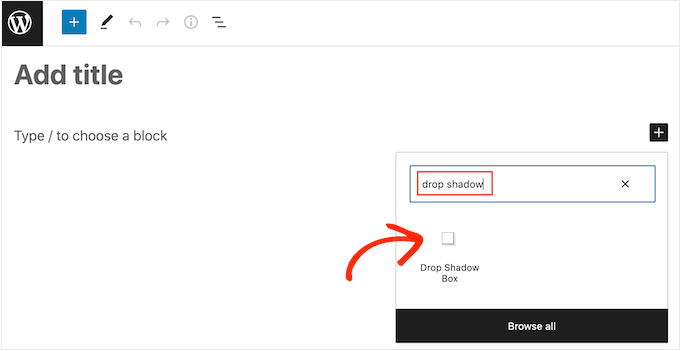
To add a drop shadow, simply click on the ‘+’ icon and start typing in ‘Drop Shadow Box.’ When the right block appears, give it a click to add it to the page or post.
This adds the drop shadow as an empty box, so the next step is adding some content.
To do this, go ahead and click on the ‘+’ inside the Drop Shadow Box block.
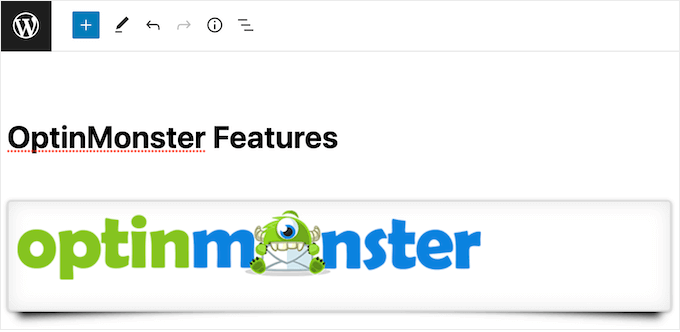
Then, simply add the block you want to use and configure it as normal.
For example, in the following image we’ve added an Image block and selected a picture from the WordPress media library.
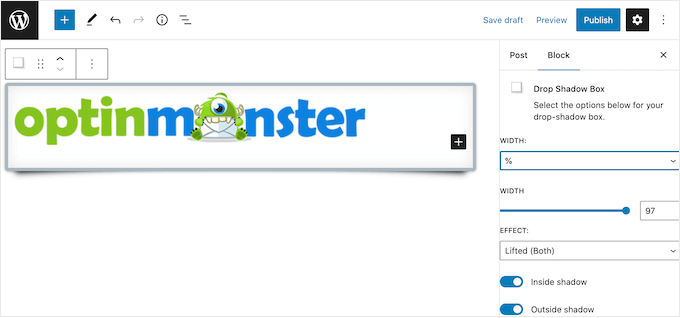
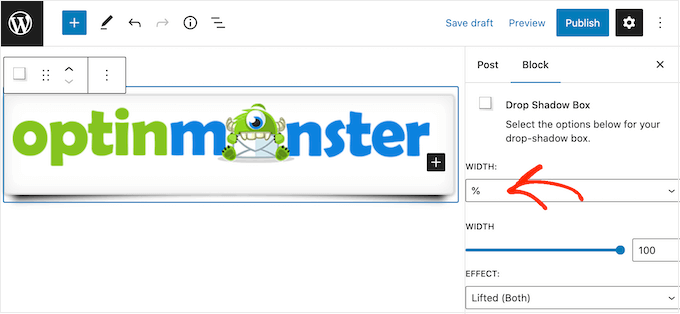
With that done, click to select the Drop Shadow Box block. In the right-hand menu, you’ll see all the settings you can use to style this block.
WordPress sets the shadow’s width automatically but you can change this by opening the ‘Width’ dropdown and then choosing either ‘Pixels’ or ‘%.’
You can then resize it using the settings that appear.
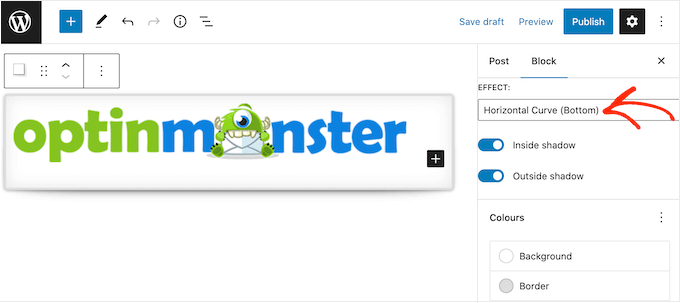
The Drop Box Shadow plugin comes with a few different effects such as curved edges and an eye-catching ‘Perspective’ effect.
To preview the different effects, simply open the ‘Effect’ dropdown and choose from the list. The preview will update automatically so you can try different styles to see what you prefer.
You can also change whether the plugin shows the shadow inside the box, outside the box, or both using the ‘Inside Shadow’ and ‘Outside Shadow’ toggles.
After that, you can change the color of the box and border using the settings under the ‘Colors’ header.
Just be aware that ‘Background’ refers to the inside of the Drop Shadow Box, while ‘Border’ appears outside of the block.
If you want to create a softer, curved shadow box then you can enable the ‘Rounded corners’ toggle. Finally, you can change the alignment and padding, similar to how you customize other blocks in WordPress.
To create more box shadows, just follow the same process described above.
When you’re happy with how the page looks, simply click on ‘Update’ or ‘Publish’ to make all your new box shadows live.
Method 3. Add a Box Shadow Using a Page Builder (Advanced)
If you want to add box shadows to landing pages, custom homepages, or any part of your WordPress theme, then we recommend using a page builder plugin.
It also lets you add box shadows to any block using its advanced drag-and-drop editor.
First, you need to install and activate the SeedProd plugin. For more details, see our step-by-step guide on how to install a WordPress plugin.
Note: There’s also a premium version of SeedProd that comes with more professionally-designed templates, advanced features, and WooCommerce integration. However, we’ll be using the free version as it has everything you need to add box shadows in WordPress.
After activating the plugin, SeedProd will ask for your license key.
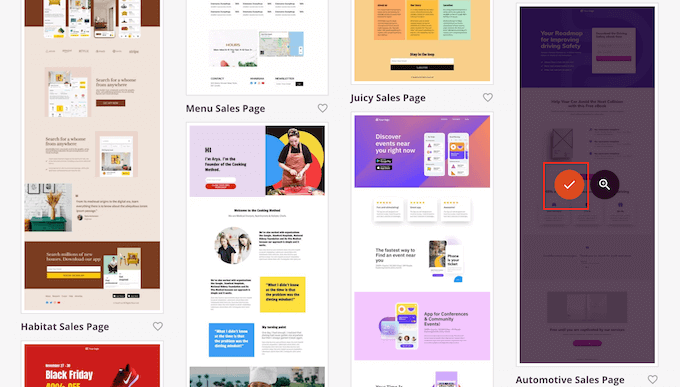
All of SeedProd’s templates are easy to customize, so you can use any design you want.
When you find a template that you like, simply hover your mouse over it and click on the checkmark icon.
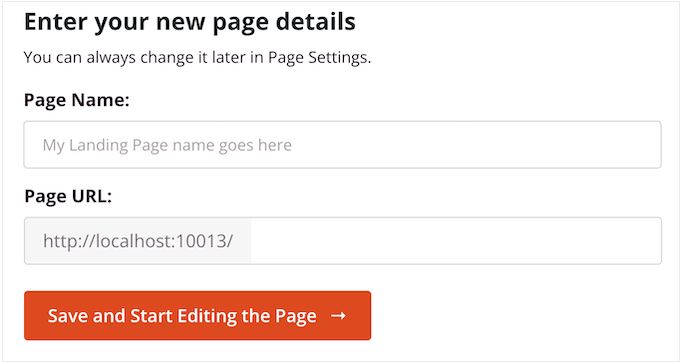
You can now type in a name for your landing page into the ‘Page Name’ field. SeedProd will automatically create a ‘Page URL’ using the page name.
It’s smart to include relevant keywords in your URL wherever possible, as this can help search engines understand what the page is about. This will often improve your WordPress SEO.
To change the page’s automatically-generated URL, simply type into the ‘Page URL’ field.
When you’re happy with the information you’ve typed in, click on ‘Save and Start Editing the Page.’ This will load the SeedProd page builder interface.
This simple drag-and-drop builder shows a live preview of your page design to the right. On the left is a menu showing all the different blocks and sections you can add to the page.
When you find a block that you want to add, simply drag and drop it onto your template.
To customize a block, go ahead and click to select that block in the SeedProd editor. The left-hand menu will now update to show all the settings you can use to customize the block.
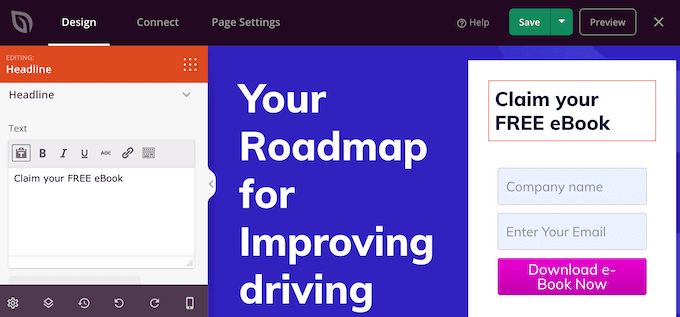
For example, if you click on a Headline block then you can type in your own text, or change the text color and font size.
As you’re building the page, you can move blocks around your layout by dragging and dropping them. For more detailed instructions, please see our guide on how to create a landing page with WordPress.
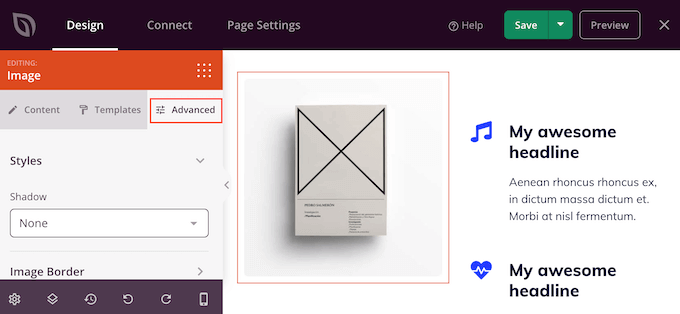
To create a box shadow, click to select any block in the SeedProd page editor. The settings in the left-hand menu may vary between blocks, but you’ll typically need to click on an ‘Advanced’ tab.
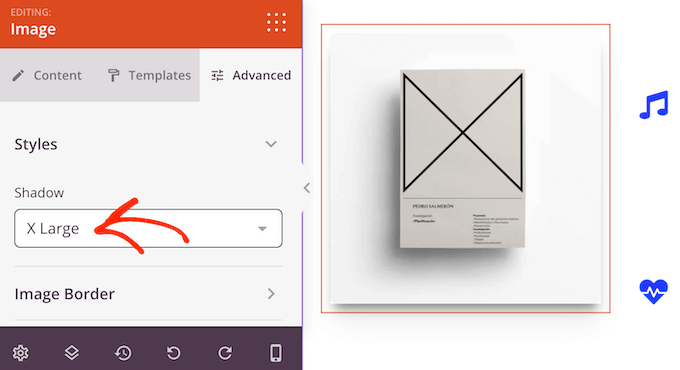
Here, look for a ‘Shadow’ dropdown menu under the ‘Styles’ section. Simply open this dropdown and choose a shadow style such as Hairline, Medium, or 2X Large.
The preview will update automatically, so you can try different styles to see what looks the best on your page design.
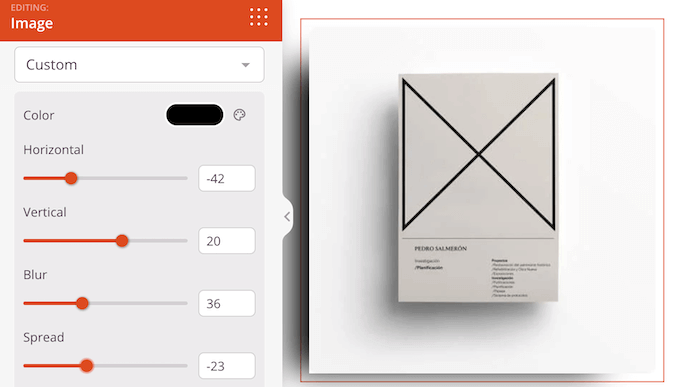
If you don’t want to use any of the ready-made styles, then click on ‘Custom.’
This adds some new settings where you can change the color, blur, spread, and position of the custom shadow.
That done, you can continue working on the page by adding more blocks and box shadows.
When you’re happy with how the page looks, click the ‘Save’ button and then choose ‘Publish’ to make it live.
Method 4. How to Add a Box Shadow Using CSS Hero (Premium Plugin)
If you’re not comfortable working with code but still want to create advanced box shadows, then you can try CSS Hero. This premium plugin allows you to fine-tune every part of your WordPress theme without having to write a single line of code.
CSS Hero allows you to create a unique shadow for each block, so it’s also a great choice if you want to create lots of different shadow effects.
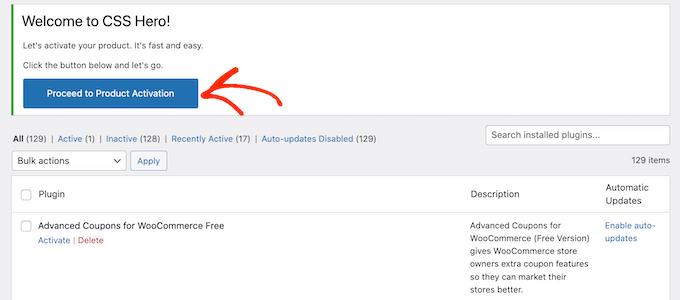
Upon activation, you’ll see a ‘Proceed to Product Activation’ button at the top of the screen. Go ahead and click on this button.
This will take you to the CSS Hero website where you can log into your account and get a license key. Simply follow the onscreen instructions, and you’ll be redirected back to your site in a few clicks.
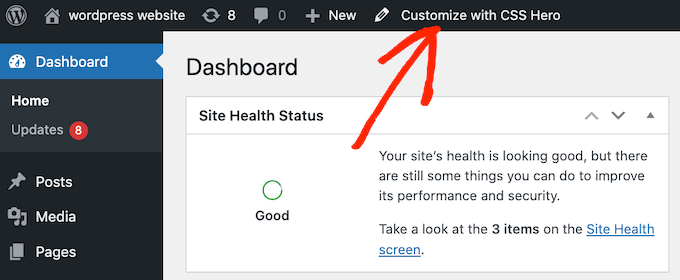
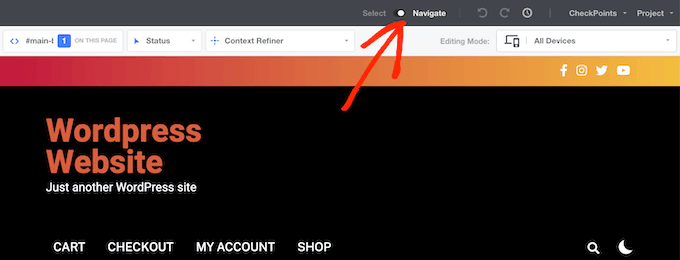
Next, click the ‘Customize with CSS Hero’ text in the WordPress admin toolbar.
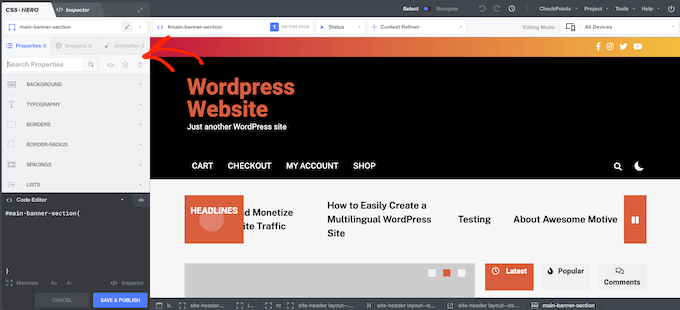
This will open the CSS Hero editor.
By default, clicking on any piece of content will open a panel with all the settings you can use to customize that content.
This is great if you want to add a box shadow to your website’s homepage. However, if you want to customize any other page then you’ll need to switch from ‘Select’ mode to ‘Navigate’ mode, as this allows you to interact with menus, links, and other content as normal.
To do this, click on the ‘Select / Navigate’ toggle in the toolbar so that it shows ‘Navigate.’
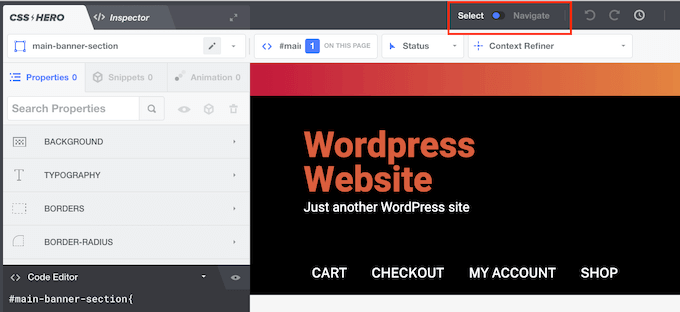
You can now navigate to the page or post where you want to add the shadow.
As soon as you reach that page, go ahead and click on the ‘Select / Navigate’ toggle again so that it shows ‘Select.’
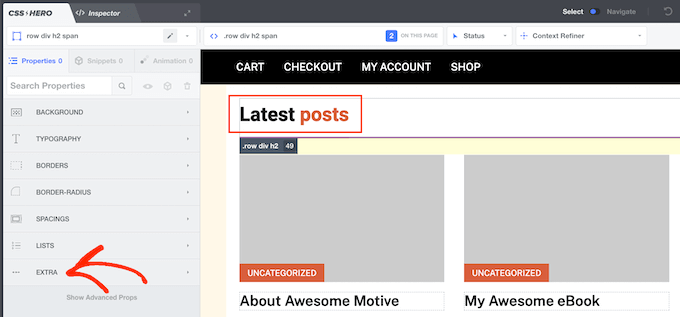
With that done, click on the paragraph, image, button, or any other content where you want to add a box shadow.
In the left-hand panel, click on ‘Extra.’
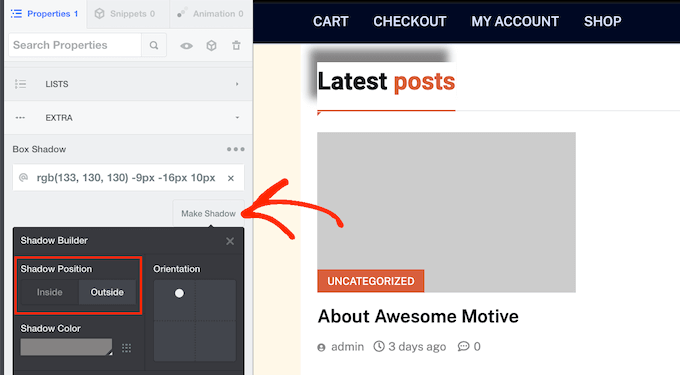
You can now go ahead and click on ‘Make Shadow,’ which shows all the settings you can use to create a box shadow.
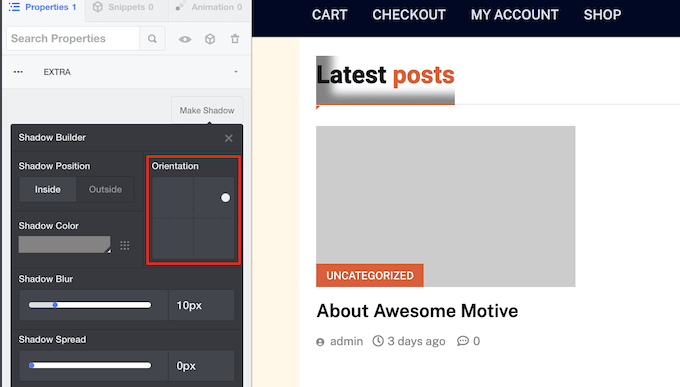
To start, you can change whether the shadow appears inside or outside the block using the ‘Shadow Position’ settings.
After making this decision, you can fine-tune the shadow’s orientation using the small dot in the ‘Orientation’ box.
Simply drag and drop the dot into a new position to see it move in the live preview.
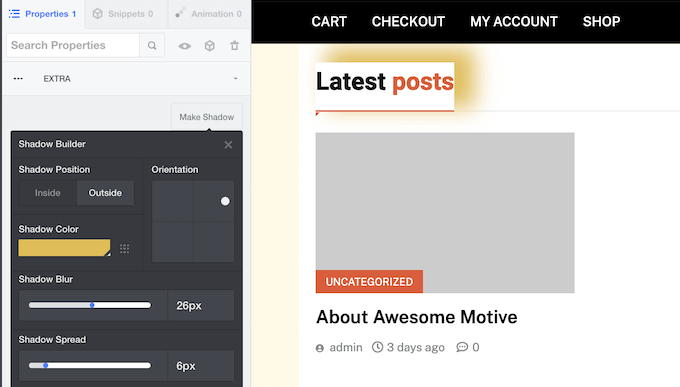
When you’re happy with the shadow’s position, you can change its color, blur, and spread.
CSS Hero will show these changes immediately, so you can try different settings to see what looks the best.
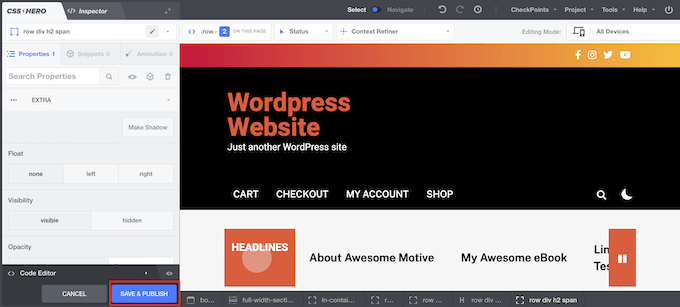
To add a box shadow to other blocks, just follow the same process described above.
When you’re happy with how the page looks, click on ‘Save & Publish’ to make it live.
Are you wondering what to add to the footer of your WordPress site?
The footer is the area at the bottom of your website. Although it’s easy to overlook, the footer can improve the user experience on your site in lots of significant ways.
In this checklist, we will share the top things that you should add to the footer of your WordPress website.
What is the Footer in WordPress?
The footer is the area that appears below the content part of your website. It is a common website design feature used by millions of websites.
‘Footer’ can also refer to the footer code area. Third-party services like Google Analytics, Facebook Pixel, and many others may ask you to add code snippets to your website’s footer.
This sort of footer code doesn’t appear to visitors but it allows you to add features, services, and other content to your WordPress website.
With so many options, beginners may struggle to decide what to add to the footer area. As a result, many website owners miss out on opportunities to improve their sites and provide a better visitor experience.
That being said, let’s take a look at some of the things to add to the footer of your WordPress site, and how to make it more useful.
Here are all the things we’ll add, so feel free to jump straight to the items that interest you.
1. Adding Links to The Footer of Your WordPress Site
Many websites add links to the footer area. This helps visitors find your site’s most important content such as the about page, products page, checkout, contact form, and more.
All popular WordPress themes come with a footer widget area where you can add different content and elements.
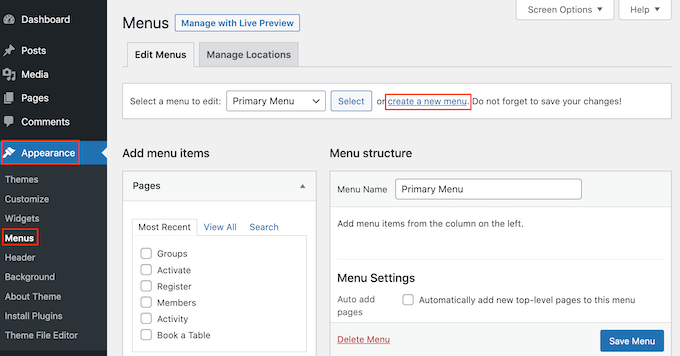
To add links to the footer area, go to the Appearance » Menus page and click on the ‘create a new menu’ link.
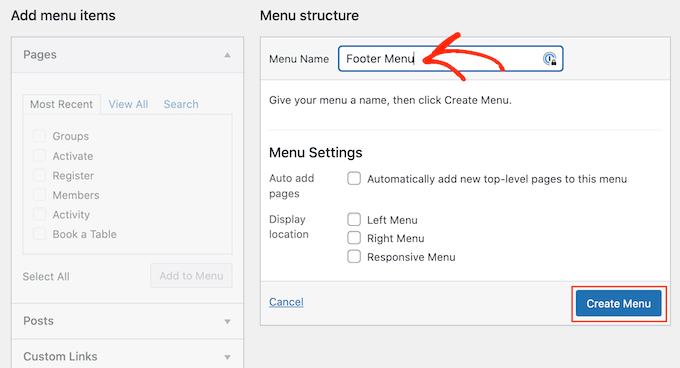
After that, type in a name for the menu. This is just for your reference so you can use anything you want.
With that done, click on the ‘Create Menu’ button.
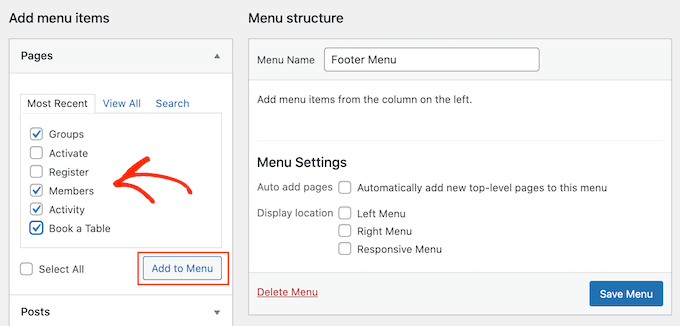
Now, check the box next to each item that you want to add to the menu.
Then, click on ‘Add to Menu.’
When you’re happy with how the menu is set up, click on the ‘Save Menu’ button to store your changes. For more help, see our guide on how to create navigation menus in WordPress.
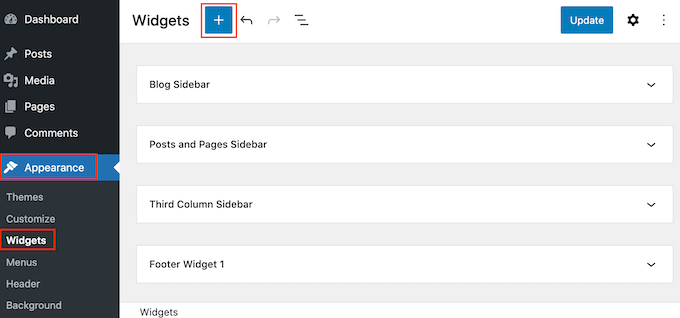
Now you’ve created a menu, let’s add it to the footer area of your website by going to Appearance » Widgets. Here, click on the blue ‘+’ button.
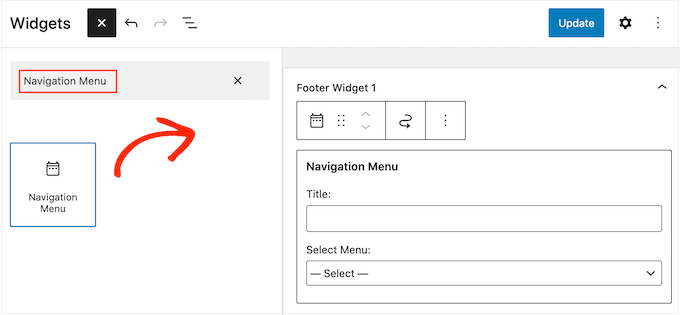
In the ‘Search’ field, type in ‘Navigation Menu.’
When the right block appears, drag and drop it onto the ‘Footer’ or similar area.
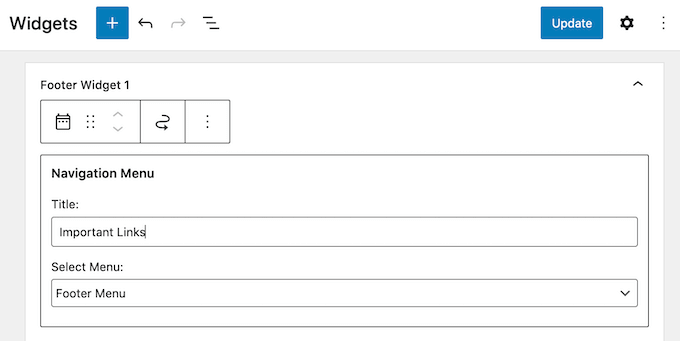
After that, open the Select Menu’ dropdown and choose the footer menu you created earlier.
You may also want to type in a title, which will appear above the links in your website’s footer.
With that done, click on the ‘Update’ button.
Now, if you visit your website you’ll see all the links in the footer area.
You can also add links to the footer using a drag-and-drop page builder plugin like SeedProd. You can even create different footers for individual WordPress pages.
Adding a Menu to Your Footer with the Full-Site Editor
If you’re using a block-based theme such as ThemeIsle Hestia Pro or Twenty Twenty-Three, then the process of adding a menu to the footer is slightly different.
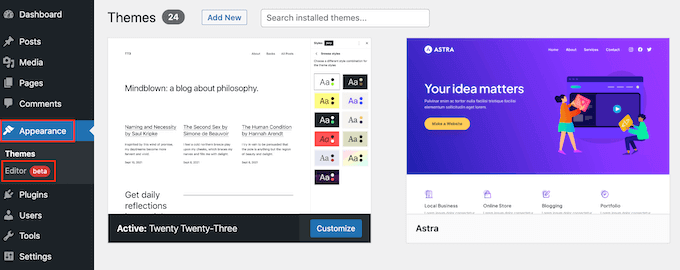
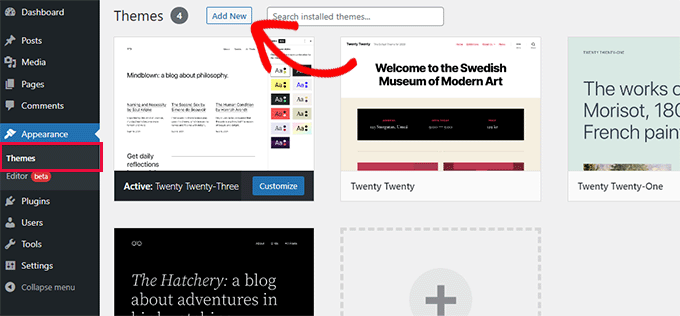
Simply create a navigation menu following the same process described above. Then, go to Themes »Editor in the WordPress dashboard to open the full-site editor.
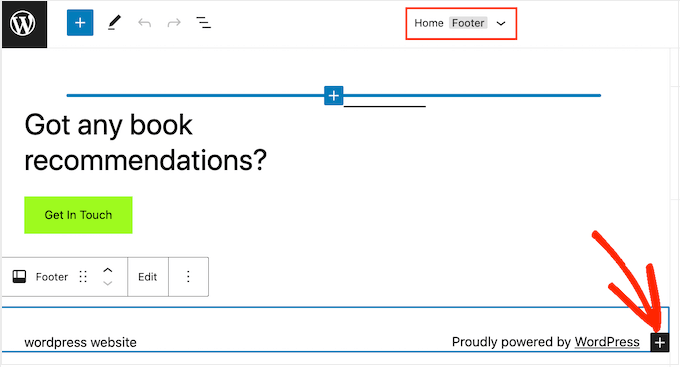
Here, click on the downwards-pointing arrow in the toolbar and select the ‘Footer’ template.
In the footer area, go ahead and click on the ‘+’ button to add a new block.
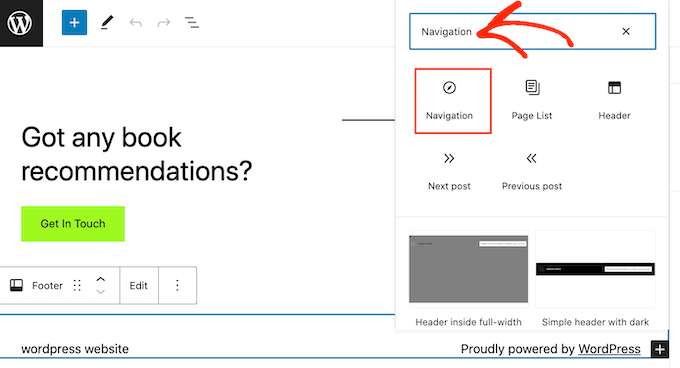
In the ‘Search’ bar, type in ‘Navigation.’
When the right block appears, click to add it to the footer area.
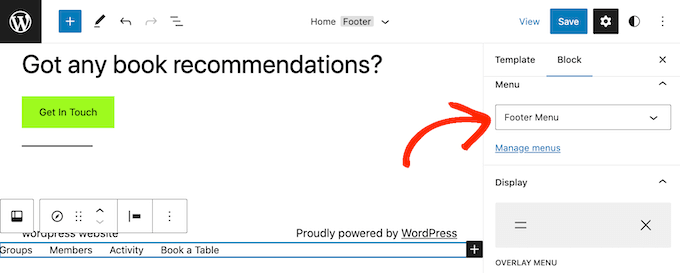
The full-site editor will show one of your navigation menus by default.
If you want to show a different menu instead, then open the ‘Select menu’ dropdown in the right-hand panel and choose the menu you want to use.
When you’re happy with how the menu looks, click on ‘Save’ to make your changes live.
2. Adding Code in WordPress Footer
Sometimes you may need to add snippets to your WordPress blog or website’s footer.
You could edit your theme files directly and paste the new code in the footer.php template. However, this isn’t recommended as the custom code will disappear if you change the WordPress theme, or update that theme.
Editing your theme files directly can also be risky. Even a simple typo or mistake could cause lots of common WordPress errors.
The best way to add code in the WordPress footer is by using a code snippets plugin. WPCode is the best code snippets plugin for WordPress. It makes it easy to insert code into your WordPress site’s headers and footers without needing to edit your theme files.
First, you need to install and activate the WPCode plugin. For more details, see our step-by-step guide on how to install a WordPress plugin.
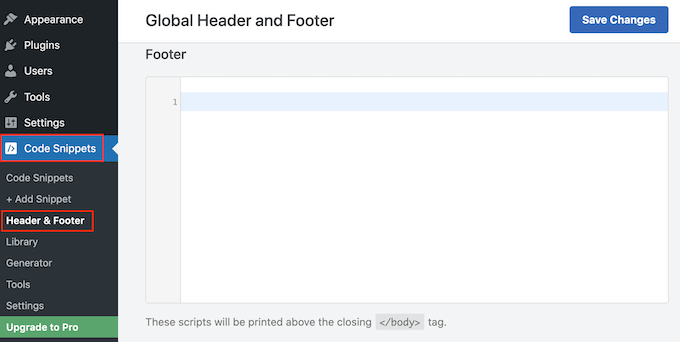
Upon activation, go to Code Snippets » Header & Footer. From here you can paste your code snippet into the ‘Footer’ box.
To comply with GDPR and other privacy-related laws in different countries, you need to add a privacy policy page in WordPress and then link to it from all the other pages.
Since the footer appears across your entire website, it’s the perfect place to add this URL.
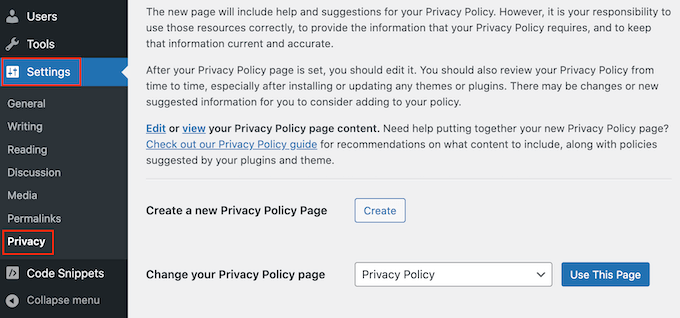
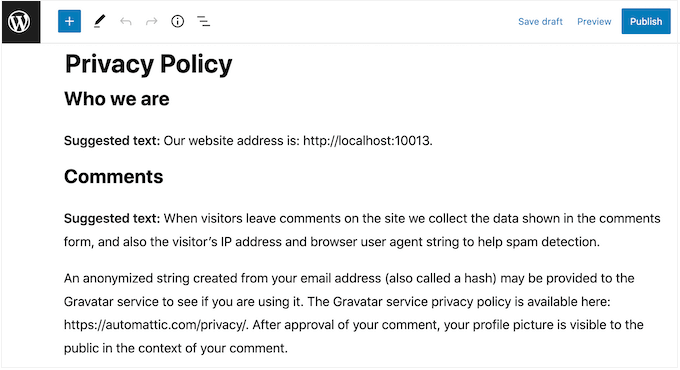
First, you need to go to Settings » Privacy in the admin area. You’ll notice that WordPress has already created a Privacy Policy page draft for you.
To use the default Privacy Policy page, simply click on ‘Use This Page.’ If you want to use a different page instead, then open the dropdown menu and choose a new page from the list.
You can also create a new privacy policy page from this screen. Simply click on the ‘Create’ button and WordPress will generate a new post with some basic privacy policy text.
No matter how you create the privacy policy page, you can edit it just like any other page in WordPress. For example, you can add more information about your requirements, and terms and conditions.
When you’re happy with the information you’ve entered, click on the ‘Publish’ button to make the privacy policy live.
With that done, you’ll need to add a link to your website’s footer. To add a navigation menu to the footer area, simply follow the same process described above.
4. Adding Copyright Date in WordPress Footer
You may also want to add a copyright date in the WordPress footer area to let visitors know that your content is copyrighted. One way to do this is by simply adding the text to your theme settings.
Many top WordPress themes allow you to add text in the footer area, so it’s worth checking whether your theme has this setting.
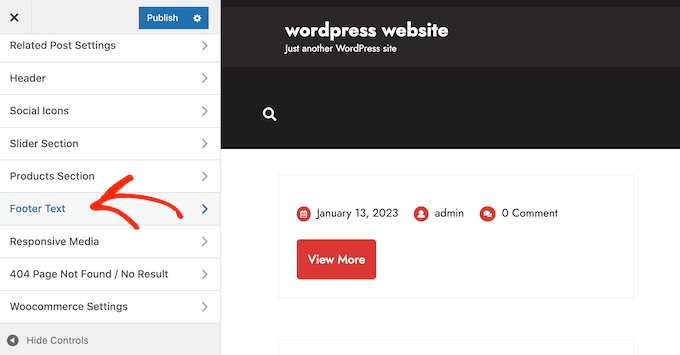
Simply go to the Appearance » Customize page and look for any footer settings in the left-hand menu. These are usually labeled ‘Footer Options,’ ‘Footer Settings’ or similar.
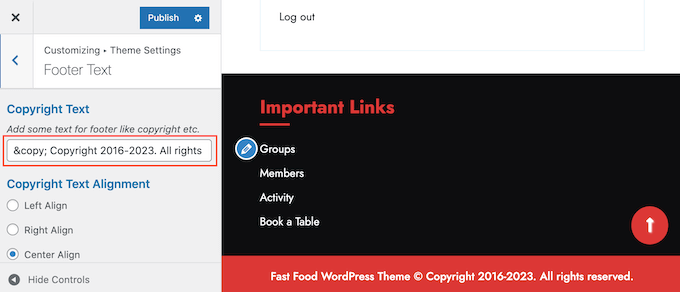
To add the copyright symbol, simply paste the following into the ‘Footer Credits,’ ‘Copyright Text’ or similar section.
The WordPress Theme Customizer will update automatically so you can see how the copyright text will look on your website.
Depending on your theme, you may also be able to change the font size and text alignment using the theme settings.
If you’re happy with how the copyright notice looks, then click on the ‘Publish’ button to make your changes live.
Pro Tip: With this approach, you’ll still need to update the copyright notice every year. To add the new year automatically, see our guide on how to add a dynamic copyright date in the WordPress footer.
Adding a Copyright Date to Your Footer with the Full-Site Editor
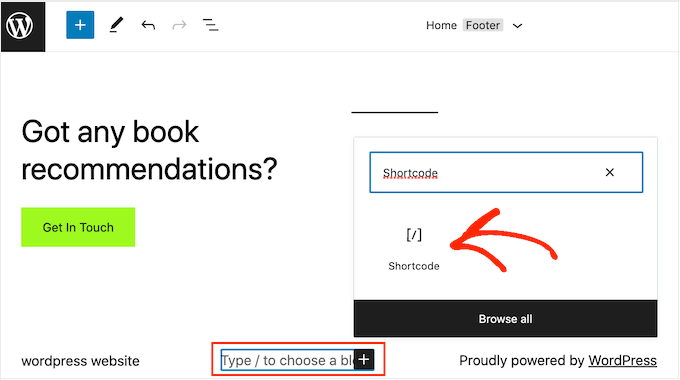
If you’re using a block-enabled theme, then it’s easy to add a copyright date to the footer. Simply go to Themes »Editor to open the full-site editor.
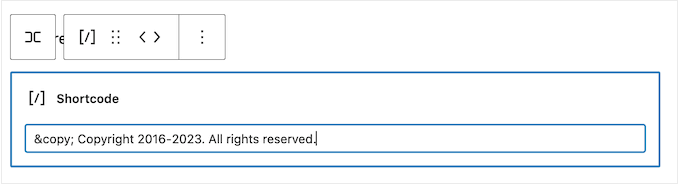
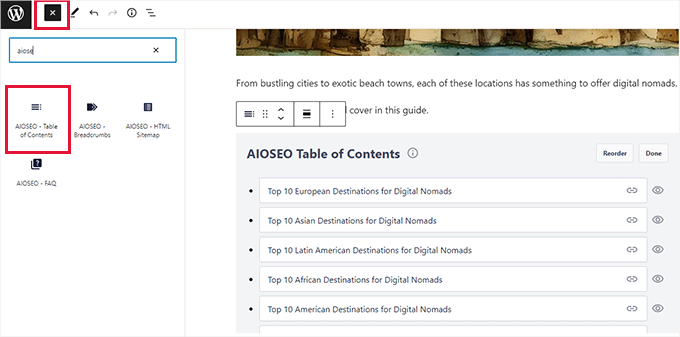
Then, scroll to the footer section and click on the ‘+’ to add a new block. You can now start typing in ‘Shortcode’ and select the right block when it appears.
After that, simply click on the ‘Save’ button to make the copyright notice live.
5. Remove Powered by Links from Footer in WordPress
Some free WordPress themes add links to the footer area. Typically this is a ‘Powered by WordPress’ disclaimer that links to the official WordPress website, but some theme developers also include links to their own websites.
These outgoing links encourage visitors to leave your website and can have a negative effect on your WordPress SEO. With that in mind, it’s a good idea to remove them from the footer area by going to Appearance » Customize.
Some themes make it difficult to remove these links so you may have to spend time looking through the different settings.
To start, we recommend looking for any settings labeled ‘Footer Options,’ ‘Footer & Copyright Options,’ or similar.
Here, you should be able to delete the links or even replace them with your own URLs.
Some themes hard-code the links in the theme files and don’t give you the option to remove them using the WordPress Customizer.
Removing Powered By Links with the Full-Site Editor
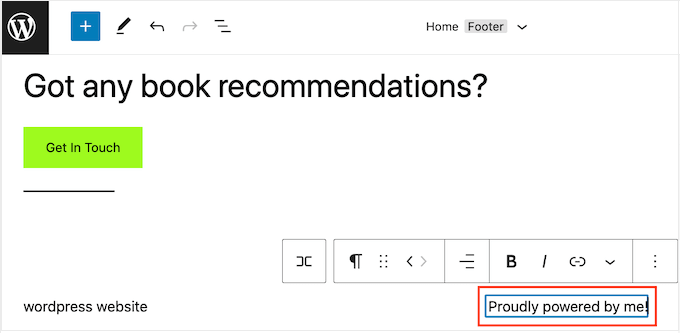
To remove the ‘Powered By’ links in a block-enabled theme, simply open the full-site editor by following the same process described above.
In the editor, find the ‘Proudly powered by WordPress’ or similar text. You can replace this with your own text by typing into the ‘Paragraph’ block.
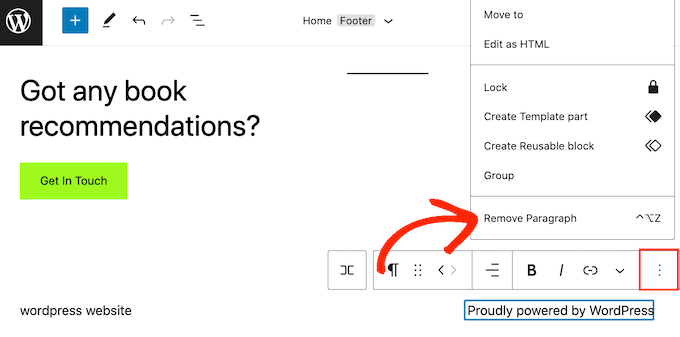
If you want to remove the text completely, then simply click to select the ‘Paragraph’ block. After that, click on the three-dotted ‘options’ button.
Finally, click on ‘Remove Paragraph’ to delete the block.
You can then go ahead and click on ‘Save.’ Now, if you visit your website you’ll see that this text has been removed.
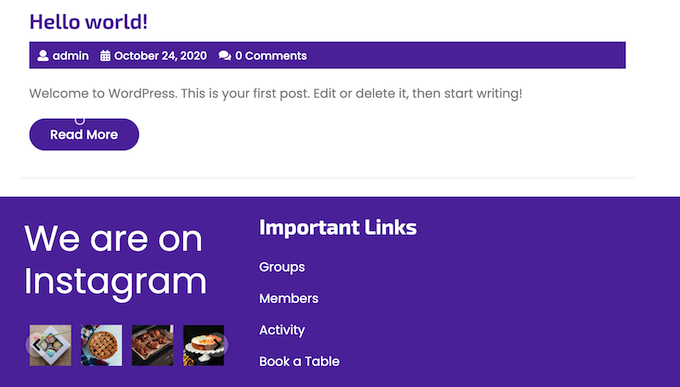
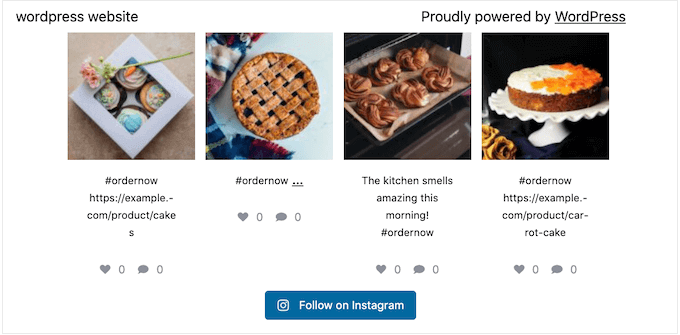
6. How to Add Instagram Feed in WordPress Footer
Do you regularly post beautiful photos and videos to Instagram?
People won’t see your Instagram content if they just visit your website. With that in mind, you may want to show recent Instagram photos in your website’s footer.
This is an easy way to promote your social media page and encourage more people to follow you on Instagram.
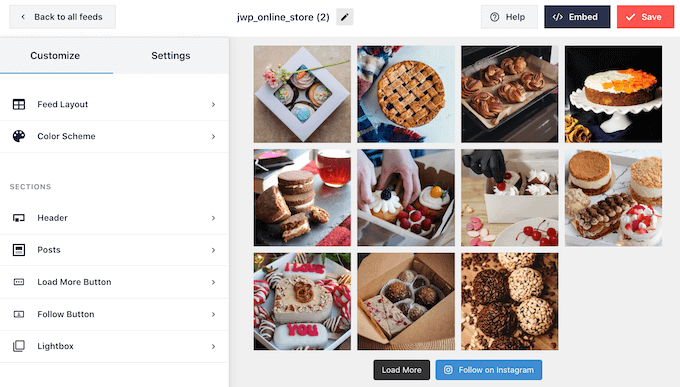
After adding the social media feed to your footer, Smash Balloon will fetch new Instagram photos automatically. In this way, your footer will always show your latest Instagram photos to the people who visit your website.
Smash Balloon has all the tools you need to fine-tune how the Instagram feed looks in your footer. For example, you can choose between different layouts, add a ‘Follow’ button, optimize your feed for mobile devices, and more with the user-friendly Smash Balloon editor.
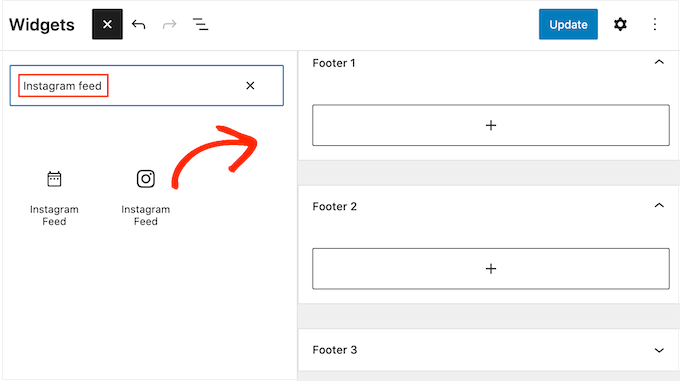
When you’re happy with how the feed looks, it’s time to add it to your website’s footer. Simply go to Appearance » Widgets and click on the blue ‘+’ button.
In the search field, type in ‘Instagram Feed’ to find the right block. Just be aware that WordPress has a built-in Instagram Feed button, so make sure you use the block that has the official Instagram logo.
You can now drag and drop the block onto your site’s footer.
With that done, simply click on ‘Update.’ After that, you can visit your website to see your Instagram feed in the footer.
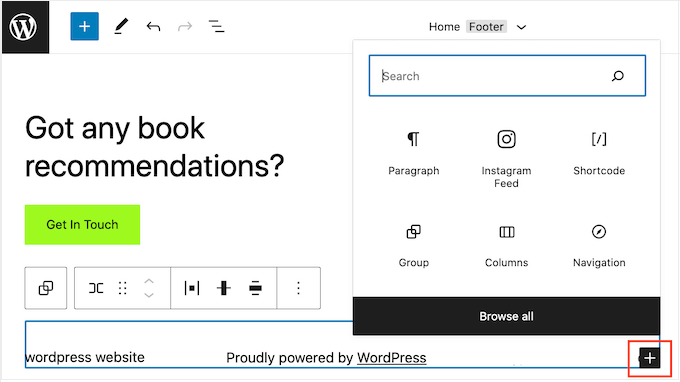
Adding an Instagram Feed with the Full-Site Editor
It’s easy to add the Smash Balloon Instagram feed to a block-enabled WordPress theme.
Simply open the full-site editor following the exact same process described above, and then click on the ‘+’ button in the footer template.
With that done, type in ‘Instagram Feed’ and select the right block when it appears to add it to the footer.
The full-site editor will automatically show the Instagram feed you created.
With that done, simply click on ‘Save’ to make the Instagram feed live.
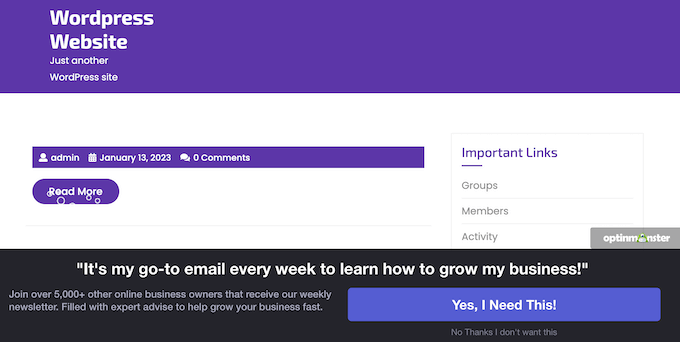
7. Add a Sticky Footer Bar in WordPress
Want to show special offers or notifications in the footer area?
You can create a footer bar that stays stuck to the bottom of the screen as the visitor scrolls.
To create this kind of sticky footer bar, you’ll need OptinMonster. It is the best conversion optimization software in the market and allows you to turn website visitors with a high bounce rate into users and customers.
OptinMonster also comes with powerful display rules so you can show personalized custom messages in your website’s footer.
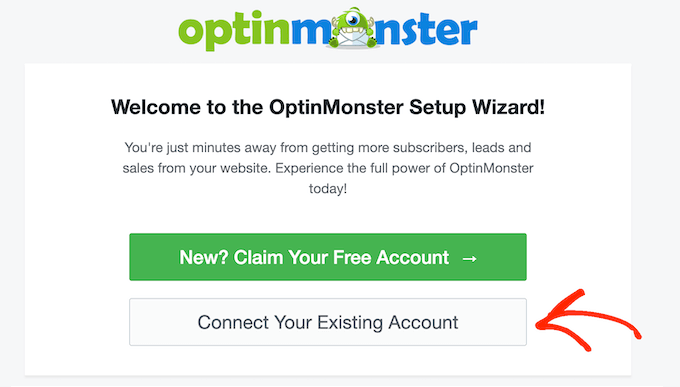
After that, install and activate the OptinMonster plugin on your WordPress website. Upon activation, select Connect Your Existing Account.
You can now type in the email address and password for your OptinMonster account.
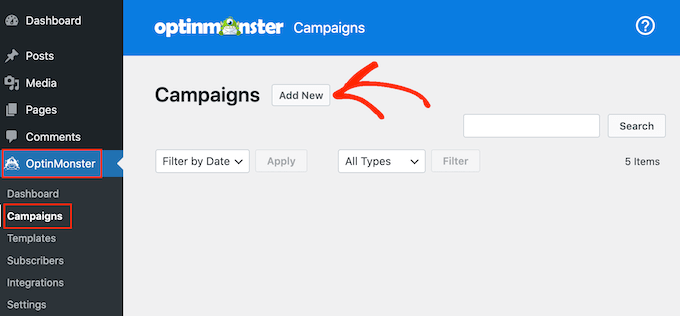
Once connected, go to the OptinMonster » Campaigns page and click on the ‘Create your first campaign’ or ‘Add New’ button.
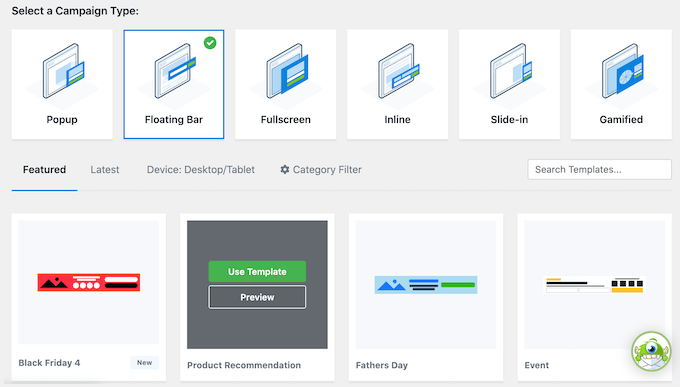
On the next screen, choose ‘Floating Bar’ as your campaign type and then select a template.
To preview an OptinMonster template, simply hover your mouse over it and then click on the ‘Preview’ button.
When you find a template you like, click on its ‘Use Template’ button.
You can then type in a name for the campaign. This is just for your reference so you can use any title you want.
With that done, click on Start Building.
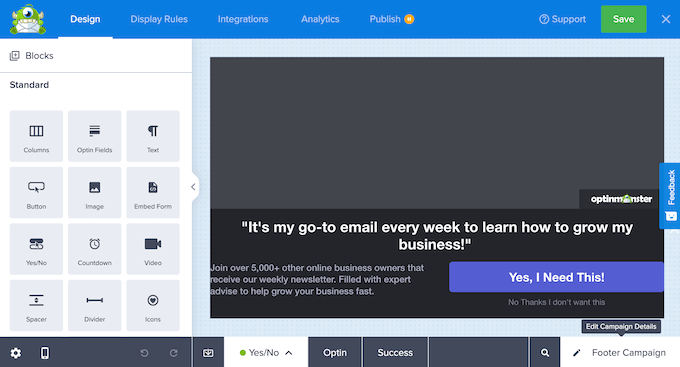
This will take you to OptinMonster’s drag-and-drop campaign builder where you can design the footer bar. Simply click on any element you want to edit, or drag and drop new blocks from the left-hand column.
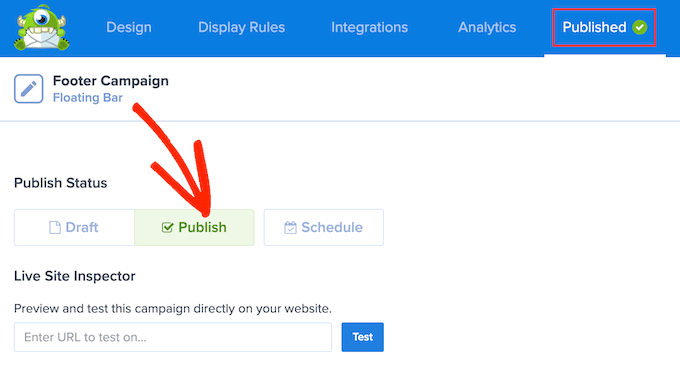
When you’re happy with how the campaign looks, simply click on the ‘Publish’ button.
Then, select ‘Publish’ to make the campaign live.
You can now select the ‘Save’ button to store your changes and then click on the ‘X’ in the upper-right corner to close the OptinMonster campaign builder.
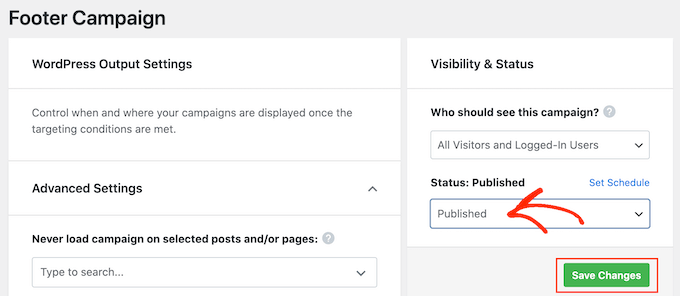
Back in the WordPress dashboard, open the ‘Status’ dropdown and select ‘Published.’
Finally, click on ‘Save.
Now, visit your WordPress website to see the floating footer bar in action.
You can use OptinMonster to create all kinds of high-converting campaigns including slide-in footer popups, countdown timers, and targeted footer notifications that can help you recover abandoned cart sales.
8. Add Social Buttons in WordPress Footer
Another good way to use the footer space in your WordPress theme is by displaying social media icons. This is an easy way to promote your different profiles and get more followers on Twitter, Facebook, and other popular platforms.
The best way to add these buttons is by using the Social Icons Widget plugin. This plugin supports all the major social networks and comes with multiple icon styles that you can choose from.
After activating Social Icons Widget, go to the Appearance » Widgets page. You can then click on the ‘+’ button and search for ‘Social Icons Block.’
When the right block appears, drag and drop it onto the footer area.
By default, the Social Icons Block already has a few social media icons built-in.
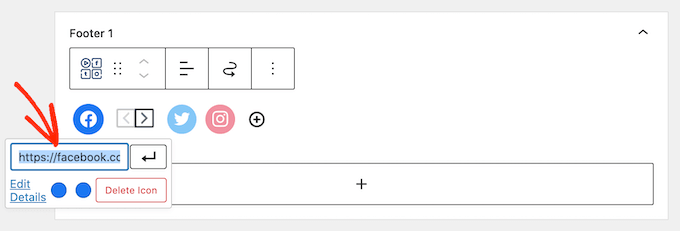
To link any of these icons to your own social profiles, simply give it a click. In the little bar that appears, type in the URL of the page you want to promote.
Want to use a different icon for this social media platform?
Then simply click on the ‘Edit Details’ link. This opens a window where you can choose a new image for the social icon.
Simply repeat this process for each built-in social media icon.
If you want to remove one of these default icons, then click on the ‘Delete icon.’
There are countless social media platforms and other websites that you may want to add to the footer area.
To do this, click on the ‘+’ button.
You can now choose a social media icon and add a link by following the same process described above.
When you’re happy with how the social media icons are set up, click on ‘Update.’ Now, simply visit your website and scroll to the footer area to see the social buttons in action.
Bonus: Want to add more social features to your website? Take a look at our expert pick of the best social media plugins for WordPress to grow your audience.
Adding Social Buttons with the Full-Site Editor
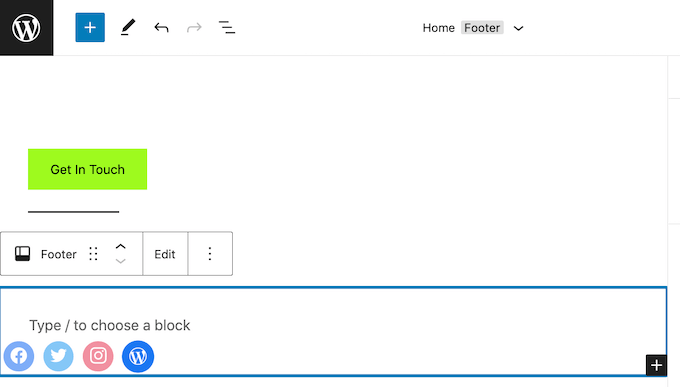
Are you using a block-enabled theme? Then you can add social icons to the footer by going to Themes »Editor.
In the footer, click on the ‘+’ button and then type in ‘Social Icons block.’
When the right block appears, click to add it to the footer.
This adds a block with the default social icons.
You can now customize these icons and add new social buttons, by following the same process described above.
When you’re happy with how the buttons look, simply click on the ‘Save’ button. Now if you visit your website you’ll see the social icons in the block-enabled footer.
9. Add a Phone Number in WordPress Footer
If you offer customer support over the phone, then adding your phone number in the WordPress footer area can help users contact you.
For this, you’ll need a business phone number. We recommend using Nextiva, which is the best business phone service for small businesses.
Nextiva allows you to make cheaper calls and use advanced features like call forwarding, unlimited free domestic calling, voicemail to email and text, and more. You can also use the same number on multiple devices and handsets, and manage calls from any device that has an internet connection.
Once you have a business phone number, you’ll need to add it to your website. The easiest way is by using the WP Call Button plugin, which adds a click-to-call button to your WordPress site.
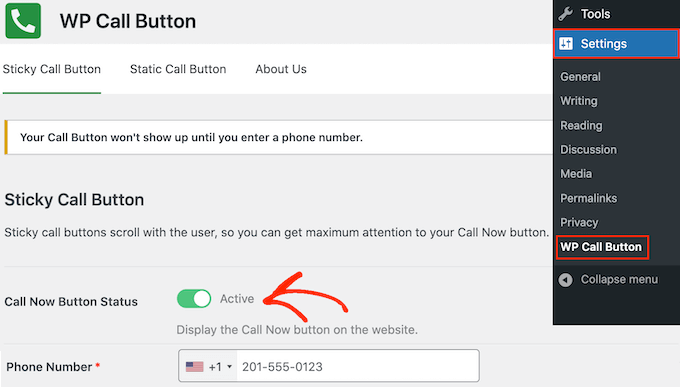
After activating the plugin, go to Settings » WP Call Button in the WordPress dashboard.
Here, click on the ‘Call Now Button Status’ switch so it shows ‘Active.’
Next, type your business phone number into the ‘Phone Number’ field.
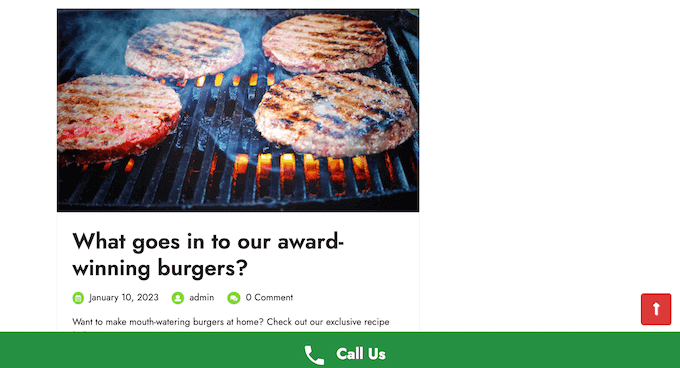
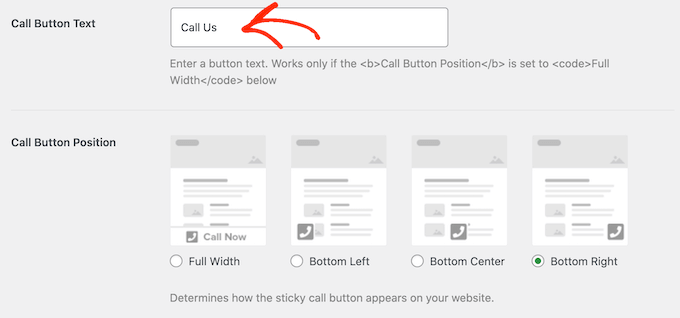
By default, the button shows ‘Call Us’ text but you can replace this with your own custom messaging by typing into the ‘Call Button Text’ field.
After that, scroll to the Call Button Position section and choose where you want to show the button on your website. For example, you can show the button in the bottom-right corner, or create a banner that covers the whole footer area.
When you’re happy with how the button is set up, click on ‘Save Changes.’ After that, simply head over to your website to see the call-to-click button in action.
Your website’s footer doesn’t have to be a dead-end. If you’ve added a navigation menu following the process described above, then you’re off to a great start. However, you can also encourage customers to connect with you by adding a contact form to the footer area.
WPForms is the best WordPress contact form plugin and comes with a ready-made Simple Contact Form template that allows you to create a contact form with just a few clicks.
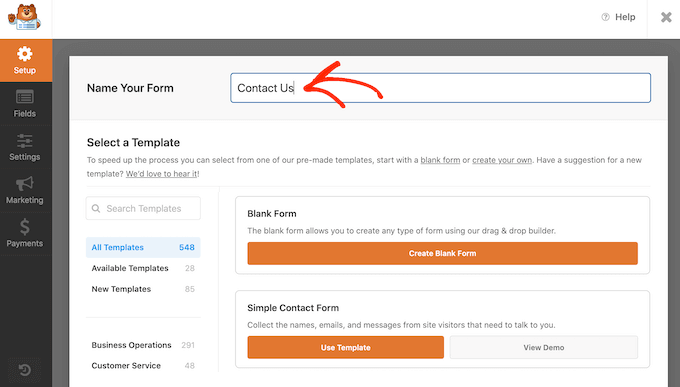
After activating the plugin, go to WPForms » Add New and type in a name for the contact form. This is just for your reference so you can use anything you want.
Simply find the ‘Simple Contact Form’ template and click on its ‘Use Template’ button.
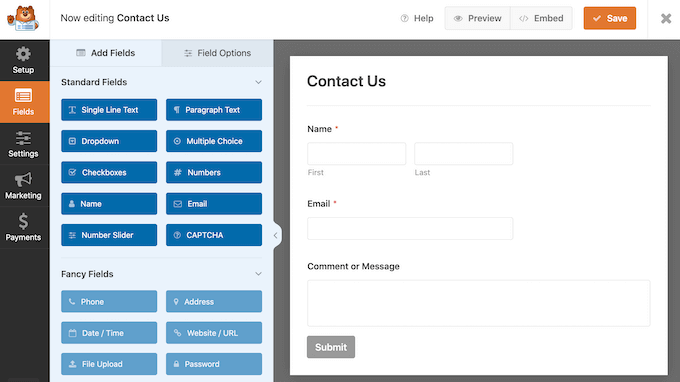
WPForms will now open the template in its form builder. The template already has all the fields you’ll typically need, but you can add more fields by dragging them from the left-hand menu and dropping them onto your form.
You can also click on any field to edit it, and rearrange them in the form using drag and drop.
To delete a field, simply hover your mouse over it and then click on the small trash can icon when it appears.
When you’re ready, click on the ‘Save’ button to store your changes.
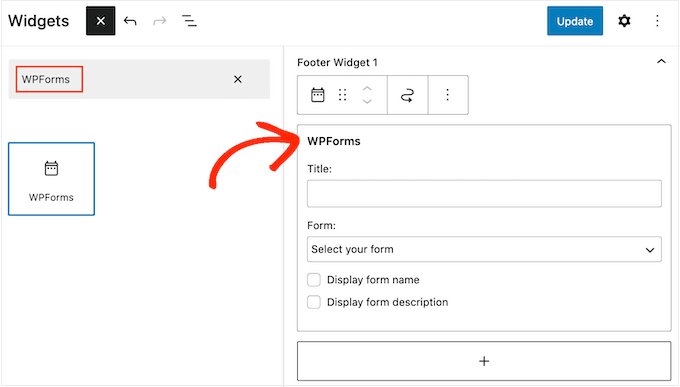
To add the contact form to your footer, head over to the Appearance » Widgets page in the WordPress dashboard.
Here, click on the ‘+’ button and search for ‘WPForms.’ When the right block shows up, drag and drop it onto your theme’s footer area.
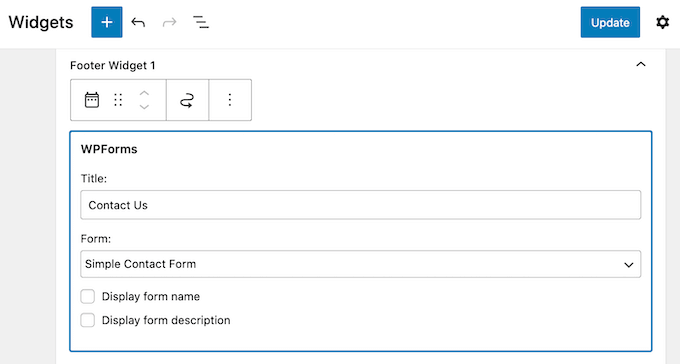
After that, open the ‘Form’ dropdown and select your contact form.
You can also add an optional title, which will appear above the contact form.
Once you’ve done that, click on the ‘Update’ button.
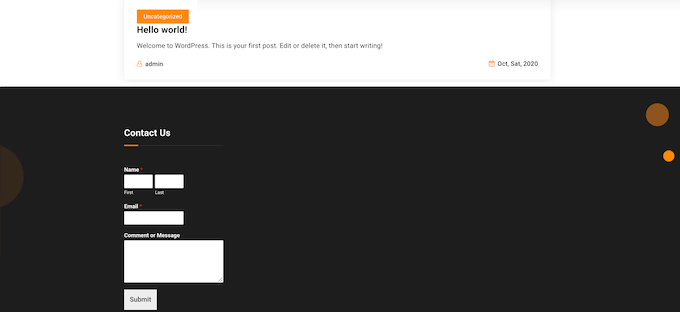
Now, if you visit your website you’ll see the new contact form in the footer.
Adding a Contact Form with the Full-Site Editor
Want to add a contact form to the footer of a block-enabled theme?
Then you’ll need to head over to Themes »Editor. Here, scroll to the bottom of the screen and click on the ‘+’ in the footer area.
With that done, type in ‘WPForms’ to find the right block.
Give this block a click to add it to the footer area.
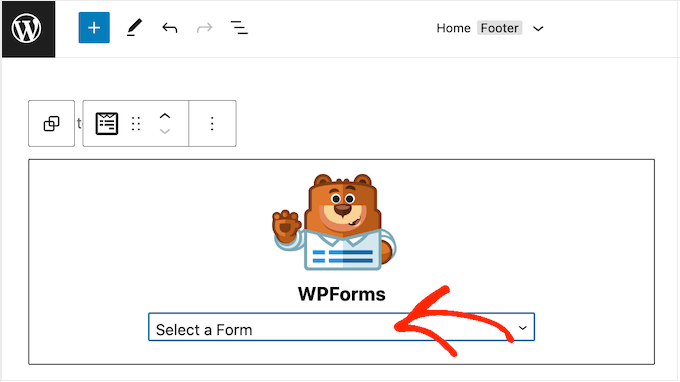
In the WPForms block, open the ‘Select a Form’ dropdown and choose the contact form we just created.
When you’re ready to make the contact form live, simply click on the ‘Save’ button.
We hope this article helped you decide which things to add to your WordPress footer to make it more useful. Next, you can see our guide on how to improve your WordPress website speed and performance, and our expert pick of the best WordPress plugins to use on your site.
If you liked this article, then please subscribe to our YouTube Channel for WordPress video tutorials. You can also find us on Twitter and Facebook.
Some users may need to create a website anonymously to protect their privacy and additional security.
In this step-by-step guide, we’ll show you how to easily create a truly anonymous website. We’ll also talk about protecting your identity online.
Why Create an Anonymous Website?
An anonymous website conceals the identity of who runs or owns a particular website.
Some users may want to remain anonymous for a number of reasons.
Whistleblowers trying to expose corruption.
Journalists under authoritarian regimes
Citizen watchdog groups
Or users who just want to remain anonymous for privacy reasons
Creating an anonymous website makes it difficult to find out who created and runs the website.
Important: Please keep in mind that there is no guaranteed way to remain completely anonymous. While you can make it difficult to trace, there is still a chance that it can be tracked.
Hostinger is one of the best WordPress hosting companies on the market and allows you to pay using Bitcoin and other cryptocurrencies to keep your purchase as anonymous as possible.
Buying Hosting and Domain Name Anonymously
First, you need to make sure you have VPN turned on whenever you are working on your anonymous website.
After that, you need to visit the Hostinger website and click on the ‘Start Now’ button.
This will bring you to the pricing and plans selection page.
We recommend choosing a 48-month plan which gives you the best discount. Plus, you wouldn’t need to worry about future payments for a long time.
Click to select the plan you want to buy, and then go to the payment section.
From here, first, you need to provide the anonymous email account you created earlier.
After that, you need to select ‘Coingate’ as the payment method and then click on the ‘Submit Secure Payment’ button.
This will take you to the payment wizard.
First, you need to select a cryptocurrency that you want to pay with and click Continue.
Next, you need to enter your anonymous email address and click on the ‘Continue’ button.
Note that you don’t need to create a Coingate account to pay using this method.
On the next screen, you’ll see the QR code to make the payment through your Bitcoin wallet app.
You can also pay manually, by sending the amount to the Bitcoin wallet address mentioned on the screen.
Upon completion of the transaction, you will be redirected back to the Hostinger website.
You will receive an email from Hostinger with a link to log in to the hosting control panel.
Once you log in to your hosting account control panel, you’ll see a notification to claim your free domain name.
During domain registration, ICANN requires website owners to provide their personal information such as name, address, email, and phone number.
You need to provide at least the email address you created earlier so that you can be reached for verification.
During the registration, you may also see an option to turn on Domain Privacy.
This feature hides any information you provide during domain registration from WHOIS searches. Anyone who checks will see Hostinger’s proxy info.
After domain registration, you may receive an email to verify your registration.
Installing WordPress to Make Your Anonymous Website
Now that you have completed the domain name and hosting setup, it is time to install WordPress.
Hostinger allows you to easily create a WordPress website. Click on the ‘Manage’ button next to your URL under the hosting panel.
This will bring you to your back-end dashboard.
From here, you need to visit the Website » Auto Installer page and then click on the ‘Select’ button under WordPress.
This will launch the auto-installer wizard.
Simply follow the on-screen instructions to finish the setup.
After that, you will see your new website options under the Hostinger control panel.
From here, first, you need to click on the ‘Install’ button next to the ‘SSL Certificate’ option.
After that, you need to click on the toggle next to ‘Force HTTPs’ option.
SSL (Secure Sockets Layer) allows your website to use secure HTTPs. Using it improves your WordPress security by encrypting all traffic to and from your website.
Having an SSL certificate is also a factor in ranking well in search engines and a part of a solid website SEO plan.
Finally, click on the ‘Edit Website’ button to launch and start editing your new WordPress website.
Working on Your WordPress Website Anonymously
By design, WordPress is privacy-conscious software to the extent that you can choose what information you want to share on your website.
First, you may want to visit the Users » Profile page and choose a pseudonym for the default admin or author of your website.
Don’t forget to click on the ‘Update Profile’ button to save your changes.
Next, you need to decide whether you want to allow users to comment on posts and pages across your website.
Simply go to Settings » Discussion page to configure comments. Uncheck all options under the ‘Default Post Settings’ section to disable comments, trackbacks, and pingbacks.
Don’t forget to click on the ‘Save Changes’ button to store your settings.
Adding Content to Your WordPress Site
WordPress comes with two default content types called posts and pages. Posts are part of a blog and are displayed in reverse chronological order, meaning that newer posts appear first.
Pages are standalone pages that are not part of a blog. They are used to create a website structure and layout. See our list of must-have WordPress pages for all types of websites.
To add a page, simply visit the Pages » Add New to create one.
WordPress comes with a powerful editor called the Block Editor. See our complete WordPress block editor tutorial to familiarize yourself with the interface.
Similarly, to create a post you will need to visit Posts » Add New page.
Choosing a Theme (Template) For Your Website
WordPress comes with a powerful templating engine that allows you to change the appearance of your website by installing themes.
There are thousands of free and paid WordPress themes available. You can choose one that looks closer to what you have in mind for your website.
You can look for themes under the Appearance » Themes page. It will show you a bunch of default themes that come with your WordPress install.
For more themes, click on the ‘Add New’ button at the top to find more free themes.
Plugins are like apps for your WordPress website. They allow you to add new features and extend the functionality of WordPress.
There are more than 60,000 free plugins available in the WordPress.org plugin directory alone. Plus, there are premium WordPress plugins sold by third-party developers with priority support and guaranteed updates.
However, you also need to consider which plugins you need to use to keep your WordPress website secure, private, and anonymous.
Following are our top picks for the best WordPress plugins to install on your anonymous website.
WPForms – It is the best WordPress contact form plugin and allows you to easily create forms for your website.
All in One SEO for WordPress – It is the best WordPress SEO plugin on the market and helps your anonymous website get more traffic from search engines.
SeedProd – It is a powerful WordPress page builder that allows you to use a drag-and-drop interface to create any type of page for your website.
OptinMonster – It is a conversion optimization software, which helps you convert website visitors into email subscribers and customers.
MonsterInsights – The best WordPress Google Analytics plugin which helps you see where your visitors and coming from and what they see on your website.
Following are some of the most commonly asked questions about creating an anonymous website.
1. Is it possible to create a fully anonymous website?
Yes, it is possible to create a fully anonymous website. However, you’ll need to be very vigilant about it. Each internet activity creates an information trail leading back to the person who initiated the activity. This trail can be traced by hackers, government agencies, and ISPs. As an anonymous website owner, it will be your job to anonymize all activities.
You can do this by minimizing the activities around your website and using a VPN to hide your IP address. Be careful about any social interactions as they may reveal personally identifiable information.
2. What is anonymous offshore hosting?
Anonymous offshore hosting is a website hosting service that allows users to purchase hosting and domain name without providing real name or credit card information.
Some of these lesser-known companies host their servers in countries with stricter privacy laws. These companies also promise to not store user logs or share them with third-country agencies.
However, these anonymous offshore hosting companies often have very bad customer service and outdated technology.
3. Can a website owner be traced?
Yes, a website owner can be traced even if they are trying to remain anonymous. However, an anonymous website owner can use privacy tools to make it harder to be traced.
Even then if someone is determined to figure out and has the technology, tools, and resources, then they may be able to find out who is running an anonymous website.
4. Can I buy a domain name anonymously?
Yes, you can buy a domain name anonymously from a domain name registrar that accepts cryptocurrencies as a payment method.
Hostinger, also allows you to register additional domain names using cryptocurrencies. During the registration, you can use a separate anonymous email account as the contact address for your domain name.
We hope this article helped you learn how to create a truly anonymous website. You may also want to see our guide on how to create a private blog or take a look at our complete WordPress security guide to keep your anonymous website secure.
If you liked this article, then please subscribe to our YouTube Channel for WordPress video tutorials. You can also find us on Twitter and Facebook.
Do you want to enable automatic updates for major WordPress updates?
Automatic updates are enabled for minor releases on WordPress. This means that the WordPress.org team can automatically install security updates without requiring user input.
However, it does not automatically update your website when there is a new major release. Luckily, you can easily turn on automatic updates for major releases as well.
In this article, we’ll show you how to enable automatic updates in WordPress for major versions.
How WordPress Automatic Updates Work
The automatic updates feature was introduced in WordPress 3.7. This allowed WordPress to automatically install new minor releases to improve the security of your WordPress website.
There is an option to disable automatic updates in WordPress. However, we recommend that you keep automatic updates enabled because they usually address crucial security issues and vulnerabilities.
Now if you just run one or two WordPress websites, then you can simply follow our guide to safely update your WordPress site when there is a new major WordPress release. However, updating WordPress manually can be time-consuming if you manage multiple sites.
Luckily, managed WordPress hosting providers like WP Engine automatically update WordPress for all new releases, not just minor ones.
You can also enable auto-updates on a shared hosting provider like Bluehost and SiteGround. But first, you’ll just need to make sure that you have a proper backup system in place in case something goes wrong.
With that being said, let’s take a look at how to easily set up automatic updates for major WordPress releases. Here’s what we’ll cover in this tutorial:
The most important layer of security you can add to any website is to set up a backup system. Whether you turn on automatic updates or not, you should always have an automatic backup system in place for every WordPress website.
There are several helpful WordPress backup plugins that you can use to set up automatic backups on your WordPress site.
We recommend using Duplicator because it is the best WordPress backup plugin on the market, and it’s free. Duplicator allows you to easily set up automatic backups of your complete WordPress website.
It also allows you to automatically store your backup files in a remote location such as Google Drive or Dropbox or Amazon S3.
Once you have set up automatic WordPress backups, you can go ahead and turn on automated WordPress updates for major releases.
Method 1: Enable Automatic Updates for Major Releases From Dashboard » Updates
When you visit the Dashboard » Updates page in your WordPress admin area, you will see the message, ‘This site is automatically kept up to date with maintenance and security releases of WordPress only.’ These are the minor releases we mentioned above.
If you would like all WordPress updates to be handled the same way, then simply click the link labeled ‘Enable automatic updates for all new versions of WordPress.’
Now major WordPress releases will be automatically installed as well.
If you decide to turn off automatic updates in the future, then simply return to the Dashboard » Updates page and click the link that says ‘Switch to automatic updates for maintenance and security releases only.’
Now major WordPress versions will not be installed automatically, just minor releases and security updates.
Method 2: Enable Automatic WordPress Updates for Major Releases Using a Plugin
The plugin method gives you more control over what is updated on your site. For example, it includes options to automatically update WordPress core, plugins, themes, and more.
Upon activation, you need to visit Dashboard » Updates Options page to set up the plugin.
Under the ‘Quick configuration actions’ section, you should click the ‘Custom’ button. After that, click the ‘Auto update all releases’ button under the ‘WordPress core updates’ section.
Note: Be cautious clicking the ‘Auto update everything’ button under ‘Quick configuration actions’. This will turn on automatic updates for everything, including WordPress core, plugins, themes, and translations.
The plugin will automatically store your settings and enable the major WordPress releases to be automatically updated.
Method 3: Manually Enable Automatic Updates for Major Releases in WordPress
This method requires you to add code to your WordPress files.
First, you need to add the following line of code to your site’s wp-config.php file.
define( 'WP_AUTO_UPDATE_CORE', true );
There is one little problem with this code. It also enables what are called ‘nightly’ updates, or ‘nightlies.’ These are still under development and may contain bugs, so should not be installed on a live WordPress website.
This filter will disable automatic updates for nightly builds or development updates.
Your WordPress site is now ready to automatically update itself without your input whenever there is a new WordPress version available.
Frequently Asked Questions about WordPress Automatic Updates
1. Why do I need to install WordPress updates?
WordPress is a regularly maintained software. Thousands of developers contribute to making WordPress better and more secure.
You need to install WordPress updates as soon as they are available. This ensures that your website has the latest security patches, new features, and the best speed and performance.
2. Are updates safe for my website?
As the world’s most popular website builder, WordPress updates immediately become available to millions of websites. The core team works very hard to ensure that they are absolutely safe for all websites to install.
However, we recommend everyone always back their WordPress website before updates. This allows you to quickly revert back in case anything goes wrong after an update.
3. Can I also automatically update WordPress plugins?
By default, WordPress requires you to manually install plugin updates. However, you can enable automatic updates for plugins as well.
4. Can I install updates on all my websites from a single dashboard?
By default, you’ll need to log in to each WordPress website to install updates. Luckily, you can use tools to manage multiple WordPress sites. These tools make it easier to install updates on all your WordPress sites without having to log in to each site.
If you have been reading WPBeginner for a while, then you know that we believe All in One SEO is the best WordPress SEO plugin on the market.
It is our #1 recommendation as the must-have SEO toolkit, and this is the exact tool that we use on our website. For beginners, All in One SEO provides the most comprehensive SEO features in one plugin.
In this article, we’ll share some of the AIOSEO power hacks that will help you take your WordPress SEO to the next level.
What Makes All in One SEO The Best SEO Toolkit for WordPress Users?
Currently over 3 million websites use AIOSEO including WPBeginner, and it is one of the top 20 most installed WordPress plugins of all time.
There’s also a free version of AIOSEO available that you can use if you’re just getting started.
All in One SEO was first released in 2007, just a few years after WordPress introduced the ability to install plugins to extend WordPress functionality.
In 2020, AIOSEO was acquired by Awesome Motive (the management company of WPBeginner). Since then, it has evolved into the most powerful and modern WordPress SEO plugin.
We use it on all our websites to improve our WordPress SEO rankings, including WPBeginner. That’s because the features are unmatched by any other SEO plugin on the market.
That being said, let’s take a look at some of the coolest things that you can do with All in One SEO.
Here is a list of topics we’ll cover in this guide.
1. Ability to Add Dynamic SEO Title and Descriptions
SEO titles and descriptions are highly important when optimizing your content for SEO. Search engines assign them slightly more weight than other parts of your content.
The SEO title also appears in search results and can help you get more clicks and bring more traffic to your site.
Many site owners often go back to old posts and edit their SEO titles to help optimize them. For instance, you may have mentioned the Current Year or pricing in the title which may become outdated.
All in One SEO allows you to use smart tags in SEO title and description fields. These tags dynamically update to match the conditions they are used for.
For instance, you can add the ‘Post Title’ tag, and it will automatically use your post or page’s title as the SEO Title.
Similarly, you can use the ‘Current Year’ or ‘Current Month’ tags, and it will automatically display the current year or month in your post title.
AIOSEO comes with the following smart tags that you can select by clicking on ‘View all tags’.
Author First Name: The first name of the post author.
Author Last Name: The last name of the post author.
Author Name: The display name of the post author.
Categories: All categories that are assigned to the current post, comma-separated.
Category Title: Current or first category title.
Current Date: The current date.
Current Day: The current day of the month.
Current Month: The current month.
Current Year: The current year.
Custom Field: A custom field from the current post.
Permalink: The permalink for the current post.
Post Content: The content of your post.
Post Date: The date when the post was published, localized.
Post Day: The day of the month when the post was published, localized.
Post Excerpt: The excerpt defined in your post settings.
Post Excerpt Only: The excerpt defined in your post.
Post Month: The month when the post was published, localized.
Post Title: The original title of the current post.
Post Year: The year when the post was published.
Separator: The separator is defined in the search appearance settings.
Site Title: Your site title.
Tagline: The tagline for your site, set in the general settings.
Taxonomy Name: The name of the first term of a given taxonomy that is assigned to the current post.
Want to make your SEO title even more attention-grabbing?
How about adding emojis into your post title or description? All in One SEO makes it super easy to use Emojis in your SEO title and descriptions.
Simply click on the emoji button to search and add an emoji.
2. Helps You Write Good Headlines and SEO Titles
Now you might already know that CTR (click through rate) plays an important role in SEO rankings.
This means that you have to write good headlines and SEO titles that encourage users to click when your site appears in search results.
All in One SEO comes with a built-in headline analyzer tool. It will automatically show you a score for your post title or headline.
Plus, it will also show you practical tips to improve the effectiveness of your title.
For instance, it may recommend using power words or removing stop words from your SEO title.
3. Comes with a Dynamic and Customizable Table of Contents Block
Reading longer articles can be difficult for your users, and they may lose interest in scrolling down while looking for the information they need.
This is where the Table of Contents block comes in.
It creates a list of topics covered in an article, and you may have seen them in articles here at WPBeginner. In fact, this post has an AIOSEO table of contents at the top!
Clicking on an item in the list takes you to that section in the article.
Not only does a table of content help users, but it also improves SEO.
Search engines like Google may display your table of content items as ‘Jump to section’ links in search results.
A table of contents can also make your website appear as the featured snippet for a search keyword.
Google may display it above all results with a much larger excerpt.
Previously, WordPress users had to use a separate plugin to generate tables of contents or manually create them.
All in One SEO comes with a dynamic Table of Contents block. Simply add the Table of Contents block to your post or page, and it will automatically generate a table of content based on the headings present in your article.
You can edit any item in the table by simply clicking on it or hide an item by clicking on the hide button.
You can also reorder items by clicking on the Reorder button. This only adjust the order of the list, not the placement of content in your article.
Optionally, you can choose a list style for your table of contents.
Currently, it allows you to choose from a plain bulleted list or a numbered list style.
4. Easily Add NoFollow Attribute to External and Referral Links
Links or backlinks are an important search engine ranking factor.
When you link to an external website, search engines consider that as a ranking signal. They will pass a small portion of your domain authority (link juice) to the other website.
Many SEO experts believe that they can rank higher in search results by adding the nofollow attribute to external and referral/affiliate links.
All in One SEO makes it super easy to add the nofollow attribute to links in your posts and pages.
Simply select the text that you want to link to and then click on the link button in the block toolbar.
You’ll see the option to add the link URL and a check box to add the nofollow attribute.
All in One SEO gives the most comprehensive and practical SEO score to your content.
It appears as a button on the top right corner of the post editor, clicking on it will bring up the TruSEO panel.
You will see a snippet preview and below that, you’ll find tips divided into the following areas:
Focus Keyphrase and Additional Keyphrases
Basic SEO
Title
Readability
You can click on any of them to expand and view the suggestions.
Errors will be highlighted in red with helpful descriptions to fix them.
SEO score is just a recommendation tool and does not guarantee search rankings. Any score above 70 is good for most types of content.
7. Comes with The Most Comprehensive Schema Markup Support
Schema markup is a special type of HTML code that you can add to your WordPress website to tell search engines more about your content.
For instance, you can tell the search engines that a particular page is a blog post, a recipe, a FAQ page, a news article, or a product page. Search engines can then use this data to display rich results.
Other WordPress SEO plugins only ship with limited schema markup support. Users had to install separate plugins to add proper schema markup for different content types.
All in One SEO solves this problem by adding the most comprehensive Schema markup support available.
It allows you to easily add schema markup in WordPress and WooCommerce. You can set the default Schema markup for different content types from plugin settings.
You can also change schema markup for individual posts and pages.
This comes in handy if you want to use your blog posts for different types of content such as recipes, product reviews, articles, and more.
Apart from content, All in One SEO also adds structured data required to be listed in Google My Business and Google Maps searches.
This allows your business to appear in Google Maps and business searches. Your listing gets an extended information panel with directions, phone numbers, business hours, and more.
Simply switch to the All in One SEO » Local SEO page and provide your business information.
If your business has multiple locations, then you can turn on the Multiple Locations option.
After that, the plugin will add a new Locations menu item to your WordPress admin sidebar.
You can now go to the Locations » Add New page to add a business location.
This will bring you to the Location editor page. First, you need to provide a title for your location and then add a little description.
You can also review options in the left column to set the location category and featured image.
After that scroll down to the AIOSEO Local Business section.
From here, you can add structured data for your location such as business name, logo, address, phone number, opening hours, and map.
Once you are finished, go ahead and click on the Publish button to save your location settings.
You can now repeat the process to add more business locations as needed.
Social media platforms are a big source of traffic for many website owners.
All in One SEO comes with super easy and extensive social media integration.
1. Easily Add Social Network Profiles and Default Settings
First, you can go to the All in One SEO » Social Networks page. From here, you can provide social media profile URLs.
If you use the same handle in all your social media profiles then you can simply check the ‘Use the same username for multiple social networks’ option.
After that, provide your username and All in One SEO will fill in the URLs for you.
The plugin also allows you to easily configure your website for popular social media platforms like Facebook and Twitter.
These options allow you to enable Open Graph metadata and provide default information that social media platforms can use when someone shares your content.
For instance, you can choose which image to use when someone shares a post. All in One SEO provides a bunch of options to automatically pick an image for Facebook and Twitter.
You can choose the featured image, the first image in the content, any attached image, the author image, any first available image, and more.
After configuring Facebook and Twitter, you can switch to the Pinterest tab. From here, you can also easily add the Pinterest verification code to verify your website on Pinterest.
2. Social Settings for Individual Posts and Pages
Once you have finished the default social networks setup, All in One SEO also provides you options to override these settings for individual posts and pages.
Simply edit a post or page and switch to the Social tab under the AIOSEO Settings section.
From here, you’ll see a preview of how your post will look on Facebook and Twitter.
Below that, you can override the default settings and change the post title, description, and social image.
If you change the data for Facebook, then you can use it for Twitter as well.
Simply switch to the Twitter tab and toggle the ‘Use Data from Facebook Tab’ option.
3. Add Social Profiles for Authors
You can also let search engines know which profiles are associated with an author or user on your website.
This allows search engines to discover and display social media profiles when someone searches for a specific person.
To add this, administrators can go to the Users » Profile page and other users can simply click on the Profile menu from the WordPress admin sidebar.
From here, switch to the social profiles tab and enter your social media profile URLs.
9. Add New Links or Cleanup Bad Links with AIOSEO Link Assistant
Links play a significant role in a website’s SEO rankings. However, as your website grows, you may add more internal links to some older posts than newer posts.
Going back to individual posts and adding links can become a tedious task. Particularly, if you have hundreds of articles.
All in One SEO solves this problem with the Link Assistant. It allows you to easily add links or clean up bad links with one click.
Here is how it works.
First, it automatically crawls your website and shows you a comprehensive link report.
From here, you can see an overview of the links with total counts for orphaned posts (posts that are not linked from any other post or page), external links, internal links, and affiliate links.
You can switch to the Links Report tab for detailed information on all your links.
You’ll see a list of all your posts and pages with columns for internal, external, and affiliate links.
It will also show a number of suggestions where you can add links.
For more details, you can click on the right arrow button next to a post or page.
This will show all links organized in different tabs. From the suggestions tab, you can quickly view link suggestions and add links without directly editing a post or page.
Want to discover more internal linking opportunities?
Switch to the ‘Linking Opportunities’ tab for more internal linking suggestions or check out the orphaned posts and add links to them.
Clean up Bad Links with 1-Click
You can view all external links that your website links to by clicking on the Domains Report tab.
From here, you can select a domain and delete all links to it with a single click.
This makes it super easy to clean up your website if it has been affected by malware that has added links to spam websites.
It also comes in handy when you no longer wish to link to a third-party website and immediately want to remove all links pointing to it.
10. Comes with Extensive XML Sitemaps with Powerful Customization Options
An XML sitemap is a file that lists all your website content in an XML format, so search engines like Google can easily discover and index your content.
WordPress comes with built-in XML sitemaps, but these are too basic and you don’t have any tools to customize them.
All in One SEO comes with extremely powerful XML sitemaps.
These custom XML sitemaps are highly customizable. For instance, you can easily include or exclude individual post types or taxonomies.
Plus, you can disable sitemaps for date and author archives.
Below that, you can add any standalone page to your sitemap under the Additional Pages option.
News results may not only appear prominently on the main search page but can also appear on the News tab or in Google Discover on mobile devices.
All in One SEO allows you to easily create a News Sitemap which is a requirement for Google News results.
Simply switch to the News Sitemap tab and turn it on.
After that, you can provide a title for your news publication.
Next, you need to choose which post types you want to include in your news sitemap.
Need even more control over your news sitemap?
All in One SEO allows you to easily exclude specific items from your news sitemap.
Simply toggle the Advanced Settings switch to show more options. From here, you can search for the post or page you want to exclude and click on the + button to add it.
12. Easily Create Customizable HTML Sitemaps
HTML Sitemaps are sitemaps for your users and can be added anywhere on your website.
They help users easily navigate a website and find the information they need. Many organizations, government websites, and small businesses find them quite helpful.
All in One SEO lets you easily create HTML sitemaps.
Simply go to the All in One SEO » Sitemaps page and switch to the HTML Sitemap tab.
From here, you can switch to the toggle next to Enable Sitemap to turn on HTML sitemap.
Below that, you can choose how you want to display the sitemap by choosing one of the following options.
Dedicated Page
Gutenberg Block
Shortcode
Widget
PHP Code
Click to select your option and it will tell you how to use it.
For instance, choosing the Dedicated Page option, you will be asked to provide URL for a page where you want to display the Sitemap.
Below that, you can choose which post types and taxonomies to include, sorting options, and enable compact archives.
Want to exclude some posts or pages from your HTML sitemap?
No worries, you can simply click on the Advanced Settings section to exclude any content from your HTML sitemap.
13. Appear in Video Results with Video Sitemaps
Videos are the most engaging type of content and for some search keywords, Google may automatically include video results at the top.
Now, if you regularly publish video content or add video embeds to your posts, then this gives you a huge opportunity to rank higher.
Research shows, that users are more likely to click on a result with a video thumbnail than just plain text.
All in One SEO’s Video Sitemaps help you get ready to appear in video search results.
Simply go to All in One SEO » Sitemaps page and switch to the Video Sitemap tab.
From here you can turn on Video Sitemap and choose which post types or taxonomies to include.
By default, the plugin will divide your sitemap into indexes. These are smaller files containing a limited number of links.
You can also adjust how many links you want to include in a sitemap.
Just like any other sitemap, you can click on the Advanced Settings section to exclude any content that you don’t want to appear in video sitemaps.
14. Get Indexed Faster with RSS Sitemaps
Unlike regular XML sitemaps which have a complete set of links to your content, RSS sitemaps provide search engines links to recent changes on a website.
This helps search engines more easily discover recent changes on a website. Google recommends using both XML sitemaps and RSS sitemap for optimal crawling.
All in One SEO allows you to easily generate an RSS sitemap for your website.
Simply go to the AIOSEO » Sitemaps settings page and switch to the RSS Sitemap tab.
From here, toggle the Enable Sitemap switch to turn on the RSS sitemap.
Below that you can choose the number of posts and which post types to include.
15. Easily Add Your Site to Webmaster Tools & Google Search Console
All top search engines provide website owners with easier tools to see how their website is performing in search and get alerts if something goes wrong.
Once you sign up for them, you will be asked to verify your ownership by adding a code snippet to your website.
All in One SEO makes it super easy to add the verification code for all webmaster tools under one place.
Simply go to the All in One SEO » General Settings and switch to the Webmaster Tools tab.
Now simply click on a search engine, and then add the verification code.
Below that you will also find a text field called Miscellaneous verification. This allows you to add verification codes from any other third-party platforms to your website.
SEO crawl budget is the number of times search engines like Google will crawl pages on your website.
Google sets a crawl budget for different domains based on its own algorithms. However, sometimes this budget is wasted if search bots spend most of the budget crawling less important pages on your site.
All in One SEO helps you fix that problem with the Crawl Cleanup feature. Simply go to the All in One SEO » Search Appearance page and switch to the Advanced tab.
From here, you need to scroll down to the bottom and switch the toggle next to the Crawl Cleanup option.
This will expand the section and will show you a bunch of options that you can exclude from crawling.
For instance, each WordPress category, tag, comments, archive, and author pages has its own RSS feeds. These get crawled, too, but are not highly important.
You can Disable them so that they are excluded from the crawl budget.
A 404 error occurs when a user visits a page on your website which is not there anymore. Perhaps it was deleted, the user entered an incorrect URL, or followed an incorrect link.
These errors create a bad user experience and can negatively impact SEO rankings.
Often, they go unnoticed by website owners until a user reports them.
All in One SEO fixes this problem by keeping a log of 404 errors on your website.
Simply go to the All in One SEO » Redirects page and switch to the 404 logs page to view them.
Now some of these links may be misspelled URLs with few hits, you can safely ignore those. Others would be links to posts that you may have deleted or changed their URLs.
In that case, you can simply click on the Add Redirect button and point that URL to the new location or any other relevant page.
21. Easy Full Site Redirects when Moving Site to Different Domains
Are you moving your WordPress website to a new domain name and worried about the SEO consequences?
All in One SEO’s redirect manager comes with super easy Full Site Redirects.
Basically, you can just paste the URL of your new domain name and it will redirect all users coming to your old domain to the exact pages on your new domain name.
This helps your new domain to rank quickly in search engines and also reduces the negative SEO consequences of moving to a new domain name.
WordPress comes with a built-in redirects system written in PHP. Many redirect plugins take advantage of it, including All in One SEO.
WordPress is used on many different types of servers and they can have different configurations that may affect redirects. Using PHP avoids dependency on server settings and makes sure that redirects work.
However, these PHP redirects are a bit slower. It is a small compromise and for most users, it is not even noticeable.
Still, some users may want to use the server to set up redirects for improved performance and speed.
All in One SEO gives those users an option to use faster redirects using the web server instead of PHP.
Note: This is a method for advanced users only, as you will need to edit not only your .htaccess file, but also your server configuration files for Apache or NGINX.
To use this method, you’ll need access to your server’s configuration files. You’ll also need to know how to safely make changes to those files.
To set it up, you can go to the All in One SEO » Redirects page and switch to the Settings tab. From here, you can click on the Web Server option under Redirect Method.
The plugin will then detect your web server and will show you an option to export redirect rules files for your web server which you can then manually place in your .htaccess file or your Nginx config file.
Next, click on the save change button to store your settings.
After that, the plugin will display a line of code that you need to add to your server’s configuration file.
If you’re using Apache as your web server, then the line should be included in the Apache virtual hosts file. You will then need to restart Apache.
If you’re using NGINX as your web server, then the line should be included in your nginx.conf file. You will then need to restart NGINX.
Keep in mind, too, that using server redirects will prevent AIOSEO from keeping logs of all redirects that occur.
23. Easily Import / Export Redirects
Want to import redirects you set up earlier using some other redirects plugin? Or perhaps you want to export your All in One SEO redirects to use elsewhere?
All in One SEO’s redirects manager can magically import redirects from other popular redirects and SEO plugins.
Simply go to All in One SEO » Redirects page and then switch to the Import / Export tab.
From here, you can import redirects from other plugins. All in One SEO can automatically import redirects from the following plugins:
Redirection
Yoast SEO Premium
Simple 301 Redirects
Safe Redirect Manager
301 Redirects Pro
30 Redirects
Page Links To
SEOPress Pro
It can also import redirects from All in One SEO as well.
In the right column, you’ll see options to export All in One SEO redirects data. You can choose to export different types of redirects or export all of them.
Lastly, the plugin also allows you to export your 404 error logs in CSV format. This comes in handy if you want to analyze the data in spreadsheet software like Google Sheets.
24. Advanced Yet Easiest Breadcrumb Navigation
Breadcrumb navigation is a navigational aid that provides users links in relation to where they are on a website’s navigational layout.
It’s like a path to show them how to get back to earlier parts of the website they may have visited before landing on their current page or post.
This provides users context, helps them discover more sections of your website, and improves user experience.
Search engines also use this information in the result snippet next to the URL.
All in One SEO comes with the easiest and most customizable breadcrumb navigation settings of any WordPress plugin on the market.
First, it automatically adds markup required by search engines to display breadcrumbs without you having to do anything.
It also gives you a full set of tools to customize breadcrumbs and display them on your website.
Simply go to the All in One SEO » General Settings page and switch to the Breadcrumbs tab.
From here, you’ll see different ways to easily display breadcrumbs on your website.
You’ll also see a link that will show you how to use these methods to display breadcrumbs.
Scroll down a little and you’ll find customization options for your breadcrumbs navigation links.
For instance, you can choose which separator you want to use, include a home link, set a prefix, and more.
Want to edit the Breadcrumbs template?
Scroll down to the Breadcrumbs template section. There you’ll see tabs for content types, taxonomies, and archives sections.
For instance, under Content Types, you can change templates for posts, pages, products, and attachments.
To edit the template switch the toggle next to ‘Use a default template’ option to reveal the settings.
You can then edit the default breadcrumbs template by switching toggles to show or hide the homepage or taxonomy links.
You can also use smart tags and even some HTML if needed. Simply insert the smart tags inside the HTML code anywhere you would put the same static information.
All in One SEO allows you to turn on REST API for headless WordPress development.
Simply go to the All in One SEO » Feature Manager page and activate the REST API feature.
This allows you to use the All in One SEO metadata and output it into the front end of your website.
See the notes on All in One SEO website on how to fetch SEO data with REST API and output it in your source code.
26. Control Which Users Have Access to SEO Features and Settings
Want to hire an SEO expert to work on your website? All in One SEO gives you powerful access control features so that you can control which parts of your website they can access.
Simply go to the All in One SEO » General Settings page and switch to the Access Control tab.
First, you’ll see access control options for default WordPress user roles such as Editor, Author, and Contributor.
By default, they will have access to SEO settings for the content that they are allowed to edit in WordPress. To learn more see our WordPress user roles and permissions guide.
Editors also have permission to access SEO settings for General Settings, Search Appearance, Social Networks, and Redirects.
You can change options for each user role by switching the User Default Settings toggle next to a user role.
All in One SEO also adds two new custom user roles that you can use.
SEO Manager – By default, they can access SEO settings for General Settings, Sitemaps, Link Assistant, Redirects, Local SEO, and individual pages and posts.
SEO Editor – By default, they can access SEO settings for individual pages and posts.
You can also change their access by switching the Use Default Settings toggle.
To assign a user an SEO role on your website, you will need to add them as a new user in WordPress and set their user role to SEO manager or SEO Editor.
All in One SEO will then immediate apply the right permissions for them to do their job and boost your site’s rankings.
27. Seamless E-commerce Integration
All in One SEO provides the easiest WooCommerce SEO features. It allows you to add an SEO title, description, and product image which is then used by search engines.
It automatically applies schema markup which gives search engines more information to display in rich results for your products.
Plus, it includes product sitemaps, breadcrumbs, image SEO, and local SEO features. This makes All in One SEO the most comprehensive toolkit for eCommerce stores.
Google image search can be a major source of traffic for many websites.
However, many users forget to add image alt and title tags when uploading images. If you have multiple authors then it becomes harder to notice if someone has missed those tags.
All in One SEO comes with an extensive image SEO addon that allows you to fix this by automatically generating these tags. To keep the software lightweight, it is not enabled by default.
You’ll need to activate it by visiting the All in One SEO » Feature Manager page.
After that, you need to visit the All in One SEO » Search Appearance page and switch to the Image SEO tab.
The first option here is to redirect attachment URLs.
All in One SEO automatically redirects attachment URLs back to the attachment because the attachment page itself only contains an image and does not have any SEO benefit.
Below that, you will find options to set up Image SEO settings. The two most important options here are the Title and Alt tags.
Under the Title tab, you can choose a default title scheme using the smart tags. AIOSEO will use your image file name as the title.
You can choose to remove punctuation like dashes or underscores. This allows you to convert your image title from ‘our-family-picnic’ to ‘our family picnic’.
Below that, you can also choose the casing for the tags. For instance, you can use all lowercase, title case, or sentence case.
Optionally, you can exclude posts, pages, or terms where you don’t want the plugin to automatically generate from image titles.
Next, you need to switch to the Alt tag tab and repeat the process.
Similarly, you can also generate captions and descriptions and modify filenames upon upload in a similar manner.
29. Safely Edit Robots.txt and .htaccess Files From WordPress Admin
You may sometimes come across tutorials asking you to edit your robots.txt or .htaccess file.
Editing these files can be difficult for beginners. Not to mention that a mistake there can break your website or affect its SEO.
To make this easier and safer for beginners, All in SEO comes with a built-in file editor where you can edit your robots.txt and .htaccess files without using FTP.
You can do that by visiting the All in One SEO » Tools page. For the robots.txt file, you can click on the button to view your current robots file.
You can also enable a custom robots.txt file and create an all new one.
Below that, you can allow or deny any user agents, and they will be added to robots.txt.
The .htaccess Editor tab will display the contents of your current .htaccess file.
You can simply edit it right there.
Note: You need to be very cautious about editing these files. A tiny mistake can break your website or damage its SEO.
30. Perform a Quick SEO Audit for Your Site
A lot of businesses hire SEO specialists and pay them to perform SEO audits for their websites.
All in One SEO helps you save money by allowing you to do a quick SEO audit for your website. This allows you to save money by fixing important SEO issues on your own.
Simply go to the All in One SEO » SEO Analysis page and the plugin will show you an SEO score of your website.
Below that, it will show you a checklist of SEO recommendations.
From here, you can see the issues that it found. Clicking on them will display a description of how to fix them.
As you can see in the image above, AIOSEO often has a button directly on the audit screen for you to use and fix the issues immediately.
31. Compare Competition with Built-in Competitor Analysis
Want to see how your competition is doing in terms of SEO?
All in One SEO can perform a quick SEO audit of your competitor’s websites too.
You can simply go to the All in One SEO » SEO Analysis page and switch to the Analyze Competitor Site tab.
32. Easily Add No Index to Content You Want to Exclude from Search Engines
Want to exclude some posts or pages from search engine?
All in One SEO makes it super easy to No Index any content on your website with a click.
Simply edit the post, page, product, custom post type, or taxonomy that you want to remove or exclude from search engines and scroll down to the AIOSEO settings section.
From here, you need to switch to the Advance tab and toggle the switch next to the Use Default Settings option. This will reveal a bunch of options.
You can check No Index and No Follow to make sure that search engines don’t include this item in search results.
Additionally, you can block any archival of this page, translation, image index, snippet, or no ODP (open directory project). You can also set Max video preview to -1 to ensure that no embedded video preview is displayed.
33. Easily Import SEO Data from Other SEO Plugins
Want to switch from your old WordPress SEO plugin to All in One SEO for WordPress?
The good news is that All in One SEO comes with a built-in SEO data importer tool that fetches SEO data from your old plugin and imports it into All in One SEO.
Once you install and activate the All in One SEO plugin it will launch the setup wizard. During this, it will detect your old SEO plugin and give you the option to import SEO data from that plugin.
It will automatically detect your old SEO plugin when you run the setup wizard and offers to import your SEO data.
You can also manually import SEO data by visiting the All in One SEO » Tools page and switching to the ‘Import/Export’ tab.
Find the ‘Import Settings From Other Plugins’ section and select your old SEO plugin from the drop-down list and then select the items you wish to import.
After that, simply click on the ‘Import’ button to fetch the data.
All in One SEO can fetch the following SEO data.
Your plugin’s SEO settings
Post meta such as SEO title and description
Term meta such as SEO title and descriptions for your categories and tags.
Bonus: Getting Started with All in One SEO for WordPress
Did you know that getting started with All in One SEO for WordPress is super easy?
We hope this article helped you discover unique things that you probably didn’t know about All in One SEO. You may also want to see our complete WordPress SEO handbook for beginners or take a look at our pick of essential WordPress plugins for all websites.
If you liked this article, then please subscribe to our YouTube Channel for WordPress video tutorials. You can also find us on Twitter and Facebook.
Do you want to track key metrics like email signups or sales for your site?
If you want your site to be successful, then you need detailed metrics like which pages are getting you the most signups, which traffic source is producing the best results, and more.
In this article, we’ll show you how to set up Google Analytics goals for your WordPress site.
What Are Goals in Google Analytics?
Goals are user interactions that you can track using Google Analytics.
You can set up goals to measure conversions, track sales, email sign-up forms, and more.
All this can help you make more money online and increase your website conversions.
Note: Google Analytics 4 (GA4) replaces Goals with Events, and on July 1, 2023, GA4 will replace the current Universal Analytics. In this post, we will show you how to set up tracking for both Events and Goals simultaneously using the MonsterInsights Dual Tracking feature, as well as how to use Events in GA4 itself.
Why You Need to Create Good Goals in Google Analytics
With goals, you can find out all sorts of details about your site. For instance:
If you sell digital products, you could use goals to find out which sources are driving the most sales.
If you run an eCommerce store, you could use goals to see where customers will most likely abandon the checkout process.
If you’re a personal trainer with a fitness blog, you could use goals to see which posts encourage prospects to fill out your contact form.
Creating the right goals for your site is important. If you have an online store, there’s not much point in setting a goal to track how many people visit your About page. Instead, your goal should be how many customers buy from you.
Let’s look at how to set up goals in Google Analytics. Here’s what we’re going to cover. Use the quick links to jump straight to that part of the tutorial:
First, you’ll need to install and activate the MonsterInsights plugin. For more details, please check out our guide on how to install a WordPress plugin.
Note: You’ll need the Pro version of the plugin or higher to unlock advanced tracking features and reports like the eCommerce report and the form conversions report. There is also a MonsterInsights Lite version you can use for free to get started.
After activating MonsterInsights, you’ll see the welcome screen in your WordPress dashboard. Simply click the ‘Launch the Wizard’ button and follow the onscreen instructions.
You can also use the Dual Tracking feature to set up Google Analytics 4 (GA4) tracking in WordPress. GA4 is the latest version of Analytics, and it will replace Universal Analytics on July 1, 2023.
After the sunset date, you won’t be able to track data in Universal Analytics and will have to start from scratch. That’s why we recommend swapping to GA4 sooner rather than later. For more details, please see our guide on switching to Google Analytics 4 in WordPress.
Automatically Track Goals by Using MonsterInsights
Now that you’ve connected Google Analytics with your WordPress site, you can use MonsterInsights to set up goals automatically.
This method is recommended for beginners because you don’t have to manually create goals, edit code, and worry about your tracking working properly.
MonsterInsights helps you track conversions like eCommerce sales, form submissions, file downloads, link clicks, video plays, and more.
Let’s take a closer look at each of these in detail.
Tracking eCommerce Conversion in WordPress
Do you want to find out how many visitors are converting into paying customers?
In Google Analytics, you’d have to set up goals to track specific actions customers perform. This can be tricky for beginners, and it might require editing the tracking code.
The best part is that you don’t have to modify the tracking code. MonsterInsights handles everything else for you.
After setting up tracking, you can head to Insights » Reports and click on the ‘eCommerce’ tab to view your report. Once you’ve had some sales, it’ll look something like this:
You won’t have to manually set up goals or events to track eCommerce conversions. The plugin will let you see all sorts of other insights, like your top conversion sources, the total of products added to carts, and the total removed from carts.
You can even see how many days it typically takes people to make a purchase, and how often people visit before making a purchase.
MonsterInsights also shows the percentage of new customers that bought a product for the first time from your store. It even shows a percentage of abandoned checkouts. You can use this data to reduce cart abandonment and convert users into paying customers.
Tracking Form Submissions in Google Analytics
Another great way to use Google Analytics and MonsterInsights is to track form conversions.
You can do this for any type of form. Here are just a few examples:
Non-fiction author: A form where people sign up for your email newsletter to hear about your upcoming books.
Realtor: A contact form where prospective clients fill in their details so you can call them back and arrange viewings.
Personal trainer: A booking form that customers use to book and pay for their personal training session.
To start tracking form conversions in MonsterInsights, go to Insights » Addons and find the Forms addon. Simply click the Install button beneath it to install and activate it.
This addon lets you track form submissions as ‘Events’ in Google Analytics 4. You don’t have to set up anything extra.
Once you’ve installed and activated the addon, you’re done! Just go to Insights » Reports and click on the ‘Forms’ tab to see your report.
After you’ve had some form submissions, it’ll look something like this:
Tracking Link Clicks and File Downloads in Google Analytics
MonsterInsights automatically adds tracking for link and button clicks on your WordPress site. It works out of the box, and you don’t have manually set up goals for tracking different user actions on your site.
You can view the report inside your WordPress dashboard. Simply go to Insights » Reports and click the ‘Publishers’ tab.
For instance, you can see which outbound links users click the most on your website.
Using this information, you can sign up for affiliate programs, get backlinks, submit guest posts, and uncover partnership opportunities.
If you have affiliate links on your site, then MonsterInsights also tracks them in Google Analytics. You can see your top-performing affiliates and promote them throughout your site to get more conversions.
MonsterInsights also automatically tracks file downloads on your site. If you offer downloadable content like ebooks, software, plugins, PDFs, and spreadsheets, then the analytics plugin tracks them in Google Analytics.
Tracking Video Plays in Google Analytics
If you have video content embedded on your site, then MonsterInsights can track them in Google Analytics and show which media content performs the best. It automatically tracks YouTube and Vimeo embeds along with other videos uploaded to your Media Library.
All you need to do is install the MonsterInsights Media addon by going to Insights » Addons from your WordPress dashboard.
Once the addon is active, you can view reports in your WordPress dashboard.
Simply head to Insights » Reports and click the ‘Media’ tab.
Here, you’ll see a graph of how many people played videos on your site in the past 30 days.
If you scroll down, then you can view more details about individual videos. For instance, the report will show video plays, average watch time, average percentage watched, and completion rate for each piece of media content.
If you don’t want to use MonsterInsights, or if you want to track a different type of goal, then you can do this manually in Google Analytics.
Do note that the latest version of Analytics (GA4) doesn’t have goals. You can only set up goals manually in Universal Analytics.
First, log in to your Universal Analytics account and click the ‘Admin’ tab on the bottom left.
Next, you’ll need to head to the View column.
From here, simply click on ‘Goals.’
Next, you can start creating a new goal.
Simply click the ‘+ New Goal’ button.
There are 4 types of goals you can create:
Destination: This tracks whether a visitor went to a specific page, like a thank you page, after filling in a form.
Duration: This tracks how long a visitor spends on your website.
Pages/Screens per session: This tracks how many pages someone looks at on your site.
Event: This can track all sorts of things, like button clicks, video plays, and downloads. It requires a bit more setup than the other options.
In many cases, Destination or Event goals will work best for tracking your key metrics.
We’re going to create a Destination goal for this example. Give your goal a name, click the radio button next to ‘Destination’ to set the type, and then click the ‘Continue’ button.
Next, you will need to enter the destination for your goal. This will normally be a specific page.
Note: Only enter the part of the URL that comes after your website’s domain name.
For instance, if your page is: https://www.example.com/thank-you-for-booking/
Then you should enter: /thank-you-for-booking/
You can add a value for the conversion if you want. This makes sense if people are completing a payment form or if you know how much each lead is worth to you on average.
If you want to track a funnel, such as a customer moving through a checkout process, then you can also do this as part of the destination goal. This can help you pinpoint areas you might want to improve.
You can click the ‘Verify this Goal’ link to see what conversion rate the goal would have based on your data from the previous 7 days.
If you get 0% and know that you’ve had some form submissions, check the destination URL you’ve entered.
Once you’re happy with your goal, click the ‘Save’ button. You should then see your goal listed in a table. You can edit it, switch it off and on, or create more goals here.
You can’t delete goals once you’ve created them, so you will need to simply switch them off if you no longer want to use them.
You can view your goal data in Google Analytics by going to Conversions » Goals, then clicking on Overview.
In the left-hand menu, you can dig further into your goals.
For instance, ‘Reverse Goal Path’ shows you what content visitors viewed before reaching the goal. Goal Flow can be used to examine all sorts of things, like the source that the visitors came from.
How to Replace Goals with Events in Google Analytics 4
As we mentioned before, Google Analytics 4 (GA4) is the new version of Google’s analytics platform. One of the main differences between GA4 and Universal Analytics is that there are no goals in the latest version.
That’s because Google Analytics 4 uses a completely different method of tracking and recording data. Instead of goals, it uses events to track user interactions and activities on your website.
You can create a custom event by logging into your GA4 property and then heading to the Admin settings.
After that, go to the Property column.
Simply click on the ‘Events’ option.
Next, you will need to add a new event in GA4.
Go ahead and click the ‘Create event’ button.
A new window will now slide in from the right, where all your custom events will be listed once they’re created.
You can click the ‘Create’ button to get started.
Next, you will need to enter details for your custom event.
You can start by entering a custom event name. GA4 already has many prebuilt events, so you can select one from the dropdown menu. For example, we will choose the ‘file_download’ event for this tutorial.
When you select an event name, GA4 will automatically enter the specific Parameter and Operator for the event. In this case, the event will be tracking the ‘event_name’ when it ‘equals’ a Value you will enter next.
In the ‘Value’ field, we will enter ‘.pdf’ so it tracks the number of downloads when a user downloads a file with the PDF extension. You might also use .epub for ebooks or even a specific word you use to organize filenames such as ‘v2’ or ‘_2023version.’
Once you’ve entered all the details, don’t forget to click the ‘Create’ button at the top.
You should now see your new event under the Custom events area of your dashboard.
Next, you can view reports to see the performance of your custom events.
Simply head to Reports » Engagement » Event: Event name from the menu on your left.
While setting up Events in GA4 is pretty easy, if you want to track multiple things, it can take a long time.
That’s why we think that if you want a simple way to set up event and goal tracking in Google Analytics, then MonsterInsights is definitely the way to go.
Setting up manual goals in Google Analytics might work for you if you’re confident using the Google Analytics interface, or if you have a lot of extra time on your hands.
What matters is that you create and track meaningful goals for your site. This is where MonsterInsights is beneficial, as you can use the data to boost signups, increase sales, and make more money or impact with super easy setup and reporting.
Do you want to delay posts from appearing in your site’s RSS feed?
Delaying posts from appearing immediately can save you from sending out unfinished work accidentally, give you time to edit typos you might see, and help you beat content scrapers in SEO.
In this article, we will show you how to delay posts from appearing in WordPress RSS feed.
Why Delay Your RSS Feed in WordPress?
Sometimes you may publish a something on your WordPress blog with a typo that you just didn’t see. The mistake is then distributed to your RSS feed and all of your subscribers. If you have email subscriptions on your WordPress blog, then those subscribers will get it as well.
By adding a delay between your RSS feed and your live site, you get a little window of time to catch an error on a live site and fix it.
RSS feeds are also used by content scraping websites. They use it to monitor your content and copy your posts as soon as they appear live. If you have a new website with little authority, then a lot of times these content scrapers may end up beating you in the search results.
By delaying an article in your RSS feed, you can give search engines enough time to crawl and index your content first.
Having said that, let’s see how to easily delay posts from appearing in WordPress website‘s RSS feed.
How to Delay Posts in Your WordPress RSS Feed
To begin, we recommend using WPCode to delay posts from appearing in your site’s feed. WPCode lets you add custom code to WordPress safely and easily without having to worry about your site breaking.
For advanced users, you can copy/paste the following code into your theme’s functions.php file instead. You’ll need to modify the code to change the time interval. Remember that editing your core WordPress files can be dangerous, which is why we recommend WPCode. You’ll also lose any custom code snippets when you update your theme.
Upon activation, you can navigate to Code Snippets »Add Snippet. After that, simply search for ‘rss’ or scroll down to the ‘RSS Feeds’ category.
Then, just hover your mouse over ‘Delay Posts in RSS Feeds’ in the results and simply click on ‘Use snippet.’
Next, you will be taken to the ‘Edit Snippet’ screen, where WPCode has pre-configured the snippet settings for you.
By default, your posts will be delayed from appearing in your RSS feed by 10 minutes from the time it’s published.
If that delay is good for you, then all you have to do is click on the switch to change it to ‘Active’ and press the ‘Update’ button.
If you want to alter the length of the delay, you can do so by changing the number on Line 10 and the unit of time on Line 13.
For example, you can delay the post by one hour if you replace $wait = '10'; and $unit = 'MINUTE' with $wait = '1' and $unit = 'HOUR'.
If you need to adjust the delay again, simply repeat those steps, and if you want the posts to go back to hitting the feed immediately, simply toggle the switch back to ‘Inactive’ and press ‘Update.’
Don’t Forget to Check Out the WPCode Snippet Library
WPCode also comes with a huge collection of other code snippets, too. You can see what’s there at Code Snippets » Library in your admin dashboard.
You may be able to replace some single-use plugins on your site by simply activating snippets you find in the library.