All posts by Editorial Staff

How to Write Content Using AI Content Generator in WordPress

Do you want to use AI (artificial intelligence) to write content in WordPress?

Artificial Intelligence tools like ChatGPT and GPT3 can produce well-researched content in natural language. Many users want to explore it to see if it can help with writing content.

In this article, we’ll talk about how to write content using artificial intelligence like ChatGPT and GPT3 in WordPress as well as the pros and cons of it.

How to Write Content Using AI in WordPress

What are ChatGPT and GPT3 AI?

ChatGPT is a computer program that uses artificial intelligence to have conversations in a chatbot-like interaction environment.

GPT3 (Generative Pre-trained Transformer 3) is a similar artificial intelligence based computer program that is designed to be more generic and broader than ChatGPT.

Both programs use a type of machine learning called Natural Language Processing that allows them to understand and respond to user input.

In simpler words, they learn by going through vast amounts of information publicly available, so they can answer your questions in a well-thought out manner.

You can visit the OpenAI website and try both tools for free. Following are a few examples of what it can do.

Example 1:

Asking questions to ChatGPT

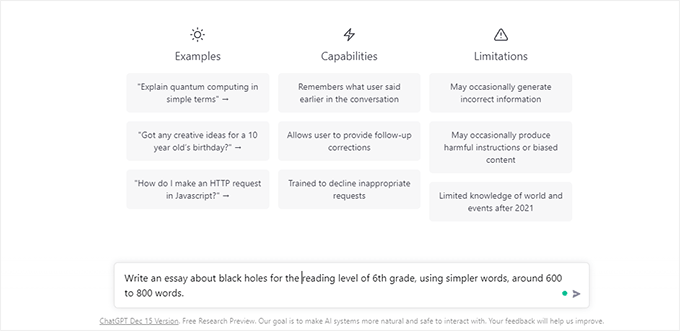
You can provide more details in your prompt to adjust the response according to your given parameters.

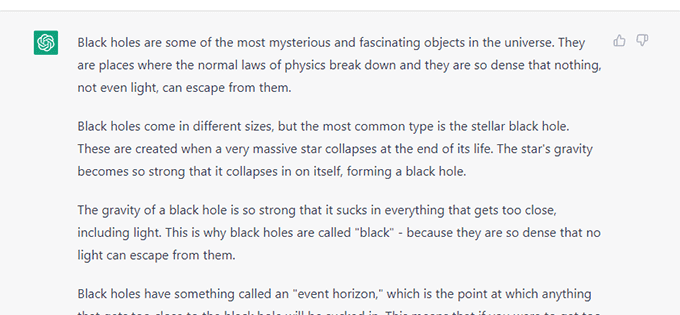
For instance, here we asked it to write an essay about black holes at a 6th grade reading level, using simple words, and keeping the response between 600-800 words.

This is how it responded.
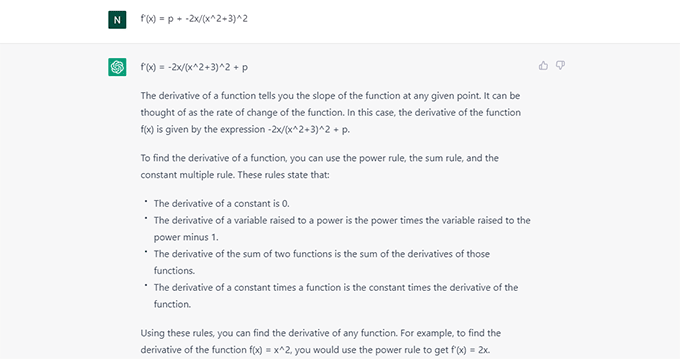
ChatGPT response example 1

Example 2:

ChatGPT can also write code, poetry, music, explain mathematical equations, and more.

ChatGPT example 2

Are ChatGPT and GPT3 AI Good Enough to Write Content?

ChatGPT and GPT3 are really good at providing detailed responses that are very well written. This leads many users to believe that it can be used to write content for their websites or be used as an autoblogging tool.

However, before you put it to the test on your actual website, the following are a few things that you need to be mindful of.

1. Accuracy of Information

The information provided by ChatGPT could be outdated or sometimes even false. It’s critical that you double-check all the information included in the article.

2. No Recent Events Are Considered

ChatGPT is trained on resources up to the year 2021, so it has limited knowledge of events after that. This may get fixed soon, but if the content you want to generate is time sensitive, then keep this in mind.

3. Doesn’t Give Strong Opinions

ChatGPT is trained to be impartial and unbiased. Unlike a human writer, it lacks the creativity required to argue for a particular opinion, be passionate, and have preferences.

Can ChatGPT AI be Good for SEO?

ChatGPT AI can generate content in a web-friendly format. However, it does not specifically follow any SEO best practices.

Researchers at Google have worked for years to detect content generated by artificial intelligence tools. In the past, they have penalized them for being low quality.

We feel that artificial intelligence tools like GPT3 can be used as writing assistants rather than full writers.

For instance, GPT AI can be used to create an article outline, gather information, and pick up some key research points.

After that, a human writer can work on it to make it more comprehensive, opinionated, factual, and SEO-friendly.

That being said, let’s take a look at how to use ChatGPT AI to create content in WordPress.

Using ChatGPT Artificial Intelligence to Write Content in WordPress

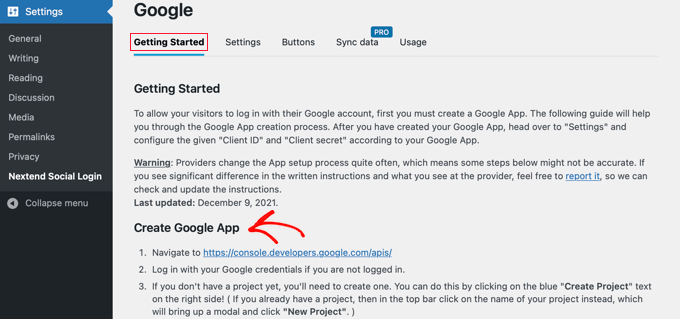
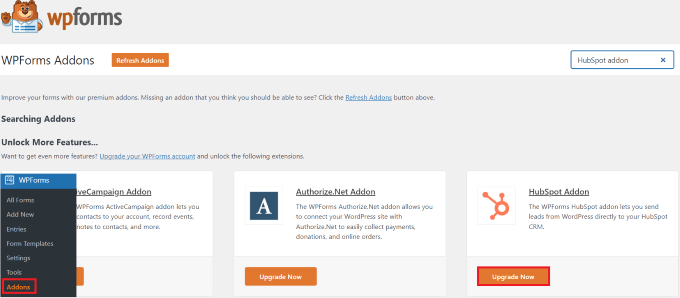
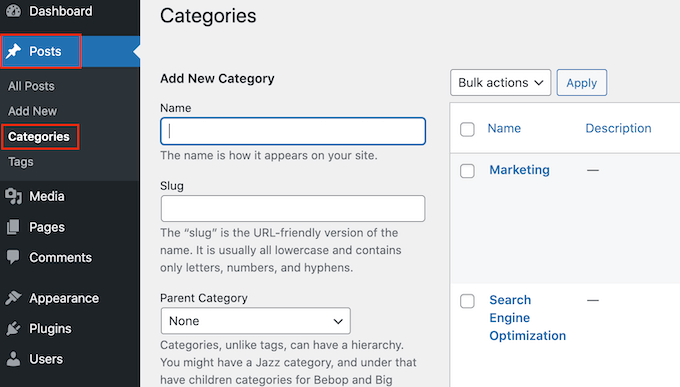
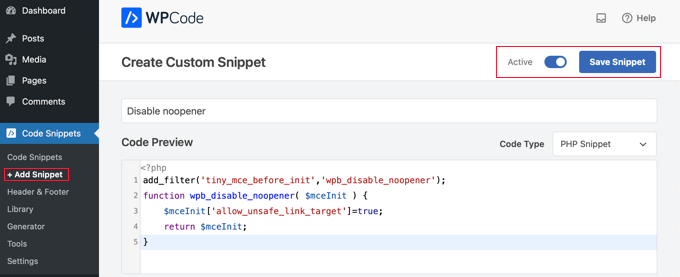
First, you need to install and activate the GPT3 AI Content Writer plugin. For more details, see our step-by-step guide on how to install a WordPress plugin.

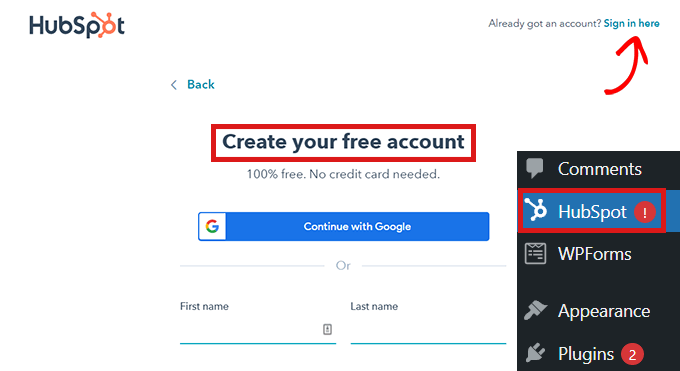
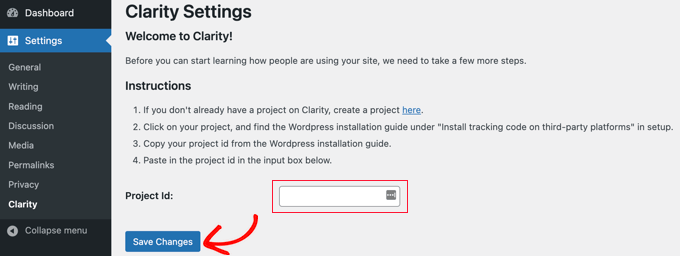
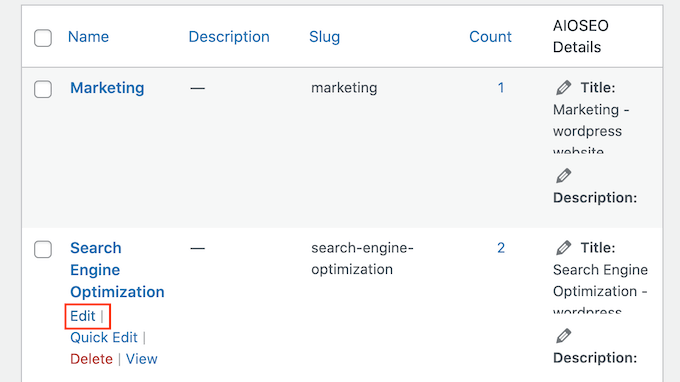
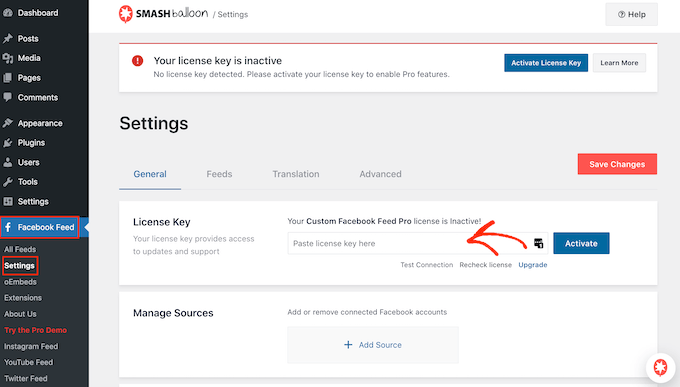
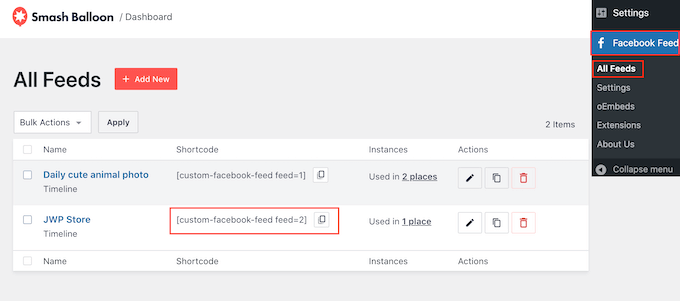
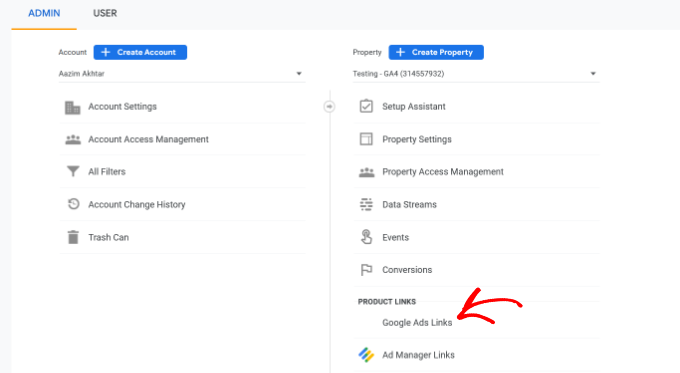
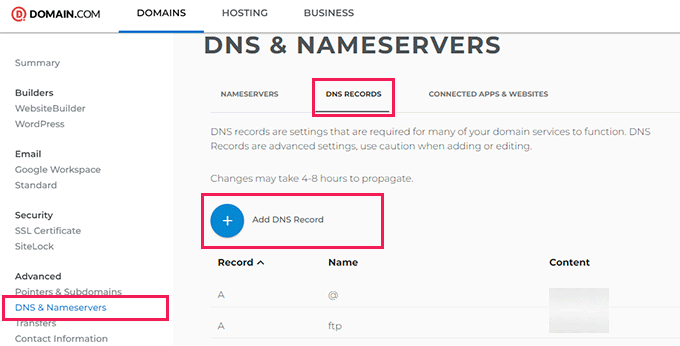
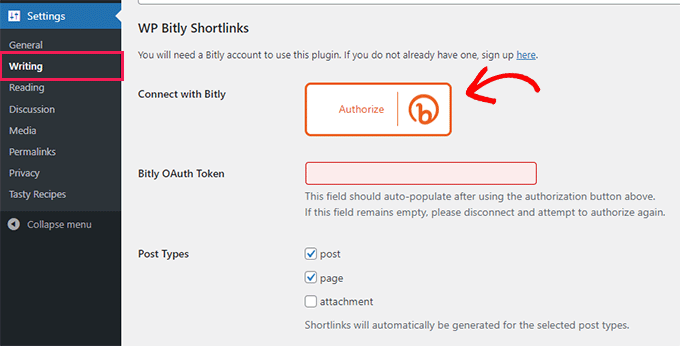
Upon activation, you need to click on the GPT3 AI Content Generator menu from the admin sidebar to view plugin’s settings page.

GPT 3 AI Content Generator

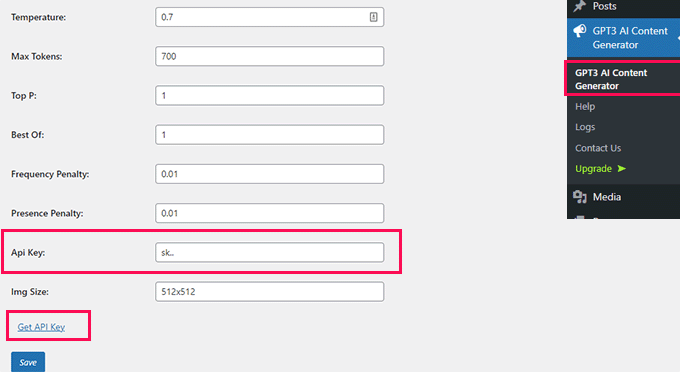
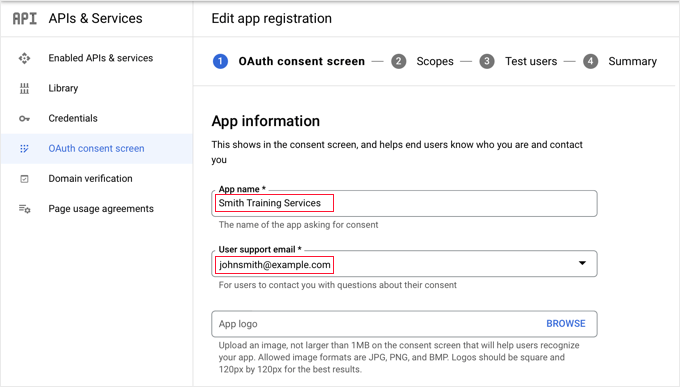
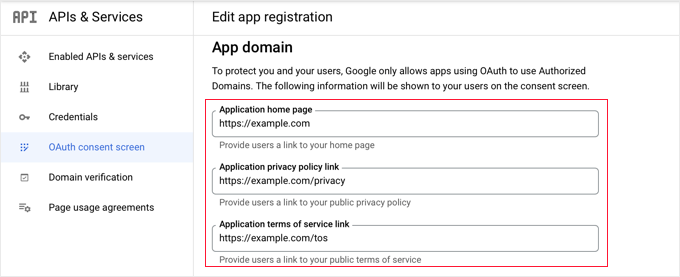
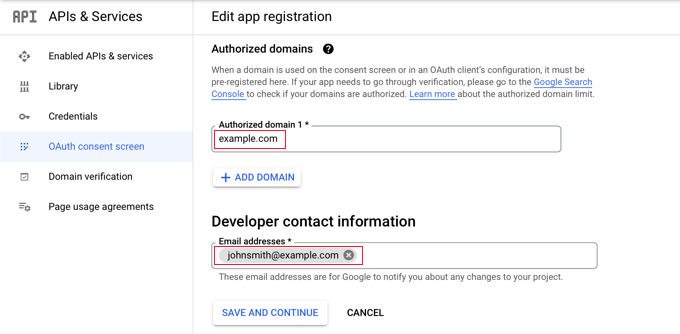
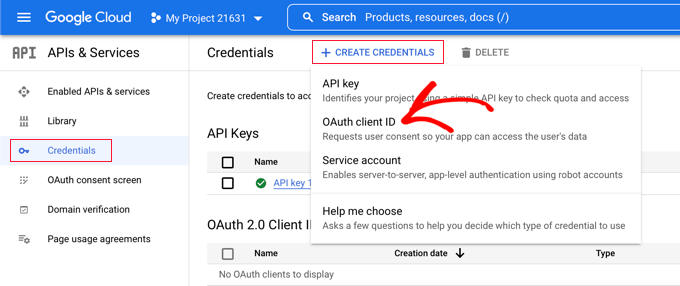
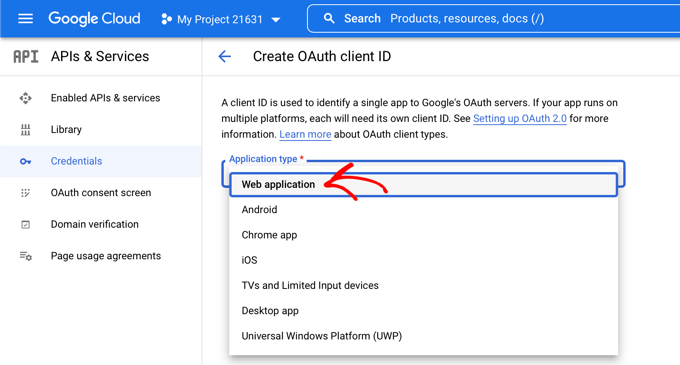
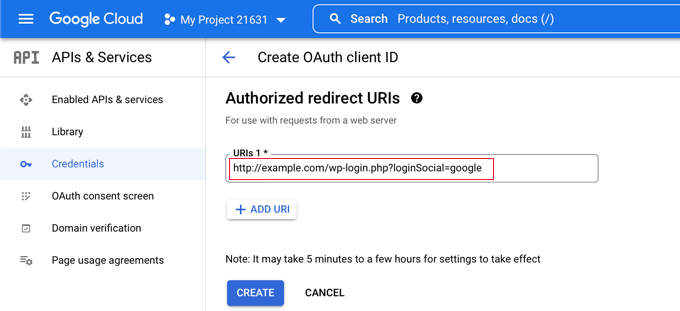
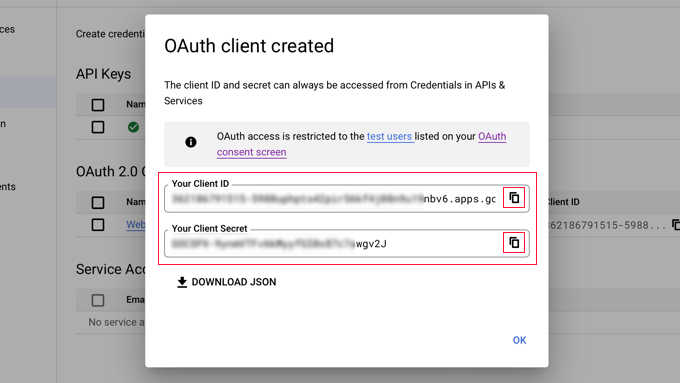
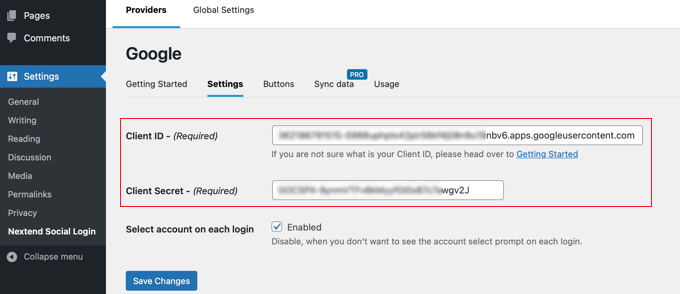
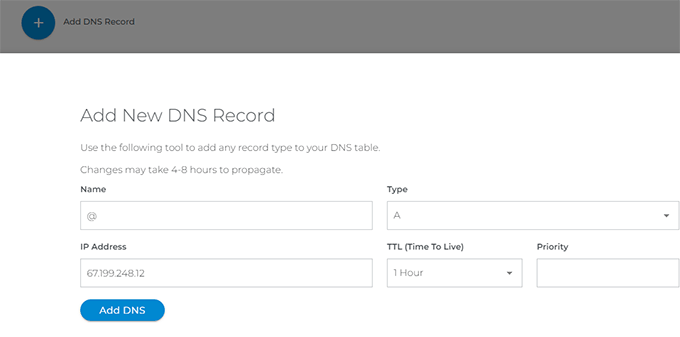
From here, you need to provide an API key. You can get one by creating a free account on the OpenAI website.

After copying and pasting your API key, don’t forget to click on the Save button to store your plugin settings.

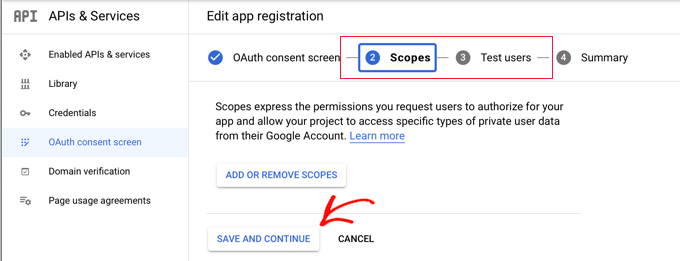
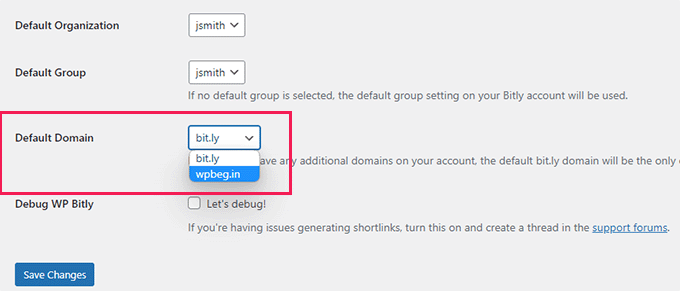
Other default options would work for most users but you can review and change them if needed.

For instance, you may want to change the image size generated by the AI or leave it blank if you would want to generate AI images by yourself or add other images.

Now you are ready to start generating AI content.

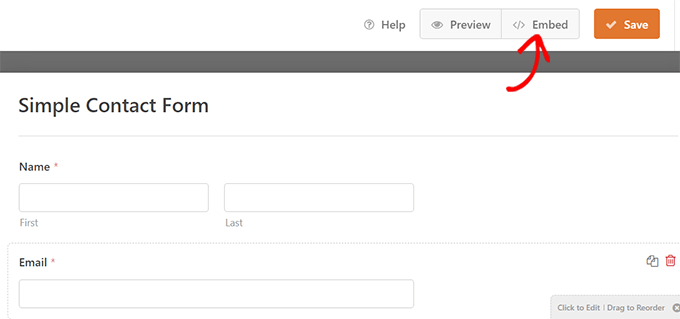
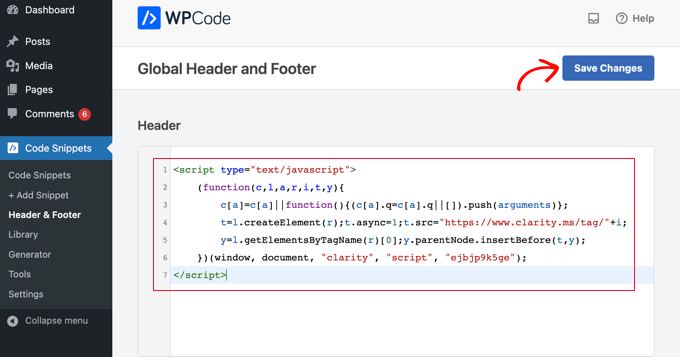
Simply create a new post or page, and you will find the GPT 3 Content Generator settings below the text editor.

AI content settings

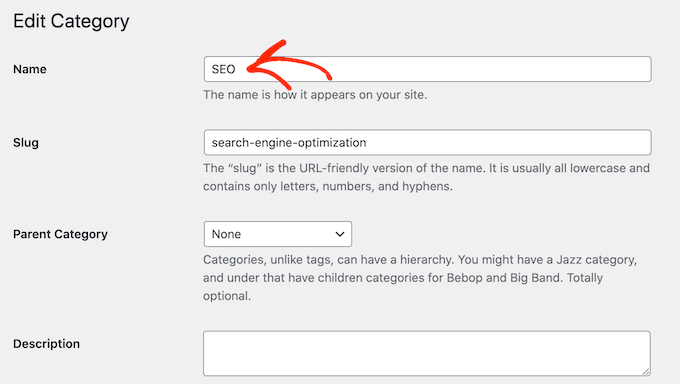
First, you need to choose a language for your article.

Currently, the plugin supports English, Spanish, French, German, Italian, Portuguese, Russian, Japanese, Korean, Chinese, Dutch, Indonesian, Turkish, Polish, Ukrainian, Arabic, Romanian, Greek, Czech, Bulgarian, Swedish and Hungarian.

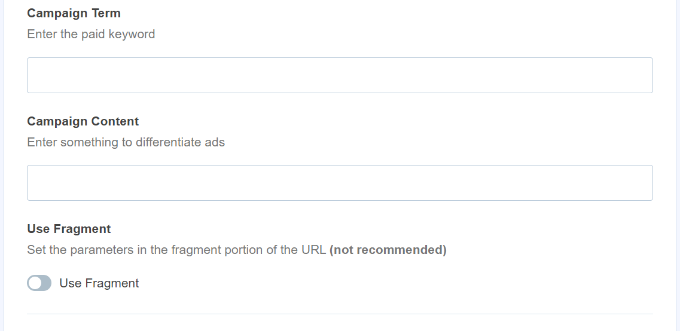
Below that, you can provide a title for your article. The Pro version of the plugin also allows you to add or exclude keywords.

After that, you can set the number of headings you want to include in your article and which heading tag to be used.

Fine tune content settings

Next, you can choose a writing style and tone for your article. For example, you can choose an informative writing style with a casual writing tone.

Below that, you can add an anchor text and set a link. However, we’ll recommend that you manually enter internal links when you are editing the article.

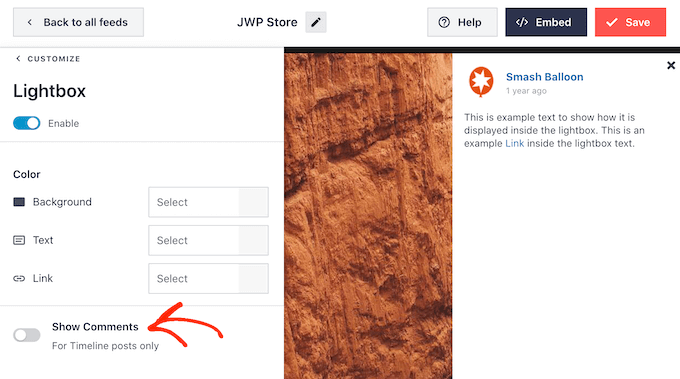
The plugin also allows you to add a call to action and choose position where you want to display it.

Finally, click on the Generate button to start generating content.

Generate content

The plugin will then begin generating content using artificial intelligence.

It may take a while depending on your settings and the topic of your article. Once finished, you will see the generated text in the box.

Save generated text as draft

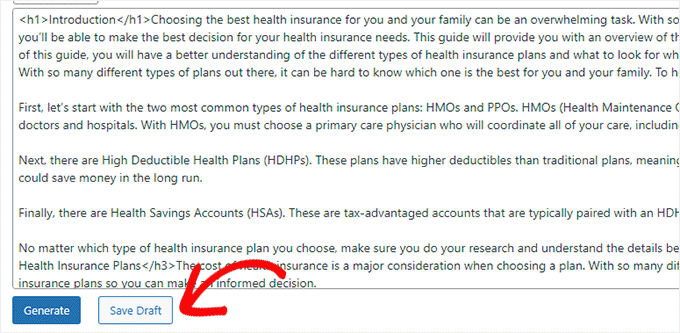
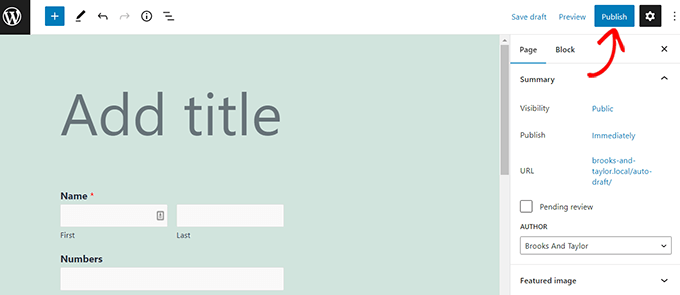
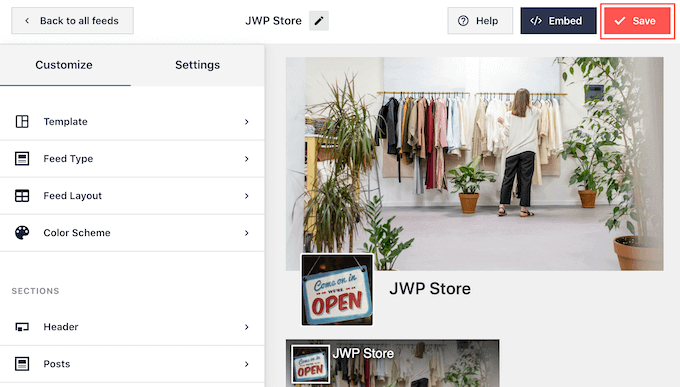
From here, you can simply click on the Save Draft button. The plugin will then load the text inside the WordPress editor wrapped in the Classic block.

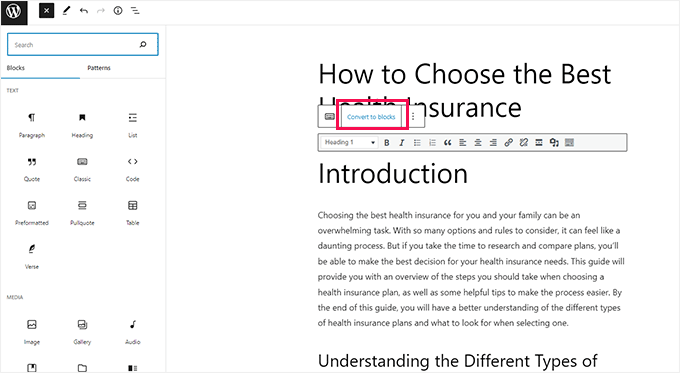
This will allow you to edit the text using the block editor. You can convert the text inside the Classic block into regular blocks and start editing.

Edit AI generated content

Tips on Editing AI Generated Content

GPT3 AI content generator will write a comprehensive article covering different aspects of the topic you choose as your article title.

However, it is far from perfect.

It can be easily identified by search engines as AI generated content, and you could get penalized and lose your search rankings.

We recommend only using GPT3 AI content for research and quick outlines. Once you have an outline, you can then thoroughly review, fact check, and edit it by yourself to expand the article further.

Following are a few things you can do to make the article unique and in your own voice:

1. Check All Information for Accuracy

Depending on your topic, GPT3 can make mistakes and may sometimes include information that is incorrect.

2. Create and Use Your Own Images

GPT3 AI Content Generator can generate images using artificial intelligence. However, for most topics these images they do not look very good. Here’s an example image that it generated for us.

Image with gibberish text

Create images for blog posts as you would normally do for any article that you write.

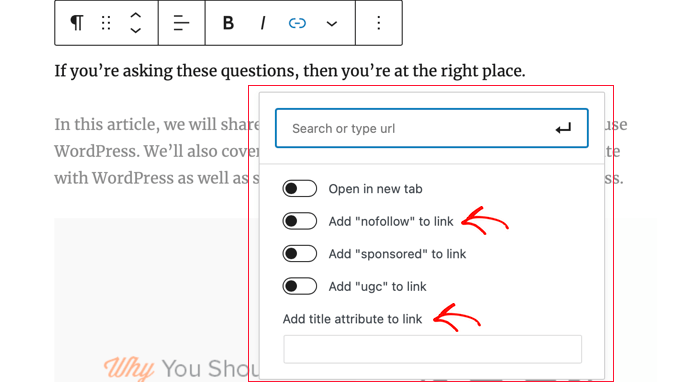
3. Add Internal and External Links as Needed

GPT3 AI doesn’t know which articles on your website are related to the topic and it cannot automatically generate internal links.

You need to manually add internal and external links to provide more context and make your article more user-friendly.

4. Use Table of Content, FAQs, and Lists

GPT3 is a text generator and does not concern itself with formatting to make the reading experience better.

You need to manually add any table of contents, lists, and FAQs needed make your content more user-friendly.

5. Personalize the article with your expertise & knowledge

As AI-content gain in popularity, it will become more critical for authors to add their own voice, expertise, and experiences. This differentiator will play an important role in determining authentic content vs not.

It’s important to personalize the article with your experience and make it more coherent, so it’s user-focused.

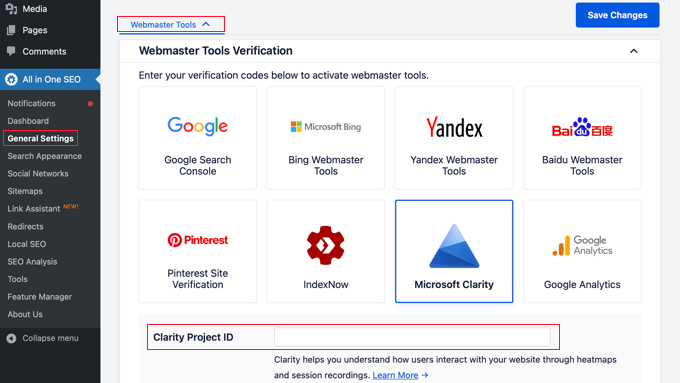
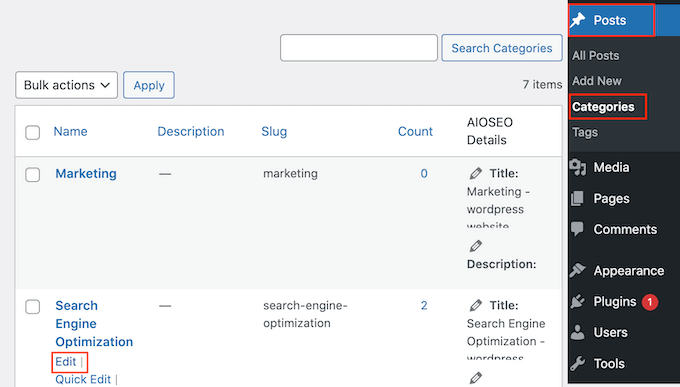
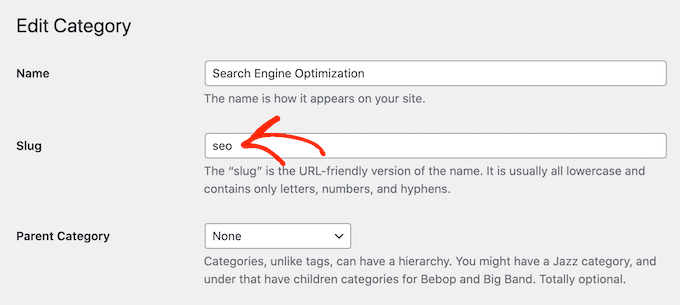
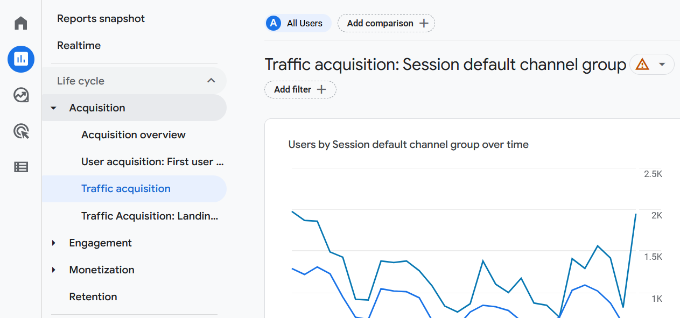
6. Optimize Content for SEO

By default, GPT3 generates easy to read text. However, this text is not exactly optimized for on-page SEO.

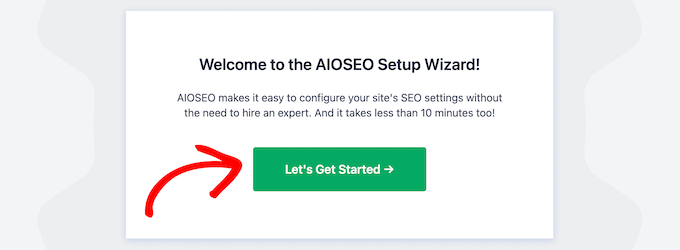
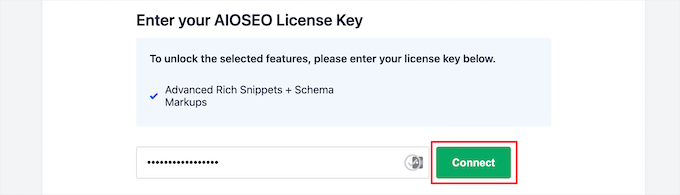
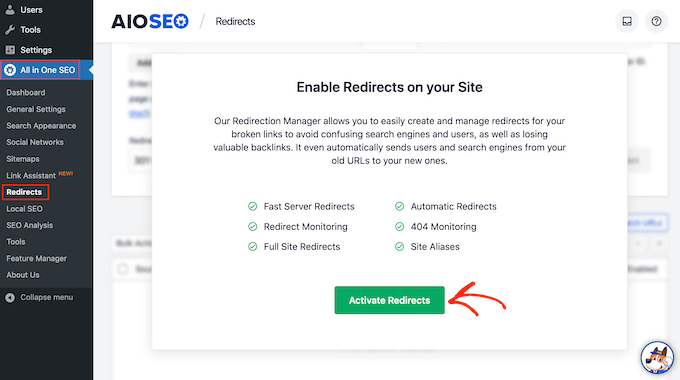
You need to optimize your content with All in One SEO for WordPress. It is the best WordPress SEO toolkit on the market.

It allows you to easily check your content for SEO, add SEO title and description, social media images, and schema markup.

For more details, see our tutorial on how to optimize a blog post for SEO.

Final Thoughts on AI Content in WordPress

This is just the beginning, and there will be many other tools that will come to the market in the coming months and years.

If you don’t want to use an AI content plugin for WordPress, then you can directly go to ChatGPT website and write the prompts there to experience the technology for yourself.

We hope this article helped you learn how to write content using AI in WordPress. You may also want to see our pick of the most useful WordPress plugins, or see our complete WordPress SEO handbook to grow traffic on your website.

If you liked this article, then please subscribe to our YouTube Channel for WordPress video tutorials. You can also find us on Twitter and Facebook.

The post How to Write Content Using AI Content Generator in WordPress first appeared on WPBeginner.

How to Create a HubSpot Form in WordPress

Are you looking to add a Hubspot form and add it to your WordPress site?

HubSpot is a popular all-in-one marketing platform designed to help grow your business used by over 113,925 people across the globe. Hubspot also enables you to create engaging forms for your website.

In this article, we will show you how to create a HubSpot in WordPress.

How to Create a HubSpot Form in WordPress

Why Use HubSpot to Create Forms

Hubspot is a marketing and sales platform that helps companies grow. It comes with numerous tools including a customer relationship manager (CRM), a content management system (CMS), built-in email marketing, and lead generation.

They also have a robust WordPress form builder, which seamlessly integrates with WordPress, allowing you to create hassle-free forms.

This form builder is an easy drag-and-drop builder that enables you to create interactive forms without a single line of code, making it one of the best contact form plugins.

Also keep in mind that HubSpot can also easily integrate with other form tools like WPForms, Formidable Forms, and more. With that being said, let’s see how you can create a HubSpot form in WordPress.

Method 1. Creating a HubSpot Form Using The HubSpot Plugin

You can easily create a HubSpot form for your WordPress website using the HubSpot plugin.

First, you need to install and activate the HubSpot plugin. For more details, see our guide on how to install a WordPress plugin.

Upon activation, the plugin will add a new menu item WordPress admin sidebar. Just click on HubSpot to be taken to the setup wizard where you can create a HubSpot account if you don’t already have one.

If you have an account, you need to click on the ‘Sign in here’ link at the top.

Go to HubSpot from the dashboard and click Sign in here link

This will open up a ‘HubSpot Login’ popup.

Simply type your username and password and then click the ‘Login’ button.

Log in to your HubSpot account

After you’ve logged in, HubSpot will ask if you want to continue with the account you’ve just logged in with.

Simply click the ‘Continue With This Account’ button.

Click continue with this account button

Then you’ll be asked to connect your HubSpot account with your WordPress website.

Just click on the ‘Connect Website’ button.

Click Connect Website button

Once you’ve connected the WordPress website with your HubSpot account, head over to HubSpot » Forms from the WordPress admin dashboard.

This will take you to the ‘Forms’ page. Now, simply click on the ‘Create a Free Form’ button at the top right corner.

Click Create a Free Form button

Next, you’ll have to select your form type and then click the ‘Next’ button on the top.

For this tutorial, we will be creating an ‘Embedded form.’

Choose a form type

After that, you’ll be taken to the HubSpot template library.

Simply choose your preferred template, such as ‘Registration’ or Contact us.’ Then, just click the ‘Start’ button at the top.

Choose a form template

Now that you’re on the Form Editor, you can edit the pre-made form template by dragging and dropping fields from the left into the preview at the right.

When you’re done customizing, click the ‘Submit’ button at the top.

Create a form and click Submit button

This will open up a ‘Review And Publish’ popup.

Simply scroll down and click the ‘Publish’ button.

Click Submit button

After you click the ‘Publish’ button, a popup will appear on your screen. As this is an Embedded form, a shortcode will be provided.

Now, just click the ‘Copy’ button beside the shortcode.

Copy the shortcode

You can embed this code on any page where you want to add your HubSpot form. For more information, check out our guide on how to add shortcodes in WordPress.

Method 2. Creating a HubSpot Form Using WPForms

You can also create a HubSpot form using WPForms as this plugin comes with a HubSpot integration addon. WPForms is the most popular drag & drop WordPress form builder with over 5 million active installs.

Note that you need at least a WPForms Elite license to access the HubSpot addon.

The first thing you need to do is install and activate the WPForms plugin. Check out our guide on how to install a WordPress plugin for details.

Upon activation, go to WPForms » Addons from the admin dashboard. This will take you to the ‘WPForms Addons’ page.

Simply locate the HubSpot addon and click the ‘Upgrade Now’ button.

Click Upgrade Now button below HubSpot addon

This will take you to your ‘WPForms Account’ page. Here, simply scroll down to the ‘HubSpot Addon’ and click the download button.

After that, you can install and activate the HubSpot addon the same way that you installed and activated the plugin.

Click Download HubSpot button

Next, go to WPForms » Settings from the WordPress dashboard. Then, head over to the ‘Integrations’ tab.

Here you will find HubSpot in the list of integrations. Just click the arrow icon to expand the section, and then you can click the ‘Add New Account’ button.

Choose HubSpot for integration

A prompt will open up, asking you to connect with your HubSpot account. Simply type your HubSpot account login credentials.

If you don’t already have an account, then you can create one here.

Log in to your HubSpot account

Next, you’ll be asked if you want to continue with this account.

Simply click the ‘Continue With This Account’ button.

Click Continue With This Account

After that, you’ll be shown a popup asking you to connect WPForms with Hubspot.

Click on the ‘Connect App’ button at the bottom of the page.

Click Connect App button to connect WPForms and HubSpot

On your WordPress dashboard, return to the ‘Integrations’ screen.

You should now see ‘Connected’ beside the section for HubSpot.

HubSpot marked Connected

Now go to WPForms » Add New from the dashboard to create your HubSpot form.

First, select a form template from the WPForms template library.

Select a template for yourself from the WPForms template library

After selecting the template, you’ll be taken to the WPForms interface where you can edit the form template.

Now, click on the ‘Marketing’ option on the menu bar to the left. Simply select ‘HubSpot’ from the list of integrations.

A HubSpot popup will then appear on the screen. Simply click the ‘Add New Connection’ button at the top.

Click Add New Connection button

WPForms will now prompt you to enter a connection nickname.

You’re free to choose any name you like, as no one will see this but you. Just click the ‘OK’ button when you’re done.

Choose a nickname of your liking

WPForms will then ask you to select your HubSpot account and choose an action to perform. Simply choose your account from the ‘Select Account’ Field.

Then choose the ‘Create/Update Contact’ option from the ‘Action to Perform’ field.

Fill action to perform field

After selecting this option, various new settings will appear within the form.

Fill in those fields accordingly.

Fill in additional fields

Next, you’re ready to customize your form in the form builder.

Simply create drag and drop fields from the left-hand side into the live preview on the right.

Form in form builder

You can add any information that you want to collect and organize in your HubSpot account.

Once satisfied, click the ‘Embed’ button present at the top of the form builder.

Click Embed button

This will open the ‘Embed in a Page’ prompt.

If you want to embed your HubSpot form on a new page, click the ‘Create New Page’ option.

To embed a form on an existing page, click the ‘Select Existing Page’ option.

Select existing page option

After that, simply choose the right page from the dropdown that appears.

Now click the ‘Let’s Go’ button.

Click Let's Go button

You will automatically be directed to the page that you selected from the dropdown menu. The HubSpot form will already be embedded there.

Simply click the ‘Publish’ button at the top of the content editor to push your new form live.

Click Publish button after embedding the form

That’s it! We hope you learned how to create a HubSpot form in WordPress. You may also want to check out our ultimate guide on SEO for beginners and our expert picks of the best multipurpose themes to create an engaging site.

If you liked this article, then please subscribe to our YouTube Channel for WordPress video tutorials. You can also find us on Twitter and Facebook.

The post How to Create a HubSpot Form in WordPress first appeared on WPBeginner.

How to Install Microsoft Clarity Analytics in WordPress

Are you looking to use Microsoft Clarity analytics on your WordPress website?

Microsoft Clarity is a free analytics tool that helps you analyze how users engage with your website with click tracking, scroll tracking, and heatmaps.

In this article, we’ll show you how to easily install Microsoft Clarity in WordPress, step by step.

How to Install Microsoft Clarity Analytics in WordPress

This is what we’ll cover in this tutorial:

What Is Microsoft Clarity and Why Use It?

Microsoft Clarity is a free analytics tool for websites. It helps you see the most popular pages on your website and how users click, scroll, and interact with those pages.

The most important feature of Microsoft Clarity is its data visualization. This includes click tracking, heatmap reports, session recordings, and more.

Heatmaps show a visual report of how users move their mouse, as well as where they click, select, and scroll.

Heatmap showing user interactions on a website

Similarly, session recordings help you see how users view your content, where they spend more time, and what takes them away from your WordPress website.

This information helps you create a better user experience for your users, improve performance, and boost sales conversion.

Viewing the Microsoft Clarity analytics dashboard

Note: Microsoft warns that Clarity should not be used on sites that contain sensitive data including user health care, financial services, or government-related information.

Microsoft Clarity vs Google Analytics: What’s the Difference?

Google Analytics is the best analytics solution on the market because it offers a lot of in-depth tracking features. Microsoft Clarity, on the other hand, focuses on the visualization of user interactions with heatmaps and session recordings.

Google Analytics helps you track almost anything on your website. It also has enhanced eCommerce tracking, conversion tracking, and detailed reports.

Microsoft Clarity is a newer platform, and it’s currently not an alternative to Google Analytics’ far superior features. However, you can use Microsoft Clarity alongside Google Analytics to unlock features like heatmaps and visitor session recordings because Google doesn’t offer those features yet.

Before Microsoft’s analytics feature, many website owners would use paid heatmap solutions like Hotjar or CrazyEgg alongside Google Analytics, but now you have a free alternative to those tools.

We recommend installing Google Analytics on all your websites. After that, you can follow our guide below to install Microsoft Clarity in WordPress.

They both work along quite well without affecting your website’s functionality.

It’s easy to add Microsoft Clarity to any website. You need to sign up for Microsoft Clarity and then add a tracking code to your website. We’ll take you through the process step by step.

Signing Up for Microsoft Clarity

First, head to the Microsoft Clarity website and click on the ‘Get Started’ button. You need a Microsoft, Facebook, or Google account to sign up.

After signing up, you will see the Clarity dashboard with a popup to add a new project.

Go ahead and enter a name for your project. You can use the name of your website to make it easily recognizable. Next, enter your website URL.

Setting up a new project in Microsoft Clarity

Once you’ve created your new project, you will be asked how you want to install Clarity. You should click the ‘Get tracking code’ option.

Install Clarity Using a Tracking Code

You will now see the tracking code that you need to add to your WordPress website. Simply click the ‘Copy to clipboard’ button.

Copying the Clarity tracking code

Depending on the method you use to add this code to your WordPress site, you may need the complete tracking code, or just your project ID. You’ll find the project ID at the end of the tracking code, just before </script>. In the screenshot above, it is ‘ejbjp9k5ge’.

We recommend leaving this tab open or copying the code to a safe place. You will need it in the next step of this tutorial.

Adding Microsoft Clarity Code to WordPress

Now you need to add the Microsoft Clarity tracking code to your WordPress website in a way that makes it present on all pages. Luckily, there are a number of easy ways to make this happen without manually editing any WordPress files.

You can choose your preferred method from the following three.

Method 1: Adding Microsoft Clarity Code Using the Microsoft Clarity Plugin

The first thing you need to do is install the Microsoft Clarity plugin. For more details, see our step-by-step guide on how to install a WordPress plugin.

Upon activation, you need to visit the Settings » Clarity page in WordPress admin. Here you need to paste the project ID. That’s the last item in your Clarity tracking code and will look something like ‘ejbjp9k5ge’.

Enter Your Microsoft Clarity Project ID

Make sure you click the ‘Save Changes’ button at the bottom to store your settings. Your WordPress site is now connected to Microsoft Clarity.

Method 2: Adding Microsoft Clarity Code Using WPCode

The safest and easiest way to add code to your website is WPCode, the best WordPress code snippets plugin. This plugin lets you add any script in your website’s header or footer right from your WordPress dashboard (no FTP or cPanel needed).

Once you have installed and activated the WPCode Free Plugin, you need to visit the Code Snippets » Header & Footer page. Once there, you should paste the entire Microsoft Clarity tracking code into the ‘Header’ field.

Paste the Microsoft Clarity Tracking Code Into WPCode's Header Field

Don’t forget to click the ‘Save Changes’ button to store your settings.

The plugin will now automatically add the Microsoft Clarity analytics code to all pages of your WordPress site, so you can track website visitor activity on your website.

Method 3: Adding Microsoft Clarity Code Using All in One SEO

All in One SEO is the best WordPress SEO plugin that allows you to easily optimize your WordPress website for search engines and social media platforms. We show you how to get the most out of it in our guide on how to set up All in One SEO for WordPress correctly.

If you have All in One SEO installed on your website, then you can use it to add the Microsoft Clarity tracking code.

Simply head over to All in One SEO » General Settings » Webmaster Tools and click on the ‘Microsoft Clarity’ icon. A field will appear where you can paste your Clarity project ID. That’s the last item in your Clarity tracking code and will look something like ‘ejbjp9k5ge’.

Pasting the Microsoft Clarity Project ID into AIOSEO

Make sure you click the ‘Save Changes’ button afterward, and your WordPress site will be connected to Microsoft Clarity.

Pro Tip: If you’re using a WordPress caching plugin, then you need to clear your WordPress cache after you add the project ID or tracking code. This is important otherwise Microsoft will not be able to verify your site for a few hours.

Using Microsoft Clarity

Once you have installed the tracking code and cleared your WordPress cache, Microsoft will then start recording visitor session data.

However, it will likely take up to 2 hours before you can see any results in your Clarity account.

Using the Microsoft Clarity Dashboard

Simply log in to your Clarity account after a few hours, and you should be able to see the activity summary in your dashboard.

Viewing the Microsoft Clarity analytics dashboard

You can see useful insights like the percentage of sessions that have ‘dead clicks’. These are clicks that don’t go anywhere. For instance, users might be clicking on an image thinking that it’s a button or a link.

Another useful statistic is rage clicks when users rapidly click or tap in the same area. Paying close attention to these metrics can help you make your site more user-friendly.

The dashboard also shows you the number of ‘quick backs’. These occur when a user moves off a page and then very quickly comes back to it.

It also tracks excessive scrolling, when users scroll through a page more than expected. And like Google Analytics, Microsoft makes it easy to see the most popular pages on your site.

Using Microsoft Clarity Recordings

The ‘Recordings’ tab shows you recordings of different user sessions. You get the details of the user’s device, operating system, and country.

Clarity also tells you the number of pages they visited, the duration and time of their session, and the number of clicks they made.

Clarity showing the recordings of user sessions

The recordings let you watch an animation of mouse movements and clicks. In the screenshot above, you can see a user moved their mouse to the November archives link and clicked it.

Using Microsoft Clarity Heatmaps

The ‘Heatmaps’ tab shows you a heatmap of your website. These help you see which sections are popular on your site based on the number of people clicking.

Clarity's heatmap showing mouse clicks

The heatmap will also show you how far users scrolled down the page, and which areas on the page received the most clicks.

Final Thoughts on Microsoft Clarity Analytics Tool

Microsoft Clarity is a new analytics tool with some neat features. While it’s no alternative to the powerful Google Analytics platform, it definitely offers some interesting features like free heatmap and session recording.

Often new website owners want to see heatmaps and session recordings, but they don’t have the budget to purchase premium solutions like HotJar or CrazyEgg. Well, now you can use Microsoft Clarity.

Using the heatmaps and session recordings, you should be able to optimize your website or online store experience to improve user experience and boost sales.

We hope this article helped you learn how to install Microsoft Clarity Analytics in WordPress. You may also want to see our comparison of the best WordPress page builders to create custom layouts without any code, and our pick of the best email marketing services to grow your business.

If you liked this article, then please subscribe to our YouTube Channel for WordPress video tutorials. You can also find us on Twitter and Facebook.

The post How to Install Microsoft Clarity Analytics in WordPress first appeared on WPBeginner.

How to Properly Change, Move and Delete WordPress Categories

Do you want to change, move, or delete WordPress categories?

Categories help organize your content and make it easy for visitors to find interesting posts. However, as your website grows and you learn more about your audience, you may need to change your categories.

In this article, we will show you how you can easily change, move, and delete the categories on your WordPress website.

How to properly change, move and delete WordPress categories

Why Change, Move or Delete WordPress Categories?

Categories help sort your blog posts and make it easier for users to find what they are looking for. This will keep them on your website for longer and encourage them to convert.

However, it can be difficult to plan all your categories in advance. This is especially true if you’re just getting started with WordPress, or aren’t sure which direction to take your new blog, online store, or small business website.

You may also want to try out different categories and content, and then analyze what works the best by installing Google Analytics in WordPress. You can then use this insight to fine-tune your categories.

With that being said, at some point, you may need to change your WordPress categories. This might involve renaming a category to include the keywords that got the most clicks during A/B split testing, or fixing a spelling mistake.

You might even organize your categories and subcategories into new parent-child relationships to help visitors discover new content.

If you don’t make these changes carefully, then it could hurt the visitor experience, damage your SEO, and make it more difficult for visitors to navigate your website.

With that being said, let’s see how you can properly change, move, and delete WordPress categories. Simply use the quick links below to jump straight to the change you want to make.

How to Rename or Edit a WordPress Category

To start, you can change a category’s name, assign it to a different parent category, or display a category description to help other authors understand how to use that category.

To make any of these changes, head over to Posts » Categories.

How to change WordPress categories

Here, find the category that you want to change and hover the mouse over it.

When the ‘Edit’ link appears, give it a click.

How to edit the categories on your WordPress website

This will take you to a screen where you can rename the category, add a parent or subcategory, or write a category description. For example, if you’ve used a keyword research tool to find some new keywords or phrases, then you may want to change the category’s name to include these words.

To rename a category, simply type the new title into the ‘Name’ field.

Renaming a WordPress category

When you’re happy with the changes you’ve made, don’t forget to click on ‘Update’ to store your settings.

After that, WordPress will automatically update all the posts within this category.

Every category has an archive page in WordPress, as you can see in the following image. These pages help visitors find related content, which can increase your pageviews and reduce the bounce rate in WordPress.

The WordPress category archive page

Sometimes you may want to change where this archive page is located. For example, if you’ve renamed a category, then you might also change its archive URL to avoid confusing visitors.

However, changing the slug means that anyone who tries to visit the original URL will get a 404 error.

A 404 error page on a category archive page

This is a bad user experience and can impact your WordPress SEO. Thankfully, you can easily fix this problem by creating a redirect.

With that in mind, go ahead and change the slug by going to Posts » Categories. Then, find the category that you want to edit and hover the mouse over it.

When the ‘Edit’ button appears, give it a click.

How to move a WordPress category to a new slug

In the ‘URL’ field, you’ll see the current slug for this category’s archive page.

Simply type in the new URL that you want to use. Just be aware that you can only use lowercase letters, numbers, and hyphens in the URL.

How to edit the URL slug for a category archive page

When you’re happy with how the slug looks, scroll to the bottom of the screen and click on ‘Update’ to store your changes.

Now, you’ll see the archive page if you visit the new URL, but you’ll get an error if you type in the original link.

The easiest way to redirect from the old URL to the new link is by using AIOSEO.

AIOSEO is the best SEO plugin for WordPress and can help you get more visitors from search engines like Google. It even has a setup wizard that will help you choose the best SEO settings for your website and improve your rankings, even if you’re completely new to search engine optimization.

For this guide, we’ll be using the AIOSEO Pro version because it has the Redirection Manager that you’ll need to set up a redirect. However, there is also a free version of AIOSEO that you can use to optimize your website no matter what your budget.

First, you’ll need to install and activate the plugin. If you need help, then please see our guide on how to install a WordPress plugin.

Upon activation, AIOSEO will automatically launch the setup wizard. You can simply click on ‘Let’s Get Started’ and then follow the onscreen instructions to improve your site’s search engine rankings.

Click let's get started AIOSEO setup wizard

To learn more, please see our step-by-step guide on how to set up All in One SEO for WordPress correctly.

Since we want to use the plugin’s premium features, you’ll need to enter a license key when asked. You can find this information under your account on the AIOSEO website.

Enter AIOSEO license key

After entering the license key, click on the ‘Finish Setup’ button to save your settings and close the setup wizard.

With that out of the way, head over to All in One SEO » Redirects in the WordPress dashboard. You can then go ahead and click on Activate Redirects.

Activating the AIOSEO redirect feature

Now you’ve activated the Redirection Manager, you can start by typing in the source URL. This is the category archive’s original web address, and will usually start with /category/ followed by the original category name.

Here, we’re redirecting anyone who tries to visit /category/search-engine-optimization.

Adding a source URL for your category redirect

After typing in the source URL, make sure you click on the small cog icon to see some extra settings that you can configure.

You’ll need to check the box next to ‘Regex.’

Creating a regex redirect in WordPress

Now, it’s time to move to the target URL, which is our new category archive page.

In the following image, visitors will be redirected to /category/seo.

Adding a 301 redirect to your WordPress website

Your next task is choosing the type of redirect that AIOSEO should use. There are various types of redirects that are identified with numbers such as 301, 302, and 307.

If you’re permanently moving the archive to a new location, then you’ll want to use a 301 redirect as this tells search engines that the page will always be at this new location. This way, all the old archive’s traffic and backlinks are transferred to the new page.

Simply open the ‘Redirect Type’ dropdown and choose ‘301 Moved Permanently.’

Choosing a redirect type for your WordPress website

If you’re only temporarily moving the category archive page to a new URL, then you should choose ‘307 Temporary Redirect’ instead.

When you’ve done that, go ahead and click on the ‘Add Redirect’ button.

Now, if you try to visit the original category archive page, AIOSEO will automatically redirect you to the new target URL.

How to Properly Delete a WordPress Category

Sometimes you may no longer need a particular category. For example, you may have accidentally created two very similar categories or changed the direction of your WordPress blog so you no longer cover the same content.

Before deleting a category, it’s important to think about how this will affect your WordPress website. Firstly, WordPress will remove the deleted category from all your posts. Any posts that no longer have a category, will be marked as ‘uncategorized.’

Lots of uncategorized content will make it more difficult for visitors to explore your website. With that being said, you may want to look through all the posts within the category you plan to delete, to make sure they have at least one alternate category.

You can also set up a redirect for that category’s archive page by following the same process described above. This can help you fix any broken links before they hurt your search engine rankings or the visitor experience.

When you’re ready to delete the category, simply go to Posts » Categories. You can then hover the mouse over the category and click on the ‘Delete’ link when it appears.

How to delete a WordPress category

How to Change the Default Uncategorized Category

If you don’t assign a category to a post, then WordPress will assign one automatically. By default, this is ‘uncategorized’ but you may want to change this to an alternative category.

Another option is to continue using the ‘uncategorized’ category, but give it a more descriptive and useful name.

This change is particularly important if you run a WordPress multi-author blog or accept guest contributions, as these people may forget to add a category to their posts.

Changing the default category can also improve your WordPress SEO by making sure that every post has a descriptive category.

Let’s start by renaming the uncategorized category by going to Posts » Categories.

Here, find ‘Uncategorized’ and hover your mouse over it. When the ‘Edit’ link appears, give it a click.

Renaming the default uncategorized category

You can now type a new title into the ‘Name’ field.

After that, scroll to the bottom of the screen and click on ‘Save.’

How to rename the default WordPress category

Another option is to change the default category. This can be useful if you’ve already created a general category, and now want to use it as your default.

To make this change, head over to Settings » Writing in the WordPress dashboard. You can then open the ‘Default Post Category’ dropdown and choose any category from the list.

How to delete a WordPress category

After that, don’t forget to click on ‘Save Changes’ to store your settings.

How to Add a Subcategory in WordPress

WordPress allows you to add category hierarchy, so you can add sub categories as needed.

You can do this easily by using the Parent category dropdown on the Add New Category screen.

Select a parent category in WordPress

For more details, see our step by step guide on how to add subcategories in WordPress.

How to Easily Convert Categories into Tags

Categories and tags are both important ways to organize and group your posts. However, to help visitors find their way around your site, you should use them in slightly different ways.

Categories are great for broadly grouping your posts, while tags are meant to describe the specific details of each post.

Visitors can use categories to quickly find the type of content they’re interested in, or their favorite subject. They can then use tags to pinpoint the exact post within that category.

At WPBeginner we have a Beginner’s Guide category, which is aimed at new WordPress users. Each post in the Beginner’s Guide has different tags, such as custom taxonomy, SEO, and sorting your content.

It’s easy to get categories and tags mixed up, especially if you’re just getting started with WordPress. Your website may also change over time, to the point where one of your tags would now work better as a category.

You can easily turn categories into tags, using the Categories to Tags Converter plugin. For example, you can turn a ‘Beginner’s Guide’ category into a ‘Beginner’s Guide’ tag with the click of a button. Even better, all posts that were categorized as ‘Beginner’s Guide’ will be assigned the new ‘Beginner’s Guide’ tag automatically.

This can save you a ton of time and let you test different ways of organizing your content.

First, you’ll need to install and activate the Categories to Tags Converter plugin. If you need help, then please see our guide on how to install a WordPress plugin.

Upon activation, go to Tools » Import. Here, find ‘Categories and Tags Converter’ and click on its ‘Run importer’ link.

Converting a WordPress category into a WordPress tag

You’ll now see all the different categories and tags you’ve created for your website, organizied into tabs.

To convert a category into a tag, simply check the box next to it. You can then click on the ‘Convert Categories’ button.

Easily turn a category into a tag

After a few moments, you’ll see a ‘Converted successfully’ message. To turn more categories into tags, simply repeat the process described above.

To turn a tag into a category, select the ‘Tags’ tab. You can now check the box next to the tag that you want to change, and click on the ‘Convert Tags’ button.

Converting a WordPress tag into a WordPress category

We hope this article helped you learn how to properly change, move, and delete WordPress categories. You can also go through our guide on the best email marketing services and proven ways to make money online blogging with WordPress.

If you liked this article, then please subscribe to our YouTube Channel for WordPress video tutorials. You can also find us on Twitter and Facebook.

The post How to Properly Change, Move and Delete WordPress Categories first appeared on WPBeginner.

How to Set Up Google Ads Conversion Tracking in WordPress

Do you want to know how much revenue you’re generating from Google Ads on your website?

Setting up Google Ads conversion tracking will help you uncover insights about your ad campaign’s performance. You can find out which campaign is performing the best, how users interact with your ads, and how you can improve conversions.

In this article, we’ll show you how to properly set up eCommerce Google Ads conversion tracking in WordPress. This is the exact same method that we use on our own websites.

How to setup Google Ads conversion tracking

Why Set Up Google Ads Conversion Tracking in WordPress?

If you’re running Google Ads for your WordPress blog, eCommerce store, or membership site, then it is important to know how they’re performing. You can’t improve, what you can’t measure.

Tracking Google Ads conversions helps you see how much revenue you earned from users who clicked on your ad campaigns. It also helps you see which paid keywords and ad groups drive the most conversions. This way, you can optimize your campaigns and budget for more profitable search terms.

Besides that, Google Ads conversion tracking also uncovers how users behave on your WordPress site after clicking an ad. For instance, you might see a lot of users arrive on a landing page, but abandon it after adding products to the cart.

You can use this information to improve the checkout process, offer discounts and incentives as users are about to leave your site, and provide a better user experience.

That said, let’s see how you can add Google Ads conversion tracking in WordPress.

Adding Google Ads to WordPress Website

The easiest way of connecting Google Ads with WordPress is by using MonsterInsights. It is the best Analytics plugin for WordPress that helps set up Google Analytics without editing.

MonsterInsights offers an Ads addon that lets you setup comprehensive conversion tracking without touching a single line of code or hiring a developer.

We will use the MonsterInsights Pro license for this tutorial because it includes the Ads addon. There is also a MonsterInsights Lite version you can use for free.

First, you’ll need to install and activate the MonsterInsights plugin. If you need help, then please see our guide on how to install a WordPress plugin.

Upon activation, you will be redirected to the welcome screen in your WordPress dashboard. Go ahead and click the ‘Launch the Wizard’ button.

Launch setup wizard

Next, you can follow the onscreen instructions to connect Google Analytics to your site. For more details, you can see our guide on how to install Google Analytics in WordPress.

With MonsterInsights, you can also use dual tracking to set up a Google Analytics 4 property. It is the latest analytics version and will soon replace Universal Analytics. You can learn more by following our guide on how to switch to Google Analytics 4 in WordPress.

Once you’ve connected Google Analytics with WordPress, the next step is to install the Ads addon. Simply go to Insights » Addons from your WordPress dashboard and navigate to the ‘Ads’ addon.

Install the ads addon

Go ahead and click the ‘Install’ button. The addon will now automatically install and activate on your site.

Creating a Conversion Action in Google Ads

Next, you’ll need to create a conversion action in Google Ads.

First, you can visit the Google Ads website and log in to your account.

After that, go ahead and click the ‘Tools and settings’ option at the top. Under the ‘Measurement’ column, simply select the Conversions option.

Click the tools and settings option

On the next screen, you’ll need to create a conversion action.

You can click the ‘New conversion action’ button to get started.

Create new conversion action

Next, Google Ads will ask you to select the type of conversions you want to track. It will show you 4 options, including a website, app, phone call, or import.

For this tutorial, we’ll choose the ‘Website’ option for tracking ad conversions.

Select the kind of conversion to track

After that, you’ll need to enter the website URL where you’d like to measure conversions.

Once that’s done, simply click the ‘Scan’ button.

Enter your domain to scan

Google Ads will now show 2 options to create conversion actions, including an automatic and manual method. In the automatic method, you’ll need to select the conversion goal, choose a match type, and enter the URL. This way is suitable if you know which events to count as conversions.

However, we recommend selecting the manual method. Simply scroll down and click the ‘+ Add a conversion action manually’ option.

Add conversion action manually

Next, you’ll need to enter the Conversion action details.

First, you can select the ‘Goal and action optimization’ for your conversion. This is the action you’d like to track. For example, when a user subscribes to your newsletter, makes a purchase, adds a product to a cart, submits a contact form, and more.

For the sake of this tutorial, we will select ‘Subscribe’ as the goal. After that, you can enter the Conversion name.

Enter conversion action details

You can now scroll down and select a Value for your conversion. Google Ads lets you choose the same value for each conversion, assign different values for conversions, or don’t use a value for conversion action.

We will select the ‘Use the same for each conversion’ option, select the currency, and enter a value for this tutorial.

Enter value for conversion action

Besides that, you can also choose how many conversions to count per click.

If you’re tracking email newsletter signups, then we recommend selecting the ‘One’ option. This way, each subscriber is counted once. However, you can use the ‘Every’ option in an eCommerce store and count each purchase as a conversion.

After selecting these options, simply click the ‘Done’ button at the bottom.

Enter value and count

You can now see your conversion action under the ‘Create conversion actions manually using code’ section.

Go ahead and click the ‘Save and continue’ button to get instructions for adding the tracking tags for conversion action to your site.

Click the save and continue button

On the next screen, you’ll see 3 options to add the conversion action to your site.

Simply select the ‘Use Google Tag Manager’ option. You should see the Conversion ID and Conversion Label. Copy these to a notepad file or keep the browser window/tab open.

Select the use tag manager option

To finish the setup process, you’ll need to head to your WordPress website dashboard and view the MonsterInsights settings.

From here, go to Insights » Settings and click on the ‘Publisher’ tab.

Publisher settings in MonsterInsights

After that, you can scroll down to the ‘Ads Tracking’ section.

Go ahead and enter the Conversion ID. Make sure you follow the format, which will look like this: AW-123456789.

If you are tracking Google Ads on Easy Digital Downloads, WooCommerce, and MemberPress, then enter the Conversion Label in the respective field.

Enter conversion ID and label

That’s it. You’ve successfully set up Google Ads conversion tracking on your WordPress website.

View Google Ads Conversion Tracking Data in Google Analytics

You can take it a step further and connect Google Ads with Google Analytics to get more insights about how people use your website after clicking on an ad.

For instance, you can see the number of visitors from paid search and find out which pages they view after landing on your site. You can also use different filters and create custom reports in Google Analytics.

Let’s see how you can link your Google Ads account with Google Analytics 4 and Universal Analytics.

Connect Google Ads with Google Analytics 4

First, you’ll need to log in to your GA4 account and then go to the ‘Admin’ settings.

Go to admin settings

After that, you can click the ‘Google Ads Links’ option.

It is located under the Property column.

Go to ads links

A new window will now slide in from the right.

Go ahead and click the ‘Link’ button in the top right corner.

Click the link button

Next, you will see different options for Link setup.

First, you can click the ‘Choose Google Ads accounts’ option.

Choose Google ads account to link

On the next screen, you’ll need to select the Google Ads account you wish to connect.

Once that’s done, simply click the ‘Confirm’ button at the top.

Select your google ads account

You will now see the Google Ads account that you want to link.

Go ahead and click the ‘Next’ button.

See selected google ads account

In the next step, Google Analytics will give you options to enable personalized advertising and enable auto-tagging.

You can use the default settings and click the ‘Next’ button.

Change configure settings

After that, you’ll see a summary of your Link setup settings.

If everything checks out, then go ahead and click the ‘Submit’ button.

Review and submit link setup

You should now see a ‘Link Created’ notification in front of your Google Ads account. This means that you’ve successfully connected Google Ads with Google Analytics.

Do note that it can take up to 24 hours for your Google Ads data to appear in Analytics reports.

See link created notification

Next, you can view the Google Ads conversion tracking report in Google Analytics 4.

First, you can head to Acquisition » Traffic acquisition from the menu on your left and scroll down to see how many visitors came from the Paid Search channel.

View paid search traffic

After that, you can go to Acquisition » Acquisition overview and view the Session Google Ads campaign report. This will show which campaign got the most traffic.

You can also click the ‘View Google Ads campaigns’ option at the bottom to view more details.

View session google ads campaign report

For each campaign, you can see the total number of users, sessions, number of Google Ads clicks, cost per click (CPC), conversions, and more.

Using the information from this report, you can see which campaigns perform the best.

View detailed stats for each campaign

Connect Google Ads with Universal Analytics

If you’re using Universal Analytics, then you can first log in to your account.

After that, head to the ‘Admin’ settings.

Click admin settings

Next, you’ll need to go to the Google Ads Links option.

You can find the option under the Property column.

Go to Google Ads links

On the next screen, you’ll need to select the Google Ads account you want to connect.

After selecting your account, simply click the ‘Continue’ button.

Select Google ads account

Next, you will need to enter a Link group title.

You can then select the Views to link with your Google Ads account. Simply click the toggle to ON for the correct Views.

Enter link group title

Once that’s done, simply click the ‘Link accounts’ button.

Google Analytics will now show a summary of your settings. Simply scroll down and click the ‘Done’ button.

Click the done button

That’s it. Your Google Ads account will now be linked to the Universal Analytics property.

To view data from your ad campaigns, head to Acquisition » Google Ads » Campaigns from the menu on your left. You can see the number of clicks, cost, CPC, and more for each campaign.

View Google ads report in UA

Final Thoughts on Google Ads Conversion Tracking in WordPress

When it comes to setting up any conversion tracking, the most important thing you want to make sure is that the setup is done properly. This is why we use and recommend MonsterInsights because it just does everything for you behind the scenes without touching any code.

However if you prefer to add code directly on your WordPress site, then you can do that as well by using a plugin like WPCode. This will help future-proof your customizations. There’s a free version of WPCode that you can use by following our tutorial on adding custom code in WordPress.

We hope this article helped you learn how to set up Google Ads conversion tracking in WordPress. You may also want to see our ultimate WordPress SEO guide and the best WooCommerce plugins to grow your store.

If you liked this article, then please subscribe to our YouTube Channel for WordPress video tutorials. You can also find us on Twitter and Facebook.

The post How to Set Up Google Ads Conversion Tracking in WordPress first appeared on WPBeginner.

How to Create Your Own Customized Short URL for Your Blog

Do you want to create your own customized short URL for your blog?

Customized short URLs are often branded short URLs that are easy to remember and share. We use wpbeg.in for our own branded custom short URLs.

In this article, we’ll show you how to easily create your own customized short URLs for your blog.

Creating customized short urls in WordPress

Why Use a Branded Customized Short URL in WordPress?

You may have noticed how popular websites like The New York Times, Twitter, Facebook, and TechCrunch use branded short URLs on social media.

The New York times uses nyti.ms, TechCrunch uses tcrn.ch, and WPBeginner uses wpbeg.in domain name for shorter customized URLs.

Short URL used on social platforms

These branded domain names are called domain hacks.

They are created by combining the brand name and a domain TLD to cleverly spell a brand name.

Since most websites use .com as their primary domain, this is a good way to create a short url for your WordPress site. See our tips on picking the best domain for your blog.

Using your own customized short URL improves brand recognition among your users. It also allows you to create shorter URLs for easy sharing on social platforms.

Most importantly, you can easily track these URLs to see how many clicks you got when you shared a URL.

Having said that, let’s see how to create your own branded customized short URLs in WordPress.

Note: If you’re just looking to create memorable short URLs using your main domain, then we recommend using the Pretty Links plugin. This is what top podcasters and YouTubers use to mention short links in their videos.

Step 1: Buy a Short URL or Short Domain Name

Most of us do not have a short URL as our primary domain name. This means you will need to register a new domain name that is much shorter than your current domain.

For example, when choosing a branded shorter domain for WPBeginner.com we registered WPBeg.in. This made our short URL 6 characters shorter than our primary domain.

There are many free domain name generators that allow you to automatically generate domain name suggestions. See our list of 14 best free domain name generators.

Domainr is the one that specializes in helping you find short domains using domain hacks.

Using domain hack to generate short url

Try different combinations and explore creative ways to spell your brand name.

Once you have found a domain name that meets your needs and is available, you can register it on any of the top domain registrars.

We recommend using Domain.com. They are the best domain registrar on the market and you can get a 25% discount using our Domain.com coupon code.

The Domain.com website with search bar

Other domain registrars that we recommend include Network Solutions and GoDaddy.

The cost of domain name registration depends on which TLD you select. Country-specific TLDs cost a little more than some other new TLDs.

Once you have registered your domain name, you will be able to manage it from your domain registrar’s control panel.

Step 2: Setup Your Custom Domain in Bitly

Bitly is a popular URL shortner service that allows you to manage and track links. We use it to shorten our WordPress URLs and manage them.

First, you will need to create a Bitly account. You’ll need at least Basic plan to use your own custom domain name for link shortening.

Sign up for a paid Bitly plan

After completing the sign up, you’ll reach your Bitly account dashboard.

From here, you need to click on Account settings » Custom domains menu and then click on the Add a domain button.

Add custom domain to Bitly

On the next screen, you’ll see options to buy a new domain name or use your own domain name.

Go ahead, and click on the ‘I want to use my own domain name’ option to continue.

Continue with your own custom domain

Next, enter the domain name you recently purchased.

Below that, select ‘No, this is an unused domain name’ option and click Next.

Enter domain name

Now you will see the option to choose a group.

Bitly allows you to organize your links, domains, and users into groups. This allows you to limit certain domains to specific users.

Choose All groups to make your custom domain available for all groups.

Allow groups

Next, you will be asked to add DNS records to your branded domain name before continuing.

You can leave this window open and proceed to the next step.

Finish adding domain

Step 3: Set DNS A Record to Point to Bit.ly

In order to create your own branded custom short URLs, you need to point your domain to Bitly servers.

To do that, you will need to add DNS records to your custom domain name. DNS records are kind of instructions that point domain name to proper servers.

You can find the DNS records that you need to add on Bitly website.

Bitly DNS records

There are two types of DNS records that you can add.

For root domain names (e.g. wpbeg.in), you’ll need to enter A records.

However, If your custom domain is a subdomain (e.g. on.wsj.com), then you’ll need to enter the CNAME records.

To add the records, simply visit the domain management area on your domain registrar’s website and look for DNS records.

If you took our advice and registered your domain with Domain.com, then you will find the DNS & Nameservers settings under the left column.

DNS records

Switch to the DNS Records tab and then click on the Add DNS Record button.

This will bring up a popup where you need to enter the following information

  • Hostname under the Name field
  • Choose A as the Type
  • Copy and paste the Bitly IP address
  • Choose 1 hour under the TTL
Setting up A records

Click on the Add DNS button to save your settings.

If you are using a subdomain for example on.wsj.com, then you need to set a CNAME record and point it to cname.bitly.com

After adding DNS records you can switch back to Bitly website and click on the Add Domain button.

Finish adding domain

Now, you will see a notification that your domain settings are being verified.

Bitly will check your domain for DNS records and if everything looks ok you’ll recieve an email notification.

Domain verification

Step 4: Set up Short URL on Your WordPress Site

The best part about using Bitly is that you can easily manage, share, and track your short URLs directly from your WordPress site.

First, thing you need to do is install and activate the Bitly’s WordPress Plugin. For more details, see our step by step guide on how to install a WordPress plugin.

Upon activation, you need to visit Settings » Writing page and scroll down to the ‘WP Bitly Shortlinks’ section.

Connect Bitly to WordPress

Simply click on the Authorize button and then Allow Bitly to connect your WordPress site.

Once connected, you can choose which post types you want to generate shortlinks for. Below that, you can choose the default domain that you added earlier.

Choose default domain

Don’t forget to click on the Save changes button to store your settings,

The plugin will now start generating your custom branded short URLs. You can see them by visiting your Bitly dashboard.

WP-Bitly plugin will also show you BitLy stats for each post. You can see those stats by editing a post and look for WP Bitly metabox.

Bitly stats inside WordPress post editor

This will allow you to track how many times your short URL for this post has been clicked and from which websites.

We hope this article helped you learn how to create your own customized short URLs in WordPress. You may also want to see our complete WordPress conversion tracking guide or see our pick of the best social media plugins for WordPress.

If you liked this article, then please subscribe to our YouTube Channel for WordPress video tutorials. You can also find us on Twitter and Facebook.

The post How to Create Your Own Customized Short URL for Your Blog first appeared on WPBeginner.

What is rel=”noopener” in WordPress? (Explained)

Have you been wondering what rel="noopener" means in WordPress?

When you add a link that opens in a new tab, WordPress will automatically add the rel="noopener" attribute to the link.

In this article, we will explain what rel="noopener" means in WordPress and how it affects your website.

What Is rel="noopener" in WordPress? (Explained)

What Is rel=”noopener” in WordPress?

When you add links to your WordPress website, you can use HTML attributes to control what happens when you click the link.

For example, when you create a link, there is a toggle switch that allows you to open it in a new tab.

Opening a Link in a New Tab

The HTML code generated by WordPress for this link looks like this:

<a href="http://example.com" target="_blank" rel="noreferrer noopener">external link</a>

Notice that some HTML attributes have been added to the link, rel="noopener" and rel="noreferrer". These attributes are added to address a security vulnerability.

The problem is that JavaScript code can be used to allow a new tab to get control of its referring window. If you link to an external website affected by the malicious code, then that website can use the window.opener property in JavaScript to change the original page (your website) to steal information and spread malicious code.

WordPress adds rel="noopener" to prevent the new tab from taking advantage of this JavaScript feature. Similarly, the rel="noreferrer" attribute prevents passing the referrer information onto the new tab.

How Does rel=”noopener” Affect Your WordPress SEO?

It doesn’t.

Even though the rel="noopener" attribute improves WordPress security, some users avoid using it because they think it will impact their WordPress SEO.

But that’s just a myth.

It has no impact on your site’s SEO rankings or your overall WordPress performance.

What’s the Difference Between “noopener” and “nofollow”?

It’s easy to confuse rel="noopener" with rel="nofollow". However, they are completely separate attributes.

The noopener attribute prevents your website from cross-site hacking and improves WordPress security.

On the other hand, the nofollow attribute prevents your website from passing on SEO link-juice to the linked website.

Search engines look for and consider the nofollow attribute when following a link on your website. However, they do not give any consideration to the noopener tag.

By default, WordPress does not allow you to add nofollow to your external links. If you want to add nofollow in WordPress, then you will need to use a plugin.

To learn more, see our article on how to add title and nofollow to links in WordPress.

Does rel=”noreferrer” Affect Affiliate Links in WordPress?

The rel="noreferrer" does not affect affiliate links in WordPress. Some users believe that it does because rel="noreferrer" prevents the referrer information passing to the new tab.

However, most affiliate programs provide you with a unique URL that has your affiliate ID. This means your affiliate ID is passed along as a URL parameter for the other website to track.

Secondly, most affiliate marketers use a link cloaking plugin for their affiliate links.

With link cloaking, the affiliate link that your users click on is actually your website’s own URL, which then redirects users to the destination URL.

How Do You Disable rel=”noopener” in WordPress?

There is no need to remove rel="noopener" from links on your website. It is good for your website’s security and has no performance or SEO impact on your website.

However, if you must remove it, then you will have to disable the Gutenberg block editor in WordPress and use the old classic editor.

That’s because if you remove rel="noopener" from the link manually, the block editor will automatically add it back in to keep your website safe.

Once the block editor is disabled, you will need to add a code snippet to your theme’s functions.php file or to the WPCode plugin (recommended). You can learn how to use the WPCode Free Plugin in our guide on how to easily add custom code in WordPress.

Simply copy the following code into a new PHP snippet:

add_filter('tiny_mce_before_init','wpb_disable_noopener');
function wpb_disable_noopener( $mceInit ) {
    $mceInit['allow_unsafe_link_target']=true;
    return $mceInit;
}
Adding a Code Snippet Using WPCode

Make sure you change the ‘Active’ toggle on and then click the ‘Save Snippet’ button.

This will stop WordPress from adding rel="noopener" to new links. You will also need to manually edit any old links to remove the attribute.

Want even more control over which rel attributes get added to your links in WordPress? We recommend using the AIOSEO plugin because it lets you add title, nofollow, and other link attributes right inside the WordPress editor.

AIOSEO Adds NoFollow and Title Attributes to the Insert Link Popup

We hope this article helped you learn about rel="noopener" in WordPress. You may also want to learn how to get a free email domain, or see our list of tips to speed up WordPress performance.

If you liked this article, then please subscribe to our YouTube Channel for WordPress video tutorials. You can also find us on Twitter and Facebook.

The post What is rel=”noopener” in WordPress? (Explained) first appeared on WPBeginner.