All posts by Editorial Staff

How to Display Author’s Twitter and Facebook on the Profile Page

Want to display your author’s Twitter and Facebook links on their WordPress profile page?

By default, WordPress user profile pages don’t include fields for adding social media profiles such as Facebook or Twitter.

In this article, we will show you how to easily display your author’s Twitter and Facebook profile links in WordPress.

How to Display Author's Twitter and Facebook on the Profile Page

Why Display Author’s Twitter and Facebook Profiles on Your Site?

Social media platforms are an important source of traffic for your WordPress website. That’s why we put together a social media cheat sheet that will help you set up your social media profiles the right way.

Your authors will also have their own social profiles, and you can display them on your site to build credibility with your readers and strengthen your site’s authority.

Your visitors will be able to follow their favorite authors on social media and discover new articles on your site sooner. You can also add their social media profiles to your site’s schema, boosting your site’s trust score on Google and other search engines.

With that being said, let’s take a look at how to display an author’s Twitter and Facebook links on their user profile page.

Some of the best WordPress themes will display an author info box below each article. You can use this feature to display simple links to your author’s social profiles.

Simply go to Users » All Users in your WordPress admin panel and click the name of the author, or the ‘Edit’ link underneath to open the Edit User page.

Click on a User in the All Users List

Next, you should scroll down to the ‘About the user’ section and look for the ‘Biographical Info’ box.

If it is there, then your theme has built-in support for an author box.

Adding HTML Social Links to the User Bio

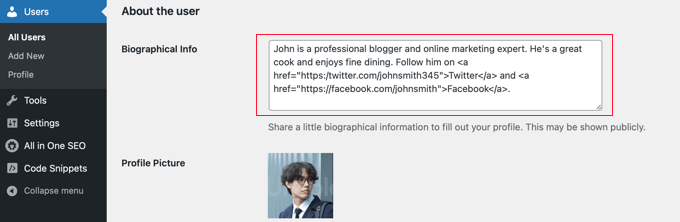
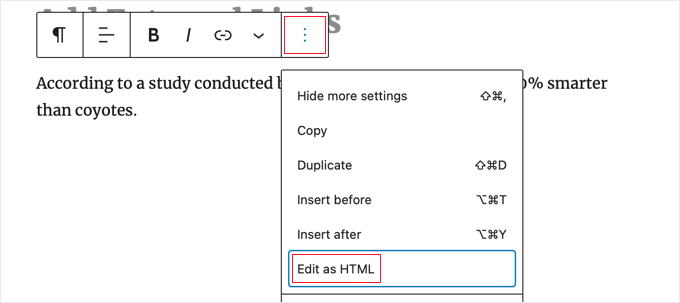
Here you can type a description of the author using text or HTML. You can manually add HTML links for the author’s Twitter and Facebook profile URLs, like this:

ADD BIO HERE. Follow them on <a href="https:/twitter.com/USERNAME">Twitter</a> and <a href="https://facebook.com/USERNAME">Facebook</a>.

Make sure you add a short biography about the author and change ‘USERNAME’ to their actual Twitter and Facebook usernames.

Once you’re finished, don’t forget to scroll to the bottom of the page and click the ‘Update User’ button to store your settings.

You will now see Twitter and Facebook links with the user’s bio on the posts that they write. Here’s how it looks on our demo website:

Preview of Author Bio with Twitter and Facebook Links

Method 2: Displaying Social Icons With an Author Bio Box Plugin

If your theme doesn’t display an author bio box, or if you want one that is more customizable and displays social icons instead of links, then you can use a plugin.

Simple Author Box is the best free author bio box plugin. It lets you customize nearly every aspect of your author bio box, including adding social media links for your authors.

First, you need to install and activate the Simple Author Box plugin. For more details, see our step-by-step guide on how to install a WordPress plugin.

If you want even more features, then there’s a pro version that lets you display an author box before or after content, add website links, get more social icon styles, include guest authors and co-authors, and more.

Upon activation, the plugin adds social media fields to each user profile. Simply navigate to the Users » All Users page in your WordPress admin area and click on the author’s name or the ‘Edit’ link below.

Click on a User in the All Users List

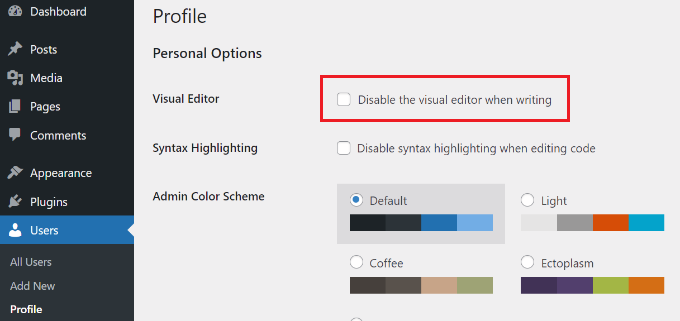
Tip: To quickly edit your own user profile, you can go to the Users » Profile page.

When you scroll to the bottom of the author profile, you will notice some new fields that have been added by the Author Bio Box plugin.

Scroll until you see the section labeled ‘Social Media Links (Simple Author Box).’ Now you need to select ‘Facebook’ from the drop-down menu, and then paste the URL to their Facebook profile into the next field.

Adding a Facebook Profile Using Author Bio Box

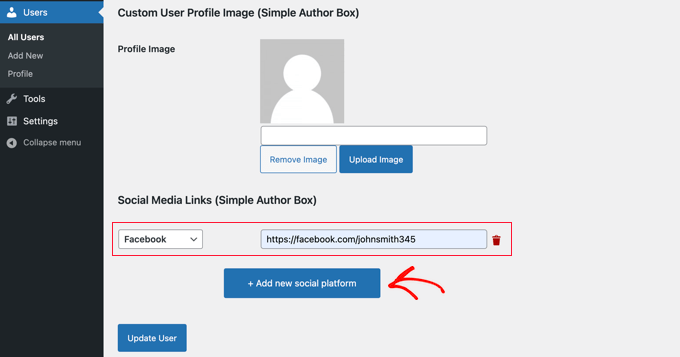
Now you can click the button labeled ‘+ Add new social platform.’

A new drop-down and field will be added where you can add their Twitter URL.

Adding Facebook and Twitter Links Using Simple Author Box

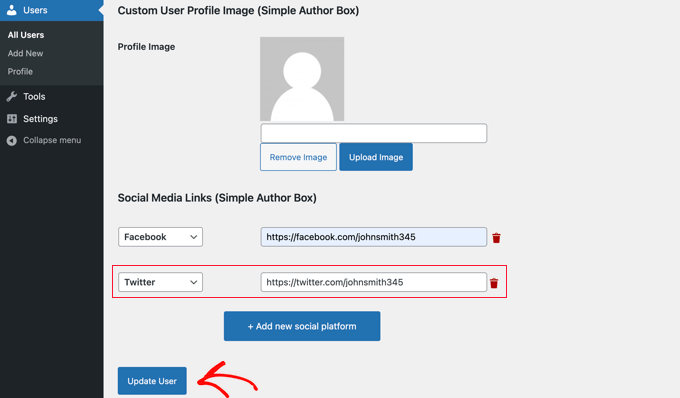
Once you’ve done that, make sure you click the ‘Update User’ button to store your settings.

Note: Don’t worry if the Facebook and Twitter URLs vanish after clicking the button. At the time of writing, there is a minor bug that hides the URLs, but the settings have been saved.

Now Facebook and Twitter icons will be displayed with the author’s profile at the bottom of their posts. Clicking these icons will take your visitors to their social profiles, but these links will open in the same window as your blog.

Preview of Simple Author Box with Social Icons

If you would prefer that the links open in a new tab, then you can navigate to the Appearance » Simple Author Box page and then click on the Elements tab. Once there, you need to find the option to ‘Open social icon links in a new tab’ and toggle it to the on position.

Open Simple Author Box Icons in a New Tab

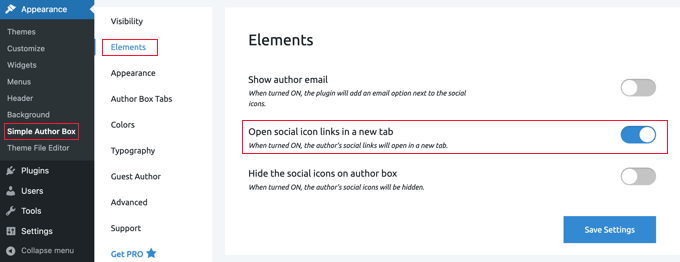
Now the author’s social profiles will open in a new tab.

Method 3: Adding Social Profiles to Your Site’s Schema for SEO

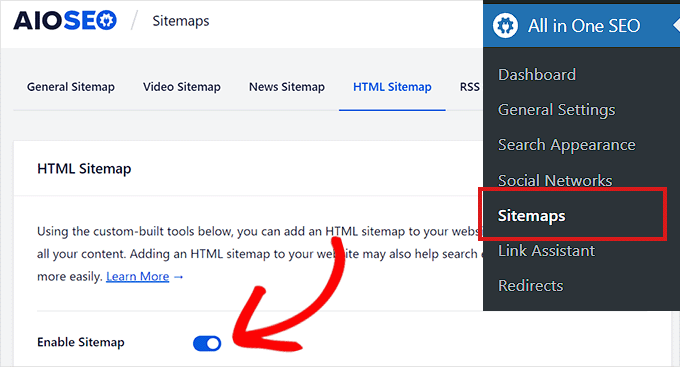
All in One SEO (AIOSEO) is the original WordPress SEO plugin that’s used on over 3 million websites. It can also be used to add social profile fields on the author’s profile page.

Unlike the other methods, this method will improve your website’s SEO since AIOSEO adds these social profiles to your site’s schema markup.

The problem is that AIOSEO does not automatically display them in the author bio. But don’t worry, we will show you how to do that.

For this tutorial, we’ll use the free version of All in One SEO since it allows you to add social profiles for your website and each user. However, AIOSEO Pro offers even more features to help you rank better in search engine results pages.

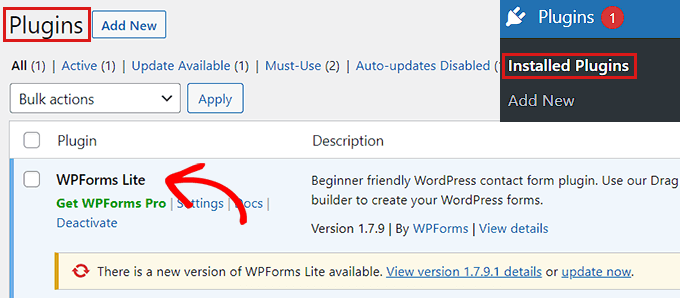
The first thing you need to do is install the free All in One SEO Lite plugin. For more details, see our step-by-step guide on how to install a WordPress plugin.

Once you have the AIOSEO plugin set up, you need to head over to the Users » All Users page, and then click on the author’s name or the ‘Edit’ link just below.

Click on a User in the All Users List

This will open the Edit User page for that author.

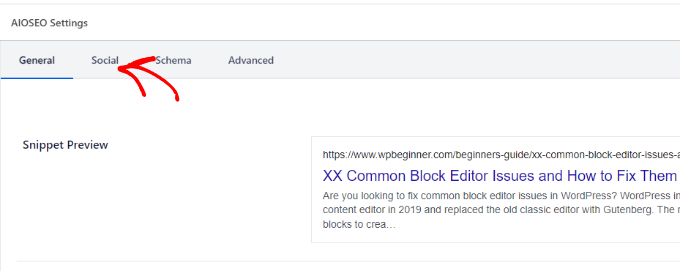
Notice that AIOSEO has added a Social Profiles tab at the top of the page. You need to click on that tab now.

All in One SEO Social Profiles Tab

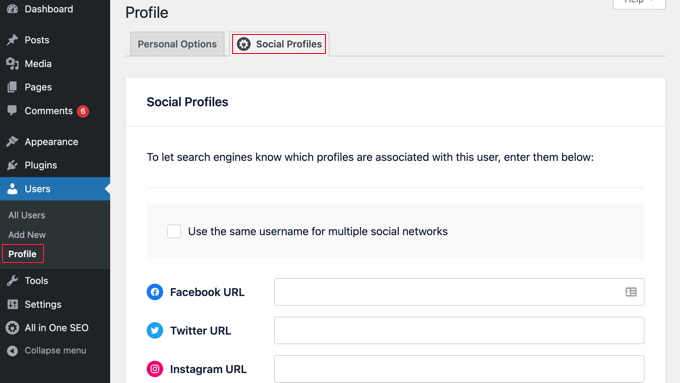
You can now enter the URL to the user’s social profiles in the boxes provided, such as:

https://facebook.com/johnsmith345
https://twitter.com/johnsmith345

Note that simply adding the username is not enough.

Alternatively, if the author uses the same username on multiple social networks, then you can click the box labeled ‘Use the same username for multiple social networks.’

Quickly Adding Multiple Social Networks With Same Username

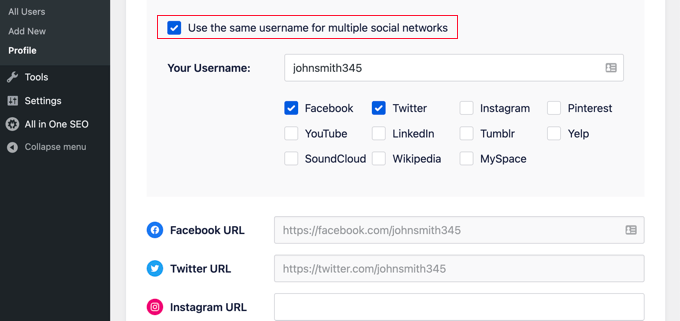
You can then type in that username and check the social networks it is used on. For other social networks, you can simply type the full URL as before.

Once you are done, click on the ‘Update User’ button at the bottom of the page to store your changes.

Pro Tip: If you have Twitter and Facebook profiles for your business or website, then you can add these to your site’s schema in a similar way by visiting All in One SEO » Social Networks and adding the links on the Social Profiles tab.

The author’s social media profiles have now been added to your site’s schema, helping search engines understand your site better. But they are not yet being displayed on your website.

Displaying AIOSEO Author Twitter and Facebook Links in Your Theme

Now you need to display these fields as links in your theme.

If you are an advanced user, then you can display links from All in One SEO’s social profiles by editing your WordPress theme files. If you haven’t done this before, then check out our guide on how to copy and paste code in WordPress.

Note: If you’re not familiar with editing your theme’s core files and adding custom code, then we recommend you use AIOSEO to add the social profiles to your site’s schema, and then display them on your website using method 1 or method 2 above.

Advanced users can add the following code to your theme files where you want to display the author profile links.

<?php
$twitter = get_the_author_meta( 'aioseo_twitter', $post->post_author );
$facebook = get_the_author_meta( 'aioseo_facebook', $post->post_author );
echo '<a href="' . $twitter .'" rel="nofollow" target="_blank">Twitter</a> | <a href="'. $facebook .'" rel="nofollow" target="_blank">Facebook</a>';
?>

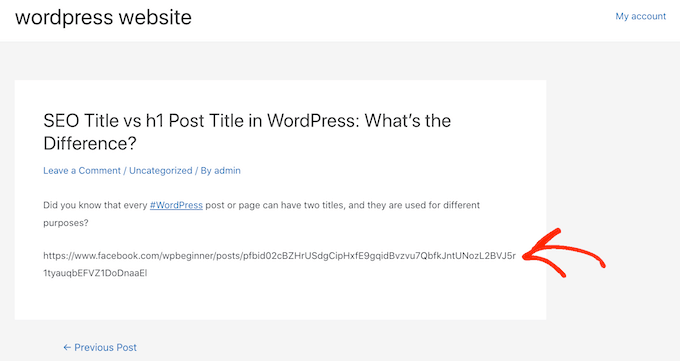
Save your changes and view a post on your website.

Here’s how it looks on our demo website. We added the code snippet to the biography.php file in the template-parts folder of the Twenty Sixteen theme.

Displaying AIOSEO Social Profiles in Your Theme Using Code

We hope this article helped you learn how to display the author’s Twitter and Facebook profile links in WordPress. You may also want to see our guide on how to display recent tweets or how to display your Facebook timeline in WordPress.

If you liked this article, then please subscribe to our YouTube Channel for WordPress video tutorials. You can also find us on Twitter and Facebook.

The post How to Display Author’s Twitter and Facebook on the Profile Page first appeared on WPBeginner.

How to Disable Emojis in WordPress (Step by Step)

Are you looking to disable emojis on your WordPress site?

Emojis are small icons that are used to express feelings or emotions. WordPress loads additional CSS and a JavaScript file to add emoji support and some users may want to remove it to improve performance and speed.

In this article, we’ll show you how to easily disable emojis in WordPress.

How to disable emojis in WordPress 4.2

What Are Emojis?

Emojis are the tiny icons or smileys used on the internet.

Originating from Japan, emojis have made their way into the Unicode character set and are now supported by desktop computers as well as iOS and Android mobile devices.

The emojis feature was first introduced in WordPress 4.2 and the primary reason for adding this feature was to add native support for Chinese, Japanese, and Korean language character sets.

Emojis example

By default, WordPress loads an additional JavaScript file and some CSS to add emoji support.

You can see it by viewing your website’s source code or by using the Inspect tool.

Emoji JavaScript in WordPress

However, some site owners may want to disable this extra emoji support to boost WordPress speed and performance by not downloading additional code and scripts.

Note: When we say disabling Emoji in WordPress, we mean disabling the extra checks and scripts used by WordPress to handle Emojis. You can still use Emoji on your site, and the browsers that support them will still be able to display them.

Having said that, let’s take a look at how to easily disable Emoji support in WordPress.

Method 1. Disabling Emojis in WordPress Using Code

For this method, we’ll be using a custom code snippet to disable emoji support in WordPress.

You can add this code snippet to your WordPress theme’ functions.php file or a site-specific plugin. However, a tiny error in the code could easily break your website and make it inaccessible.

To avoid this, we recommend using WPCode. It is the best code snippets plugin for WordPress and offers the safest way to add custom code to your site without breaking it.

First, you need to install and activate the WPCode plugin. For more instructions, see our guide on how to install a WordPress plugin.

After activation, simply go to the Code Snippets » All Snippets page from the WordPress admin dashboard.

From here, you need to click the ‘Add New’ button at the top.

Add new code snippet

This will take you to the ‘Add Snippet’ page.

From here, take your mouse over to the ‘Add Your Custom Code (New Snippet)’ option and then click the ‘Use snippet’ button.

Click Use Snippet button

This will bring you to the ‘Create Custom Snippet’ page. You can start by typing a name for your code snippet. It can be anything you like.

After that, you need to select ‘PHP Snippet’ as your ‘Code Type’ from the drop-down menu present in the right corner.

Type a name for your code snippet and choose PHP as code type

Now all you need to do is copy and paste the following code in the ‘Code Preview’ box.

/**
 * Disable the emoji's
 */
function disable_emojis() {
 remove_action( 'wp_head', 'print_emoji_detection_script', 7 );
 remove_action( 'admin_print_scripts', 'print_emoji_detection_script' );
 remove_action( 'wp_print_styles', 'print_emoji_styles' );
 remove_action( 'admin_print_styles', 'print_emoji_styles' ); 
 remove_filter( 'the_content_feed', 'wp_staticize_emoji' );
 remove_filter( 'comment_text_rss', 'wp_staticize_emoji' ); 
 remove_filter( 'wp_mail', 'wp_staticize_emoji_for_email' );
 add_filter( 'tiny_mce_plugins', 'disable_emojis_tinymce' );
 add_filter( 'wp_resource_hints', 'disable_emojis_remove_dns_prefetch', 10, 2 );
}
add_action( 'init', 'disable_emojis' );

/**
 * Filter function used to remove the tinymce emoji plugin.
 * 
 * @param array $plugins 
 * @return array Difference betwen the two arrays
 */
function disable_emojis_tinymce( $plugins ) {
 if ( is_array( $plugins ) ) {
 return array_diff( $plugins, array( 'wpemoji' ) );
 } else {
 return array();
 }
}

/**
 * Remove emoji CDN hostname from DNS prefetching hints.
 *
 * @param array $urls URLs to print for resource hints.
 * @param string $relation_type The relation type the URLs are printed for.
 * @return array Difference betwen the two arrays.
 */
function disable_emojis_remove_dns_prefetch( $urls, $relation_type ) {
 if ( 'dns-prefetch' == $relation_type ) {
 /** This filter is documented in wp-includes/formatting.php */
 $emoji_svg_url = apply_filters( 'emoji_svg_url', 'https://s.w.org/images/core/emoji/2/svg/' );

$urls = array_diff( $urls, array( $emoji_svg_url ) );
 }

return $urls;
}
Paste your code snippet

After that, scroll down to the ‘Insertion’ section to choose an insert method for your code.

Simply select the ‘Auto Insert’ mode so that the code can be automatically executed on your site upon activation.

Choose Auto Insert as insert method

Now go back to the top of the page and toggle the switch on the right from ‘Inactive’ to ‘Active’.

Finally, click the ‘Save Snippet’ button to save your custom code snippet.

Click the Save Snippet button to save changes

That’s all, you have successfully disabled emojis in WordPress.

Method 2. Disable Emojis in WordPress Using a Plugin

For this method, we’ll be using a plugin to disable Emojis in WordPress.

First, you need to install and activate the Disable Emojis plugin. See our guide on how to install a WordPress plugin for more instructions.

The plugin works out of the box and there are no settings for you to configure.

Upon activation, it will automatically disable emoji support from your WordPress site.

We hope this article helped you learn how to disable Emojis on your WordPress site. You may also want to check out our guide on how to create a custom Facebook feed in WordPress and our article on how to add web push notifications to your WordPress site.

If you liked this article, then please subscribe to our YouTube Channel for WordPress video tutorials. You can also find us on Twitter and Facebook.

The post How to Disable Emojis in WordPress (Step by Step) first appeared on WPBeginner.

How to Create Compact Archives in WordPress

Do you want to create compact archives on your WordPress website?

If you have been blogging for a few years, then the list of your posts might have become too long to fit in your WordPress sidebar. This will make your sidebar look cluttered which won’t be good for your site presentation

In this article, we’ll show you how to easily create compact archives in WordPress.

How to create compact archives in WordPress

Why Do You Need Compact Archives in WordPress?

Adding an archive in WordPress allows you to easily display your previously published content on your website for users to go through.

By default, WordPress offers an ‘Archives’ block and widget that can be added to the sidebar of your WordPress blog.

However, the ‘Archives’ block only allows you to display your archives as a long list or a dropdown menu.

A list will make your site look cluttered while a dropdown can be easily overlooked by users as it isn’t as noticeable.

The default archive block in WordPress

By creating compact archives, you can easily display your archives in the WordPress sidebar without taking up much space. You can also display them on your about page or even create a dedicated Archives section.

That being said, let’s take a look at how to easily add compact archives in WordPress.

How to Add Compact Archives in WordPress

You can easily create compact archives in WordPress using the Compact Archives plugin.

First, you need to install and activate the Compact Archives plugin. For further instructions, check out our guide on how to install a WordPress plugin.

Now, the plugin offers three styles to display compact archives on your website.

Style 1. Relaxed three-letter month initials

Style one of the compact archives

Style 2. Compact Monthly Initials

Style two of compact archives

Style 3. Numeric Block

Style three of the compact archives

There are multiple ways to easily display compact archives on your website.

In this tutorial, we will be showing you all four methods and you can choose the one that you like the most.

Method 1. Add Compact Archives in WordPress Posts or Pages

It is super easy to add compact archives to your WordPress page or post because the plugin comes with an easy-to-use block that you can add to your post or page.

For this tutorial, we will be creating a new page for compact archives.

Simply head over to the Pages » Add New page from the admin sidebar. Once a new page opens up in the block editor, you can start by typing a name for your page.

Next, you need to click the ‘Add Block’ (+) button at the top and search for the ‘WPBeginner’s Compact Archvies’ block.

Upon locating it, simply click on the block to add it to your page.

Add the Compact archives block to a page

Next, you need to choose a style for your archives from the Block Settings panel on the right corner of the screen.

Simply choose a style of your liking from the dropdown menu below the ‘Select Archive Type’ option.

Select an archive type from the dropdown menu

You can also choose if you want your archive text to be capitalized or Uppercase.

For that, you need to open the dropdown menu below the ‘Transform Text’ option.

Select the archive text from the dropdown menu

Once you’re satisfied with your choice, simply click the ‘Publish’ or ‘Update’ button at the top.

This is how your archives page will look.

Archives preview

Method 2. Add Compact Archives as a Widget

You can also display your archive as a widget on your website.

Adding the Compact Archives Block in Full Site Editor

If you’re using a block-based theme on your website, then you’ll have to add the ‘ WPBeginners’ Compact Archives’ block using the full site editor.

First, you need to visit the Appearance » Editor page from the admin sidebar to launch the FSE.

From here, you need to click the ‘Add Block’ (+) button on the top-left corner of the screen to open up the block menu.

Next, you need to simply locate and add the ‘WPBeginner’s Compact Archvies’ block to your preferred place on the website.

Add the compact archives block in the FSE

Once you add the block, you can configure its’ style and text settings from the Block Settings panel on the right.

Finally, don’t forget to click on the ‘Save’ button at the top to store your settings.’

Configure the Compact archives settings in FSE

Your compact archives will look like this.

Compact archives in FSE

Adding the Compact Archives Block Using Widgets

If you’re not using a block-based theme, then this method is for you.

First, you need to visit the Appearance » Widgets page from the admin sidebar.

Once there, simply click the ‘Sidebar’ tab to expand it.

Now, you need to click the ‘Add Block’ (+) button in the sidebar tab.

This will open up the ‘Widget Block Menu’ where you need to search for the ‘WPBeginner’s Compact Archive’ block.

Upon locating it, simply click the block to add it in the sidebar section.

Add the compact archives block in the sidebar

Once the ‘Compact Archives’ block is added you can change the style and text of your archive by configuring the settings from the Block Settings panel on the right.

Don’t forget to click the ‘Update’ button at the top to save your changes.

Configure the block settings of the compact archives and click Update button

This is how your website sidebar will look upon adding the ‘Compact Archvies’ block.

Compact archive preview in sidebar

Method 3. Displaying Compact Archives in Template Files

If you are making a custom WordPress theme or want to display archives in a theme template file, Compact Archives comes with handy template tags that you can use.

Simply add the following template tag to your code.

<ul> <?php compact_archive(); ?> </ul>

After adding the tag, compact archives will be added to your page.

However, if you want to add a style to your archive, you can do so by adding the following template tag in your code.

<ul>
<?php compact_archive($style='initial', $before='<li>', $after='</li>'); ?>
</ul>

For example, $style == 'initial' will display only month name initials and should fit right inside a sidebar. Using$style == 'block', will fit the main column of a page. Using $style == 'numeric', will display numeric months.

Method 4. Add Compact Archives to Your HTML Sitemap

If you want to create an HTML sitemap page for your in WordPress, then you can also display compact archives on your HTML sitemap page.

First, you will need to install and activate the All in One SEO for WordPress plugin. For more details see our article on how to install a WordPress plugin.

All in One SEO is the best WordPress SEO plugin on the market. It allows you to easily optimize your website for search engines.

It also comes with an HTML sitemap feature that allows you to easily add an HTML sitemap to your WordPress site.

It is a premium plugin but you can also use the free version called All in One SEO Lite. The free version has fewer features but it includes HTML sitemaps.

Upon activation, the plugin will launch the setup wizard. Simply follow the on-screen instructions to set up the plugin or see our guide on how to properly set up All in One SEO for WordPress.

Once finished, you now need to visit the All in One SEO » Sitemaps page from the admin sidebar.

From here, you need to click on the ‘HTML Sitemap’ tab and make sure that the ‘Enable Sitemap’ toggle is turned on.

Toggle the Enable Sitemap switch

Next, you need to choose how you want to display your HTML sitemap.

For this tutorial, we will be choosing the ‘Gutenberg Block’ option.

If you choose this method, then you’ll have to add the “AIOSEO – HTML Sitemap” block to any page where you wish to display your HTML sitemap.

Choose the Gutenberg block

Next, you need to scroll down to the ‘Compact Archives’ option in the ‘HTML Sitemap Settings’ section.

Here, you need to simply toggle the ‘Compact Archives’ switch to ‘Enabled’.

Now your HTML sitemap will be displayed in a compact date archive format.

Toggle the compact archives switch to Enabled

Finally, don’t forget to click on the ‘Save Changes’ button to store your settings.

Next, open up a page where you want to display the HTML sitemap from the admin sidebar.

From here, simply click on the ‘Add Block’ (+) button at the top and then add the ‘AIOSEO-HTML Sitemap’ block to your page.

Add the AIOSEO-HTML Sitemap block to your page

Finally, don’t forget to click the ‘Publish’ or ‘Update’ button to save your changes.

Your compact archives HTML Sitemap will look like this.

We hope this article helped you learn how to easily create compact archives in WordPress. You may also want to see our guide on how to easily create an email newsletter in WordPress and our top picks of the best social media plugins to help promote your website.

If you liked this article, then please subscribe to our YouTube Channel for WordPress video tutorials. You can also find us on Twitter and Facebook.

The post How to Create Compact Archives in WordPress first appeared on WPBeginner.

9 Best Age Verification Plugins for WordPress (Compared)

Are you looking for a plugin to set up age verification on your WordPress site?

Setting up age restrictions allows you to limit users from seeing content due to legal requirements or the nature of the content. You can set up age verification with the right WordPress plugin without editing any code.

In this article, our expert team have researched and picked the best age verification plugins for WordPress.

Best age verification plugins for WordPress

Why Do You Need an Age Verification Plugin?

If you’re selling products or promoting goods that are age sensitive, then it is important to verify the user’s age before allowing them access.

For example, many countries have laws and regulations that require websites to verify users’ age. This is common if you’re in the business of selling alcohol, tobacco, cannabis, vape, tattoos, and other similar goods.

Similarly, different videos and games are not appropriate for minors and require an age gate. You can also add age verification on your membership website if it contains sensitive content.

A simple way of adding age verification to a WordPress site is by using a plugin. You don’t have to edit any code or hire a developer.

Plus by using a plugin, you can show a confirmation form or a popup where users can enter their age before accessing the content or buying a product.

That being said, let’s look at the best age-verification WordPress plugins for different business needs.

1. WPForms

The WPForms form builder plugin for WordPress

WPForms is the best WordPress contact form plugin that is beginner friendly and lets you create all types of forms. It offers a drag-and-drop form builder and comes with over 500+ pre-built form templates.

WPForms offers a Form Locker addon that allows you to set up age restrictions on your online forms. You can pick age as the verification type for your form and define the age limit. Users will then have to enter their date of birth before they can submit a form on your site.

Enable age verification in WPForms

Using WPForms, you can create forms for all kinds of situations. For instance, the plugin lets you create a login form or a registration form and only allows logged-in users to view the content.

If you’re looking for feedback about your company from a specific age group, then you can create a survey form and add an age restriction. Similarly, you can add an order form on your website with age verification to sell concert tickets or alcohol.

Besides that, WPForms also offers other features and addons. You can integrate payment services like Stripe and PayPal to accept online payments, allow file uploads, connect email marketing services, and more.

Pricing: You will need the WPForms Pro version to access the Form Locker addon and set up age verification in WordPress. This will cost you $199.50 per year. There is also a WPForms Lite version you can use for free.

2. OptinMonster

OptinMonster

OptinMonster is the best lead generation and popup plugin for WordPress. It helps you get more leads, grow your email list, and boost conversions.

You can create stunning campaigns for your site, including age verification popups. The plugin offers a drag-and-drop campaign builder, pre-built templates, and lots of customization options. You can add different elements like images, buttons, videos, and more to your popup.

For instance, you can create a simple age verification lightbox popup with Yes/No options or show a popup where visitors need to enter their date of birth.

Create age verification popup

OptinMonsters also offers fullscreen campaigns, which are great for restricting access to your website or a page until users confirm their age.

The plugin provides powerful display rules that let you choose when and where to show your campaigns. For instance, you can show your age verification campaigns on selected pages or hide the popup for users that have already verified their age on your website.

Besides that, OptinMonster easily integrates with different email marketing services and works with eCommerce platforms like WooCommerce and Shopify.

Pricing: OptinMonster prices start from $9 per month (billed annually). There is also a free version of OptinMonster that you can use to get started.

3. Age Gate

Age gate

Age Gate is a free age verification WordPress plugin that is very easy to use. Using the plugin, you can easily restrict content based on the user’s age.

It offers 3 input options to add age verification in WordPress. You can show a dropdown menu and let visitors select an age, allow users to enter their date of birth, or simply offer a Yes/No option to verify age.

Other than that, you can choose whether to restrict the entire website or select pages based on age. Plus, there is also an option to set different age restrictions for individual content using the plugin.

With Age Gate, you get multiple customization options to edit the appearance of your age restriction message. For instance, you can add a logo, change the background color, add blur, add a background image, and more.

Pricing: Age Gate is a free WordPress plugin.

4. MemberPress

MemberPress

MemberPress is the best membership plugin for WordPress. It lets you create a membership site and sell subscription-based products and services.

With MemberPress, you can add age restrictions to your WordPress site. Let’s say you don’t want members under 18 signing up for a particular membership or course. By setting up an age limit, you can prevent access to content.

Besides that, MemberPress offers other powerful features. It gives you full control over who can access content, release paid content over time, add payment gateways, and more. You can also create and sell online courses using MemberPress’s course builder.

If you want to learn more about setting up a subscription-based website, then please see our ultimate guide to creating a WordPress membership site.

Pricing: MemberPress is a premium plugin with prices starting from $179.50 per year.

5. WooCommerce Age Verification Popup

WooCommerce age verification popup

WooCommerce Age Verification Popup is the next plugin on our list. It is a paid extension for WooCommerce stores. If you have a WooCommerce store and you’re selling products like tobacco, vaping, medicines, fireworks, or items that require age verification, then this plugin is for you.

The plugin offers 4 verification methods where users can simply enter their age, select their date of birth, click a checkbox, or simply select from a Yes/No option.

Besides that, you can choose which pages the popup should appear on. For instance, you can enable it on your entire website or specific pages like cart, checkout, my account, and shopping page.

There are also different customization options you can use to edit your popup. These include adding a background image, selecting a color, adjusting the border height, and text size, and more.

However, if you want more options like prebuilt templates and the ability to add different elements to the popup, then you can use OptinMonster. It also works seamlessly with WooCommerce and offers more powerful display rules.

Pricing: WooCommerce Age Verification Popup is available for $29 per year.

6. Age Verification for WordPress

Age Verification

Age Verification for WordPress is a free WordPress plugin that you can use to add an age limit to your WordPress site. The plugin is beginner friendly and offers basic features.

It adds an age verification popup to your site and restricts access to content for visitors that don’t meet the age requirements. Once a user verifies their age, a cookie is saved for 30 days, so they don’t have to verify their age again.

The plugin offers limited options to edit your age verification box. For instance, you can only add a background image, logo, title text, message text, and edit the yes/no button text using the Age Verification plugin.

However, there are other plugins on our list, like WPForms and OptinMonster, that offer more customization options. Plus, you get to choose from pre-built templates and drag-and-drop builders.

Pricing: The Age Verification plugin is free to use.

7. AgeChecker.Net 

AgeChecker.net

AgeChecker.Net is a third-party age verification platform for eCommerce websites. It uses identity networks and a proprietary database to verify customer’s age at checkout.

The plugin is compatible with different eCommerce platforms, including WooCommerce, Shopify, Magento, BigCommerce, and more.

It adds age verification on checkout pages and instantly verifies 90% of the user’s age in the United States.

If the data isn’t available in the data sources, then it will ask for the customer’s ID verification. Once a customer submits the required documents, AgeChecker.Net’s 24/7 live team manually verifies it for you. If the customer is underage, they will disable their access to the product or service.

Other than that, you can customize the minimum age, digital signature requirements, and order blocking based on the customer’s location. Plus, the plugin is compliant with Food and Drug Administration (FDA) and other federal and state regulations in the US.

Pricing: AgeChecker.Net has a free WordPress plugin that connects with WooCommerce. However, you will need to signup for their premium plan, which will cost you $25 per month + 50¢ per accepted verification.

8. AgeVerify

AgeVerify

AgeVerify is another WordPress age verification plugin that is free to use. The plugin is super simple to use and lets you create an age-verification message for your website.

It comes with prebuilt templates that you can use for different types of businesses. Plus, you can edit the age verification text, change the text and color of the button, and more.

What makes this plugin different from others on our list is that it lets you edit the cookie duration (in hours) for the age verification message. This way, your visitors won’t have to verify their age each time they visit your website.

Pricing: AgeVerify is a free WordPress plugin.

9. Easy Age Verify

Easy Age verify

Easy Age Verify is an age verification plugin for WordPress that comes with pre-built verification settings and messages for alcohol, vape, and adult businesses.

The plugin is super easy to use and doesn’t require complex configuration. All you need to do is enable age verification, select your industry, and the plugin will take care of the rest. It also gives you the option to exclude age verification for logged-in users.

On the downside, you cannot customize the appearance of your age verification message in the free version. However, you can use WPForms as an alternative. It helps display a custom age verification form anywhere on your website.

Pricing: Easy Age Verify is free to use. There is also a premium version that unlocks customization features, and it costs $8.25 per month (billed annually).

Which is the Best Age Verification WordPress Plugin?

Our top picks for the best age verification plugin for WordPress are WPForms and OptinMonster.

WPForms offers a Form Locker addon that allows you to add an age gate on any type of form and display it anywhere on your site. It offers a drag-and-drop form builder, prebuilt templates, and lots of customization options.

On the other hand, if you’re looking to add an age verification popup on your WordPress site, then OptinMonster is the best option. It lets you create age verification popups, offers powerful targeting rules to show and track that campaign, and easily integrates with eCommerce platforms.

We hope this article helped you find the best age verification plugin for WordPress. You may also want to see our post on the best live chat software for small businesses and proven ways to make money online blogging with WordPress.

If you liked this article, then please subscribe to our YouTube Channel for WordPress video tutorials. You can also find us on Twitter and Facebook.

The post 9 Best Age Verification Plugins for WordPress (Compared) first appeared on WPBeginner.

How to Stop WordPress From Overwriting .htaccess File

Recently one of our readers asked if it was possible to stop WordPress from overwriting the custom code in your .htaccess file?

WordPress along with several plugins add custom settings to the .htaccess configuration file. If you have added your own custom code to .htaccess, then you may be worried that it will be overwritten or deleted.

In this article, we’ll show you how to stop WordPress from overwriting the .htaccess file.

How to Stop WordPress From Overwriting .htaccess File

Why Does WordPress Overwrite the .htaccess File?

Your .htaccess file is a powerful configuration file that stores important settings about your WordPress website. It contains rules that tell your hosting server how to handle your site.

WordPress uses the .htaccess file to store its permalink settings. Whenever you change or regenerate your permalinks, WordPress will automatically overwrite the old settings in .htaccess with the new settings.

Some WordPress plugins also save their settings in .htaccess. For example, the W3 Total Cache plugin will modify your .htaccess file in order to configure the caching and optimization tools that are part of the plugin.

Lastly, you can make your own custom changes to .htacess to control how your website works. For example, you can add custom rules to the file that protect your admin area, keep your site safe from hackers, set up redirects, ban suspicious IP addresses, and more.

Some users are concerned that if they add their own custom rules to .htaccess, then they may be deleted when WordPress overwrites the file with new settings. Other users prefer to manually configure .htaccess and not let WordPress write to it at all.

With that being said, let’s take a look at how to stop WordPress from overwriting your .htaccess file. Simply use the quick links below to jump to the section you are interested in.

How to Stop WordPress From Overwriting Your .htaccess Rules

The good news is that if you understand how the .htaccess file works, then you can be confident that your custom rules will not be overwritten.

That’s because the areas of the file that will be changed by WordPress or your plugins are clearly marked. Simply make sure that you don’t add code to those areas.

Don’t Modify Code Inside the WordPress Markers

As we said earlier, WordPress uses .htaccess to store the settings for an SEO-friendly URL structure. The code it saves to the file will be automatically overwritten and updated whenever you change your permalink settings.

As you can see in the screenshot below, WordPress saves this information between two markers, # BEGIN WordPress and # END WordPress.

WordPress Markers in .htaccess

Notice the warning inside those markers:

The directives (lines) between “BEGIN WordPress” and “END WordPress” are dynamically generated, and should only be modified via WordPress filters. Any changes to the directives between these markers will be overwritten.

This means that WordPress will not overwrite or modify any code that you add outside these markers. Users typically add their custom code to the top of the file, above the # BEGIN WordPress marker.

Tip: .htaccess is a hidden file located in your WordPress site’s root folder. If you are having difficulties finding it, then take a look at our guide on why you can’t find the .htaccess file on your WordPress site.

Don’t Modify Code Inside Your Plugins’ Markers

When a plugin saves its settings to .htaccess, it also places it between markers that look like # BEGIN Plugin and # END Plugin.

For example, if you install and set up the W3 Total Cache plugin to improve your website speed and performance, then it will add rules to .htaccess between # BEGIN W3TC Browser Cache and # END W3TC Browser Cache markers.

Example of Plugin Markers in .htaccess

These rules will be overwritten whenever you change the plugin’s settings, so you need to be careful not to add your own custom .htaccess rules between those markers.

Creating Markers for Your Custom Code

In rare cases, a badly behaved plugin may modify code outside of its # BEGIN and # END markers. However, it will normally not modify code found between the markers used by WordPress or other plugins.

If you are concerned about a badly behaved plugin overwriting your code, then you can add your own markers to the .htaccess file.

For example, you can type # BEGIN MyCustomCode and # END MyCustomCode markers at the top of the .htaccess file, and then add your own custom rules between those markers.

You Can Create Your Own Markers in .htaccess for Your Custom Rules

If you also need to add code to the end of .htaccess, then you can add a different set of markers there. Just be sure to give them different names. For example, you could use ‘MyCustomCodeTop’ and ‘MyCustomCodeBottom’.

How to Stop WordPress From Modifying .htaccess

Now that you understand how .htaccess works, you can be confident that your custom code will not be overwritten by WordPress or your plugins.

However, some developers and advanced users want to stop WordPress from making any changes to .htaccess.

For example, they may want to create permalinks by typing the settings manually into .htaccess. In this case, they will want to avoid conflicts by stopping WordPress from saving its own permalink settings to the file.

We don’t recommend this unless you know what you’re doing, because it can lead to unexpected consequences. However, it can be done by changing the file’s permissions or using code.

Stopping WordPress From Changing .htaccess Using File Permissions

One way to stop WordPress from modifying .htaccess is to make the file read-only. To do this, you need to change the file permissions using an FTP client or the file manager provided by your WordPress hosting provider.

You will find the .htaccess file in the root directory of your WordPress installation. Next, you should right-click the file and select ‘File permissions’.

Selecting File Permissions From the Menu in Your FTP Client

This will display a pop-up where you can change the file’s attributes.

The default setting will be 644, but you can change this to 444 by typing directly into the ‘Numeric value’ field or making sure that only the ‘Read’ boxes are checked.

Changing the .htaccess File Permissions to 444 or Read-Only

Once you click the ‘OK’ button, the file will be read-only and cannot be modified.

Of course, this will mean that you are unable to write to the file as well. When you wish to make changes, you will need to temporarily set the file permissions back to 644.

Stopping WordPress From Changing .htaccess Using Code

Another solution is to use a code snippet that lets WordPress know not to write to the .htaccess file. This is useful if you want to stop WordPress from modifying .htaccess without blocking your plugins.

Note: Editing any core WordPress files can be dangerous. Even a small mistake can cause major errors on your site. That’s why we only recommend this method for advanced users.

Simply add the following code snippet at the end of your wp-config.php file. If you need help, then please refer to our guide on how to edit the wp-config.php file in WordPress.

add_filter('got_rewrite', '__return_false');

Once you’ve done that, WordPress will no longer write to the .htaccess file.

Error Message Displayed When WordPress Can’t Change .htaccess

If you try to change your permalink settings when .htaccess is set to read-only, then an error message will be displayed.

At the top of the Settings » Permalinks page, you will see the message ‘You should update your .htaccess file now.’

Permalink Settings Error Message When .htaccess Cannot Be Accessed

This lets you know that WordPress was unable to modify the .htaccess file.

Normally, this is what you intended. However, if you do wish to add the WordPress permalink settings to .htaccess, then you will need to do it manually.

At the bottom of the Settings ≫ Permalinks page, you will see another error message saying that your .htaccess file is not writable. Underneath that, you will see the rules that need to be added to .htaccess.

List of Rules You Will Need to Add to .htaccess Manually if Needed

If you wish to add those settings, then you will need to temporarily change the .htaccess file permissions back to 644 so that it can be edited. After that, you should paste the rules between the file’s WordPress BEGIN and END markers, replacing the code already there.

When you’re finished, simply set the value back to 444 and save the file. It will once again be unwritable.

We hope this tutorial helped you learn how to stop WordPress from overwriting the .htaccess file. You may also want to learn how to add push notification in WordPress and check out our expert list of the best WordPress SEO plugins and tools.

If you liked this article, then please subscribe to our YouTube Channel for WordPress video tutorials. You can also find us on Twitter and Facebook.

The post How to Stop WordPress From Overwriting .htaccess File first appeared on WPBeginner.

How to Easily Add Icon Fonts in Your WordPress Theme

Do you want to add icon fonts to your WordPress site?

Icon fonts allow you to add resizable vector icons that are loaded like web fonts, so they don’t slow down your website. You can even style them using CSS to get exactly the look you want.

In this article, we will show you how to easily add icon fonts in your WordPress theme.

How to easily add icon fonts in your WordPress theme

What are Icon Fonts and Why You Should Use Them?

Icon fonts contain symbols or small pictures instead of letters and numbers.

You can use these icon fonts to show common images. For example, you can use them with your shopping cart, download buttons, feature boxes, giveaway contests, and even in WordPress navigation menus.

Font Awesome icon fonts

Most visitors will immediately understand what a commonly-used icon means. In this way, you can help visitors find their way around your website and engage with your content.

These pictures can also help you create a multilingual WordPress website, since most people can understand icon fonts no matter what language they speak.

Compared to image-based icons, font icons load much more quickly so they can boost WordPress speed and performance.

There are several open-source icon font sets that you can use for free such as IcoMoon, Genericons, and Linearicons.

In fact, the WordPress software comes with free dashicon icons built-in. These are the icons you can see in the WordPress admin area.

Font icons in the WordPress dashboard

In this guide, we’ll be using Font Awesome as it is the most popular open-source icon set. We use it on WPBeginner, and in all our premium WordPress plugins.

With that said, let’s look at how you can easily add icon fonts in your WordPress theme. Simply use the quick links to jump straight to the method that you want to use.

Method 1. Adding Icon Fonts Using a WordPress Plugin (Easy)

The easiest way to add icon fonts to WordPress is by using the Font Awesome plugin. This allows you to use icon fonts in your pages and posts without modifying your theme files. You’ll also get any new Font Awesome icons automatically every time you update the plugin.

The first thing you need to do is install and activate the Font Awesome plugin. For more details, see our step-by-step guide on how to install a WordPress plugin.

Upon activation, you can add a Font Awesome icon to any shortcode block. Simply open the page or post where you want to show the icon font, and then click on the ‘+’ icon.

You can now search for ‘Shortcode’ and select the right block when it appears.

Adding a font icon to WordPress using shortcode

With that done, you can add any Font Awesome icon using the following shortcode:

[icon name="rocket"]

Simply replace “rocket” with the name of the icon that you want to show. To get this name, head over to the Font Awesome site and click on the icon that you want to use.

Choosing an icon font for your WordPress website

In the popup that appears, go ahead and click on the icon’s name.

Font Awesome will now copy the name to your clipboard automatically.

Getting the name of a font icon

With that done, simply paste the name into the shortcode. You can now click on ‘Publish’ or ‘Update’ to make the icon font live.

Sometimes you may want to show an icon font inside a block of text. For example, you may need to display a ‘copyright’ symbol after a brand name.

To do this, simply paste the shortcode inside any Paragraph block.

Adding an icon font in WordPress using a shortcode

You can then use the settings in the right-hand menu to customize the icon, similar to how you customize options for text blocks. For example, you can change the font size.

WordPress will turn the shortcode into a Font Awesome icon for visitors and show it alongside your text.

An example of an icon font in WordPress

Another option is to add the shortcode to any widget-ready area.

For example, you can add a Shortcode block to your site’s sidebar or similar section.

Adding an icon font to a widget-ready area in WordPress

For more information, please see our guide on how to use shortcodes in your WordPress sidebar widgets.

You can even add the icon shortcode to columns and create beautiful feature boxes.

An example of a features box on a WordPress website

For detailed instructions, see our guide on how to add feature boxes with icons in WordPress.

Many websites use icon fonts in their menus, to help visitors find their way around. To add an icon, either create a new menu or open an existing menu in the WordPress dashboard.

For step-by-step instructions, check out our beginner’s guide on how to add a navigation menu in WordPress.

Then, click on ‘Screen Options’ and check the box next to ‘CSS Classes.’

Adding CSS classes to a WordPress navigation menu

With that done, simply click to expand the menu item where you want to show the icon.

You should now see a new ‘CSS Classes’ field.

Adding an icon font using a CSS class

To get an icon’s CSS class, simply find the icon font on the Font Awesome website and give it a click. If you want, then you can change the icon’s style by clicking on the different settings.

In the popup, you’ll see an HTML code snippet. The CSS class is simply the text between the quotation marks. For example, in the following image, the CSS class is fa-solid fa-address-book.

Getting the code for an icon font

Simply copy the text inside the quotes, then switch back to the WordPress dashboard.

You can now paste the text into the ‘CSS Classes’ field.

Adding icon fonts in WordPress using a CSS class

To add more icon fonts, simply follow the same process described above.

When you’re happy with how the menu is set up, click on ‘Save.’ Now if you visit your WordPress website you’ll see the updated navigation menu.

An example of icon fonts in a WordPress navigation menu

Method 2. Using Icon Fonts with SeedProd (More Customizable)

If you want more freedom over where you use font icons, then we recommend using a page builder plugin.

SeedProd is the best drag-and-drop WordPress page builder in the market and has over 1400 Font Awesome icons built-in. It also has a ready-made Icon box that you can add to any page using drag and drop.

With SeedProd, it’s easy to create custom pages in WordPress and then show Font Awesome icons anywhere on those pages.

The first thing you need to do is install and activate the plugin. For more details, see our beginner’s guide on how to install a WordPress plugin.

Note: There is a free version of SeedProd, but we’ll be using the Pro version since it comes with the Icon box.

Upon activation, go to SeedProd » Settings and enter your license key.

Entering the SeedProd license key

You can find this information under your account on the SeedProd website. After entering the license key, go ahead and click the ‘Verify Key’ button.

Next, you need to visit SeedProd » Pages and click on the ‘Add New Landing Page’ button.

Choosing a custom design for your WordPress page

Now, you can choose a template to use as the basis for your page. SeedProd has over 180 professionally-designed templates that you can customize according to your WordPress blog or website’s needs.

To select a template, hover your mouse over it and then click the ‘Checkmark’ icon.

Choosing a professionally-designed template

We’re using the ‘Ebook Sales Page’ template in all our images, but you can use any design you want.

Next, go ahead and type in a name for the custom page. SeedProd will automatically create a URL based on the page’s title, but you can change this URL to anything you want.

When you’re happy with the information you’ve entered, click on the ‘Save and Start Editing the Page’ button.

Adding a title to a SeedProd page design

Next, you’ll be taken to the SeedProd drag-and-drop page builder, where you can customize the template.

The SeedProd editor shows a live preview of your design to the right and some block settings on the left.

Customizing a SeedProd WordPress page template

The left-hand menu also has blocks that you can drag onto your design.

You can drag and drop standard blocks like buttons and images or use advanced blocks such as the contact form, countdown, social share buttons, and more.

Adding blocks a page or post design in WordPress

To customize any block, simply click to select it in your layout.

The left-hand menu will now show all the settings you can use to customize that block. For example, you can often change background colors, add background images, or change the color scheme and fonts to better match your brand.

Creating a custom layout for a WordPress website

To add an icon font to the page, simply find the ‘Icon’ block in the left-hand column and then drag it onto your layout.

SeedProd will show an ‘arrow’ icon by default.

Adding an icon font in WordPress using SeedProd

To show a different Font Awesome icon instead, simply click to select the Icon block.

In the left-hand menu, hover your mouse over the icon and then click on the ‘Icon Library’ button when it appears.

Choosing a font icon using a page builder

You’ll now see all the different Font Awesome icons that you can choose from.

Simply find the font icon that you want to use and give it a click.

SeedProd's built-in icon font library

SeedProd will now add the icon to your layout.

After choosing an icon, you can change its alignment, color, and size using the settings in the left-hand menu.

How to customize a font icon using SeedProd

You can continue working on the page by adding more blocks and customizing those blocks in the left-hand menu.

When you’re happy with how the page looks, click the ‘Save’ button. You can then select ‘Publish’ to make that page live.

Publishing a custom page layout with a font icon

We hope this article helped you learn how to add icon fonts in your WordPress theme. You can also go through our guide on the best popup plugins compared and how to choose the best web design software.

If you liked this article, then please subscribe to our YouTube Channel for WordPress video tutorials. You can also find us on Twitter and Facebook.

The post How to Easily Add Icon Fonts in Your WordPress Theme first appeared on WPBeginner.

13 Common WordPress Block Editor Problems and How to Fix Them

Are you running into errors when using the WordPress block editor?

WordPress replaced the old classic editor in 2019 with a brand new content editor called Gutenberg. This new editor uses blocks to create content in WordPress. However, sometimes you may come across annoying issues when using it.

In this article, we’ll share how to fix the most common WordPress block editor problems, so you can improve your workflow.

Common block editor issues and how to fix it

What is WordPress Block Editor?

WordPress block editor, or Gutenberg, is a new content editor introduced in the WordPress 5.0 release. Since then, WordPress has improved the editor and added new features and functionalities.

It provides more customization features compared to the Classic Editor. You get different blocks to add different elements to your content and don’t have to edit code to change the appearance and style.

It tries to show how your blogs and pages will look in real time by mimicking the same font and colors of your WordPress theme.

For example, you can use an image block to add pictures to your blog posts. Plus, you get options like image style, size, alignment, and more using the block.

Add an Image Block

Besides that, many WordPress plugins add their blocks to the content editor. This makes it super easy to embed things like forms, social media feeds, and tables of content in just a few clicks.

That said, the block editor isn’t perfect. Like any other WordPress plugin, you may come across different errors or bugs. Here are a few common issues in the content editor. You can click the links below to see your preferred section.

1. Fix WordPress Block Editor Not Working Error

One of the most common issues users face is the ‘WordPress block editor not working.’

There are multiple reasons why this error occurs. For instance, it could be because of an old outdated theme, a faulty plugin, or other technical errors.

The WordPress block editor may also not work if you have a misconfigured setting on your site, like disabling the visual editor when creating a user profile.

You can check this by going to Users » Profile from your WordPress dashboard. From here, just ensure that the ‘Disable the visual editor when writing’ option is not selected.

Disable the visual editor when writing

If the problem still persists, then you can try deactivating all the plugins on your site. This should help rule out any conflicts a plugin might be causing and stop the block editor from working.

Another way to fix this is by updating your WordPress theme. An outdated theme can cause the block editor not working error. You can see our guide on how to update WordPress theme without losing data and customization.

2. WordPress Block Editor Keeps Crashing

Another common issue that some users face is the WordPress block editor would crash unexpectedly.

When it crashes, you would see a ‘The editor has encountered an unexpected error’ error message. WordPress would then show 3 options, including attempt recovery, copy post text, and copy error.

Block editor crashed

There could be multiple reasons for this issue. For instance, a plugin could break the block editor and show this error, or your WordPress version isn’t up to date.

You can fix this by deactivating all the plugins and reactivating them one by one. Another fix is to change your WordPress to a default theme, like Twenty Twenty-Two, and see if the problem persists.

If you’re still facing this issue after checking the WordPress plugins and theme, then try updating the WordPress version and clearing the WordPress cache.

3. Remove The Invalid JSON Error in the Content Editor

When you’re editing a blog post or page, a ‘The response is not a valid JSON response’ error may occur when you click the Update button in the block editor.

View JSON error in block editor

WordPress is in continuous communication with the website server in the background when you’re editing a post on your WordPress blog. This error is caused when WordPress fails to receive a response from the server or the response is not in the JSON format.

Here are a few reasons why you would get an invalid JSON error and how to fix them:

  • Check WordPress URLs in Settings – You will need to ensure that the WordPress Address and Site Address in your site’s settings are correct. Simply go to the Settings » General page and check if the URLs are the same. The JSON error could be triggered if the Site Address is different.
Ensure WordPress and site address are same
  • Fix Permalink Settings in WordPress – In WordPress, you can set up SEO-friendly URLs for your pages and posts. However, incorrect settings can make it hard for the block editor to get a valid JSON response. Just make sure to select the right permalink format.
  • Check WordPress .htaccess File Settings – The .htaccess file is used as a configuration file in WordPress to manage SEO-friendly URLs (permalinks). Usually, WordPress will automatically regenerate and update it. However, incorrect settings or out-of-date .htaccess files can cause JSON errors.
  • See REST API Debug Logs – The REST API is a set of techniques WordPress uses to communicate with your site’s server. A JSON error can also mean that REST API encountered an error. You can check this by viewing the REST API logs on the Site Health page in WordPress.
  • Try Deactivating All The Plugins – A conflict between different WordPress plugins can also result in an invalid JSON error. Try deactivating all the plugins on your website and see if the error reoccurs.
  • Switch to the Classic Editor – If you’re still unable to resolve the JSON error, then you can switch back to the Classic Editor in WordPress. The old content editor doesn’t rely on REST API to get a JSON response from the website server.

To learn more about each of these tips in detail, please see our guide on how to fix the invalid JSON error in WordPress.

4. Resolve Updating Failed / Publishing Failed Error

Another error you might see when updating or publishing a blog post or page in the WordPress block editor is: ‘Updating failed. You are probably offline.’

This issue occurs when WordPress REST API cannot communicate with the WordPress database.

Updating failed error

If the block editor fails to send and receive requests from the WordPress hosting database, then different parts of your site won’t function. This includes the block editor.

The REST API may stop working if you’re not connected to the internet or have lost connectivity. To fix this issue, please make sure that your internet connection is working properly, and then try to update or publish your page.

Aside from that, you can go to Tools » Site Health from your WordPress dashboard and view the REST API logs. If there is an issue with REST API, then you will see it under the ‘recommended improvements’ section.

View site health

The error log will show what happened to the REST API and may give you clues about what might have caused the issue.

For information on fixing this issue, you can take a look at our guide on how to fix WordPress updating failed errors.

5. Add or Remove Blank Spaces between WordPress Blocks

When creating custom pages and posts using the WordPress block editor, you may notice too much or too little space between blocks.

Usually the spacing is controlled by your WordPress theme. However, there are options in the block editor that also let you control the layout of your page and offer a better user experience.

For instance, you can add a Spacer block to add blank spaces. Simply click the ‘+’ button and add the Spacer block anywhere in the content.

Add spacer block to page

This way, you can add additional space between blocks.

WordPress also lets you adjust the size of the spacer block. You can make it bigger or smaller by dragging the block up or down.

Resize spacer block

If you want to remove extra blank space between blocks, then you will need to enter custom CSS into your WordPress theme or use a CSS plugin like CSS Hero.

The plugin lets you edit your website’s CSS without editing the code. It offers different spacing options that you can use to adjust the blank space between blocks.

CSS Hero change bottom margin

You can also use SeedProd to create a custom page in WordPress and have full control over the design.

To learn more, please see our guide on how to add or remove blank space between WordPress blocks.

6. Copy and Paste Content without Formatting Issues

Have you ever noticed that when you copy and paste content from a desktop app or a web page into the block editor, you end up pasting unwanted formatting as well?

You’ll see that the font and colors of the pasted content don’t match your WordPress theme. This is very common if you’re using Microsoft Word or Google Docs to write the content and then enter it in the block editor.

Some simple tips for keeping the original formatting include using Word and Google Docs heading styles. This way, WordPress automatically picks the headline level when you paste the content into the block editor.

Besides that, you should check the HTML code of your page or post after pasting the content. In the WordPress content editor, you can select a block and then click the 3 vertical dots option. From the dropdown menu, simply select the ‘Edit as HTML’ option.

Switching to the HTML View of a Block in the WordPress Block Editor

This way, you should be able to find any formatting errors, like incorrect bolds and italics, unwanted text, and more.

For more details, you can see our guide on how to copy and paste in WordPress without formatting issues.

7. Fix the Image Upload Issue in WordPress

Next, you might see an error when uploading images in the WordPress block editor. It is one of the most common image issues in WordPress.

The main reason for this error is due to incorrect file permissions. All your website files are stored on your web hosting service and require specific file and directory permissions to work.

If these permissions are incorrect, it can prevent WordPress from reading and uploading files onto the hosting server. As a result, you will notice that images will disappear from the media library when uploaded, or you may see an error that says:

‘Unable to create directory wp-content/uploads/2019/04. Is its parent directory writable by the server?’

To fix this issue, you’ll need to edit the file permissions. You can use an FTP client and access the /wp-content/ folder. From here, you can right-click the folder and change the file permissions.

Check the File Permissions of the WP-Content Folder

Follow our step-by-step guide on how to fix image upload issue in WordPress for more information on this fix.

8. Fixing the HTTP Image Upload Error

Another issue you may encounter when uploading images in the WordPress block editor is the HTTP error.

WordPress will show a generic ‘HTTP’ error’ when you upload images in the Media Library and you won’t be able to see a preview of the picture.

HTTP image upload error

There are several things that could cause this issue. The frustrating part is that the error message doesn’t give many clues to the actual cause.

To fix this, you can try a bunch of things. First, you can simply wait a few minutes and try reuploading the image. At times, your website server could encounter a problem like unusual traffic and low server resources.

Besides that, you can increase WordPress memory limit and prevent lack of memory from causing the HTTP error. Other things you can try include changing the image editor library used by WordPress and editing the .htaccess file.

Also, your login might have expired, and this error will sometimes go away by going to your login screen and entering your username and password again.

You can read about each of these tips in detail in our guide on how to fix the HTTP image upload error in WordPress.

9. Remove Missed Schedule Post Errors in WordPress

Did you know that WordPress offers a built-in option to schedule blog posts?

In the WordPress content editor, you can change the date and time for publishing your blog posts. However, sometimes your scheduled content may not get published at the set time.

Posts Can Be Published Immediately or Scheduled to Go Live in the Future

The main reason for this error is due to the WordPress hosting environment or plugin conflicts. WordPress uses a technology called ‘cron’ to automatically publish your post at a later time.

If a plugin or the website hosting server is affecting the cron jobs, then it will lead to missed schedule post error in WordPress.

You can fix this issue by checking the timezone of your WordPress site. It is possible that your site’s timezone doesn’t match the timezone you’d like to use for scheduling your blogs.

Simply head to Settings » General from the WordPress admin panel and scroll down to the Timezone section.

Edit the timezone settings

You can also try to fix this issue by clearing the WordPress cache and increasing the WordPress memory limit.

Please see our guide on how to fix the missed scheduled post error in WordPress.

10. Fixing Alignment Issues in WordPress Block Editor

Another common WordPress block editor you might face is that your content and images may not be properly aligned.

For example, let’s say you added a bullet list to a blog post and center-aligned it. However, the list appears left-aligned in the block editor when editing the post. Similarly, a center-aligned image block may appear aligned to the left or right.

If you have the Gutenberg plugin installed and active on your WordPress site, then it can cause block alignment issues. We recommend that you deactivate the Gutenberg plugin and see if it resolves the problem.

Another solution is to add the following custom CSS code for the text you’d like to center-align:

.has-text-align-center {
text-align: center;
}

You can also see our guide on how to add and align images in the WordPress block editor.

11. Resolve Facebook Incorrect Thumbnail Issue

Have you ever noticed that when you share an article on Facebook, the post thumbnails are incorrect?

The problem can be caused by conflicting plugins, content delivery network (CDN) issues, or missing open graph meta tags for Facebook.

Now, this isn’t an issue that you will see in the WordPress block editor. However, you can specify an open graph image for Facebook using the content editor.

You can use the All in One SEO (AIOSEO) plugin to quickly fix the issue. It is the best SEO plugin for WordPress and helps you optimize your site for search engines and social media.

Upon activation, you will see an AIOSEO Settings meta box in the WordPress content editor. Simply head to the ‘Social’ tab.

head to the social tab

Next, you can scroll down to the ‘Image Source’ section.

From the dropdown, you can select which image to show on Facebook and other social media sites when the article is shared.

Select image source

You can follow our guide on how to fix Facebook incorrect thumbnail issue in WordPress and learn about other ways of resolving this issue.

12. Fixing Facebook and Instagram oEmbed Issues

Another social media-related block editor issue you will face is adding Facebook and Instagram content to WordPress.

In the past, you could easily embed posts from Instagram or Facebook in WordPress. However, Facebook has changed the way oEmbed works now.

You can no longer embed videos, images, updates, and other content in WordPress. It will instead show a plain URL of the content.

An example of an oEmbed error in WordPress

You can easily fix this issue using a social media WordPress plugin like Smash Balloon. It helps you embed content from Facebook and Instagram easily using oEmbed, and you can also show social media feeds on your website.

For more details, please see our guide on how to fix the Facebook and Instagram oEmbed issues in WordPress.

13. Unable to See Embedded Content Preview in Block Editor

This is an issue that was raised in WordPress 5.7 version. Whenever you embedded a video from YouTube and Vimeo or added audio from Spotify and SoundCloud, the preview wouldn’t appear in the block editor.

Instead, you would simply see ‘Preview is not available’ written in the blocks. The main cause of this problem was the default lazy loading feature.

In WordPress 5.5, iFrames were lazy-loaded by default, which meant embedded content like pictures would not load until a visitor scrolled down to the location of the content.

A simple fix to this issue is updating your WordPress version. This bug has since then been resolved. If you’re using version 5.7 or lower, then we highly recommend updating your WordPress to the latest version.

We hope this article helped you learn about the common block editor issues and how to fix them. You may also want to see our guide on common WordPress errors and how to fix them, and the ultimate guide to WordPress SEO for beginners.

If you liked this article, then please subscribe to our YouTube Channel for WordPress video tutorials. You can also find us on Twitter and Facebook.

The post 13 Common WordPress Block Editor Problems and How to Fix Them first appeared on WPBeginner.

How to Open a WordPress Popup Form On Click of Link or Image

Do you want to create a popup that appears when visitors click on a link or an image on your site?

This is a proven way to grow your email list. It is more effective since it starts with an action taken by a user. Popular sites often use it to offer an optin incentive to get even more subscribers.

In this article, we’ll show how to open a WordPress popup on click of a link or an image, step by step.

How to Open a WordPress Popup Form on Click of Link or Image

What Is an ‘On Click’ Popup Form?

On-click popup forms are lightbox popups that open when a user clicks on a link, button, or image on your WordPress website.

Normally, popups appear on websites when a user arrives or when they are about to leave. On-click popup forms are triggered by user interaction.

We also use on-click popups on WPBeginner to grow our email list. For instance, a popup will appear when a user clicks the email icon in the sidebar next to all social icons.

On click popup preview

Why Are On-Click Popup Forms So Effective?

On-click popup form is effective because it uses the powerful Zeigarnik effect. This is a psychological principle that states users who start an action themselves are more likely to finish it.

When someone clicks a link or button to trigger your popup, they’ve already shown interest. When the form popup appears, they’ll be more likely to use it.

For example, you can use an on-click popup to offer a lead magnet. This could be a free downloadable resource like an ebook or PDF file that users can get in exchange for their email address.

However, there are other ways to use on-click popups on your website. For instance, you can ask users to claim a coupon code, learn more about a product, fill-out surveys, and more.

That being said, let’s take a look at how to easily make an on-click lightbox popup for your website.

Creating an On-Click Popup in WordPress

The easiest way to create an on-click popup is by using OptinMonster. It is the popup plugin for WordPress and lead generation software.

First, you’ll need to sign up for an OptinMonster account. You’ll need the Pro account (or higher) because it includes the MonsterLinks™ feature that lets you create on-click popups.

Simply visit the OptinMonster website and click the ‘Get OptinMonster Now’ button to get started.

OptinMonster

Next, you need to install and activate the OptinMonster plugin on your WordPress website. For help, see our step-by-step guide on how to install a WordPress plugin.

This lets you connect your OptinMonster account to your WordPress site.

Once you’ve activated the plugin, you’ll need to connect your account. You should be taken to the Welcome page automatically in your WordPress dashboard.

Go ahead and click the ‘Connect Your Existing Account’ button.

Connect your existing account

After that, a new window will open.

You can click the ‘Connect to WordPress’ button to add your site to OptinMonster.

Connect OptinMonster to WordPress

Once you’ve connected your OptinMonster account to your WordPress site, you can create your on-click popup.

Simply go to OptinMonster » Campaigns from your WordPress dashboard and click the ‘Create Your First Campaign’ button.

Create your first campaign

You’ll be taken straight to the OptinMonster website.

The Campaign Type should already be set to Popup. If not, just click on Popup to select it. Next, you’ll need to choose a campaign template.

Choose a campaign type and template

You’ll be able to modify the template exactly how this looks later. We’re going to use the ‘Basic’ template for this tutorial.

Simply run your cursor over the template and click the ‘Use Template’ button.

Select the basic template

Now, you’ll be prompted to enter a name for your campaign. This is just for you. The users will not see it.

Simply enter a name and click the ‘Start Building’ to create your popup.

Enter a name for your campaign

OptinMonster will automatically load up the template in the drag-and-drop campaign builder.

You can edit the default text and add or remove elements from your template. Simply drag blocks from the menu on your left and drop them on the template.

Add blocks to onclick campaign

You can also remove any element in the form by clicking on it and using the menu options to the left. For instance, we will remove the ‘Name’ field from the form.

First, you’ll need to click on the ‘Optin’ tab at the bottom of the screen. After that, click on the field to select it, and you’ll see the available options in the left column, including the option to remove it.

Delete name field

Once you have designed the popup, the next step is to design the Success view, which people see after filling out the form.

Simply switch to the ‘Success’ view at the top of the screen.

Edit the success view for onclick popup

You can edit the success view just like you edited the optin view. For instance, you may want to change the text or include a link to download a lead magnet.

Connecting Your Popup to Your Email List

Once you’re happy with your popup, click on the Integrations tab at the top of the screen. You’ll need to link OptinMonster to your email marketing service so that you can add people to your email list.

From here, click the ‘+ Add New Integration’ button on the left-hand side of the screen.

Add an email marketing tool

Next, you can select your email provider from the dropdown list.

From here, simply follow the instructions to connect it to OptinMonster.

Select your email provider

Setting Your Popup to Appear On Click

Now, you need to configure your popup to appear when the user clicks a link.

Go ahead and click on the Display Rules tab at the top of the screen.

Select display rules

The default display rule set by OptinMonster is ‘time on page.’ This means that the default pop-up will appear after the user has been looking at that page for a certain amount of time.

However, you can click the dropdown and select the ‘MonsterLink™’ (On Click)’ option instead.

Select MonsterLink display rule

After that, you should see your MonsterLink™ in the display rules.

You can click the button to copy your MonsterLink™ Code. You’ll need this in a moment.

Copy the MonsterLink

Making Your On-Click Popup Live

Next, you can go to the ‘Published’ tab at the top of the page and change your campaign’s status from ‘Draft’ to ‘Publish.’

Publish your on click campaign

Once you’ve done that, click the ‘Save’ button at the top of the screen and close the campaign builder.

Next, you’ll see the ‘WordPress Output Settings’ for your campaign. You can click the ‘Status’ dropdown menu and change it from ‘Pending’ to ‘Published.’ When that’s done, click the ‘Save Changes’ button.

Change status from pending to published

Adding Your MonsterLink to Your WordPress Website

Now, you need to add the special MonsterLink™ to your site. If you didn’t copy this earlier, you can get it by going back to the ‘Display Rules’ setting for your campaign.

First, you’ll need to create a new post or page, or edit the one where you want to add your link.

The MonsterLink™ is HTML code, so you need to paste it into a custom HTML block.

When you’re in the WordPress content editor, click the (+) button to add a Custom HTML block.

Add a Custom HTML Block to Your Page

Now, copy your MonsterLink™ into that block. It should look something like this:

<a href="https://app.monstercampaigns.com/c/mcqdabfqzia6zdiosiz0/" target="_blank" rel="noopener noreferrer">Subscribe Now!</a>

You can change the words ‘Subscribe Now!’ to whatever text you want to use for your link.

Enter the MonsterLink Code

Once you’ve placed the link, you can preview your page or post to ensure it’s working.

Here’s our link in action. Note we’ve applied some styling to the text to create a box with larger text to help promote the lead magnet:

On click popup preview

Tip: You’re not limited to just text links using MonsterLinks™. You can also use MonsterLink with call-to-action buttons, images, banners, or navigation menus on your website.

We hope this tutorial helped you learn how to trigger a WordPress popup form on click. You may also want to see our tutorial on how to speed up your WordPress site and our ultimate WordPress SEO guide.

If you liked this article, then please subscribe to our YouTube Channel for WordPress video tutorials. You can also find us on Twitter and Facebook.

The post How to Open a WordPress Popup Form On Click of Link or Image first appeared on WPBeginner.

Research: The Truth Behind Make Money Online Videos on YouTube and TikTok (We Analyzed 344 Videos)

Have you ever wondered whether those YouTube and TikTok influencers teaching how to make money online are telling the truth?

We analyzed 354 videos from YouTube and TikTok to see whether the business model or earning potential they share is realistic for an average person.

Here’s what we found out.

While a lot of these make money online influencer videos paint a rosier picture than the truth of online entrepreneurship, there are still a lot of options to earn consistent income through the internet.

Below are our findings on online business statistics along with the original research data that we collected from YouTube and TikTok.

How online entrepreneurs make money according to YouTube and TikTok

The Trend of Online Work: An Overview

The COVID-19 pandemic showed millions of people that they could work from anywhere and at any time. As offices closed and all but the most essential services shut down, many jobs moved onto the internet.

This trend towards flexibility has persisted: even as most of the world has returned to normal, people still like working remotely. In fact, 45% of employees said they were likely to look for a new job if their employer required them to report to work in person.

Online work can also open up new opportunities for people who lost their jobs during the financial crises spurred on by the pandemic, said Haiyi Zhu, a professor at Carnegie Mellon University’s Human-Computer Interaction Institute who studies gig work. These workers might “turn to online, virtual work as either a transitional job or to find additional income sources” as they look for new full-time employment, she explained.

At the same time, social media platforms like YouTube and TikTok have made it easier than ever for people to learn about online work opportunities. Searches for online gig work or investment opportunities can lead a user to hours upon hours of content, explaining potential business ideas and suggesting how much an aspiring worker could earn.

At WPBeginner, we’ve summarized the money-making advice from hundreds of top videos, exploring the trends in business options and earning potential.

Of course, some videos might paint a rosier picture than the truth of online entrepreneurship. But, there are still a lot of options for earning consistent income through the internet.

For this report, our team used 177 videos from YouTube and 177 videos from TikTok, available in this repository.

On YouTube, we selected videos that came up at the top of a search for “how to make money online.” While on TikTok, we used hashtags like #makemoneyonline and #entrepreneurship to select videos with this theme. We analyzed the videos based on the business options, potential earnings, and required skillsets they advertised.

The potential earnings we discuss in this article were taken directly from the YouTube and TikTok creators whose videos we analyzed.

These numbers do not necessarily reflect accurate trends. Rather, we are presenting them as a reflection of how online creators advertise work opportunities.

Wide Range of Earning Potential

After analyzing all of the videos from YouTube and TikTok, we found that the median pay these influencers advertised was about $50 per hour.

Distribution of Hourly Earnings by Platform - YouTube and TikTok Case Study

At the lowest end of the range, creators advertised microwork tasks, or series of small tasks (such as answering survey questions) that can be completed asynchronously over the internet. Microwork can lead to earnings as low as $1 per hour, according to the videos.

At the highest end of the range, video creators suggested that entrepreneurs can earn over $1,000 per hour for more skilled work like running a popular blog. In our expert opinion, this number is exaggerated and very rarely do individual bloggers get to such income level.

Overall, though, the earning potential mentioned in the videos skewed lower: 90% of the videos on both platforms advertised that workers would get under $300 per hour.

This statistic again should be taken with a grain of salt because it doesn’t factor in true-working hours because it’s unlikely to have a 40 hour work-week at that hourly rate.

Income instability is one of the most common challenges that online gig workers face, Zhu said. Her team has a paper currently undergoing peer review that names key issues across online gig workers and those that use online platforms to coordinate physical work, like driving for Uber or DoorDash. Other major challenges include a lack of employment benefits, health and safety (both physical and online), and a lack of power in the workplace, she said.

Some YouTube and TikTok creators advertise more lucrative career paths by talking about their own experiences getting rich, though their videos may be misleading.

For example, Adam Enfroy, a popular creator on both platforms, claims to make $300,000 a month through blogs and affiliate marketing, but this income is unrealistic for new marketers just starting out. According to statistics, the average earnings for professional, freelance marketers is $50 per hour or $100,000 per year only if you’re absolutely at the top of your game.

Making Money with Online Publishing

Business Types Mentioned by Platform on YouTube and TikTok

Online publishing Statistics, according to YouTube

Online publishing was the most popular type of online business advertised on YouTube, clocking in at 45% of the videos we analyzed.

Business Types Mentioned on YouTube Videos

This is a broad category of online work which might include setting up a blog that earns revenue through affiliate links, writing a newsletter, making videos on YouTube, or creating content as an influencer.

YouTube creators pushing online publishing advertised that workers could earn a median of:

  • $925 per hour writing a blog
  • $312 per hour writing a newsletter or similar periodic articles
  • $230 per hour for YouTube sponsorships
  • $106 per hour with affiliate marketing

Note: these rates shared in videos may not reflect actual earnings.

Affiliate marketing is one of the simpler options for a new writer with less experience. In this model, companies pay you to send customers to their products. Google a simple question like “best laptop for college,” and you’ll find hundreds of lists on sites ranging from independent blogs to the New York Times, taking advantage of the search engine to drive affiliate revenue.

Online publishing Statistics, according to TikTok

Creators on TikTok similarly advertised blogs and marketing as a high-earning strategy. The videos we analyzed claimed that writing a blog could net a median of $1,500 per year. Digging into this further, we analyzed the skills that TikTok creators claimed would be most lucrative for different online businesses.

Business Types Mentioned on TikTok Videos

According to the TikTok creators, marketing could lead to the highest (advertised) earnings at a median of $62.50 per hour, followed by investing at $56 per hour and video editing at $50 per hour.

As on YouTube, TikTok creators tend to provide fairly limited evidence for their earning estimates. Video creators also tend to advertise business ideas that are easier to sell to a broad audience as “easy money-making strategies”. In reality, getting extremely rich off of a blog is harder than video creators make it sound.

Instead, experts suggested that selling writing or another type of service as a freelancer might be more successful for online workers with prior talents under their belts.

Making Money with a Service Business

Service businesses can include a range of skillsets.

On TikTok, we found that services businesses were the most popular type of online work advertised by creators.

Hourly Earnings by Online Business Type

These businesses include a range of skills and activities such as: starting your own agency to provide a service like tech support to other companies, selling goods through an online store, making content for clients on platforms like Upwork and Fiverr, and performing microwork tasks like filling out surveys or tagging content.

Microwork can be particularly appealing for people who are not currently employed full-time and looking to make extra cash, said Melissa Keith, a psychology professor at Bowling Green State University whose research focuses on the platform Mechanical Turk. Mechanical Turk, run by Amazon, allows remote workers to make money by doing small tasks that can’t be completed by computers.

Microwork rates are low, but improving.

“It’s pretty unrealistic to think you’re going to make a full-time salary on most of these platforms,” Keith said. But the all-remote, fully flexible nature of the platform allows workers to earn money on their own terms — potentially even while working at another job. While TikTok videos advertise that workers might be able to earn over $50 per hour while on platforms like Mechanical Turk, Keith found this number is unrealistic compared to her research. “A good rate is closer to $10 an hour,” she said.

In recent years, workers on microwork platforms have pushed the companies posting jobs to improve their hourly rates, Keith noted. Tasks that might once have paid under $1 an hour will now earn a worker the U.S. minimum wage, if not more. These rates can be particularly attractive to workers in other countries where the cost of living is lower.

Related: 11 Best WordPress Developer Jobs Sites (+ Example Job Templates)

Balancing Expectations and Reality

Online videos paint a rosy picture of entrepreneurship opportunities. This is especially true for financial and investment advice, as creators advertise buying into cryptocurrency and other risky assets. As CNET contributor Ana Staples points out, anyone can claim to be an expert on TikTok. Short, punchy videos can make getting rich online look much easier than it really is.

It’s also important to consider the gap between who makes videos about earning money online and who actually comprises the online gig workforce.

Our analysis found that the creators of YouTube and TikTok videos skew towards men in their 20s; the user bases of platforms like Mechanical Turk tend to be pretty evenly split on gender, Keith said.

YouTube TikTok Case Study Presenter Demographic

Younger men might be “more willing to share their success stories,” said Zhu, the Carnegie Mellon researcher. Meanwhile, low-income immigrants who are doing more low-paid gig work might “not necessarily want to brag about their work, and also don’t have the time to create videos,” she added.

As online work remains popular in the wake of the pandemic, Zhu and Keith both anticipate that workers will continue to push for higher wages, flexibility on the job, and benefits that better align with those of typical full-time employment. “If people move towards these more flexible work arrangements, we’re going to have to have systems in place to protect workers,” Keith said.

List of Sources

Federal Reserve Board, Haiyi Zhu, Upwork, CNET, Melissa Keith, YouTube and TikTok

That’s a wrap! We hope this original research gave you an idea of what to expect if you’re looking to start an online business or become a freelancer.

If you’re looking to start earning online, you may found the following resources helpful:

If you liked this article, then please subscribe to our YouTube Channel for WordPress video tutorials. You can also find us on Twitter and Facebook.

The post Research: The Truth Behind Make Money Online Videos on YouTube and TikTok (We Analyzed 344 Videos) first appeared on WPBeginner.

How to Enable / Activate WordPress Plugins from the Database

Are you looking to enable or activate plugins from the WordPress database?

If you are unable to access your WordPress admin area and need to activate a plugin to restore your access, then you can do that from the WordPress database.

In this article, we will show you how to easily activate your WordPress plugins using the database.

How to enable/activate WordPress plugins from the database

When Should You Activate WordPress Plugins Using Database

A number of common WordPress errors can prevent a website owner from accessing the WordPress admin area. In most of those situations, the user is looking to deactivate WordPress plugins without admin access.

However in some situations, a website owner may need to activate certain plugins to restore access to their WordPress website.

For example, let’s assume an error is stopping you from accessing your WordPress dashboard, and you have found a plugin that can fix that error.

Luckily, WordPress stores the active plugins information in your WordPress database. This means you can manually enter this information directly in the database and tell WordPress to activate a plugin.

The only condition is that the plugin must be installed on your WordPress site. Which means that it should be present in the plugins folder on your WordPress website.

With that being said, let’s see how you can easily enable/activate a plugin using the database.

Step 1. Find Your Database Name Using the Hosting Control Panel

To activate your WordPress plugins using phpMyAdmin, first, you need to find out your WordPress database’s name.

Now, to find the name of your database, you need to log in to your web hosting dashboard. For this tutorial, we will be using Bluehost.

If you are using a different hosting company, then your WordPress hosting dashboard may look slightly different.

Once you are on the cPanel, scroll down to the ‘Files’ section and click the ‘File Manager’ option.

Click at the file manager

This will open up the File Manager in a new window. Here you simply need to locate and click the public_html folder from the left column.

This will open up all the files that are stored in the public_html folder. Now, you simply need to locate and click the folder with your site’s name on it present under the ‘Name’ column.

Go to the publich_html file and find your site name

Some users may instead see their WordPress files and folders installed inside public_html folder.

After you have opened up your WordPress site’s file, locate the wp-config.php file under the ‘Name’ section and right-click on it.

This will open up a menu where you need to select the ‘View’ option.

Click View

This will open up the wp-config.php file in a new window where you can locate your database details.

We recommend that you copy and paste your database details including username and password into a notepad on your computer.

Database details

Now you’ve successfully found your database’s name, let’s move to our next step.

Step 2. Locate Active Plugins Option via PhpMyAdmin

After you have found out the name of your database, you need to go back to your WordPress hosting control panel.

Once there, scroll down to the ‘Databases’ section and click the ‘phpMyAdmin’ option.

Click the phpMyAdmin option in the cPanel

This will launch the phpMyAdmin app in a new browser tab.

Note: Before you make any kind of changes, please make sure to create a complete backup of your database. It will come in handy if anything goes wrong with the process.

Next, you simply need to click the ‘Database’ tab from the navigation menu present at the top of the page.

Now, simply locate your WordPress database and click on the browse button to expand it.

Click the Database tab from the navigation menu

This will show your WordPress database tables.

Here, you will simply need to locate wp_options table and click browse next to it.

Note: By default, WordPress uses wp_ as the prefix for table names. Your WordPress database table may have a different table prefix.

Click at wp-options

Inside the wp_options table, you’ll need to find the row where option_name is set toactive_plugins.

After that, click on the Edit link next to it.

Click the Activate_Plugins option

This will open up a box where you can manually enter details to activate a plugin.

Step 3. Activate a Plugin Using phpMyAdmin

WordPress stores the active plugins information in a special format so that it can be programatically accessed by the software.

In order to tell WordPress which plugins to activate, we’ll need to use that same format.

First, we’ll start by entering the option_value as a:1: and then open up the curly bracket ({).

We are entering this value as 1 because we only want to activate one plugin. You have to change the value to the number of plugins you plan on activating.

Add option value

Next, we will be entering i:0; after the curly bracket. Here we are essentially assigning a serial number to our plugin.

Remember to always assign numbers starting from 0 instead of 1.

Add serial number

Next, we will be entering the number of characters present in the plugin’s name and the php file name of the plugin that we’re about to activate.

For that, we will type s:24: in the box. Keep in mind that the number of characters will differ for each plugin based on the characters in the plugin directory and file name.

For instance, we are activating WPForms in this tutorial which has 24 characters in its name including the file name of the plugin as stored in our file manager.

Add character number

Next, you just need to type the plugin’s directory name. You can find it by visiting the /wp-content/plugins/ folder using the File Manager app.

Don’t forget to add quotation marks before typing the plugin’s directory name.

Type the plugins' name

After the /, you need to enter the plugin’s file name. This is usually the file with similar name inside the plugin folder.

Plugin file and folder name

Now, go back to phpMyAdmin and type the name of the plugin and then close the quotation marks.

After that, simply add a semi-colon (;) and close the curly brackets (}). The final value in this example would look like this:

a:1:{i:0;s:24:"wpforms-lite/wpforms.php";}

This is how it will look once you’re done.

Activating a single plugin

Next, simply click the ‘Go’ button to execute the command.

Now go visit your WordPress dashboard and head over to Plugins » Installed Plugins.

Your plugin has been successfully activated.

activated-plugin

Now let’s say you want to activate two more plugins.

First you will need to change the number of plugins. After you will adjust each entry for the plugin that you want to activate.

Here is an example:

a:3:{
i:0;s:47:"all-in-one-seo-pack-pro/all_in_one_seo_pack.php";
i:1;s:35:"insert-headers-and-footers/ihaf.php";
i:2;s:24:"wpforms-lite/wpforms.php";
}

Note: We have added line breaks here to make the code look more readable. You need to make sure that there are no line breaks or spaces in your code. Otherwise, it wouldn’t work.

We hope you learned how to activate a plugin using the database. You may also want to see our guide on how to add social media feeds to WordPress, and our comparison of the best domain registrars in the world.

If you liked this article, then please subscribe to our YouTube Channel for WordPress video tutorials. You can also find us on Twitter and Facebook.

The post How to Enable / Activate WordPress Plugins from the Database first appeared on WPBeginner.