There are thousands of responsive WordPress themes out there, and it’s no secret that some are remarkably better than others. So, how can you be sure that the theme you’re thinking of using will provide your visitors with the kind of world-class user experience they expect, regardless of the device you use? The answer is [...]
Do you want to add an SEO Editor role in WordPress?
If you have hired an SEO specialist to work on your website, then adding them as an SEO editor is the safest way to give them access to your WordPress website.
In this article, we’ll show you how to easily add an SEO editor role in WordPress.
Why Add an SEO Editor Role in WordPress?
WordPress comes with a user role management system that defines what a user can and cannot do on your website. You can assign different user roles to your team members depending on their job descriptions.
By adding an SEO Editor / Manager role to your WordPress website, you will be providing secure access to the SEO features and tools to some specific members of your team.
An SEO Editor role has access to the SEO settings for all your posts and pages. This allows them to optimize posts for SEO and work on search rankings.
An SEO Manager tends to have access to sitewide SEO settings including sitemaps, redirects, local SEO, and more.
By default, WordPress doesn’t offer either the SEO Editor or SEO manager user roles.
Note: You’ll need the Pro version of the All in One SEO plugin to unlock SEO user role features.
Upon activation, the plugin will launch the setup wizard which will walk you through the setup. If you need help, then you can follow our guide on how to set up All In One SEO in WordPress.
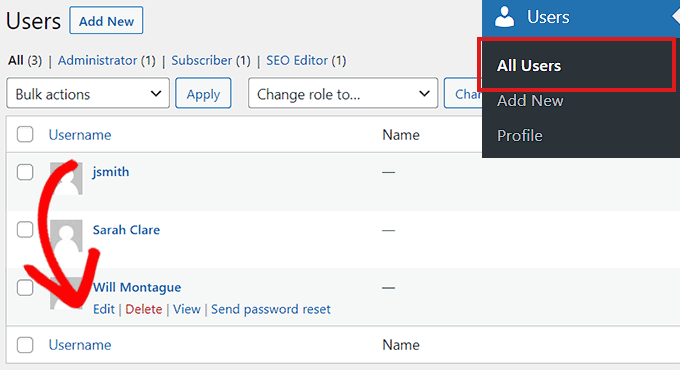
Now you can simply add a new user to your WordPress website by visiting Users » Add New page or you can edit an existing user account by visiting the Users » All Users page.
After that, simply click on the Edit link below the user account that you want to change.
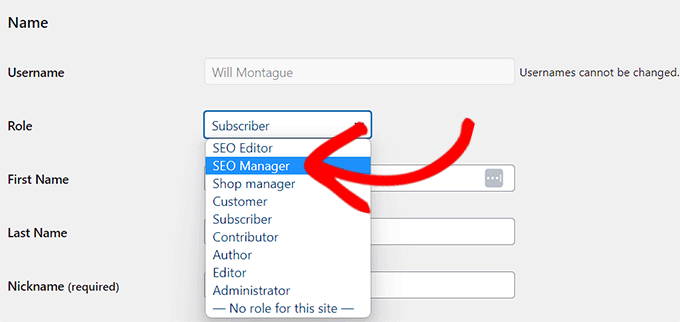
On the Edit user screen, scroll down to the Role option and select SEO Editor or SEO Manager user role from the drop down menu.
Don’t forget to click on the Add / Update User button to save your changes.
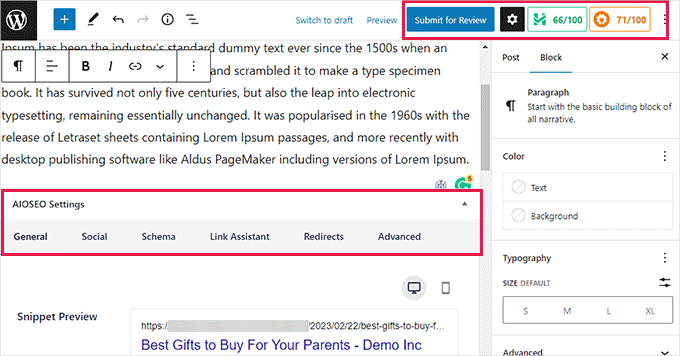
These users will now be able to access SEO features based on the user role assigned to them.
For instance, SEO Editor will be able to see and edit SEO Settings for a post or page by simply editing them.
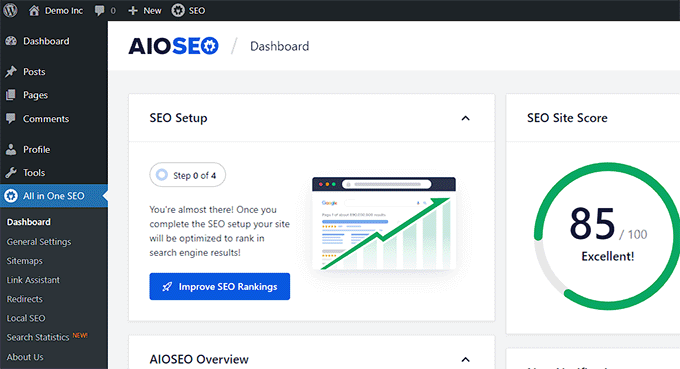
On the other hand, a user with the SEO Manager role will also be able to view the General SEO settings on the WordPress admin sidebar.
They will be able to make changes to site-wide SEO settings that may affect your entire website.
How to Customize SEO User Roles in WordPress
By default, All in One SEO selects the best access control settings for each SEO user role.
However, sometimes you may want to add or remove permissions from the SEO editor or Manager user roles.
All in One SEO lets you customize SEO user roles so that you can select which options they’ll have access to.
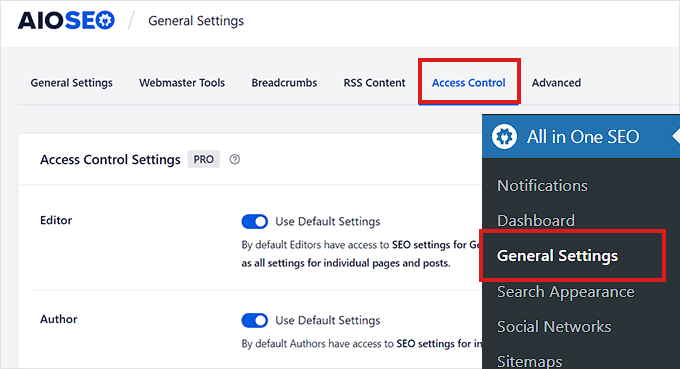
Simply head over to the All in One SEO » General Settings page and switch to the Access Control tab.
Caution: Be very careful when giving a user role access to any option under the General SEO Settings. These options may allow them to apply SEO changes that will affect your entire website.
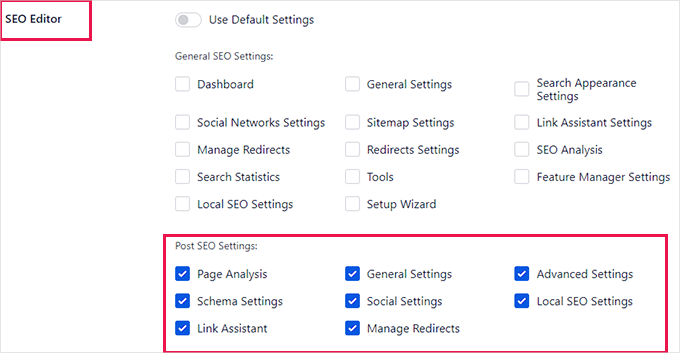
From here, scroll down to the ‘SEO Editor’ option and toggle the switch next to the ‘Use Default Settings’ option.
This will reveal the Default Settings that All in One SEO has chosen for the SEO Editor role.
As you can see that by default the SEO editor user role only has access to Post SEO settings.
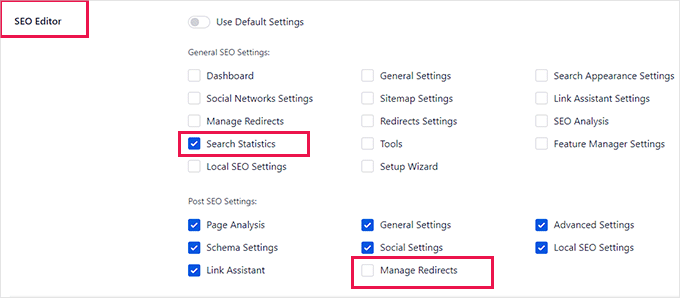
From here, you can check or uncheck items that you want to allow the SEO editor to have access to.
For instance, you can remove access to the Manage Redirects option or give them access to the Search Statistics feature.
Similarly, if you want to change settings for the SEO Manager user role, then you will need to switch off the ‘Use Default Settings’ toggle next to the SEO Manager option.
This will reveal the default settings that All in One SEO has chosen for the SEO manager user role.
By default, the SEO manager user role has access to several options under the General SEO settings as well as all the options under the Post SEO settings.
You can change that by checking the items that you want them to have access to or unchecking to remove access from specific items.
Once you are finished, don’t forget to click on the Save Changes button to store your settings.
Do you want to add image icons to your WordPress navigation menus?
Images can help visitors understand your site’s navigation at a glance. You can even use icons to highlight the menu’s most important content or call to action.
In this article, we will show you how to add image icons to navigation menus in WordPress.
Why Add Image Icons With Navigation Menus in WordPress?
Usually, WordPress navigation menus are plain text links. These links work for most websites, but they don’t always look interesting or engaging.
By adding image icons to the navigation menu, you can encourage visitors to pay attention to the menu and explore more of your site.
If your menu has lots of different options, then image icons can make it easier for visitors to scan the content and find what they’re looking for. This can be an easy way to increase pageviews and reduce bounce rate in WordPress.
You might even use an image icon to highlight the most important menu item, such as the Checkout link on your online marketplace.
By highlighting a call to action in the menu bar, you can often get more signups, sales, members, and other conversions.
With that being said, let’s see how you can add image icons to your WordPress navigation menu. Simply use the quick links below to jump straight to the method you want to use.
Method 1: Add Image Icons to Navigation Menus Using a Plugin (Quick and Easy)
The easiest way to add image icons to your WordPress menus is by using the Menu Image plugin. This plugin comes with dashicon icons that you can add with just a few clicks.
If you have added Font Awesome icons to your website, then you can use them with this free plugin. For more information on how to set up Font Awesome, see our guide on how to easily add icon fonts to your WordPress theme.
If you want to use your own icon files, then Menu Image also lets you select an image or icon from the WordPress media library.
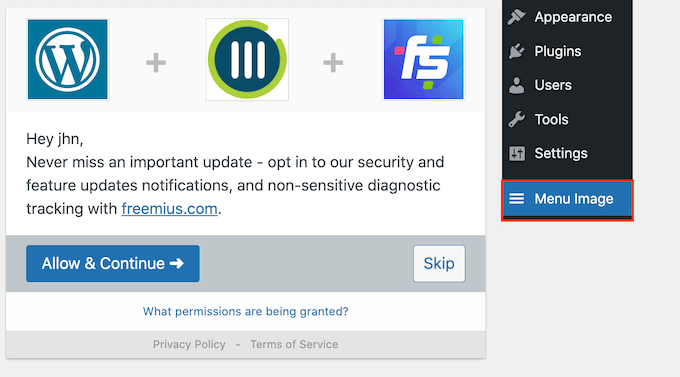
Upon activation, click on Menu Image in the WordPress dashboard. On this screen, you can choose whether to get security and feature notifications or click on the ‘Skip’ button.
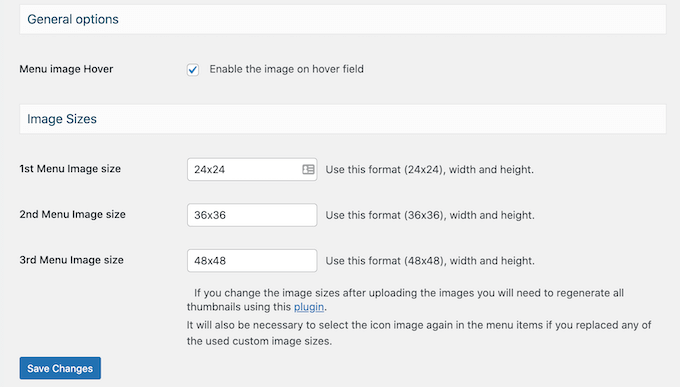
This will take you to a screen where you can configure the plugin’s settings. To start, you’ll see all the different sizes you can use for the image icons.
If you plan to use icons from Font Awesome or dashicons, then Menu Image will resize them automatically. However, if you use images from the media library, then you’ll need to select the size manually.
The plugin supports the default WordPress image sizes, such as thumbnail, image, and large. It also adds three unique sizes that are set to 24×24, 36×36, and 48×48 pixels by default.
These settings should work well for most websites, but you can make the icons bigger or smaller by typing in different numbers for 1st, 2nd, or 3rd Menu Image size.
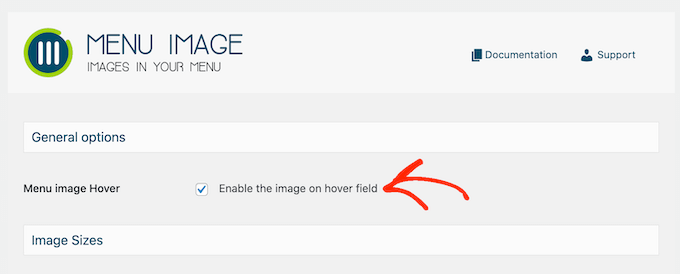
When you’re adding icons to your menu, you’ll see an ‘image on hover’ field by default. This allows you to show a different icon when the visitor hovers over that menu item.
Just be aware this setting is only available when you’re using your own images. You don’t need to worry about the ‘image on hover’ feature if you plan to use dashicons or Font Awesome icons.
Showing a different icon can help visitors see where they are in the navigation menu. This is particularly useful if a menu has lots of different items. For example, you might use different colors or icon sizes to highlight the currently-selected menu item.
If you want to try different hover effects, then make sure you check ‘Enable the image on hover field.’
With that done, click on ‘Save Changes’ to store your settings.
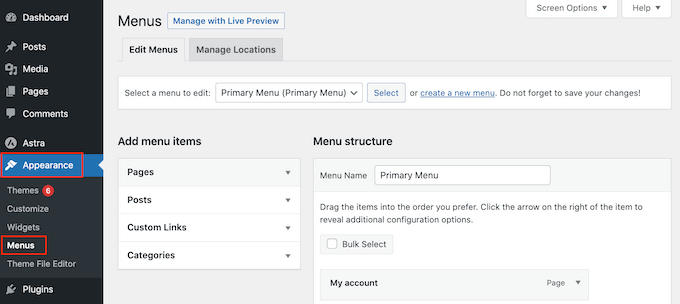
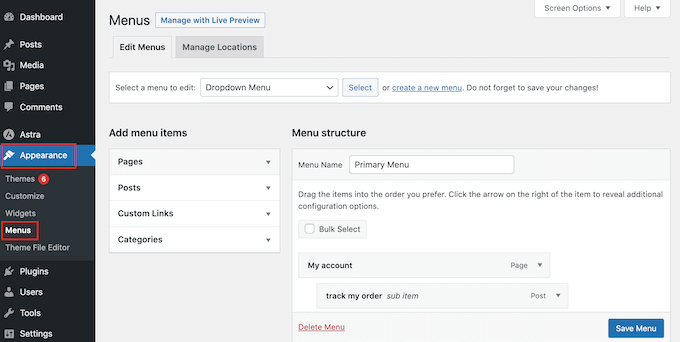
To add icons to the navigation menu, head over to Appearance » Menus. By default, WordPress will show your site’s primary menu.
If you want to edit a different menu, then simply open the ‘Select a menu to edit’ dropdown and choose a menu from the list. After that, click on ‘Select.’
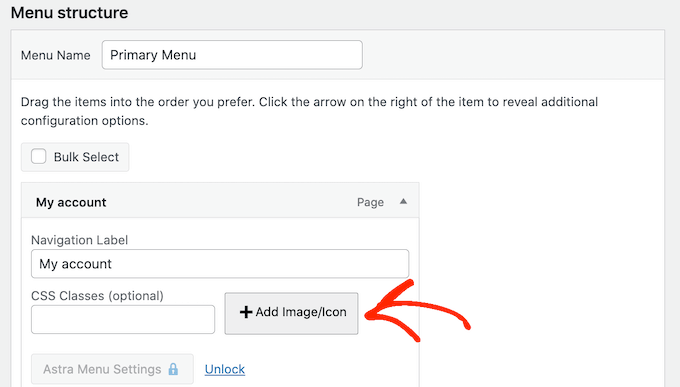
Now, find the first menu item where you want to add an icon and give it a click. Then, simply select the new ‘Add Image / Icon’ button.
You can now decide whether to use your own image or choose an icon.
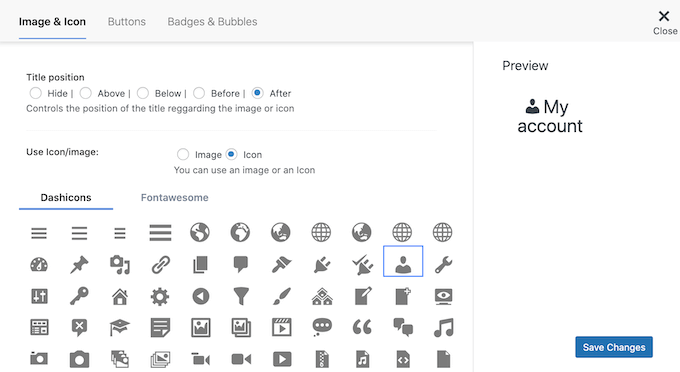
To use a ready-made icon, click on the radio button next to ‘Icons.’ You can then click to select any dashicon or Font Awesome icon.
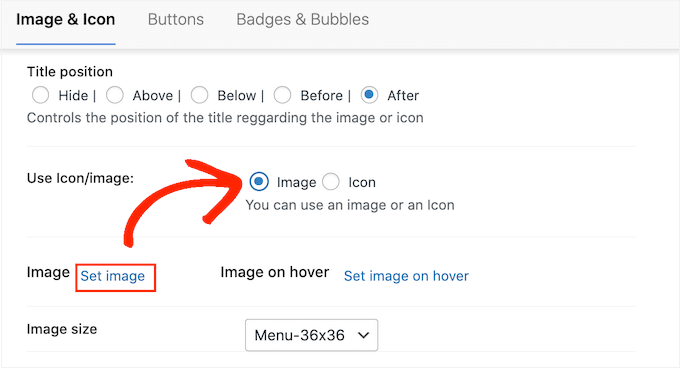
Do you want to use your own images instead?
Then select the radio button next to ‘Image’ and click the ‘Set Image’ link.
You can now either choose an image from the WordPress media library or upload a new file from your computer.
If you checked ‘Enable the image on hover field’ in the plugin’s settings, then you’ll also need to click on ‘Set image on hover.’
Now, choose an image to show when the user hovers over this menu item.
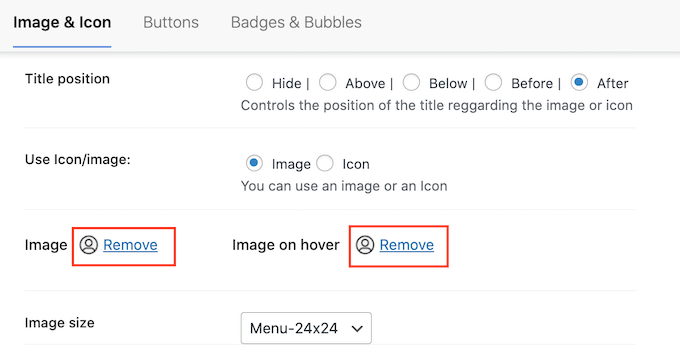
Sometimes, you may want to ignore this setting and show the same icon no matter what. To do this, click on ‘Set image on hover’ and then choose the exact same image.
If you don’t do this, then the icon will disappear when the visitor hovers over it.
After that, open the Image Size dropdown and choose a size from the list. Using the same size for all icons tends to make the menu look more organized.
However, you might make the menu’s most important icon bigger. For example, if you’ve created an online store using a plugin like WooCommerce, then you might use a bigger icon for ‘Checkout’ so it stands out.
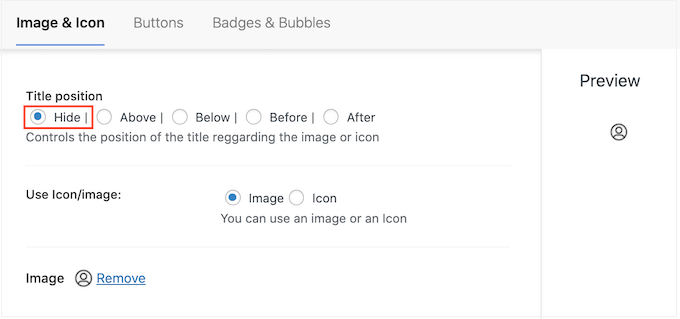
When you’re happy with the icon, it’s time to look at the menu item’s label.
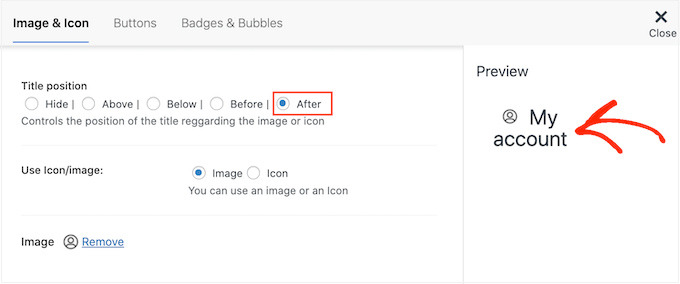
By default, the plugin shows the title label after the icon.
To change this, select any of the radio buttons in the ‘Title position’ section.
Another option is to remove the navigation label completely, creating an icon-only menu. This can prevent a menu with a lot of items from looking cluttered.
However, you should only hide the labels if it’s obvious what each icon means. If it’s unclear, then visitors will struggle to navigate your WordPress blog or website.
To go ahead and hide the label, select the radio button next to ‘None.’
When you’re happy with how the menu item is set up, click on ‘Save Changes.’
To add an icon to other menu items, simply follow the same process described above.
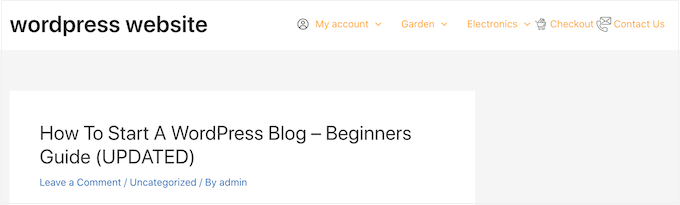
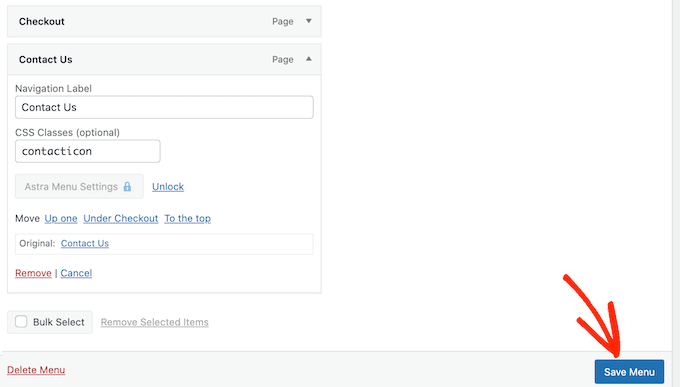
When you’ve finished, don’t forget to click on the ‘Save Menu’ button. Now, if you visit your website you’ll see the updated navigation menu live.
Method 2: Add Icons to WordPress Menus Using Code (More Customizable)
You can also add image icons to your navigation menus using custom CSS. This gives you more flexibility to control exactly where the icons appear in your menus.
However, it does require you to add custom code in WordPress, so it’s recommended for more intermediate or advanced WordPress users.
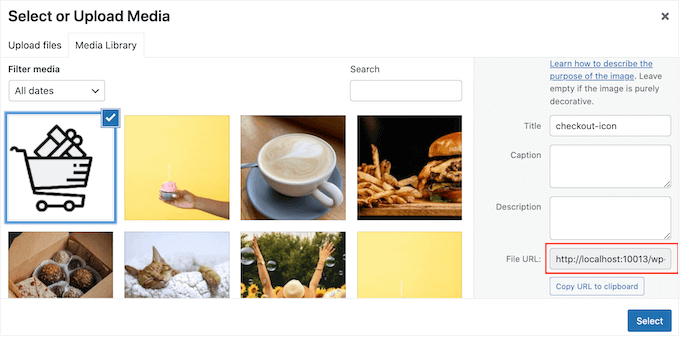
Before you start, go ahead and upload all your image files to the WordPress media library. For each image, make sure you copy its URL and paste it into a text editor like Notepad. You’ll need to use the links in your code, so this can save you a lot of time.
To find an image’s URL, simply select it in the WordPress media library and then look at the ‘File URL’ field.
Next, open the ‘Select a menu to edit’ dropdown and choose the menu where you want to add the image icons.
After that, go ahead and click on ‘Select.’
Next, you need to enable custom CSS classes by clicking on ‘Screen Options.’
In the panel that appears, check the box next to ‘CSS Classes.’
With that done, you can add custom CSS classes to any item in the navigation menu. This is how you will link each menu item to an image in the WordPress media library.
You can call these classes anything you want, but it’s a good idea to use something that helps you identify the menu item.
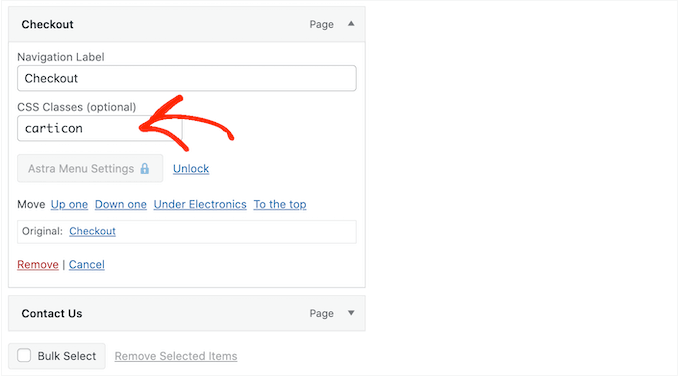
To get started, simply click on the first item you want to add an image icon to. In the ‘CSS Classes (optional)’ field, type in the class name you want to use.
You’ll use these custom CSS classes in the next step, so make a note of them in your Notepad or similar app.
Simply follow the same process to add a separate class to all your menu items. After that, click on ‘Save Menu’ to store your settings.
Note: Each icon will be tied to its own CSS class, so be sure to label the menu items differently if you want to use separate icons.
Now you’re ready to add image icons to your WordPress navigation menus using CSS.
Often, WordPress tutorials will tell you to add code snippets to your WordPress theme files. However, doing so may cause common WordPress errors and isn’t very beginner-friendly.
WPCode is the most popular code snippets plugin used by over 1 million WordPress websites. It allows you to add custom code without editing your theme’s functions.php file.
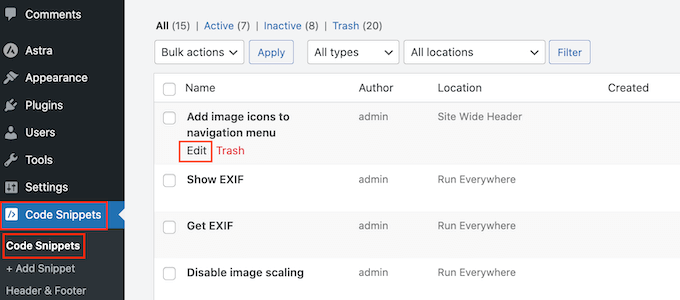
Upon activation, head over to Code Snippets » Add Snippet.
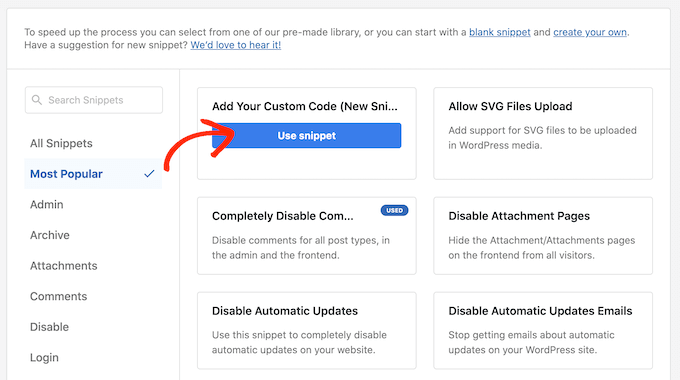
Here, simply hover your mouse over ‘Add Your Custom Code.’
When it appears, click on ‘Use snippet.’
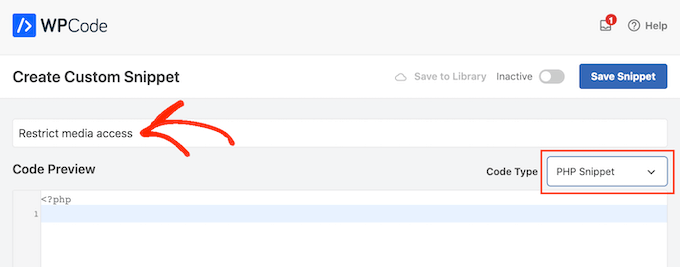
To start, type in a title for the custom code snippet. This can be anything that helps you identify the snippet in the WordPress dashboard.
With that done, open the ‘Code Type’ dropdown and select ‘CSS Snippet.’
In the code editor, you’ll need to add some code for every icon you want to show.
To help you out, we’ve created a sample snippet below. You can go ahead and change ‘.carticon’ to the custom CSS class you created in the previous step. You’ll also need to replace the URL with a link to the image in your WordPress media library:
Note: You will need to keep the dot ‘.’ in front of the CSS class in the code snippet. That’s what tells WordPress that it’s a class and not another kind of CSS selector.
You will need to adjust the snippet above for each individual menu item you created above. You can simply paste them all into the ‘Code Preview’ field.
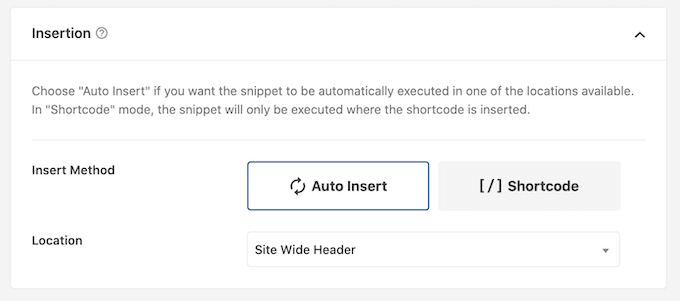
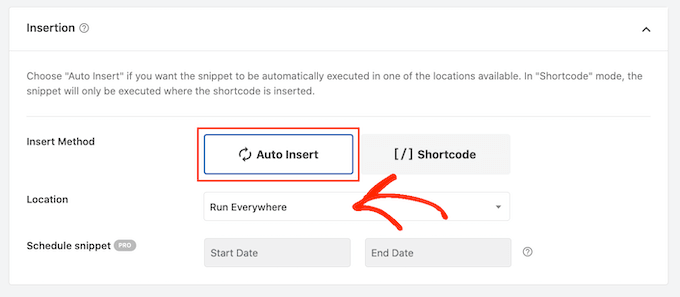
When you’re happy with your code, scroll to the ‘Insertion’ section. WPCode can add code to different locations, such as after every post, frontend only, or admin only.
You want to use the custom CSS code across our entire WordPress website, so click on ‘Auto Insert’ if it isn’t already selected.
Then, open the ‘Location’ dropdown menu and choose ‘Site Wide Header.’
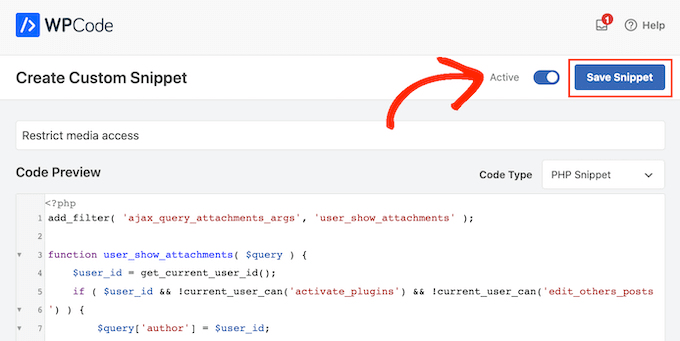
After that, you’re ready to scroll to the top of the screen and click on the ‘Inactive’ toggle, so it changes to ‘Active.’
Finally, click on ‘Save Snippet’ to make the custom CSS live.
Now, if you visit your website you’ll see all the image icons in your navigation menu.
Depending on your theme, you may need to tweak the CSS so it shows the image icons in exactly the right spot. If this is the case, then head to Code Snippets » Code Snippets in the WordPress dashboard.
Then, simply hover over the snippet and click on the ‘Edit’ link when it appears.
This opens the code editor, ready for you to make some changes.
Are you looking for popular digital product ideas to sell online?
In today’s creator economy, there are many opportunities to make money online. You can sell items like music files, videos, blog posts, eBooks, software, apps, podcasts, premium content, and more.
In this article, we will share the most popular digital products that you can sell online.
What are Digital Products?
A digital product is essentially anything that you can buy, download, and use on a device such as a computer or mobile phone. For example, ebooks, software, videos, music, online courses, and more can be digital products that you can purchase at an online store.
They are delivered to you electronically, usually through a direct download in your user dashboard or in an email with a download link inside. In general, you can easily access them anytime or anywhere.
Why Sell Digital Products Online?
Digital products have a lot of advantages compared to selling physical products.
First, you don’t have to worry about keeping inventory and meeting supply or demand requirements. Once you create a digital product, you can sell it again and again.
This also relieves you of any storage issues. Some physical products need to be kept at a warehouse and may require special storage conditions like refrigeration, which can be costly. On the other hand, you don’t have to worry about storing your digital products.
Besides that, you get to generate a passive income stream with digital goods and easily grow your sales. They also help reach a wider audience across the globe, as people from around the world can buy your digital products.
That said, let’s look at some of the most popular digital products you can sell online today.
1. eBooks
eBooks are a great digital product to have, and you can write about any topic you like. The best part, once you’ve created an ebook, you can simply market it and earn passive income.
Now, if you have a WordPress blog or write articles regularly on any other platform, then you can repurpose the content for your ebook.
For instance, your most popular guides would already have enough content to be converted into an ebook. Or you can combine several blog posts into an ebook about a particular topic.
The next most popular digital product you can sell is online courses. People are always looking to improve their skillset and learn new things.
You can use this opportunity to share your expertise and teach other people through a virtual classroom. For example, if you’re a fitness instructor, then you can create an online course and teach people different exercises.
The best part, you need very little investment and no technical knowledge to create online courses.
There are many tools in the market that can help you get started in no time. All you need is a domain name for your site, WordPress website hosting, and a learning management system (LMS) plugin.
LMS software like MemberPress or Thrive Apprentice makes it super easy to create interactive courses without editing code. Plus, you can manage students and course material, offer quizzes, and more.
Just like ebooks and online courses, a membership website is another simple way of making money online. You can sell premium memberships with access to exclusive content and community features.
For example, you can lock specific guides, cheat sheets, interviews, videos, podcasts, newsletters, and other content behind premium memberships.
On the other hand, you can offer exclusive entry to different communities, like a forum, Slack channel, or Facebook group, through a membership site.
What’s great about memberships is that you don’t have to rely on advertising revenue. You can allow your website visitors to support your site and generate continuous income.
There are many membership plugins and tools you can use to get started. For instance, MemberPress lets you restrict access to content, integrate different payment services, create unlimited membership levels, allow drip content, and more.
You can also sell individual guides and tutorials as digital products. This is a great way to earn more money if you have long articles or multiple blog posts on a particular topic.
Simply turn your guides into a downloadable file like a PDF document. You can then charge a fee to visitors who are willing to purchase your content.
For example, let’s say you have a detailed guide on email marketing. You can turn that guide into a PDF file and sell it as a digital product.
There are many WordPress eCommerce platforms you can use to sell digital products. We recommend using Easy Digital Downloads because it is beginner friendly, offers a shopping cart, easily integrates with payment gateways, and more.
Spreadsheets are another type of digital product you can sell on your website and generate revenue. You can create all types of useful spreadsheets for your audience.
For example, let’s say you have expertise in search engine optimization (SEO). You can create a technical SEO checklist for beginners and offer that as a paid spreadsheet. Similarly, you can create checklists, templates, calculators, lists, and other types of spreadsheets.
The best part is that you don’t need any investment to create a spreadsheet. Plus, it helps offer evergreen content that can you use to generate leads and a passive income stream.
You can also create WordPress plugins and sell them as digital products.
WordPress is open-source software, and it powers over 43% of the website on the internet. There are over 60,000 WordPress plugins that include free and paid options. This shows that there is a huge potential to create a plugin that generates revenue.
Usually, you need basic coding knowledge like PHP, CSS, HTML, and JavaScript to write a plugin. For more details, you can see our step-by-step guide on how to create a WordPress plugin.
You can also hire a developer to help you create a plugin. There are many WordPress developer job websites where you can post an opening and hire the right talent for a specific project.
If you’re willing to take on a DIY project, then you can also use a plugin called Pluginception. It lets you create a WordPress plugin from the WordPress dashboard. To learn more, please follow our guide on how to create a WordPress plugin using a plugin.
7. Software and Mobile Apps
Just like WordPress plugins, you can also create software and mobile apps. There are many SaaS (software as a service) products that you can create for any niche. It can be productivity software, workout apps, games, and more.
Usually, SaaS products have a recurring subscription. This means that you’ll need to generate income on a monthly or annual basis.
Since creating such software and apps requires specific skills, you might need to hire developers. This process can be expensive because you’ll need investment for creating software or purchasing an existing one ($15,000 and upwards).
As an alternative, you can convert your WordPress websites into mobile apps and monetize them. There are tools and plugins that can turn your site into an app. For example, let’s say you have a membership site. Converting it into an app will help you attract mobile users and sell it as a digital product.
On the other hand, you can also join affiliate programs and earn a commission on each sale. You can create a WordPress blog to review different software and apps and promote them as affiliates. Or you could create an online store using affiliates.
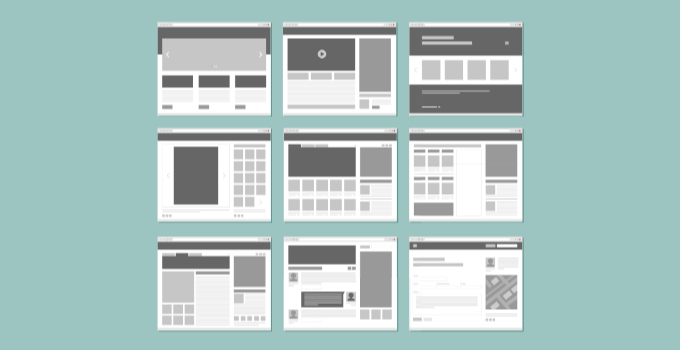
Similarly, you can make WordPress themes and sell them online. Themes are necessary for every WordPress user, and often users look for themes that offer specific features and customization options.
There are many platforms where you can sell website themes. Some of these include Enavto, Themeforest, CodeCanyon, and Creative Market.
You can also list a free version of your theme on the WordPress.org theme directory. From here, you can encourage users to upgrade to a premium version to unlock more features.
We recommend selling the digital products on your own websites instead of a marketplace like Envato because they charge a large commission on every sale without much benefit.
You can use an eCommerce solution like Easy Digital Downloads to create your own digital store.
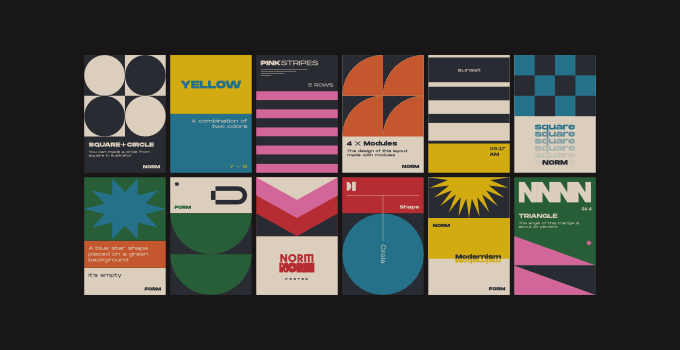
9. Digital Art and Graphics
If you’re a graphic designer or an artist, then you can create a variety of digital products and sell them online.
For example, you can create logos, design templates, original digital artwork, clip art, patterns, brushes, backgrounds, icons, fonts, shapes, and more.
Besides that, creating assets for different photo editing software like Adobe PhotoShop, Canva, Affinity Designer, and Affinity Photo can also help you make money online.
Another great digital product you can sell online is photography. Many people look for images that they can use for their WordPress websites and blogs.
There are different types of photos you can sell. Some of these include stock photos, event pictures, portraits, drone images, backgrounds, and more.
Now, you can sell your images to different stock photo sites, like Shutterstock, 500px, iStock Photo, Adobe Stock, and more. Each of these websites has a payment structure where they’ll share a percentage of direct sales or give you a royalty fee.
On the other hand, you can create your own photography website and sell your images there. This way, you don’t have to share the profits with another third party and have more control over your images.
Videos are the next digital products on our list that you can sell online.
For example, videos like drone footage, stock videos, online training, product reviews, video game reviews, and gameplay footage are some of the ideas you can use to create a video-based digital product.
One of the easiest ways of monetizing your videos is by creating a video membership site. This way, you don’t have to rely on ad revenue from other platforms and get recurring payments from users who pay to access your content.
12. Recipes
Are you a chef, a home cook, or a food blogger? If you do, then you can sell recipes as digital products.
The food industry is worth trillions of dollars and is very competitive. However, you can find a niche that your audience likes and share recipes to earn money.
For instance, you can start a food blog and offer premium recipes for subscribers. Or you could combine multiple recipes into an ebook and sell that as a digital product.
Plus, you can offer cooking courses and other premium content by creating a membership site. We recommend MemberPress for this sort of site, as it’s the best plugin for that on the market.
13. Podcasts
Podcasts are audio shows that users can subscribe to. They are generally made up of audio files that listeners can download or stream to listen to.
There are many topics you can create a podcast on. For example, if your topic is music, then you can narrow it down to a specific genre. Similarly, if you’re into sports, then you can create a podcast on football.
Another great way of selling podcasts is by inviting industry experts and serving it as a masterclass. You can charge a premium or only offer these podcasts to members to generate income.
Many podcasters rely on their communities supporting them, whether that’s through a service like Patreon or creating their own membership site.
For more details, you can follow our guide on how to start a podcast and make it successful.
14. Professional Services and Coaching
You can also sell your expertise as a digital product and help other businesses.
For example, if you’re a copywriter, graphic designer, social media expert, developer, fitness coach, legal professional, translator, SEO expert, offer technical support through live chat, or any type of consultant, then you can offer your services to others for a fee.
Now, you can sign up for different freelancing websites like Upwork, or create your own site. From here, simply market your expertise on social media platforms and build a following to get more projects and clients.
15. Research and Data
Do you conduct industry-wide surveys, polls, and research? If yes, then you can create digital products and sell the research data.
Many businesses are looking for insights into their industry. They want to better understand their audience and find out what they like or don’t like.
You can carry out research on popular topics, collaborate with companies, or simply run a survey to gather data. After that, you can create a report, add it to your website, and sell it to consumers.
If you have a membership website, then you can also offer research and data to subscribers.
For examples, see some of our research articles we offer for free here at WPBeginner:
Bonus: Plugins and Tools to Market Your Digital Products
Now that you know some of the most popular digital products to sell online, you’ll also need to market them to your customers.
Here’s a list of WordPress plugins and tools that you can use to promote your product and boost conversions:
OptinMonster – It is the best lead generation and popup plugin for WordPress. You can create different campaigns and use smart targeting rules to promote digital products and increase conversions.
WPForms – This is the best WordPress form plugin. You can use it to create an order form, payment form, and more.
All in One SEO (AIOSEO) – The plugin helps you optimize your website for search engines. This way, you get to improve search engine rankings, attract more organic visitors to your site, and boost sales of your digital products.
MonsterInsights – It is the best Google Analytics plugin for WordPress. Using the plugin, you can track your digital products performance, which files get the most downloads, uncover the most popular products, and track eCommerce revenue without editing code.
PushEngage – This is a push notification software for WordPress and allows you to send personalized web notifications to customers about new products, promotions, sales, etc.
WP Simple Pay – You can collect online payments on your website using this plugin. The best part, you don’t have to set up a shopping cart to sell digital products while using WP Simple Pay.
Do you want to display your Instagram photos in the WordPress sidebar?
Your Instagram posts make great content for your website. By creating an Instagram feed, you can keep your site fresh and interesting while also promoting your Instagram account.
In this article, we’ll show you how to display your Instagram photos and videos in the WordPress sidebar widget.
Why Add an Instagram Feed to Your WordPress Site?
With more than a billion monthly active users, Instagram is a great place to promote your products, services, and blog posts.
Depending on your industry, Instagram may even be the most important part of your social media strategy. For example, Instagram is particularly popular among top fashion blogs, cooking, lifestyle, and photography websites.
However, people won’t see your Instagram posts if they only visit your website. This can make it difficult to grow your Instagram following and get engagement on your photos and videos.
With that being said, it’s a good idea to add an Instagram feed to your WordPress website. By showing your latest posts, you can promote your Instagram account in an engaging and eye-catching way.
This will get more traffic to your Instagram page and encourage visitors to interact with your posts by leaving comments, clicking on the ‘Share’ button, and more.
The feed will also update automatically every time you make a new Instagram post, so it’s a great way to keep your website fresh.
That being said, let’s take a look at how to easily display Instagram photos in the WordPress sidebar widget.
How to Install an Instagram Photos Plugin
The best way to display Instagram photos in a WordPress sidebar or similar widget is by using Smash Balloon Social Photo Feed. This free plugin lets you show photos from one or more Instagram accounts in a fully customizable feed.
After creating a feed, you can add it to the sidebar using either a shortcode or block.
In this guide, we’ll be using the free version of Smash Balloon, as it has everything you need to embed an Instagram feed. However, there’s also a Pro version that allows you to display hashtag feeds, add Instagram shoppable images in WordPress, and more.
Before getting started, you’ll need to connect your Instagram account to a Facebook page. If you have a personal Instagram account, then you may also want to turn it into a business account, as this allows Smash Balloon to show your Instagram bio and header automatically.
For step-by-step instructions on how to do both of these things, check out our FAQ section at the end of the post.
When you’re ready, go ahead and install and activate the Smash Balloon Social Photo Feed plugin. For more details, see our guide on how to install a WordPress plugin.
How to Connect an Instagram Account to WordPress
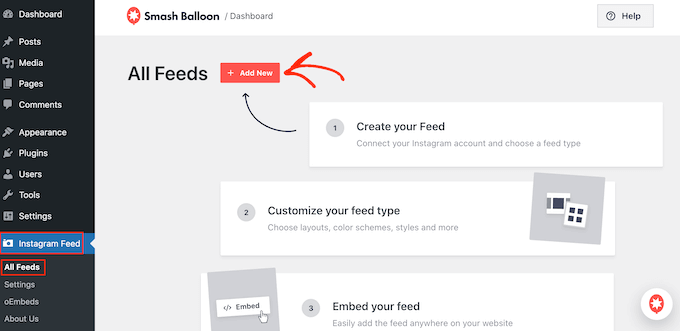
After activating the plugin, it’s time to connect your Instagram account to WordPress. Simply go to Instagram Feed » Settings and then click on ‘Add New.’
With Smash Balloon Pro, you can create feeds from tagged posts and hashtags, or even create a social wall with content from lots of different websites, including YouTube, Facebook, and Twitter.
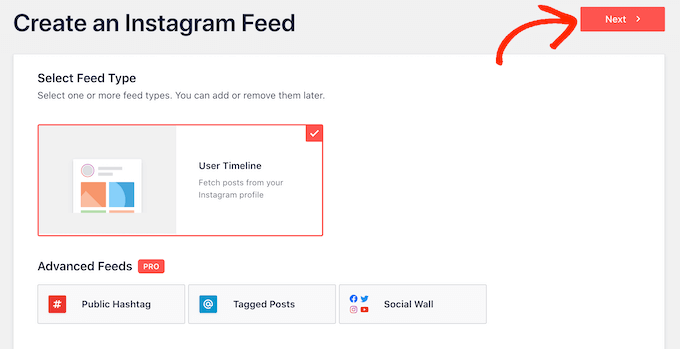
Since we’re using the free version, simply select ‘User Timeline’ and then click on ‘Next.’
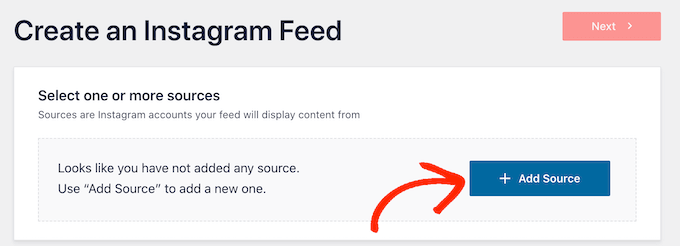
After that, you’ll need to choose the Instagram account where you’ll get the photos from.
To get started, click on ‘Add Source.’
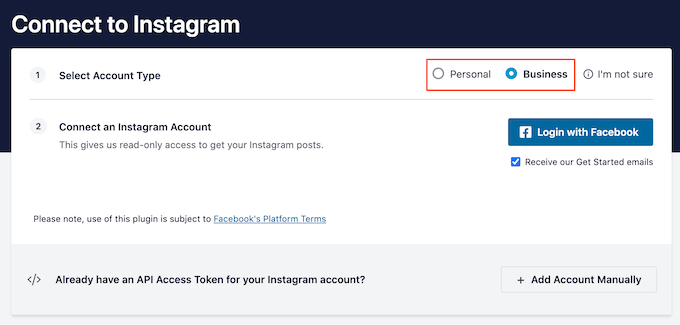
On the next screen, choose whether you want to display photos from a personal or business Instagram account.
If you check the box next to ‘Personal,’ then Smash Balloon won’t include the Instagram avatar and bio in your header by default. However, you can always add the avatar and bio manually in the plugin’s settings.
After choosing ‘Personal’ or ‘Business,’ go ahead and click on ‘Login with Facebook.’
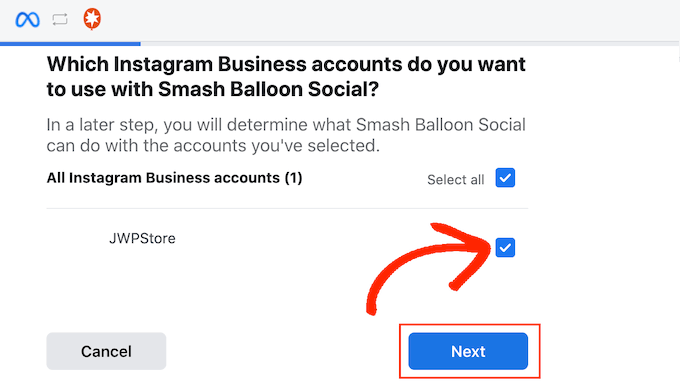
You can now check the Instagram account that you want to use and click on ‘Next.’
After that, check the box next to the Facebook page that’s linked to your Instagram account.
With that done, go ahead and click on ‘Next.’
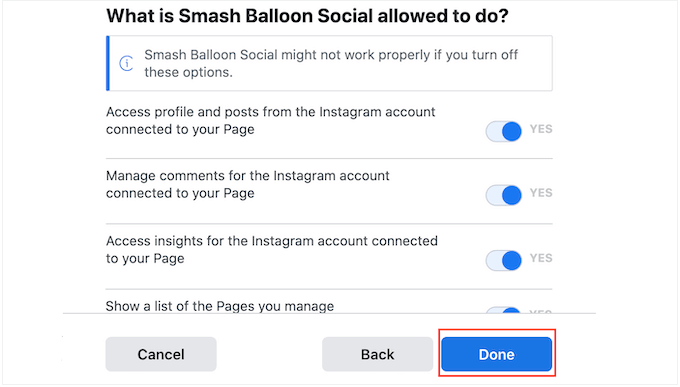
Smash Balloon will now show a popup listing all the information it will have access to and the actions it can perform.
To restrict Smash Balloon’s access to your Instagram account, click any of the switches to turn it from ‘Yes’ to ‘No.’ Just be aware that this may affect the photos and videos that you can embed on your WordPress blog or website.
With that being said, we recommend leaving all the switches enabled.
When you’re ready, click on ‘Done.’
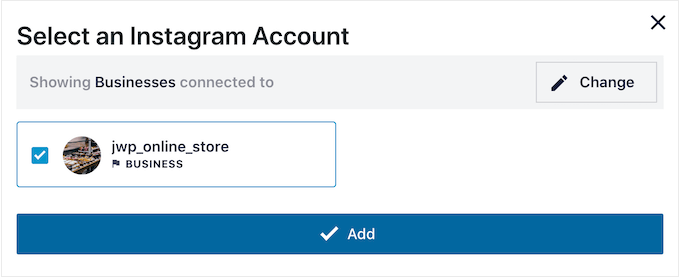
You’ll now see a popup with the Instagram account you just linked to WordPress.
Simply check the box next to the account and then click on ‘Add.’
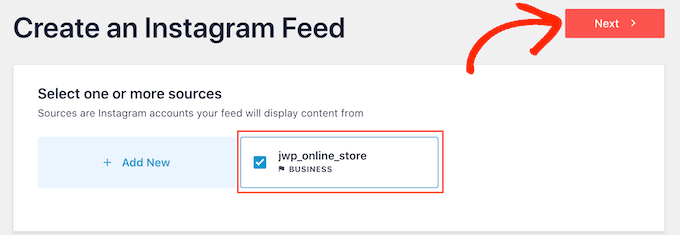
Smash Balloon will now take you back to Instagram Feeds » All Feeds automatically.
To create a feed, simply check the box next to your Instagram account. Then, click on ‘Next.’
The plugin will now create an Instagram photo feed for your website, and then open that feed in the Smash Balloon editor.
How to Customize Your Instagram Photo Feed
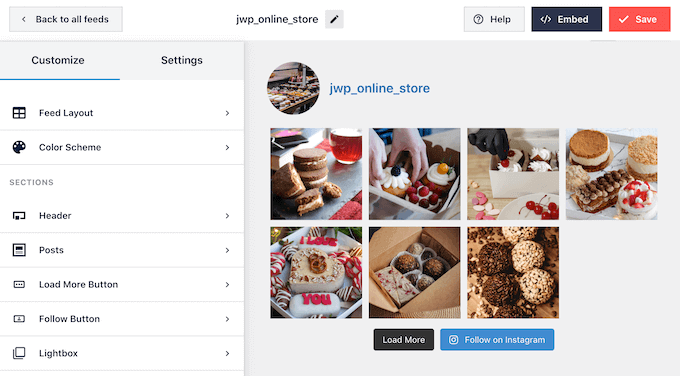
You can use the editor to fine-tune how Instagram photos look on your website.
On the right, you’ll see a preview of your Instagram photo feed. On the left-hand side are all the settings you can use to customize the photo feed.
Most of these settings are self-explanatory, but we’ll quickly cover some key areas.
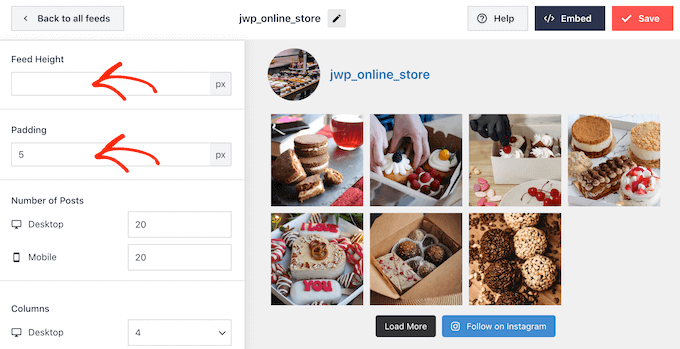
To start, you can change the feed layout and add padding by selecting ‘Feed Layout’ from the left-hand menu. As you make changes, the preview will update automatically, so you can try different settings to see what works best for your Instagram photo feed.
By default, Smash Balloon shows the same number of posts on desktop computers and mobile devices.
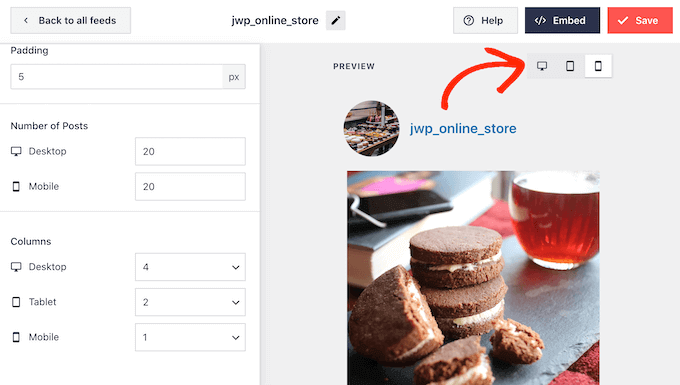
You can preview how the Instagram feed will look on desktop computers, tablets, and smartphones using the row of buttons in the upper-right corner. By testing different layouts, you can create an Instagram feed that looks great, no matter what device the visitor is using.
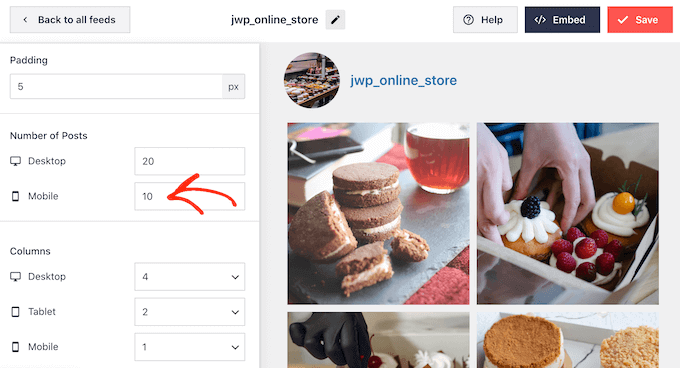
Smartphones and tablets typically have smaller screens and less processing power, so you may want to show fewer photos and videos on mobile devices.
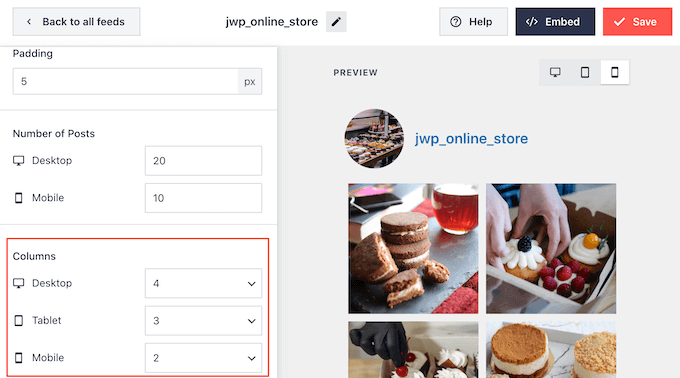
To do this, simply type a different number into the ‘Mobile’ field under ‘Number of Posts.’
By default, the Facebook feed shows fewer columns on smartphones and tablets, compared to desktop computers. This helps your photos and videos fit comfortably on smaller screens.
After testing the mobile version of your WordPress website, you may be unhappy with how the columns look on smartphones and tablets. If this is the case, then you can show fewer columns by changing the numbers in the ‘Columns’ section.
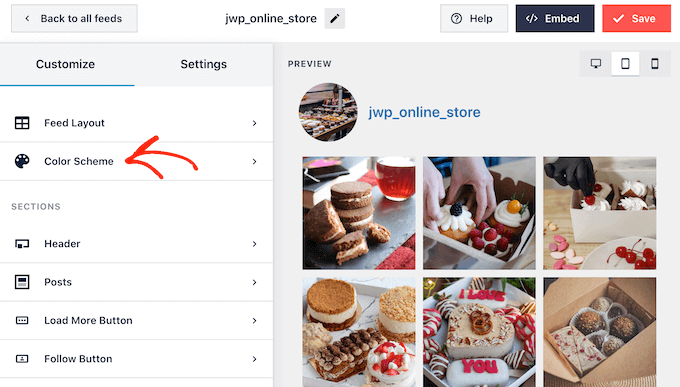
When you’re happy with the changes you’ve made, click on the ‘Customize’ link.
This will take you back to the main Smash Balloon editor, where you can explore the next settings screen, which is ‘Color Scheme.’
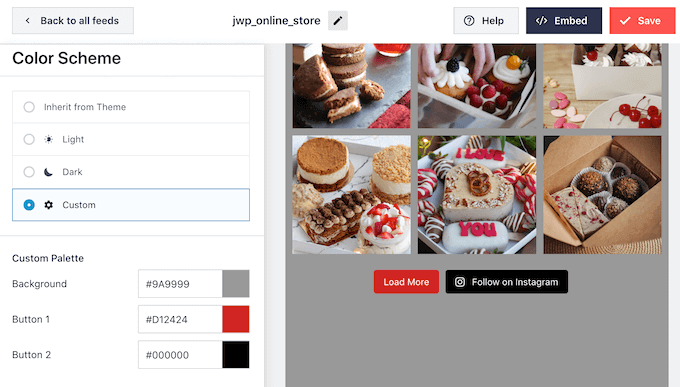
By default, Smash Balloon uses a color scheme inherited from your WordPress theme, but it also has ‘Light’ and ‘Dark’ themes that you can use.
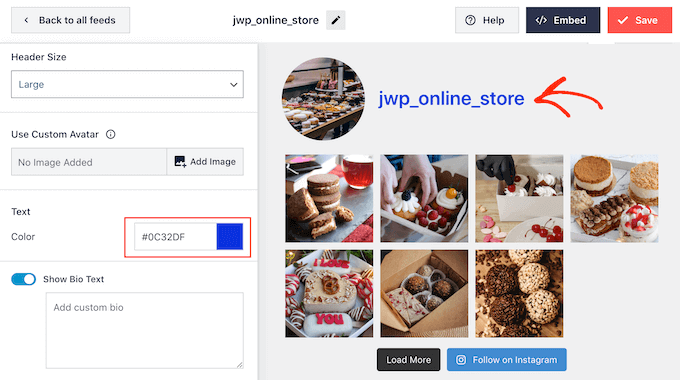
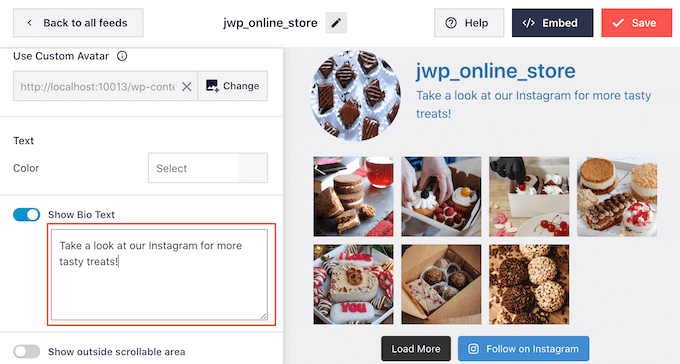
By default, Smash Balloon adds a header to your feed, which is your Instagram profile picture and the name of your page. To change how this section looks, click on ‘Header’ in the left-hand menu.
On this screen, you can change the size and color of the header, and show or hide your Instagram bio.
Sometimes, you may want to show a different profile picture. For example, your Instagram avatar may clash with your WordPress theme.
To do this, simply click on ‘Add Image’ under ‘Show custom avatar.’
You can then either choose an image from the WordPress media library or upload a new photo from your computer.
Similarly, you can show a different bio. For example, you may want to introduce your Instagram feed or encourage people to follow you for more great content.
To replace the Instagram bio, simply type into the ‘Add custom bio’ box.
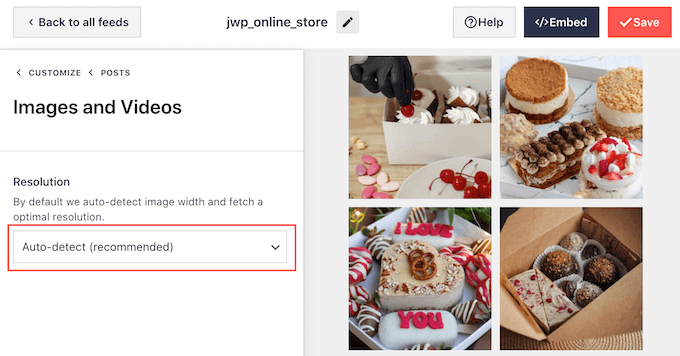
Smash Balloon automatically analyzes your Instagram photos and displays them at the best resolution. While we recommend using these default settings, it is possible to make the images bigger or smaller.
To change the image size, click on ‘Posts’ from the left-hand menu. Then, select the ‘Images and Videos’ option.
You can now choose between thumbnail, medium, and full-size using the dropdown menu.
If you’re unhappy with the results, then you can return to this screen at any point and select ‘Auto-detect (Recommended)’ from the dropdown menu.
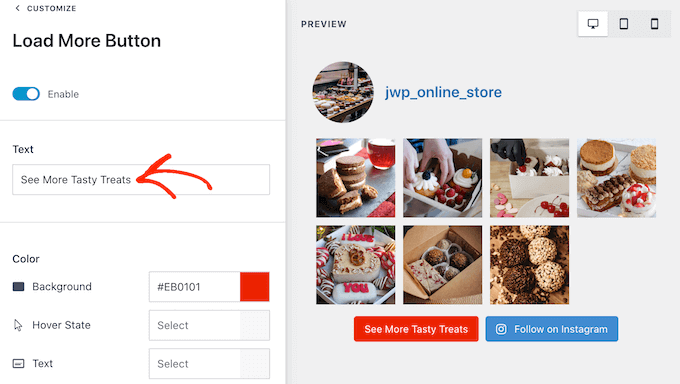
By default, Smash Balloon adds a ‘Load More’ button to the bottom of your Instagram feed, which allows visitors to scroll through more of your photos and videos.
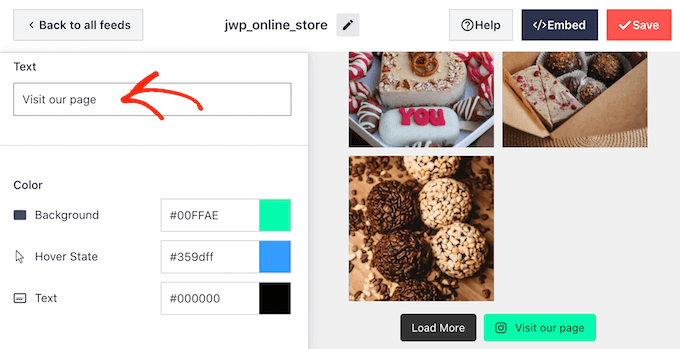
Since it’s such an important button, you may want to customize it by selecting the ‘Load More Button’ option from the left-hand menu.
Here, you can help ‘Load More stand out by changing its background color, text color, and hover state.
You can also change the button’s label by typing into the ‘Text’ field.
Another option is to remove the button completely by clicking the ‘Enable’ toggle. In this way, you can encourage people to visit your Instagram by limiting the number of posts they can see on your website.
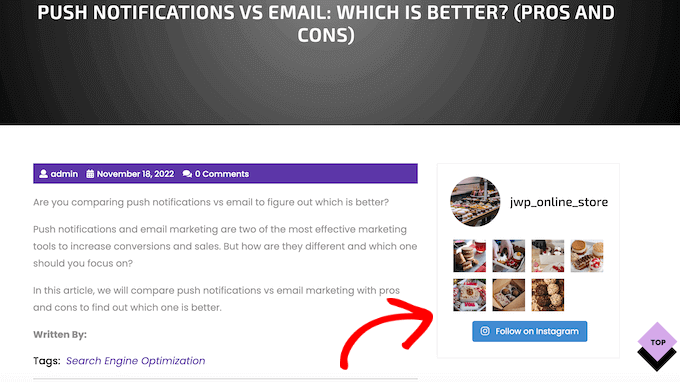
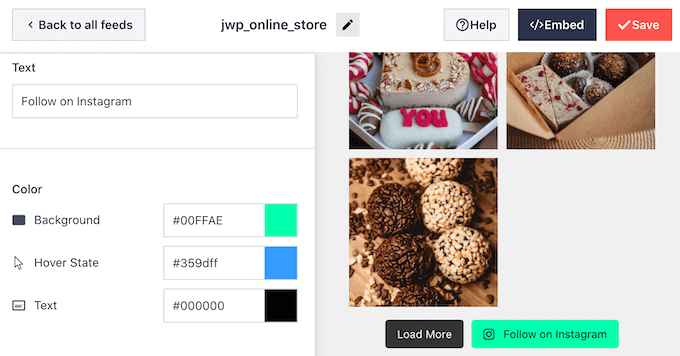
If visitors like what they see, they may decide to follow you on Instagram using the ‘Follow on Instagram’ button that Smash Balloon adds automatically.
With that in mind, you may want to help the button stand out by selecting ‘Follow Button’ in the left-hand menu.
Here, you can change the button’s background color, hover state, and text color.
By default, the button has a general ‘Follow on Instagram’ label.
You can replace this with your own messaging by typing into the ‘Text’ field.
When you’re happy with how the Instagram feed looks, don’t forget to click on ‘Save’ to store your changes. You’re now ready to add the Instagram feed to your WordPress sidebar widget.
How to Add Your Instagram Photos in WordPress Sidebar Widget
You can add your feed to the sidebar or similar section using the Instagram Feed block.
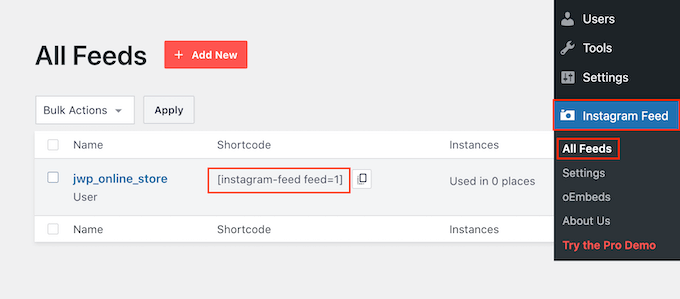
If you’ve created more than one feed using Smash Balloon, then you’ll need to know the feed’s code.
Simply go to Instagram » All Feeds and then copy the value in the ‘Shortcode’ column.
In the following image, we’ll need to use instagram-feed feed=1.
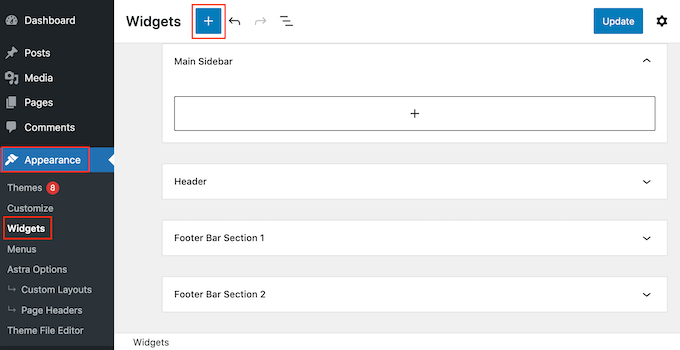
With that done, go to Appearance » Widgets in the WordPress dashboard.
Then click on the blue ‘+’ button.
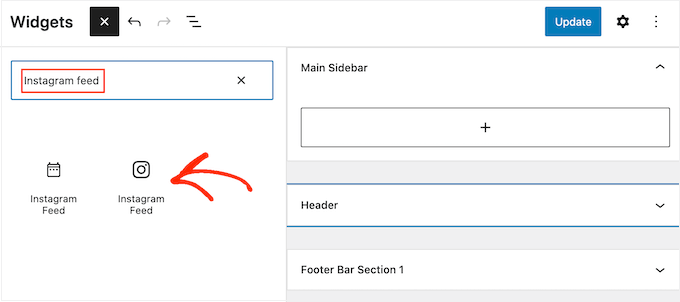
In the search bar, type in ‘Instagram Feed’ and select the right widget when it appears.
WordPress has a built-in Instagram widget, so make sure you choose the one that shows the official Instagram logo.
After that, simply drag the widget onto the area where you want to show the Instagram feed, such as the sidebar or similar section.
The widget will automatically show one of the feeds you created using Smash Balloon.
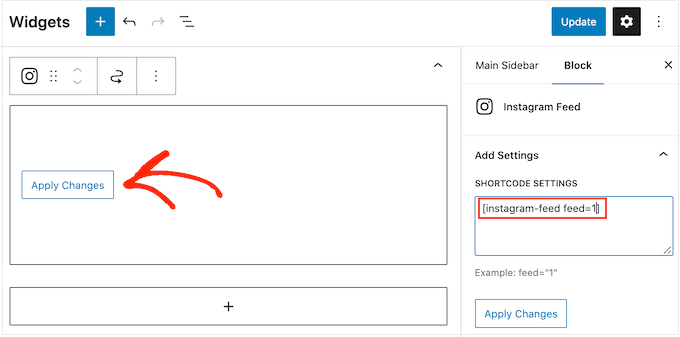
To show a different feed instead, simply type the feed’s shortcode into the ‘Shortcode Settings’ box and then click on ‘Apply Changes.’
You can now click on the ‘Update’ button to make the widget live. For more information, please see our step-by-step guide on how to add and use widgets in WordPress.
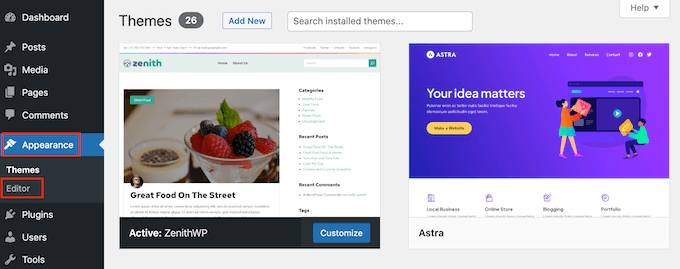
If you’re using a block-enabled theme, then you can add an Instagram feed to the sidebar using the full-site editor. To get started, simply go to Appearance »Editor.
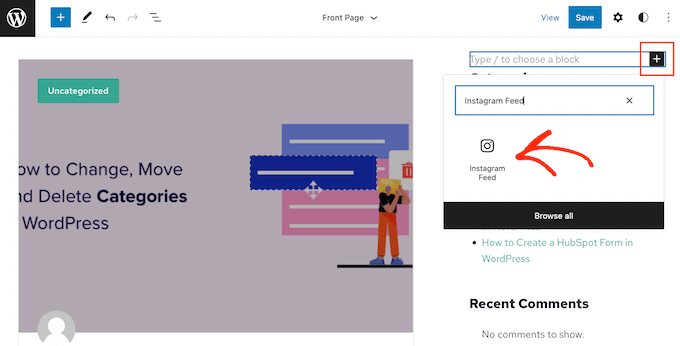
In the editor, simply click to select the sidebar section and then click on the ‘+’ button.
You can then start typing in ‘Instagram Feed’ and select the right block when it appears.
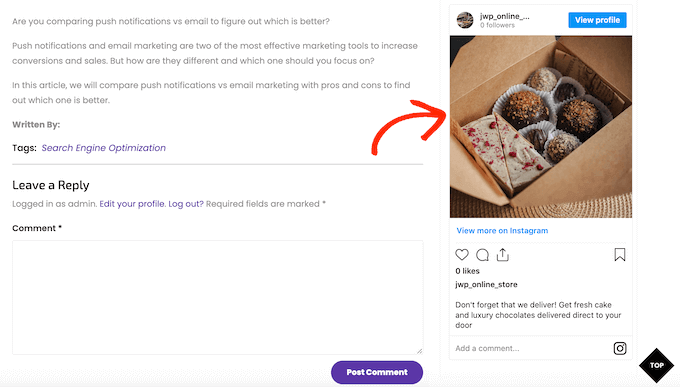
By default, the full-site editor will show one of the Instagram feeds you created using Smash Balloon. To show a different feed, simply add the shortcode following the same process described above.
When you’re happy with how the Instagram feed looks, click on ‘Save’ to make your changes live.
How to Display a Specific Instagram Photo in WordPress
Sometimes you may want to show a specific Instagram post on your website. This might be your most popular photo, an evergreen post, or even a social media contest that you’re currently running.
In the past, you could easily embed an Instagram post in WordPress using a protocol known as oEmbed. However, Facebook changed the way that oEmbed works, so you can no longer easily embed Instagram photos in WordPress.
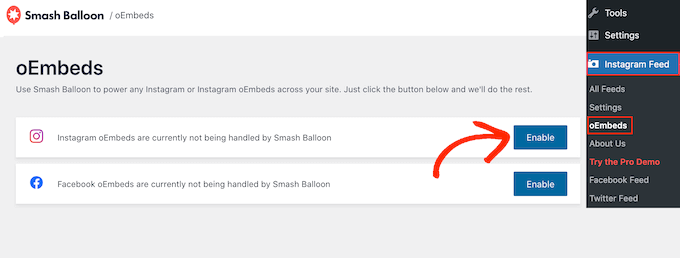
The good news is that Smash Balloon can fix the Facebook and Instagram oEmbed issue. This allows you to easily embed a specific Instagram post in any page, post, or widget-ready area, such as the sidebar.
To enable this feature, simply go to Instagram Feed » oEmbeds. You can then click on the ‘Enable’ button.
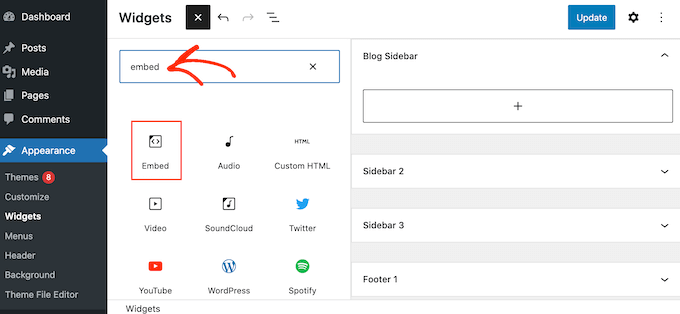
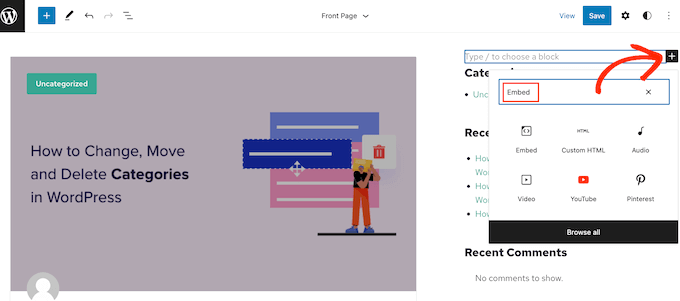
After that, go to Appearance » Widgets and click on the blue ‘+’ button.
In the search bar, type in ‘Embed’ to find the right block.
When the ‘Embed’ block appears, drag it onto the area where you want to show the photo.
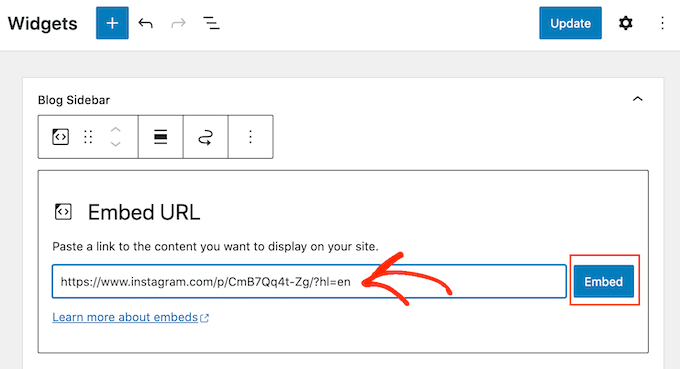
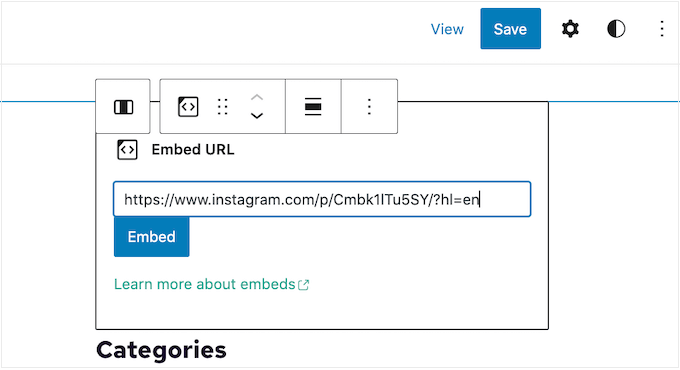
In the ‘Embed’ field, simply paste the URL of the Instagram post that you want to show on your website. Then, click on ‘Embed.’
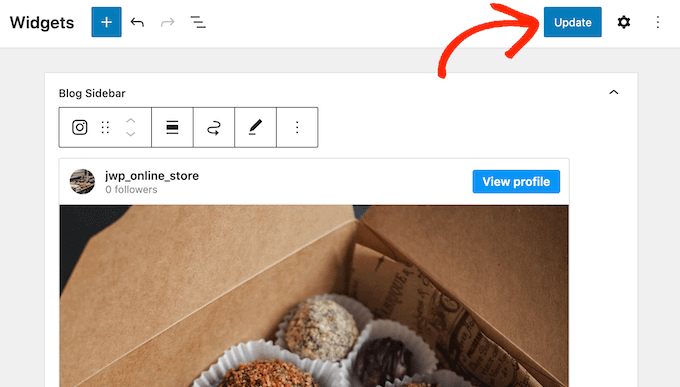
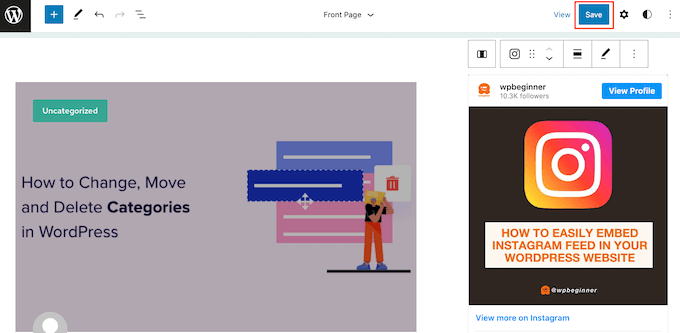
WordPress will now show the specific Instagram post.
If you’re happy with how it looks, then click on ‘Update’ to make it live.
Now, if you visit your website, you’ll see the Instagram post live.
If you’re using a block-enabled theme, then you’ll need to add specific Instagram posts using the full-site editor.
To do this, simply enable Smash Balloon’s oEmbed feature and get the Instagram post’s URL by following the same process described above.
After that, open the full-site editor by going to Appearance »Editor in the WordPress dashboard. Once you’re inside the full-site editor, click on the ‘+’ button in the sidebar section and then type in ‘Embed.’
When the right block appears, click to add it to the sidebar.
You can then add the URL for the post you want to embed and click on the ‘Embed’ button.
The full-site editor will now show the Instagram post.
If you’re happy with how it looks, then click on ‘Save’ to publish this photo or video to the block-enabled sidebar.
FAQs About Displaying Instagram Posts in WordPress
Smash Balloon makes it easy to create a custom Instagram feed or even display specific Instagram posts on your WordPress website.
That being said, here are some of the most frequently asked questions about showing Instagram posts on WordPress.
How Do I Create an Instagram Business Account?
Smash Balloon can display photos from either a personal or business Instagram account.
However, Smash Balloon can’t automatically fetch the Instagram avatar and bio from a personal Instagram account. Instead, you’ll need to add the avatar and bio manually in the plugin’s settings.
With that being said, you may want to check whether you have a personal or business account, and then switch to a business account if necessary.
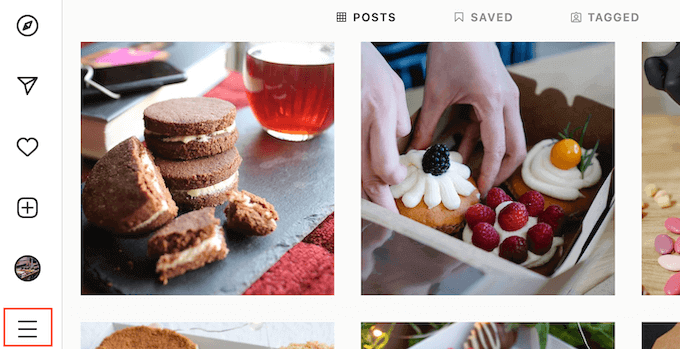
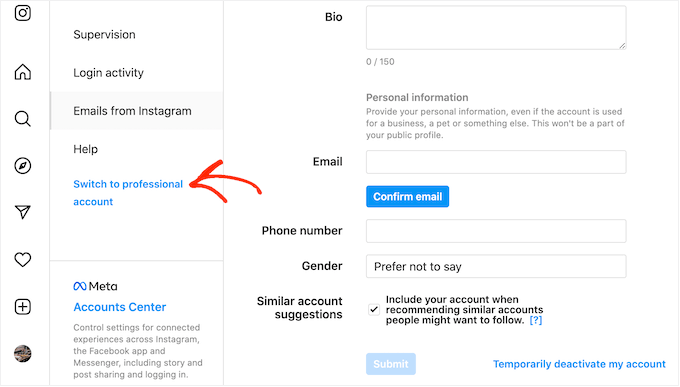
To do this, simply visit your Instagram account and click on the lined icon in the side menu.
After that, click on ‘Settings.’
If you don’t have a business account, then this screen will show ‘Switch to professional account’ as the last option.
If you currently have a personal account and want to switch to a business account, then simply click on this link.
How Do I Connect a Facebook Page to an Instagram Account?
Before you can display Instagram photos in WordPress, you’ll first need to connect your Instagram account to a Facebook page.
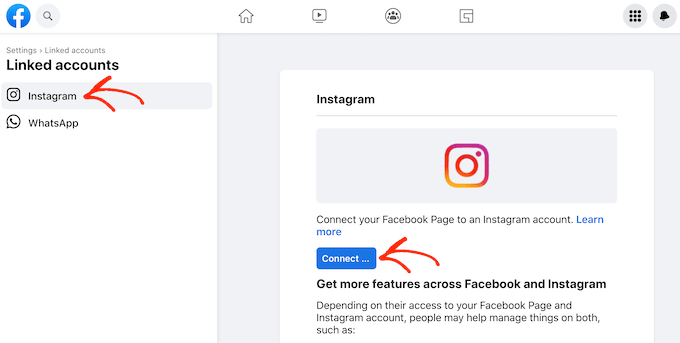
To do this, head over to the Facebook page that you want to use and then click on ‘Settings’ in the left-hand menu.
Once you’ve done that, click on ‘Linked Account.’ You can now select ‘Instagram’ and click on the ‘Connect’ button.
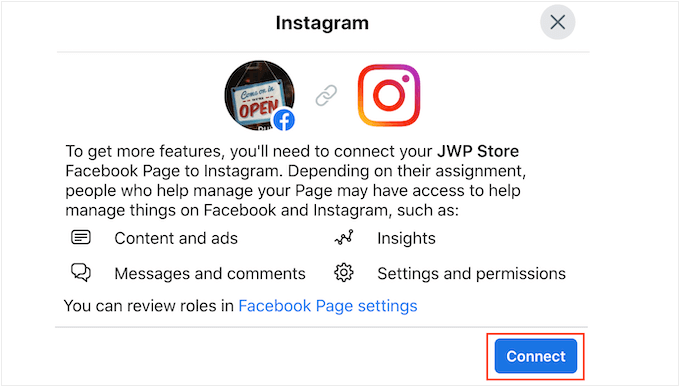
Facebook will now show all the actions it can perform, and the information it can access.
If you’re happy with this, then click on the ‘Connect’ button.
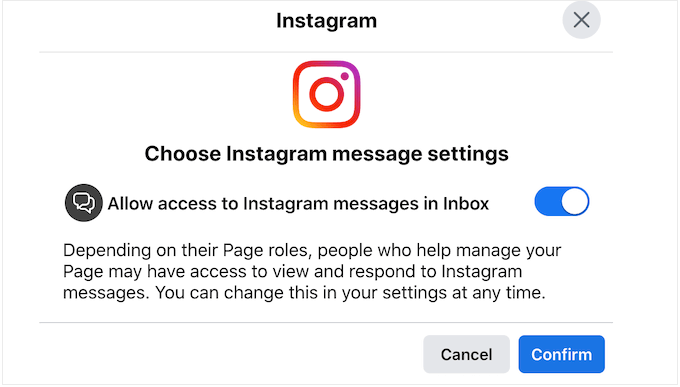
Just be aware that the people who manage your Facebook page may be able to see your Instagram messages and respond to them. If you want to stop this and keep your messages private, then click to disable the slider.
When you’re ready to move to the next screen, click on ‘Confirm.’
This opens a popup where you can type in your Instagram username and password.
After that, click on the ‘Log in’ button.
After a few moments, you’ll see a message saying that your Instagram and Facebook accounts are now connected.
Recently, one of our readers asked if it was possible sell music online in WordPress?
The answer is yes. Whether you’re selling your own songs or creating an online music store, you can easily do this in WordPress. Selling music online is a great way to make money without having to pay high shipping or manufacturing costs. It can also be an easy way to promote your own band or music, as well as grow your fanbase.
In this article, we will show you how to easily sell music online in WordPress, step by step.
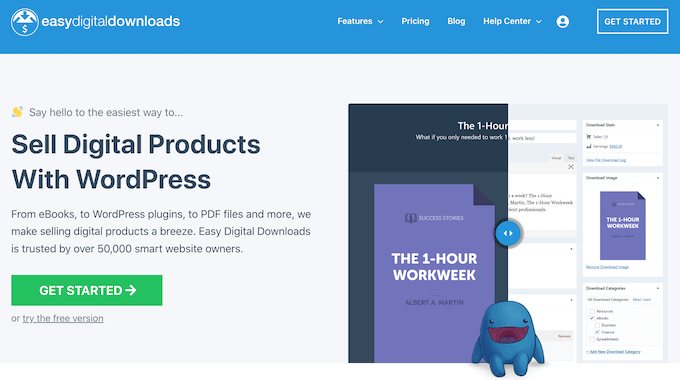
Unlike general eCommerce plugins like WooCommerce, Easy Digital Downloads is built specifically with the features you need to promote, sell, and distribute digital music online.
In this way, you don’t have to waste time configuring features that aren’t necessary for selling digital products, such as shipping and inventory management settings.
With that being said, let’s see how you can easily sell music online in WordPress.
Note: If you are looking to sell physical copies of your music, too, such as vinyl records or CDs, check out our guide on how to set up an online store.
Before You Get Started
Before you can start selling music online, it’s important that you have a WordPress site setup already.
For this, you will need a domain name and WordPress hosting.
We recommend using SiteGround’s EDD hosting because it comes with Easy Digital Downloads pre-installed.
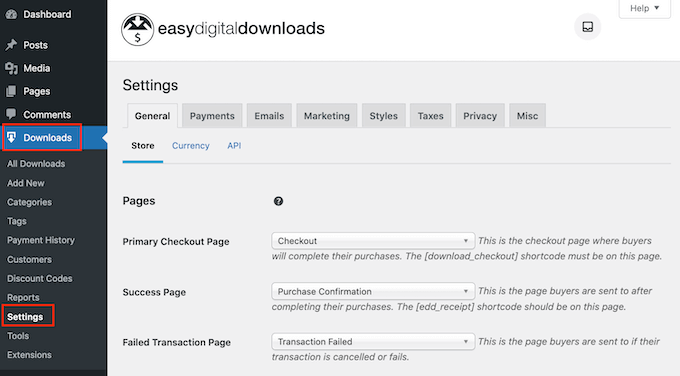
Upon activation, head over to Downloads » Settings in the WordPress dashboard.
Even though you’re selling music, you still need to set your store’s location. This allows Easy Digital Downloads to auto-fill some fields in the order form, which will make it easier for fans to buy your music. Easy Digital Downloads will also use this information to calculate sales tax.
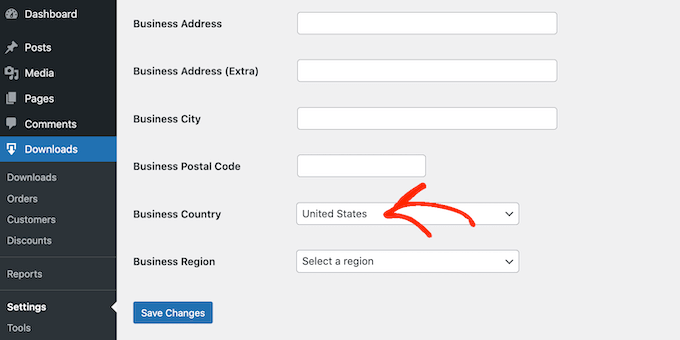
To add your location, simply open the ‘Business Country’ dropdown menu. You can then choose where your business is based.
Next, open the ‘Business Region’ dropdown menu and choose the state or province where your store operates from.
After making these changes, go ahead and click on Save Changes to store your settings.
Step 2. Adding a Payment Gateway to Your Music Store
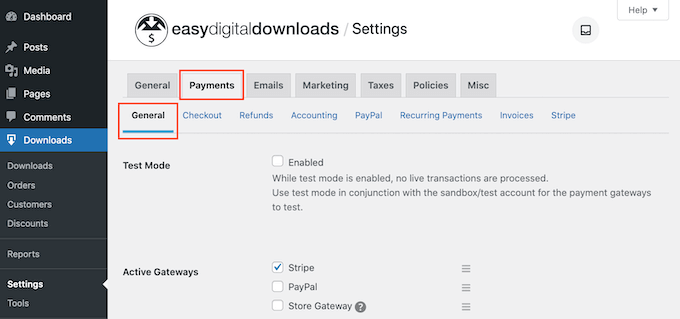
By default, Easy Digital Downloads supports popular payment gateways including Stripe, PayPal and Amazon Payments.
Pro Tip: Want to use a different payment gateway instead? You can add extra payment options using the Easy Digital Download extensions.
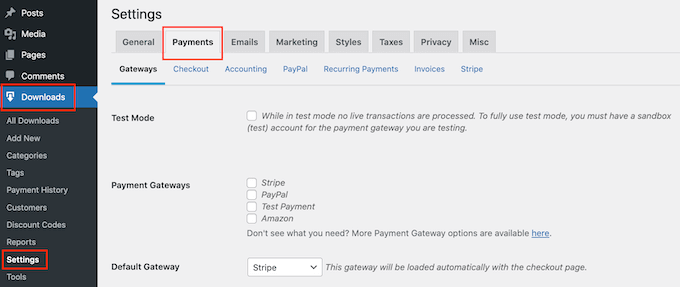
To add payment gateways to your website, go ahead and click on the ‘Payments’ tab. Then make sure the ‘General’ tab is selected.
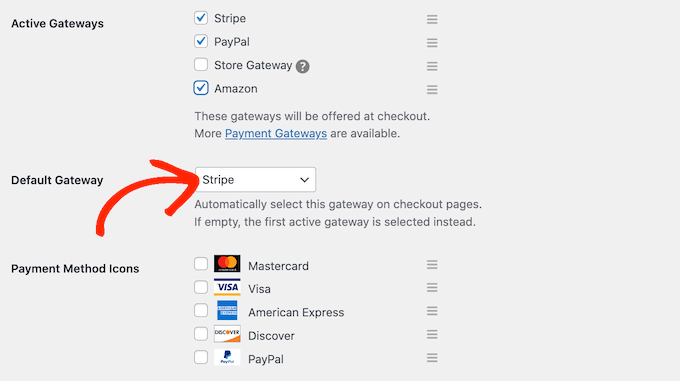
In the Active Gateways section, check the box next to each gateway you want to use on your WordPress website.
If you check more than one payment method, then you’ll need to choose a default gateway, which will be selected automatically when the visitor arrives at the checkout.
To make this decision, simply open the ‘Default Gateway’ dropdown and choose the payment method you want to use. You can use any gateway you want, but Stripe can accept credit cards as well as Apple Pay and Google Pay. With that in mind, we recommend using Stripe as your default gateway.
After selecting one or more payment gateways, click on the ‘Save Changes’ button. You’ll now have access to some new tabs where you can configure each payment gateway.
The process will vary depending on which gateway you’re using, but Easy Digital Downloads will walk you through the process.
Let’s use Stripe as an example.
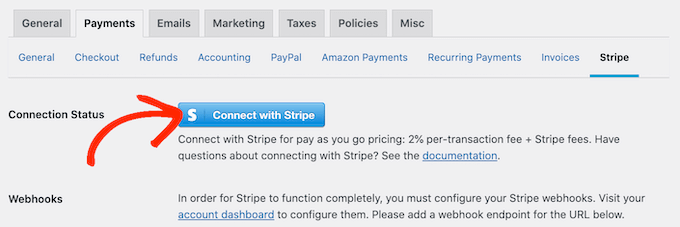
To set up Stripe, simply select the ‘Stripe’ tab and then click on ‘Connect with Stripe.’
This launches a setup wizard that will walk you through the process of configuring Stripe as your payment gateway.
If you’re using multiple payment gateways, then you’ll need to repeat these steps to set up each gateway separately.
By default Easy Digital Downloads shows all your prices in US dollars. Once you’ve set up your payment gateway, you may want to change the currency that’s used on your website.
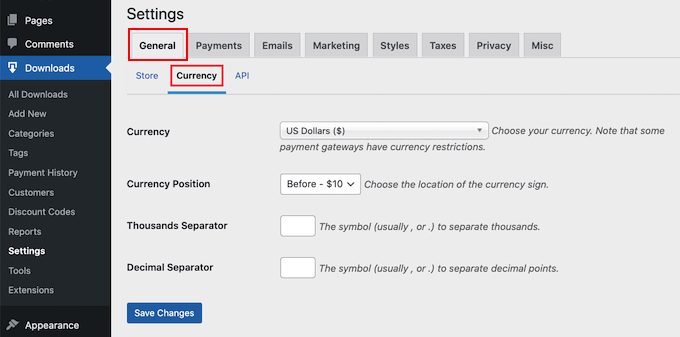
To show your prices in any currency other than US dollars, just click on the ‘General’ tab. Then, select ‘Currency.’
Next, open the ‘Currency’ dropdown. You can now choose the currency that you want to use on your online music store.
Just be aware that some payment gateways may not accept every currency. If you’re unsure, then you can always check your chosen payment gateway’s website. Most have a list of all the currencies they support.
With that done, click on ‘Save Changes’ to store your settings.
Step 3. Turn Your Music Files into Downloadable Products
Once you’ve set up a payment gateway, you’re ready to start adding music to your online store. With Easy Digital Downloads, you can add sell a single song or add multiple files to the same digital product. This is perfect for selling EPs, albums, compilations, and other products that have multiple separate audio files.
Create a New Digital Product
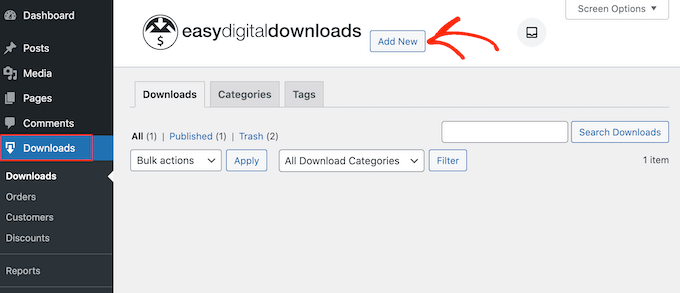
To create a digital product, simply select ‘Downloads’ from the left-hand menu. Then, click on the Add New button.
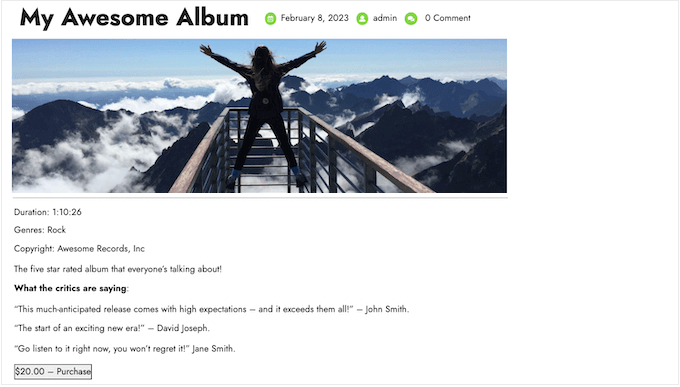
You can now type in a name for the product. This will be shown on the product’s page, so you’ll typically want to use something descriptive like the title of the album or single.
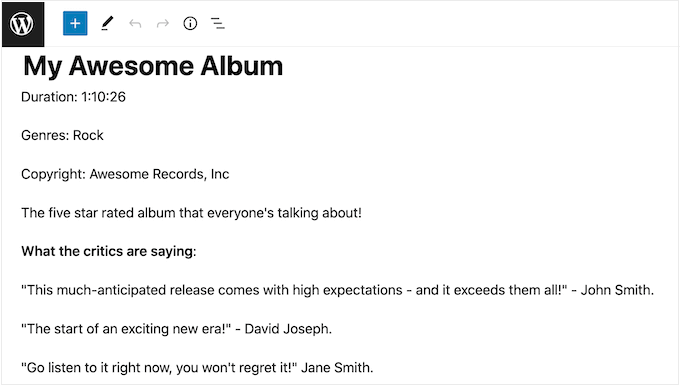
Next, type out the description that will appear on the product page.
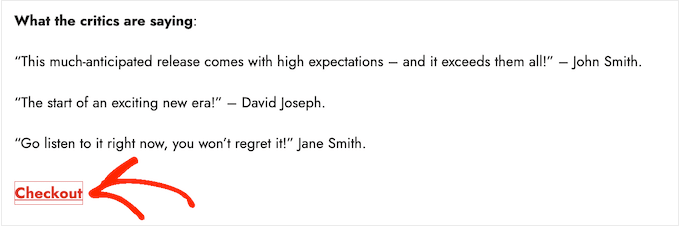
This should give shoppers all the information they need to decide whether the product is right for them. For example, you might include the genre, duration, and track listing. You might also want to show customer reviews, quotes from music critics, or the star rating.
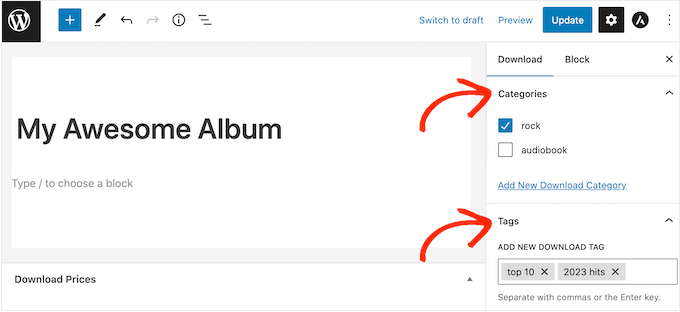
Add Categories and Tags
If you’re planning to sell music from lots of different artists, then categories and tags can help shoppers find what they’re looking for.
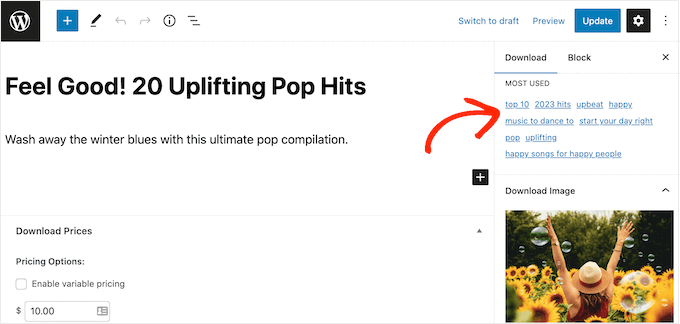
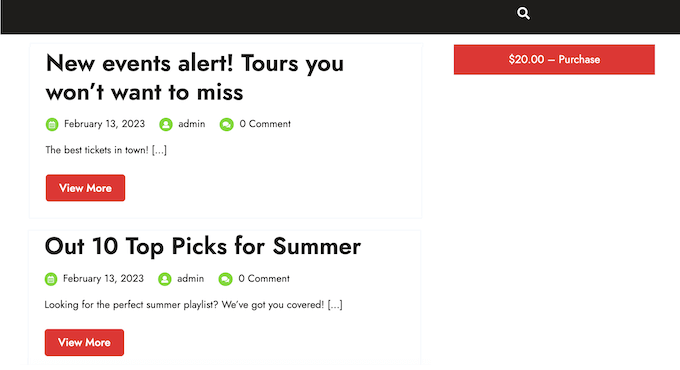
Helpful and descriptive categories can encourage shoppers to explore related artists and genres, which can get you more sales. You might even get creative and add tags for different characteristics like mood, influences, or activities, as you can see in the following image.
You can create new categories and tags in the ‘Categories’ and ‘Tags’ boxes.
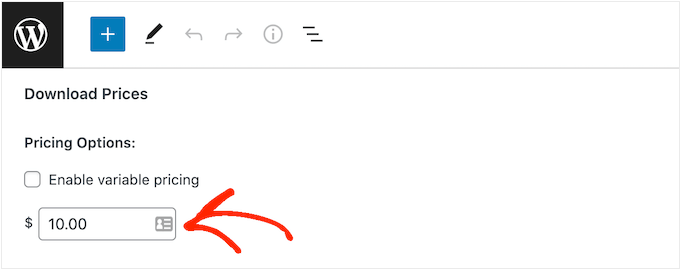
After that, you’ll want to set a price by scrolling to the Download Prices section.
Here, type in how much visitors need to pay before they can download the digital product.
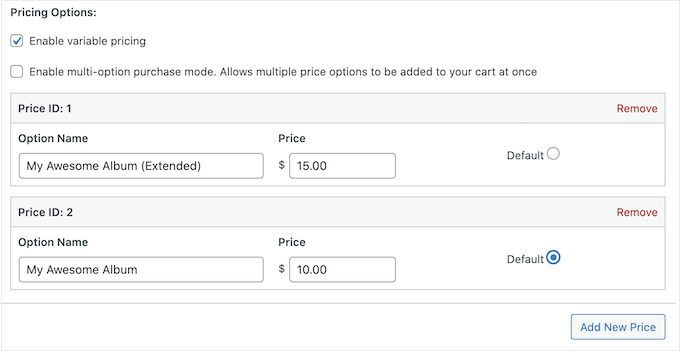
Most of the time you’ll want to charge a fixed amount, but Easy Digital Downloads also supports variable pricing.
You might use variable pricing to sell different versions of the same digital product. For example, you could create an extended album with additional tracks, or have several versions of a single with different bonus songs.
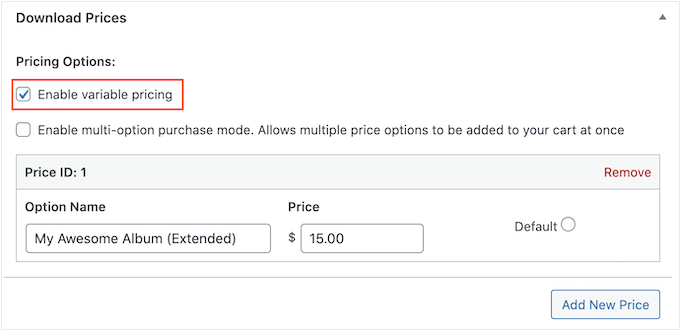
If you want to sell variations, then select the ‘Enable variable pricing’ checkbox. This adds a new section where you can start to build your variations.
For now, just type in a title and price for each variation.
To add more variations, simply click on ‘Add New Price.’ This adds another section where you can type in a title and price.
With that done, you’ll need to set the default variation, which will be selected when the visitor first lands on the product page. Simply check the radio button next to the variation you want to use.
Add Your Audio Files
You’re now ready to start uploading audio, which can either be a single file or multiple separate audio tracks.
When it comes to music, WordPress supports mp3, ogg, and wav. WordPress also supports m4a, although this format may not work in all browsers.
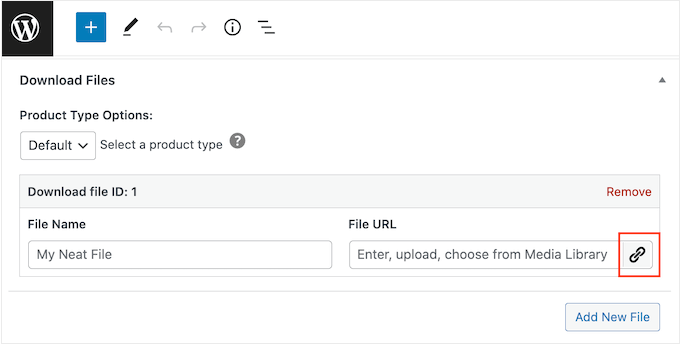
You can now scroll to the Download Files section and click on the ‘Upload a File’ icon.
Now simply choose a song from the media library, or upload a new file from your computer.
With that done, type a title into the ‘File Name’ field. This will be visible to the shopper, so you’ll typically want to use the song’s title. However, you can also add extra information such as the artist’s name.
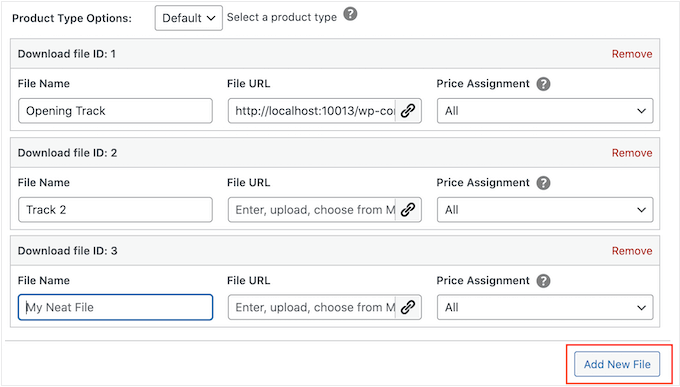
If you want to add multiple tracks to the digital product, then click on ‘Add New File.’ This adds a section where you can upload another file.
Simply repeat these steps to upload all the files you want to include in the digital product.
Finish Setting Up Variable Pricing (Optional)
Did you enable variable pricing in the previous step? If you’re selling different versions of the same product, then you’ll need to choose which files to include in each variation.
For example, you might release ‘My Awesome Album’ with 10 tracks, and ‘My Awesome Album Extended Edition’ with 12 tracks.
Note: If you set a single price, then skip ahead to the next section.
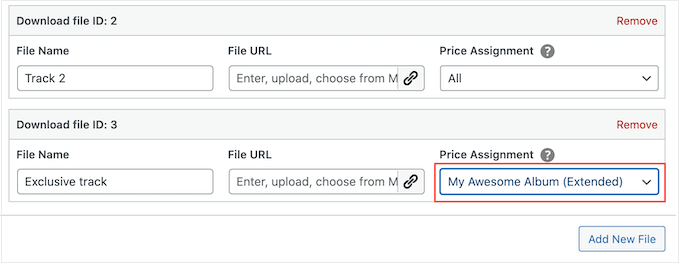
In the ‘Price Assignment’ column, you’ll see that every audio file is set to ‘All’ by default. This means it’s included in every variation.
To change this, simply open a file’s ‘Price Assignment’ dropdown and choose the variation that customers need to purchase, in order to get this audio file.
Simply repeat these steps to build unique variations with different track listings.
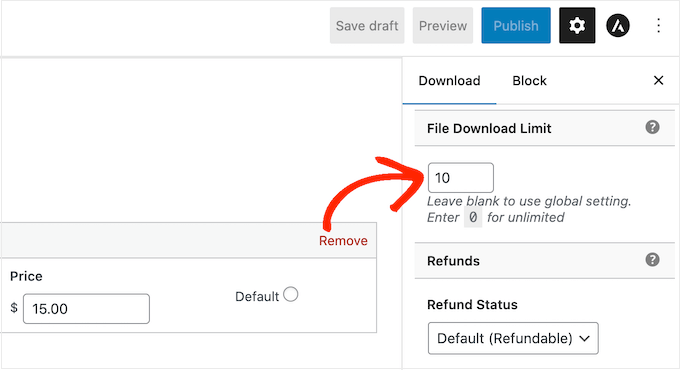
Protect Your Music By Setting a Download Limit
By default, a customer can download a product as many times as they want after purchasing it. This can be useful if the person accidentally deletes their download, or they want to listen to the track on multiple devices such as their smartphone, tablet, and computer.
However, offering unlimited downloads can make you vulnerable to scams. For example, a customer might share their direct download link with dozens of other people, who then download your music for free.
With that in mind, you may want to set a reasonable file download limit by typing into the ‘File Download Limit’ field.
Note: If you set this value too low, then customers may occasionally contact you asking for extra downloads. If there’s a genuine reason why they need to re-download the file, then you can simply resend the purchase receipt by going to Downloads » Payment History in your WordPress dashboard.
Create a Refund Policy
Hopefully, everyone who buys your music will be happy with their purchase. However, it’s still smart to think about how you’ll handle refunds.
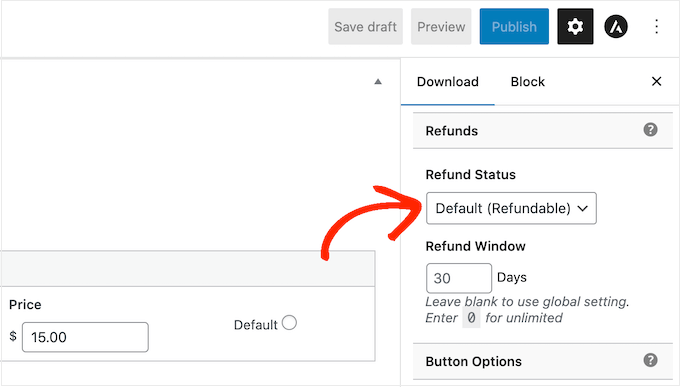
If you scroll to the ‘Refunds’ section in the left-hand menu, then you’ll see that Easy Digital Downloads offers your customers a 30-day refund by default.
If you want to give customers more or less time to claim a refund, then simply type a new number into the ‘Refund Window’ field.
A generous refund policy can make customers see your site as trustworthy and fair, which could get you more sales. It will also help turn hesitant visitors into first-time customers.
Giving unhappy customers their money back is a big part of good customer service. Even if they didn’t like their purchase, an easy refund process may still convince people to buy from you in the future.
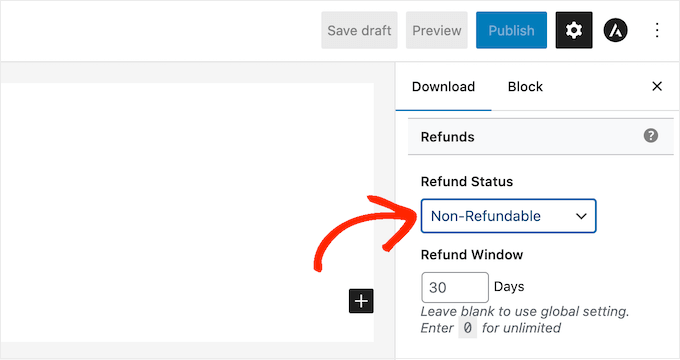
For that reason, we recommend offering refunds wherever possible. However, if you don’t want to give refunds, then open the ‘Refund status’ dropdown and choose ‘Non-Refundable.’
Upload Your Album or Song’s Cover Art
With that done, you’ll need to add a product image. This will typically be the album or single’s front cover, or the musician’s logo.
Pro Tip: If you don’t already have a product image, then you can create one using web design software such as Canva.
To add a product image, simply scroll to the Download Image section and then click on the ‘Set Download Image’ link.
This launches the WordPress media library where you can choose an image or upload a new file from your computer.
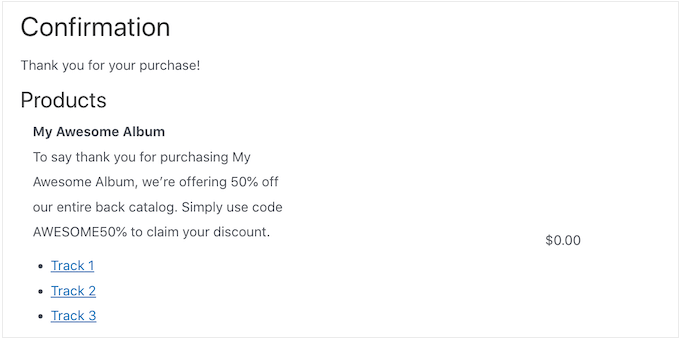
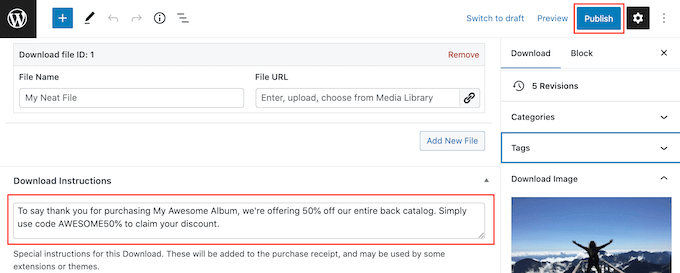
Add Download Instructions
Finally, you may want to add some download instructions, which will appear on the order confirmation page.
They’ll also be added to the bottom of the purchase receipt email customers get when they buy from your site.
You can use this section to share technical information, such as the file format or the programs it’s compatible with. However, you can also write a thank you note, or even share exclusive perks such as a coupon code.
No matter what information you want to share, go ahead and type it into the ‘Download Instructions’ box.
Once that’s done, you can go ahead and click on the ‘Publish’ button to make the digital download live.
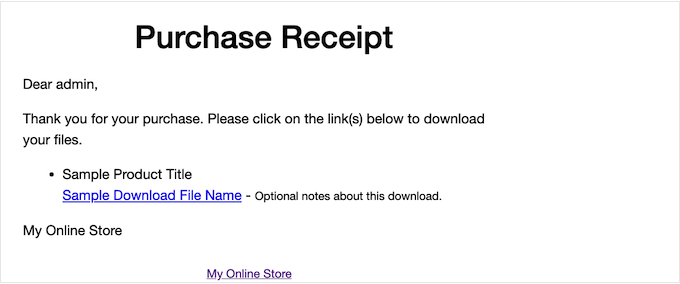
Step 4. Customize Your Digital Download Emails
Every time someone buys music from your store, Easy Digital Downloads will send them an email.
Inside the email, they will find a download link to their purchased music.
While this email has everything the customer needs by default, it’s a good idea to customize it. For example, you might help your email stand out by adding your own branding and logo.
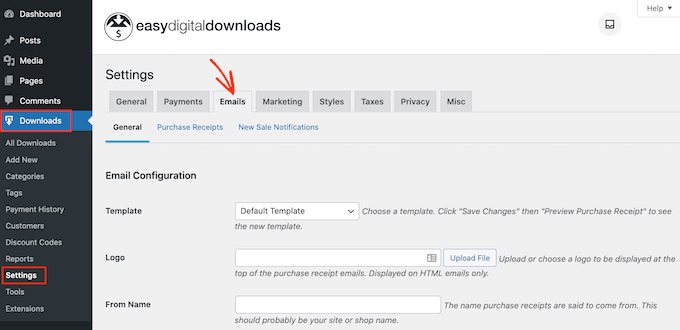
To customize the default email, head over to Downloads » Settings. Then click on the ‘Emails’ tab.
Add Your Own Logo and Branding
You may want to start by adding a logo to the purchase confirmation email.
This logo appears at the top of the screen, so customers can immediately see who the purchase email is from.
To add a logo, click on the ‘Upload File’ button. You can now either choose an image from the WordPress media library or upload a file from your computer.
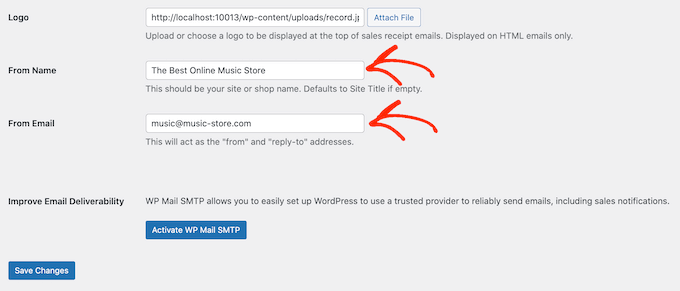
Change the ‘From’ Name and Email
You can also add a ‘From Name’ which will appear in the customer’s inbox. With that being said, you’ll want to use something that the customer will recognize such as the name of your band or online music store.
You’ll also need to add a ‘From Email,’ which will act as the ‘from’ and ‘reply-to’ address.
Some customers may reply to the purchase receipt email. For example, if they’re having problems downloading your music, then they might reach out by clicking ‘Reply.’
If shoppers don’t get the purchase receipt email, then they won’t be able to download the music they just bought.
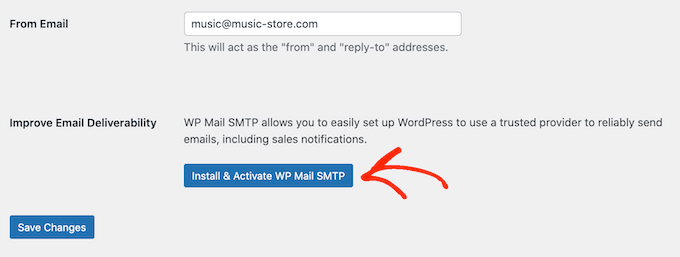
This is a bad customer experience, so you’ll want to make sure the purchase receipt email arrives in the shopper’s inbox and not in their spam folder. For that reason, we recommend using WP Mail SMTP to improve email deliverability rates.
Simply click on the ‘Install & Activate WP Mail SMTP’ button and then follow the onscreen instructions to configure the free plugin. For more information, please see our step-by-step guide on how to fix the WordPress not sending email issue.
When you’re finished, don’t forget to click on the ‘Save Changes’ button.
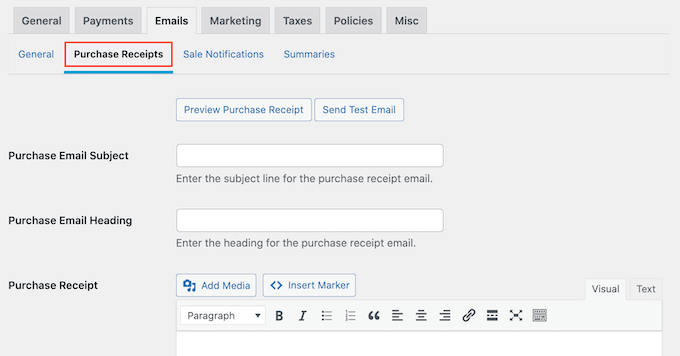
Write Your Purchase Email
After all that, click on the ‘Purchase Receipts’ tab.
On this screen, you can type in an email subject, add a heading and also change the email’s body text.
You could simply type in the text that you want to send to every customer. However, you can create more helpful and personalized emails by using the Conditional Emails feature.
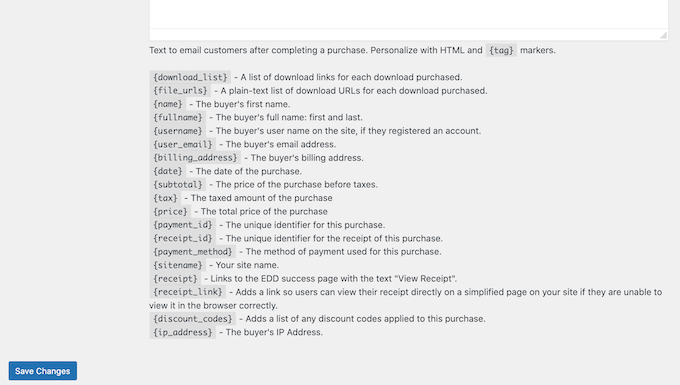
Conditional Emails use ‘template tags’ to personalize your messages. These template tags change based on factors such as the buyer’s name, how much they paid for their music download, and any coupon codes they used for the purchase.
When Easy Digital Downloads sends an email, it’ll automatically replace the template tags with real values.
To see all the different tags you can use, simply scroll to the bottom of the page.
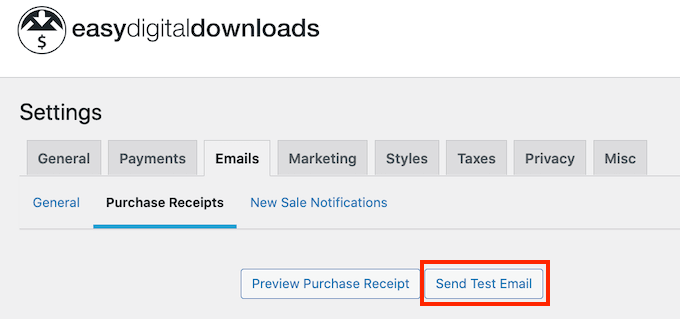
Test Your Purchase Receipt Email
When you’ve finished making changes, you may want to send a test email to check how the message will look to your customers.
Simply click on the ‘Send Test Email’ button and Easy Digital Downloads will send an email to your admin email address.
When you’re happy with how the purchase receipt email looks, you can go ahead and click on the ‘Save Changes’ button.
Step 5. Test Your Digital Music Download
After all that, it’s a good idea to test the digital download to see whether there are any problems or anything you want to change.
Enable Test Purchases
To start, you’ll need to put Easy Digital Downloads into test mode so you can buy products without having to enter any payment information.
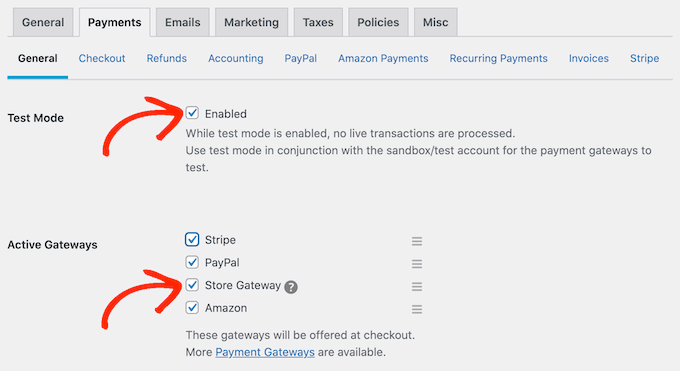
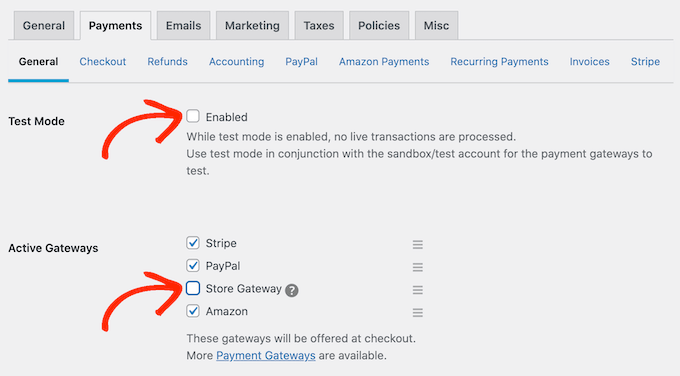
In the WordPress dashboard, go to Downloads » Settings and then click on ‘Payments.’
On this screen, check the box next to ‘Test Mode.’
Next, select ‘Store Gateway’ as this allows you to make a purchase without typing in any credit or debit card information.
After that, click on ‘Save Changes’ to store your settings.
Make a Test Purchase
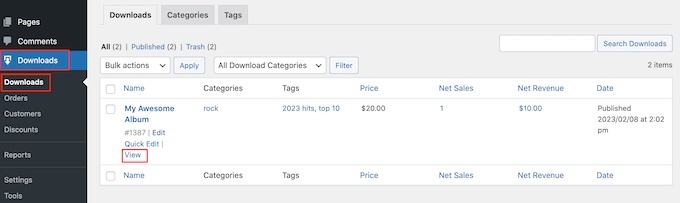
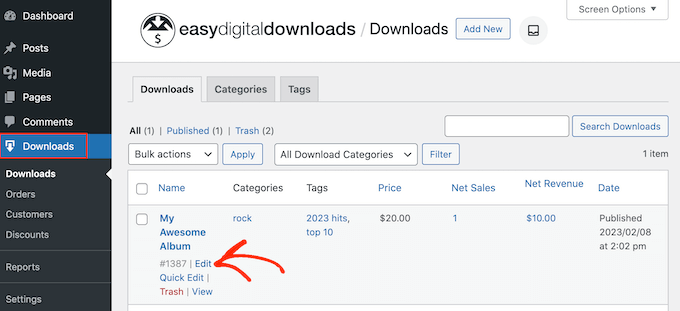
Now you’re in test mode, go to Downloads » Downloads and hover your mouse over the product you want to test.
When it appears, click on the ‘View’ link.
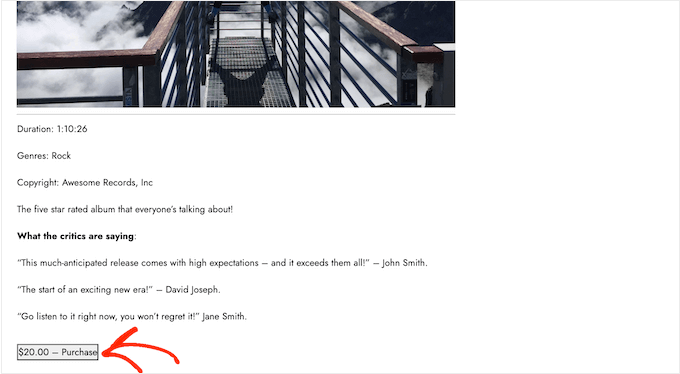
This opens the item’s product page.
To go ahead and make a test purchase, click on the ‘Purchase’ button.
Easy Digital Downloads will now add this product to your shopping cart.
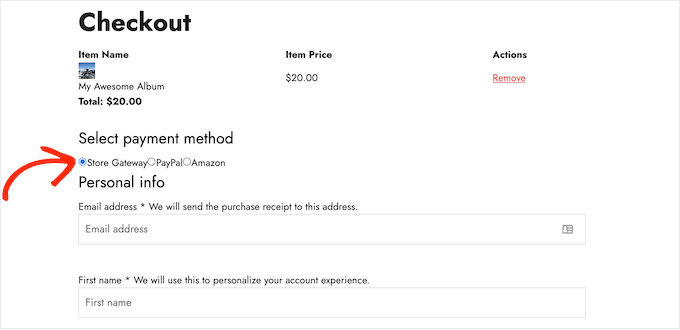
To proceed, click on the ‘Checkout’ button.
Under ‘Select payment method,’ click to select the radio button next to ‘Store Gateway.’
You can now type in your name and email address. Easy Digital Downloads will send the purchase receipt to this address, so you’ll need to use a real email address that you have access to.
After a few moments, you’ll get a purchase confirmation email containing links to download each track in the digital product.
If everything works as expected, then you’re ready to start accepting payments from real-life music fans.
To take Easy Digital Downloads out of test mode, go to Downloads » Settings, and then select the ‘Payments’ tab. Here, uncheck the box next to ‘Test Mode’ and the box next to ‘Store Gateway.’
At this point, you’ve created one or more digital products, but you still need to drive potential customers to your product pages so they can buy your music.
This might mean creating a sales page where you advertise all the latest releases, adding a particular product page to your website’s menu, or even highlighting your favorite track on a custom home page.
You could even write a WordPress blog where you talk about music topics such as the latest releases, your tour experiences, or your favorite records. These posts are the perfect place to include links to any relevant albums and singles that readers may want to buy.
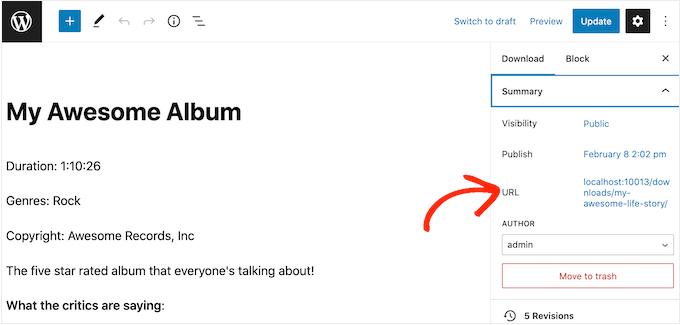
No matter how you promote a product, you’ll need to know its URL.
To find this link, head over to Downloads » Downloads. You can then hover your mouse over the product and click on its ‘Edit’ link.
You’ll find the URL under ‘Summary’ in the right-hand menu.
You can now link to this product page from any area of your website, simply by using its URL. To learn more, see our step-by-step guide on how to add a link in WordPress.
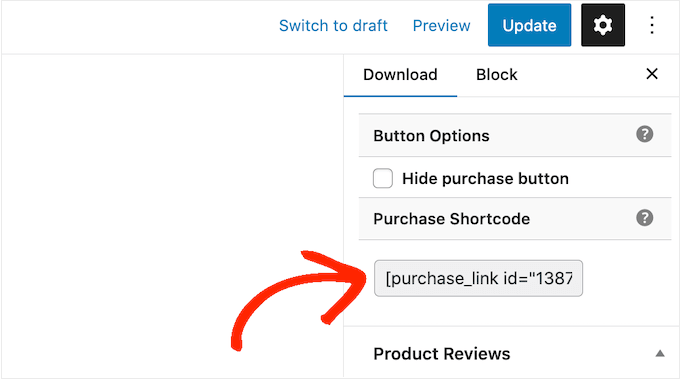
Easy Digital Downloads also creates a ‘Purchase’ button for each digital download. Visitors can click this button to add that specific product to their shopping cart.
You can add this button to any page, post, or widget-ready area. This allows visitors to start the purchasing process without necessarily visiting the product’s page.
To get the button’s shortcode, simply scroll to the product’s Download Settings section. You can then copy the text in the ‘Purchase Shortcode’ field.
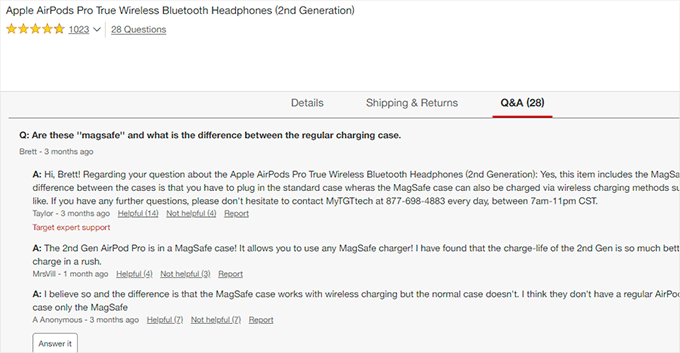
Are you looking to add a product question and answer section in WooCommerce?
Adding a Q&A section enables customers to ask questions about the product before buying it, and see the questions and answers of other customers. This helps recover abandoned cart sales and improve customer engagement in your store, and reduce support requests.
In this article, we’ll show you how to easily add product questions and answers in WooCommerce.
Why Should You Add Product Q&A in WooCommerce
You may have noticed the product question-and-answer section on popular eCommerce websites like Amazon, Target, Best Buy, and more.
Adding a product questions and answers section allows customers to ask questions about a product right there on the product page.
You or your customers can then answer that question and it becomes visible to all other new customers who may have the same question in mind.
Over a period of time, your product page will have its own frequently asked questions section, which will help increase sales and reduce abandoned cart rates.
Adding a question and answers section to your online store also allows you to curate user-generated content which improves your WooCommerce product search rankings.
That being said, let’s see how you can easily add product questions and answers to WooCommerce.
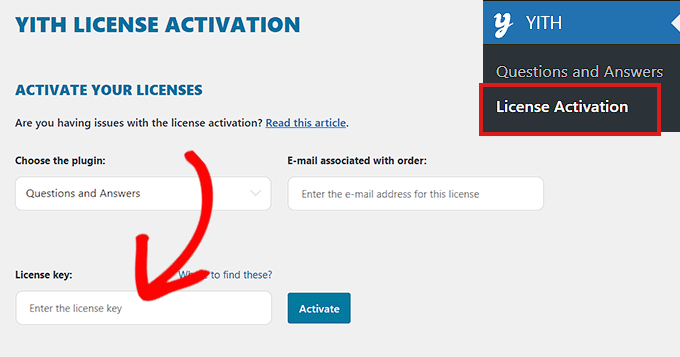
Upon activation, go to the YITH » License Activation page and enter your license key. You can find this information under your account on the plugin website.
Don’t forget to click on the Activate button after entering your license key.
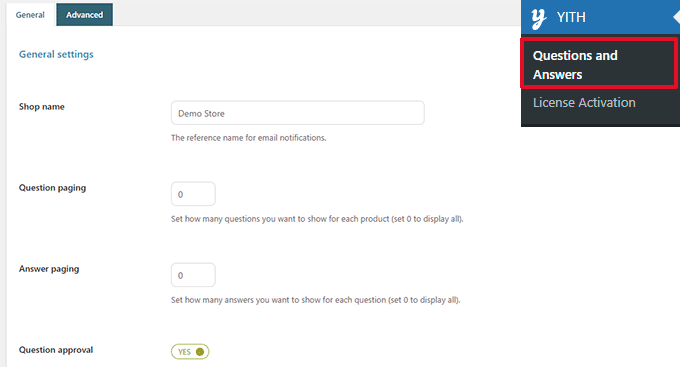
Next, you need to go to the YITH » Questions and Answers page to configure plugin settings.
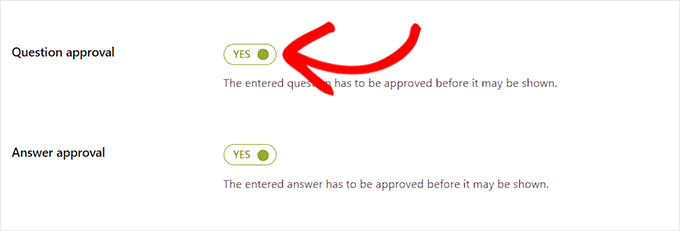
From here you need to scroll down to the ‘Question Approval’ option and simply toggle the switch to ‘Yes’.
Once you do that, the questions on the product pages will have to be approved by an administrator before they are displayed on your WooCommerce store.
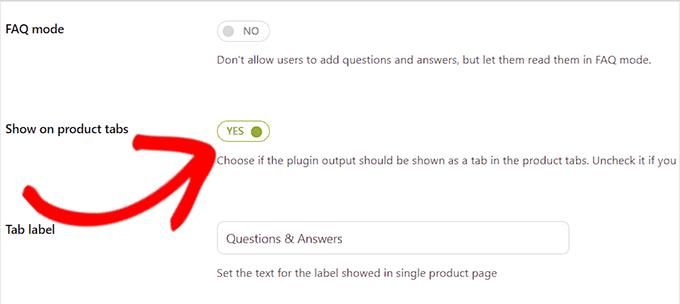
Next, you need to scroll to the ‘Show on Product Tabs’ option.
Here, you need to toggle the switch to ‘Yes’ so that the plugin will automatically add a ‘Questions and Answers’ section to product pages.
After that, don’t forget to click the ‘Save Options’ button to store your changes.
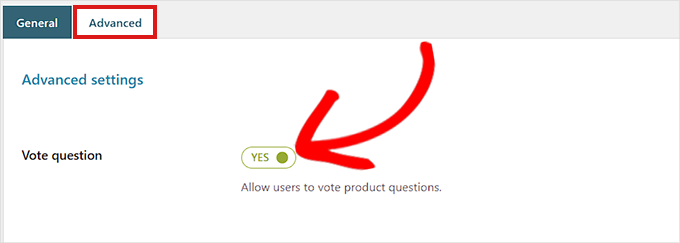
Now, you need to switch to the ‘Advanced Settings’ tab.
From here, simply toggle the ‘Vote Question’ switch to ‘Yes’ if you want to allow users to vote on product questions.
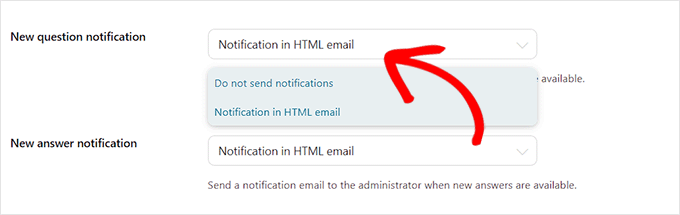
Next, you can choose if you want to get an email notification once a question is submitted on your website.
Simply select the ‘Notification in HTML Email’ option from the dropdown menu next to the ‘New question notification’ field.
Similarly, you can also choose the ‘Notification in HTML Email’ option in the ‘New answer notification’ field if you want to receive an email once a question is answered on your site.
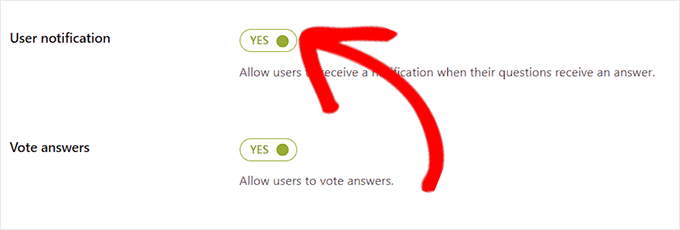
Your user can also receive a notification once the question submitted by them is answered.
To enable this, you need to toggle the switch next to the ‘User Notification’ option to ‘Yes’.
After that, you can review other settings. The default options would work for most websites but you can change them if needed.
Finally, don’t forget to click on the ‘Save Options’ button to save your changes.
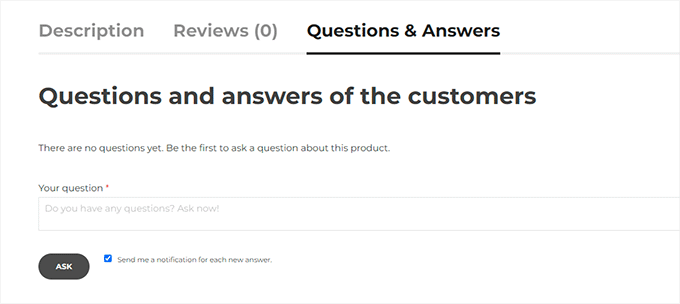
You can now visit your website to see the Questions & Answers section appear on your product pages.
From here, your customers can submit their questions.
Moderating Questions and Adding Answers
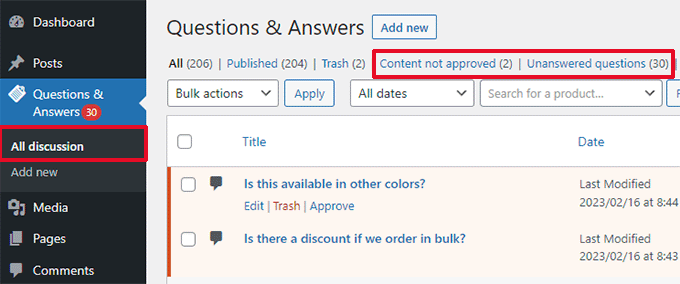
You will receive an email notification for new questions submitted by the users. You can also view them by visiting the Questions & Answers » All discussion page.
You can sort entries here by ‘Content not approved’ or ‘Unanswered Questions’.
You can also take your mouse over a question and click ‘Approve’ to make it live.
To add an answer to a question, you can simply click on the ‘Edit’ link below that question. On the edit screen, scroll down to the ‘Your Answer’ section to answer the question.
Repeat the process if you have more unanswered questions.
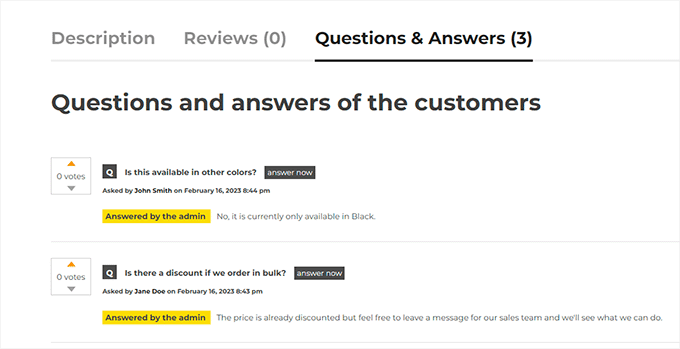
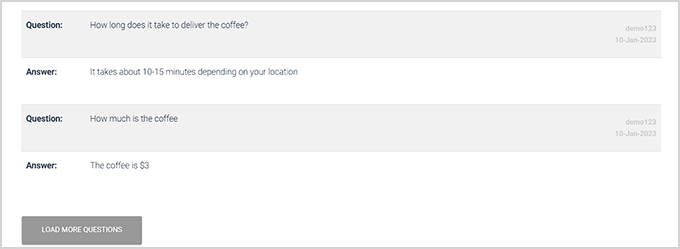
This is how the product questions and answers section looked on our demo store.
2. Adding a Product Q&A Section Using a Free Plugin
If you want to use a free plugin to add a product Q&A section to your WooCommerce store, then this method is for you.
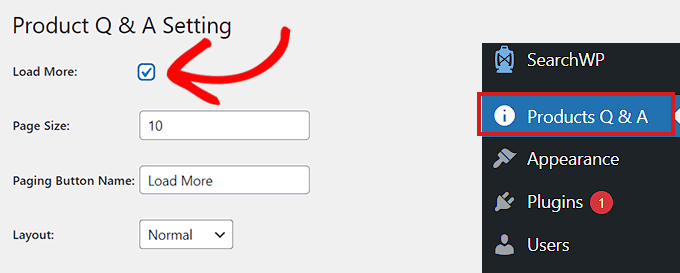
Upon activation, click the Product Q&A menu from the WordPress admin sidebar which will direct you to the ‘Product Q&A Settings’ page.
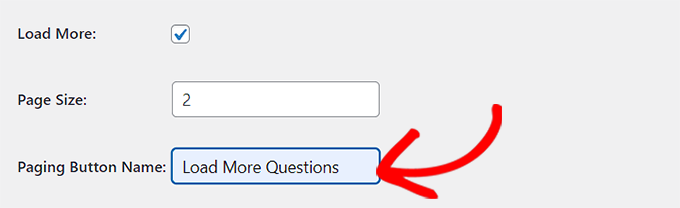
From here, simply check the ‘Load More’ option if you want to add a ‘load More’ button to your product Q&A section.
Adding this button will allow customers to load older questions and reduces the page load time if a product gets a ton of questions.
Next, you need to choose a page size.
This means that you need to select a default number of questions that are shown in your Q&A section.
All the other questions will be hidden from view. Users will be able to access those questions after clicking the ‘Load More’ button.
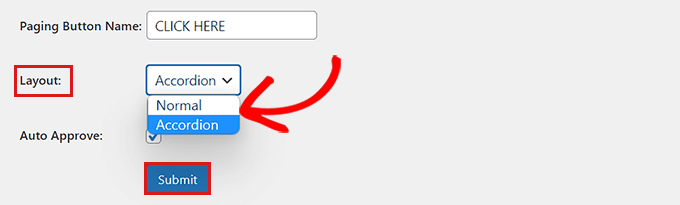
You can also change the text used for the ‘Load More’ button to anything you like. For instance, you can call it ‘Load more questions’.
Next, you need to choose a layout for your product Q&A section from the dropdown menu next to the ‘Layout’ option.
You can choose the ‘Normal’ option if you want to display the Q&A section in paragraphs.
On the other hand, you can also display your questions as an Accordion menu. This means users will need to click on a question to view the answer.
Once finished, don’t forget to click the Submit button at the bottom to save your settings.
Managing Product Question and Answers
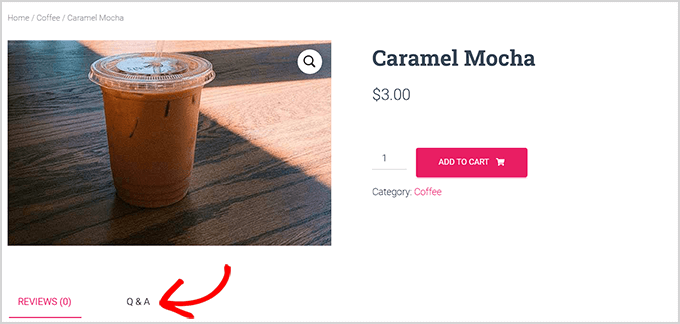
After plugin configuration, simply visit any product page on your store. You’ll notice a new Q&A tab added there.
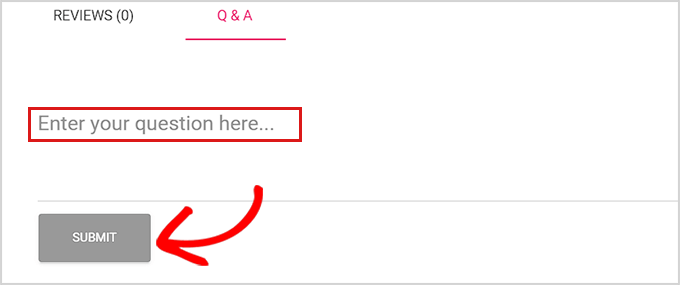
Clicking on it will display the ‘Q&A’ section where customers can submit their questions.
You will receive an email notification when a user submits a question.
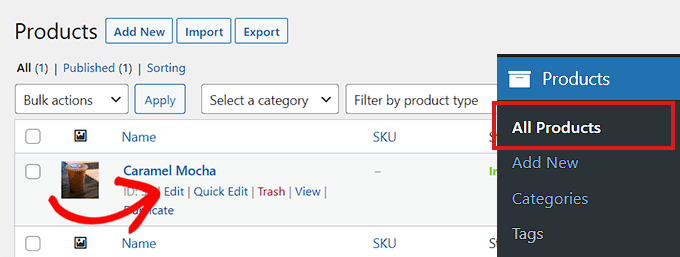
Now, to answer customer questions, you need to go to the Products » All Products page from the WordPress admin dashboard.
From here, simply click the ‘Edit’ button under a product to open up its’ ‘Edit Product’ page.
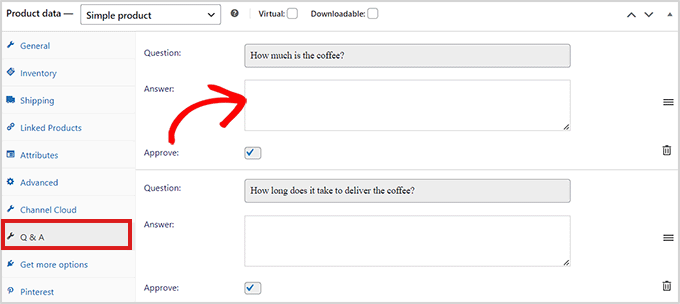
Next, you need to scroll down to the ‘Product Data’ section and click the ‘Q&A’ tab from the left column.
Here, all the questions submitted on that specific product’s page will be displayed.
Now, you need to simply type the answer to a customer query in the ‘Answer’ field.
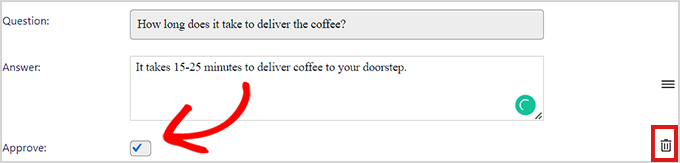
If you want to delete a question because it’s inappropriate or irrelevant to your product, then you can also do that by clicking the Delete icon on the right corner of each question.
You can also uncheck the ‘Approve’ option if you don’t want to display the question on the product page.
After you have answered the product questions, go to the top of the page and click the ‘Update’ button to save your changes.
Now, you can visit the product page to see the Questions and Answer section in action.
We hope this article helped you learn how to add product questions and answers in WooCommerce. You can also check out our top picks for the best WooCommerce plugins to grow your store, and our beginner’s guide on how to add web push notification to boost sales.
If you liked this article, then please subscribe to our YouTube Channel for WordPress video tutorials. You can also find us on Twitter and Facebook.
WP101 is one of the most trusted premium WordPress video training providers in the market. Over 3 million users have learned WordPress from their WordPress video tutorials. The WP101 Plugin allows WordPress agencies and service providers an easy way to offer white-labeled professional WordPress training videos to their clients.
Introduction to WP101 – Quick Overview
WP101 offers professionally-produced WordPress training videos to help you learn WordPress, fast. It’s a perfect solution for small businesses owners, large corporations, and government agencies who want to offer professional WordPress training videos in their employee onboarding process.
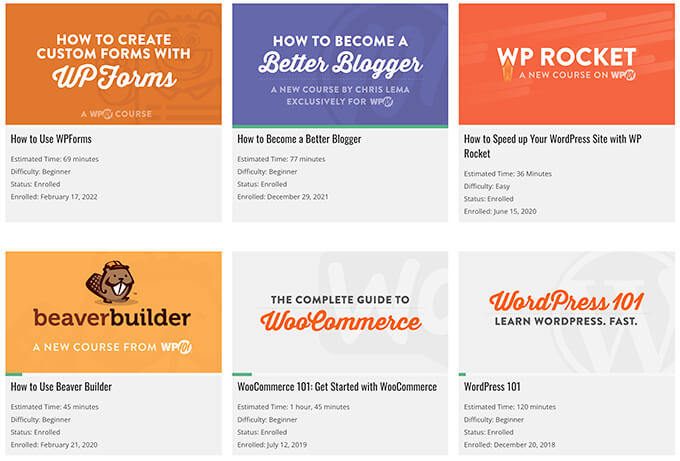
With WP101, you get access to over 200+ WordPress training videos that cover everything you need to learn the WordPress user interface in a university style format.
In addition to the popular WordPress 101 series for both Gutenberg and the Classic Editor, the current library also includes video tutorials for top WordPress plugins including WooCommerce, WPForms, Elementor, Beaver Builder, and more.
The WP101 Plugin makes it easy for WordPress developers and agencies to offer white-label training videos to their clients, right inside the WordPress dashboard.
It gives you the ability to add your own custom videos as well as selective show / hide videos based on client’s needs.
Whether you’re a small business owner or large corporation, I highly recommend adding WP101 training to your employee onboarding process.
If you’re a WordPress freelancer or agency, then you should consider adding the WP101 Plugin to your client and build a recurring revenue stream.
Background Story – Why WP101?
Both WPBeginner and WP101 started around the same time with a similar mission: making it easy for people to learn WordPress.
At WPBeginner, we did it with our easy to understand written tutorials, while Shawn at WP101 offered premium video training.
I have been friends with Shawn Hesketh, founder of WP101 for a long time, and we have enjoyed over a decade of coopetition. I have a lot of admiration and respect for the massive impact he’s had in the growth of the WordPress community.
After 14+ years of creating WordPress training videos, when Shawn was ready to move on to the next chapter of his life, we started talking about the future of WP101 and carrying his legacy forward.
Given my experience running the largest WordPress resource site, it made perfect sense for us to be the future custodian of the WP101 brand.
It gives me great joy to be there for a friend and offer him the exit that he deserves as he pursues the next chapter of his career. At the same time, it’s an honor and a privilege that Shawn trusted us to carry the mission forward.
Note: Want to join our remote team to work on something awesome & make an impact? We’re hiring. Come work alongside me and help shape the future of the web.
What’s Coming Next?
Our work is just starting.
My goal is to create the best class-room style WordPress training videos to help WordPress grow in enterprise, government agencies, as well as at the school and collegiate level.
I’m really excited about the latter because I believe that education helps level the playing field, and that’s the mission of my Balkhi Foundation.
WordPress is an open source platform, and open source is one of the greatest ideas of our generation. It has the power to transform the lives of so many people across the world, like it did for me when I first immigrated to the US.
While talent is everywhere, opportunities are not. I want to use the WP101 training platform to bring opportunities everywhere, so we can help shape the future of the web for billions worldwide.
This is a big mission, and I need your help. If you have experience with instructional design or higher-ed, I would love to chat with you to see how we can work together to bring WordPress to classrooms and universities. Please send me a message via WPBeginner contact form.
If you’re passionate about teaching WordPress and want to be a part of our mission, we’re hiring content creators and trainers. While the listings for these roles aren’t public, just send me a brief message via our contact form with your resume, and I’ll get in touch with you.
As always, I want to thank you for your continued support of WPBeginner.
Every time I share an announcement like this, I realize that I’m only able to do what I love every day because of you, our amazing readers, and I’m extremely grateful for your support throughout the years.
WPBeginner and Awesome Motive would not be here without YOU, and I just want to say how much I appreciate all of you.
I look forward to continuing serving you, and the larger WordPress / web ecosystem for years to come.
Yours Truly,
Syed Balkhi Founder of WPBeginner
P.S. Want us to acquire or invest in your WordPress business? Learn more about the WPBeginner Growth Fund.
If you’re running a WooCommerce store, you know how important it is to understand your customers’ behavior. Tracking customer behavior allows you to identify pain points in your sales funnel, understand what’s driving sales, and optimize your marketing campaigns accordingly. However, tracking customer behavior is easier said than done. With so many different platforms and [...]
Do you want to organize media uploads by user in WordPress?
If you run a multi-author website, then you may want to restrict each author’s media library access to only their own uploads. This can prevent an author from accidentally deleting another user’s images, and help keep subscriber-only content private.
In this article, we’ll show you how to organize media uploads by users in WordPress.
Why Restrict Author Access to Media Uploads?
If you have a multi-author WordPress blog, then people might be uploading lots of different images. This can make it difficult for an author to find the right image, or they might delete or edit another person’s media file by accident.
This can cause all sorts of problems including poor productivity, lots of extra work for site admins and editors, and a complicated editorial workflow.
This unlimited access can also be a privacy concern. For example, if you’re working on a new product or idea, then other authors might see confidential images in the media library before you make a public announcement.
If you have a WordPress membership site, then contributors and subscribers may be able to access premium media files they shouldn’t have access to. For example, if you sell online courses then a contributor might use their media library access to download premium PDFs and other course materials, without buying a subscription.
That being said, let’s take a look at how to restrict who can see media uploads inside your WordPress admin area. Simply use the quick links below to jump straight to the method you want to use.
If the user doesn’t have this permission, then once this plugin is activated, they won’t be able to access another user’s files in the WordPress media library. This allows you to organize media uploads by users, without restricting access for admins and editors.
This plugin works out of the box and there are no settings for you to configure, so you can simply install and activate the Frontier Restrict Access plugin. For more details, see our guide on how to install a WordPress plugin.
Method 2. Organizing Media Uploads Using Code (Advanced)
Another option is to restrict access to files in the media library using code. This method requires you to add a code snippet to your WordPress blog or website, so it isn’t the most beginner-friendly method. However, you won’t need to install a separate plugin just to organize your media uploads.
Often, you’ll find guides with instructions to add custom code to your WordPress theme. However, this isn’t recommended as mistakes and typos in your code can cause common WordPress errors, or even break your site completely.
WPCode is the best code snippets plugin used by over 1 million WordPress websites. It makes it easy to add custom code in WordPress without having to edit the functions.php file.
For this method, we’ll be adding code that checks whether the user has the edit_others_posts permission. If they don’t have this permission, then the code snippet below will stop them from accessing other people’s files in the WordPress media library.
Next, just scroll to the ‘Insertion’ section. WPCode can add your code to different locations, such as after every post, frontend only, or admin only.
We want to use the custom PHP code across our entire WordPress website, so click on ‘Auto Insert’ if it isn’t already selected. Then, open the ‘Location’ dropdown menu and choose ‘Run Everywhere.’
After that, you’re ready to scroll to the top of the screen and click on the ‘Inactive’ toggle, so it changes to ‘Active.’
Finally, click on ‘Save Snippet’ to make the PHP snippet live.
Now, users will only have access to the files they upload to the WordPress media library.