Do you want to add your WordPress products to Google Shopping?
Adding your online store products to Google Shopping can help you increase traffic, reach more customers, and generate greater revenue.
In this article, we’ll show you how to easily add WordPress products to Google Shopping.
Why Should You Add WordPress Products to Google Shopping
Google Shopping is a virtual marketplace like Amazon and Etsy, where users can search, view, and compare products from different online stores that have paid to advertise their products.
If you have a WooCommerce store, then adding your products to Google Shopping can prove to be extremely beneficial for your business.
Your products will be shown to all users browsing through Google shopping which will increase traffic on your WordPress website, generate more revenue and bring in more customers.
That being said, let’s see how you can add WordPress products to Google Shopping.
How to Add WordPress Products in Google Shopping
Step 1: Creating a Google Merchant Account
To add your products to Google Shopping, you have to start by creating an account in the Google Merchant Center. This is the place where your product information will be stored for viewing by Google Shopping.
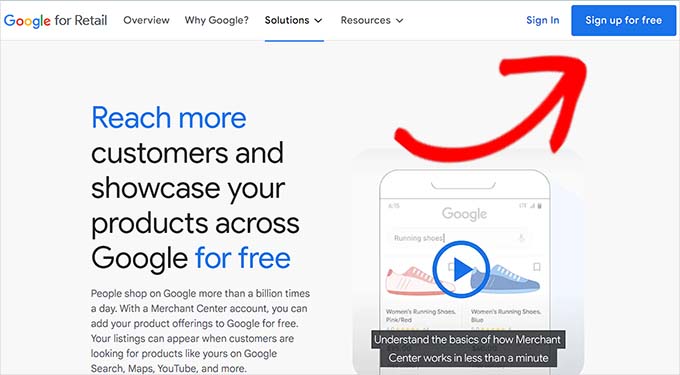
First, go to the Google Merchant Center page and click the ‘Sign up for free’ button.
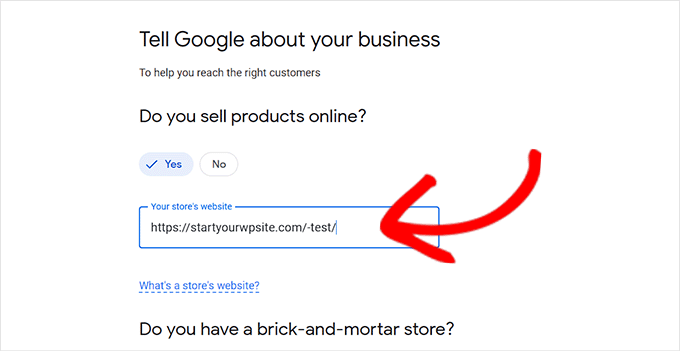
After that, Google will ask you about your online business.
Just check the answers that apply to you, and then provide your website’s URL.
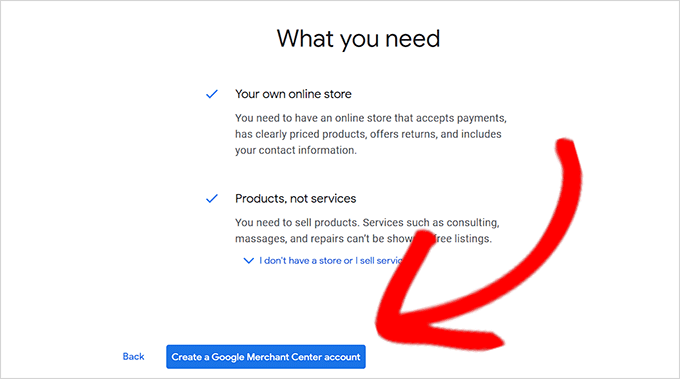
After you’ve provided the details, you’ll be redirected to another page.
Here, you simply have to click the ‘Create a Google Merchant Account’ button at the bottom of the page.
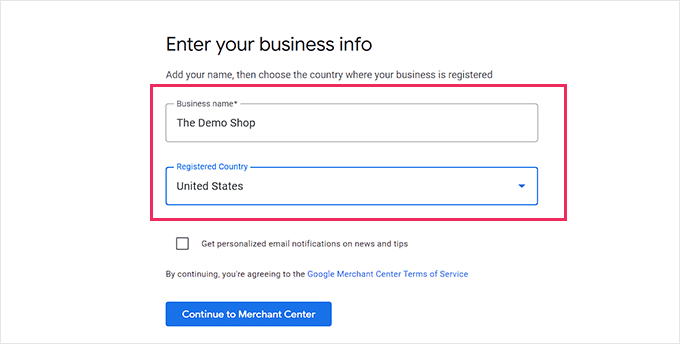
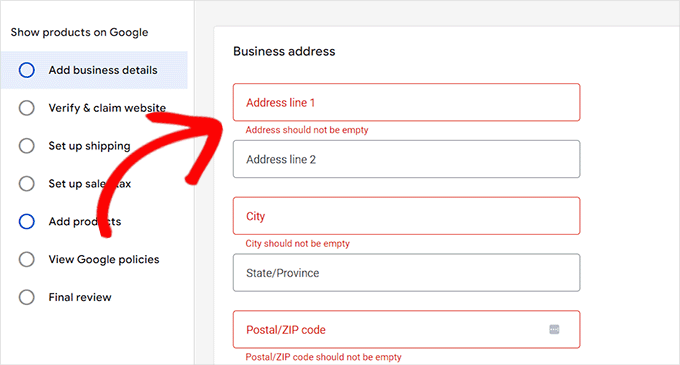
Now, you will be asked to provide your business details. You can start by writing your business name.
Next, select the country where your business is based from the dropdown menu below the ‘Registered Country’ option.
After that, click the ‘Continue to Merchant Center’ button.
You’ve successfully created your Google Merchant Account. Now all you have to do is provide your business info and shipping details.
Once you’ve filled in those details, simply click the ‘Save’ button at the bottom to store your settings.
Step 2: Linking Your Google AdWords Account
Now you’ll have to link your Google AdWords account to your Google Merchant Center account so that you can show your products via Google Shopping.
To link your account, simply go to the Google Merchant Center dashboard and click the gear icon at the top of the page.
Clicking it will open up a ‘Tools and Settings’ prompt. Here you simply have to choose the ‘Linked Account’ option present.
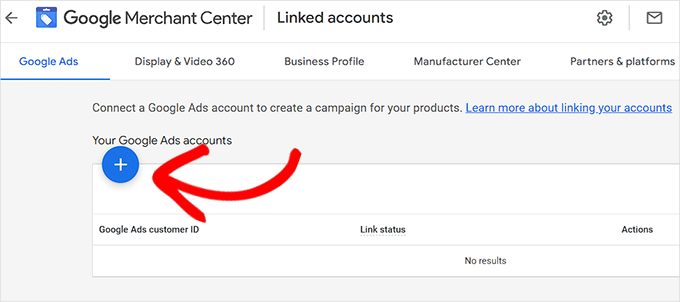
This will take you to the ‘Linked Accounts’ page.
Now you simply have to click the ‘+’ button to create your Google Ads account.
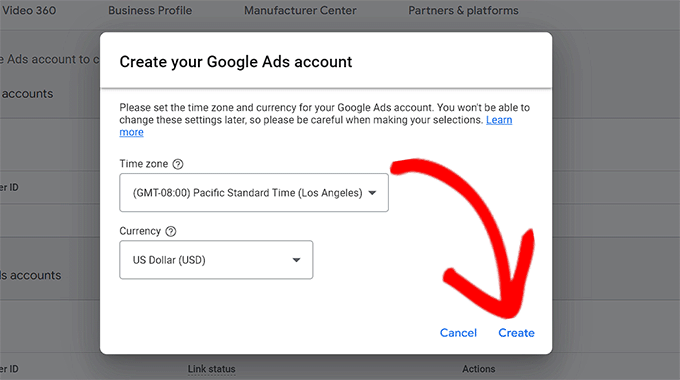
This will open up a ‘Create Your Google Ads Account’ prompt.
Simply choose your preferred time zone and currency and then click the ‘Create’ button.
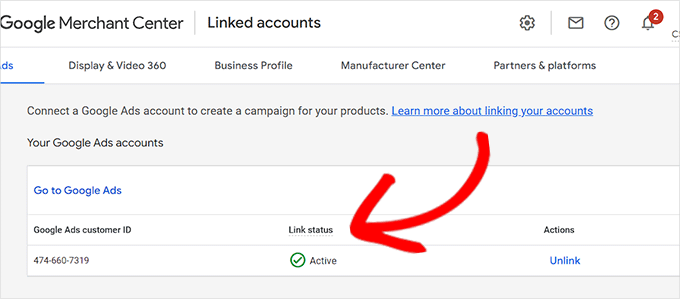
You have now successfully created your Google Ads account.
This is how it will look once your account has been created.
Step 3: Adding WordPress Products to Google Shopping
To add your WordPress products to Google Shopping, we will be using the ELEX Google Shopping plugin to display your WooCommerce products in Google Shopping.
Upon activation, head over to the Google Shopping Feed » Create Feeds page from the WordPress admin sidebar.
From here, simply fill in your business details and click the ‘Continue’ button at the bottom.
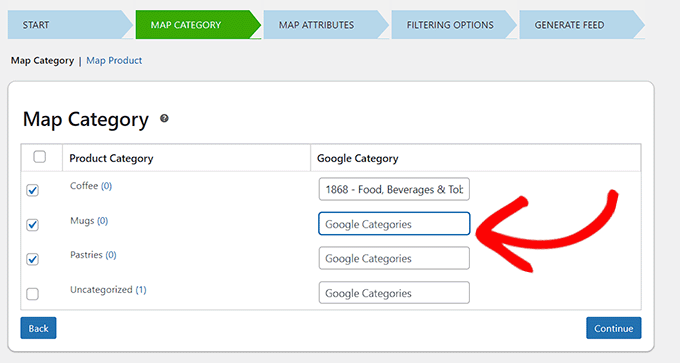
Next, you’ll be taken to the ‘Map Category’ page. Here you simply have to select your product categories.
Simply type your product categories in the ‘Google Categories’ tab and click ‘Continue’
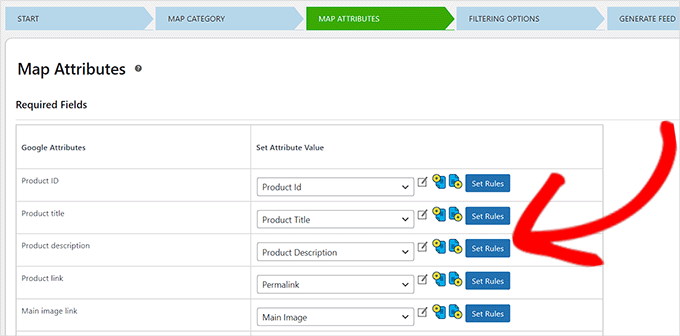
After that, you’ll be directed to the ‘Map Attributes’ page.
This is where you’ll have to fill in your product details including product id, product description, product link, pricing, image, and more.
Here select and fill in as many attributes as possible for more visibility in Google Shopping and click the ‘Continue’ button.
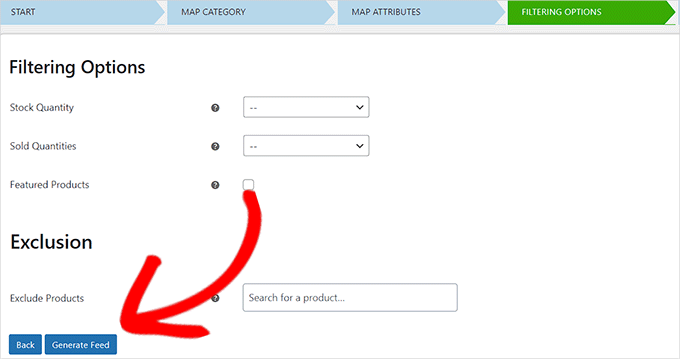
Now that you’re on the ‘Filtering Options’ page, simply fill in the details as required for your online store.
For example, you can include how many items you have in stock or note how many have sold already.
Next, simply click the ‘Generate Feed’ button at the bottom.
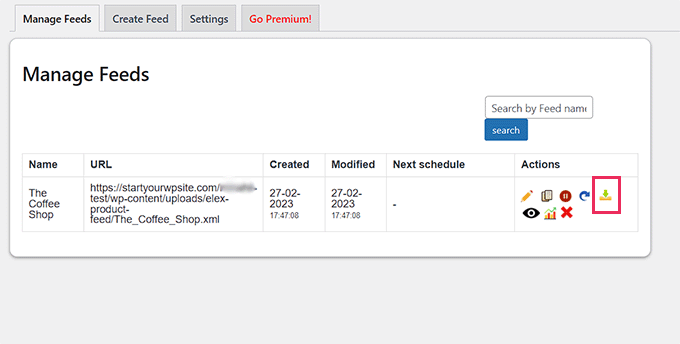
After you’ve created your Google Shopping feed, go to the Google Shopping Feed » Manage Feeds page from the admin sidebar.
Here you will be able to view your Google Shopping Feed. Now you have to simply click the ‘Download’ button beside it.
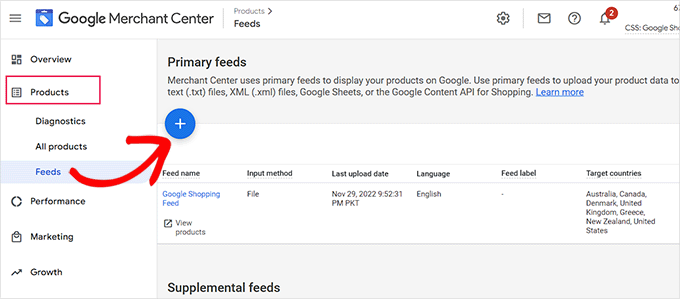
Once you’ve downloaded your feed as an XML file, go back to the ‘Google Merchant Center’ dashboard and click the Products » Feeds option from the sidebar.
This will open up the ‘Primary Feeds’ page where you have to click the ‘+’ button to add a new feed.
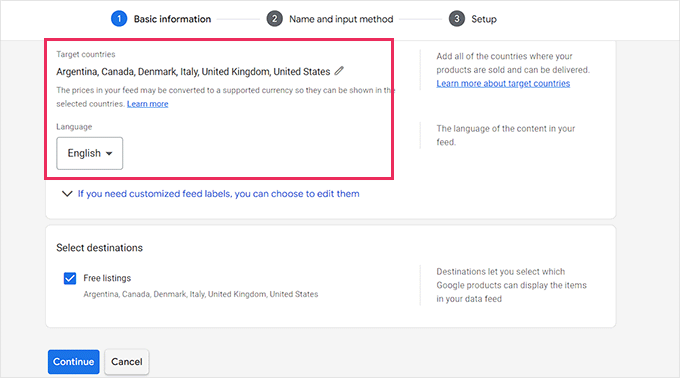
This will take you to the ‘New Primary Feed’ page where you can start by filling in basic details. First, start by adding all your target countries.
Next, select your preferred language and then click the ‘Continue’ button.
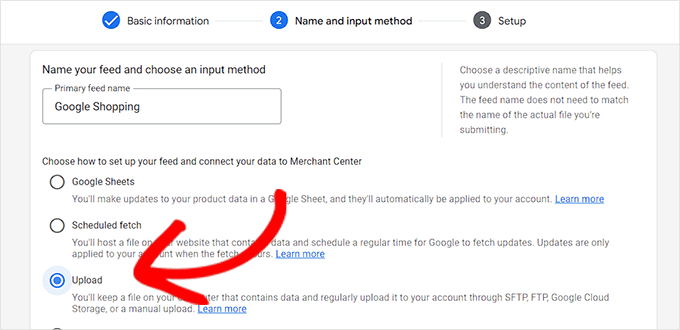
Then, you have to choose a name for your feed and select a method to connect your data to the Merchant center.
For this tutorial, we will be uploading the feed XML from WordPress.
After that, just click on the ‘Continue’ button.
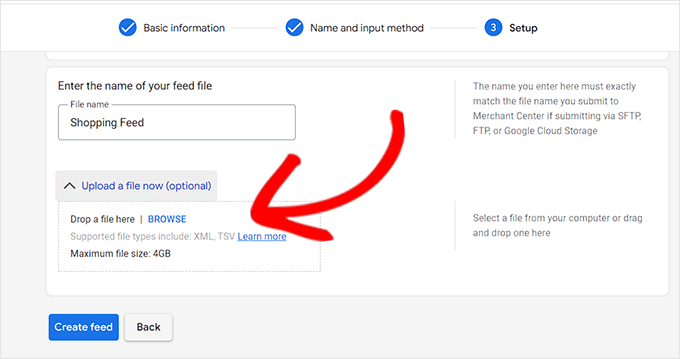
Now that you’re on the ‘Setup’ page, simply type the name for your Google Shopping Feed.
Next, just upload the Feed file you got from WordPress and click the ‘Create Feed’ button.
You have now successfully added your WordPress products to Google Shopping.
Bonus: How to Add Google Merchant Center Schema in WordPress
To improve your product search visibility in Google Shopping and increase conversion rates, you should add a Google Merchant schema in WordPress.
Schema markup is an HTML code that provides more details about your products to search engines.
A GMC listing schema will make your search snippets more prominent and will allow your products to be featured as popular products for the relevant search terms.
The easiest way to add a Google Merchant Center listing schema to WordPress is by using the All in One SEO for WordPress.
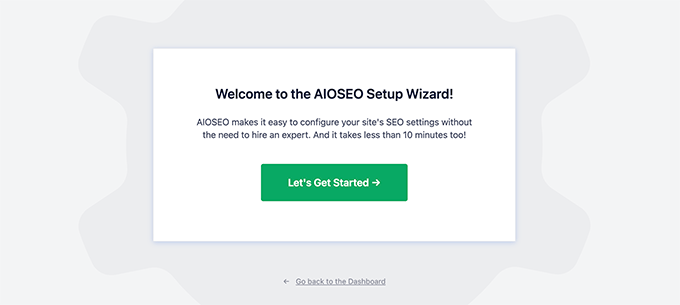
Upon activation, a setup wizard will open up. Simply go ahead and click the ‘Get Started’ button.
After that, you need to follow the onscreen instructions in the setup wizard to configure the plugin. If you need help, please see our guide on how to properly set up AIOSEO in WordPress.
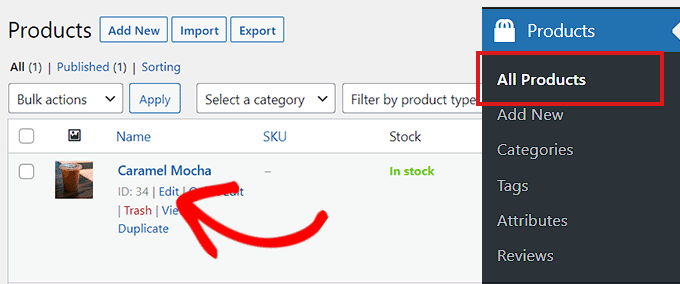
After the AIOSEO plugin has been set up, you need to visit the Products » All Products page from the admin sidebar.
From here, simply click on the ‘Edit’ link below a product to open up the ‘Edit Product’ page.
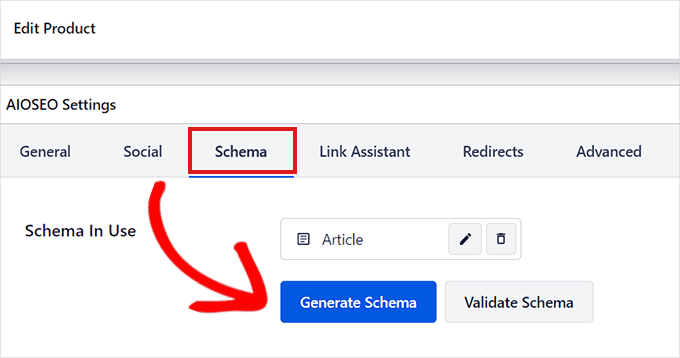
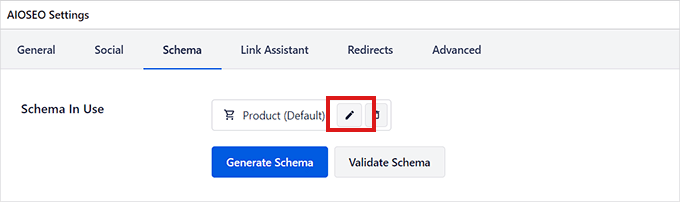
Once there, you need to scroll down to the ‘AIOSEO Settings’ section and click on the ‘Schema’ tab.
Now, you need to make sure that the schema type is set to ‘Product’ by default.
If that is not the case, then simply click on the ‘Generate Schema’ button.
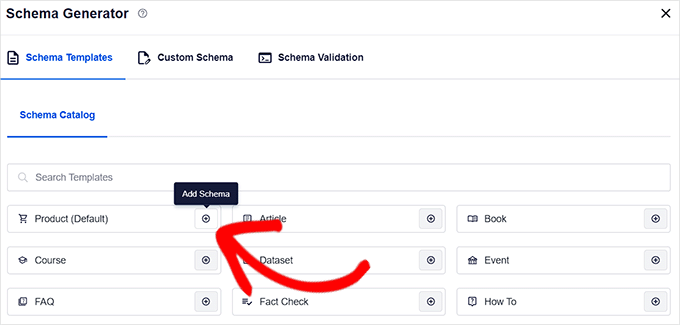
It will open up the Schema Catalog which will list all the available schema templates.
From here, you need to click the ‘Add Schema’ (+) button beside the Product option to set it as your primary schema.
Note: You may see the ‘Article’ schema already applied. If so, you can remove it as you add the new one because this particular page isn’t an article or blog post in Google’s eyes.
Next, you will need to fill in the product information to add the GMC listing schema.
For that, you need to click the ‘Edit Schema’ button next to the ‘Schema in Use’ option.
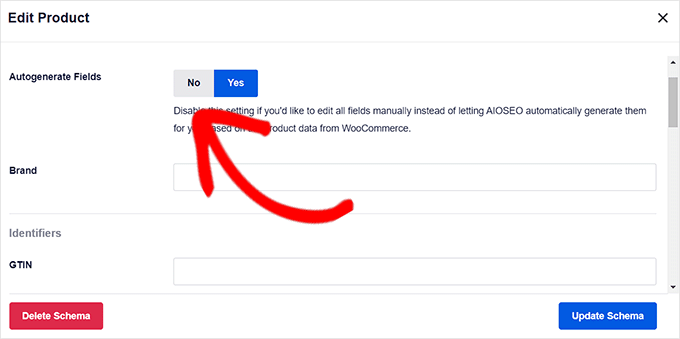
This will open up the ‘Edit Product’ modal where you will need to fill in the product details.
If you’re using WooCommerce, then AIOSEO will automatically pull most of the product data from your product information.
However, if you want to fill in the information manually, you need to simply toggle the ‘Autogenerate Fields’ switch to ‘No.’
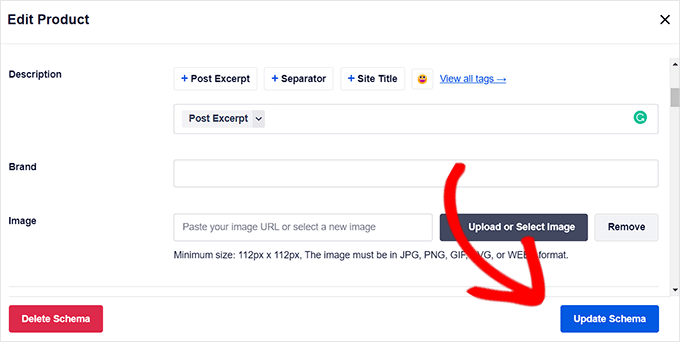
The product attributes that you will need to add include the product name, description, image, ISBN, price, material, color, shipping details, and more.
We recommend that you provide all the details so that the schema markup can make your product snippets more engaging.
Once you’re done, simply click the ‘Update Schema’ or ‘Add Schema’ button to store your settings.
You have now successfully added the Google Merchant Center listing schema to WordPress, and your products can now be featured on the platform and hopefully earn you more sales.
Do you want to create a restaurant website with WordPress?
A restaurant website can help attract new customers and grow your business. It can also provide a better experience for your existing customers and keep them coming back to your restaurant, cafe, takeaway, or similar business.
In this article, we will show you how to create a restaurant website with WordPress.
Why Create a Restaurant Website?
A website is one of the best ways to market your restaurant to new customers and provide a better experience for your existing clients.
By creating an online presence for your restaurant, you can introduce your business to people who are looking for venues and food just like yours.
After a potential customer discovers your business, a professionally-designed and helpful restaurant website will tell them everything they need to know about your business. They can then decide whether your restaurant is right for them.
Even if you have lots of loyal customers and a positive reputation in the local area, a restaurant website can help you improve the customer experience.
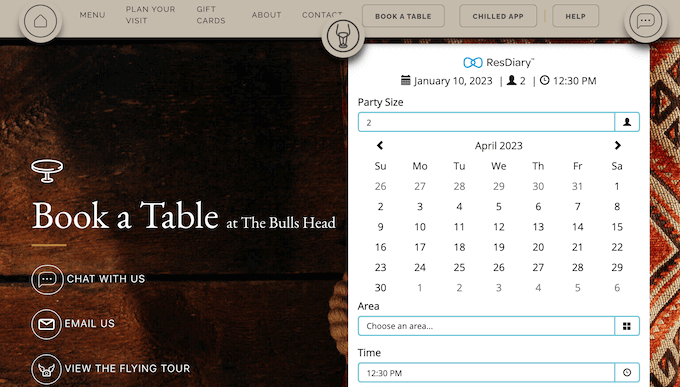
For example, it can allow customers to book a table online, send you questions using a convenient contact form, check out the latest menu, and much more.
In this way, a restaurant website can keep your customers happy, so they carry on visiting you for months, or even years to come.
That said, let’s see how you can easily create a restaurant website with WordPress.
Which Is the Best Website Builder for Your Restaurant?
There are many website builders that can help you create a restaurant website but we recommend using WordPress.
According to our blogging research statistics, WordPress is the most popular website platform in the world. It powers nearly 43% of all websites on the internet including many top restaurant websites.
WordPress is also open-source and free. For more on this topic, see our article on why WordPress is free.
However, it’s important to realize that there are two types of WordPress software, so you don’t choose the wrong one.
First, there is WordPress.com, which is a blog hosting platform. Then, there is WordPress.org which is also known as self-hosted WordPress.
For a restaurant website, we recommend using WordPress.org because it gives you complete ownership of your site and allows you to install third-party plugins, including plenty that are designed specifically for restaurant owners.
To learn more about why we recommend WordPress to all our readers, please see our complete WordPress review with pros and cons.
A domain name is your website’s address on the internet. This is what customers will type into their browsers to reach your website, such as justeat.com or tacobell.com.
Web hosting is where your website lives online. To help you out, we’ve hand-picked some of the best WordPress hosting that you can buy for a restaurant website.
Although the WordPress software is free, hosting and domain names are where the costs can really start to add up.
A domain name typically costs $14.99/year and hosting costs start from $7.99/month. This is a lot for restaurants that already have bills and expenses to pay.
Thankfully, Bluehost has offers a free domain name, and our readers can get 60% off on web hosting. Bluehost is one of the largest hosting companies in the world, and an official WordPress-recommended hosting partner.
They’re also offering our readers a free SSL certificate. If you want to accept payments online, then an SSL certificate will help keep the customer’s credit and debit card information safe.
You can click the button below to get started for as little as $2.75 per month.
Once there, you will need to go to the Bluehost website in a new tab and click on the green ‘Get Started Now’ button.
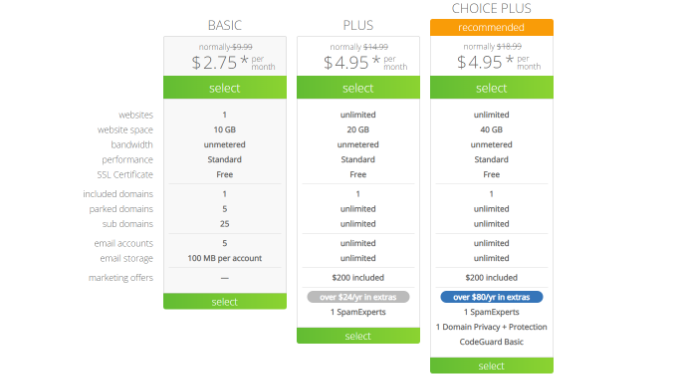
This will bring you to a pricing page where you can choose a hosting plan for your website.
We recommend choosing a Basic or Plus plan, as they’re the most popular web hosting plans among our readers.
After selecting a plan, click on ‘Continue.’
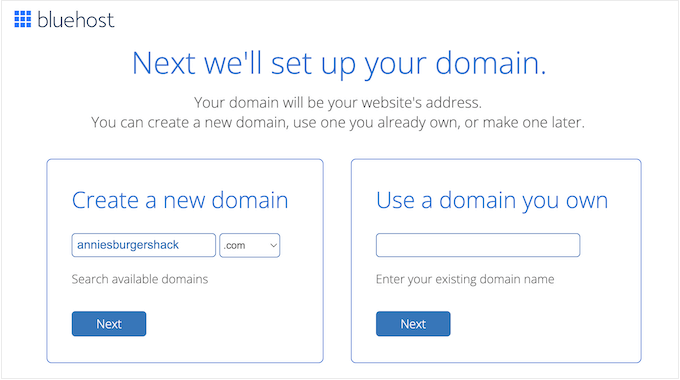
On the next screen, you’ll need to choose a domain name.
Ideally, the domain name will be easy to pronounce and spell, easy to remember, and related to your business. The name of your restaurant is a great place to start, but sometimes that domain may already be taken by another business.
In that case, you can try extending the domain name by adding your restaurant’s location, your own name, or the type of food you serve.
After choosing a name, click on the ‘Next’ button to continue.
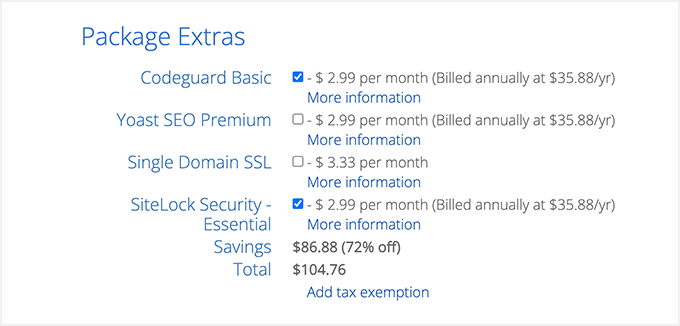
Now you’ll need to provide your account information such as your name and email address. After that, you’ll also see optional extras that you can purchase.
We generally don’t recommend purchasing these extras straight away, as you can always add them later on if you need them.
After that, simply type in your payment information to complete the purchase.
Once you’ve done that, you’ll get an email with instructions on how to login to your web hosting control panel. This is your hosting account dashboard where you can manage your restaurant website, including setting up email notifications and asking for WordPress support.
It’s also where you’ll install the WordPress software.
Step 2. Create a New WordPress Website
When you signup with Bluehost using our link, Bluehost installs WordPress on your domain name automatically.
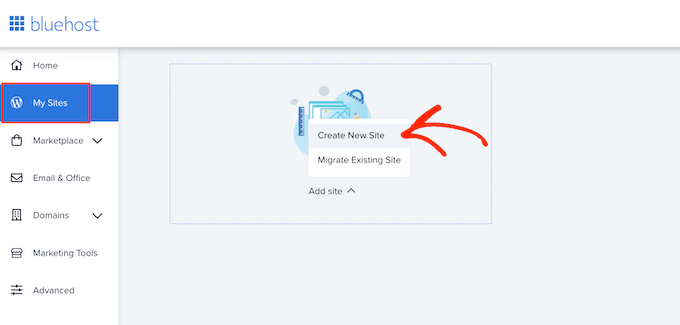
If you want to create a different WordPress website, then you can simply click on the ‘My Sites’ tab in the Bluehost dashboard.
Next, just click on the ‘Add Site’ button and select ‘Create New Site.’
The Bluehost wizard will now guide you through the setup process.
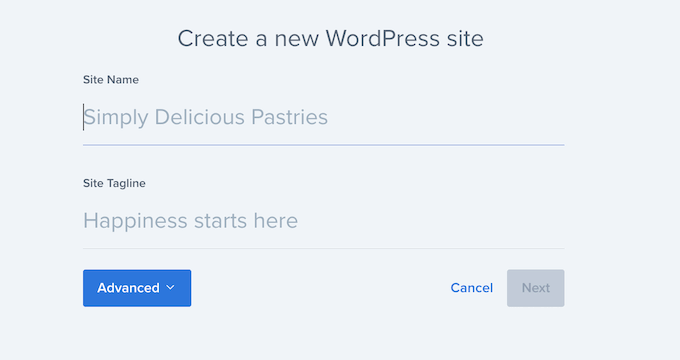
First, you’ll need to type in a site title and optional tagline.
Click on the ‘Next’ button to continue.
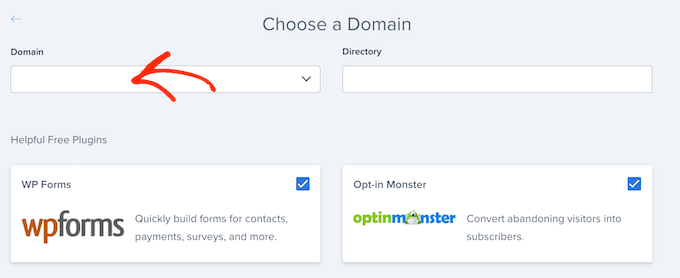
After that, Bluehost will ask you to select a domain name and path for your restaurant website. If you’ve already purchased a domain name, then you can simply select it from the dropdown menu.
If you don’t have a domain name then you can buy one by visiting the ‘Domains’ page inside the Bluehost dashboard.
After choosing a domain name, you can leave the directory path blank and let Bluehost fill it in for you. The installer will also show a few must-have WordPress plugins that you may want to install on your restaurant website including OptinMonster.
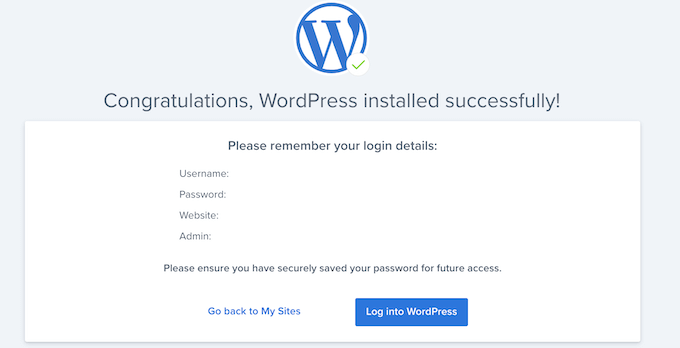
After that, click on the ‘Next’ button and the installer will set up your restaurant site.
Once it’s finished, you’ll see a ‘WordPress installed successfully’ message with information about your new website. You can now go ahead and click on the ‘Log into WordPress’ button.
This will take you to your site’s admin area.
You can also log in to the WordPress dashboard by simply going to yoursite.com/wp-admin/ directly from your browser.
Your typical restaurant website needs special features, like the ability to show a menu, photos, location information, business hours, and more.
With that in mind, it makes sense to look for a theme that’s designed for the food or hospitality industry. To help you out, we’ve collected the best WordPress restaurant themes.
You can also use a website and landing page builder plugin such as SeedProd.
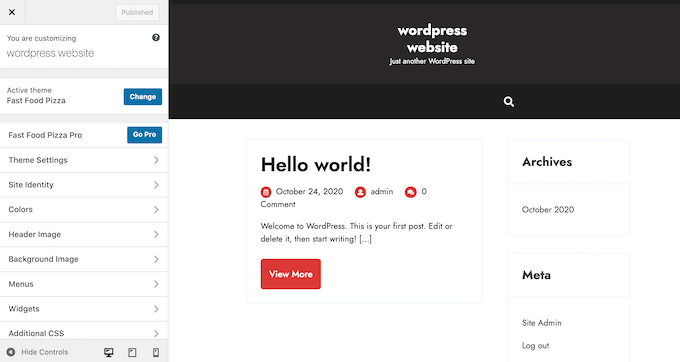
After installing your theme, you may want to customize it by going to Appearance » Customize in the WordPress dashboard.
This will launch the theme customizer where you can fine-tune the theme settings and see your changes in the live preview.
If you’re using one of the newer full site editing themes, then you’ll see the option for Appearance »Editor, which uses blocks similar to the content editor to customize your site.
Pro Tip: No matter what theme you’re using, neither the default WordPress customizer nor the full site editing offers a user-friendly drag and drop customization experience. For that reason, we recommend using a page builder like SeedProd to customize your theme.
Just remember that you can always return to this screen and continue customizing your theme. You can even completely change your WordPress theme at any point.
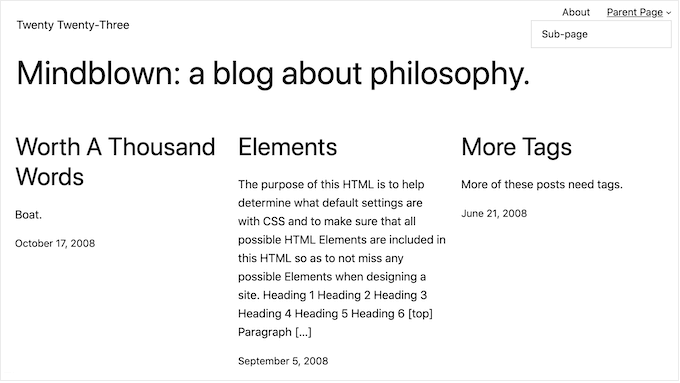
Step 4. Create a Custom Home Page
WordPress has two two default content types called posts and pages.
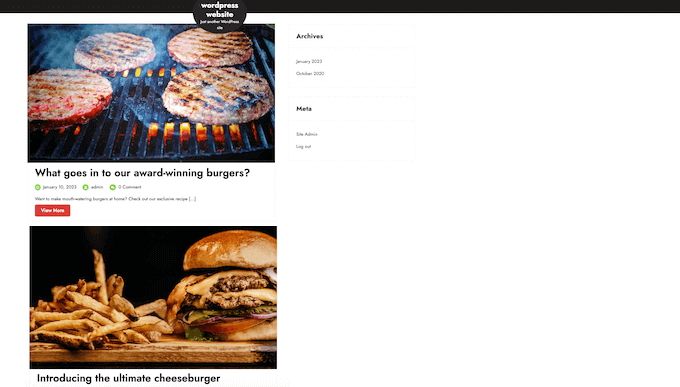
You’ll typically use posts to create articles and blogs. By default, the home page shows these posts in reverse chronological order, so the newest content appears at the top of the list.
You might use a blog to build a stronger relationship with their customers, improve your WordPress SEO, and get more traffic to your restaurant website. For example, you could write about recipes, share cooking tips, or blog about the latest restaurant industry news.
However, even if you plan to publish blog posts, you typically won’t show these on the home page. Instead, we recommend creating a custom home page that introduces your business to new visitors.
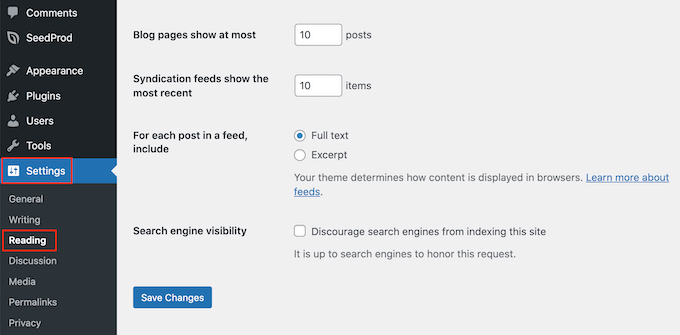
Once you’re happy with the page’s design, it’s time to set it as your home page. To do this, go to Settings » Reading in the WordPress dashboard.
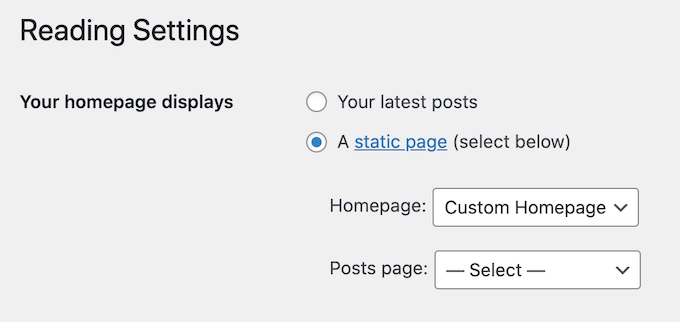
Here, scroll to ‘Your homepage settings’ and select ‘A static page.’
Next, open the ‘Homepage’ dropdown and choose the page that you want to use.
Then, simply scroll to the bottom of the screen and click on ‘Save Changes.’ Now, if you visit your website you’ll see the new home page in action.
If you are going to write blogs, then make sure you create a separate blog page to display your posts. If you don’t, then customers will struggle to find your latest WordPress blogs.
Step 5. Create an Online Restaurant Menu
Even long-term, loyal customers may want to look at your menu from time to time. By publishing your menu online, customers can look at it any time of day or night.
Publishing a menu can also help convince new customers to visit your restaurant.
It is possible to upload PDF files to your WordPress website. However, downloading a PDF menu can be difficult depending on the customer’s data plan and internet connection, and they’re non-responsive so they can be hard to read on some devices.
Plus, if you add new dishes or change your pricing, then you’ll also need to upload a completely new PDF.
For that reason, we recommend using SeedProd to add an online menu to your WordPress website. SeedProd also allows you to create a mobile responsive menu that looks great on every device.
You can also easily update the menu as you add new dishes, change the prices, remove dishes, and more.
SeedProd even comes with a ‘Menu Sales Page’ template that’s perfect for creating a menu.
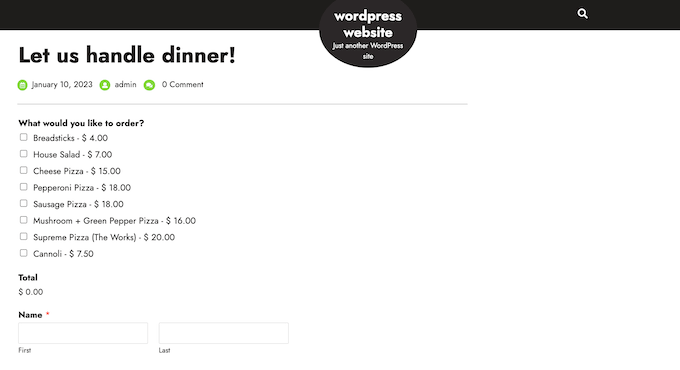
Many restaurants allow customers to order food online. For example, you might give customers the option to pre-order their meal or place an order for delivery.
It may sound technical, but you can easily add online food ordering to your website using the WPForms plugin.
WPForms is the best WordPress form builder that allows you to create online order forms for all kinds of products and services.
It even comes with a ready-made ‘Takeout Order Form’ that you can customize to suit your restaurant website.
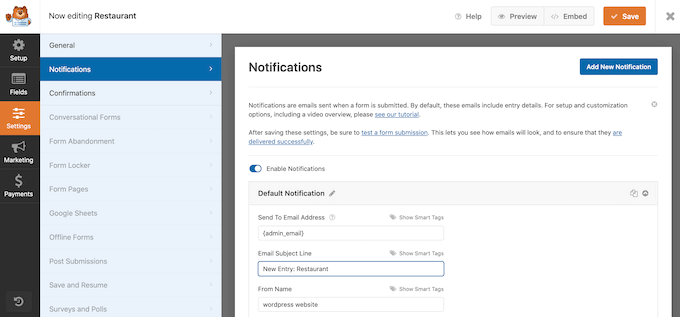
Every time someone completes the form, WPForms will notify you automatically so you can start working on that order straight away.
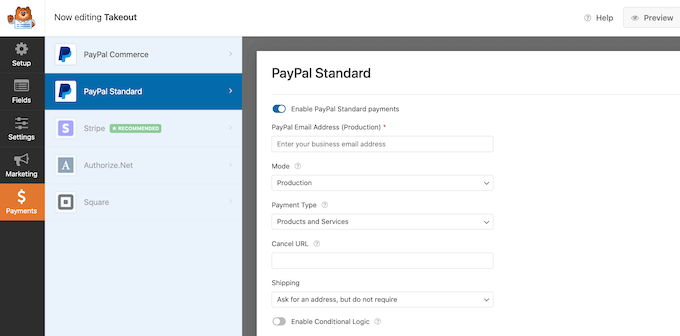
If you don’t want to accept cash on delivery, then WPForms supports all of the best payment gateways including PayPal and Stripe. This allows you to accept payments securely online, which is quick and convenient for your customers.
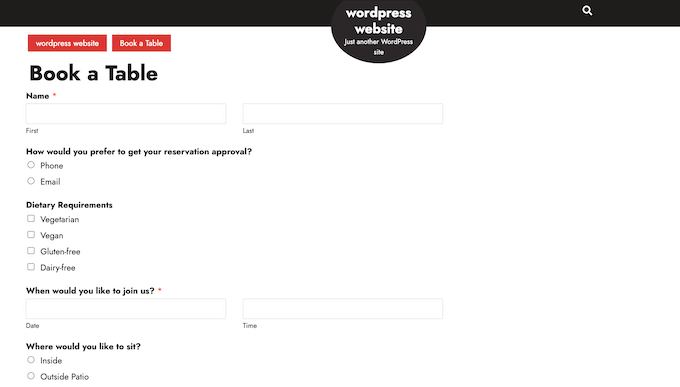
Today, most people expect to be able to book appointments through an automated system.
By adding a booking form to your restaurant website, you can accept reservations at any time of the day or night. You’ll never lose another customer just because you weren’t around to answer the phone.
Booking forms can also automate a lot of the booking process. This includes collecting payments and emailing your customers to remind them about their upcoming booking.
You can easily add a restaurant booking form to your website using WPForms. This plugin has a ready-made dinner reservation form template that you can customize for your restaurant.
WPForms also integrates with all of the top email marketing providers. This makes it easy to send reservation confirmation emails to your customers.
As their booking approaches, you can even send the customer a reminder email, ask them to share any dietary requirements, send a pre-order form, and more.
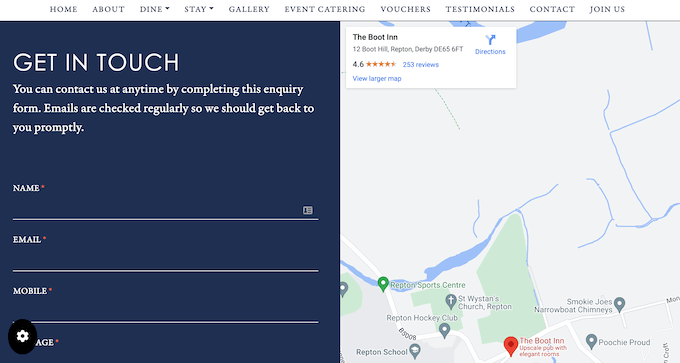
While visitors could ring your phone number or send a message to your business email address, we always recommend adding a contact form to your website.
Most of the best contact form plugins come with built-in spam protection, so you won’t get any contact form spam. A form will also collect consistent information from visitors, so you’ll have all the data you need to write a helpful reply.
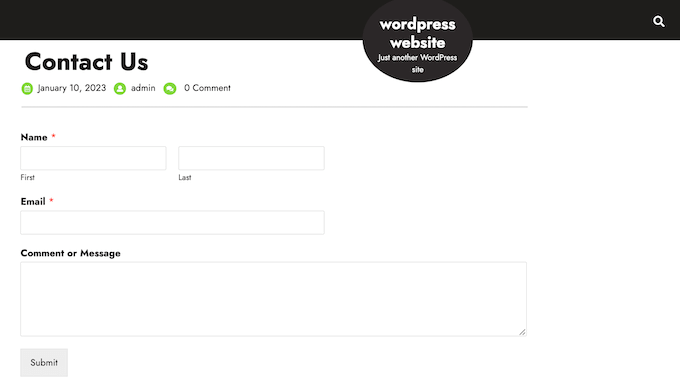
The easiest way to add a contact form to your WordPress website is by using the free WPForms plugin.
This free plugin comes with a built-in Simple Contact Form template that you can quickly customize using the drag and drop editor.
Then, simply add the form to any page, post, or widget-ready area using the ready-made WPForms block.
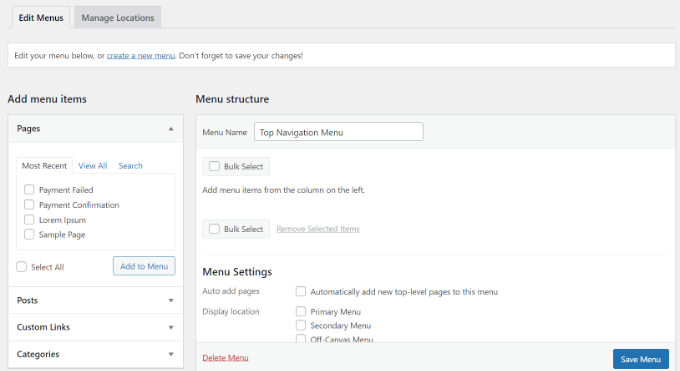
Once you’ve added some content to your restaurant website, you’ll want to help visitors find their way around those pages and posts by adding a navigation menu.
No matter what theme you’re using, WordPress makes it really easy to add menus and sub-menus to your restaurant website.
Step 10. Add Social Proof to Your Restaurant Website
Social proof is one of the best ways to earn customer trust, and convince new people to visit your restaurant. After all, we’re more likely to try things that we see other people buying, using, or recommending.
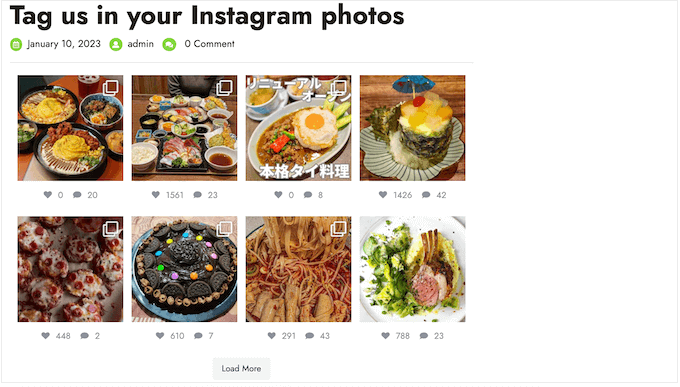
Using this plugin, you can create a hashtag feed and show photos that customers have tagged your account in. This includes photos of your food, venue, and shots of customers having fun at your restaurant.
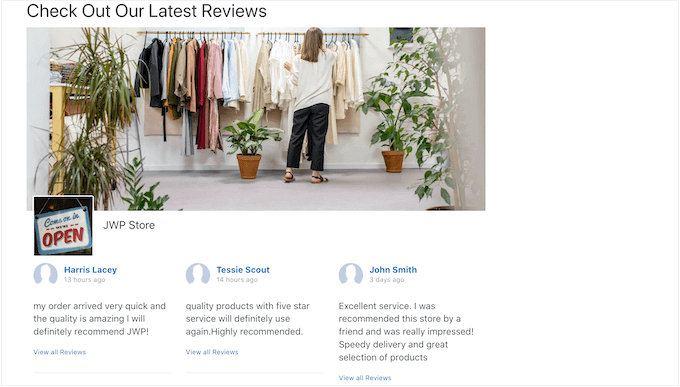
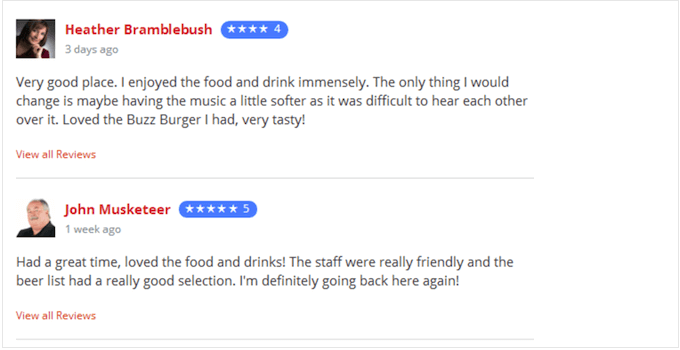
Customer reviews and testimonials can provide visitors with more information, and may even solve any question or worries customers have about visiting your restaurant.
If you want to show reviews from other platforms like Yelp or Google My Business, then there’s also plenty of customer review plugins for WordPress that you can use.
These plugins will collect reviews automatically and then organize them into a nice layout on your restaurant website.
We hope this tutorial helped you learn how to create a restaurant website with WordPress. You may also want to see our ultimate WordPress security guide and our expert pick of the must have WordPress plugins that you should install on all business sites.
If you liked this article, then please subscribe to our YouTube Channel for WordPress video tutorials. You can also find us on Twitter and Facebook.
Do you want to create a loyalty program in WooCommerce?
A loyalty program can keep customers coming back to your online store, and keep them away from your competitors. It can also be a great way to reward your best customers and make them feel valued.
In this guide, we’ll show you how to create a loyalty program for your WooCommerce store.
Why Create a Loyalty Program in WooCommerce?
Creating a loyalty program can be a great way to get more sales on your online store.
A loyalty program encourages customers to keep coming back to your WordPress website, which is the key to running a successful business over the long term. It can even boost average spend per customer by giving shoppers a reason to add more items to their basket.
Most stores give customers points for buying products and services. However, you can also reward customers for other actions like creating an account, placing their first order, signing up to your email newsletter, or spending over a certain account.
You might even give customer extra points for returning to an abandoned shopping cart and completing their purchase. In this way, a loyalty program can help you recover WooCommerce abandoned cart sales.
With that said, let’s take a look at how to add a loyalty program in WooCommerce.
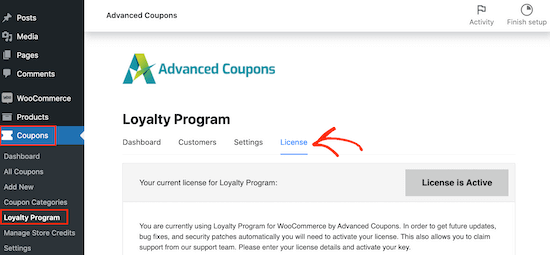
After creating a loyalty program, Advanced Coupons will show the customer how many points they’ll get for each action, including buying a specific product.
After that, go ahead and click on the ‘Settings’ tab. This brings you to a screen where you can build the loyalty program.
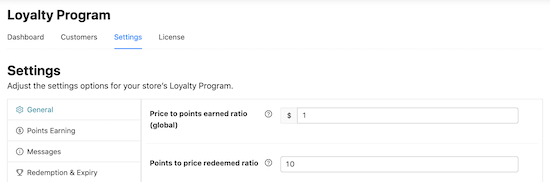
To start, let’s reward members with points when they take certain actions on your website, like leaving a product review, posting a comment, or buying a product.
In the ‘Price to points earned ratio,’ we can see that the Loyalty Program plugin gives customers 1 point for every $1 spent.
If you want your WooCommerce loyalty program to look more impressive, then you give customers more points. For example, members might earn 2 points or 10 points for every $1 they spend.
‘Points to price redeemed ratio’ is how many points it takes to earn a dollar as part of your loyalty program.
By default, customers earn $1 for every 10 points. That means the customer needs to redeem 10 points to get a $1 discount coupon. You can change these values to anything you want.
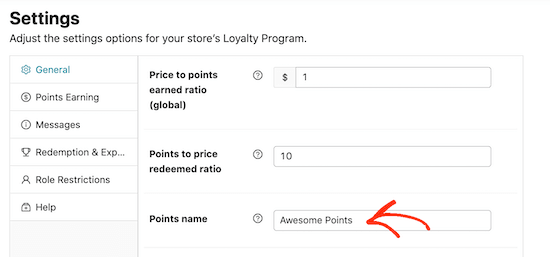
You can also change the name of your loyalty scheme by typing into the ‘Points name’ field. We’ve gone with ‘Awesome Points’ for our loyalty program, but you might want to use something more branded, like Starbucks does with their ‘Stars’.
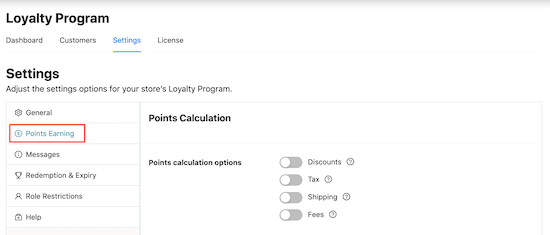
Next, you’ll need to decide how your points are calculated. For instance, you may want to give a customer less points if they use a coupon code, compared to a customer who didn’t use a coupon. In this way, you can give the best rewards to your best customers.
To do this, click on the ‘Points Earning’ tab. Here, you can check the boxes to take any discounts, tax, shipping costs, and any fee amounts into account when awarding points.
Many online marketplaces and digital stores only reward customers for spending money. However, there may be other actions that benefit you, so it’s a good idea to reward customers for taking these actions.
For example, you might want to reward visitors for registering with your membership site, posting a product review, or even commenting on a blog post.
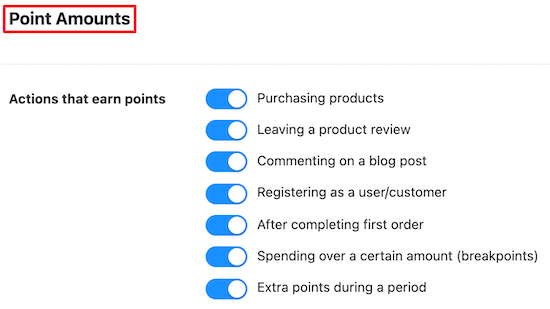
Simply scroll to the ‘Point Amounts’ section and then click the switch for any action that will earn the customer points.
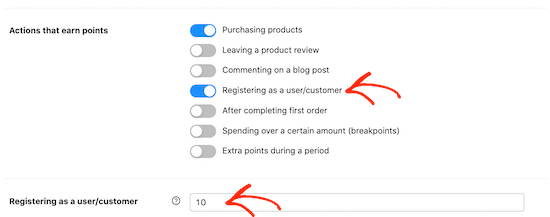
After activating these toggles, check whether there are any new settings to configure.
For example, you’ll need to type in how many points customers will get for registering as a new user.
You can also encourage shoppers to spend more by awarding extra points for orders over a certain amount.
To do this, enable the ‘Spending over a certain amount’ switch and then type a value into the ‘Spending over a threshold’ field.
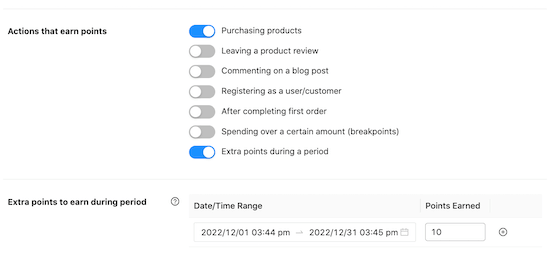
During busy shopping periods you may want to give customers an extra reason to buy from your store. For example you might award extra points during Black Friday, so customers aren’t tempted to shop with a competitor.
You can give customers extra points during a specific period by enabling the ‘Extra Points To Earn During Period’ slider. Then, enter a date and time range into the ‘Extra points to earn during period’ section and type in how many points customers will earn.
There are some more settings you may want to look at, but this is enough to create a loyalty program in WooCommerce. When you’re happy with how the program is set up, scroll to the bottom of the page and click the ‘Save changes’ button.
Your new WooCommerce loyalty program is now live.
Automatically Creating Accounts for Your Customers
Your customers will need to create an account in order to collect loyalty points.
Already, this encourages people to sign up to your online store. However, you can also create an account automatically when a visitor makes their first purchase. This can improve the shopping experience, and may get you some extra members.
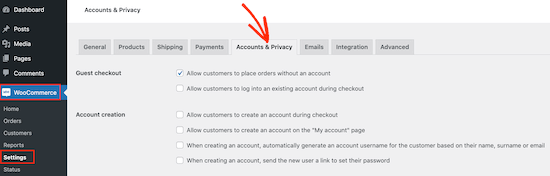
To automatically create an account for a new customer, go to WooCommerce » Settings. Then, click on the ‘Accounts and Privacy’ tab.
To start, you may want to uncheck ‘Allow customers to place orders without an account’, so that customers can’t checkout as a guest. This will encourage more people to register with your site, but it may cause more shoppers to give up on a purchase and abandon their shopping carts.
Next, check the ‘Allow customers to log into an existing account during checkout’ box.
Once you’ve done that, you’ll want to make it as easy as possible for customers to create an account. With that in mind, we recommend checking all the boxes in the ‘Account creation’ section, as you can see in the following image.
Now, WooCommerce will automatically send an email to first-time customers with information on how to access their new account.
The WooCommerce Loyalty Program in Action
Your loyalty program is up and running! Once a customer has earned loyalty points, they can turn them into coupons by going to My Account » My Reward Points.
The customer can then simply type in how many points they want to use, and your WordPress blog or website will show how much the coupon is worth.
The customer can go ahead and click ‘Redeem’ to create that coupon.
In the following image, the customer has created a $5 coupon by converting 500 of their points. They still have 550 points left to redeem.
Do you want to add an SEO Editor role in WordPress?
If you have hired an SEO specialist to work on your website, then adding them as an SEO editor is the safest way to give them access to your WordPress website.
In this article, we’ll show you how to easily add an SEO editor role in WordPress.
Why Add an SEO Editor Role in WordPress?
WordPress comes with a user role management system that defines what a user can and cannot do on your website. You can assign different user roles to your team members depending on their job descriptions.
By adding an SEO Editor / Manager role to your WordPress website, you will be providing secure access to the SEO features and tools to some specific members of your team.
An SEO Editor role has access to the SEO settings for all your posts and pages. This allows them to optimize posts for SEO and work on search rankings.
An SEO Manager tends to have access to sitewide SEO settings including sitemaps, redirects, local SEO, and more.
By default, WordPress doesn’t offer either the SEO Editor or SEO manager user roles.
Note: You’ll need the Pro version of the All in One SEO plugin to unlock SEO user role features.
Upon activation, the plugin will launch the setup wizard which will walk you through the setup. If you need help, then you can follow our guide on how to set up All In One SEO in WordPress.
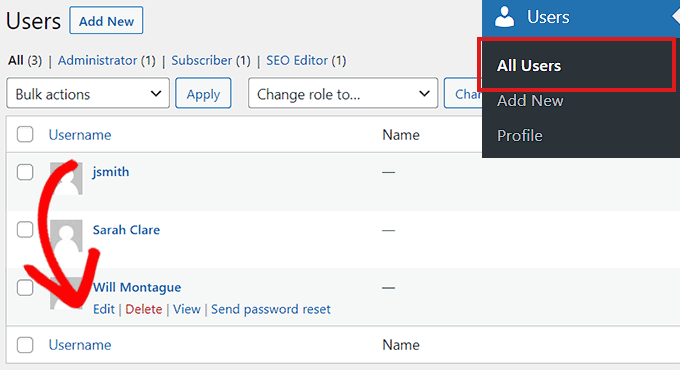
Now you can simply add a new user to your WordPress website by visiting Users » Add New page or you can edit an existing user account by visiting the Users » All Users page.
After that, simply click on the Edit link below the user account that you want to change.
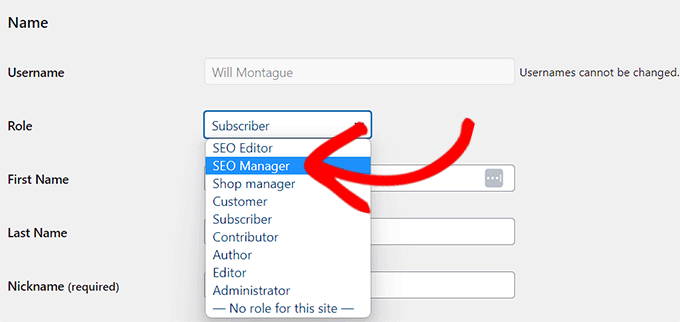
On the Edit user screen, scroll down to the Role option and select SEO Editor or SEO Manager user role from the drop down menu.
Don’t forget to click on the Add / Update User button to save your changes.
These users will now be able to access SEO features based on the user role assigned to them.
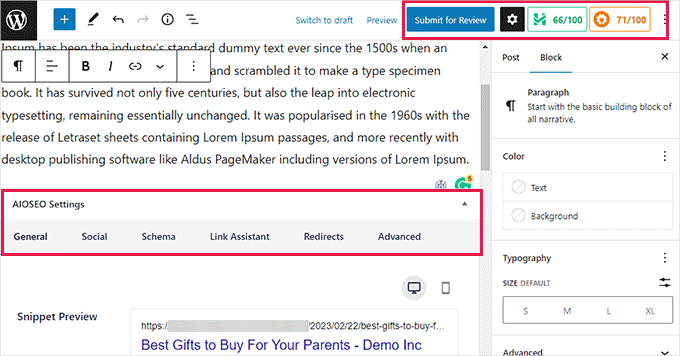
For instance, SEO Editor will be able to see and edit SEO Settings for a post or page by simply editing them.
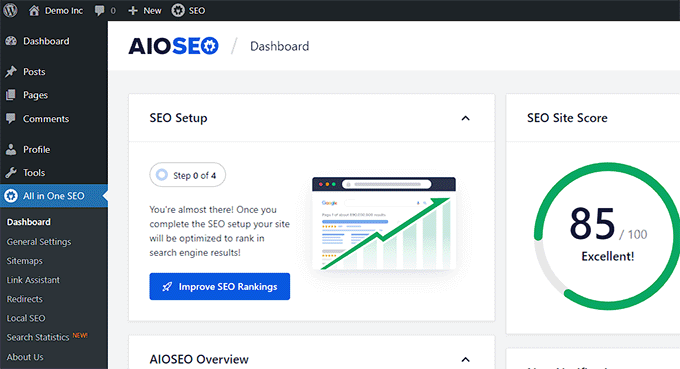
On the other hand, a user with the SEO Manager role will also be able to view the General SEO settings on the WordPress admin sidebar.
They will be able to make changes to site-wide SEO settings that may affect your entire website.
How to Customize SEO User Roles in WordPress
By default, All in One SEO selects the best access control settings for each SEO user role.
However, sometimes you may want to add or remove permissions from the SEO editor or Manager user roles.
All in One SEO lets you customize SEO user roles so that you can select which options they’ll have access to.
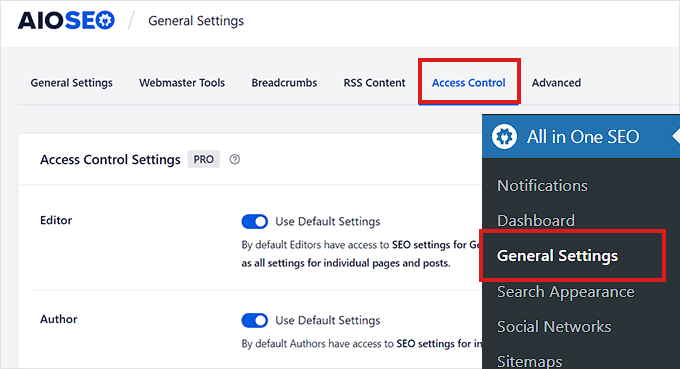
Simply head over to the All in One SEO » General Settings page and switch to the Access Control tab.
Caution: Be very careful when giving a user role access to any option under the General SEO Settings. These options may allow them to apply SEO changes that will affect your entire website.
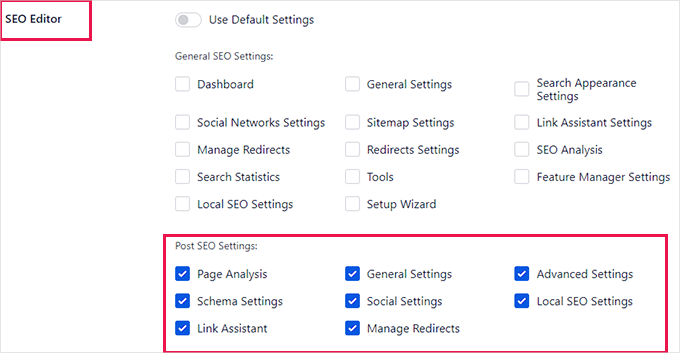
From here, scroll down to the ‘SEO Editor’ option and toggle the switch next to the ‘Use Default Settings’ option.
This will reveal the Default Settings that All in One SEO has chosen for the SEO Editor role.
As you can see that by default the SEO editor user role only has access to Post SEO settings.
From here, you can check or uncheck items that you want to allow the SEO editor to have access to.
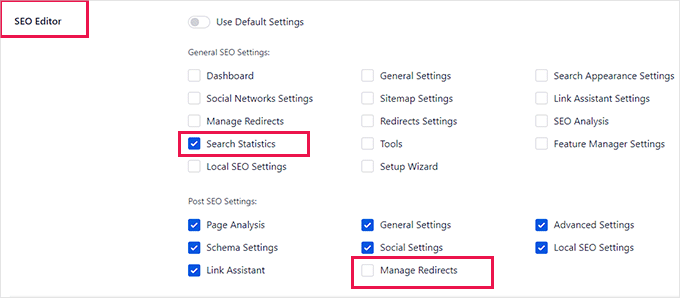
For instance, you can remove access to the Manage Redirects option or give them access to the Search Statistics feature.
Similarly, if you want to change settings for the SEO Manager user role, then you will need to switch off the ‘Use Default Settings’ toggle next to the SEO Manager option.
This will reveal the default settings that All in One SEO has chosen for the SEO manager user role.
By default, the SEO manager user role has access to several options under the General SEO settings as well as all the options under the Post SEO settings.
You can change that by checking the items that you want them to have access to or unchecking to remove access from specific items.
Once you are finished, don’t forget to click on the Save Changes button to store your settings.
Recently, one of our readers asked if it was possible sell music online in WordPress?
The answer is yes. Whether you’re selling your own songs or creating an online music store, you can easily do this in WordPress. Selling music online is a great way to make money without having to pay high shipping or manufacturing costs. It can also be an easy way to promote your own band or music, as well as grow your fanbase.
In this article, we will show you how to easily sell music online in WordPress, step by step.
Unlike general eCommerce plugins like WooCommerce, Easy Digital Downloads is built specifically with the features you need to promote, sell, and distribute digital music online.
In this way, you don’t have to waste time configuring features that aren’t necessary for selling digital products, such as shipping and inventory management settings.
With that being said, let’s see how you can easily sell music online in WordPress.
Note: If you are looking to sell physical copies of your music, too, such as vinyl records or CDs, check out our guide on how to set up an online store.
Before You Get Started
Before you can start selling music online, it’s important that you have a WordPress site setup already.
For this, you will need a domain name and WordPress hosting.
We recommend using SiteGround’s EDD hosting because it comes with Easy Digital Downloads pre-installed.
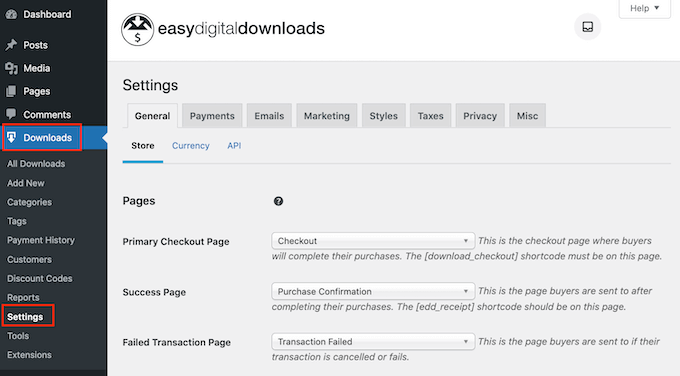
Upon activation, head over to Downloads » Settings in the WordPress dashboard.
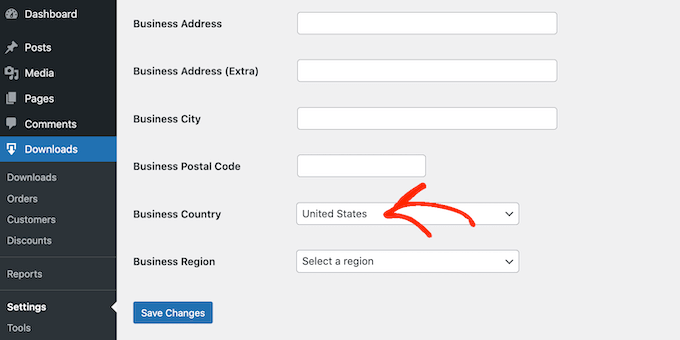
Even though you’re selling music, you still need to set your store’s location. This allows Easy Digital Downloads to auto-fill some fields in the order form, which will make it easier for fans to buy your music. Easy Digital Downloads will also use this information to calculate sales tax.
To add your location, simply open the ‘Business Country’ dropdown menu. You can then choose where your business is based.
Next, open the ‘Business Region’ dropdown menu and choose the state or province where your store operates from.
After making these changes, go ahead and click on Save Changes to store your settings.
Step 2. Adding a Payment Gateway to Your Music Store
By default, Easy Digital Downloads supports popular payment gateways including Stripe, PayPal and Amazon Payments.
Pro Tip: Want to use a different payment gateway instead? You can add extra payment options using the Easy Digital Download extensions.
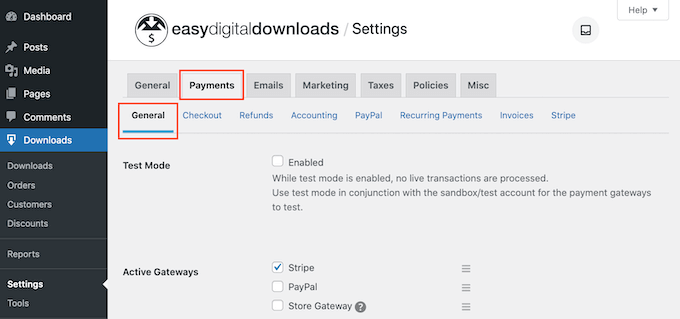
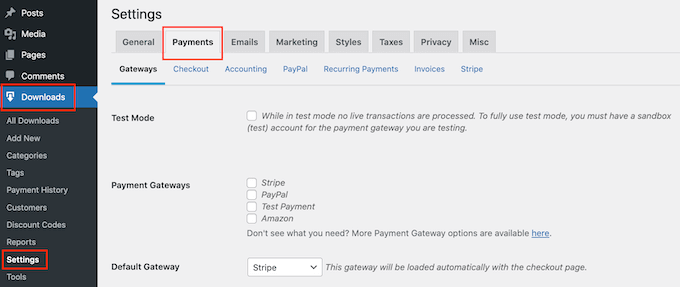
To add payment gateways to your website, go ahead and click on the ‘Payments’ tab. Then make sure the ‘General’ tab is selected.
In the Active Gateways section, check the box next to each gateway you want to use on your WordPress website.
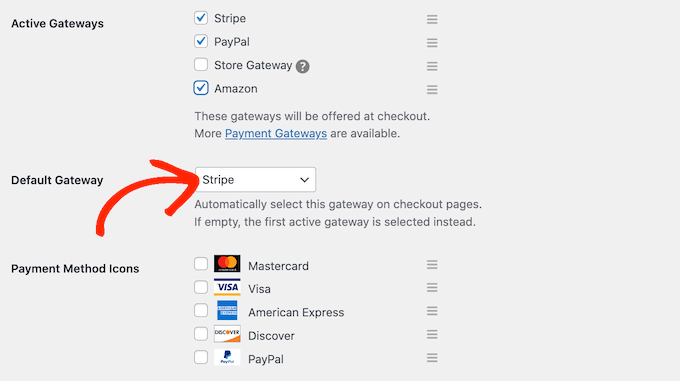
If you check more than one payment method, then you’ll need to choose a default gateway, which will be selected automatically when the visitor arrives at the checkout.
To make this decision, simply open the ‘Default Gateway’ dropdown and choose the payment method you want to use. You can use any gateway you want, but Stripe can accept credit cards as well as Apple Pay and Google Pay. With that in mind, we recommend using Stripe as your default gateway.
After selecting one or more payment gateways, click on the ‘Save Changes’ button. You’ll now have access to some new tabs where you can configure each payment gateway.
The process will vary depending on which gateway you’re using, but Easy Digital Downloads will walk you through the process.
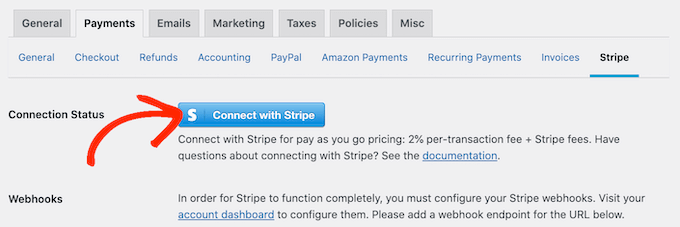
Let’s use Stripe as an example.
To set up Stripe, simply select the ‘Stripe’ tab and then click on ‘Connect with Stripe.’
This launches a setup wizard that will walk you through the process of configuring Stripe as your payment gateway.
If you’re using multiple payment gateways, then you’ll need to repeat these steps to set up each gateway separately.
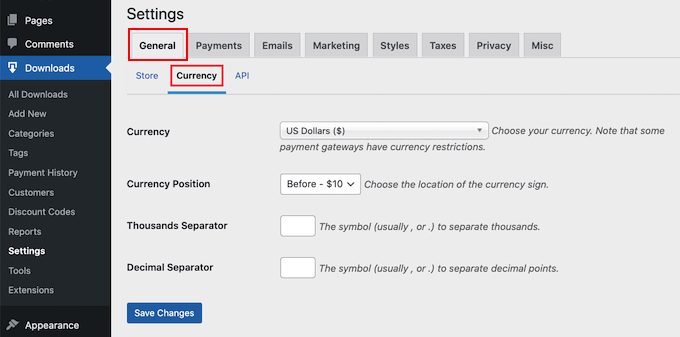
By default Easy Digital Downloads shows all your prices in US dollars. Once you’ve set up your payment gateway, you may want to change the currency that’s used on your website.
To show your prices in any currency other than US dollars, just click on the ‘General’ tab. Then, select ‘Currency.’
Next, open the ‘Currency’ dropdown. You can now choose the currency that you want to use on your online music store.
Just be aware that some payment gateways may not accept every currency. If you’re unsure, then you can always check your chosen payment gateway’s website. Most have a list of all the currencies they support.
With that done, click on ‘Save Changes’ to store your settings.
Step 3. Turn Your Music Files into Downloadable Products
Once you’ve set up a payment gateway, you’re ready to start adding music to your online store. With Easy Digital Downloads, you can add sell a single song or add multiple files to the same digital product. This is perfect for selling EPs, albums, compilations, and other products that have multiple separate audio files.
Create a New Digital Product
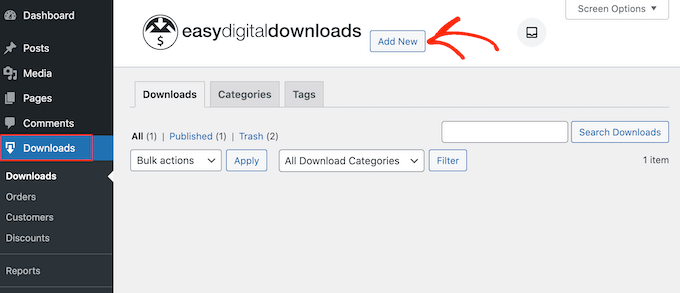
To create a digital product, simply select ‘Downloads’ from the left-hand menu. Then, click on the Add New button.
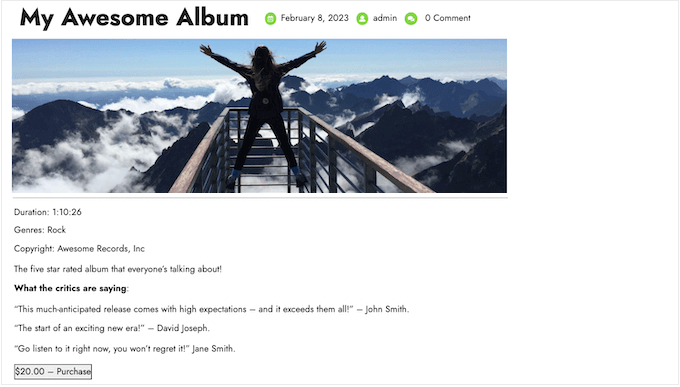
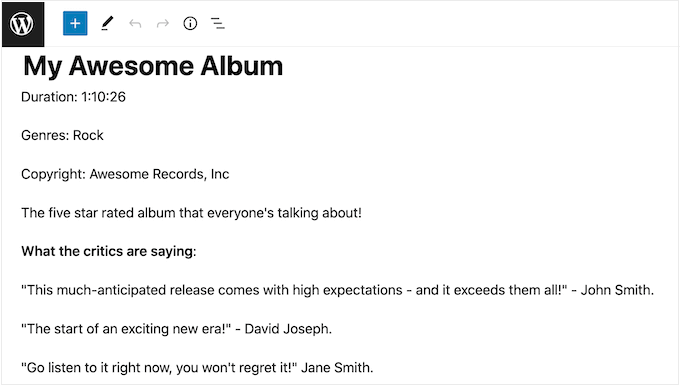
You can now type in a name for the product. This will be shown on the product’s page, so you’ll typically want to use something descriptive like the title of the album or single.
Next, type out the description that will appear on the product page.
This should give shoppers all the information they need to decide whether the product is right for them. For example, you might include the genre, duration, and track listing. You might also want to show customer reviews, quotes from music critics, or the star rating.
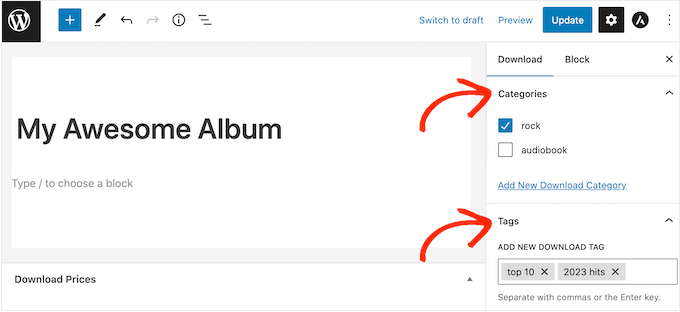
Add Categories and Tags
If you’re planning to sell music from lots of different artists, then categories and tags can help shoppers find what they’re looking for.
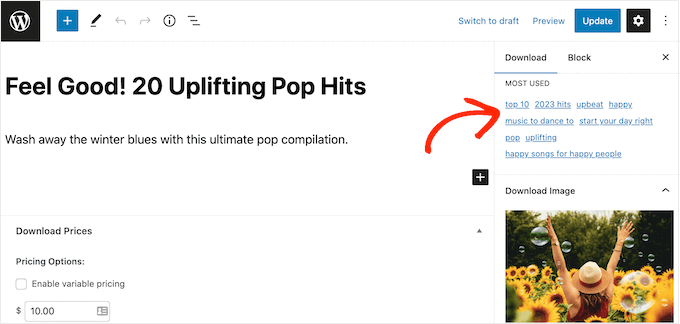
Helpful and descriptive categories can encourage shoppers to explore related artists and genres, which can get you more sales. You might even get creative and add tags for different characteristics like mood, influences, or activities, as you can see in the following image.
You can create new categories and tags in the ‘Categories’ and ‘Tags’ boxes.
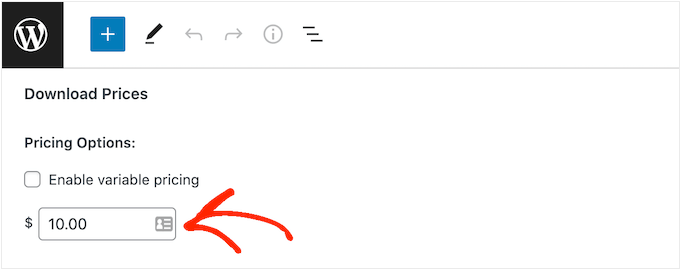
After that, you’ll want to set a price by scrolling to the Download Prices section.
Here, type in how much visitors need to pay before they can download the digital product.
Most of the time you’ll want to charge a fixed amount, but Easy Digital Downloads also supports variable pricing.
You might use variable pricing to sell different versions of the same digital product. For example, you could create an extended album with additional tracks, or have several versions of a single with different bonus songs.
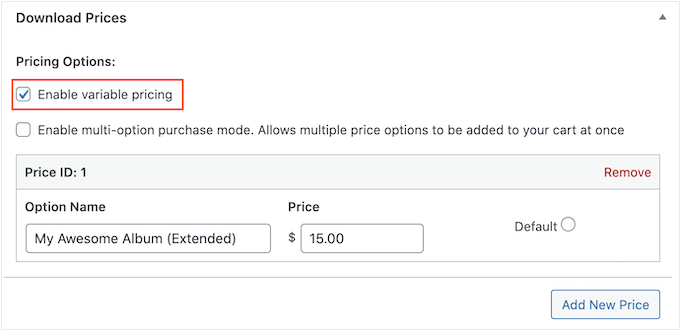
If you want to sell variations, then select the ‘Enable variable pricing’ checkbox. This adds a new section where you can start to build your variations.
For now, just type in a title and price for each variation.
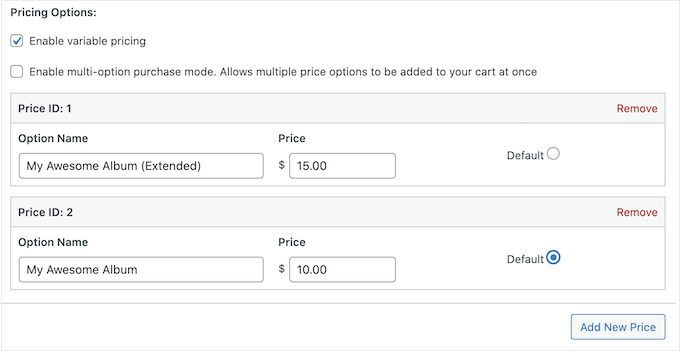
To add more variations, simply click on ‘Add New Price.’ This adds another section where you can type in a title and price.
With that done, you’ll need to set the default variation, which will be selected when the visitor first lands on the product page. Simply check the radio button next to the variation you want to use.
Add Your Audio Files
You’re now ready to start uploading audio, which can either be a single file or multiple separate audio tracks.
When it comes to music, WordPress supports mp3, ogg, and wav. WordPress also supports m4a, although this format may not work in all browsers.
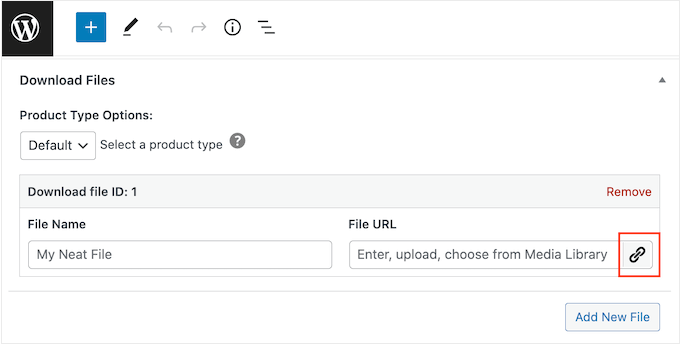
You can now scroll to the Download Files section and click on the ‘Upload a File’ icon.
Now simply choose a song from the media library, or upload a new file from your computer.
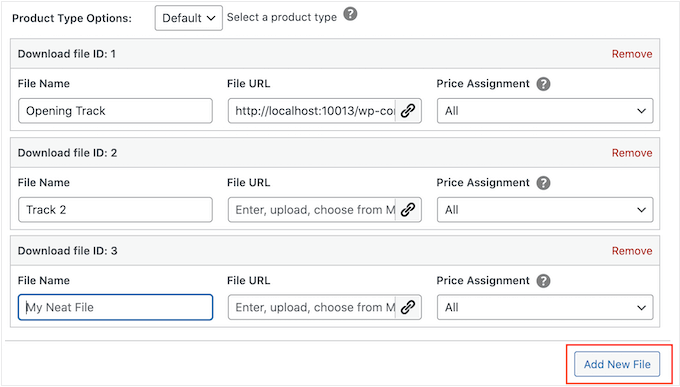
With that done, type a title into the ‘File Name’ field. This will be visible to the shopper, so you’ll typically want to use the song’s title. However, you can also add extra information such as the artist’s name.
If you want to add multiple tracks to the digital product, then click on ‘Add New File.’ This adds a section where you can upload another file.
Simply repeat these steps to upload all the files you want to include in the digital product.
Finish Setting Up Variable Pricing (Optional)
Did you enable variable pricing in the previous step? If you’re selling different versions of the same product, then you’ll need to choose which files to include in each variation.
For example, you might release ‘My Awesome Album’ with 10 tracks, and ‘My Awesome Album Extended Edition’ with 12 tracks.
Note: If you set a single price, then skip ahead to the next section.
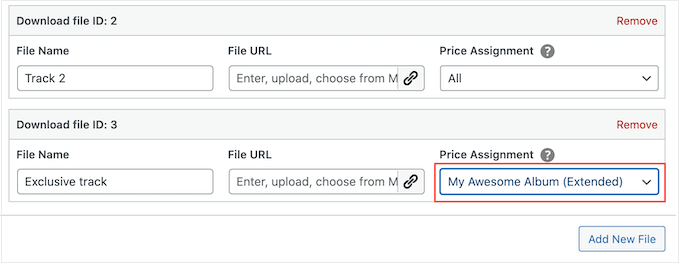
In the ‘Price Assignment’ column, you’ll see that every audio file is set to ‘All’ by default. This means it’s included in every variation.
To change this, simply open a file’s ‘Price Assignment’ dropdown and choose the variation that customers need to purchase, in order to get this audio file.
Simply repeat these steps to build unique variations with different track listings.
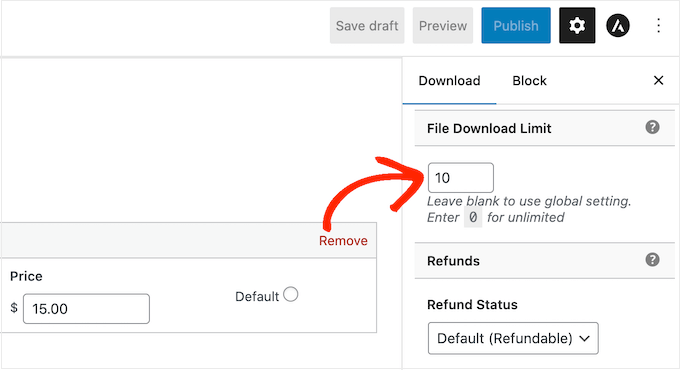
Protect Your Music By Setting a Download Limit
By default, a customer can download a product as many times as they want after purchasing it. This can be useful if the person accidentally deletes their download, or they want to listen to the track on multiple devices such as their smartphone, tablet, and computer.
However, offering unlimited downloads can make you vulnerable to scams. For example, a customer might share their direct download link with dozens of other people, who then download your music for free.
With that in mind, you may want to set a reasonable file download limit by typing into the ‘File Download Limit’ field.
Note: If you set this value too low, then customers may occasionally contact you asking for extra downloads. If there’s a genuine reason why they need to re-download the file, then you can simply resend the purchase receipt by going to Downloads » Payment History in your WordPress dashboard.
Create a Refund Policy
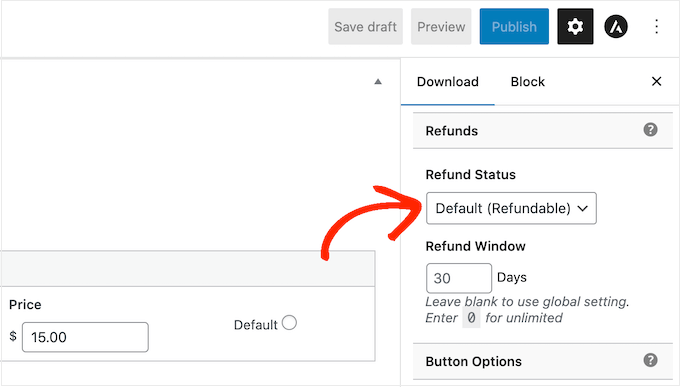
Hopefully, everyone who buys your music will be happy with their purchase. However, it’s still smart to think about how you’ll handle refunds.
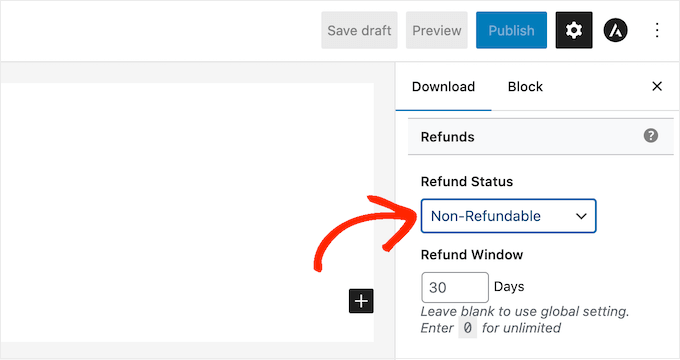
If you scroll to the ‘Refunds’ section in the left-hand menu, then you’ll see that Easy Digital Downloads offers your customers a 30-day refund by default.
If you want to give customers more or less time to claim a refund, then simply type a new number into the ‘Refund Window’ field.
A generous refund policy can make customers see your site as trustworthy and fair, which could get you more sales. It will also help turn hesitant visitors into first-time customers.
Giving unhappy customers their money back is a big part of good customer service. Even if they didn’t like their purchase, an easy refund process may still convince people to buy from you in the future.
For that reason, we recommend offering refunds wherever possible. However, if you don’t want to give refunds, then open the ‘Refund status’ dropdown and choose ‘Non-Refundable.’
Upload Your Album or Song’s Cover Art
With that done, you’ll need to add a product image. This will typically be the album or single’s front cover, or the musician’s logo.
Pro Tip: If you don’t already have a product image, then you can create one using web design software such as Canva.
To add a product image, simply scroll to the Download Image section and then click on the ‘Set Download Image’ link.
This launches the WordPress media library where you can choose an image or upload a new file from your computer.
Add Download Instructions
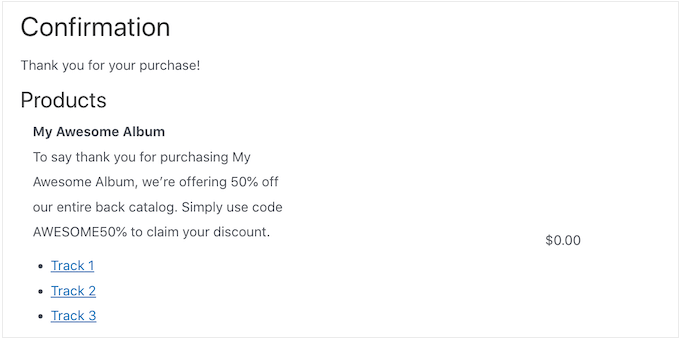
Finally, you may want to add some download instructions, which will appear on the order confirmation page.
They’ll also be added to the bottom of the purchase receipt email customers get when they buy from your site.
You can use this section to share technical information, such as the file format or the programs it’s compatible with. However, you can also write a thank you note, or even share exclusive perks such as a coupon code.
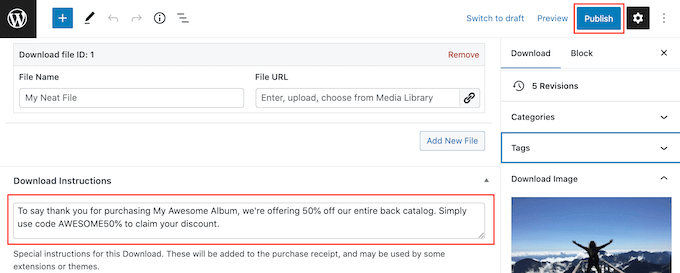
No matter what information you want to share, go ahead and type it into the ‘Download Instructions’ box.
Once that’s done, you can go ahead and click on the ‘Publish’ button to make the digital download live.
Step 4. Customize Your Digital Download Emails
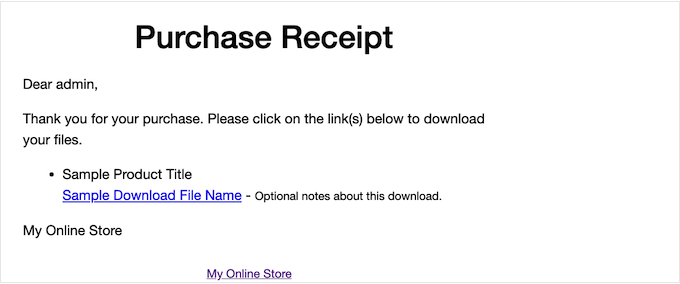
Every time someone buys music from your store, Easy Digital Downloads will send them an email.
Inside the email, they will find a download link to their purchased music.
While this email has everything the customer needs by default, it’s a good idea to customize it. For example, you might help your email stand out by adding your own branding and logo.
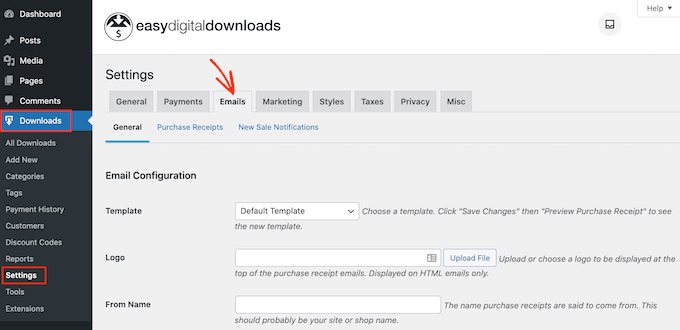
To customize the default email, head over to Downloads » Settings. Then click on the ‘Emails’ tab.
Add Your Own Logo and Branding
You may want to start by adding a logo to the purchase confirmation email.
This logo appears at the top of the screen, so customers can immediately see who the purchase email is from.
To add a logo, click on the ‘Upload File’ button. You can now either choose an image from the WordPress media library or upload a file from your computer.
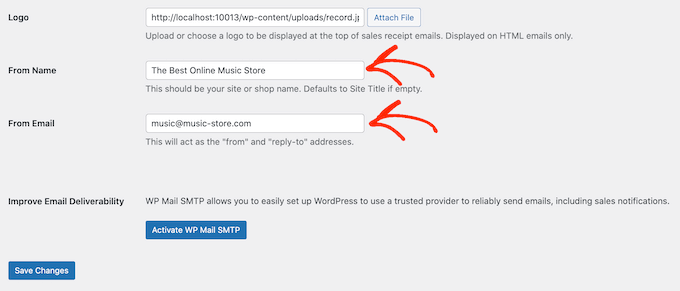
Change the ‘From’ Name and Email
You can also add a ‘From Name’ which will appear in the customer’s inbox. With that being said, you’ll want to use something that the customer will recognize such as the name of your band or online music store.
You’ll also need to add a ‘From Email,’ which will act as the ‘from’ and ‘reply-to’ address.
Some customers may reply to the purchase receipt email. For example, if they’re having problems downloading your music, then they might reach out by clicking ‘Reply.’
If shoppers don’t get the purchase receipt email, then they won’t be able to download the music they just bought.
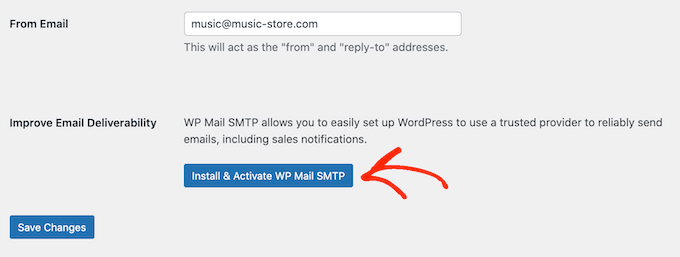
This is a bad customer experience, so you’ll want to make sure the purchase receipt email arrives in the shopper’s inbox and not in their spam folder. For that reason, we recommend using WP Mail SMTP to improve email deliverability rates.
Simply click on the ‘Install & Activate WP Mail SMTP’ button and then follow the onscreen instructions to configure the free plugin. For more information, please see our step-by-step guide on how to fix the WordPress not sending email issue.
When you’re finished, don’t forget to click on the ‘Save Changes’ button.
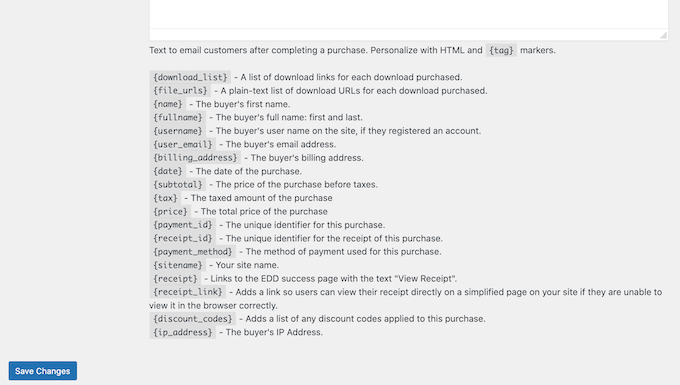
Write Your Purchase Email
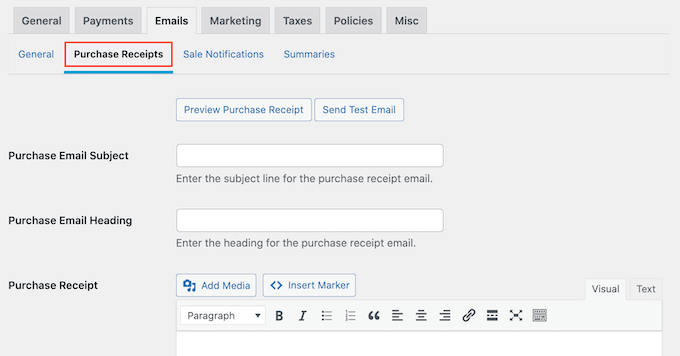
After all that, click on the ‘Purchase Receipts’ tab.
On this screen, you can type in an email subject, add a heading and also change the email’s body text.
You could simply type in the text that you want to send to every customer. However, you can create more helpful and personalized emails by using the Conditional Emails feature.
Conditional Emails use ‘template tags’ to personalize your messages. These template tags change based on factors such as the buyer’s name, how much they paid for their music download, and any coupon codes they used for the purchase.
When Easy Digital Downloads sends an email, it’ll automatically replace the template tags with real values.
To see all the different tags you can use, simply scroll to the bottom of the page.
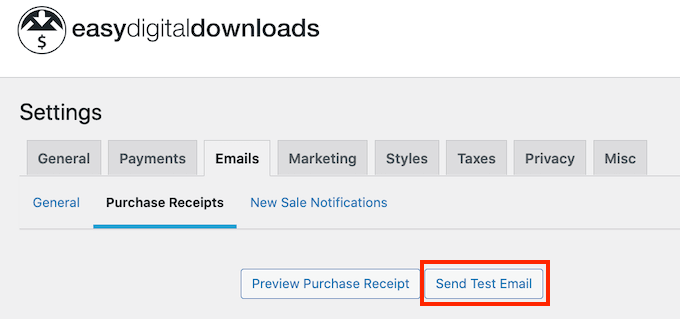
Test Your Purchase Receipt Email
When you’ve finished making changes, you may want to send a test email to check how the message will look to your customers.
Simply click on the ‘Send Test Email’ button and Easy Digital Downloads will send an email to your admin email address.
When you’re happy with how the purchase receipt email looks, you can go ahead and click on the ‘Save Changes’ button.
Step 5. Test Your Digital Music Download
After all that, it’s a good idea to test the digital download to see whether there are any problems or anything you want to change.
Enable Test Purchases
To start, you’ll need to put Easy Digital Downloads into test mode so you can buy products without having to enter any payment information.
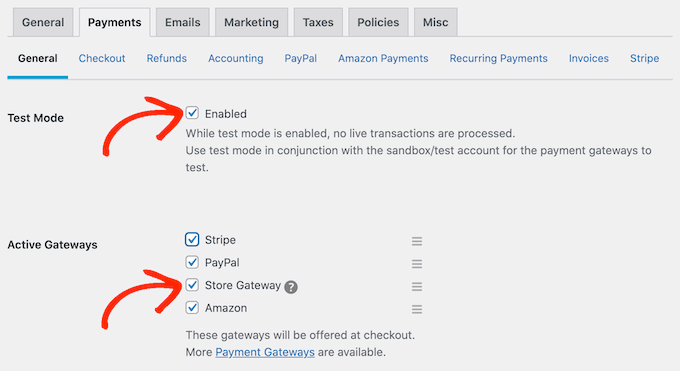
In the WordPress dashboard, go to Downloads » Settings and then click on ‘Payments.’
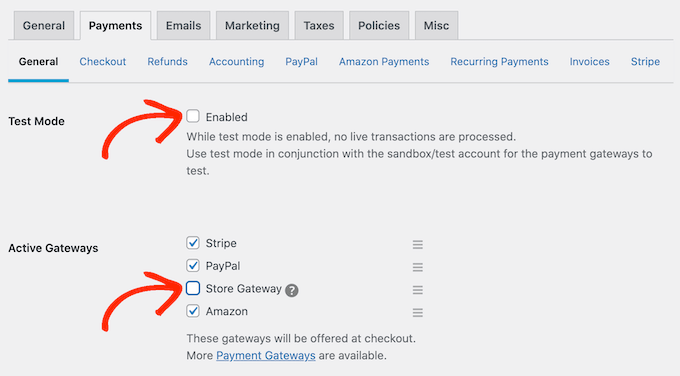
On this screen, check the box next to ‘Test Mode.’
Next, select ‘Store Gateway’ as this allows you to make a purchase without typing in any credit or debit card information.
After that, click on ‘Save Changes’ to store your settings.
Make a Test Purchase
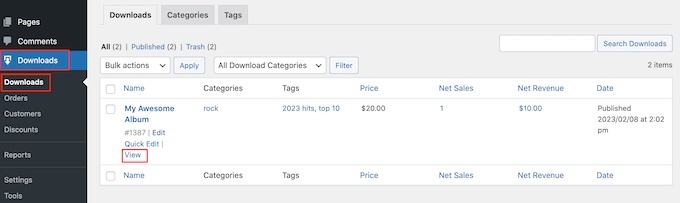
Now you’re in test mode, go to Downloads » Downloads and hover your mouse over the product you want to test.
When it appears, click on the ‘View’ link.
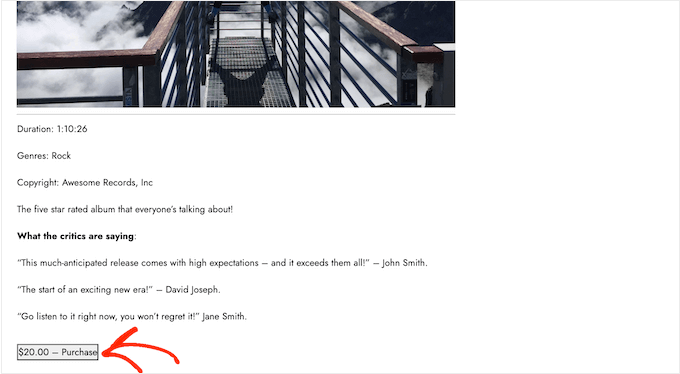
This opens the item’s product page.
To go ahead and make a test purchase, click on the ‘Purchase’ button.
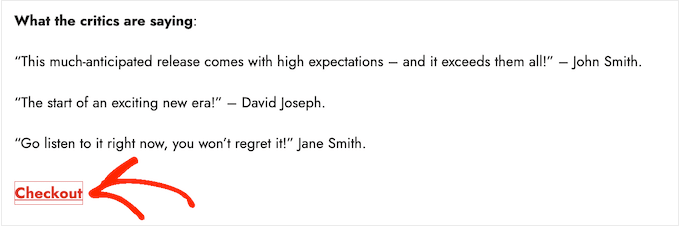
Easy Digital Downloads will now add this product to your shopping cart.
To proceed, click on the ‘Checkout’ button.
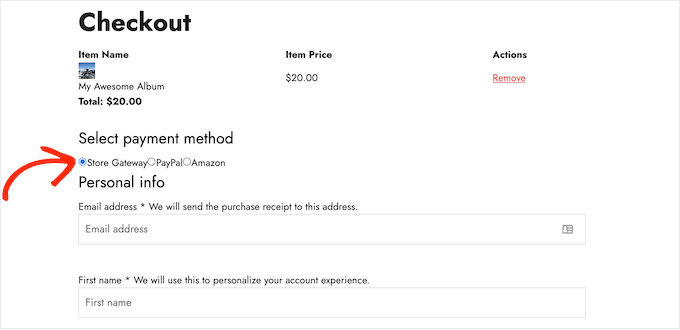
Under ‘Select payment method,’ click to select the radio button next to ‘Store Gateway.’
You can now type in your name and email address. Easy Digital Downloads will send the purchase receipt to this address, so you’ll need to use a real email address that you have access to.
After a few moments, you’ll get a purchase confirmation email containing links to download each track in the digital product.
If everything works as expected, then you’re ready to start accepting payments from real-life music fans.
To take Easy Digital Downloads out of test mode, go to Downloads » Settings, and then select the ‘Payments’ tab. Here, uncheck the box next to ‘Test Mode’ and the box next to ‘Store Gateway.’
At this point, you’ve created one or more digital products, but you still need to drive potential customers to your product pages so they can buy your music.
This might mean creating a sales page where you advertise all the latest releases, adding a particular product page to your website’s menu, or even highlighting your favorite track on a custom home page.
You could even write a WordPress blog where you talk about music topics such as the latest releases, your tour experiences, or your favorite records. These posts are the perfect place to include links to any relevant albums and singles that readers may want to buy.
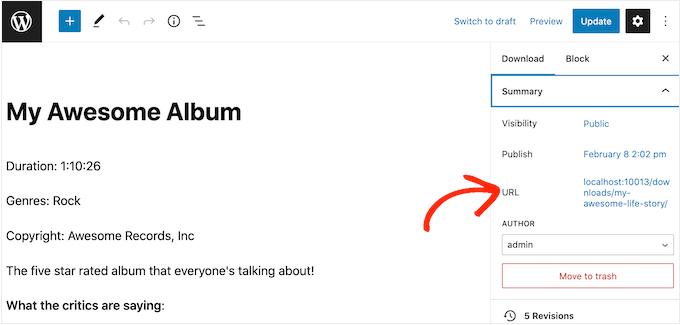
No matter how you promote a product, you’ll need to know its URL.
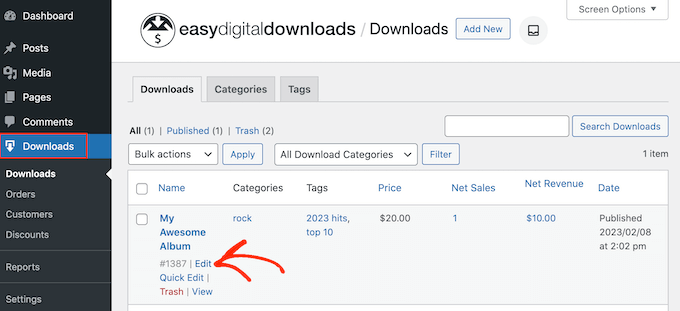
To find this link, head over to Downloads » Downloads. You can then hover your mouse over the product and click on its ‘Edit’ link.
You’ll find the URL under ‘Summary’ in the right-hand menu.
You can now link to this product page from any area of your website, simply by using its URL. To learn more, see our step-by-step guide on how to add a link in WordPress.
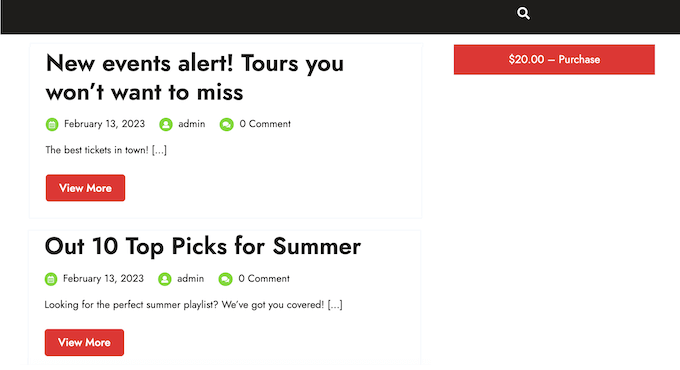
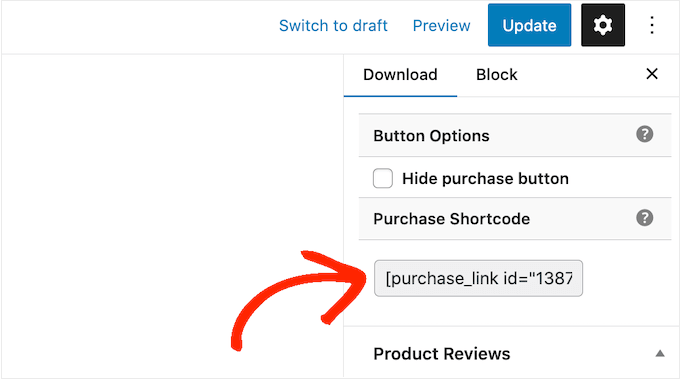
Easy Digital Downloads also creates a ‘Purchase’ button for each digital download. Visitors can click this button to add that specific product to their shopping cart.
You can add this button to any page, post, or widget-ready area. This allows visitors to start the purchasing process without necessarily visiting the product’s page.
To get the button’s shortcode, simply scroll to the product’s Download Settings section. You can then copy the text in the ‘Purchase Shortcode’ field.
Want to display your author’s Twitter and Facebook links on their WordPress profile page?
By default, WordPress user profile pages don’t include fields for adding social media profiles such as Facebook or Twitter.
In this article, we will show you how to easily display your author’s Twitter and Facebook profile links in WordPress.
Why Display Author’s Twitter and Facebook Profiles on Your Site?
Social media platforms are an important source of traffic for your WordPress website. That’s why we put together a social media cheat sheet that will help you set up your social media profiles the right way.
Your authors will also have their own social profiles, and you can display them on your site to build credibility with your readers and strengthen your site’s authority.
Your visitors will be able to follow their favorite authors on social media and discover new articles on your site sooner. You can also add their social media profiles to your site’s schema, boosting your site’s trust score on Google and other search engines.
With that being said, let’s take a look at how to display an author’s Twitter and Facebook links on their user profile page.
Method 1: Displaying Social Links in the Author Bio
Some of the best WordPress themes will display an author info box below each article. You can use this feature to display simple links to your author’s social profiles.
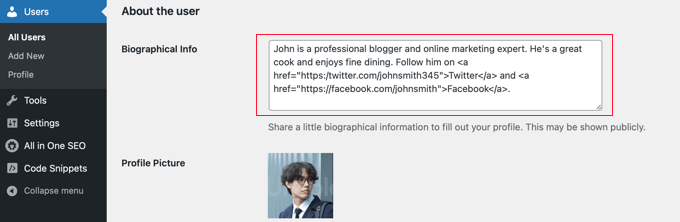
Simply go to Users » All Users in your WordPress admin panel and click the name of the author, or the ‘Edit’ link underneath to open the Edit User page.
Next, you should scroll down to the ‘About the user’ section and look for the ‘Biographical Info’ box.
If it is there, then your theme has built-in support for an author box.
Here you can type a description of the author using text or HTML. You can manually add HTML links for the author’s Twitter and Facebook profile URLs, like this:
ADD BIO HERE. Follow them on <a href="https:/twitter.com/USERNAME">Twitter</a> and <a href="https://facebook.com/USERNAME">Facebook</a>.
Make sure you add a short biography about the author and change ‘USERNAME’ to their actual Twitter and Facebook usernames.
Once you’re finished, don’t forget to scroll to the bottom of the page and click the ‘Update User’ button to store your settings.
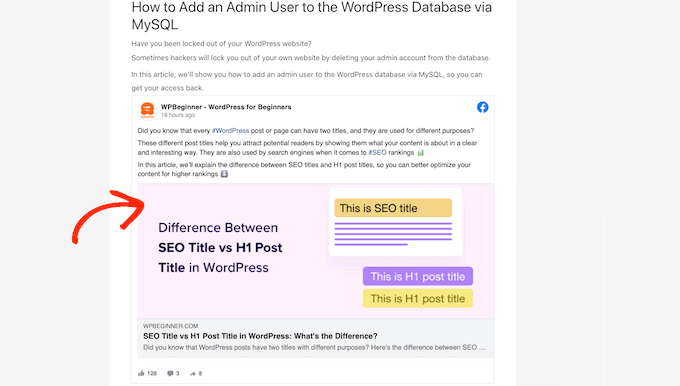
You will now see Twitter and Facebook links with the user’s bio on the posts that they write. Here’s how it looks on our demo website:
Method 2: Displaying Social Icons With an Author Bio Box Plugin
If your theme doesn’t display an author bio box, or if you want one that is more customizable and displays social icons instead of links, then you can use a plugin.
Simple Author Box is the best free author bio box plugin. It lets you customize nearly every aspect of your author bio box, including adding social media links for your authors.
If you want even more features, then there’s a pro version that lets you display an author box before or after content, add website links, get more social icon styles, include guest authors and co-authors, and more.
Upon activation, the plugin adds social media fields to each user profile. Simply navigate to the Users » All Users page in your WordPress admin area and click on the author’s name or the ‘Edit’ link below.
Tip: To quickly edit your own user profile, you can go to the Users » Profile page.
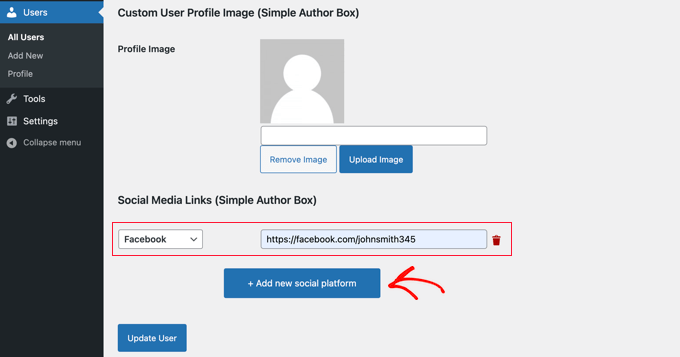
When you scroll to the bottom of the author profile, you will notice some new fields that have been added by the Author Bio Box plugin.
Scroll until you see the section labeled ‘Social Media Links (Simple Author Box).’ Now you need to select ‘Facebook’ from the drop-down menu, and then paste the URL to their Facebook profile into the next field.
Now you can click the button labeled ‘+ Add new social platform.’
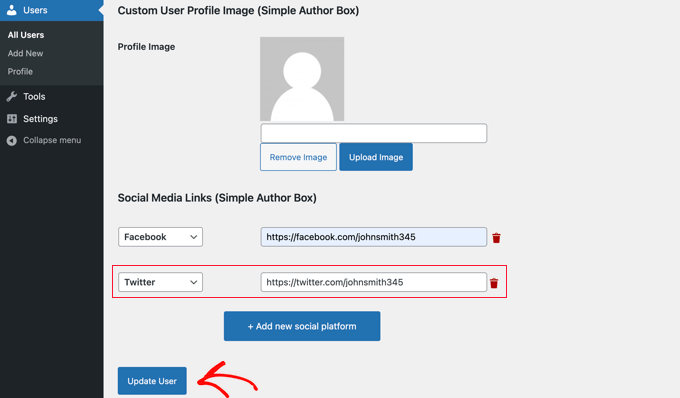
A new drop-down and field will be added where you can add their Twitter URL.
Once you’ve done that, make sure you click the ‘Update User’ button to store your settings.
Note: Don’t worry if the Facebook and Twitter URLs vanish after clicking the button. At the time of writing, there is a minor bug that hides the URLs, but the settings have been saved.
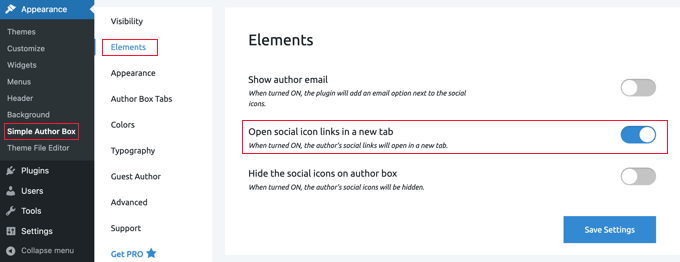
Now Facebook and Twitter icons will be displayed with the author’s profile at the bottom of their posts. Clicking these icons will take your visitors to their social profiles, but these links will open in the same window as your blog.
If you would prefer that the links open in a new tab, then you can navigate to the Appearance » Simple Author Box page and then click on the Elements tab. Once there, you need to find the option to ‘Open social icon links in a new tab’ and toggle it to the on position.
Now the author’s social profiles will open in a new tab.
Method 3: Adding Social Profiles to Your Site’s Schema for SEO
All in One SEO (AIOSEO) is the original WordPress SEO plugin that’s used on over 3 million websites. It can also be used to add social profile fields on the author’s profile page.
Unlike the other methods, this method will improve your website’s SEO since AIOSEO adds these social profiles to your site’s schema markup.
The problem is that AIOSEO does not automatically display them in the author bio. But don’t worry, we will show you how to do that.
For this tutorial, we’ll use the free version of All in One SEO since it allows you to add social profiles for your website and each user. However, AIOSEO Pro offers even more features to help you rank better in search engine results pages.
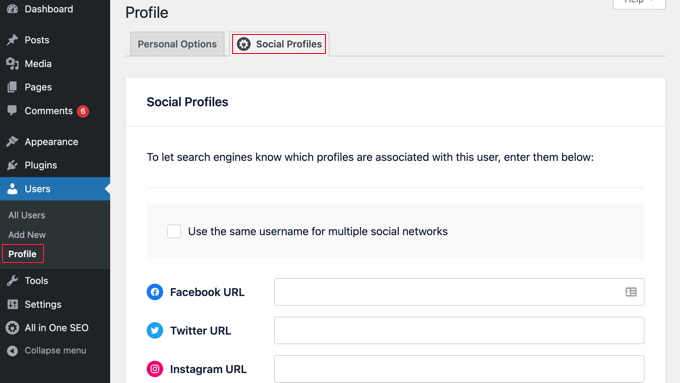
Once you have the AIOSEO plugin set up, you need to head over to the Users » All Users page, and then click on the author’s name or the ‘Edit’ link just below.
This will open the Edit User page for that author.
Notice that AIOSEO has added a Social Profiles tab at the top of the page. You need to click on that tab now.
You can now enter the URL to the user’s social profiles in the boxes provided, such as:
Note that simply adding the username is not enough.
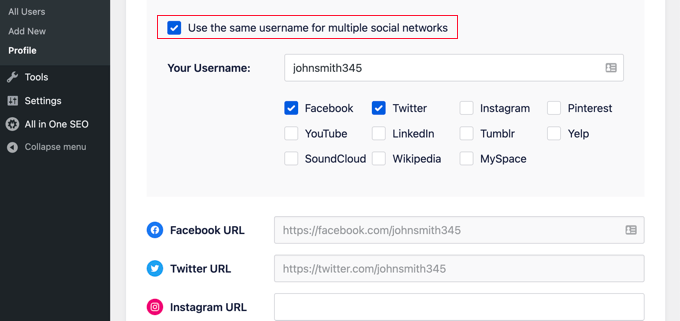
Alternatively, if the author uses the same username on multiple social networks, then you can click the box labeled ‘Use the same username for multiple social networks.’
You can then type in that username and check the social networks it is used on. For other social networks, you can simply type the full URL as before.
Once you are done, click on the ‘Update User’ button at the bottom of the page to store your changes.
Pro Tip: If you have Twitter and Facebook profiles for your business or website, then you can add these to your site’s schema in a similar way by visiting All in One SEO » Social Networks and adding the links on the Social Profiles tab.
The author’s social media profiles have now been added to your site’s schema, helping search engines understand your site better. But they are not yet being displayed on your website.
Displaying AIOSEO Author Twitter and Facebook Links in Your Theme
Now you need to display these fields as links in your theme.
If you are an advanced user, then you can display links from All in One SEO’s social profiles by editing your WordPress theme files. If you haven’t done this before, then check out our guide on how to copy and paste code in WordPress.
Note: If you’re not familiar with editing your theme’s core files and adding custom code, then we recommend you use AIOSEO to add the social profiles to your site’s schema, and then display them on your website using method 1 or method 2 above.
Advanced users can add the following code to your theme files where you want to display the author profile links.
Recently one of our readers asked if it was possible to stop WordPress from overwriting the custom code in your .htaccess file?
WordPress along with several plugins add custom settings to the .htaccess configuration file. If you have added your own custom code to .htaccess, then you may be worried that it will be overwritten or deleted.
In this article, we’ll show you how to stop WordPress from overwriting the .htaccess file.
Why Does WordPress Overwrite the .htaccess File?
Your .htaccess file is a powerful configuration file that stores important settings about your WordPress website. It contains rules that tell your hosting server how to handle your site.
WordPress uses the .htaccess file to store its permalink settings. Whenever you change or regenerate your permalinks, WordPress will automatically overwrite the old settings in .htaccess with the new settings.
Some WordPress plugins also save their settings in .htaccess. For example, the W3 Total Cache plugin will modify your .htaccess file in order to configure the caching and optimization tools that are part of the plugin.
Lastly, you can make your own custom changes to .htacess to control how your website works. For example, you can add custom rules to the file that protect your admin area, keep your site safe from hackers, set up redirects, ban suspicious IP addresses, and more.
Some users are concerned that if they add their own custom rules to .htaccess, then they may be deleted when WordPress overwrites the file with new settings. Other users prefer to manually configure .htaccess and not let WordPress write to it at all.
With that being said, let’s take a look at how to stop WordPress from overwriting your .htaccess file. Simply use the quick links below to jump to the section you are interested in.
How to Stop WordPress From Overwriting Your .htaccess Rules
The good news is that if you understand how the .htaccess file works, then you can be confident that your custom rules will not be overwritten.
That’s because the areas of the file that will be changed by WordPress or your plugins are clearly marked. Simply make sure that you don’t add code to those areas.
Don’t Modify Code Inside the WordPress Markers
As we said earlier, WordPress uses .htaccess to store the settings for an SEO-friendly URL structure. The code it saves to the file will be automatically overwritten and updated whenever you change your permalink settings.
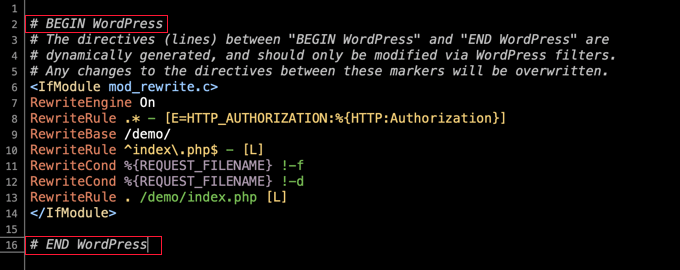
As you can see in the screenshot below, WordPress saves this information between two markers, # BEGIN WordPress and # END WordPress.
Notice the warning inside those markers:
The directives (lines) between “BEGIN WordPress” and “END WordPress” are dynamically generated, and should only be modified via WordPress filters. Any changes to the directives between these markers will be overwritten.
This means that WordPress will not overwrite or modify any code that you add outside these markers. Users typically add their custom code to the top of the file, above the # BEGIN WordPress marker.
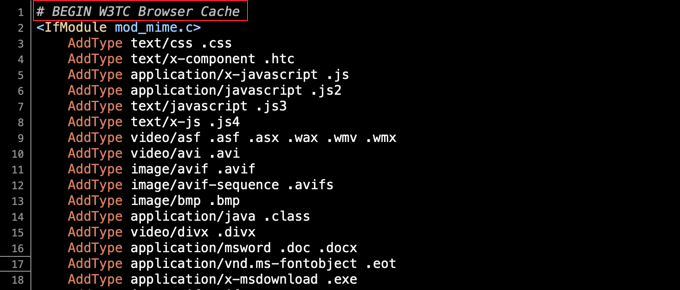
When a plugin saves its settings to .htaccess, it also places it between markers that look like # BEGIN Plugin and # END Plugin.
For example, if you install and set up the W3 Total Cache plugin to improve your website speed and performance, then it will add rules to .htaccess between # BEGIN W3TC Browser Cache and # END W3TC Browser Cache markers.
These rules will be overwritten whenever you change the plugin’s settings, so you need to be careful not to add your own custom .htaccess rules between those markers.
Creating Markers for Your Custom Code
In rare cases, a badly behaved plugin may modify code outside of its # BEGIN and # END markers. However, it will normally not modify code found between the markers used by WordPress or other plugins.
If you are concerned about a badly behaved plugin overwriting your code, then you can add your own markers to the .htaccess file.
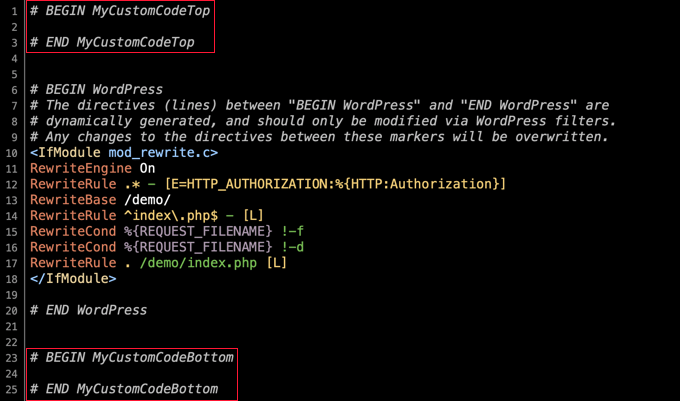
For example, you can type # BEGIN MyCustomCode and # END MyCustomCode markers at the top of the .htaccess file, and then add your own custom rules between those markers.
If you also need to add code to the end of .htaccess, then you can add a different set of markers there. Just be sure to give them different names. For example, you could use ‘MyCustomCodeTop’ and ‘MyCustomCodeBottom’.
How to Stop WordPress From Modifying .htaccess
Now that you understand how .htaccess works, you can be confident that your custom code will not be overwritten by WordPress or your plugins.
However, some developers and advanced users want to stop WordPress from making any changes to .htaccess.
For example, they may want to create permalinks by typing the settings manually into .htaccess. In this case, they will want to avoid conflicts by stopping WordPress from saving its own permalink settings to the file.
We don’t recommend this unless you know what you’re doing, because it can lead to unexpected consequences. However, it can be done by changing the file’s permissions or using code.
Stopping WordPress From Changing .htaccess Using File Permissions
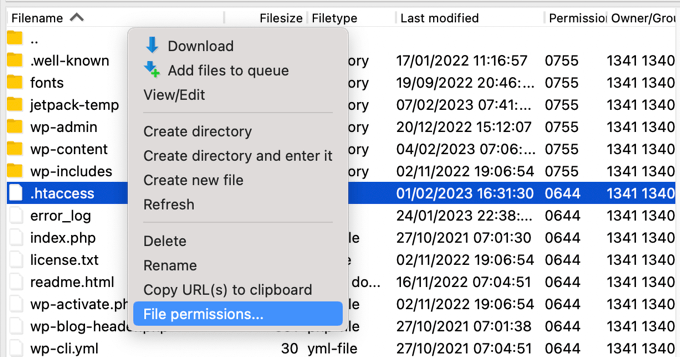
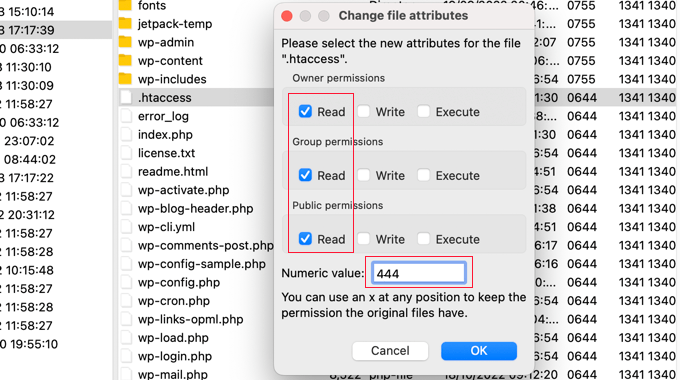
One way to stop WordPress from modifying .htaccess is to make the file read-only. To do this, you need to change the file permissions using an FTP client or the file manager provided by your WordPress hosting provider.
You will find the .htaccess file in the root directory of your WordPress installation. Next, you should right-click the file and select ‘File permissions’.
The default setting will be 644, but you can change this to 444 by typing directly into the ‘Numeric value’ field or making sure that only the ‘Read’ boxes are checked.
Once you click the ‘OK’ button, the file will be read-only and cannot be modified.
Of course, this will mean that you are unable to write to the file as well. When you wish to make changes, you will need to temporarily set the file permissions back to 644.
Stopping WordPress From Changing .htaccess Using Code
Another solution is to use a code snippet that lets WordPress know not to write to the .htaccess file. This is useful if you want to stop WordPress from modifying .htaccess without blocking your plugins.
Note: Editing any core WordPress files can be dangerous. Even a small mistake can cause major errors on your site. That’s why we only recommend this method for advanced users.
Once you’ve done that, WordPress will no longer write to the .htaccess file.
Error Message Displayed When WordPress Can’t Change .htaccess
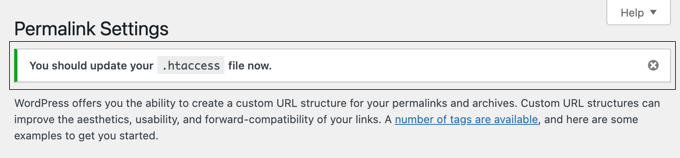
If you try to change your permalink settings when .htaccess is set to read-only, then an error message will be displayed.
At the top of the Settings » Permalinks page, you will see the message ‘You should update your .htaccess file now.’
This lets you know that WordPress was unable to modify the .htaccess file.
Normally, this is what you intended. However, if you do wish to add the WordPress permalink settings to .htaccess, then you will need to do it manually.
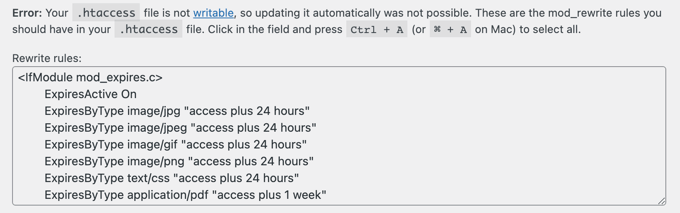
At the bottom of the Settings ≫ Permalinks page, you will see another error message saying that your .htaccess file is not writable. Underneath that, you will see the rules that need to be added to .htaccess.
If you wish to add those settings, then you will need to temporarily change the .htaccess file permissions back to 644 so that it can be edited. After that, you should paste the rules between the file’s WordPress BEGIN and END markers, replacing the code already there.
When you’re finished, simply set the value back to 444 and save the file. It will once again be unwritable.
Do you want to create a popup that appears when visitors click on a link or an image on your site?
This is a proven way to grow your email list. It is more effective since it starts with an action taken by a user. Popular sites often use it to offer an optin incentive to get even more subscribers.
In this article, we’ll show how to open a WordPress popup on click of a link or an image, step by step.
What Is an ‘On Click’ Popup Form?
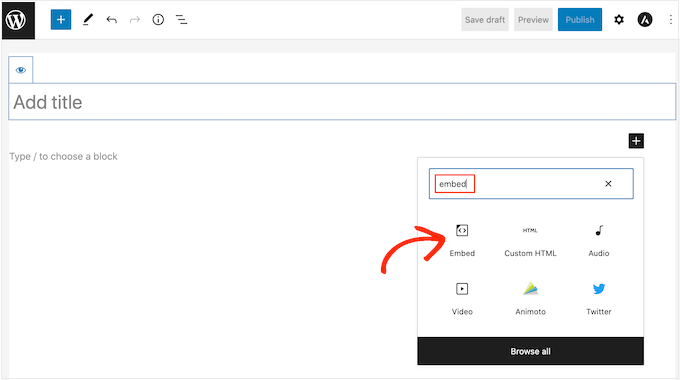
On-click popup forms are lightbox popups that open when a user clicks on a link, button, or image on your WordPress website.
Normally, popups appear on websites when a user arrives or when they are about to leave. On-click popup forms are triggered by user interaction.
We also use on-click popups on WPBeginner to grow our email list. For instance, a popup will appear when a user clicks the email icon in the sidebar next to all social icons.
Why Are On-Click Popup Forms So Effective?
On-click popup form is effective because it uses the powerful Zeigarnik effect. This is a psychological principle that states users who start an action themselves are more likely to finish it.
When someone clicks a link or button to trigger your popup, they’ve already shown interest. When the form popup appears, they’ll be more likely to use it.
For example, you can use an on-click popup to offer a lead magnet. This could be a free downloadable resource like an ebook or PDF file that users can get in exchange for their email address.
However, there are other ways to use on-click popups on your website. For instance, you can ask users to claim a coupon code, learn more about a product, fill-out surveys, and more.
That being said, let’s take a look at how to easily make an on-click lightbox popup for your website.
First, you’ll need to sign up for an OptinMonster account. You’ll need the Pro account (or higher) because it includes the MonsterLinks™ feature that lets you create on-click popups.
Simply visit the OptinMonster website and click the ‘Get OptinMonster Now’ button to get started.
This lets you connect your OptinMonster account to your WordPress site.
Once you’ve activated the plugin, you’ll need to connect your account. You should be taken to the Welcome page automatically in your WordPress dashboard.
Go ahead and click the ‘Connect Your Existing Account’ button.
After that, a new window will open.
You can click the ‘Connect to WordPress’ button to add your site to OptinMonster.
Once you’ve connected your OptinMonster account to your WordPress site, you can create your on-click popup.
Simply go to OptinMonster » Campaigns from your WordPress dashboard and click the ‘Create Your First Campaign’ button.
You’ll be taken straight to the OptinMonster website.
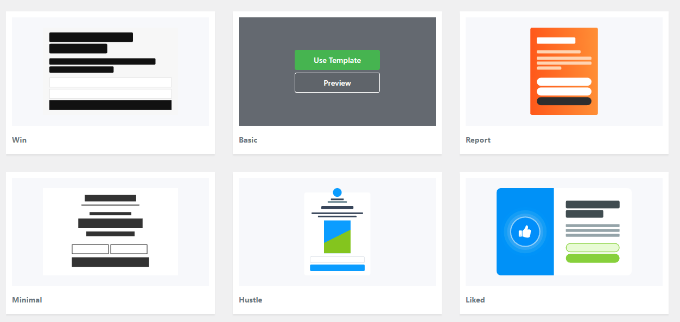
The Campaign Type should already be set to Popup. If not, just click on Popup to select it. Next, you’ll need to choose a campaign template.
You’ll be able to modify the template exactly how this looks later. We’re going to use the ‘Basic’ template for this tutorial.
Simply run your cursor over the template and click the ‘Use Template’ button.
Now, you’ll be prompted to enter a name for your campaign. This is just for you. The users will not see it.
Simply enter a name and click the ‘Start Building’ to create your popup.
OptinMonster will automatically load up the template in the drag-and-drop campaign builder.
You can edit the default text and add or remove elements from your template. Simply drag blocks from the menu on your left and drop them on the template.
You can also remove any element in the form by clicking on it and using the menu options to the left. For instance, we will remove the ‘Name’ field from the form.
First, you’ll need to click on the ‘Optin’ tab at the bottom of the screen. After that, click on the field to select it, and you’ll see the available options in the left column, including the option to remove it.
Once you have designed the popup, the next step is to design the Success view, which people see after filling out the form.
Simply switch to the ‘Success’ view at the top of the screen.
You can edit the success view just like you edited the optin view. For instance, you may want to change the text or include a link to download a lead magnet.
Connecting Your Popup to Your Email List
Once you’re happy with your popup, click on the Integrations tab at the top of the screen. You’ll need to link OptinMonster to your email marketing service so that you can add people to your email list.
From here, click the ‘+ Add New Integration’ button on the left-hand side of the screen.
Next, you can select your email provider from the dropdown list.
From here, simply follow the instructions to connect it to OptinMonster.
Setting Your Popup to Appear On Click
Now, you need to configure your popup to appear when the user clicks a link.
Go ahead and click on the Display Rules tab at the top of the screen.
The default display rule set by OptinMonster is ‘time on page.’ This means that the default pop-up will appear after the user has been looking at that page for a certain amount of time.
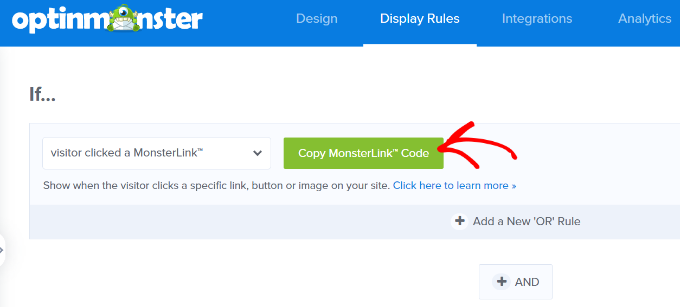
However, you can click the dropdown and select the ‘MonsterLink™’ (On Click)’ option instead.
After that, you should see your MonsterLink™ in the display rules.
You can click the button to copy your MonsterLink™ Code. You’ll need this in a moment.
Making Your On-Click Popup Live
Next, you can go to the ‘Published’ tab at the top of the page and change your campaign’s status from ‘Draft’ to ‘Publish.’
Once you’ve done that, click the ‘Save’ button at the top of the screen and close the campaign builder.
Next, you’ll see the ‘WordPress Output Settings’ for your campaign. You can click the ‘Status’ dropdown menu and change it from ‘Pending’ to ‘Published.’ When that’s done, click the ‘Save Changes’ button.
Adding Your MonsterLink to Your WordPress Website
Now, you need to add the special MonsterLink™ to your site. If you didn’t copy this earlier, you can get it by going back to the ‘Display Rules’ setting for your campaign.
First, you’ll need to create a new post or page, or edit the one where you want to add your link.
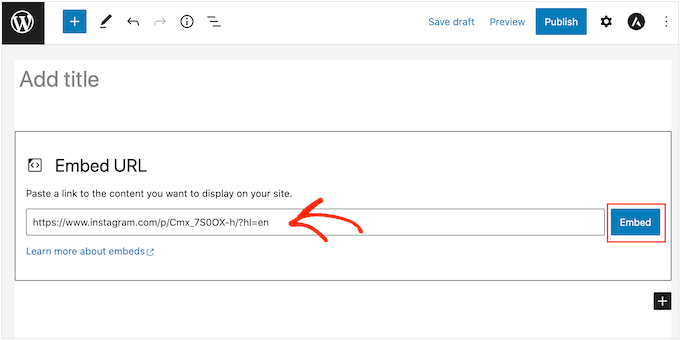
The MonsterLink™ is HTML code, so you need to paste it into a custom HTML block.
You can change the words ‘Subscribe Now!’ to whatever text you want to use for your link.
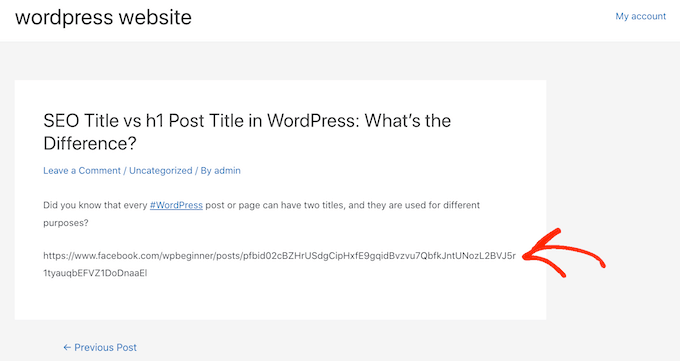
Once you’ve placed the link, you can preview your page or post to ensure it’s working.
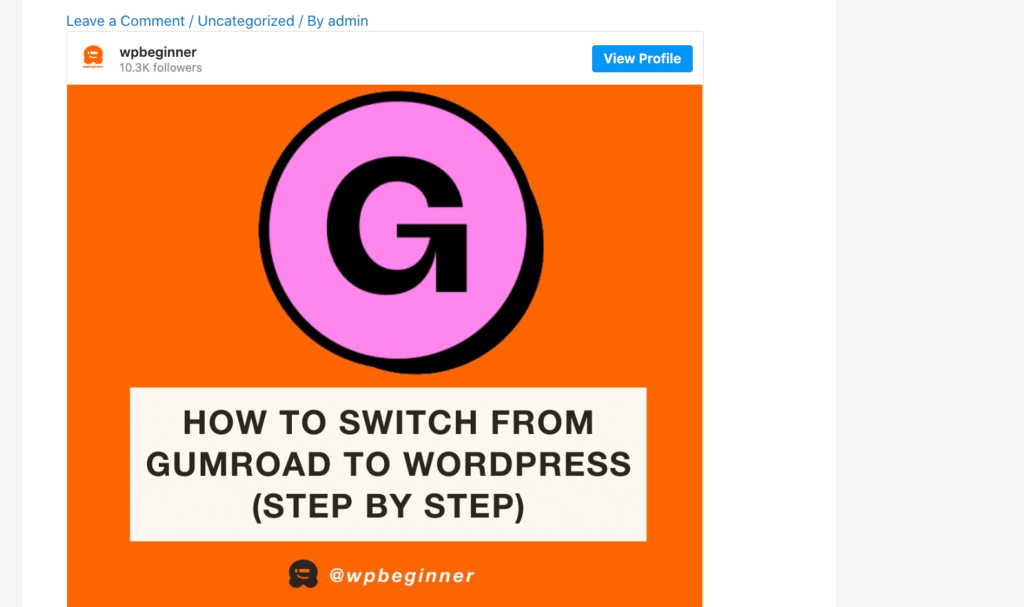
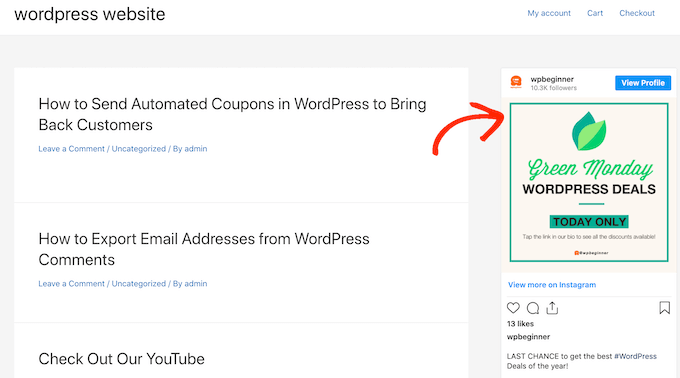
Here’s our link in action. Note we’ve applied some styling to the text to create a box with larger text to help promote the lead magnet:
Tip: You’re not limited to just text links using MonsterLinks™. You can also use MonsterLink with call-to-action buttons, images, banners, or navigation menus on your website.
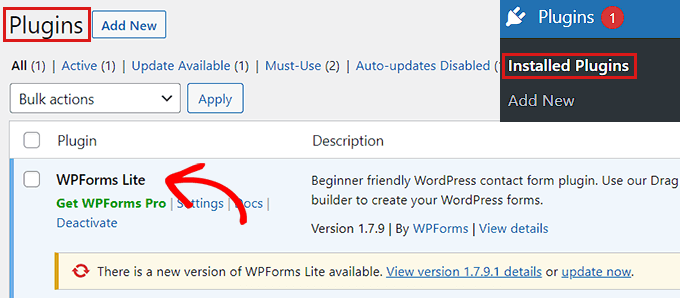
Are you looking to enable or activate plugins from the WordPress database?
If you are unable to access your WordPress admin area and need to activate a plugin to restore your access, then you can do that from the WordPress database.
In this article, we will show you how to easily activate your WordPress plugins using the database.
When Should You Activate WordPress Plugins Using Database
However in some situations, a website owner may need to activate certain plugins to restore access to their WordPress website.
For example, let’s assume an error is stopping you from accessing your WordPress dashboard, and you have found a plugin that can fix that error.
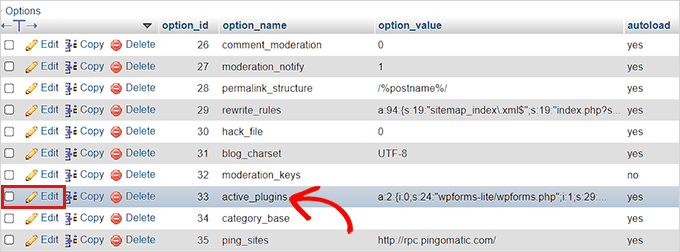
Luckily, WordPress stores the active plugins information in your WordPress database. This means you can manually enter this information directly in the database and tell WordPress to activate a plugin.
The only condition is that the plugin must be installed on your WordPress site. Which means that it should be present in the plugins folder on your WordPress website.
With that being said, let’s see how you can easily enable/activate a plugin using the database.
Step 1. Find Your Database Name Using the Hosting Control Panel
To activate your WordPress plugins using phpMyAdmin, first, you need to find out your WordPress database’s name.
Now, to find the name of your database, you need to log in to your web hosting dashboard. For this tutorial, we will be using Bluehost.
If you are using a different hosting company, then your WordPress hosting dashboard may look slightly different.
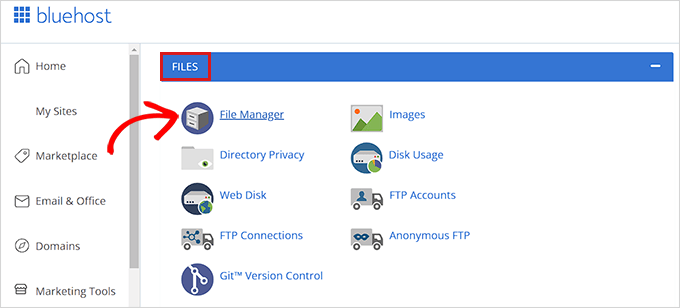
Once you are on the cPanel, scroll down to the ‘Files’ section and click the ‘File Manager’ option.
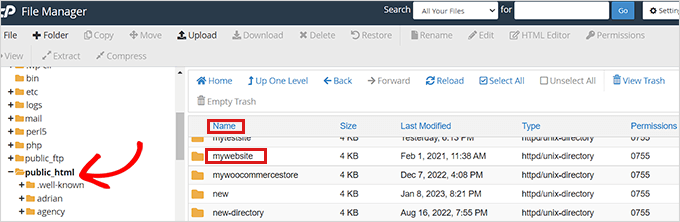
This will open up the File Manager in a new window. Here you simply need to locate and click the public_html folder from the left column.
This will open up all the files that are stored in the public_html folder. Now, you simply need to locate and click the folder with your site’s name on it present under the ‘Name’ column.
Some users may instead see their WordPress files and folders installed inside public_html folder.
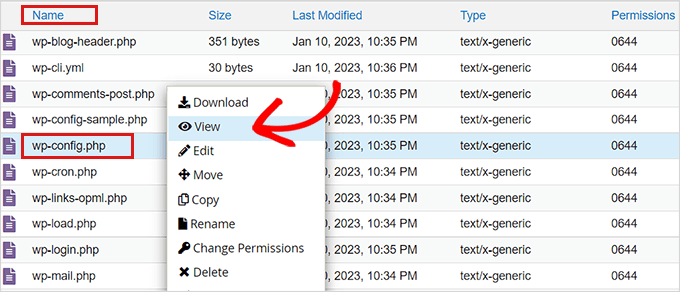
After you have opened up your WordPress site’s file, locate the wp-config.php file under the ‘Name’ section and right-click on it.
This will open up a menu where you need to select the ‘View’ option.
This will open up the wp-config.php file in a new window where you can locate your database details.
We recommend that you copy and paste your database details including username and password into a notepad on your computer.
Now you’ve successfully found your database’s name, let’s move to our next step.
Step 2. Locate Active Plugins Option via PhpMyAdmin
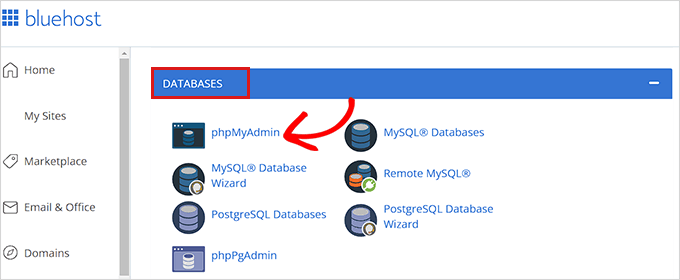
After you have found out the name of your database, you need to go back to your WordPress hosting control panel.
Once there, scroll down to the ‘Databases’ section and click the ‘phpMyAdmin’ option.
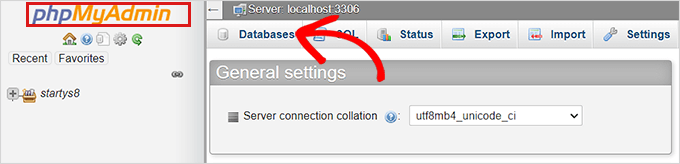
This will launch the phpMyAdmin app in a new browser tab.
Note: Before you make any kind of changes, please make sure to create a complete backup of your database. It will come in handy if anything goes wrong with the process.
Next, you simply need to click the ‘Database’ tab from the navigation menu present at the top of the page.
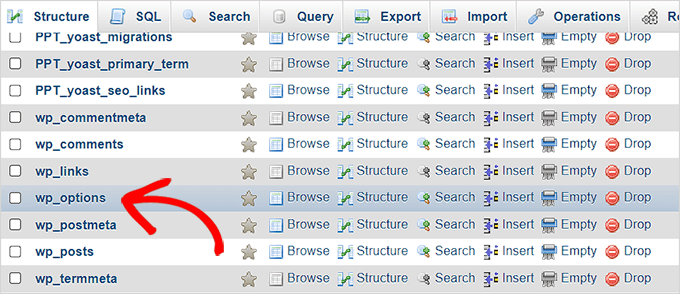
Now, simply locate your WordPress database and click on the browse button to expand it.
This will show your WordPress database tables.
Here, you will simply need to locate wp_options table and click browse next to it.
Note: By default, WordPress uses wp_ as the prefix for table names. Your WordPress database table may have a different table prefix.
Inside the wp_options table, you’ll need to find the row where option_name is set toactive_plugins.
After that, click on the Edit link next to it.
This will open up a box where you can manually enter details to activate a plugin.
Step 3. Activate a Plugin Using phpMyAdmin
WordPress stores the active plugins information in a special format so that it can be programatically accessed by the software.
In order to tell WordPress which plugins to activate, we’ll need to use that same format.
First, we’ll start by entering the option_value as a:1: and then open up the curly bracket ({).
We are entering this value as 1 because we only want to activate one plugin. You have to change the value to the number of plugins you plan on activating.
Next, we will be entering i:0; after the curly bracket. Here we are essentially assigning a serial number to our plugin.
Remember to always assign numbers starting from 0 instead of 1.
Next, we will be entering the number of characters present in the plugin’s name and the php file name of the plugin that we’re about to activate.
For that, we will type s:24: in the box. Keep in mind that the number of characters will differ for each plugin based on the characters in the plugin directory and file name.
For instance, we are activating WPForms in this tutorial which has 24 characters in its name including the file name of the plugin as stored in our file manager.
Next, you just need to type the plugin’s directory name. You can find it by visiting the /wp-content/plugins/ folder using the File Manager app.
Don’t forget to add quotation marks before typing the plugin’s directory name.
After the /, you need to enter the plugin’s file name. This is usually the file with similar name inside the plugin folder.
Now, go back to phpMyAdmin and type the name of the plugin and then close the quotation marks.
After that, simply add a semi-colon (;) and close the curly brackets (}). The final value in this example would look like this:
a:1:{i:0;s:24:"wpforms-lite/wpforms.php";}
This is how it will look once you’re done.
Next, simply click the ‘Go’ button to execute the command.
Now go visit your WordPress dashboard and head over to Plugins » Installed Plugins.
Your plugin has been successfully activated.
Now let’s say you want to activate two more plugins.
First you will need to change the number of plugins. After you will adjust each entry for the plugin that you want to activate.
Note: We have added line breaks here to make the code look more readable. You need to make sure that there are no line breaks or spaces in your code. Otherwise, it wouldn’t work.
Do you want to learn how to fix the Facebook and Instagram oEmbed issue in WordPress?
If you’ve previously added Facebook or Instagram content to WordPress using the default oEmbed or Embed block, then this feature no longer works. This can cause errors and missing content on your WordPress website.
In this guide, we’ll show you how to fix the Facebook and Instagram embed issue, so visitors can enjoy social content on your WordPress website.
What is the Facebook and Instagram oEmbed Issue in WordPress?
In the past, you could easily embed Instagram and Facebook posts in WordPress using a protocol known as oEmbed.
However, Facebook changed the way that oEmbed works so you can no longer easily embed videos, pictures, updates, and other content from Facebook or Instagram.
Instead, you now need to register an app and use a client token to get data from the Facebook Graph API, before you can embed Facebook or Instagram content on your WordPress blog.
This would take a lot of time and effort, especially if you want to show lots of different social posts across your website. With that in mind, the people behind WordPress decided to remove the Facebook and Instagram embed feature.
If you previously added any Facebook content to your website using oEmbed, it’ll now look something like the following image.
If you embedded any Instagram posts using oEmbed, then you’ll get a similar error.
This is a bad user experience, and some visitors may assume that your website is broken, no longer maintained, or that you’re not a trustworthy or reliable business.
There are ways to fix the problem manually. For example, you might go through each page and post and delete the embedded content. However, this would take a lot of time and effort, and there’s no guarantee you’ll manage to find every broken embed.
With that being said, let’s see how you can easily fix the Facebook and Instagram oEmbed issue on WordPress.
How to Fix the Facebook & Instagram oEmbed Issue
The easiest way to fix the oEmbed issue is by using one of the free Smash Balloon plugins.
First, you need to install and activate the plugin. For more details, see our step by step guide on how to install a WordPress plugin.
After installing either plugin, simply head over to Instagram Feed » oEmbeds or Facebook Feed » oEmbeds, depending on the plugin you’re using.
We’re using the Social Photo Feed plugin in all our images, but the steps will be exactly the same no matter what plugin you’re using.
On this screen, simply click on the ‘Enable’ button.
That’s it. You can now embed Facebook and Instagram posts on your WordPress website.
How to Embed Instagram or Facebook Posts in WordPress
Whether you’re using Facebook or Instagram, you can embed a specific post in any page, post, or widget-ready area, such as the sidebar.
One option is to open the page or post where you want to show the social content. Then, click on the ‘+’ icon and type in ‘Embed.’
When the right block appears, click to add it to the page or post.
In the ‘Embed’ field, simply paste the URL of the Instagram or Facebook post that you want to show on your website.
Then, click on ‘Embed.’
WordPress will now show that specific post. When you’re ready to make the post live, simply click on ‘Update’ or ‘Publish.’
Now when you visit the page, you’ll see the social media post live.
Another option is adding the Instagram or Facebook post to a widget-ready area such as the sidebar. That way, you can promote the same post across every page of your website.
To add a Facebook or Instagram post to a widget-ready area, simply go to Appearance » Widgets and click on the blue ‘+’ button.
In the search bar, type in ‘Embed’ to find the right block.
When the ‘Embed’ block appears, drag it onto the area where you want to show the Facebook or Instagram post.
In the ‘Embed’ field, simply paste the URL of the Instagram or Facebook post that you want to show on your website. Then, click on ‘Embed.’
WordPress will now show that specific post.
If you’re happy with how it looks, then click on ‘Update’ to make it live.
Now, when you visit your website, you’ll see the Instagram or Facebook post live.
How to Add an Instagram or Facebook Feed to WordPress
With the free Smash Balloon plugins, it’s easy to fix the oEmbed issue so you can add Facebook and Instagram posts to your website.
This is great if you only want to embed a small number of posts or you want to control exactly where each social post appears on WordPress. However, you may also want to embed a Facebook or Instagram feed on your website.
By creating a feed, you can show all your latest posts in a nice layout. Even better, the feed will update automatically so visitors will always see the newest posts without you having to update your site manually.
This can keep your site fresh and interesting, even for regular visitors.
Want to add both Facebook and Instagram feeds to your WordPress website? Then you may want to look at Smash Balloon Social Wall.
This powerful plugin lets you combine any feeds you’ve created using the Smash Balloon plugins, including Facebook, Twitter, YouTube feeds, and more.
For example, if you’ve set up the Facebook Feed and Instagram Feed plugins, then you can simply go to Social Feeds »Create a Social Wall in your WordPress dashboard.
Here, you’ll see all the different feeds you’ve created so far.
Simply select each feed that you want to add to the social wall.
For example, you can combine posts from your Instagram and Facebook accounts.
Small Balloon Social Wall will then create a shortcode that allows you to add the social wall to any page, post, or widget-ready area.