Do you want to add a sliding side cart in WooCommerce?
This allows shoppers to see their shopping cart from any page on your online store. Customers can then add items to their basket, remove products, and add coupons without ever having to visit a separate cart page.
In this article, we will show you how you can easily add a sliding cart in WooCommerce.
Why Add a Sliding Side Cart in WooCommerce?
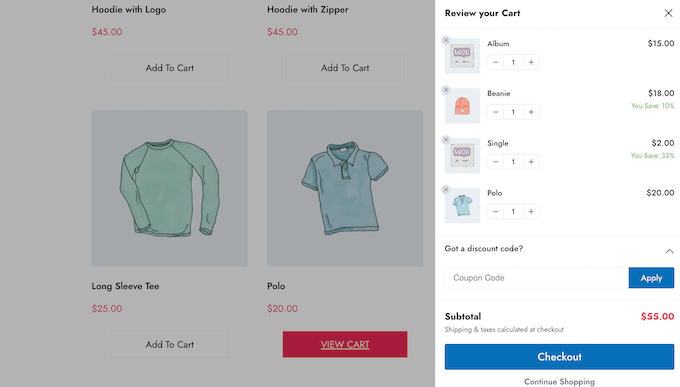
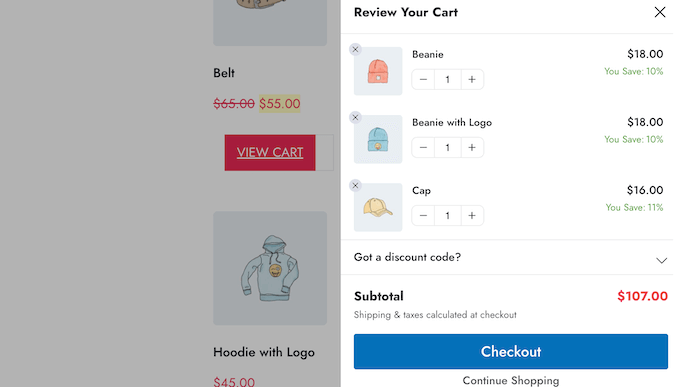
A sliding side cart is a panel that appears when a customer adds an item to their basket.
Customers can also open the cart at any time by clicking on the cart icon. This allows them to check their shopping basket without having to visit a separate WooCommerce cart page.
Depending on how the cart is set up, shoppers may also be able to add and remove items as well as apply coupons directly from the sliding panel. You can even add call to action buttons such as a link to your WooCommerce checkout page.
Sliding carts can improve the customer experience by removing friction from the shopping process, and help shoppers keep track of how much they’ll pay at checkout. This can reduce cart abandonment rates, while also possibly increasing the average order value.
With that being said, let’s see how you can add a sliding side cart in WooCommerce. Simply use the quick links below to jump straight to the method you want to use.
Method 1. How to Add a Sliding Side Cart in WooCommerce Using a Free Plugin
The quickest and easiest way to create a sliding side cart is by using Cart For WooCommerce By FunnelKit. This free plugin allows you to add a cart icon to your online store.
Shoppers can click the button to open the sliding side cart.
You can change the cart’s colors, borders, buttons, messaging, and more.
There are a ton of options to make it perfectly fit your WordPress theme.
You can show the cart button across your entire site, limit it to WooCommerce pages only, or add the button to specific pages and posts using a shortcode.
How to Setup the Cart For WooCommerce Plugin
First, you’ll need to install and activate the FunnelKit Cart for WooCommerce plugin. If you need help, then please see our guide on how to install a WordPress plugin.
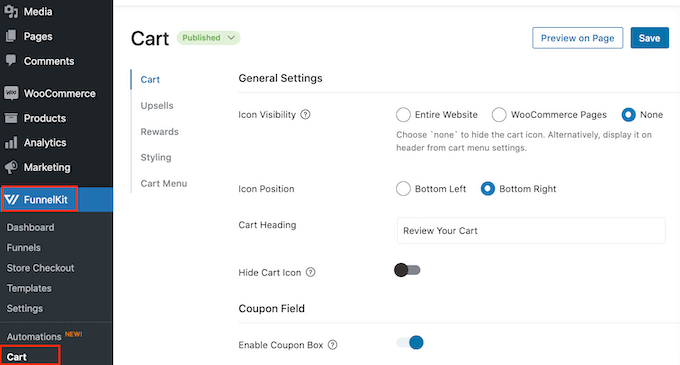
Upon activation, go to FunnelKit » Cart. You’ll see a preview of the sliding slide cart towards the right of the screen.
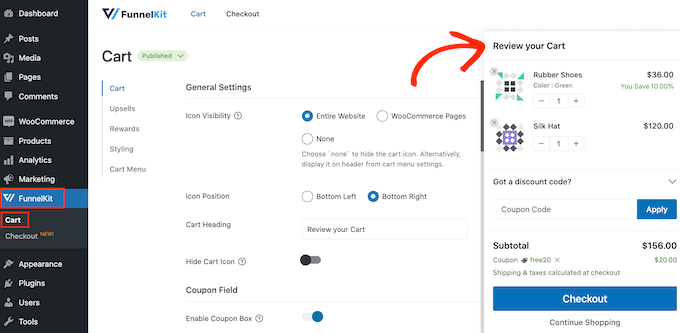
You can now customize the cart to better suit your needs.
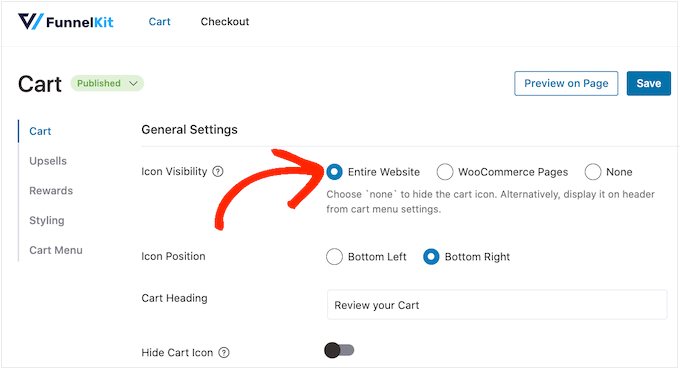
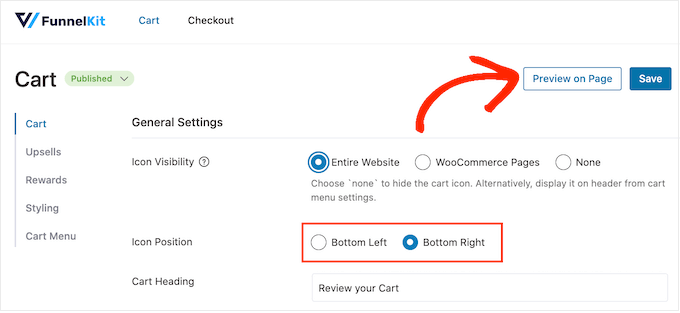
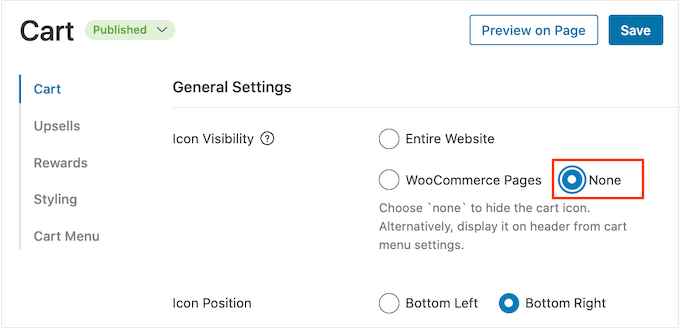
To start, you can decide whether to show the cart icon across your entire website or on WooCommerce pages only.
If you select ‘Entire Site’, then shoppers can open the sliding cart from any page, so this is a good choice for online marketplaces and stores.
However, some WooCommerce sites have lots of non-ecommerce content. For example, you might run a popular WordPress blog, but use WooCommerce to sell merchandise to your fans.
Showing a cart button on every single blog post may become annoying. In that case, you can check the ‘WooCommerce Pages’ radio button.
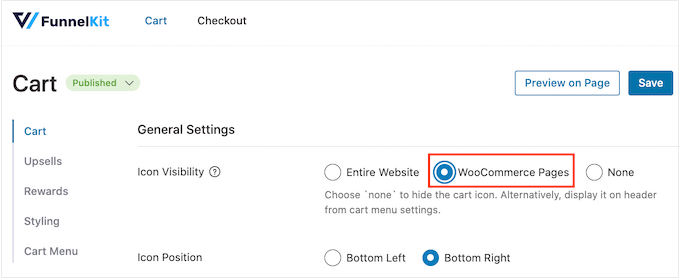
Another option is ‘None,’ which hides the cart icon completely.
If you select the ‘None’ option, then you can add the icon to any page, post, or widget-ready area using a shortcode. You can also add the icon to your navigation menu.
We’ll show you how to do this later in the post, but for now, select ‘None’ if you plan to add the cart icon manually.
After making this decision, select ‘Bottom Left’ or ‘Bottom Right’ depending on where you want to show the cart button. Here, it may help to check how the button will look on your online store by selecting ‘Preview on Page.’
By default, the plugin shows ‘Review Your Cart’ at the top of the sliding side cart.
You can replace this with your own messaging by typing into the ‘Cart Heading’ field.
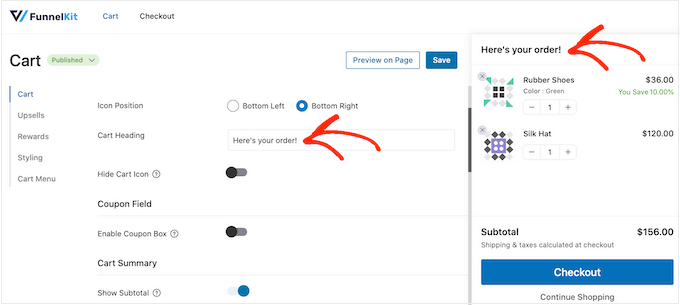
If you don’t want to show a heading, then simply leave the field empty.
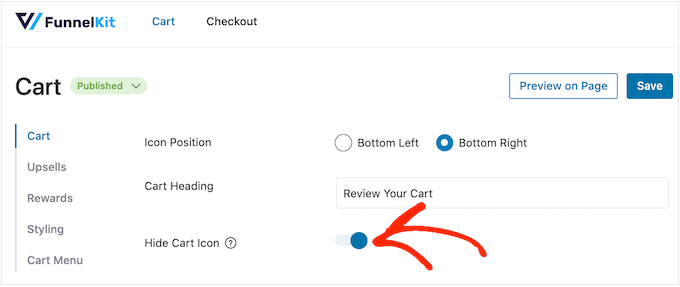
By default, FunnelKit shows the cart icon before the shopper adds any items to their basket.
If you prefer, then you can hide the icon until the visitor starts adding items. Simply click on the ‘Hide Cart Icon’ toggle so that it turns blue.
This is all you need to create a basic sliding side cart, but there are settings that can get you even more sales. With that in mind, let’s take a look at FunnelKit’s more advanced features.
Accept Coupons in the WooCommerce Sliding Side Cart
Coupons are a great way to get more sales and build customer loyalty.
If you’ve created any smart WooCommerce coupons using the Advanced Coupons plugin, then shoppers can type them directly into the sliding cart page.
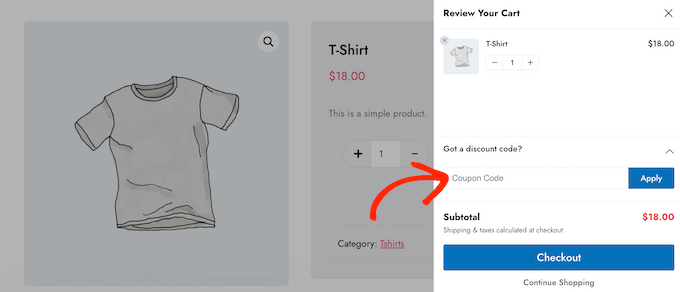
When the customer clicks on ‘Apply,’ the sliding cart will show how much they’ve saved.
Since customers can see the discount straight away, this will encourage them to add more items to their basket and may reduce your cart abandonment rates.

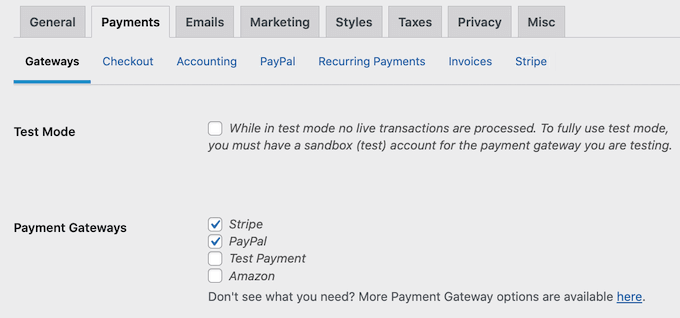
You can create these codes using the built-in WooCommerce coupon feature or by using a coupon code plugin.
To add the coupon field, click on the ‘Enable Coupon Box’ toggle, which turns it from grey (disabled) to blue (enabled).
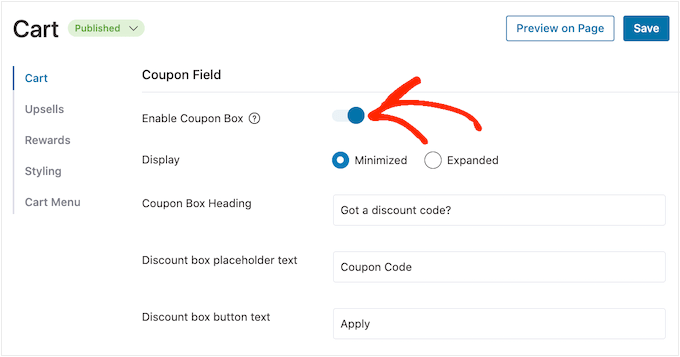
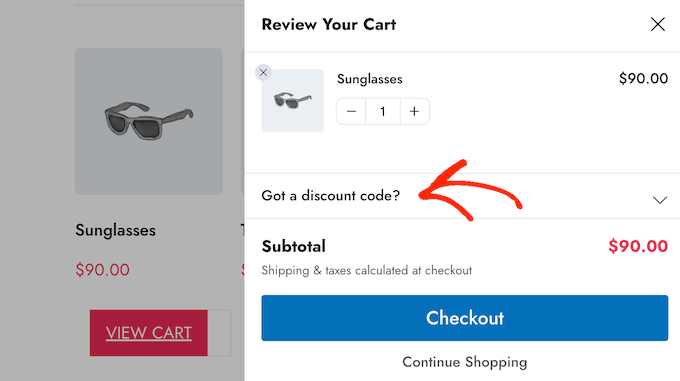
After that, you can switch between ‘Minimized’ and ‘Expanded’ layouts. Minimized takes up less space so it’s less distracting, but shoppers will need to expand the coupon section before they can type in any codes.
In the following image, you can see the minimized layout.
After choosing a layout, you can change the text that FunnelKit uses for the coupon box heading, discount placeholder text, and button text.
Customize the Cart Summary
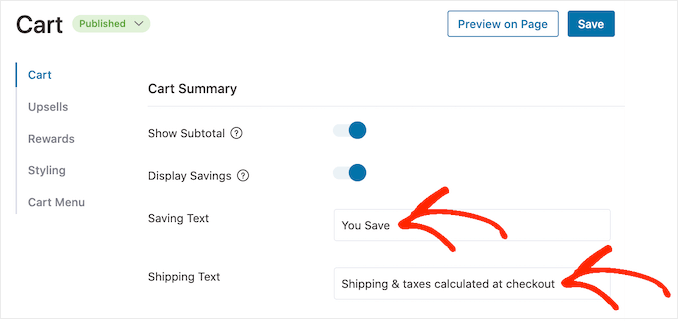
The cart summary shows customers how much their purchase will cost. This helps reduce cart abandonment rates since there are no nasty surprises at checkout.
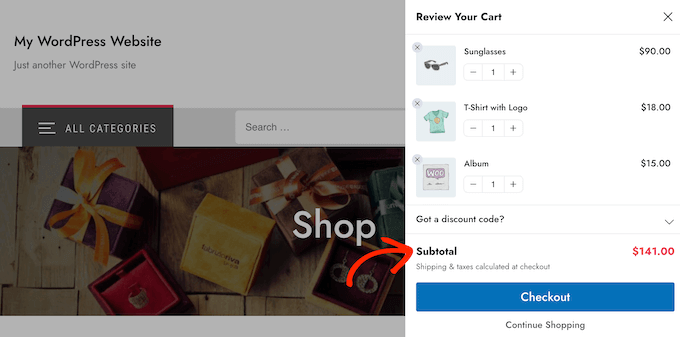
For that reason, we recommend leaving the ‘Show Subtotal’ toggle enabled.
However, if you want to simplify the side cart, then you can click to disable the ‘Show Subtotal’ toggle.
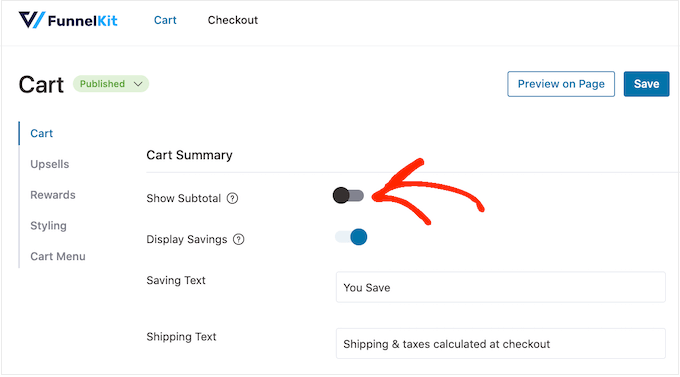
You can also show any savings the customer has qualified for, including discounts from any coupons they’ve applied.
In this way, you can use FOMO to increase conversions, especially if the savings are time-sensitive. For example, you might schedule coupons in WooCommerce so the customer can only use them for a limited time.
If you prefer to hide this information from the sliding side cart, then you can disable the ‘Display Savings’ toggle.
You can also replace the ‘Saving Text’ and ‘Shipping Text’ with your own custom messaging.
Customize the WooCommerce Cart’s Call To Action
The sliding side cart has a default checkout button, but you can customize this call to action button to get more conversions. To start, you can add a checkout icon using the ‘Enable Button Icon’ toggle.
This can be particularly useful if you’re creating a multilingual WordPress site.
You can also add the cart price to the checkout button using the ‘Enable Cart Price’ toggle.
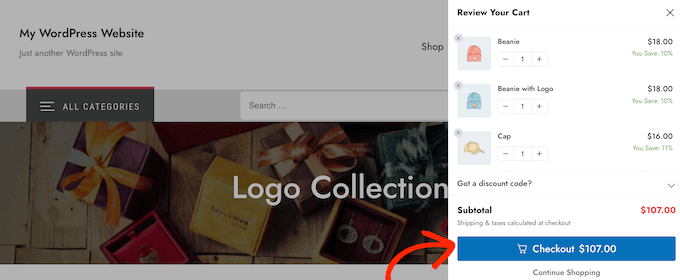
This may help shoppers keep track of how much the cart will cost, especially if you’ve removed the subtotal from the cart summary section.
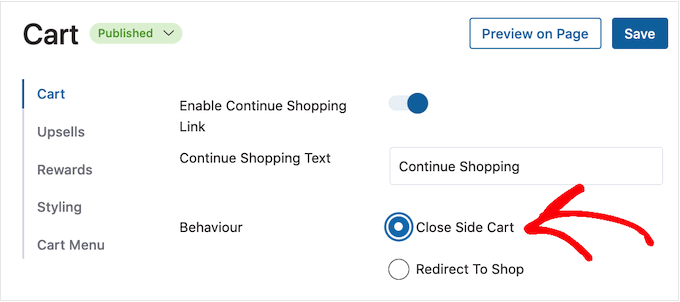
By default, FunnelKit adds a ‘Continue Shopping’ link at the bottom of the sliding side cart. You can replace this text with your own messaging by typing into the ‘Continue Shopping Text’ field.
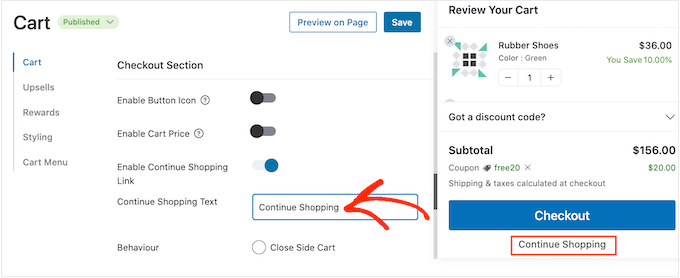
After that, choose whether this link will simply close the side cart panel or redirect the shopper to your WooCommerce store page.
Most shoppers will expect to exit the sliding cart, so we recommend selecting the ‘Close Side Cart’ button.
If you select ‘Redirect to Shop,’ then you may want to change the ‘Continue Shopping Text’ text so it’s clear what will happen when customers click the link.
Create a Custom Empty Cart Screen
It is possible to hide the cart button until the shopper adds at least one item to their basket, following the process described above.
However, if you don’t hide the button then customers may sometimes see an empty cart screen.
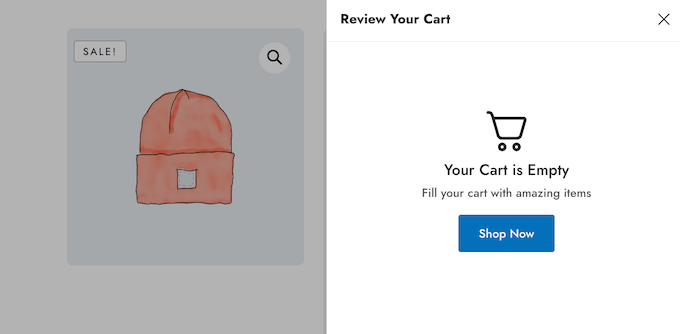
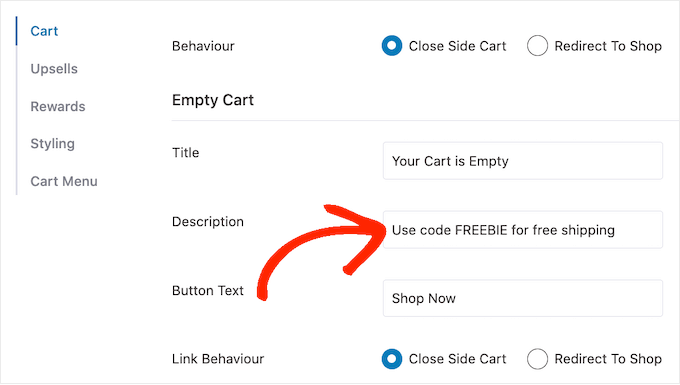
You can change the title, description, and button text using the settings in the ‘Empty Cart’ section. Typically, you’ll want to encourage customers to start shopping. For example, you might talk about things you offer such as free shipping or a money-back guarantee.
You might even give the shopper a coupon code such as a buy one get one free (BOGO) discount.
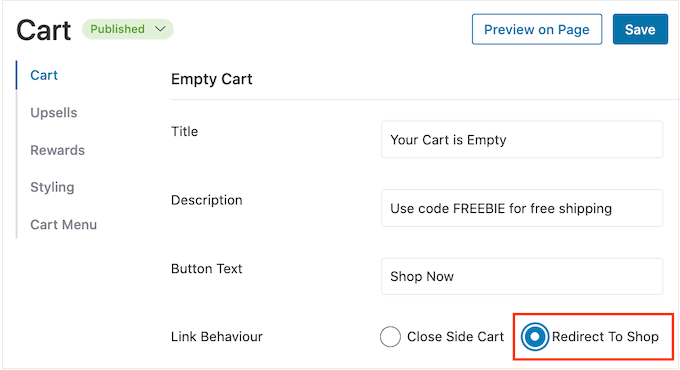
You can also choose whether clicking on the ‘Shop Now’ button will take the customer to the WooCommerce store page, or simply close the side panel.
We recommend selecting ‘Redirect To Shop’ as this will make it easier for shoppers to start adding items to their carts.
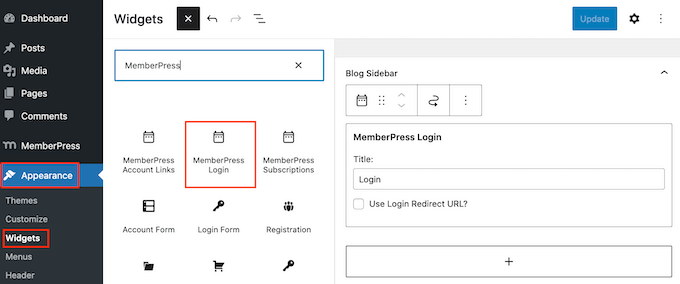
Add The Cart Icon Anywhere on your Site
If you want more control over where the cart icon appears, then you can add it to any page, post, or widget-ready area using a shortcode. You can also add it to your site’s menu.
This is a great choice if you selected ‘None’ in the ‘Icon Visibility’ settings following the process described above.
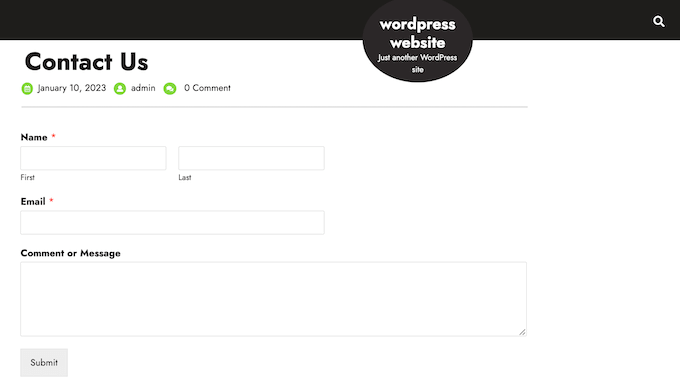
However, if you selected ‘WooCommerce Pages’ then this method allows you to add the cart icon to other important areas of your site. For example, you might add the icon to your custom home page or contact form.
To start, select ‘Cart Menu’ and then click on the ‘Enable Cart Menu’ toggle.
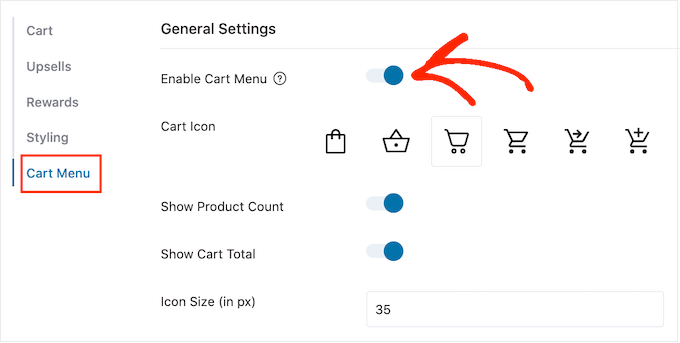
You can now change how the icon looks by selecting one of the icon templates, and choosing whether to show the product count and cart total as part of the icon. This information can help visitors keep track of their carts.
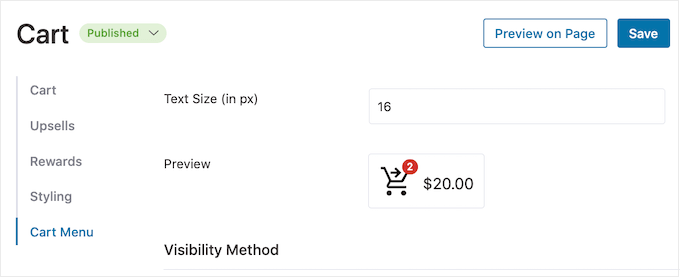
You can also change the icon size and text size. As you make changes, the small preview will update automatically so you can try different settings to see what looks the best.
When you’re happy with how the sliding side cart icon looks, click on the ‘Save’ button.
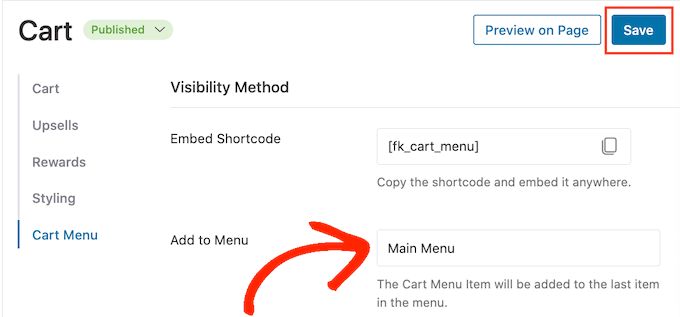
You can now add the icon to any page, post, or widget-ready area using the code next to ‘Embed Shortcode.’
For more information on how to place the shortcode, please see our guide on how to add a shortcode in WordPress.
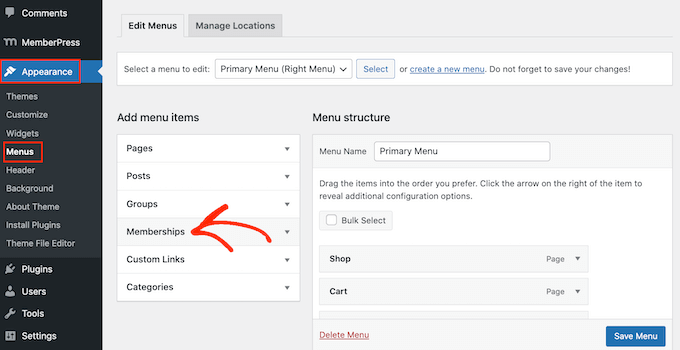
Another option is to add the icon to your site’s navigation menu. In this way, the sliding side cart is always within easy reach, without distracting from the main page content.
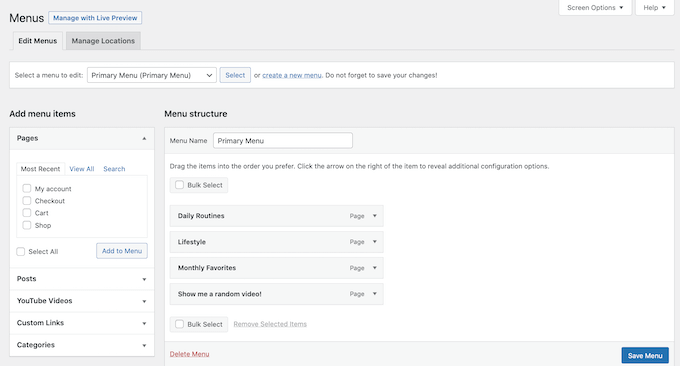
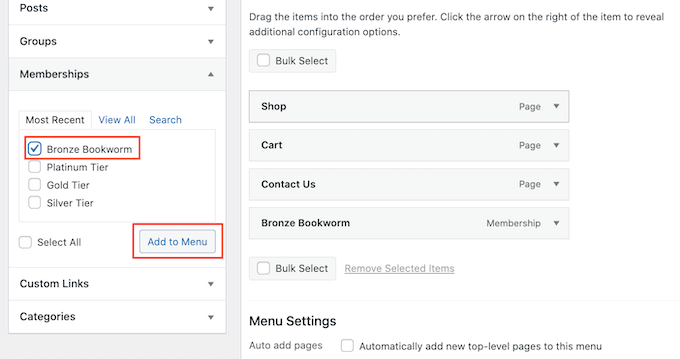
To do this, open the ‘Add to Menu’ dropdown and choose the menu you want to use.
After that, click on the ‘Save’ button.
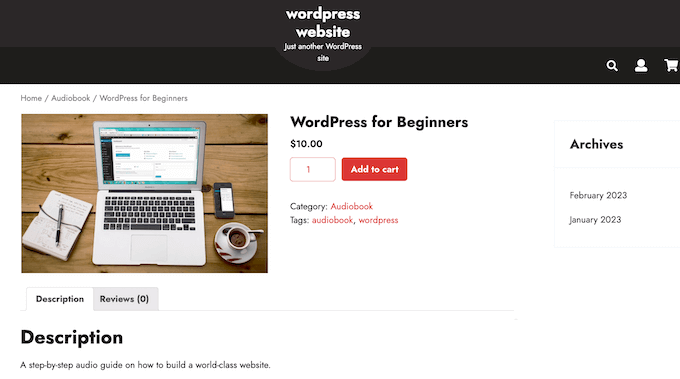
Now if you visit your WordPress website, you’ll see the cart icon in the navigation menu.
Add Your Own Colors and Branding
You may want to change the sliding side cart’s colors to better match your WooCommerce theme or branding. To change the text color, button color, link color, and more, go ahead and click on ‘Styling.’
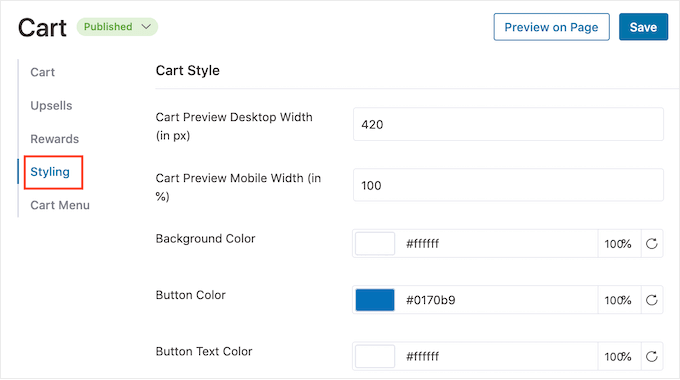
To change any of the default colors, simply give it a click. This opens a popup where you can try out different colors.
For example, in the following image, we’re customizing the border.
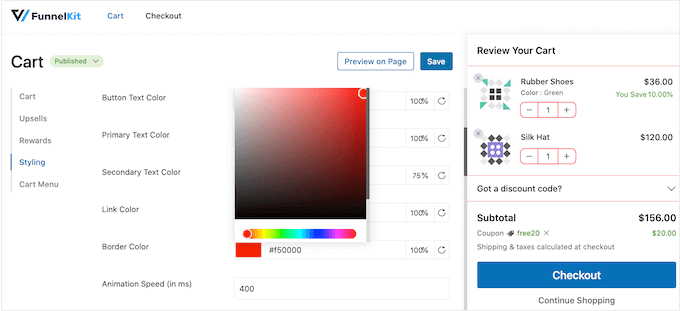
Another option is to type a hex code into the ‘Hex’ field. This is perfect if you already have a specific shade in mind.
If you don’t know what hex code to use, then it may help to use a site like HTML Color Codes. Here, you can explore different colors and then get a code that you can simply paste into the FunnelKit plugin.
How to Create a Responsive Sliding Side Cart
Many people buy products and services using a mobile device. With that in mind, you’ll want to make sure the sliding side cart looks just as good on smartphones and tablets, as it does on desktop computers.
Here, it may help to change the cart’s width so it doesn’t completely fill the small screen of a mobile device. To do this, click on ‘Styling’ and then look at the ‘Cart Preview Mobile Width.’
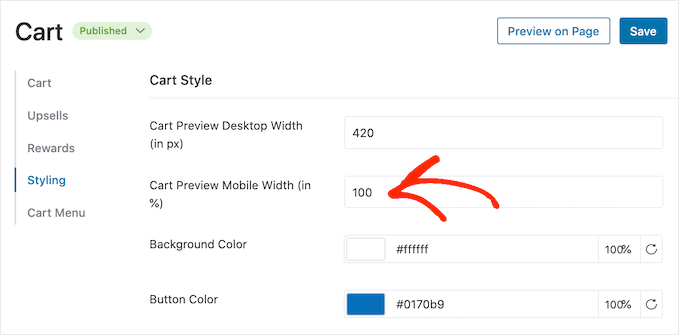
You may want to try typing different values into this field. If you do change the default settings, then it’s a good idea to check the mobile version of your WordPress site from the desktop to make sure you’re happy with the results.
While you’re on this screen, you can also change the width of the sliding side cart on desktop. To do this, simply change the number in the ‘Cart Preview Desktop Width’ field.
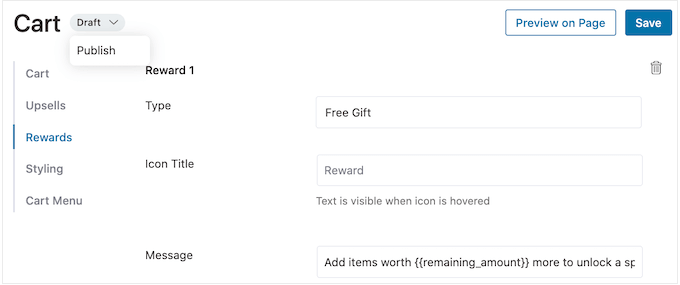
How To Publish Your Sliding Side Cart
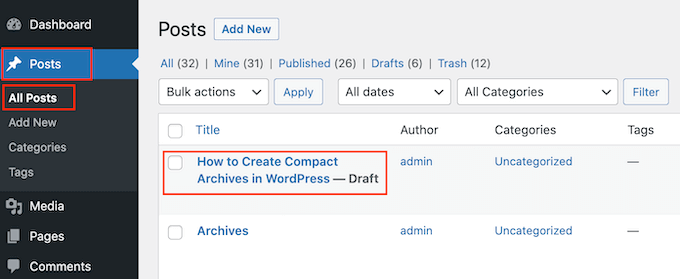
When you’re happy with how the sliding side cart is set up, it’s time to make it live. Simply click on the ‘Draft’ button next to ‘Cart’ and then choose ‘Publish.’

Now if you visit your online store, you’ll see the sliding cart live.
If you want to remove the sliding side cart at any point, then just head back to FunnelKit » Cart in the WordPress dashboard. Then, click on the ‘Publish’ button and select ‘Draft.’
Method 2. Add an Advanced Sliding Side Cart (With Upsells, Cross-Sells, and Rewards)
If you want to increase the average order value on your store, then you can upgrade to FunnelKit Cart Pro. This advanced sliding side cart plugin adds powerful upsell, cross-selling, and reward features to the FunnelKit sliding side cart.
With this plugin, you can recommend related products every time a customer adds an item to their cart.
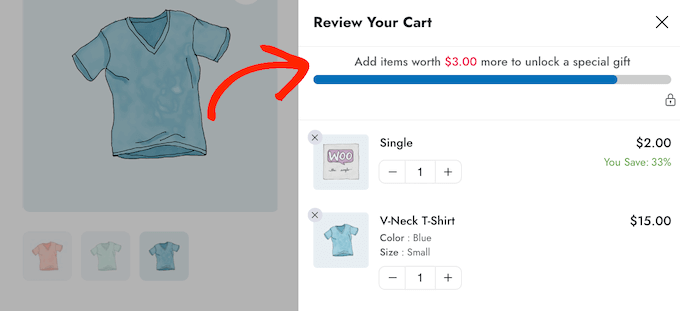
You can also create unique rewards such as coupon codes and free gifts, and then promote them inside the sliding cart.
FunnelKit can even track how much more the customer needs to spend, in order to unlock the next reward.
To add these powerful features, you’ll need to upgrade to FunnelKit Funnel Builder Pro. Just be aware that you’ll need the Plus or higher plan.
After buying a plan, log into your FunnelKit account. Here, you’ll find the FunnelKit Funnel Builder Pro plugin, plus FunnelKit Funnel Builder and FunnelKit Cart. You’ll need to install all three plugins to unlock the advanced sliding cart features.
First, you’ll need to install and activate the three plugins. If you need help, then please see our guide on how to install a WordPress plugin.
Upon activation, go to FunnelKit » Settings and add your license key to the ‘FunnelKit Funnel Builder Pro’ field.
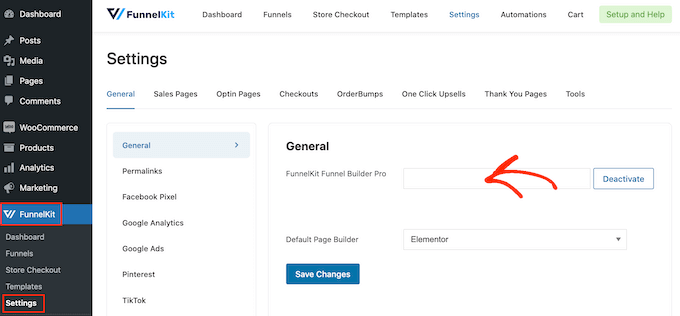
You can find this information by logging into your account on the FunnelKit website. With that done, click on ‘Activate.’
After that, simply go to FunnelKit » Cart.
You can now configure and customize the side cart by following the same process described in method 1. When you’re happy with how the sliding side cart is set up, you’re ready to add upsells, cross-sells, and rewards.
Get More Sales By Upselling and Cross-Selling WooCommerce Products
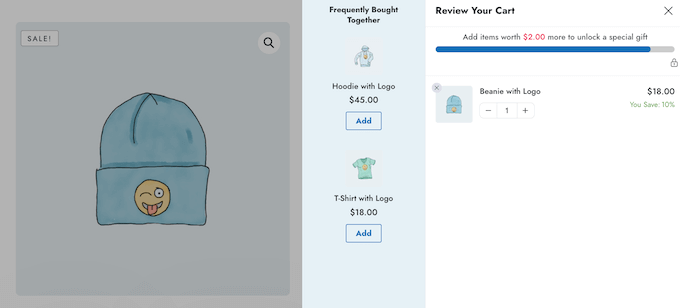
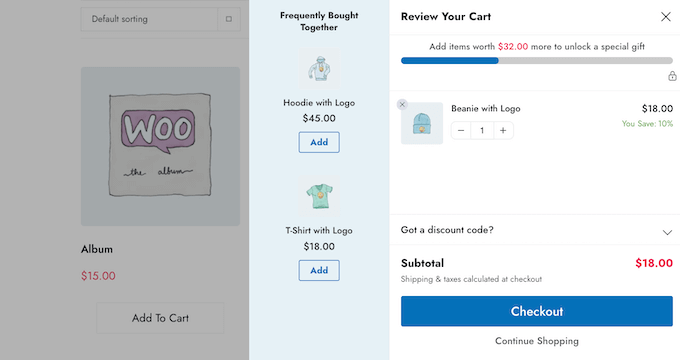
When a customer opens the sliding side cart, you can show them unique upsell and cross-sell promotions based on the items in their shopping basket.
Upselling is where you encourage shoppers to buy a higher-priced product instead of the one they already have in their shopping cart.
For example, imagine a customer adding a waterproof jacket to their cart. You might suggest a higher-quality jacket that’s more durable, versatile, and comes in different colors.
Cross-selling is where you promote a product that’s related to something the customer is already buying. For example, if they add a greeting card to their cart, then you might encourage them to buy chocolates or flowers too.
WooCommerce has a linked product feature that allows you to create upsells and cross-sells. For more information, please see our guide on how to upsell products in WooCommerce.
However, you can also create upsells and cross-sells directly from the FunnelKit dashboard. This is the quickest option, so it’s the one we’ll be using in this guide.
To start, click on the ‘Upsells’ option and then select ‘Enable Cart Upsells.’
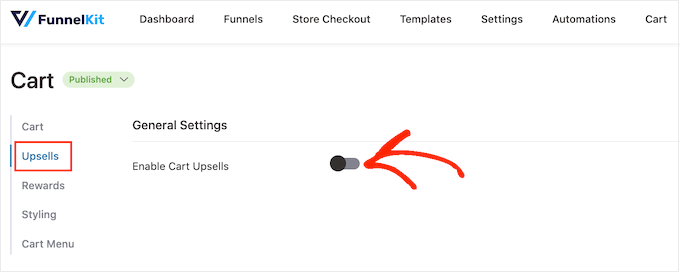
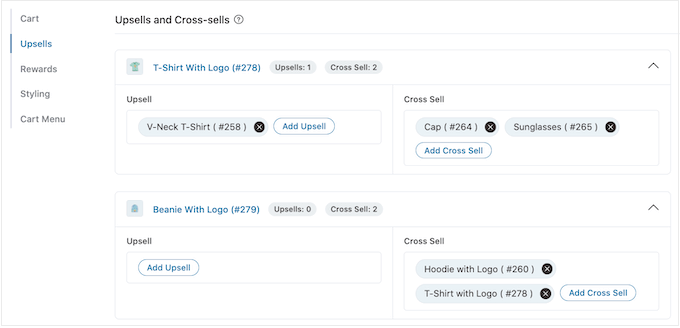
After that, scroll to the ‘Upsells and Cross-Sells’ section.
Here, you’ll see all the products on your online store.
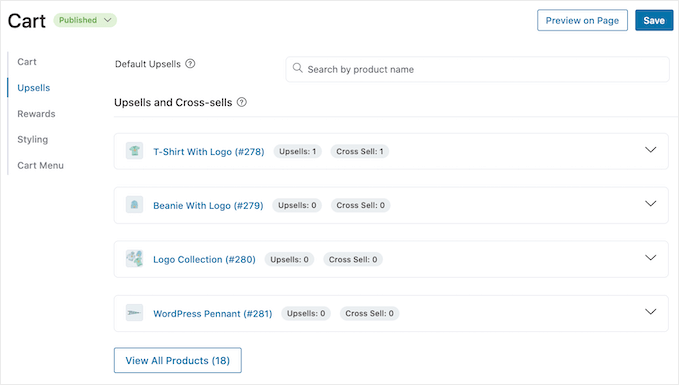
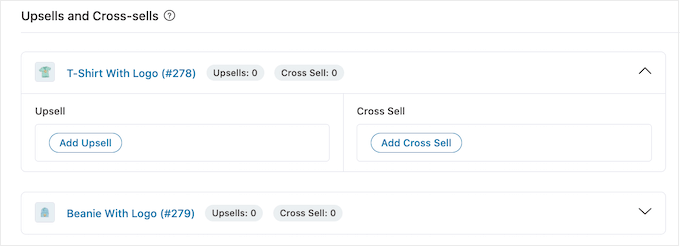
Simply click on the item where you want to add one or more linked products.
Then, click on either ‘Add Upsell’ or ‘Add Cross Sell’ depending on the kind of promotion you want to create.
In the popup, start typing the product that you want to use as the upsell or cross-sell. When the right product appears, give it a click.
To offer multiple products, simply follow the same process described above.
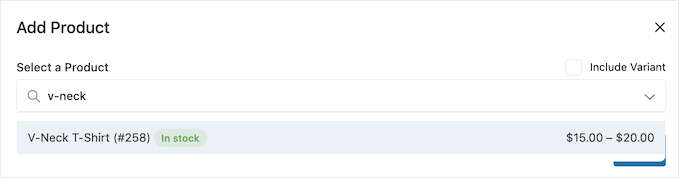
With that done, simply click on the ‘Add’ button.
You can now create unique cross-sell and upsell campaigns for every product in your store, simply by following the same process described above.
Now, you’re ready to customize how the upsell and cross-sell promotions will look on your sliding side cart.
To start, try switching between different styles by clicking the radio buttons next to ‘Display.’
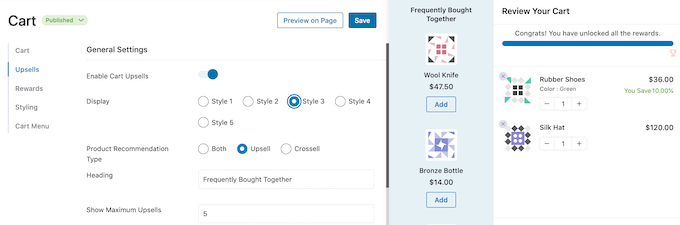
The live preview will update automatically so you can try different styles to see which one you like the best.
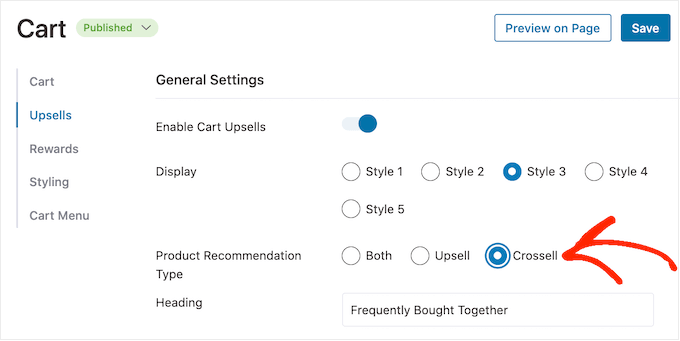
By default, FunnelKit will show both upsells and cross-sells in the sliding side cart. If you prefer then you can show only upsells, or only cross-sells using the radio buttons in ‘Product Recommendation Type.’
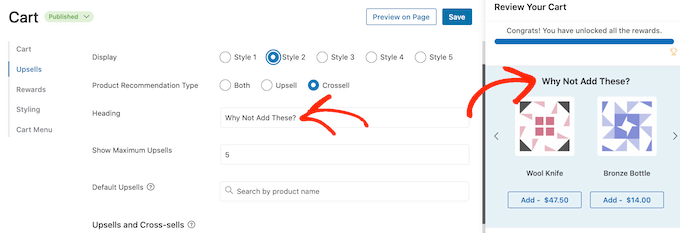
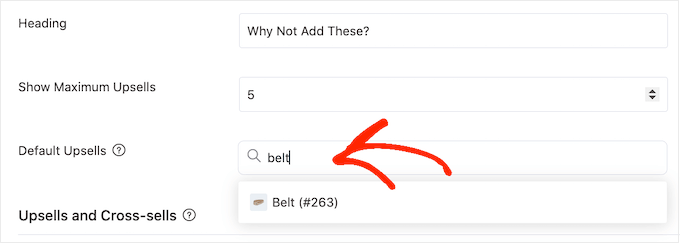
Next, you can change the heading that FunnelKit shows above the upsell or cross-sell promotion by typing it into the ‘Heading’ field.
Just be aware that FunnelKit will use the same heading for both types of promotion.
After that, you can set the maximum number of suggested products that FunnelKit will show, by typing into the ‘Show Maximum Upsells’ field.
Wherever possible, it’s a good idea to create unique upsell and cross-sell promotions for every product. However, if your online store has lots of items then this might not be possible.
With that in mind, you can set a default upsell product that FunnelKit will promote when no linked products are available. To do this, simply type the name of a product into the ‘Default Upsells’ field. When the right product appears, give it a click.
When you’re happy with the upsell and cross-sell promotions you’ve created, don’t forget to click on ‘Save’ to store your changes.
Offer Free Shipping, Discounts, and Free Gifts
You can often increase the average order value by giving customers a reason to spend more. With that in mind, FunnelKit allows you to create various rewards and then promote them as unlockable bonuses in the sliding side cart.
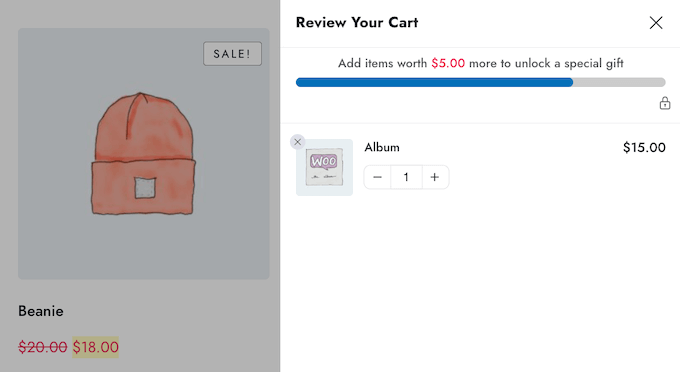
For example, you might offer free shipping if the customer exceeds a minimum spend. FunnelKit will even show customers how much more they need to spend to unlock their prize.
This is an easy way to get more sales and build customer loyalty with gamification.
FunnelKit allows you to offer three different rewards: free shipping, a discount, and a free gift.
To offer free shipping, you’ll need to have already set up shipping in your WooCommerce store. For step-by-step instructions, please see our complete WooCommerce made simple guide.
Meanwhile, the ‘discount’ reward auto-applies a coupon when the customer reaches the minimum spend. If you want to offer this reward, then you’ll need to create a percentage discount coupon using either the built-in WooCommerce coupon feature or a WordPress coupon plugin.
For step-by-step instructions, please see our guide on how to create smart coupons.
After that, you’re ready to create a reward by selecting ‘Rewards’ in the FunnelKit settings and then clicking on ‘Create Reward.’

You can now open the ‘Type’ dropdown and choose the kind of reward you want to create.
No matter whether you choose free gift, free shipping, or discount, you can change the text that FunnelKit shows to customers by typing into the ‘Message’ field.
If you do make any changes, then be careful not to edit {{remaining_amount}} as this allows FunnelKit to show how much more the customer needs to spend.
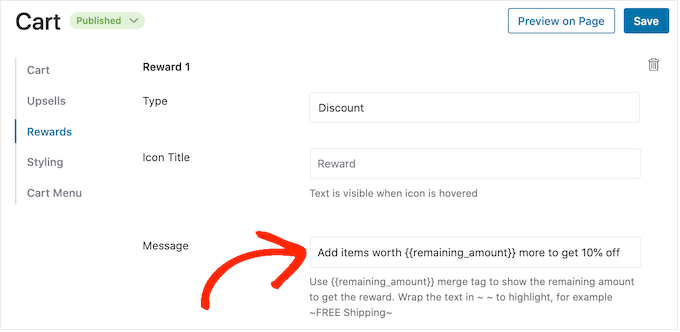
If you’re offering a discount, then make sure you change the message to show how much the customer will save.
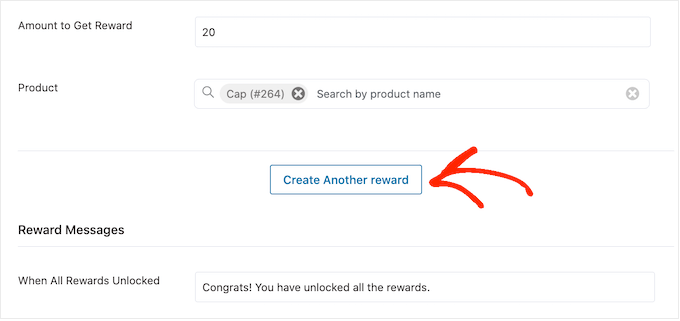
With that done, type a number into the ‘Amount to Get Reward’ field. This is how much shoppers must spend, in order to unlock the reward.
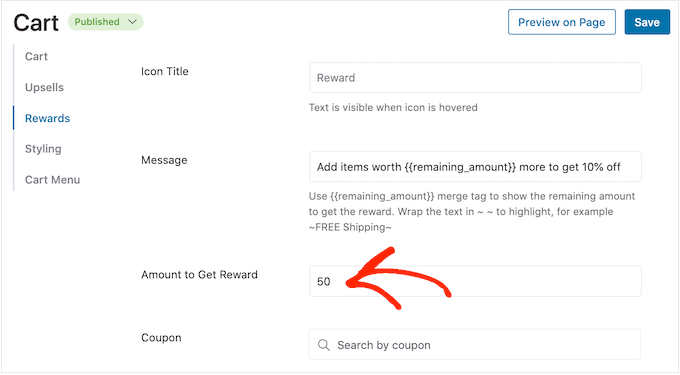
If you’re offering a percentage discount, then you need to specify which coupon FunnelKit should auto-apply.
In the ‘Coupon’ field, start typing the coupon that you want to use. When the right code shows up, give it a click.
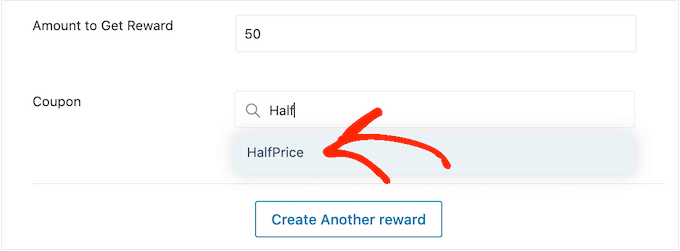
Now, FunnelKit will auto-apply the coupon when someone meets the minimum spend.
Offering a free gift instead? Then start typing the name of the gift into the ‘Product’ field.

When the right product shows up, give it a click.
Now, FunnelKit will add this item to the customer’s shopping cart as soon as they meet the minimum spend.
To add more rewards, simply click on ‘Create Another Reward.’
You can now configure the discount, free gift, or free shipping reward by following the same process described above.
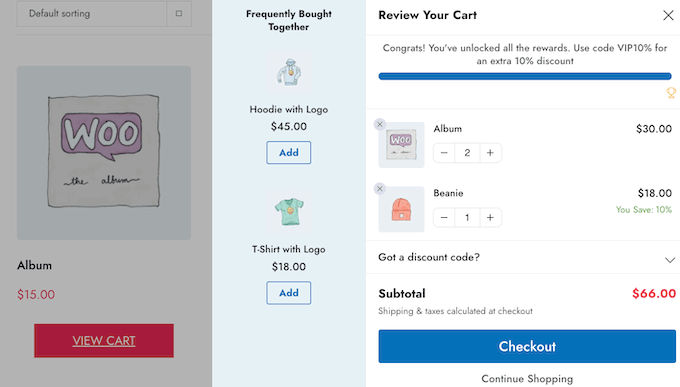
By default, FunnelKit will show the following message once a customer qualifies for all the awards: ‘Congrats! You have unlocked all the rewards.’
To show a different message instead, simply type into the ‘When All Rewards Unlocked’ field. You might even offer the customer a special bonus for unlocking all your rewards, such as an exclusive coupon code to use on their next purchase.
When you’re happy with how your rewards are set up, click on the ‘Save’ button.
How To Publish Your Sliding Side Cart
When you’re ready to make the sliding side cart live, simply select the ‘Draft’ button next to ‘Cart.’ You can then click on ‘Publish.’
If you want to remove the sliding side cart at any point, then simply head back to FunnelKit » Cart in the WordPress dashboard. Then, click on the ‘Publish’ button and select ‘Draft.’
We hope this article helped you add a sliding side cart in WooCommerce. You may also want to check out our guide on how to create a WooCommerce popup to increase sales and the best WooCommerce plugins for your store.
If you liked this article, then please subscribe to our YouTube Channel for WordPress video tutorials. You can also find us on Twitter and Facebook.
The post How to Easily Add a Sliding Side Cart in WooCommerce first appeared on WPBeginner.


 directory")


 - welcome mat example")